Observatory Update: Laying the Foundation!
Date: Nov 8, 2024
Table of Contents Show (Click on lines to navigate)
NOTICE!
This post shares my preliminary design thoughts for a Roll-Off-Roof Observatory.
I make NO representations regarding the fitness or soundness of the designs and design decisions discussed.
Use this information at YOUR OWN RISK!
If you decide to build your own version of this project, YOU ASSUME ALL LIABILITY for your efforts and their results.
Earlier Posts in this Series
I have been thinking about building an observatory for a while now. Below are previous posts that have led up to where I am today.
Observatory Update: Custom Telescope Piers Part 3 - Painted and Complete! Sept 2024
Observatory Project: Breaking Ground! Excavation Complete! Sept 2024
Observatory Project: A Final Update Before We Break Ground! Aug 2024
Observatory Project: Opening The Roof! Aug 2024
Observatory Project: Final Roof Track System Hardware Selection July 2024
Observatory Project: Designing Custom Steel Piers - Part I June 2024
Observatory Project: Galvanic Corrosion and a Change in Track Selection! June 2024
Observatory Update: Designing the Roll-Off-Roof Track System! May 2024
The Move is Complete, Now Pivoting to the Observatory Project! April 2024
An Observatory Project Update: Success! We Just Bought A Property and Will Be Moving! Nov 2023
An Observatory Project Update - One Year In Feb 2023
Goals for my Observatory Project March 2022
Surviving Delays
After searching for land for two years, suffering through the move to new house, finalizing he design of an observatory and finding a contractor to build it, I have been raring to get this thing built.
We broke ground almost a month ago, as the excavator leveled off and created the construction pad.
Then…. Nothing. Or rather, Delays!
Both the Steel order and the scissor truss order were delayed. My builder had delays finishing his current jobs, so we had scheduling problems.
However, a few days ago, things finally came together, and the crew is now on site, and work is quickly progressing.
The next step was to establish the foundation.
Layout
To start this process, string lines that define the perimeter of the building walls and the outrigger framework had to be accurately laid out. Once this was done, the location for the center of the various holes that were needed had to be marked off in paint.
The Foundation Plan showing the hole location.
Laying out string lines.
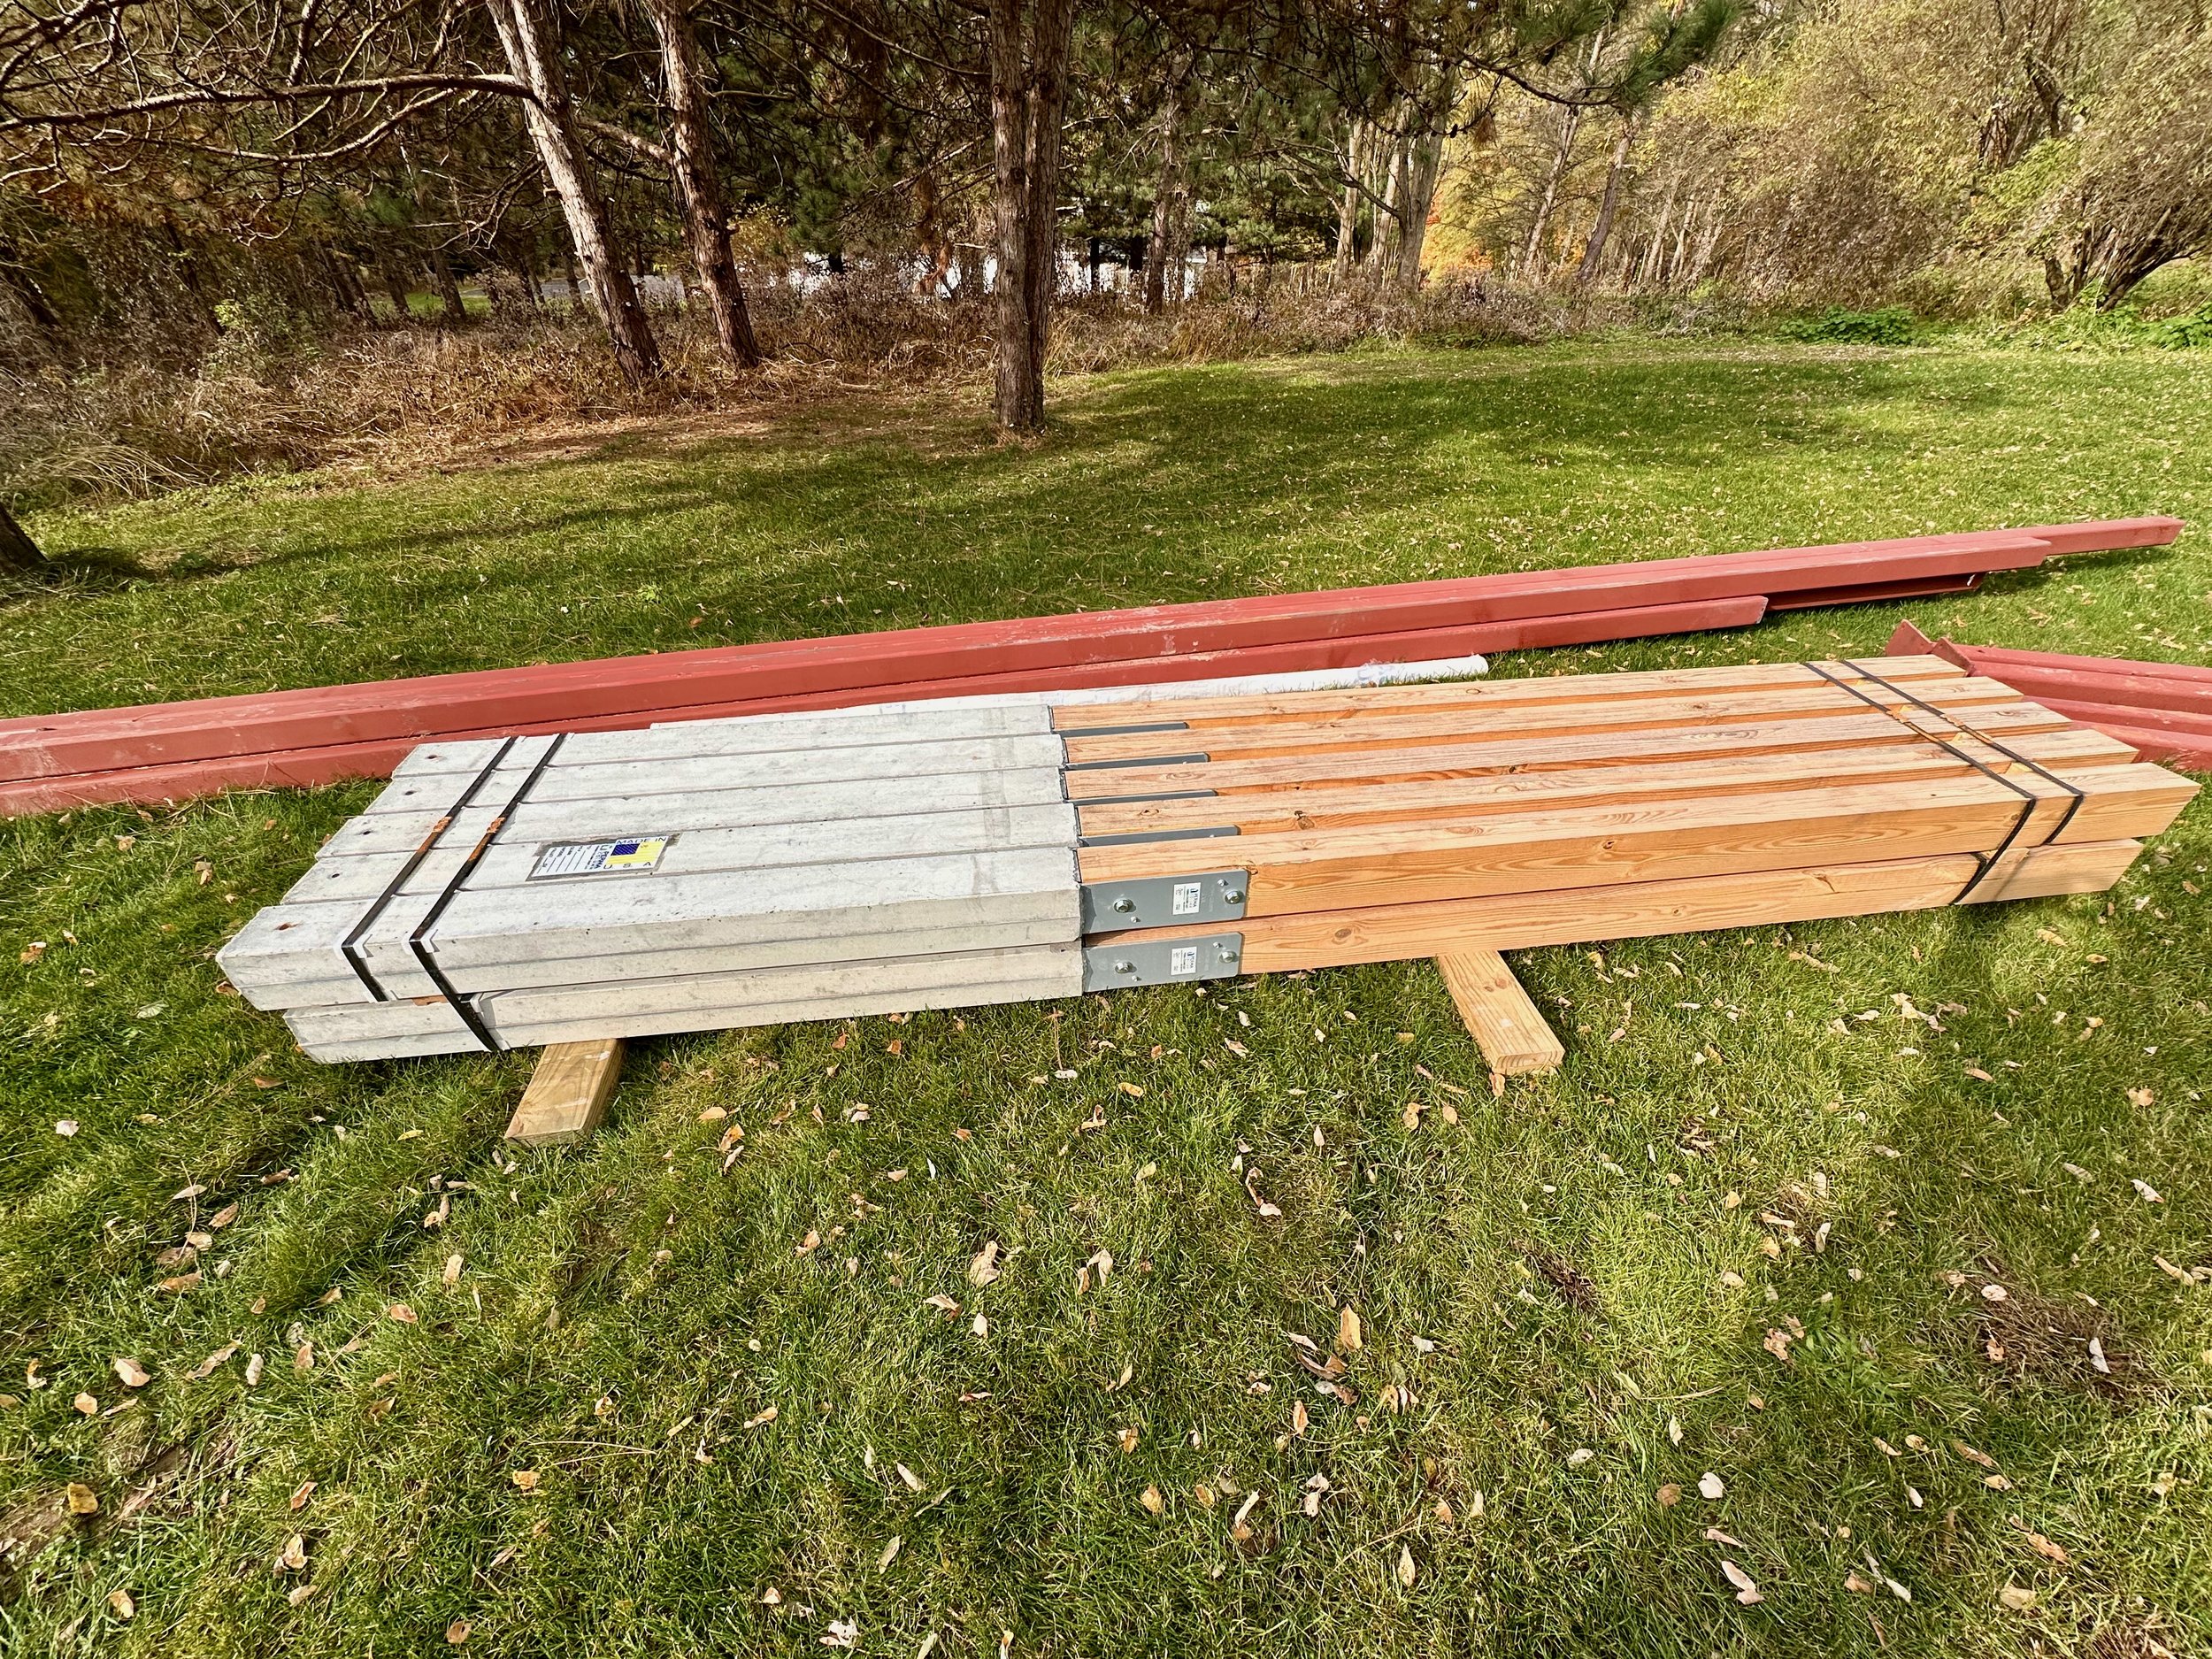
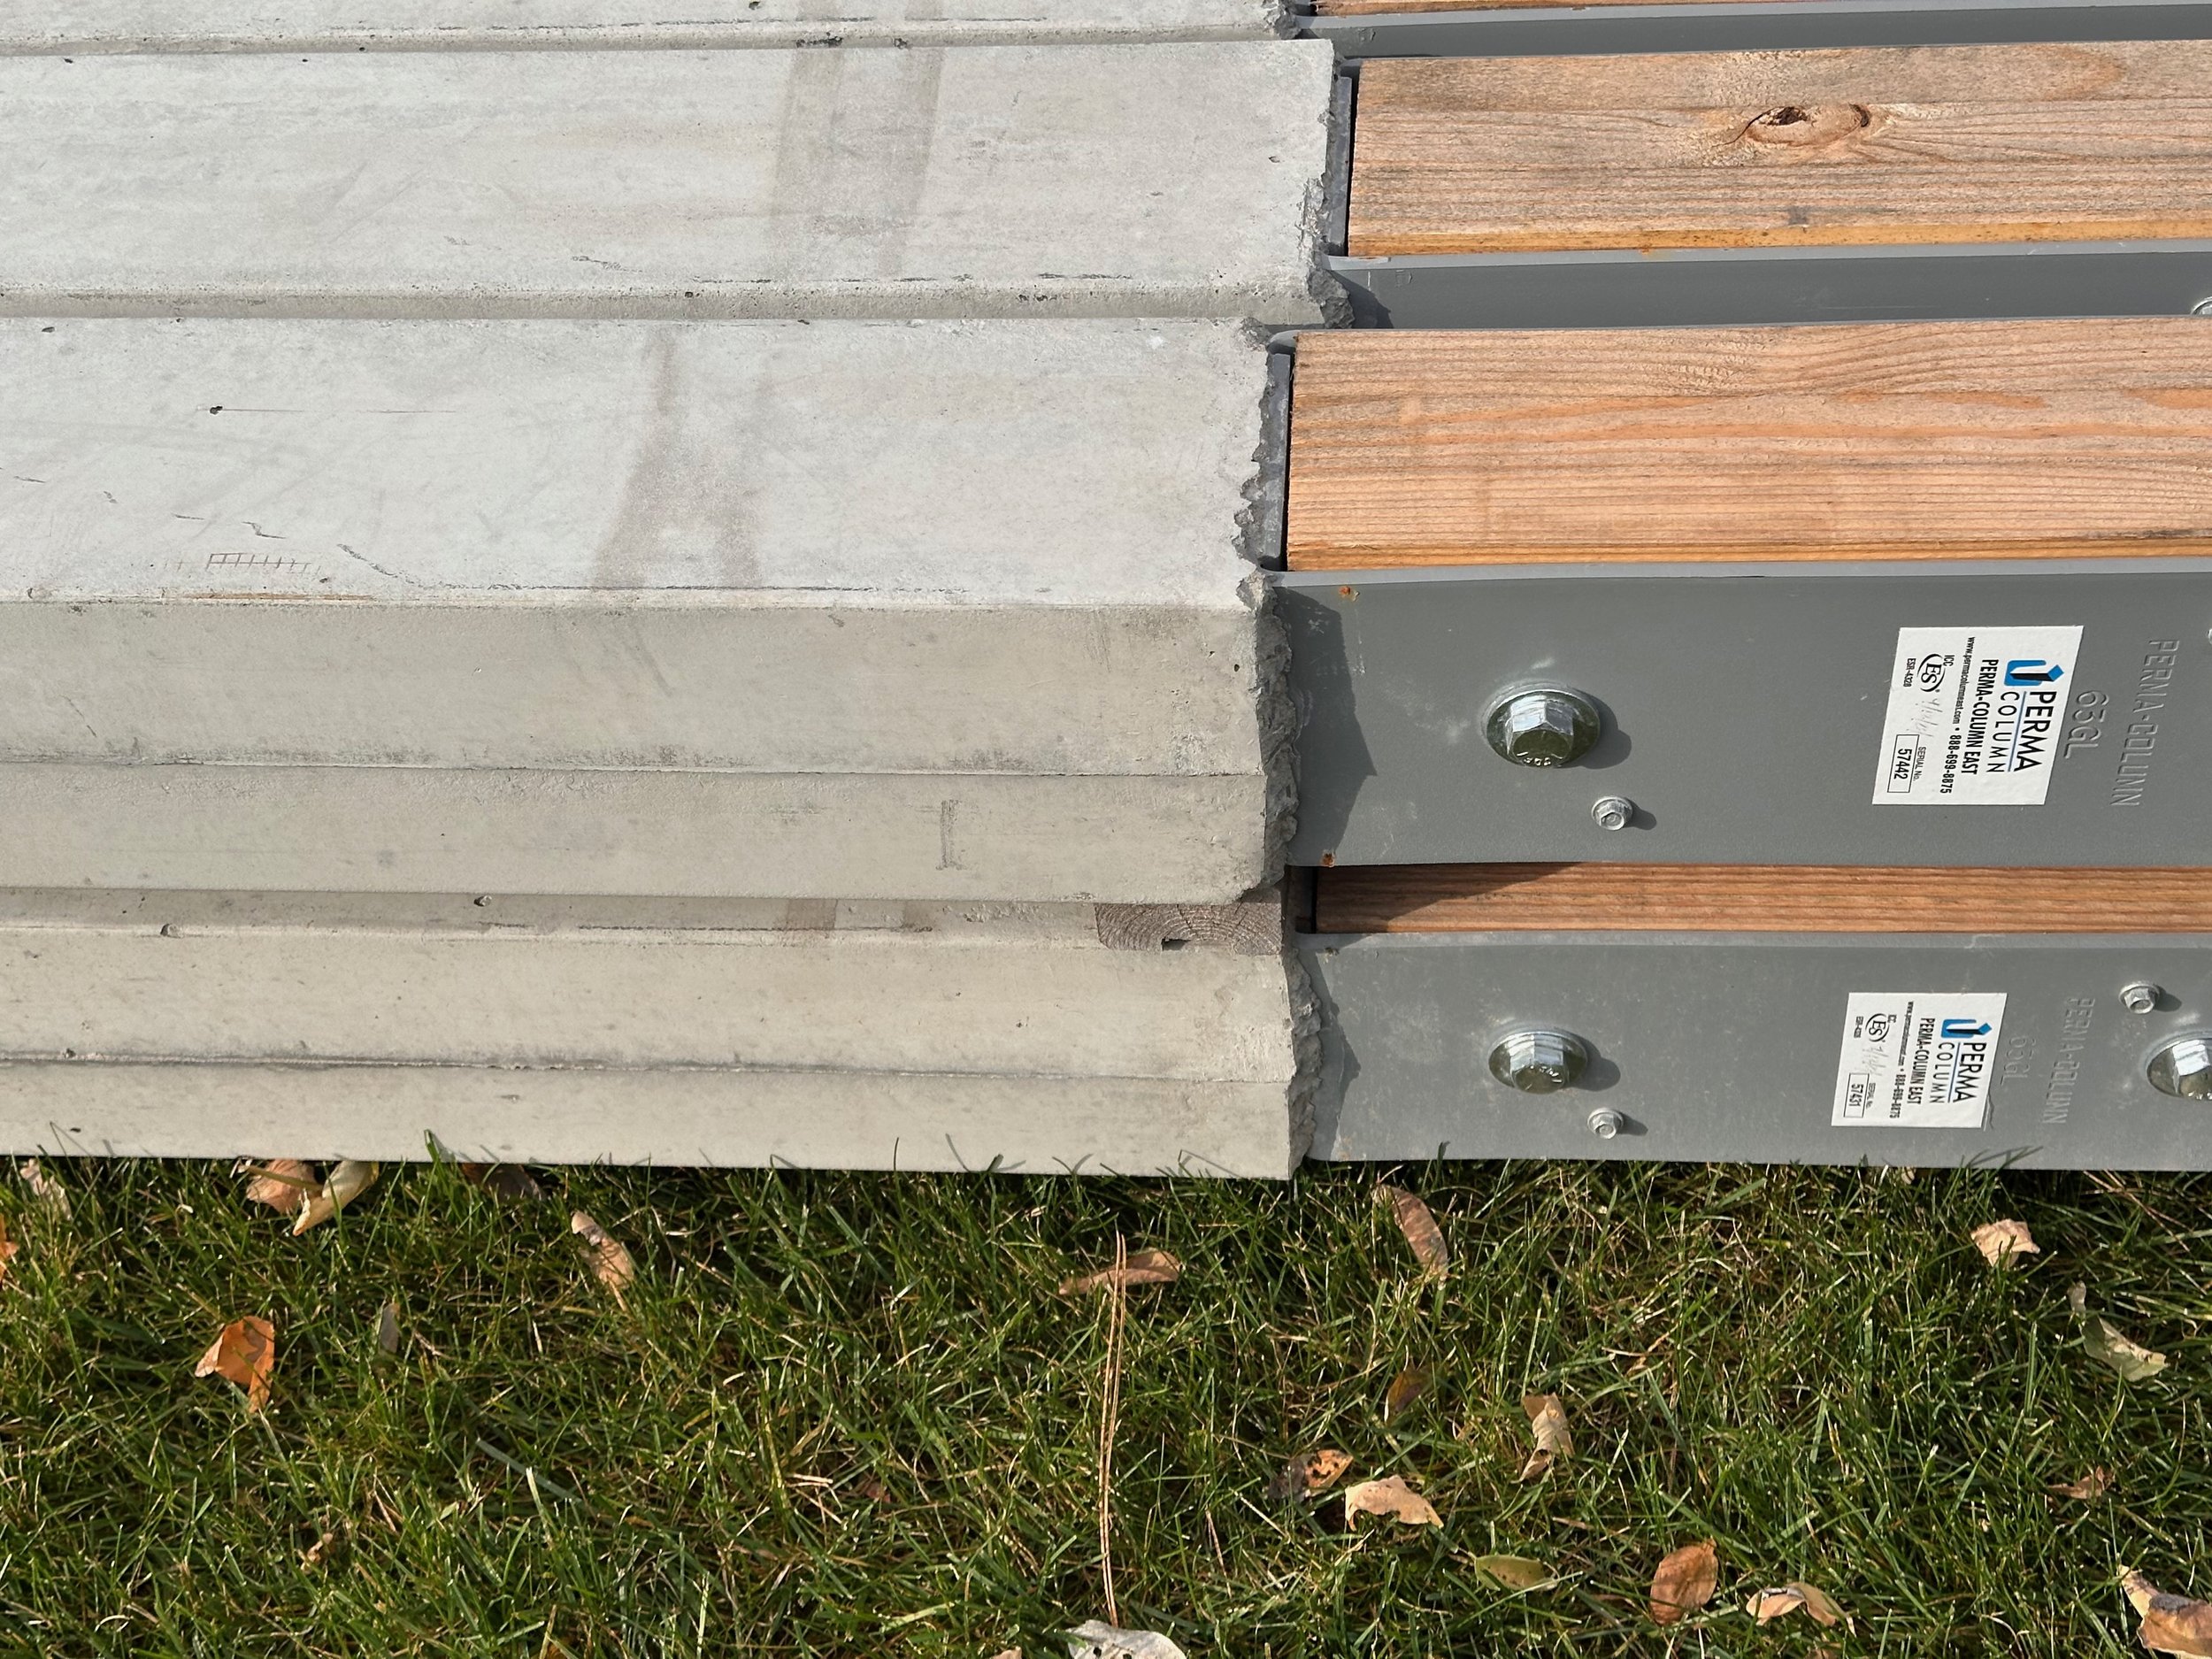
The design will use prefabricated Perma-Columns and a pole-barn method of construction. A total of 10 will be used for perimeter of the main building. Each of these needs a 24-inch hole drilled down to 10 inches below the frost line. Later, 10" of concrete will be poured into these holes to form the foundation for the Perma-Columns.
Perma-Columns waiting to be installed.
A closer view o the columns.
The Outrigger framework needs four concrete pads that the steel can be attached to. These also require 24-inch holes that go down to the frost line. These will be filled with concrete.
Finally, We will need four more holes, also 24 inches wide, for the foundation for the telescope piers. These will be filled with cement as well.
So, a total of 18 holes were marked off.
Drilling
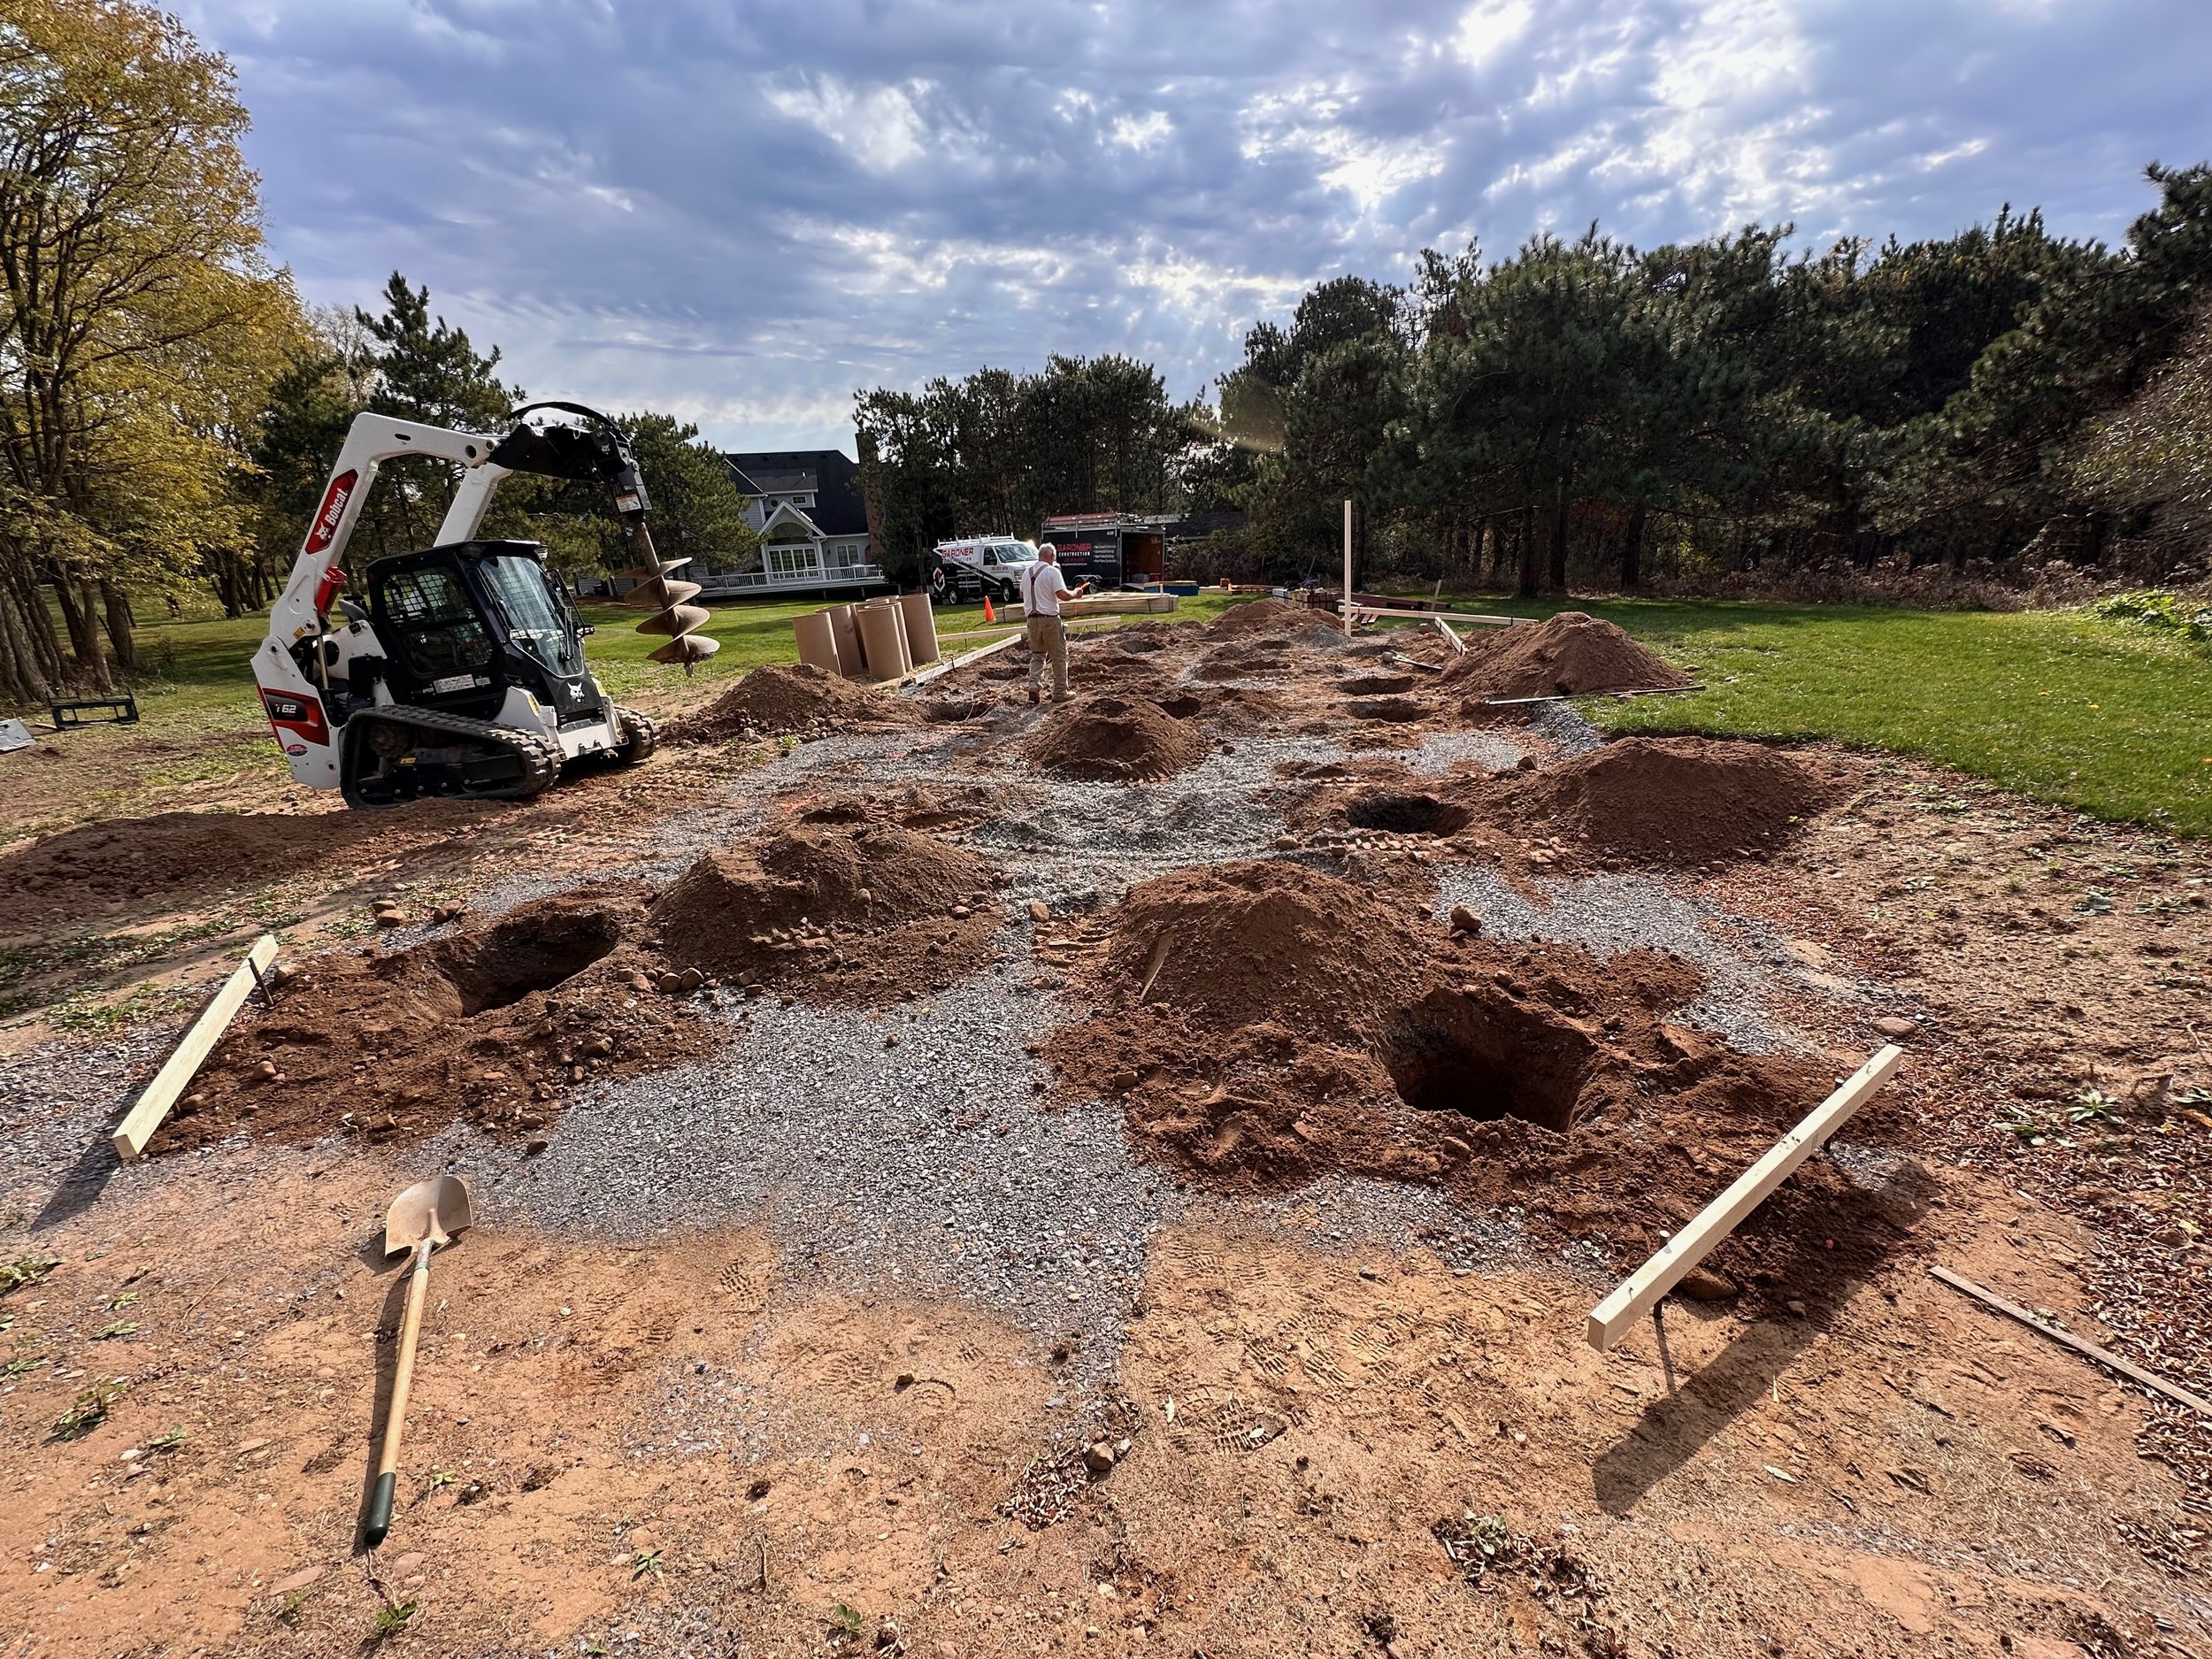
Each hole was drilled with a Bobcat outfitted with a 24-inch auger. The auger was positioned and worked its way through the packed gravel, a layer of very sandy soil, and a final region with large cobbles. The cobbles, at times, stopped the auger completely! It did not take a larger rock to do this - and when it happened, the auger had to be withdrawn, and the rock needed to be freed with a large pry bar and extracted from the hole. This slowed down the process considerably. We ended up with piles of sand, gravel, cobbles, and large rocks everywhere!
But by mid-afternoon, all of the holes were complete!
Getting Ready to drill the first hole…
A field of holes. Looks like a serious gofer problem!
Setting up the Forms
The holes for the Perma-Columns did not require a form, as all we needed to do was fill the bottom with 10” of concrete.
However, the holes for the Pier foundations and the Outrigger foundations were to be filled with concrete, so we needed Sonotubes.
Actually - what was used was not a true Sonotube. Instead, these were the discarded cores for steel windings. They were four feet long with a 5/8 inch wall thickness. This is much thicker than seen with a typical Sonotube. These were placed in the holes, and then a framework of 2x4s was placed around the tube. They were carefully positioned and leveled and then screwed into the 2x4 framework.
The forms for the piers.
A close view of one of the tubes.
An aerial view of the whole from the end of the first day. Only part of the tubes are set up at this point.
Now we needed the concrete delivery. This prep work was completed on Friday, with the concrete delivery being scheduled for Monday.
Concrete Delivery
The delivery was scheduled for 10 am Monday. Because we would be putting concrete into whole lot of holes, I thought they would send a front-loading boom truck. But instead, a regular cement truck showed up. I was not sure how well this was going to work out.
As it turned out - it worked out quite well. The driver was quite skilled, and with extensions added to the main chute, we could reach every hole pretty well. We were just short on one hole, and a shovel was used to help direct the concrete stream into the hole.
Ten inches were poured into the column holes. The concrete was leveled and tamped down with a tool created from some 2x4s. The depth was being checked continuously with a laser sensor on a depth probe.
The Outrigger Sonotubes were filled to the top, and a float was used to smooth these off. Initially, nothing was done to sink in L-bolts. The concrete would be wet long enough for these to be added later.
The concrete surface level position for the pier foundations was critical. So, in advance, the team measured and marked the Sonotube with the desired level. Then, they were filled. The depth was constantly tested against these marks, and a laser probe was used to ensure that things were correct.
In a surprisingly short time, the concrete was all poured, and the truck had left the site.
Filling the forms first…
Chute extentions were used to reach the farthest holes.
Again with the long chute…
Setting the Bolt Plates
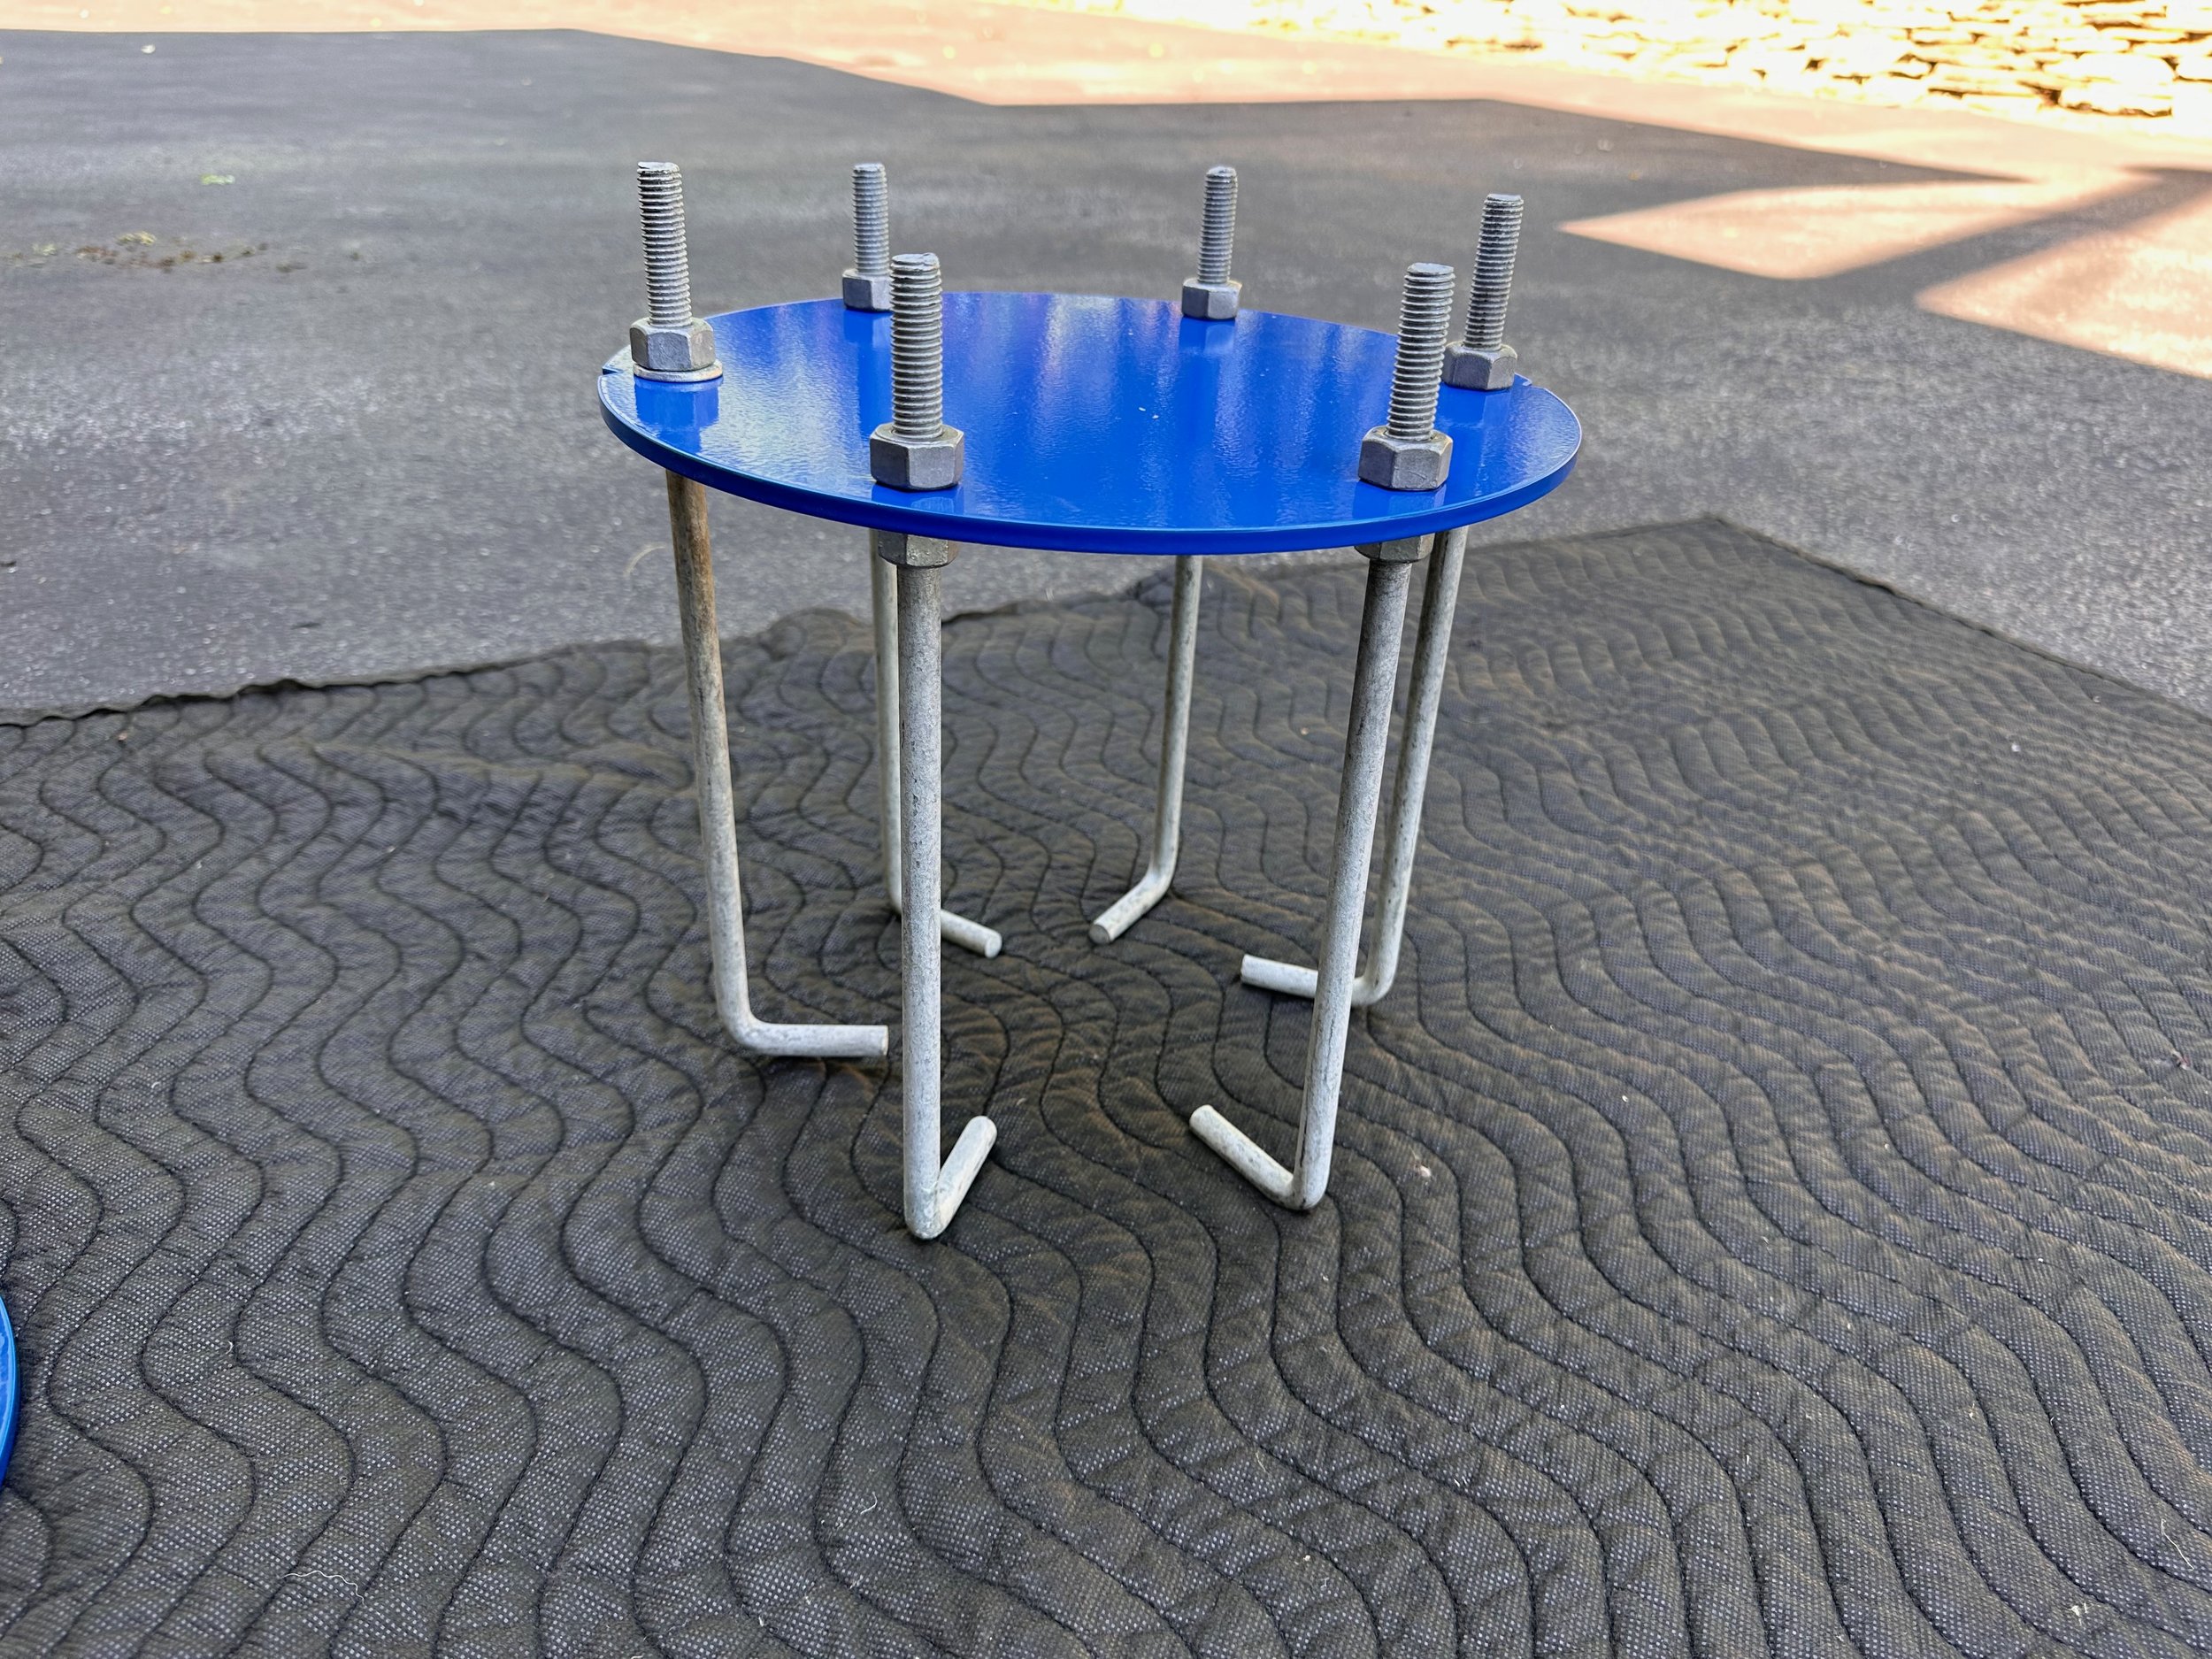
String lines were laid out to mark precisely where the bolt pattern for the outriggers had to go. Then, each Sonotube had two lengths of rebar installed. L-bolts followed this in a square wooden pattern, which was sunk into the concrete and precisely positioned and leveled. The remaining concrete surface was floated smooth once again.
The outrigger foundation L-bolt holder and rebar, ready to go.
The bolts are set and level is being checked and adjusted.
The same essential thing was done with the pier foundations. They were positioned and leveled, and the heights were verified with the laser.
The pier foundation plate with L-bolts ready to go!
Establishing the center of the plate prior to installation.
Installed!
You can see that plate is off-center in this view. Not a problem!
With the westmost Sonotube, the pier foundation plates were well-centered. However, this was not true in the eastern set of plates. The proper positioning of the plate ended up being off-center. I am told that this kind of thing is hard to avoid. The holes drilled are not precise, and when you hit a lot of rocks, the drill can move off-center. But I don't think there is any structural problem. We will have to center the slab to orient the slab holes with the piers as posiitoned.
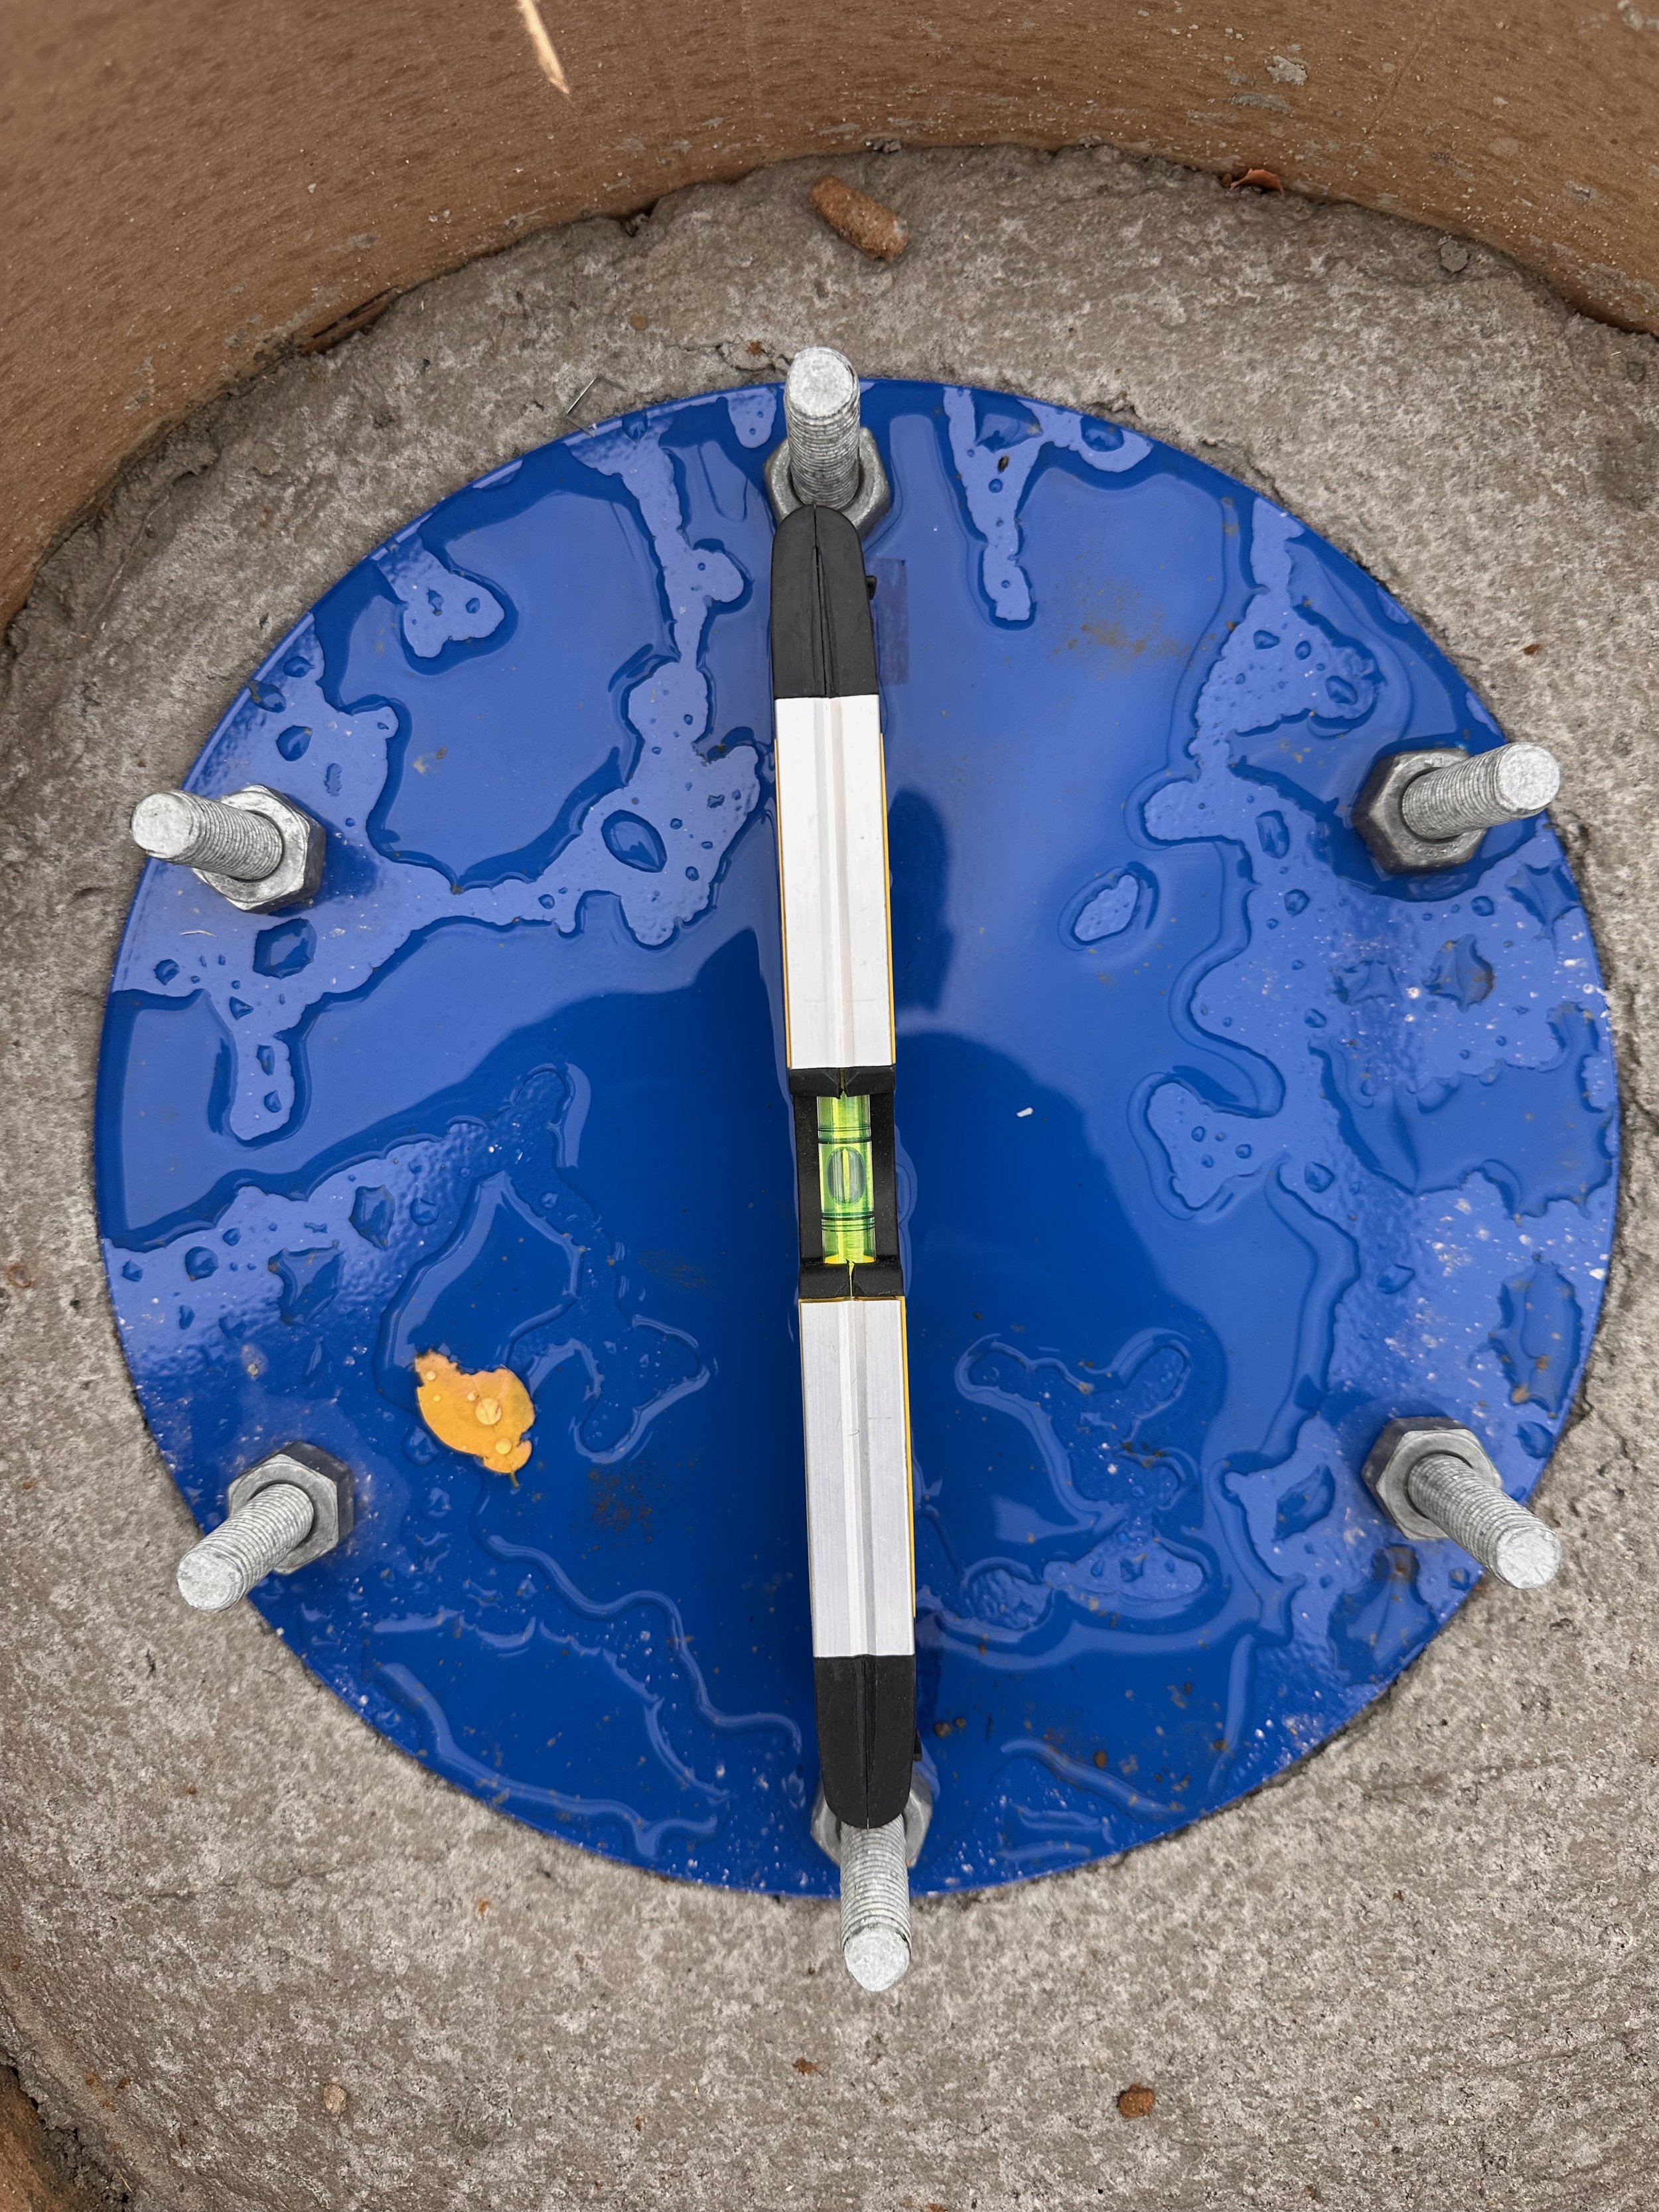
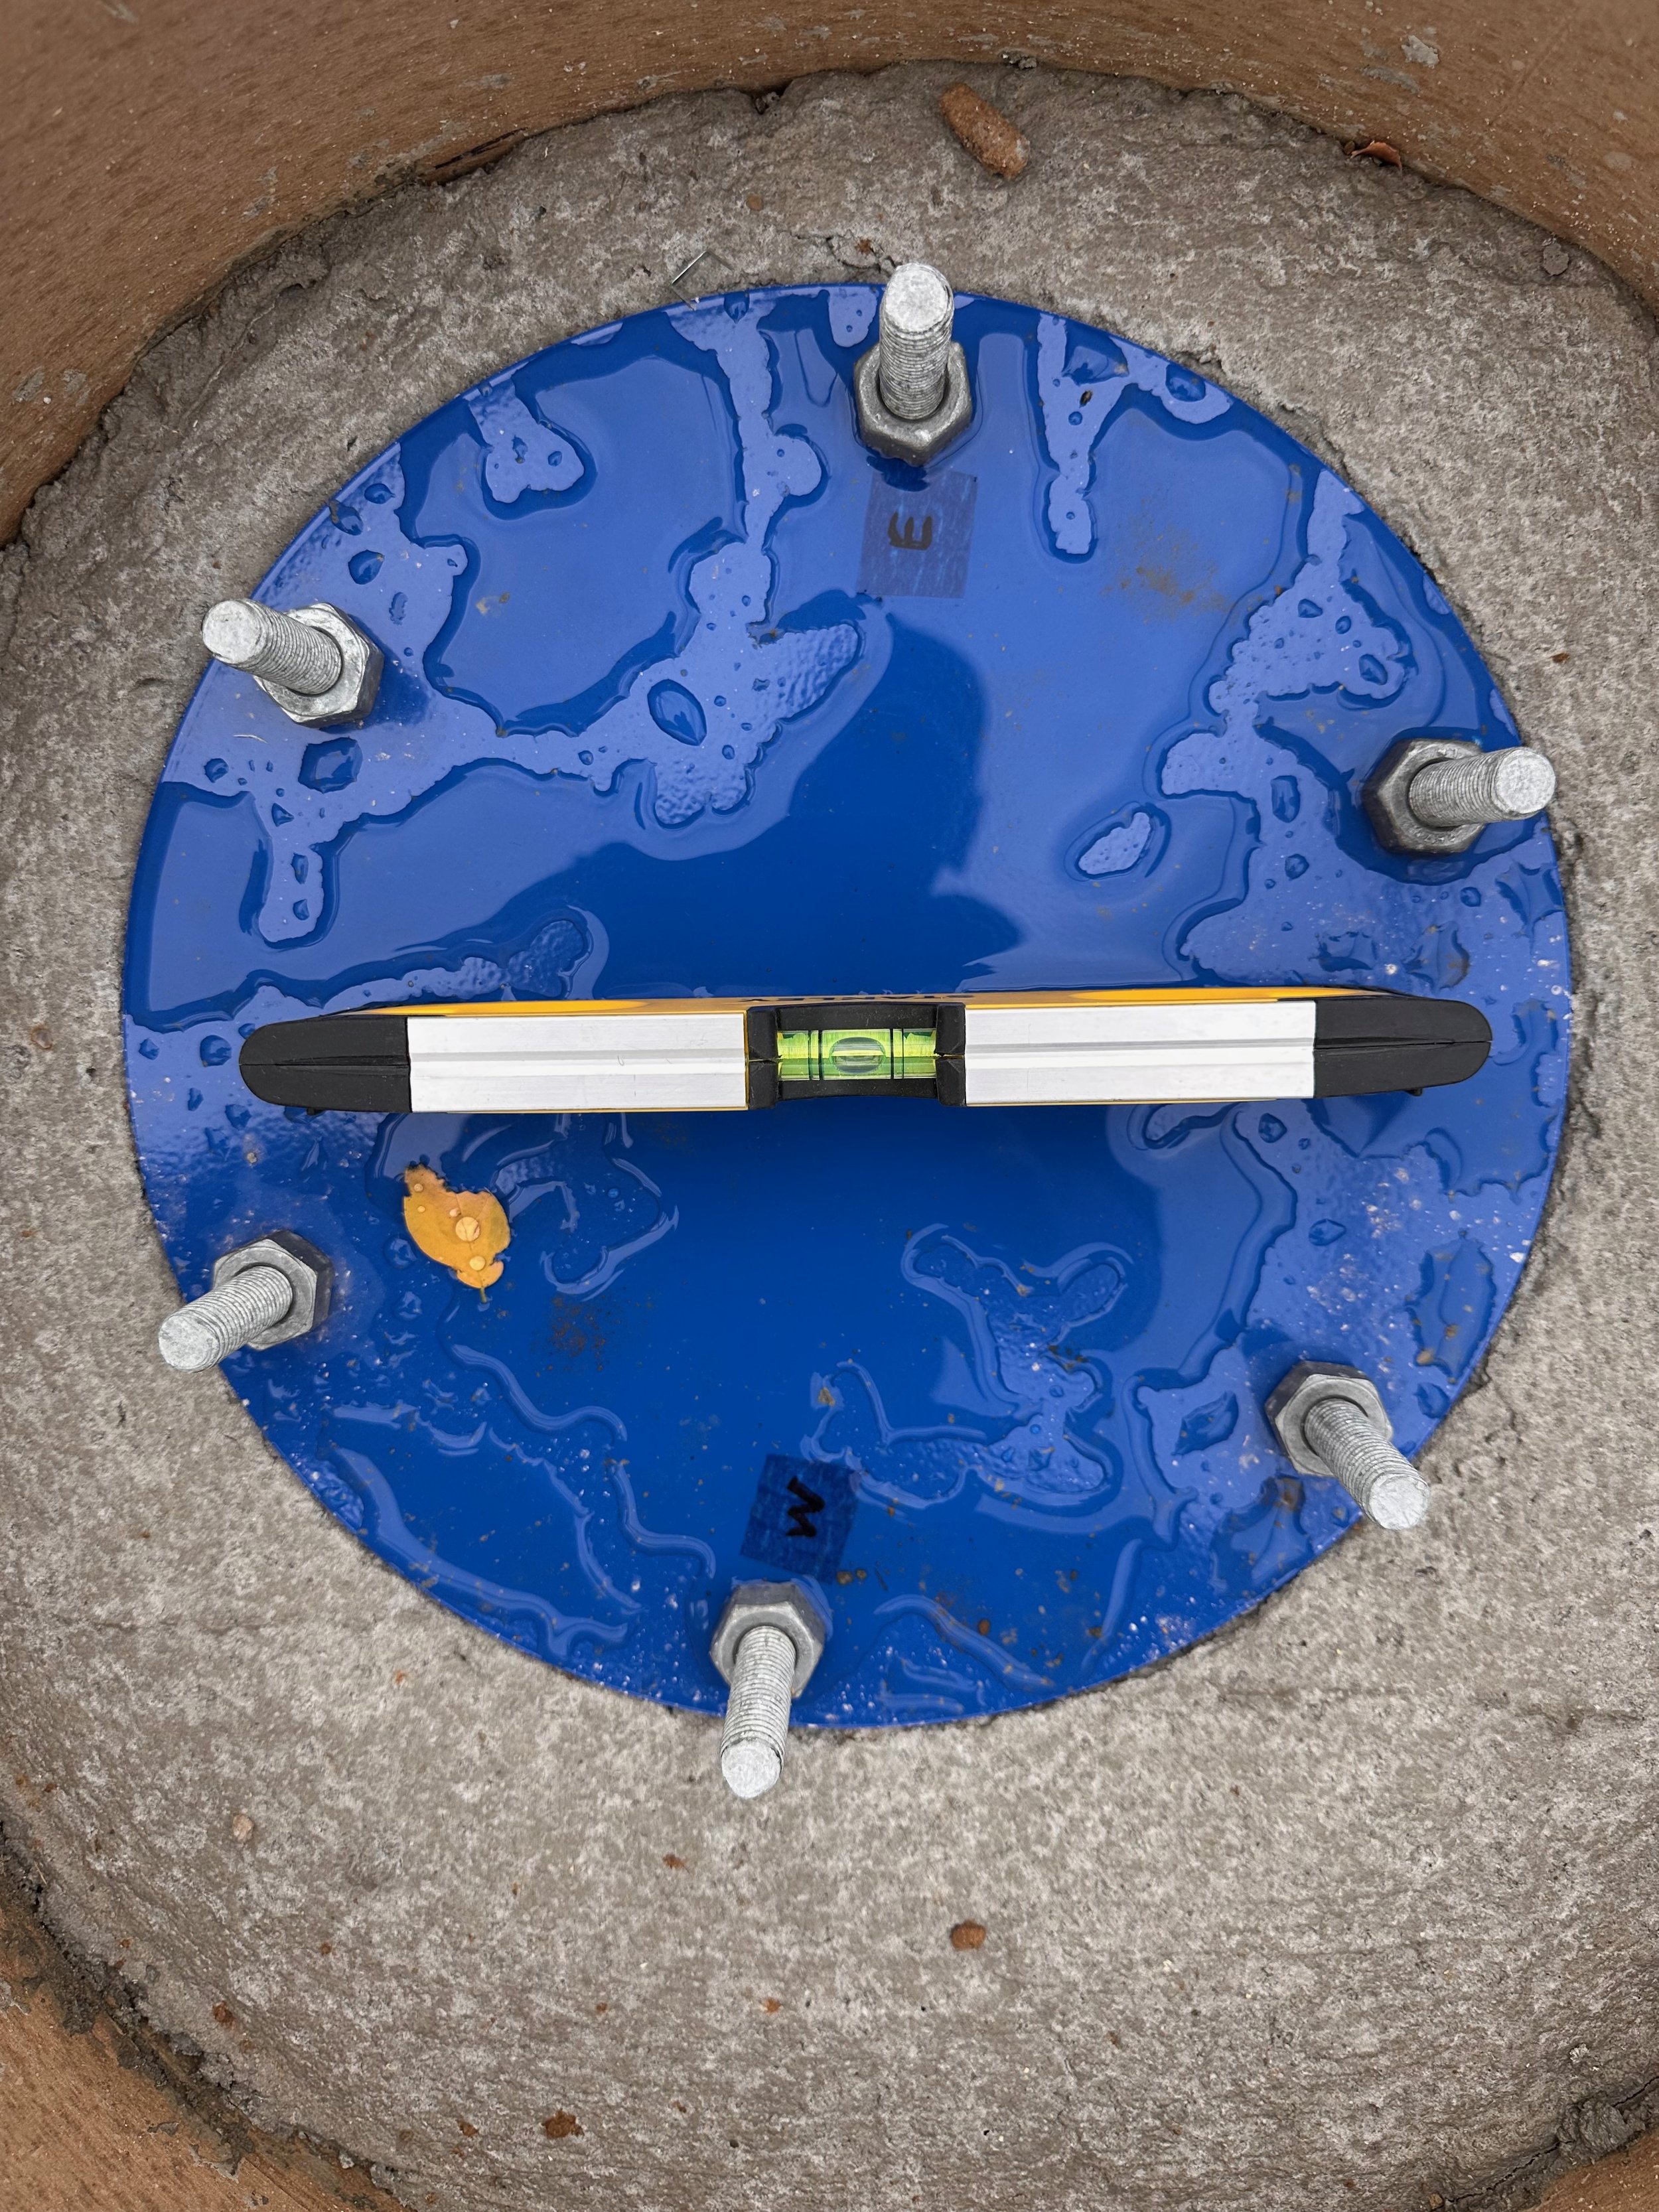
After the concrete had set (a couple of days), I went back and used a level to assess how level the final pated were. Three were perfect! The NW plate was level E-W, but was a little off N-S. So I will shim this a bit when I mount the peir.
The SouthWest Pier plate: E-W.
The same location but N-S.
The NW plate is a little off in N-W.
All-in-all - things are looking quite good.
The Video Overview
The video below shows off the entire 3 days of work compessed to just a few minutes. Beware - the video speedup can make your eyes go a little nuts!
The Team
This was the first opportunity to work with the team building my observatory.
I must say that I found them to be very nice - very competent - and very patient! After all, they had me hovering around them, taking photos and videos. They worked very quickly and efficiently.
Based on my experience so far, I think this build will go very well and will be a lot of fun!
Next
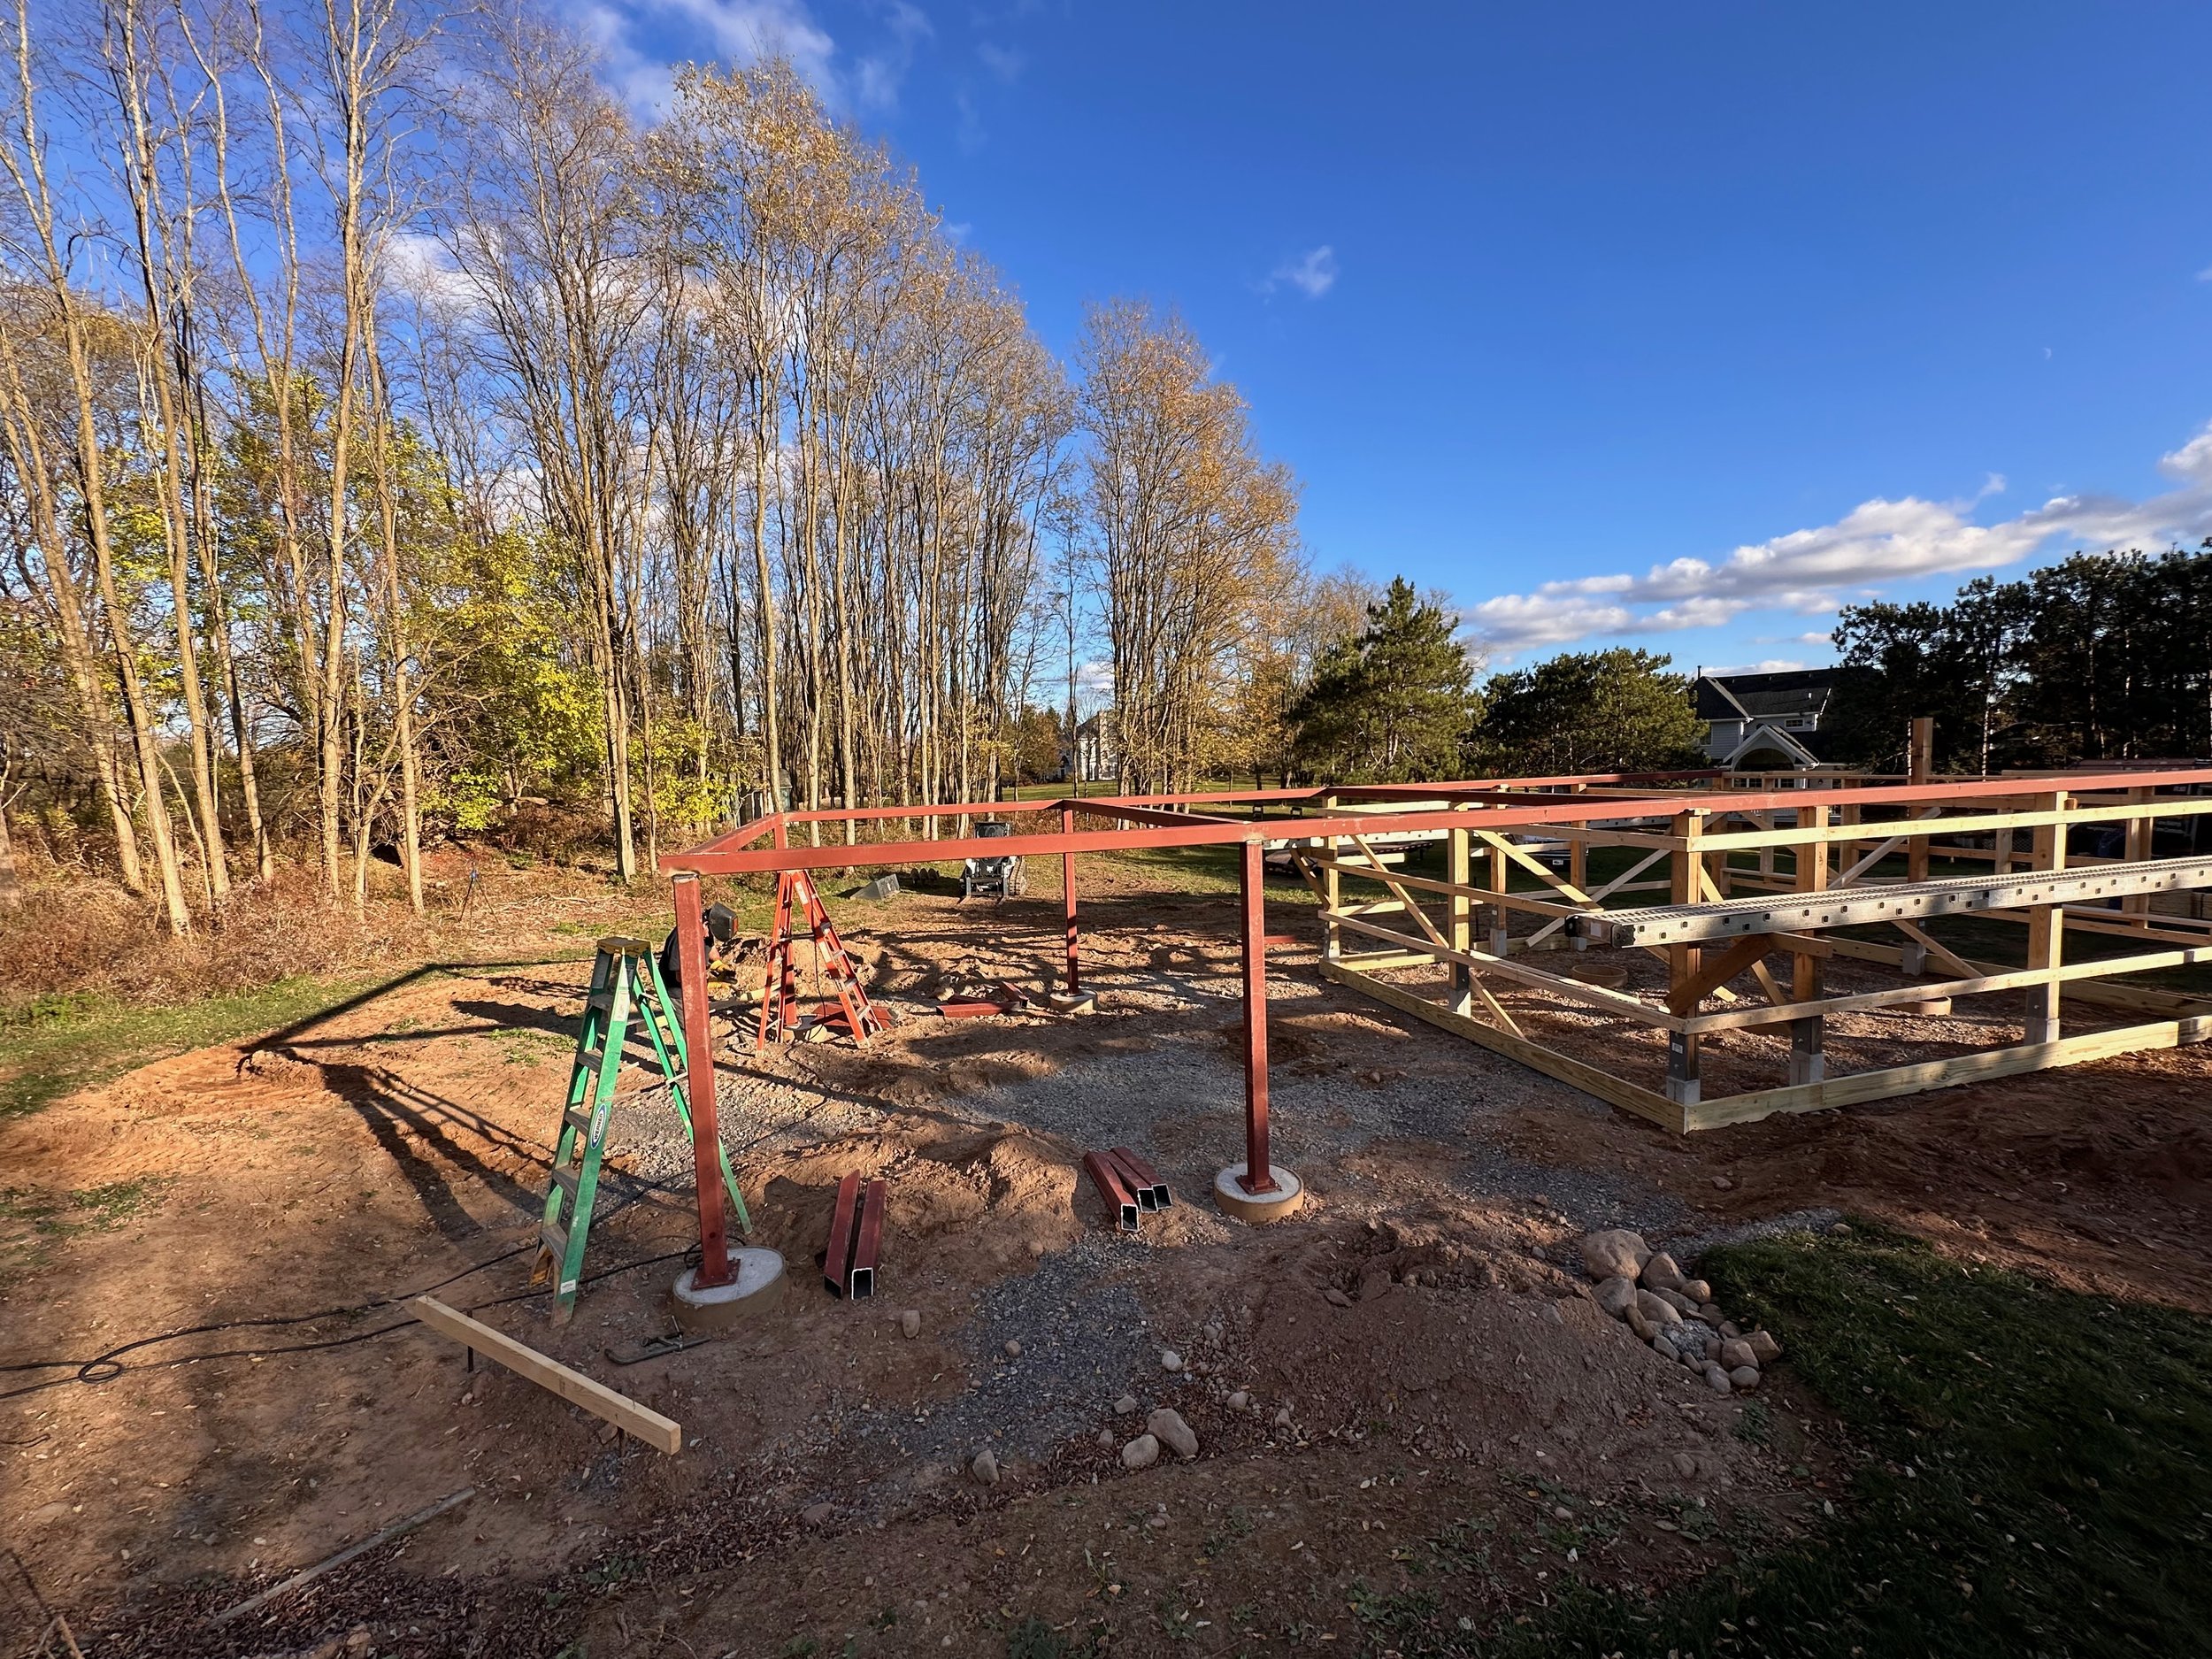
Work on framing the walls and installing the steel outrigger has already begun and I will report on that soon. But for now here is a little teaser”
The walls and steel are already up!


