
The Move is Complete, Now Pivoting to the Observatory Project!
Date: April 16, 2024
Table of Contents Show (Click on lines to navigate)

NOTICE:
This post shares my preliminary design thoughts for a Roll-off Roof Observatory. I make no representations regarding the designs and design decisions discussed. Use this information at your own risk! If you decide to build your own version of this project - you do so at your OWN RISK and YOU ASUME ALL LIABILITY for your efforts and its results.
Earlier Posts in this Series
I have been thinking about building an observatory for a while now - below are previous posts leading up to where I am today.
An Observatory Project Update: Success! We Just Bought A Property and Will Be Moving! Nov 2023
An Observatory Project Update - One Year In Feb 2023
Goals for my Observatory Project March 2022
The House Transition
In my last update, I shared that we had bought a new property that would allow for the construction of my observatory. Since then, there has been a whirlwind of Activity!
We closed on the new house in mid-December with plans to move at the end of January. This allowed us to do two things:
Pack! After 32 years in one house, it’s incredible how much “stuff” you collect. So, the process here was to do some triage. Some things were disposed of—we filled a 20-year dumpster! Some were donated. Finally, the rest was packed.
We wanted to do some work on the new house before we moved! We wanted to change some lighting, swap out a soak tub, and upgrade the security system and aspects of the heating system. During this time, we accomplished a lot of projects.
Finally, the move date arrived, and we watched as the movers loaded up the trucks and made the trek to the new house. It turns out that we should have downsized even more, as the move ended up taking over two days!

The Move begins!
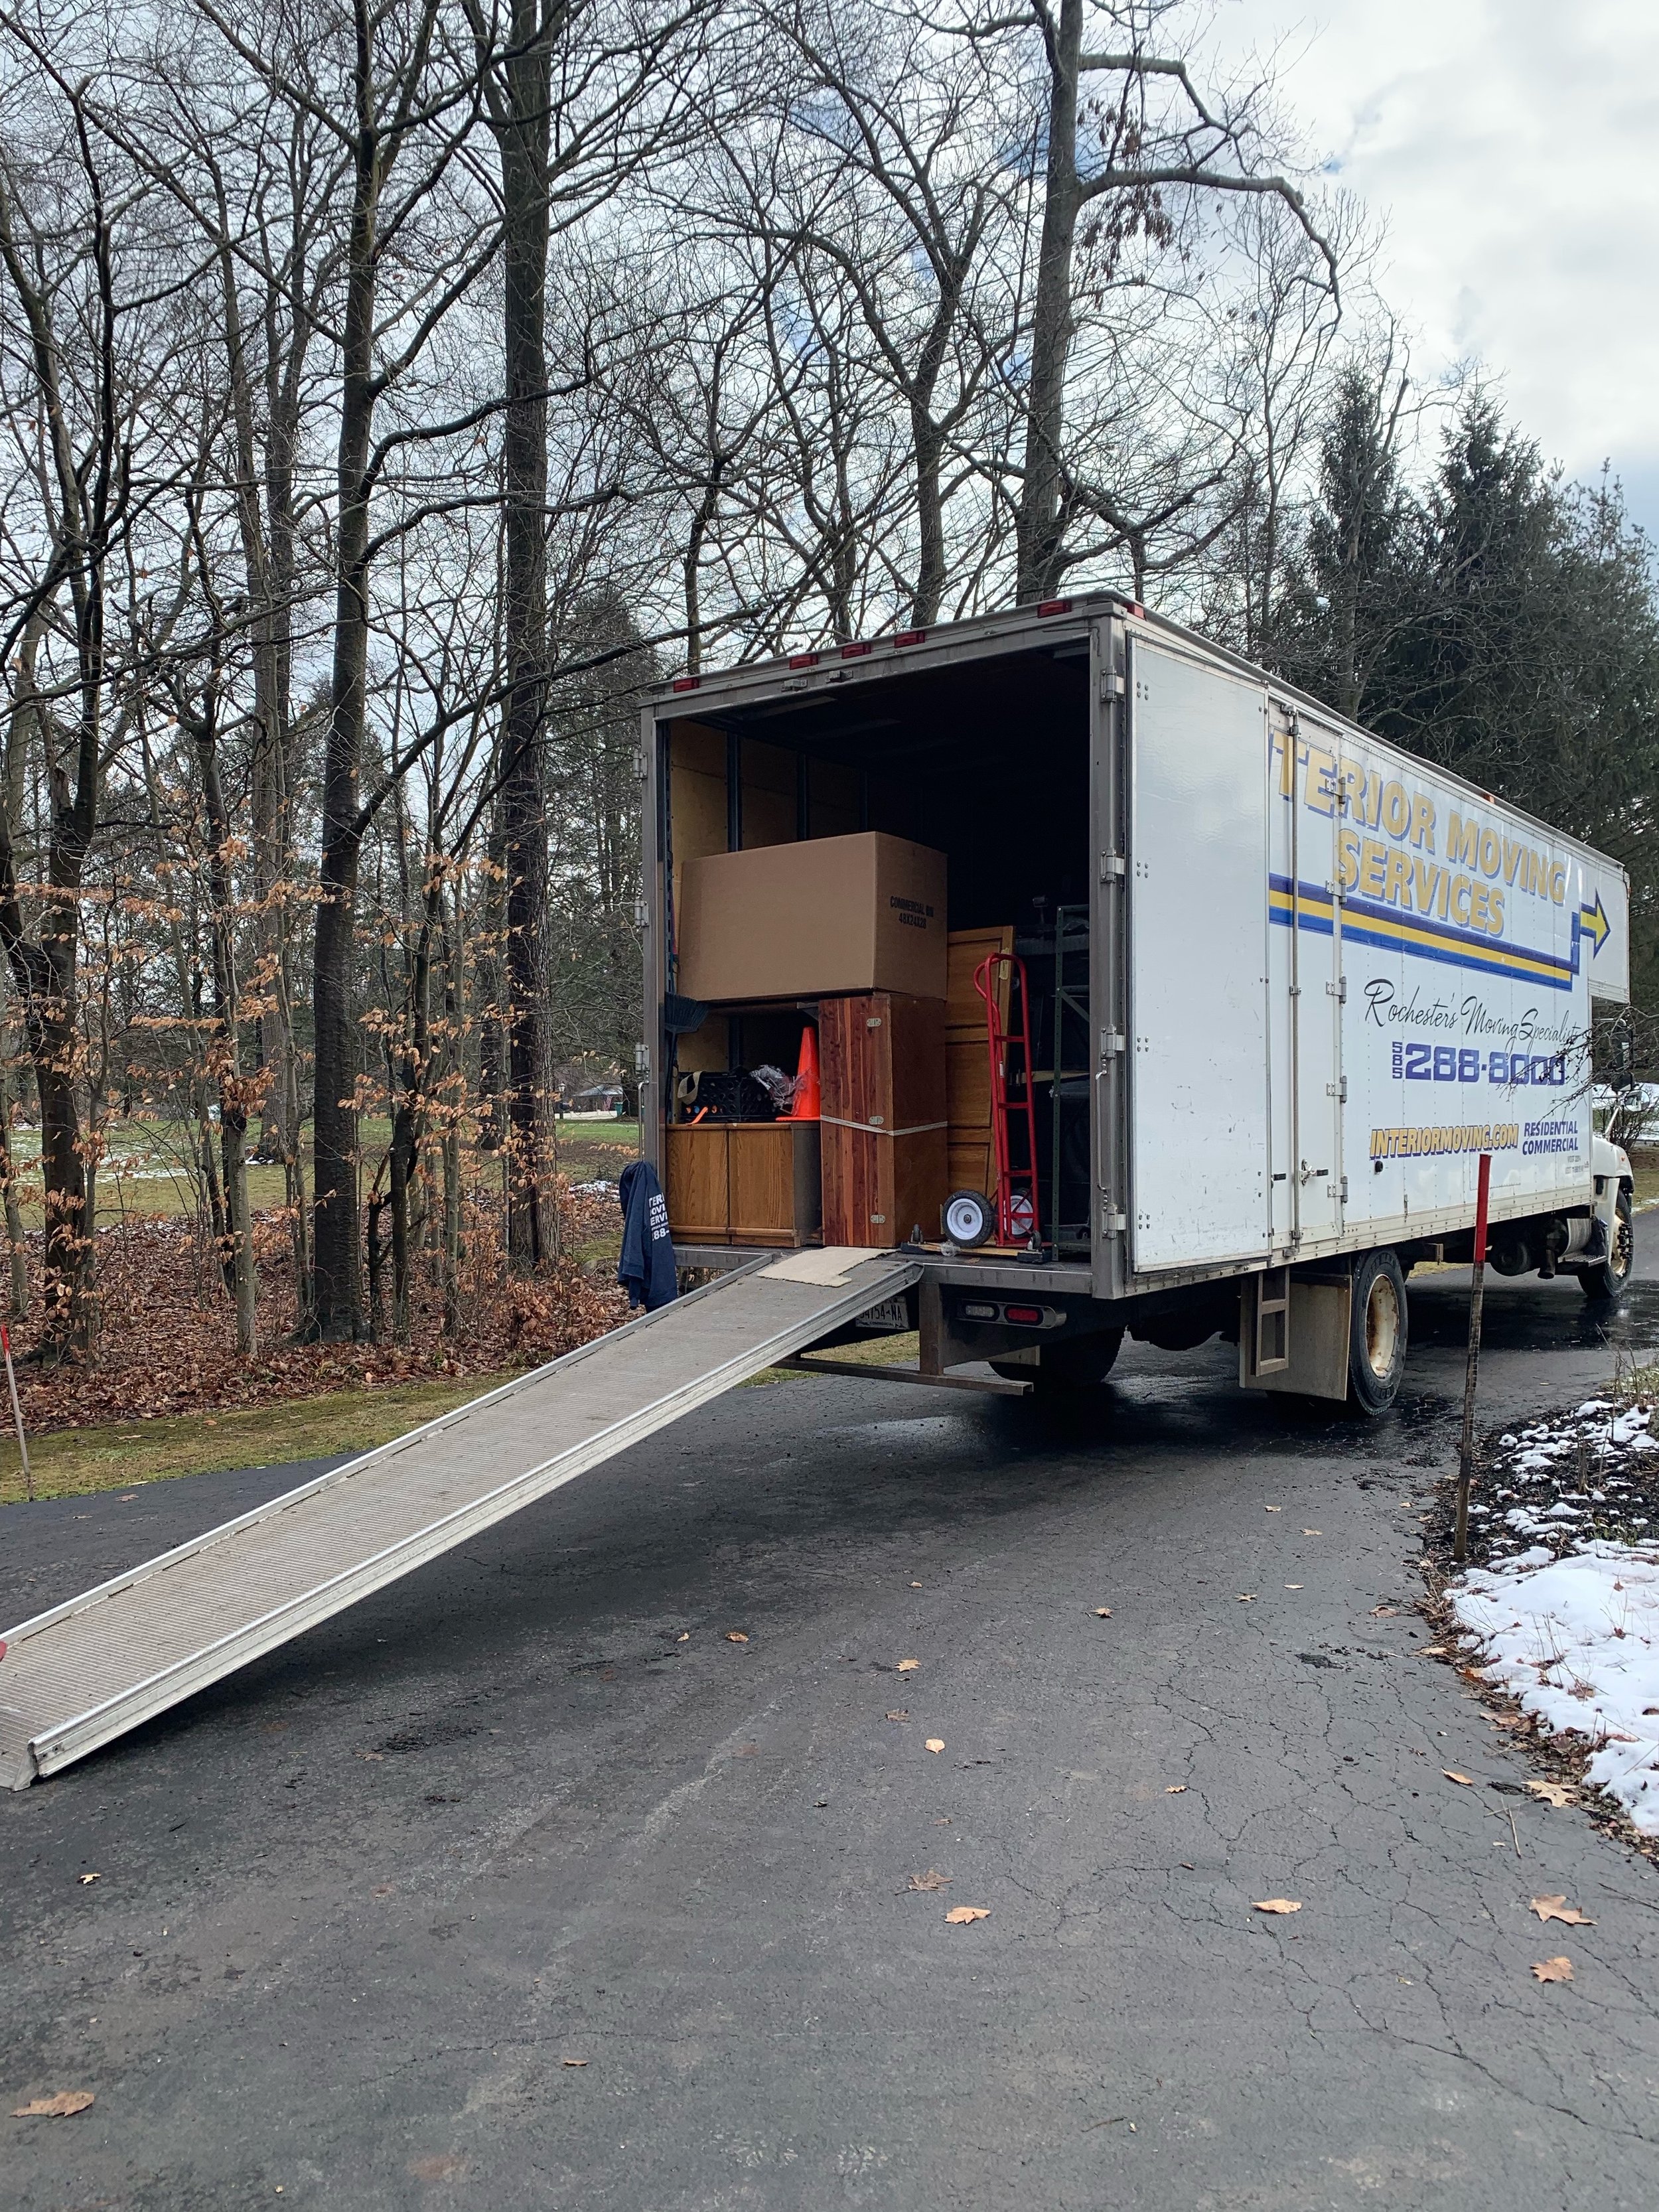
The truck is parked just behind where I would set up my telescopes!
Now, the focus was on unpacking and settling into the new house.
At the same time, we started getting the old house ready for the market. I had not anticipated how much effort this ended up taking! My wife took on this as her prime focus, and I focused on unpacking the new house. Even still, I did a lot of work on the old house as well.
We ripped out the old carpets and then had the wood floors refinished. After this, we painted almost the entire interior of the house. Then, new carpets went in. Our realtor worked with us to update some of the fixtures. We cleaned the windows (it's amazing what a positive impact this had), and we did some Spring Cleanup in the yard.
While it took a lot of time, the old house looked great, and our Realtor did a fantastic job staging it and creating marketing materials.
We listed and the house sold within five days at a great price. We recently closed on this sale, and we can now finally focus exclusively on the new house!
Beginning Work on the Observatory Project - Finally!
With the new house finally getting under control, I could begin to focus once again on the observatory project - that is - after all - why we moved in the first place.
I had stamped blueprints for a design, so how do I get started?
Here are the tasks that I laid out for myself:
Builders: Decide which builders I want to consider and have them come out to the property and begin the task of creating quotes
Placement: Determine the exact location and placement of the observatory
Site Map: I need to get a site plan made up - I know I will need this for the permits
Building Permits: Contact the town building inspector and investigate their expectations for this project on this property
Design Mods for Esthetics: The south elevation of the observatory will be directly visible from a sunroom area in the new house. Right now, it is pretty utilitarian - and I need to make some changes to make it pleasing to the eye as seen from the house.
Needed Hardware: Begin to identify and specify the hardware items that I would need to source. This includes:
The Tracks and wheels for the roof
The Gate Motor to pen and close the roof
The Piers
So now, let’s take a look at each of these tasks.
Builders
Not every builder is a good fit for this project.
Many builders focus on houses and have developed an approach with designs and materials that work for them. Doing a project like this has aspects that are unfamiliar to them, and either they are not interested or they jack up their prices to cover the risk associated with unfamiliar design elements.
On the other extreme, you have “handyman” types who do small projects but perhaps do not have the experience to deal with things like the more complicated aspects of the foundation design being done here.
So far, I have only identified two builders who I thought could do a good job.
I want the builder to:
Erect the building and roof
Bring power and ethernet to the building
Install my track system
Install the gate motor and passive roof interlocks.
Grade the land around the building and hydro-seed
The rest I will be doing myself.
I have now had both visit the property and review the plans with me. Both made suggestions and design changes that I will have to consider. Right now, I am waiting to receive their quotes before I can make the final decisions.
If the quotes align with my budget, we can choose a builder and move on. If the quotes are higher than the budget, we might have to adjust our plan to fit the budget. Right now, this is the biggest unknown.
I hope to have estimates by the end of next week.
Placement
Where - precisely - would I want to place the observatory?
The backyard rises up and then levels off a bit at the back end. So, I would want to place things on the more level portion in the back, but I also have to place it with the appropriate setbacks from the rear property lines.
I will also want to align it North-South.
Finally, I need to figure out how to place it East-West. Trees play a role here. Towards the East, there are trees that I cannot trim as they are not on my property. Trees on the North and South are located on my property, and I can either remove them or bob them. So, I am inclined to push things towards the west a bit. This will give me better sight lines over the Eastern Trees.
My plan is to have a couple of my astronomy friends cover over, and we can work this out—choosing what trees to remove and which to bob.
Site Map
I am assuming that I will need a site plan in order to get a building permit, so I will have to investigate what is required for that and how elaborate it should be.
Building Permits
Long before we bought the property, I had talked to the building inspectors in some of the towns we have considered. Some were very helpful and seemed easy to work with. Some were not. They seemed more like bureaucrats. Fortunately, where we ended up, we had one who was very helpful. But now we have a specific property involved, and we need to meet with him and see what considerations he would have for the observatory design on this property. One of the issues has to do with the grade of the land. I think we can develop a plan where the main area of the observatory is scraped flat and then we use the dirt thus generated to smooth out the contours. They are concerned with drainage, so we want to run this by him. We fully expect that they will want a site plan so that we can confirm this as well - but the goal here is to see if there are any issues we will need to address from their perspective as we move forward.
Design for Esthetics
This is the view of the observatory area from the house:
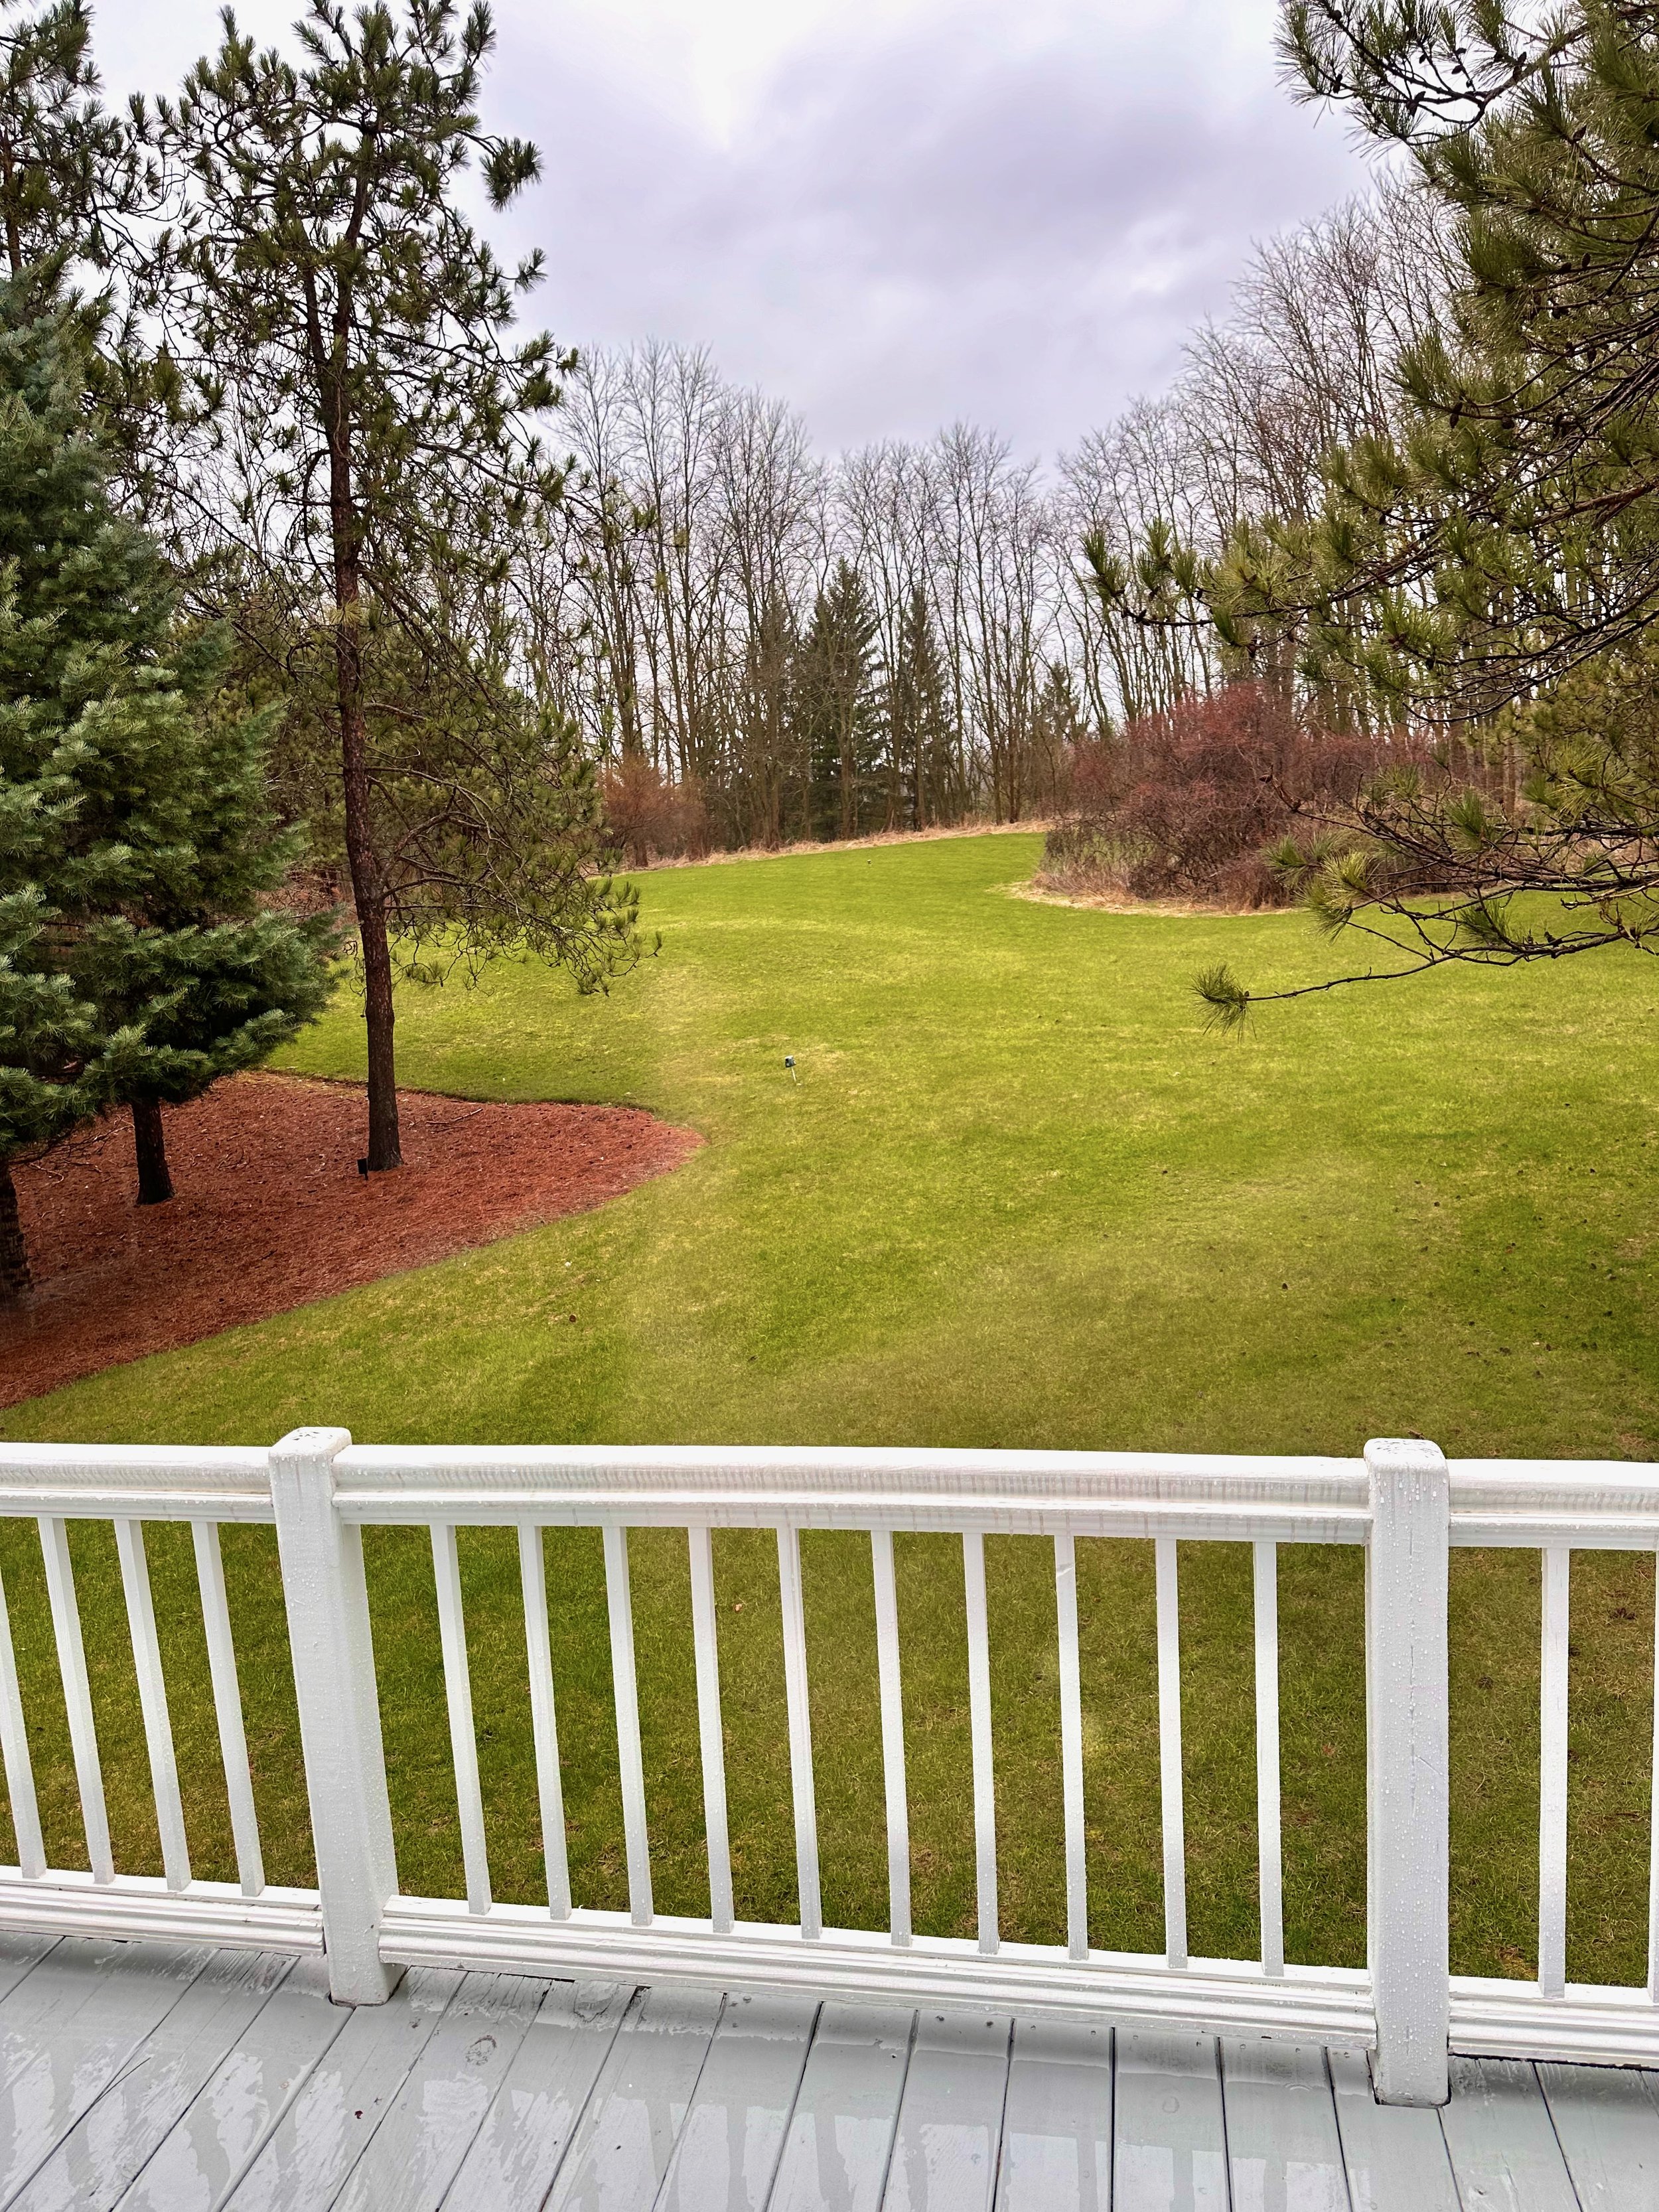
Looking up the hill…
And here is the southern elevation of the observatory:

Not very impressive. I think this must have some design elements added to make this more pleasing - perhaps something like this:

Adding a door and two windows - even faux versions - makes this elevation more visually interesting.
Hardware
The Track System
My plan is to use a v-track with v-wheels on one side and flat wheels and flat tracks on the other side. This will keep the track system from being over constrainted.
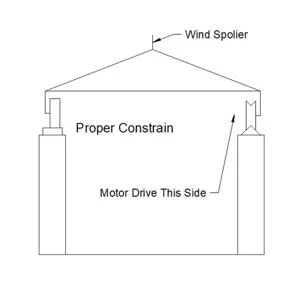
Rick Albrecht’s Track proposal
The track location is seen here on the blue print:

For the V-track, I am likely to use something like this:

For the V-Wheels, something like this:

The roof is estimated to weigh about 7,000 lbs, so by putting 5 of these on one side, we can handle about 5,000 lbs of weight. The flat wheels will carry the rest.
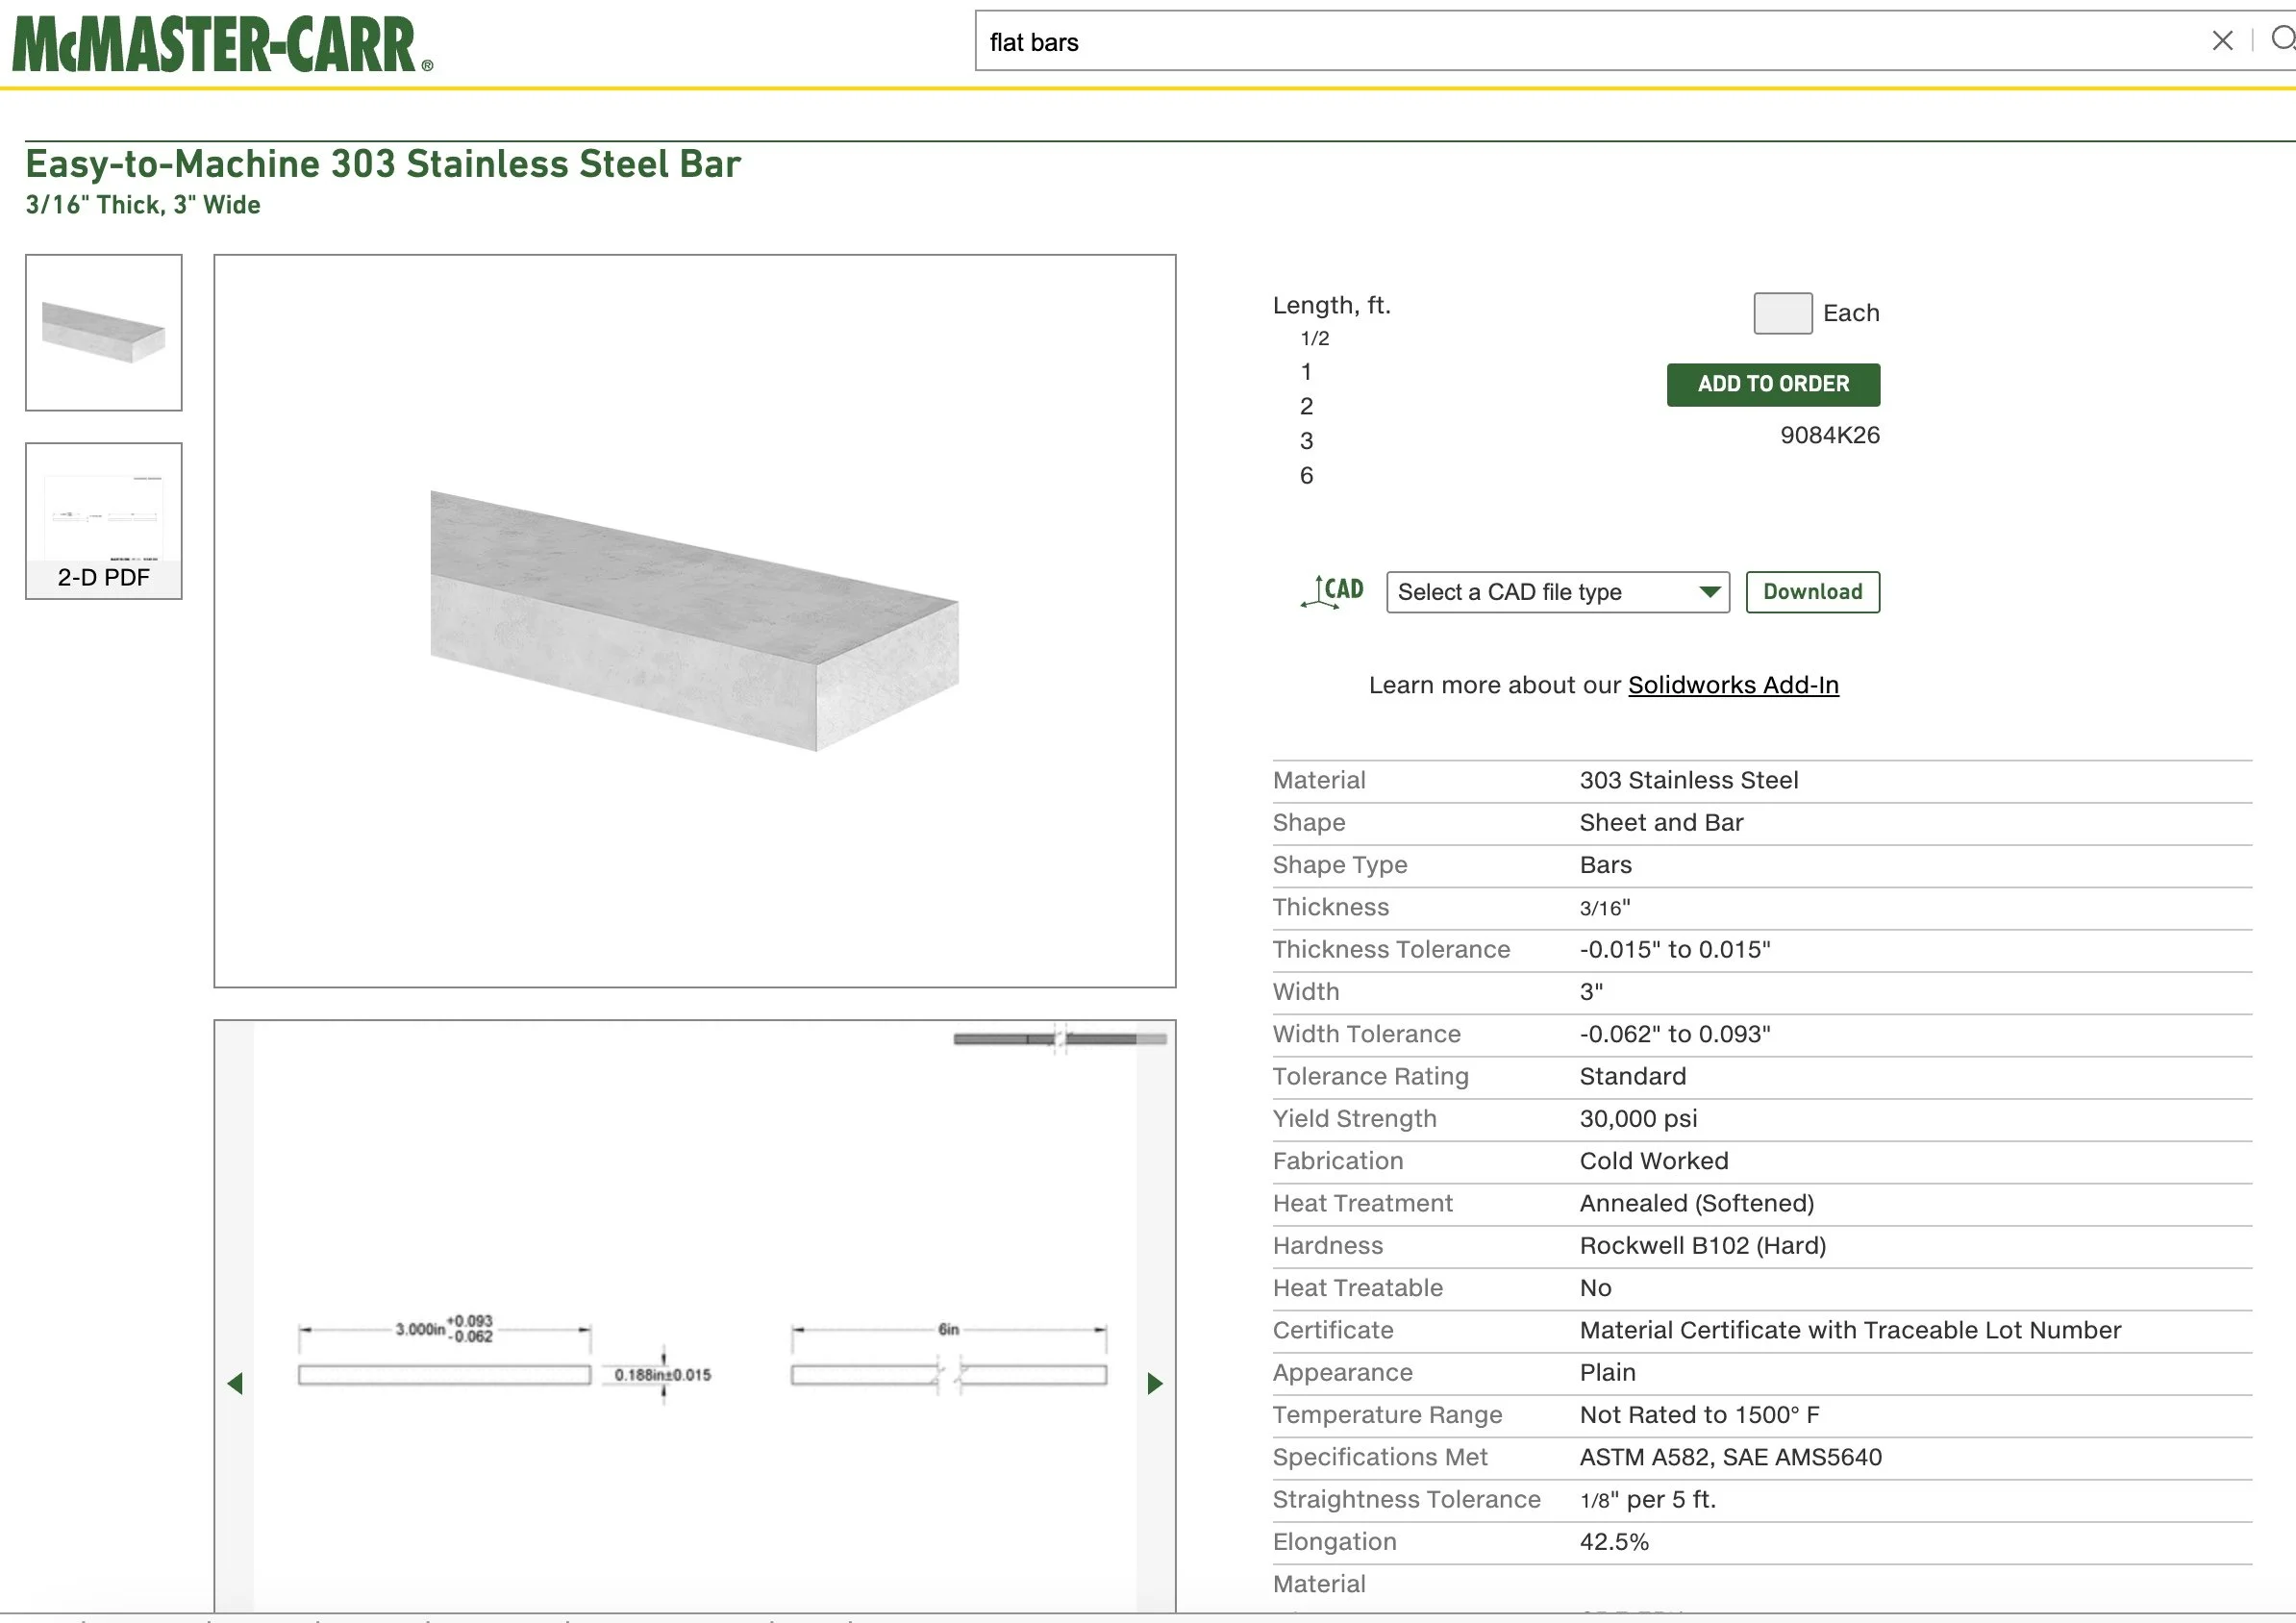
For the flat track, I am looking at this:
And finally - for the flat wheels, I am looking at this:

The Gate Motor
In order to open and close the roof, I am looking at using a Gate motor. Right now, I am looking at this set up - it is one of the more powerful ones and it offers steel gear tracks and accessories that include WiFi Control and limit sensors.
https://www.amazon.com/TOPENS-RK2600T-Automatic-Industrial-Commercial/dp/B099RNSHRL/ref=sr_1_19_sspa?crid=1TMZN7UNFHFRS&dib=eyJ2IjoiMSJ9.LoFL-L0Mu97DddB1vJepGYwDYtcm8ZAINbpZAR6l1ajw86M_9CDCJbWXI4bYr1Y6XoqyqDo1-whhl1q_UMGhe_Q-f3VbySaohyE7Nx6205HcnOTFwVXKKUdmlZML6vzo7e28FP7Lku7lTmmjaemQpnyr_bxiQbLDIb5loDaASOdvyRpPgtOPnYmENUBHo2sttHiHIdi3JACdlgSAFaMxfMDSikosY9UYEuUcpn0tsIIKb9s12iYyYLNcKtAUNJB0l70MOq8TXdzTqQRMQGiSN0057FXHuqJD4ptOovYsewo.Dvu-IFoN0yilfFkbJRv-FGRqya5AKZbwUJQLMC8nICk&dib_tag=se&keywords=gate+motor&qid=1712075486&sprefix=gate+moto%2Caps%2C178&sr=8-19-spons&sp_csd=d2lkZ2V0TmFtZT1zcF9tdGY&psc=1

Steel Piers
Design Considerations
The final thing I have been working on is the idea of having 4 steel piers that could bolt onto the isolated pier foundations. I looked at many commercially available piers, but these seem expensive and often have very long lead times.
I have a friend who made his own pier, and he offered to help me have some custom piers built. But what would I need?
My current two main scopes use the IOptron CEM60 mounts on IOptron Tri-piers. The diameter of the mounts is roughly 6 inches, so mimicking this would be one way to go.
Rick Albrecht - my Mechanical Engineering friend, suggested that I try going with the following configuration:
6-inch OD Steel pier with 1/4 thick walls.
1/2” thick bottom flange that would be 8-9 inches in diameter
Four 1/2 to 3/4 inch j-bolts into a concrete foundation
1/4 thick plate welded to the top. Pier plates could be mounted on this.
This sounded pretty good.
What about the pier plates? I am still thinking this through. Two of my scopes use IOptron CEM60 mounts. Another uses a ZWO AM5 mount. The 4th is TBD.
IOptron sells a Top Pier plate that is configured for the CEM60, so I picked one up.

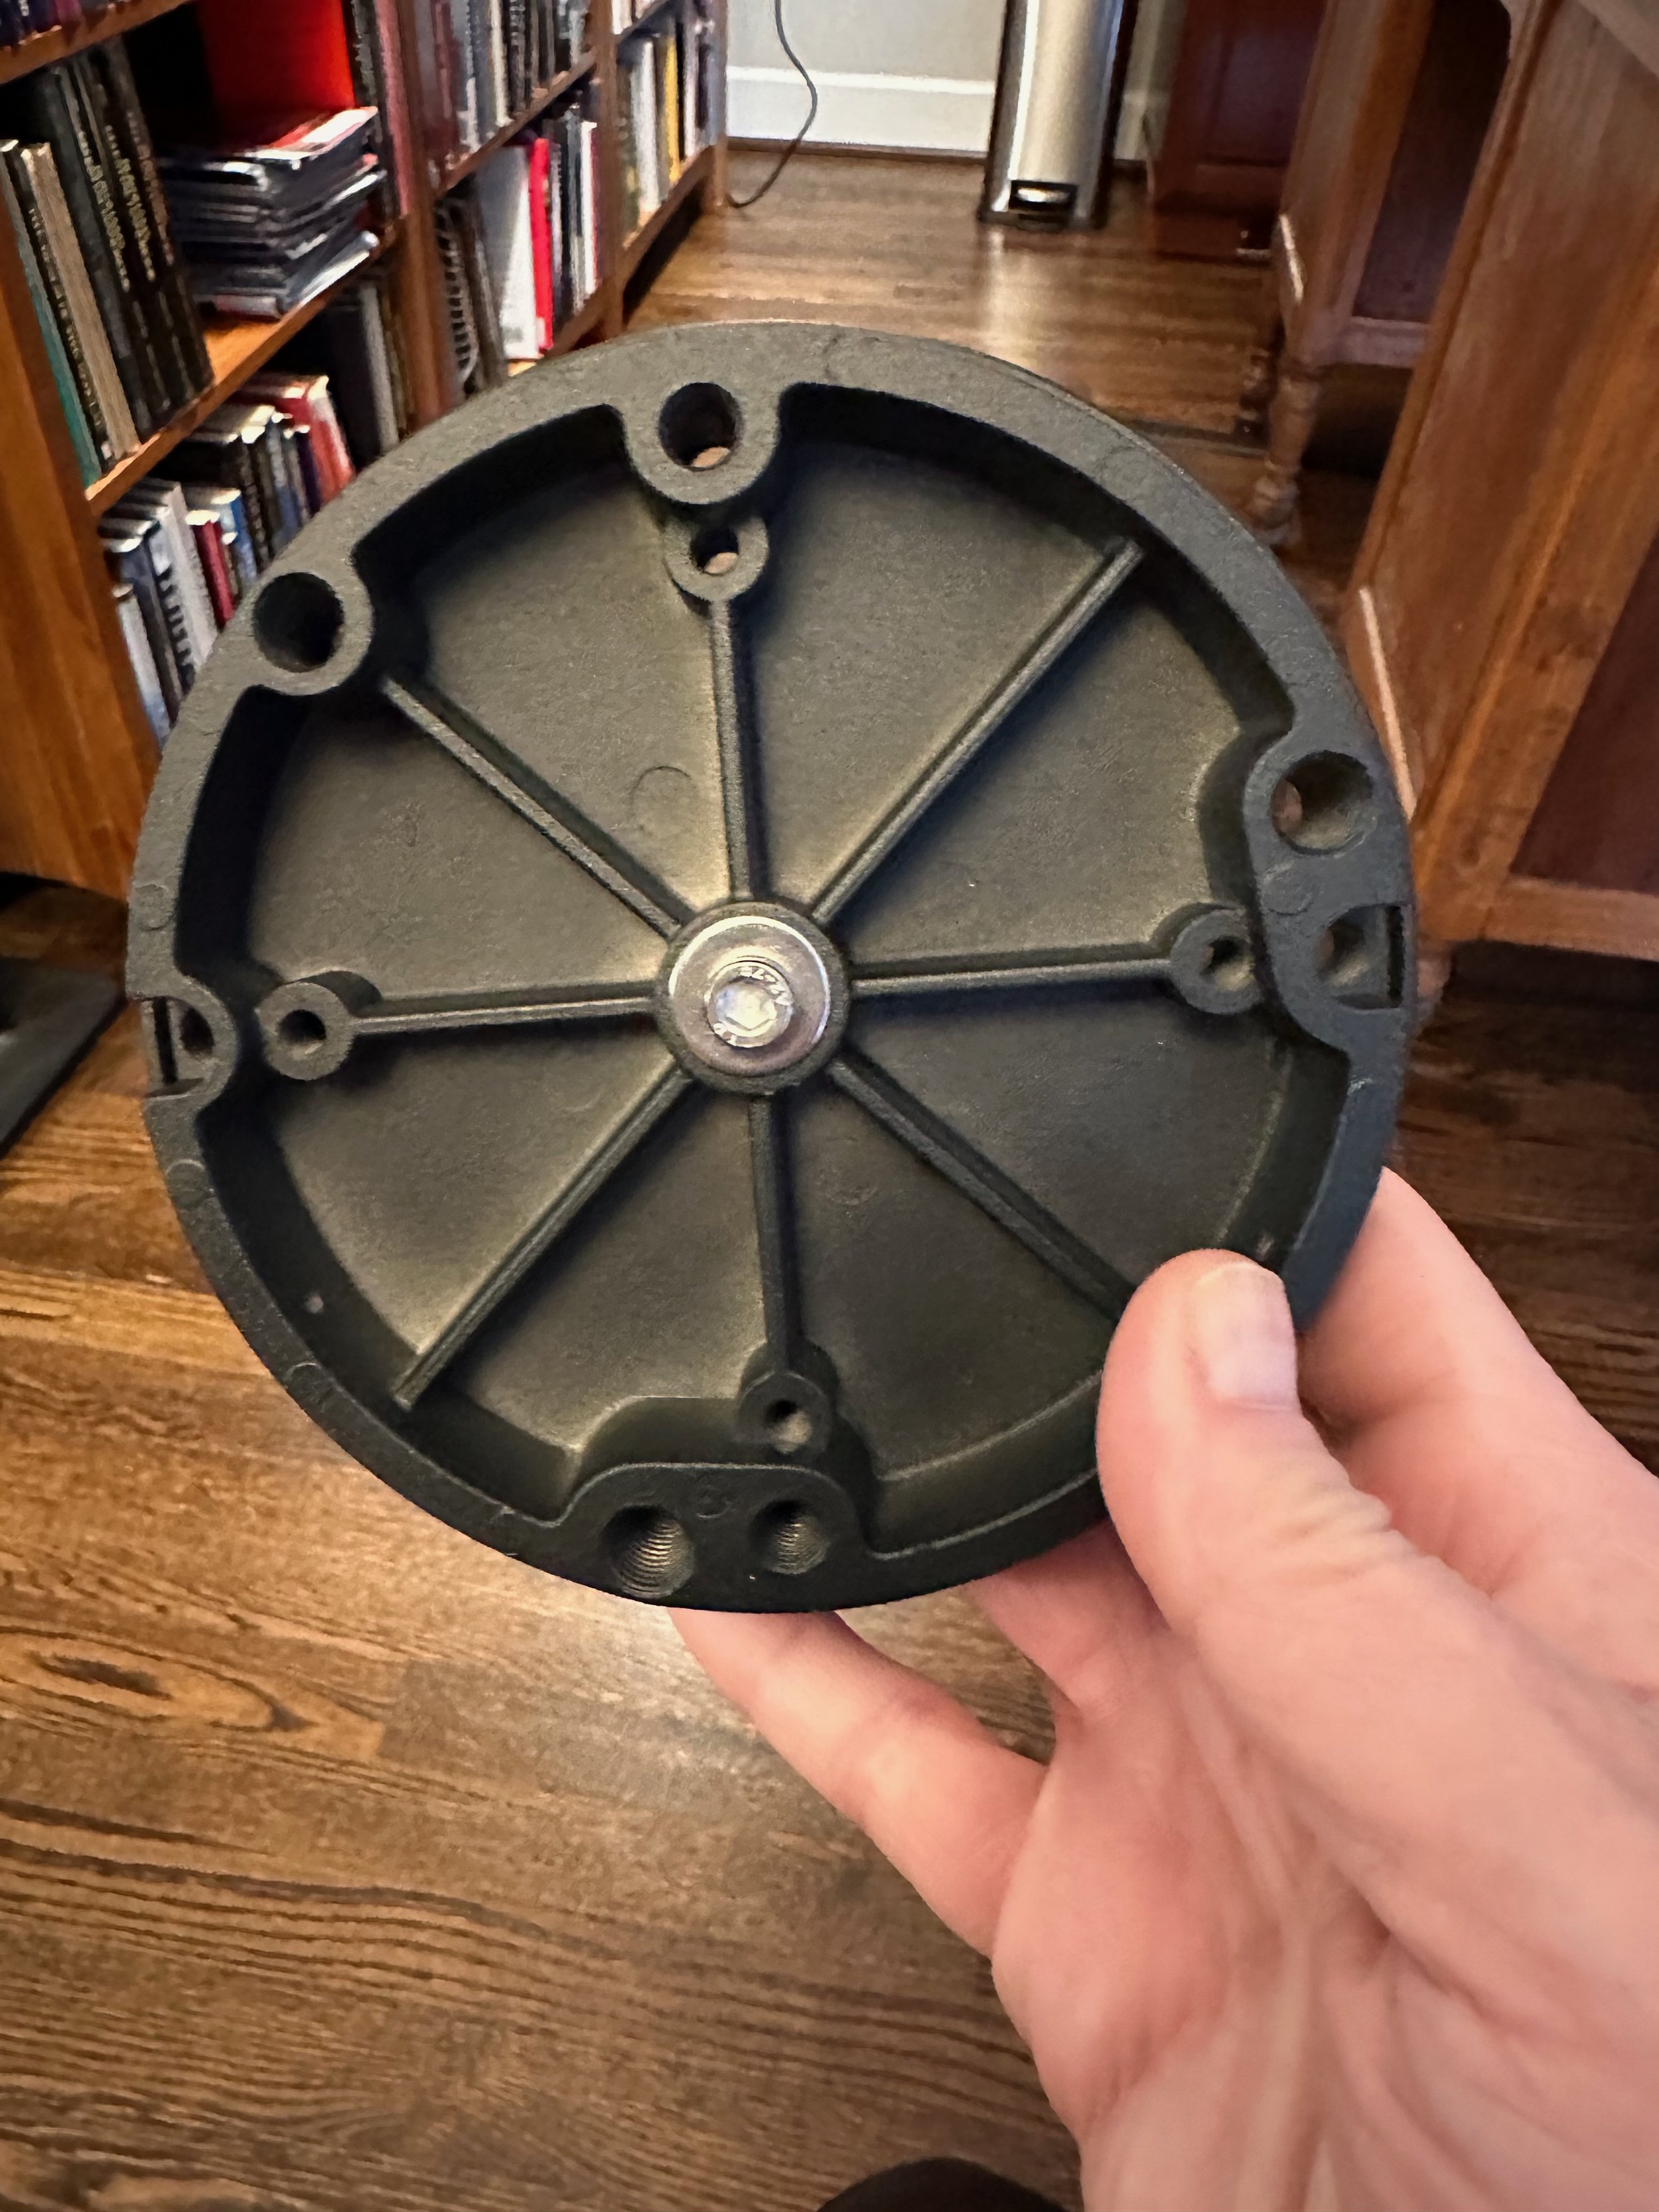
This was made of cast aluminum and had many holes that might be useful for bolting it to the top of the Pier.

Beside the central hub peg, there are two holes used to mount studs that the mount is slipped over. The leaves many holes that might be used to secure this to the top plate of the pier. However, you could just tap the top of the pier for the central and stud holes and use it as it is.
The AM5 only requires a 3/8-inch threaded bolt - as commonly found on tripods. What could be simpler?
My observatory plan originally called for a 39-inch high concrete pier. I wanted the height to be 49 inches, so I assumed I would have 10 inches for threaded rods, leveling bolts, and pier plates.
But now, I probably would not need that 10-inch section, so that would make the steel pipe length 49 inches from the floor. But the whole point of going to a steel pier is so that I could easily remove them when we sold the house, and the observatory could be used as a storage shed. So, I really wanted the base of the pier to be below the floor. Then I could put a cover over the hole, and the observatory is now a “shed.”
So, if I added 6 inches to the length of the pipe - that would make it 55 inches long. I KNOW that length plays a significant factor here, so I touched base with Rick again. He gave me a spreadsheet to calculate deflection as a function of the pipe parameters. The length was a big factor. Even an inch or so can make a difference. So, I decided to minimize the height and dropped it just below the floor level. This would bring the height to about 51 or 52 inches.
Meanwhile, my friend helping me with the pier had checked steel pipe prices, and he could get a pipe that was long enough for all four piers
for a very reasonable price. The spec on this pipe was even better. It had an OD of 6 5/8 inches and a wall thickness of 0.28 inches. With these specs, the height of 52 inches looked much better!
My friend asked an interesting question - if we filled the pier with sand - would that have a dampening effect? I ran this by Rick, and he thought that was a great idea - it would have to be very dry sand - but perhaps there is a way we could make a provision for a hole at the top of the pier for filling…
Based upon more input from Rick, we decided to go with a 6-bolt pattern and a 1/2-inch plate flange that was about 10 inches in diameter. The Flange will be a complete circular disk - this will be stronger and will help keep the sand in! Finally, the top plate should be 3/8 inch thick rather than 1/4 inch - but we may as well go with a 1/2-inch plate like the flange on the bottom.
Design Summary - So Far
Total Height is 52 inches.
The top and bottom flange are 1/2 steel plate discs, so the pipe is 51 inches.
The pipe to be used is 6 5/8” OD and 0.28 wall thickness
The bottom Flange will be 10” in diameter and a solid disk. It will support size 1/2-inch bolts that are at least 3/4” away from the pipe
The top flange will be a 1/2” steel disc. Right now, this will be welded.
Some provisions must be made for filling the pipe with sand to dampen vibrations.
Use of the IOptron Top Plate for the CEM60 mounts. 3/8” threaded rod for AM5 mount
Right now, there is no leveling mechanism.
Questions about the Top Plate
So far, we know that:
it could be welded to the pipe - but would bolting it on offer more flexibility?
we might need a sand filer hole of some kind
we could bolt the IOptron plate to it (I think we might have to modify the plate a bit - at least countersinking the bolt holes so they don’t hit the mount bottom)
We could drill and tap the top plate for IOptron or 3/8” tripod stud mount (what if I ever wanted to swap some other scope mount there? I guess I could shift things around to allow new holes to be tapped. )
We need to build this to be oriented N-S so Polar Alignment is possible.
Theoretically - we could laser level the foundation and bolts, and the pier would be level - but I think that shit happens, and if we got it together and it was not level - do we need to have some minimal leveling capability?
Well - one thing at a time - We will work this all out!
This was starting to come together. It looked like the pier could be cut, welded, sandblasted, and painted with about a 2-month turnaround. This would work out fine!
Stay Tuned!
Now that work is actively starting on the observatory, I will be posting progress reports more often - so stay tuned!