
Observatory Update: Custom Telescope Piers Part 3 - Painted and Complete!
Date: Sept 9, 2024

Table of Contents Show (Click on lines to navigate)
NOTICE!
This post shares my preliminary design thoughts for a Roll-Off-Roof Observatory.
I make NO representations regarding the fitness or soundness of the designs and design decisions discussed.
Use this information at YOUR OWN RISK!
If you decide to build your own version of this project, YOU ASSUME ALL LIABILITY for your efforts and their results.
Earlier Posts in this Series
I have been thinking about building an observatory for a while now. Below are previous posts that have led up to where I am today.
Observatory Project: Breaking Ground! Excavation Complete! Sept 2024
Observatory Project: A Final Update Before We Break Ground! Aug 2024
Observatory Project: Opening The Roof! Aug 2024
Observatory Project: Final Roof Track System Hardware Selection July 2024
Observatory Project: Designing Custom Steel Piers - Part I June 2024
Observatory Project: Galvanic Corrosion and a Change in Track Selection! June 2024
Observatory Update: Designing the Roll-Off-Roof Track System! May 2024
The Move is Complete, Now Pivoting to the Observatory Project! April 2024
An Observatory Project Update: Success! We Just Bought A Property and Will Be Moving! Nov 2023
An Observatory Project Update - One Year In Feb 2023
Goals for my Observatory Project March 2022
The Custom Piers are Complete!
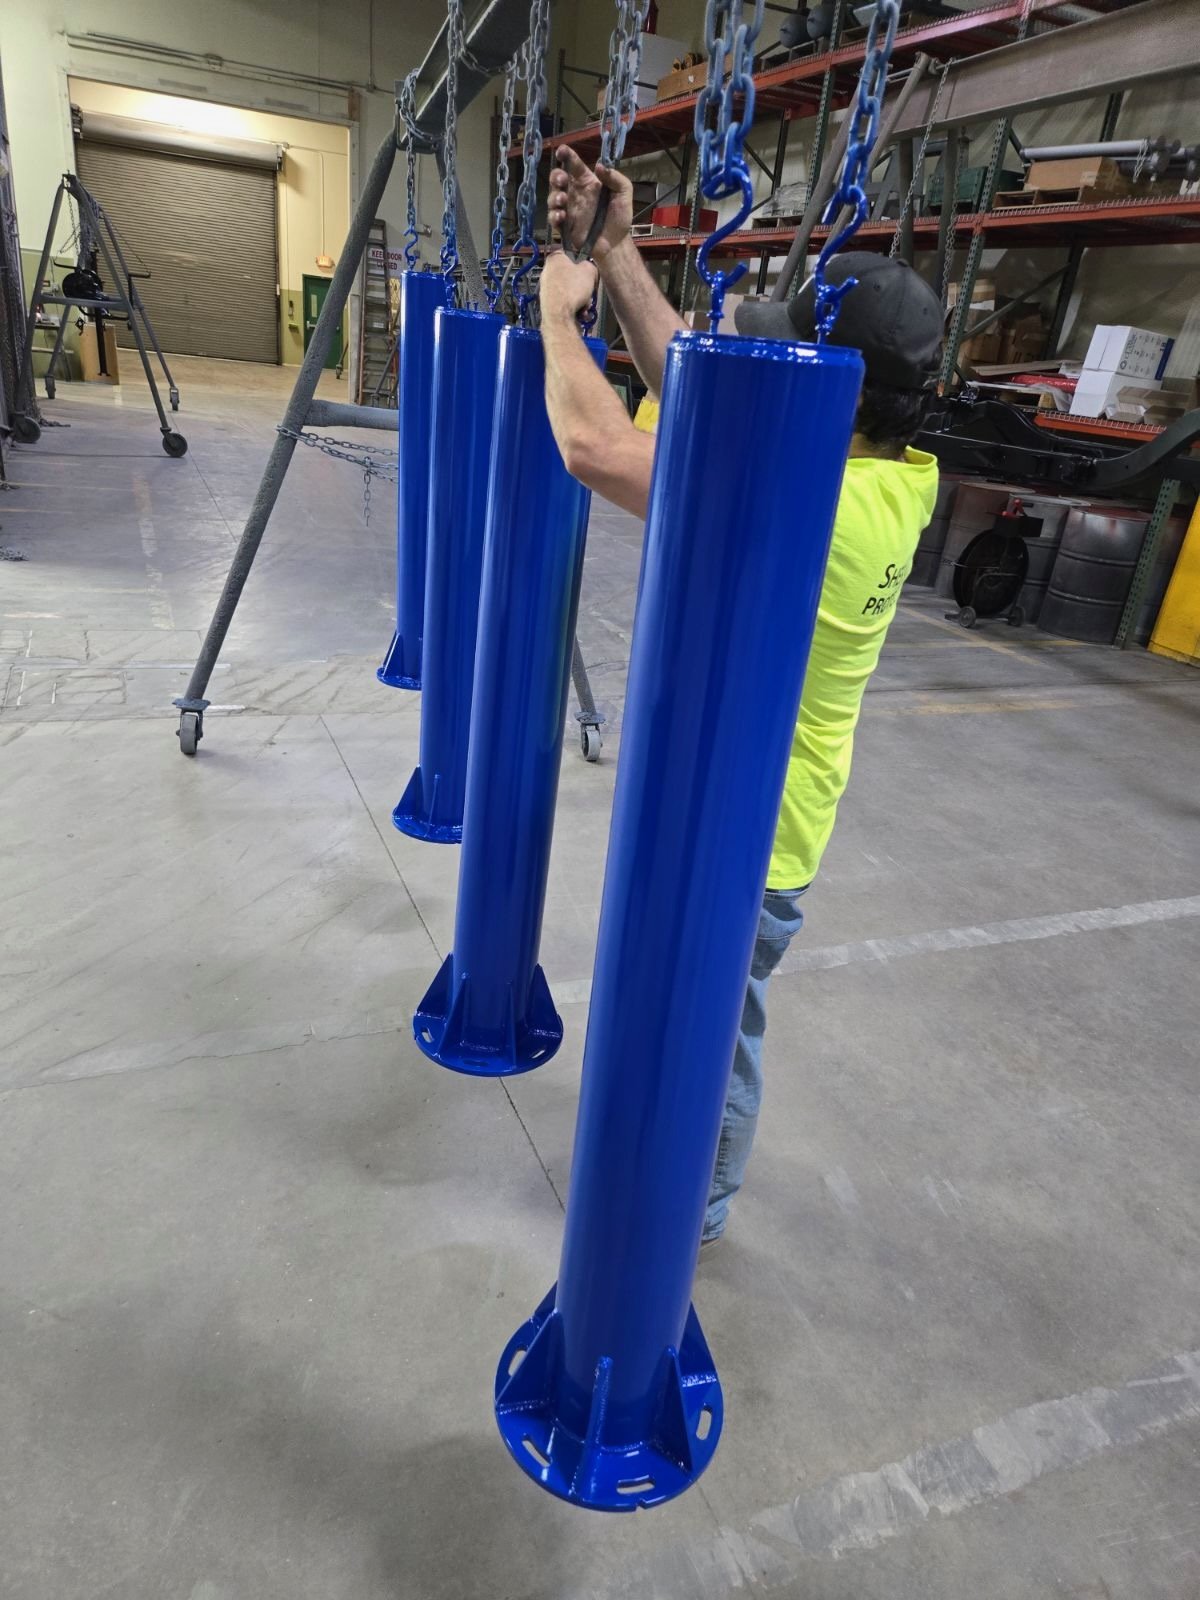
A few weeks back, I indicated that the welded piers had been dropped off at the painters - Millers Sandblasting and Painting.
There, I selected a blue color that I thought would really pop. I did not want to go with the traditional black or white.
They would sandblast the piers, the foundation plates, and the wedge-shaped washers and then prime and paint them.
A few weeks passed, and Gary called to say they were ready for pick-up! Gary picked them up with his truck and dropped them off at my house.
I thought the painters had done a great job - and I liked my chosen color. The piers just looked amazing to me! Thank you, Miller Sandblasting and Painting!

The piers are at Millers Sandblasting and Painting - hanging from the A-frame for painting.
Another view
The Final Results
Gary and I were just able to unload these beasts!
After watching the parts be cut, welded together, and painted - I had not, up until this point, had to lift them. They are MASSIVE. It took Gary and I together to get them into my garage. Moving them to the Observatory will be fun. But I expect we can use a truck when the time comes.


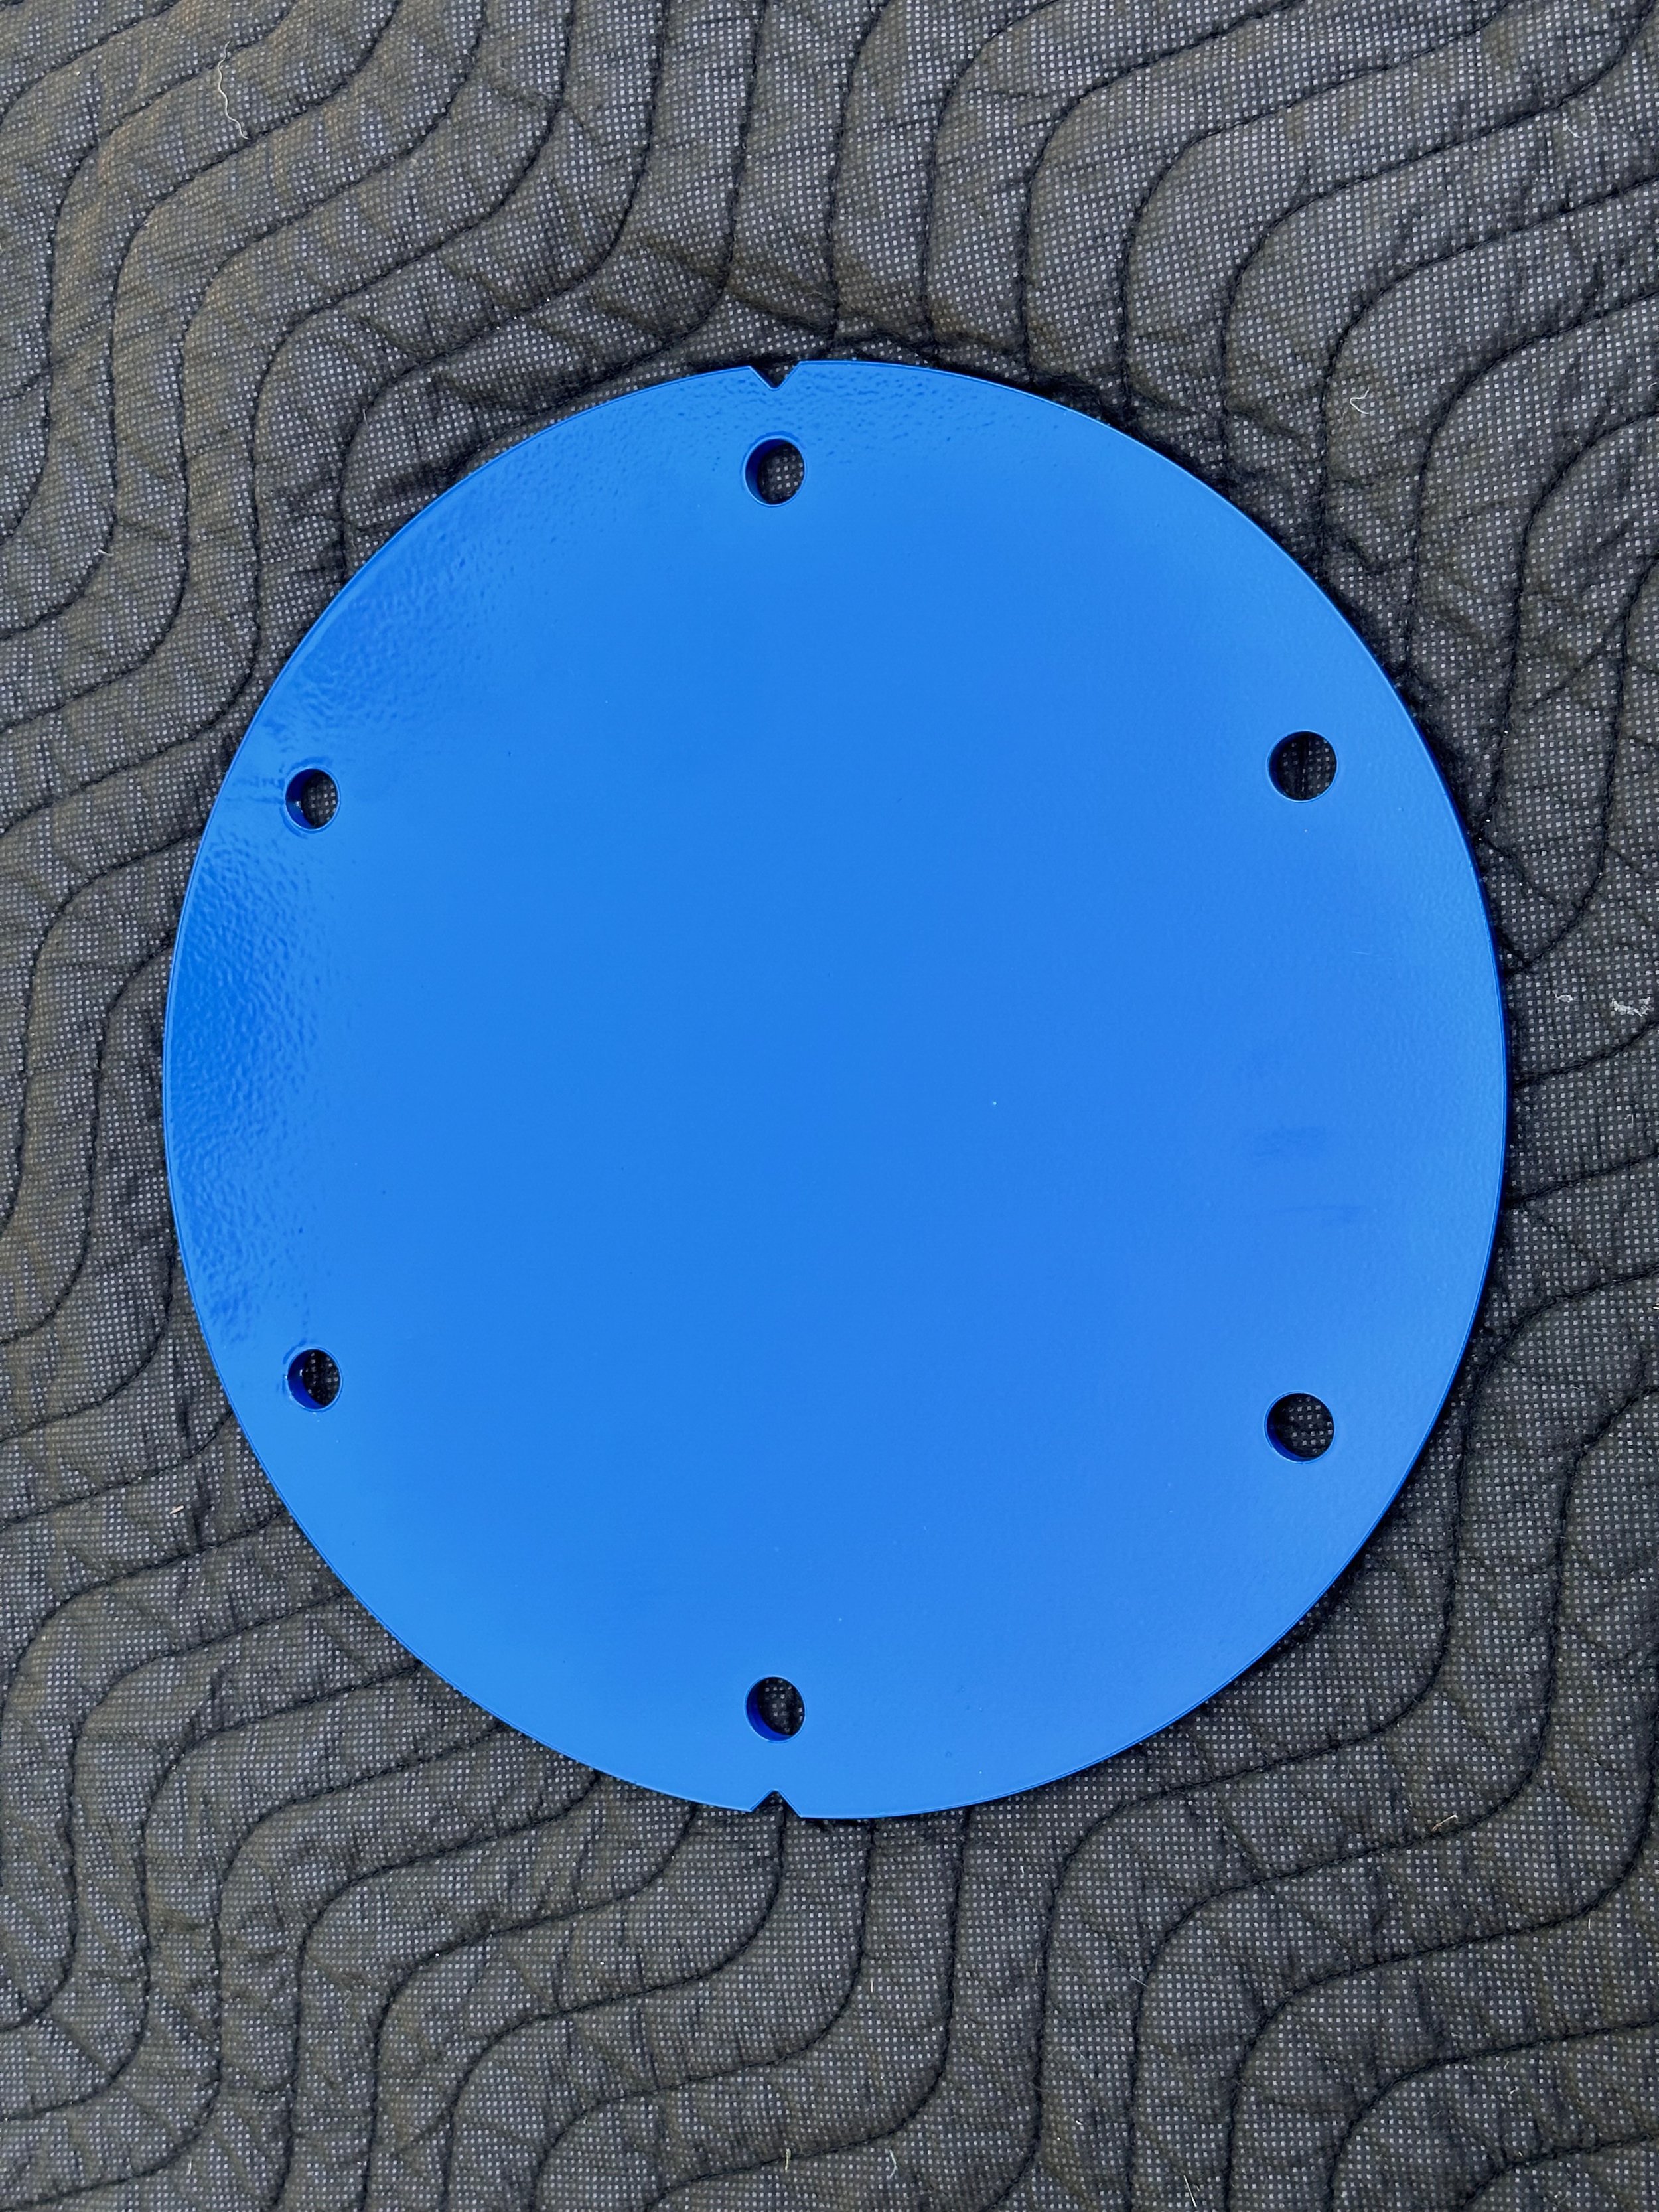

Assembling the Foundation Plates
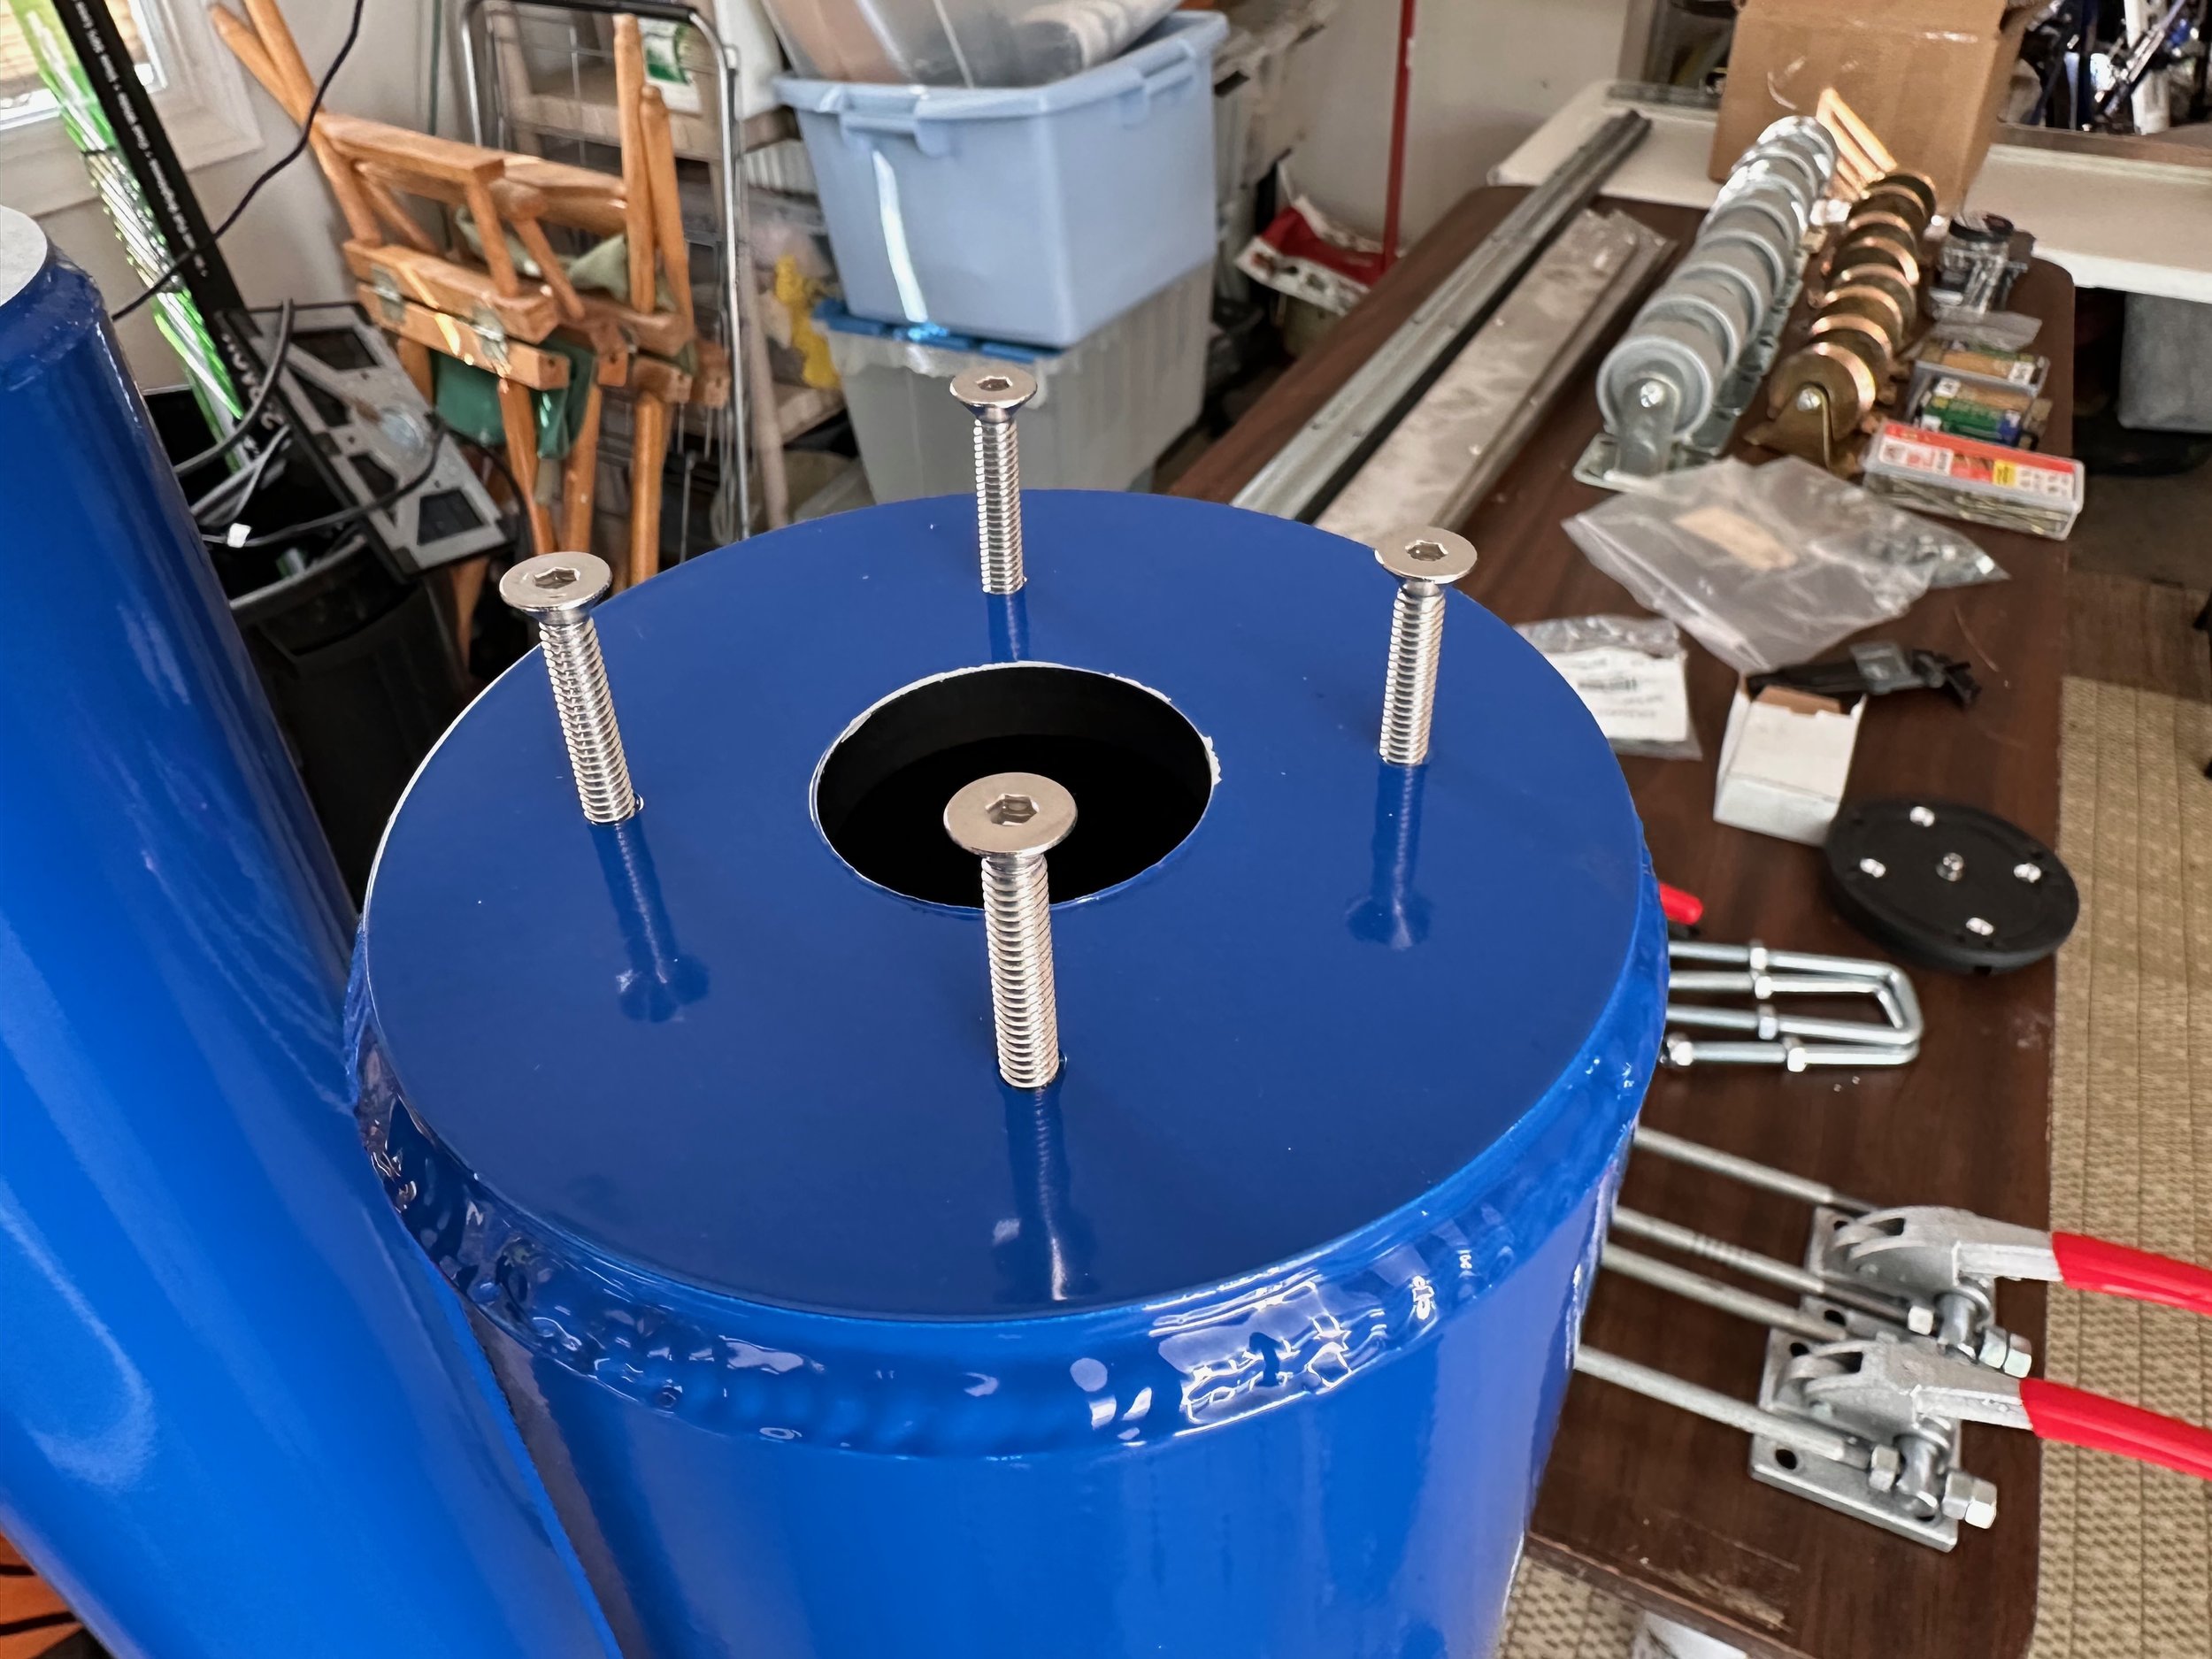
The first thing I wanted to do was to assemble one of the foundation plates.
I had already purchased the L-bolts that I would use to put in the concrete. These were 12 inches long - most are only 8 inches. I also had to find ones that had longer than usual threaded portions. The standard ones had a shorter thread length, which would not be sufficient to clear the bottom flange; the wedge-shaped washers have room for the final nut. So I found 12" ones that were longer. Actually, Rick Albrecht found them on McMaster-Carr. These were 1/2" in diameter, 12" inches long, and hot-dipped galvanized. I had also bought nuts and washers for this size that were also galvanized.
So, I put the first one together, and it worked out pretty well. Some L-Rods threads had galvanization crud, making the nuts run a little rougher when they were first threaded.
Once the first one was assembled, I did the other three.
As I did this, I found that three of my L-Rods had damaged threads at the ends that made it hard to get the nut on. So, I cleaned these up with a wire brush and a file. I was able to thread a nut on two of them—and that was all I needed, so I was set to go.
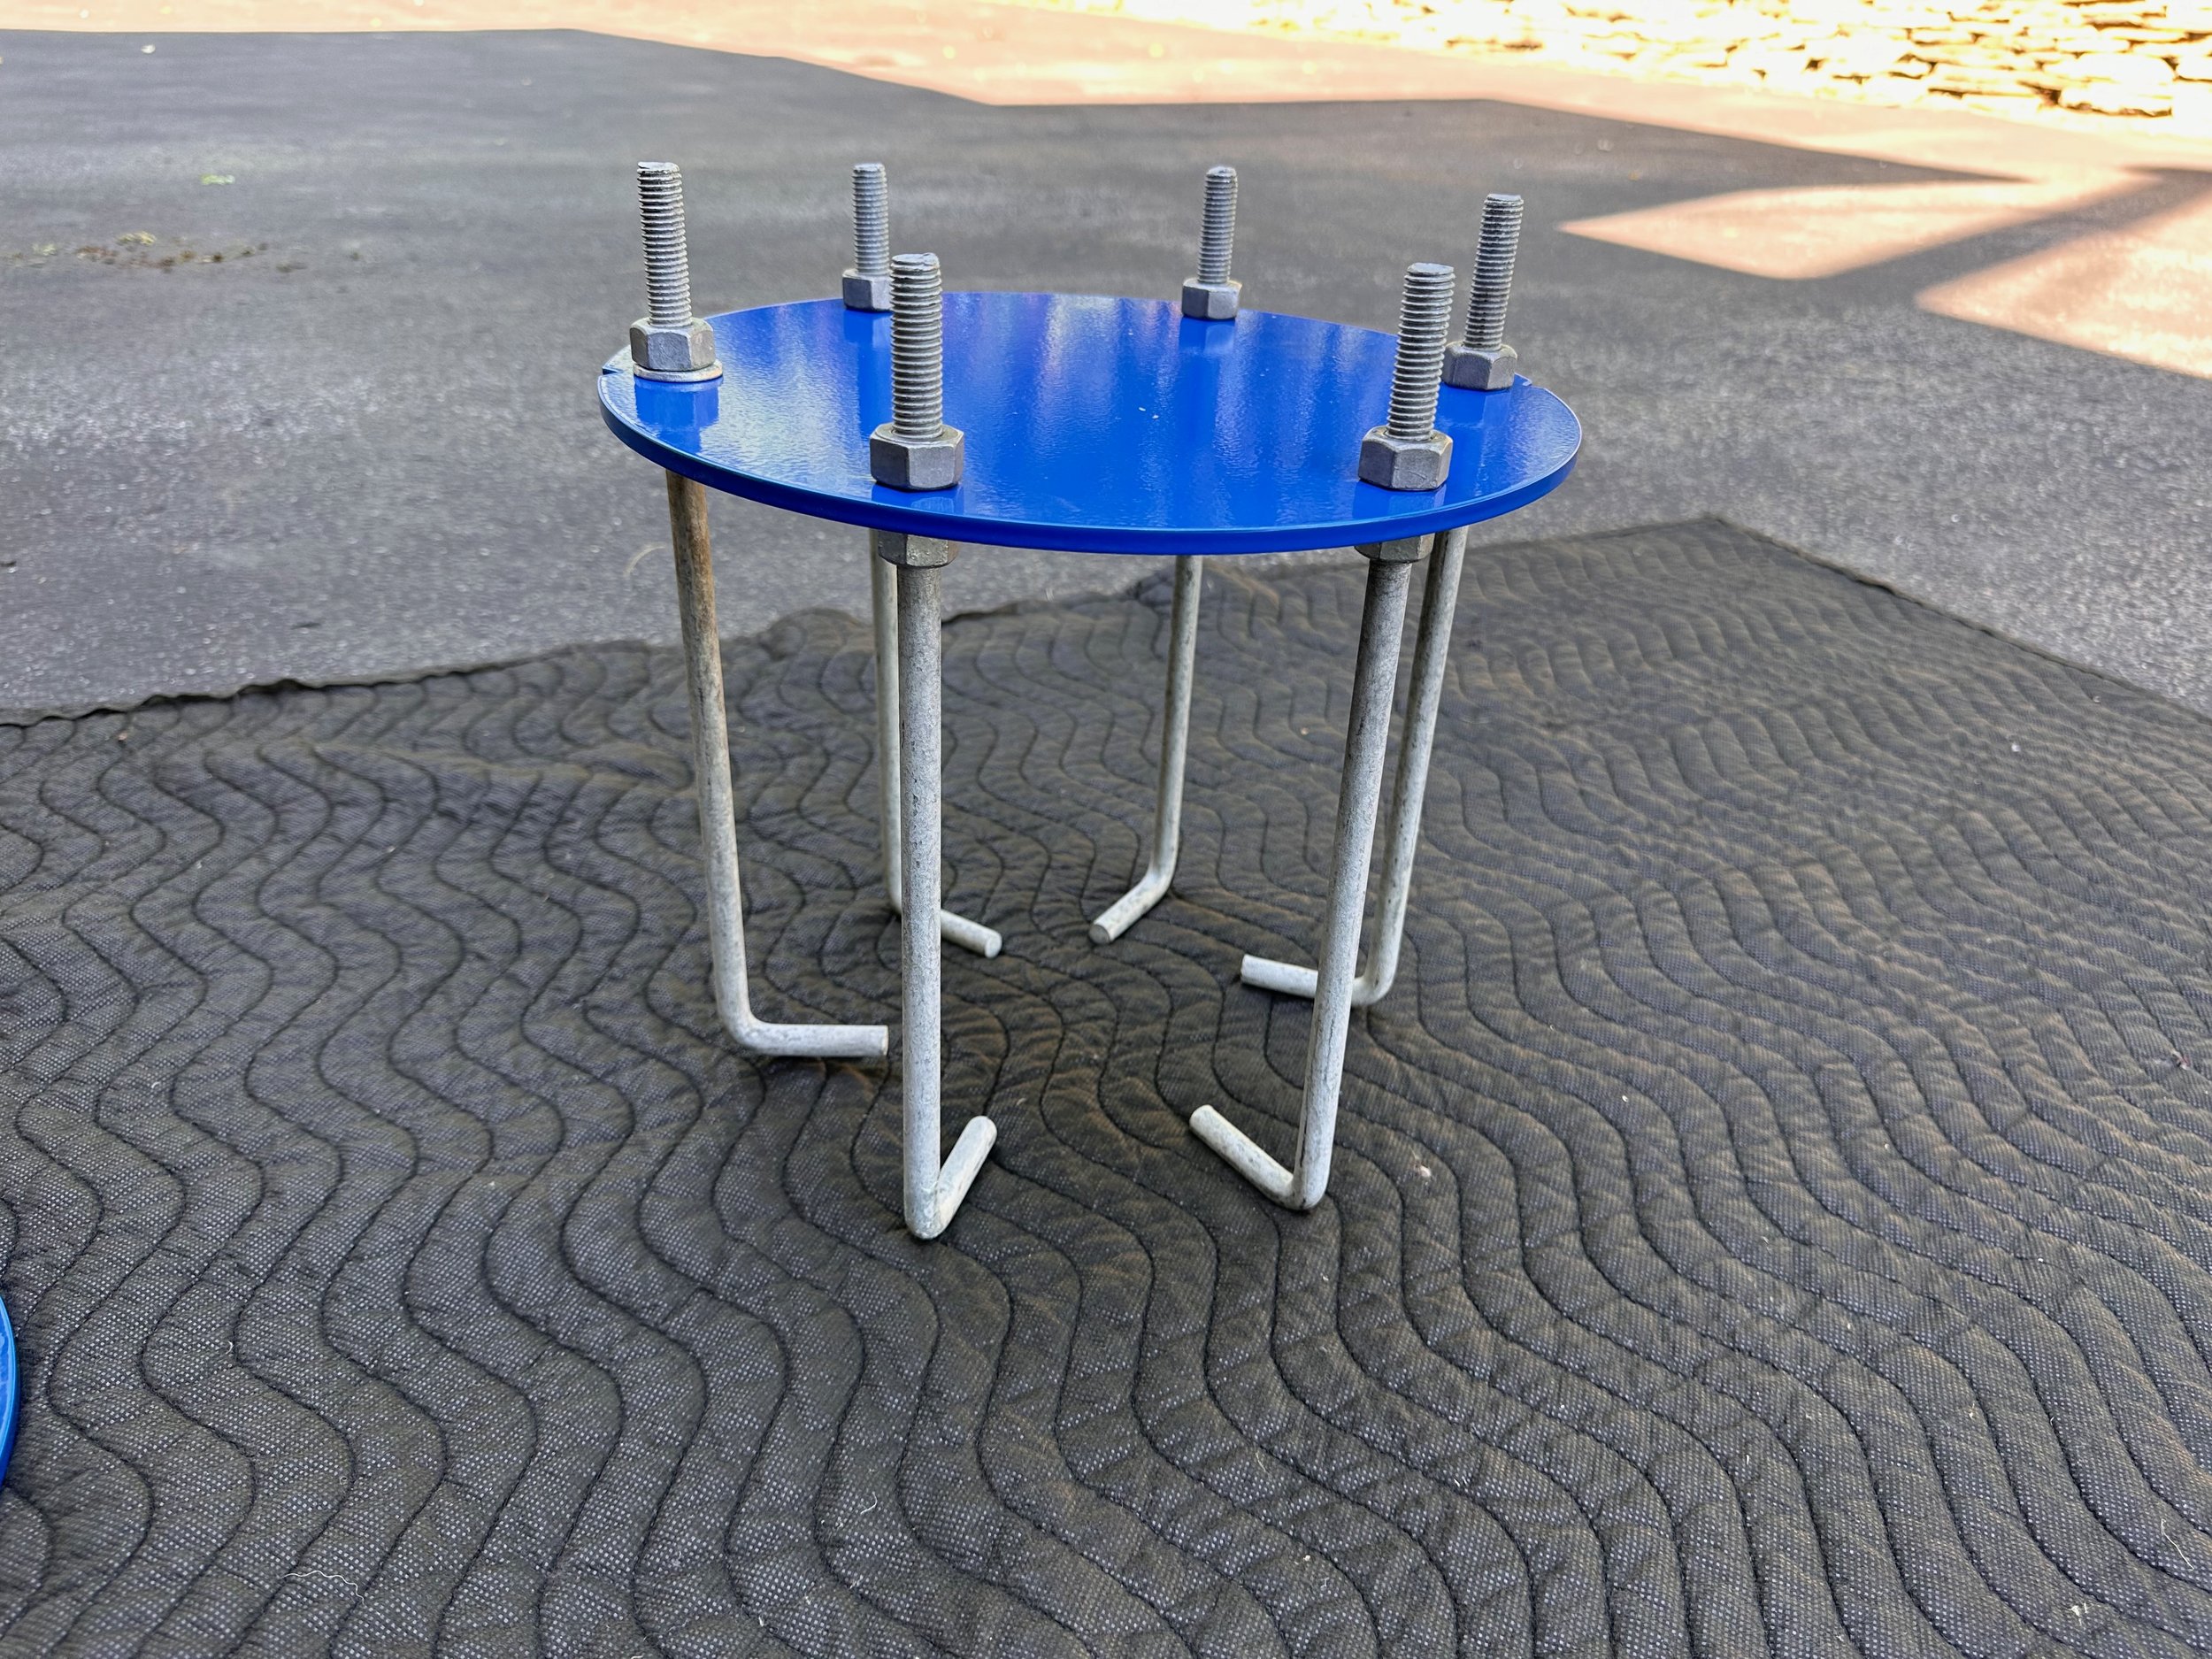
The first unit assembled!

The Top View
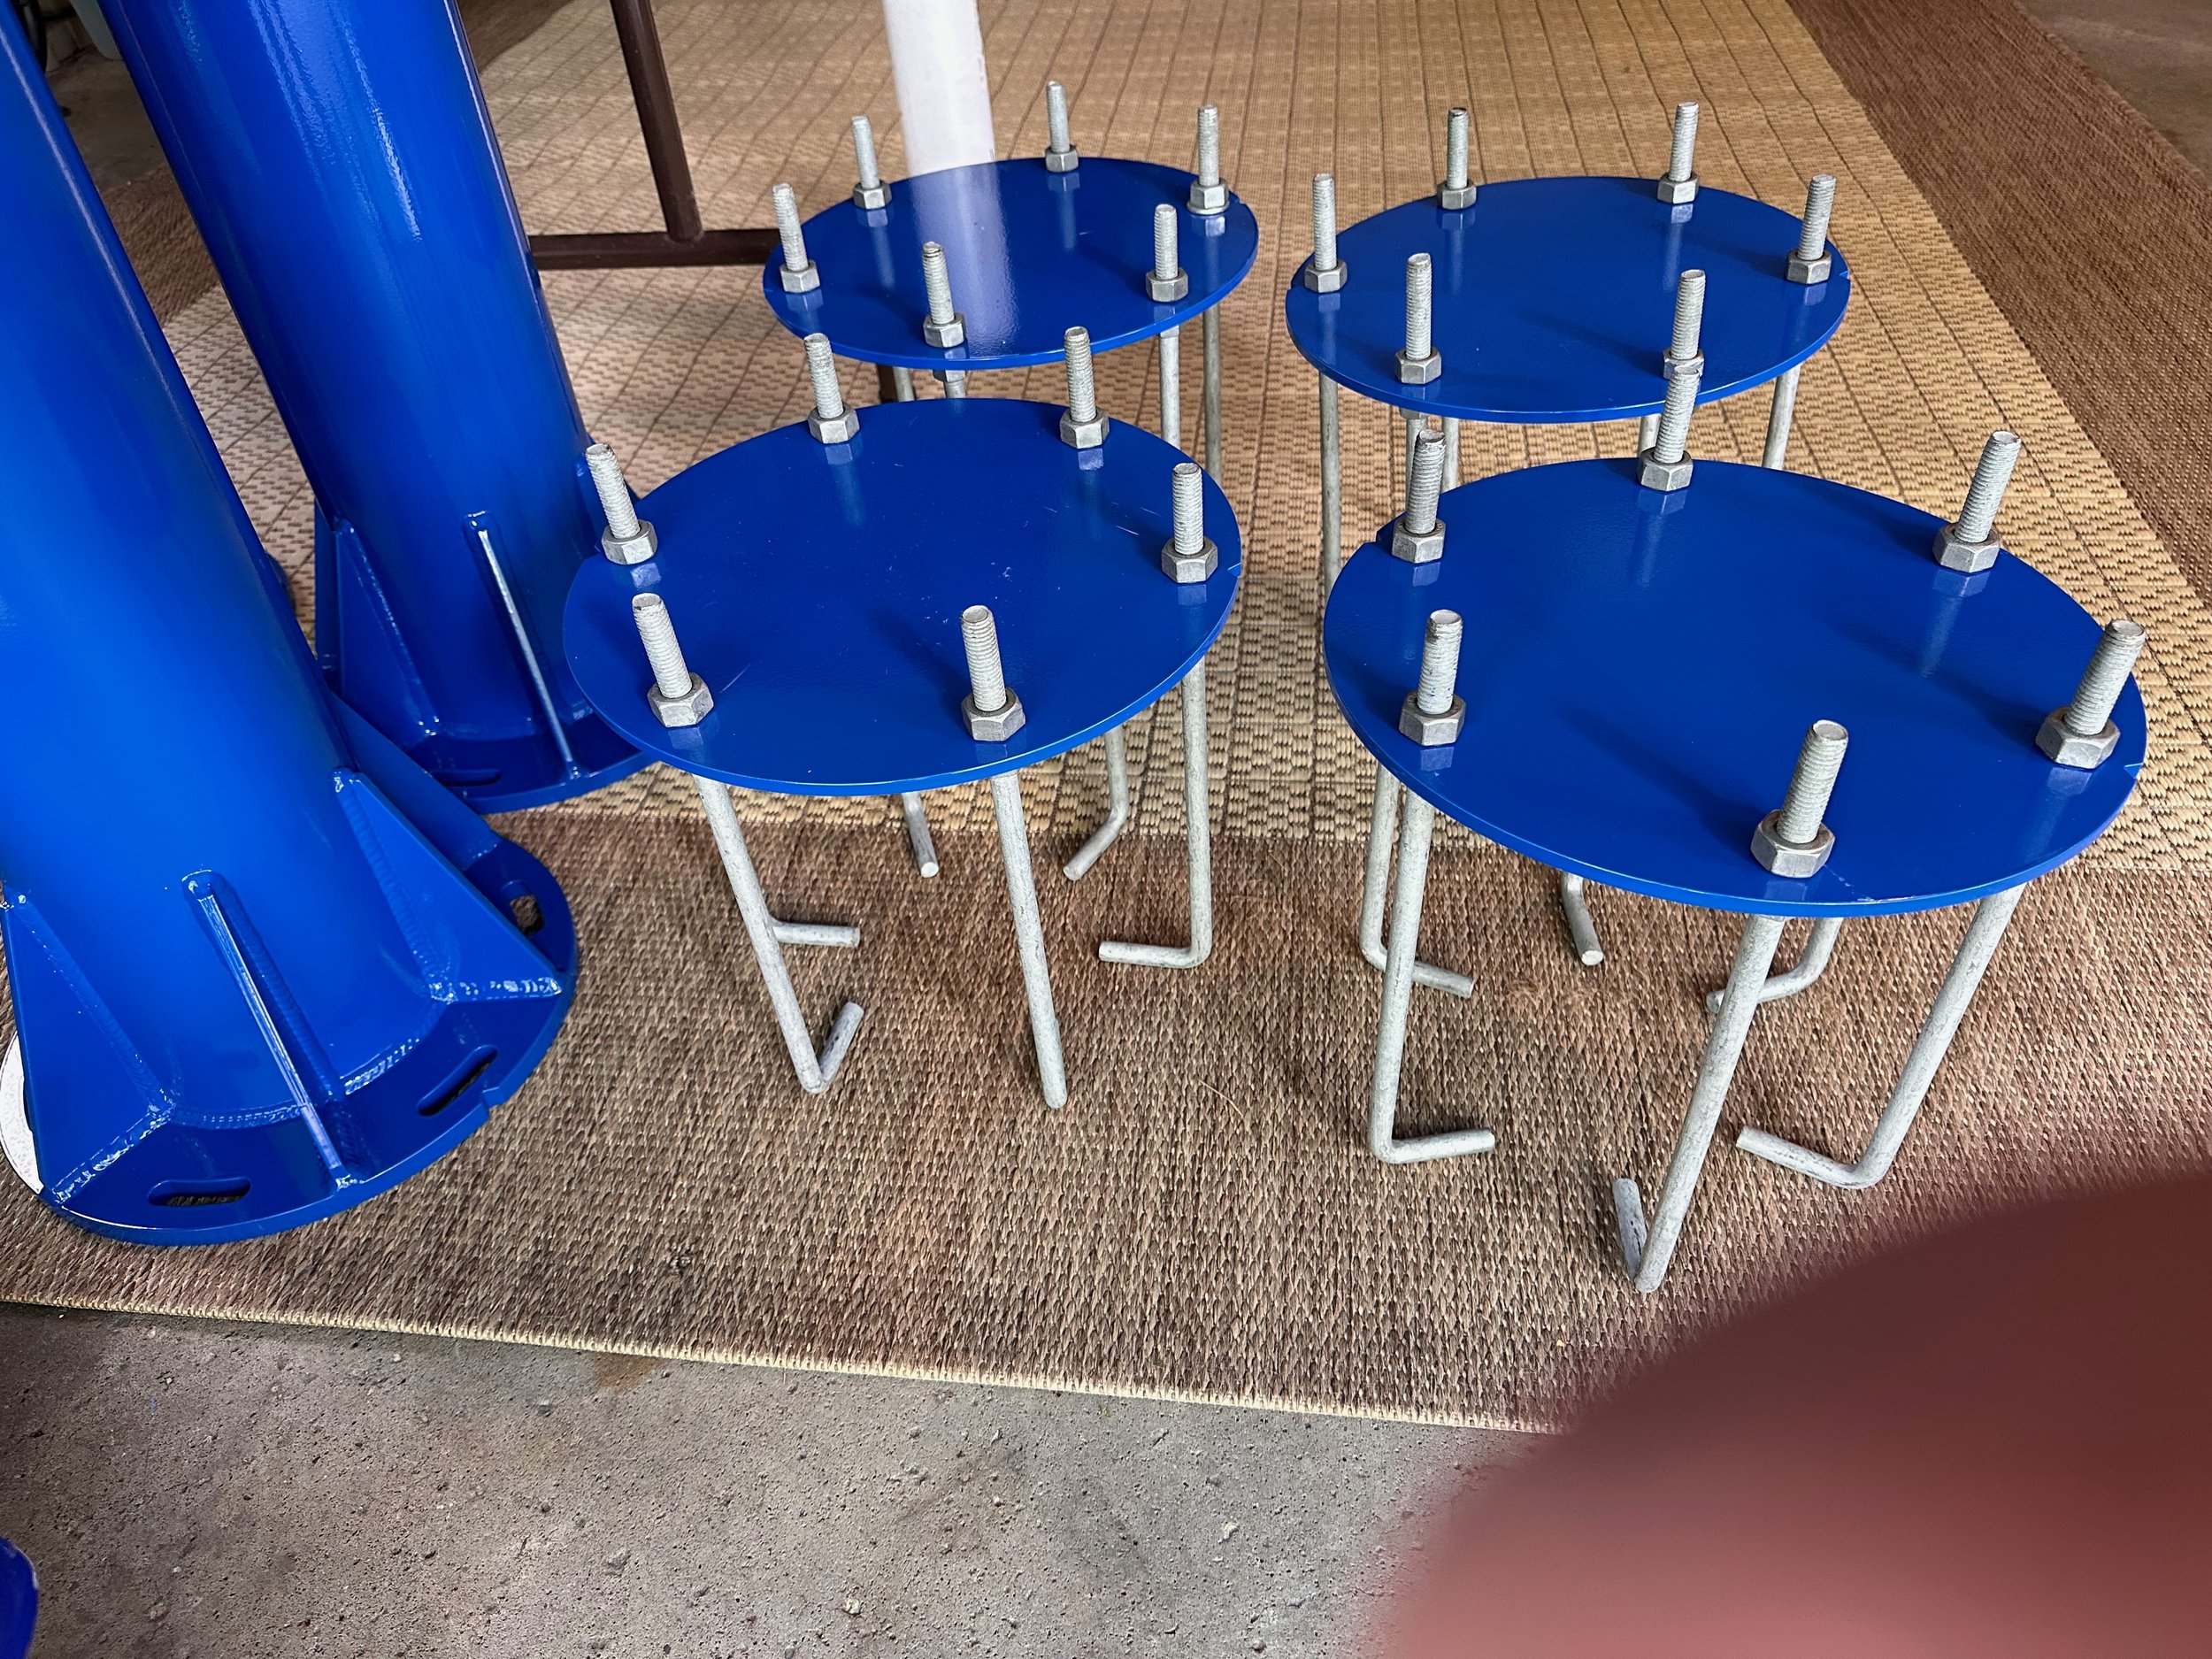
All four of the foundation plates assembled!
Test the Top Plate Fit
The next thing I wanted to test out was the top plate.
I planned to take two IOptron Top Pier-Plates available for $60 each and adapt them. These are cast aluminum, so I knew I could drill out the four central holes and counter-sink them so 1/4-20 screws could be used to go flush.
This would allow me to mount my two CEM 60 mounts.
The tapped holes were perfect, and the screws went right in!
The holes in the top of the mount and the top plate aligned perfectly, and I was able to screw the top in easily.
I did have one issue that I recovered. I had marked the N point on the IOptron Top Pier plate incorrectly, which meant the holes on the top of the pier were rotated 90 degrees from where they should be. Opps!
The easy fix is to mount the foundation plates and the piers so the N-S notches become the E-W noticed. Problem solved!
The screws fit perfectly!

Top Plate now mounted!
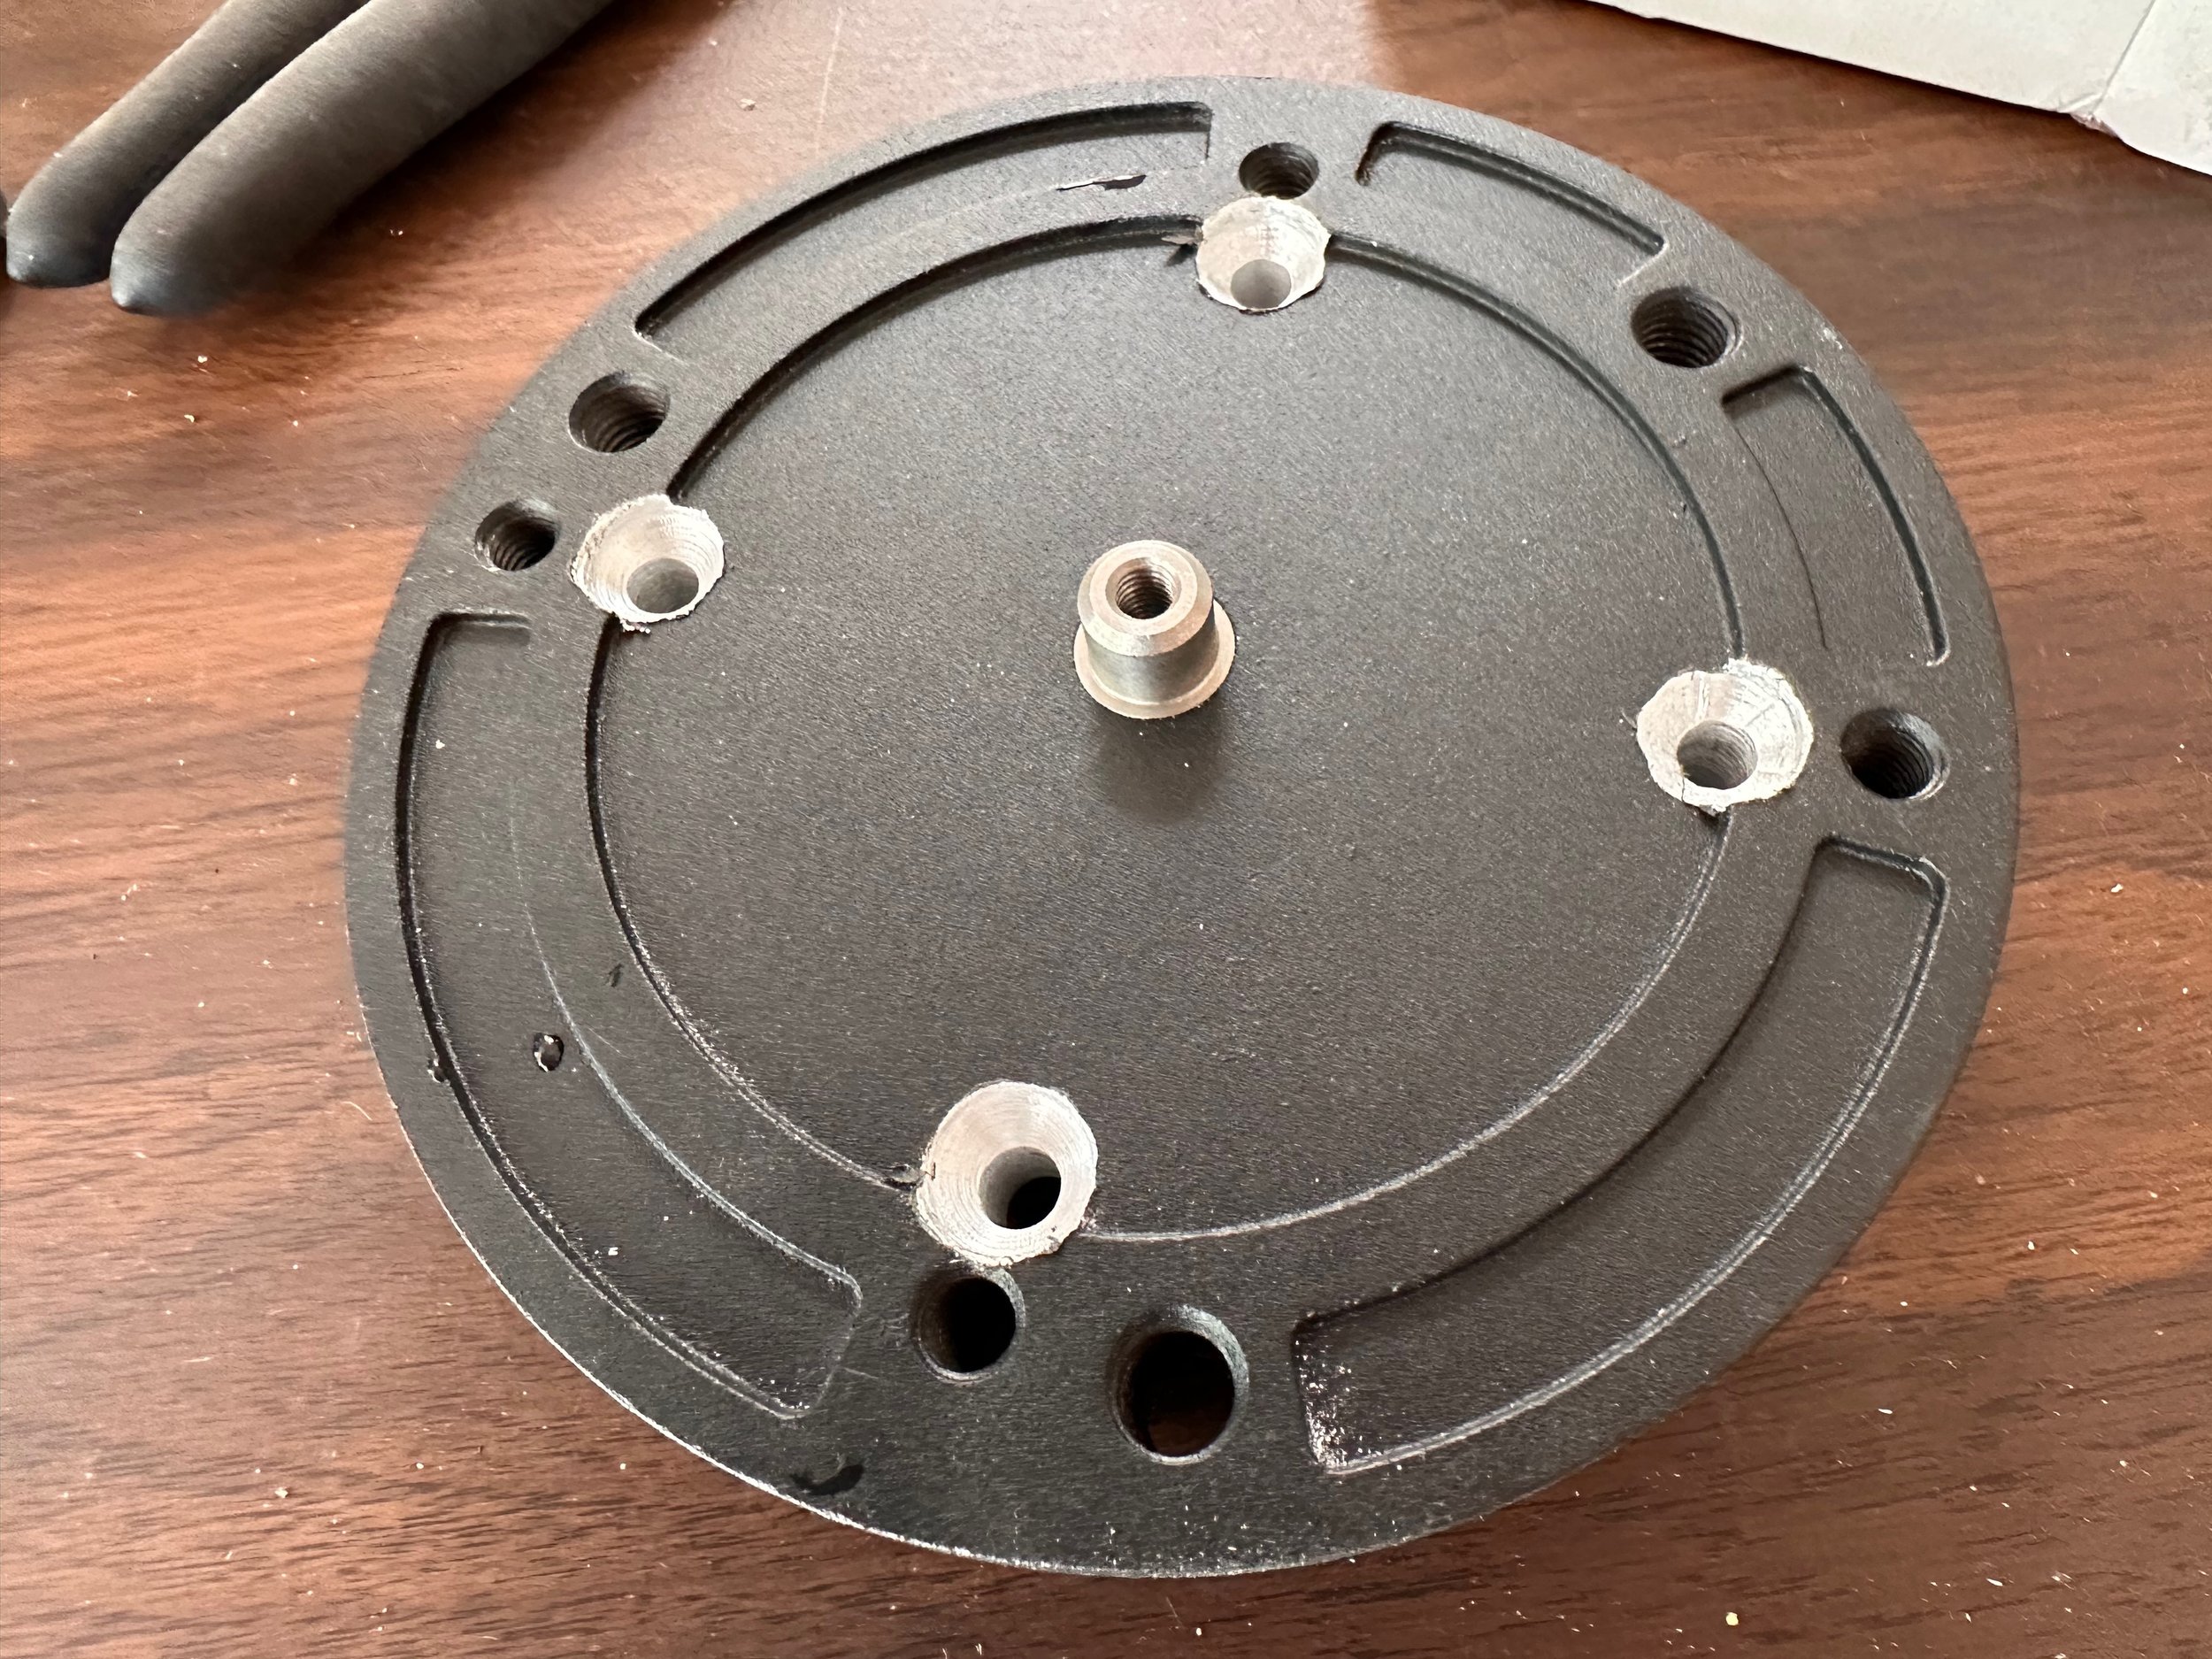
Here is the IOptron Top Pier plate. Note that the four inner circles are drilled to size and countersunk.

Another view
For my ZWO AM5 mount, I am having Gary make me a circular plate that has these 4 bolt holes and a central 3/8-inch tripod mount - which will allow me to bolt the extension pier to plate.
The Video Overview
The video below shows off the mounts, so check it out.
The next step for these guys will be when we are ready to pour the pier foundations and we sink in the pier foundation plates!
So stay tuned!