
Using Deconvolution in Pixinsight - Part 5: Example - The Draco Triplet
March 26, 2022

This posting is part of seven-part series: "Using Deconvolution in Pixinsight."
Navigate to other parts of this Series:
Table of Contents Show (Click on lines to navigate)
The Draco Triplet
Now it’s time to work with some real image examples. We will be working with my image of the Draco Triplet. This image was the result of a 5.7-hour integration in LRGB, taken with a William Optics 132mm FLT APO, an IOptron CEM60, and a ZWo ASI1600MM-Pro camera with ZWO LRGB filters. You can see the story of that image HERE.
This telescope has a focal length o 920mm, and theoretically should do well with Deconvolution. We shall see.

This is Draco Triplet: NGC 5981, NGC 5982, & NGC 5985. This was a 5.7-hour integration in LRGB, taken with a William Optics 132mm FLT APO, an IOptron CEM60, and a ZWo ASI1600MM-Pro camera with ZWO LRGB filters.
Setting up Deconvolution Parameters
Creating the Object Mask
We will start with a simple Luminance Mask.
Simply make a copy of the image and take it nonlinear to make it useful as a mask. I often use the STF->HT method to do this. Dark areas are protected from Deconvolution. White areas will have no protection. Gray areas will be ramped according to code value. This is very simple to do, and many folks use this method.
I would take the luminance mask as a starting point and then modify it using the HistogramTransformation Tool, in live preview mode, so you can see what you are changing.
I tend to move the zero clip level up into the histogram so that all of the low exposed noisy areas are clipped to black (these will not be touched by deconvolution). I then play with the mid-tone white clip point slider so that high signal areas are pure white. I do allow for a transition zone between these. Please see my examples below.

Here is a Luminance mask for the first image (The Draco Triplet) that we will be using for a processing example.

If you zoom into the Object Mask, you can see the grainy texture found in some of the transition zones.

Using the Histogram Tool, I have clipped the back regions and pushed the galaxy areas into the pure white zone.

I have done a little convolution to smooth this out a bit. How much? That is a judgment call. I usually try and take it about this far.
Create the LDSI Image
You can easily create the LDSI mask using the Starmask process. I use the default settings for the most part with the Scale raised to 6, and the smoothness to 10, and click on the aggregate box.
Adjust the mask with HT by moving the center mid-tone slider towards the left to the 25% point. This scales the star images up a bit.

The Starmask tool set up to create a LDSI Support Map.

AN example of how I set up the HistogramTransform tool to boost the LDSI map a bit.

The starting LDSI Star Mask

After a tweak with the HistogramTransform Tool.
Create the PSF Image
Use the PSFImage Script with default values.

The PSFImage control panel. I leave all parameters at their default value and hit “Evaluate”. Once this is done, I hit “View Stars” to see what stars it has selected, and then, I hit “create” to save the PSF Model to file. It can’t get any easier!

Here is a samle PSF file created by PSFImage.
Select three Preview Areas

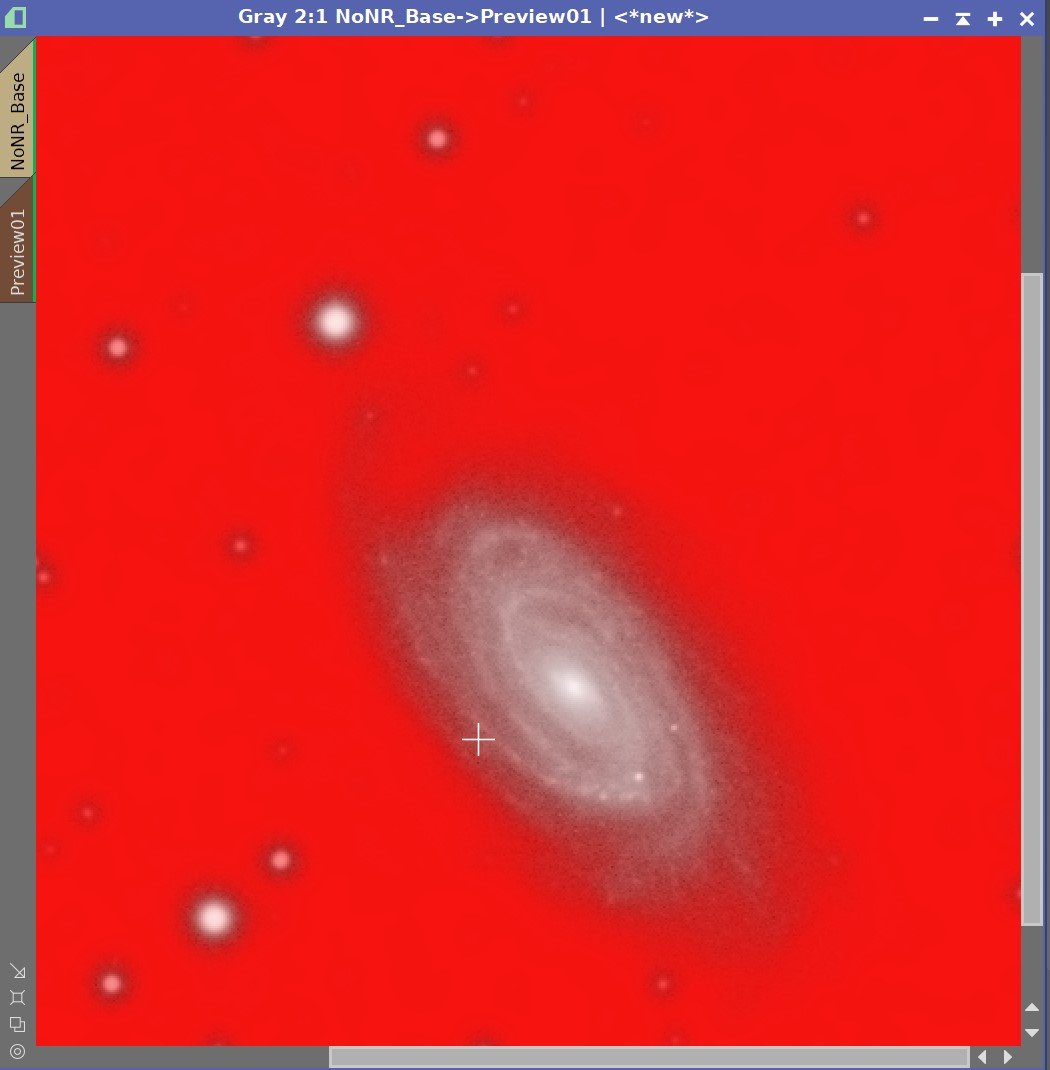
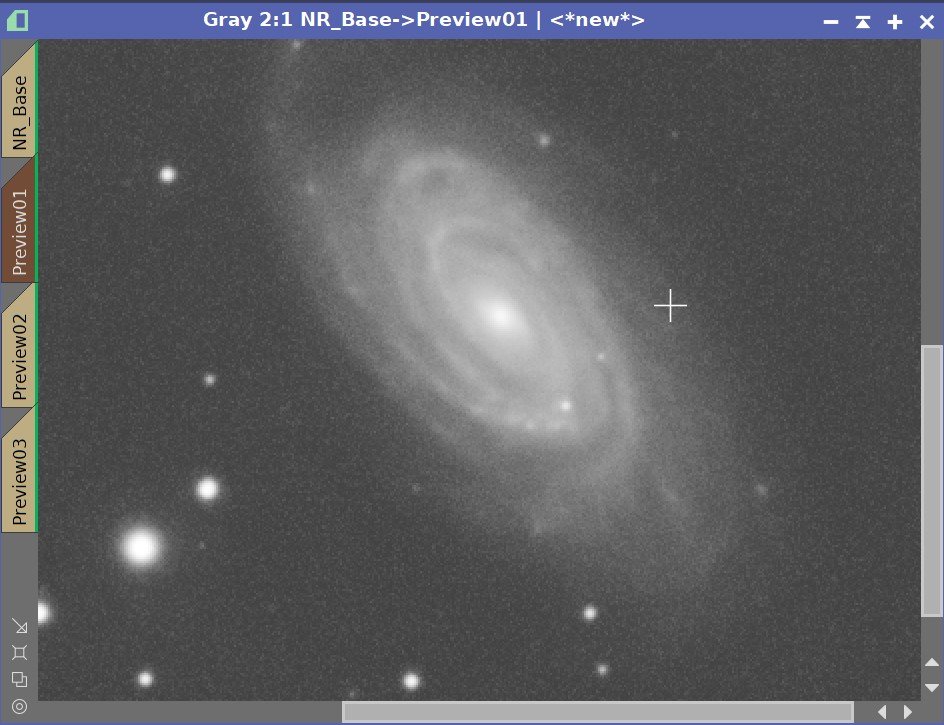
Here is the whole image, showing the three preview areas I decided to use.
Apply the Object Mask
Next, we apply the Object Mask to the image. Using one of our preview regions, we can show how the Object Mask will effect this local area.

Here is my first preview area, centers on the body of the Spiral Galaxy.
Here is the same preview but now showing the coverage of the Object Mask
Now set up the Deconvolution Panel

Values entered into the Deconvolution Panel in preparation for trial-and-error value setting runs.
Establish Parameters by Trial & Error
Do a Global Dark Series
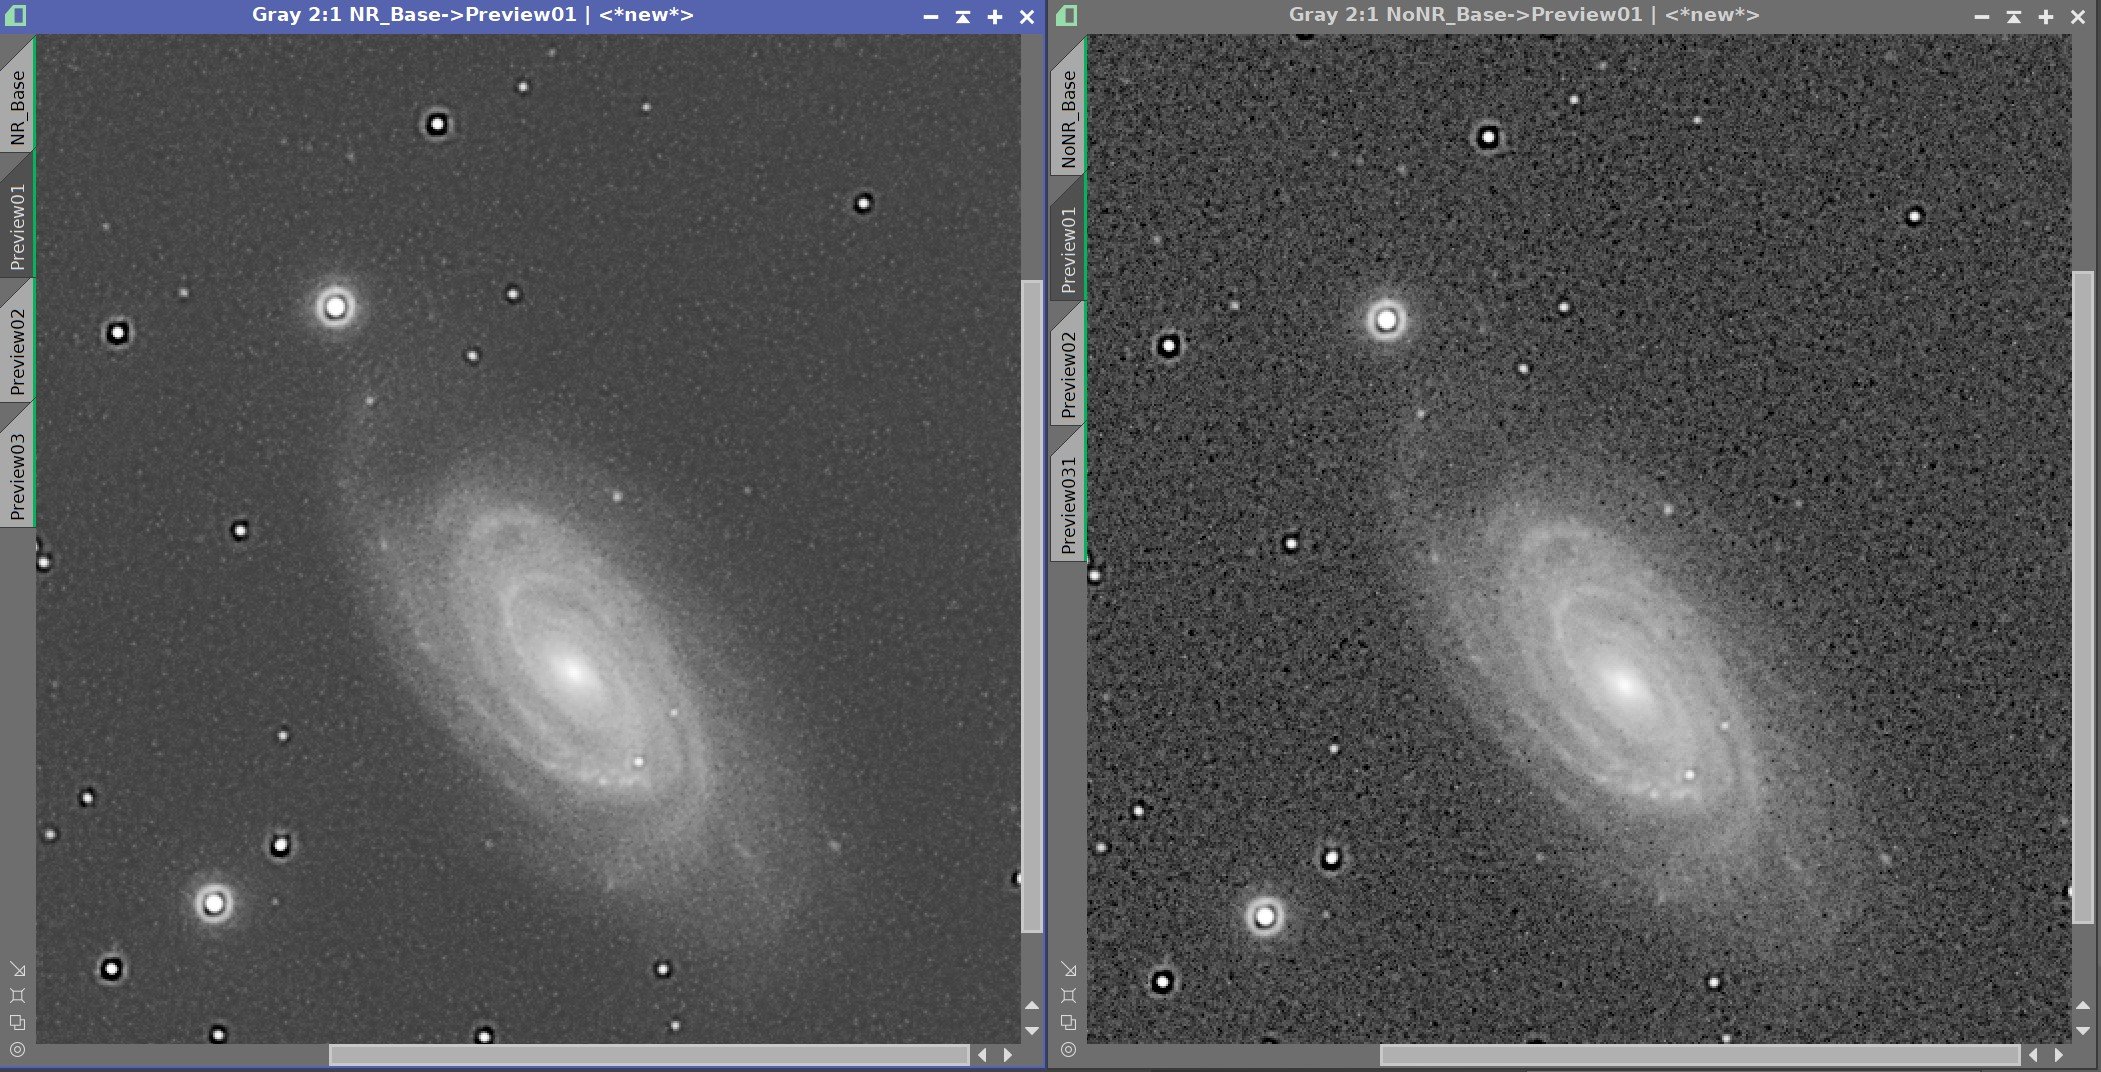
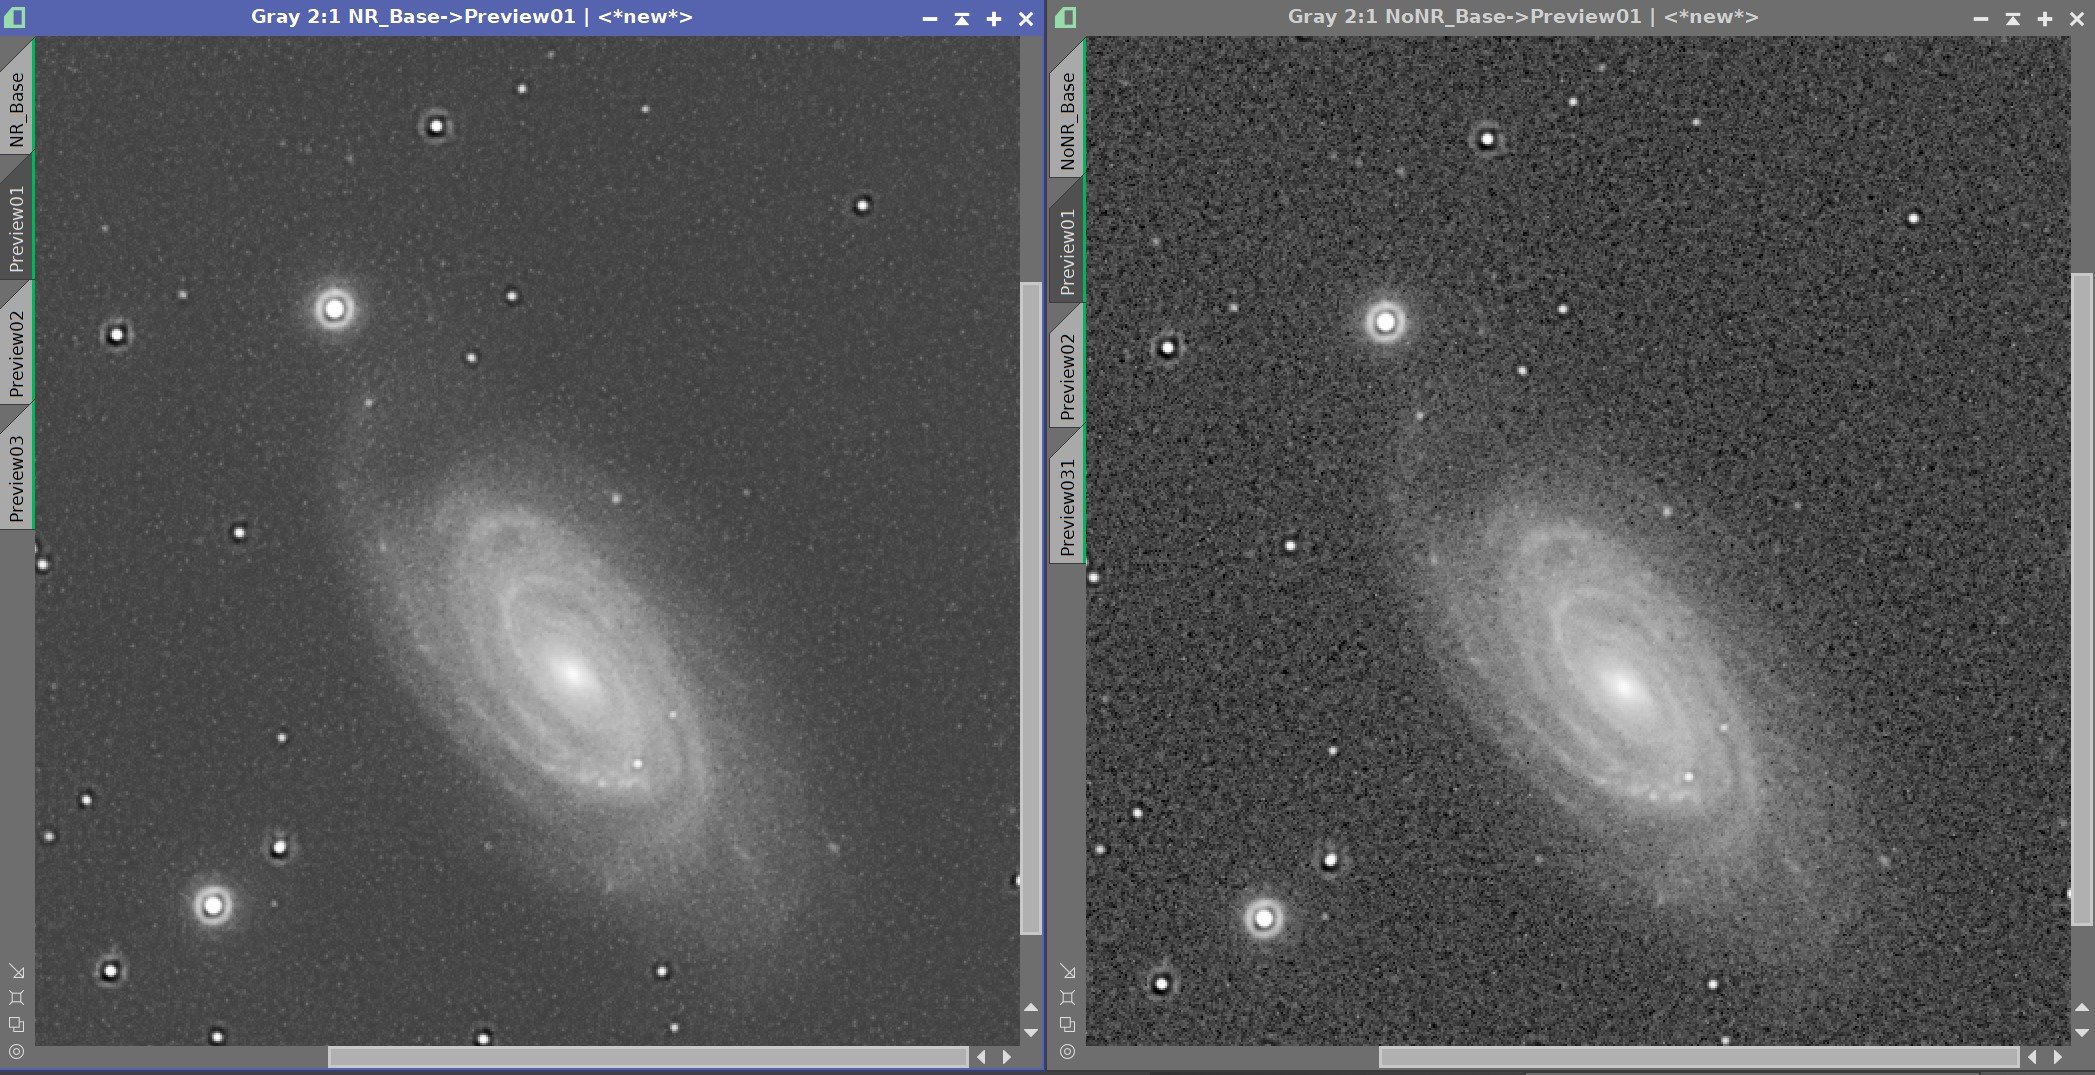
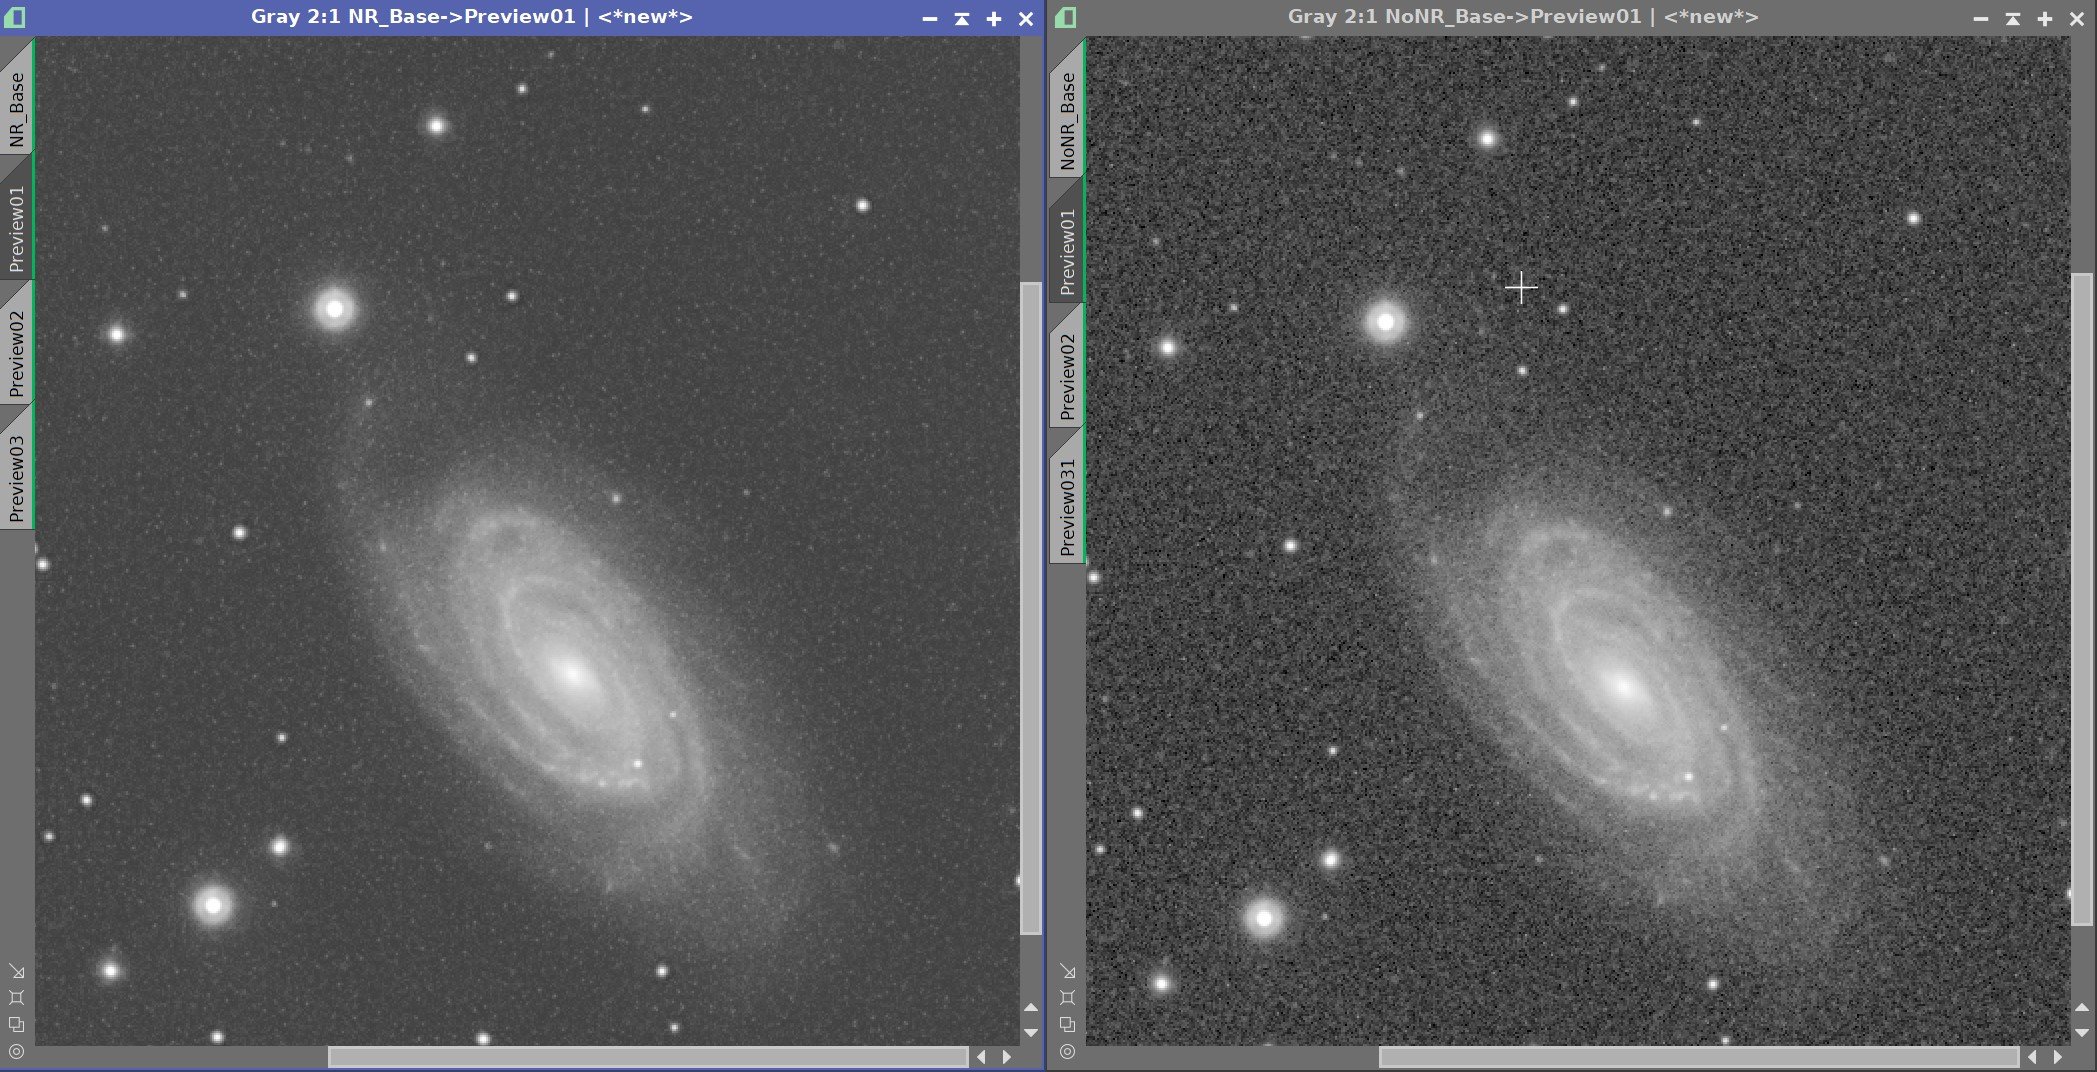
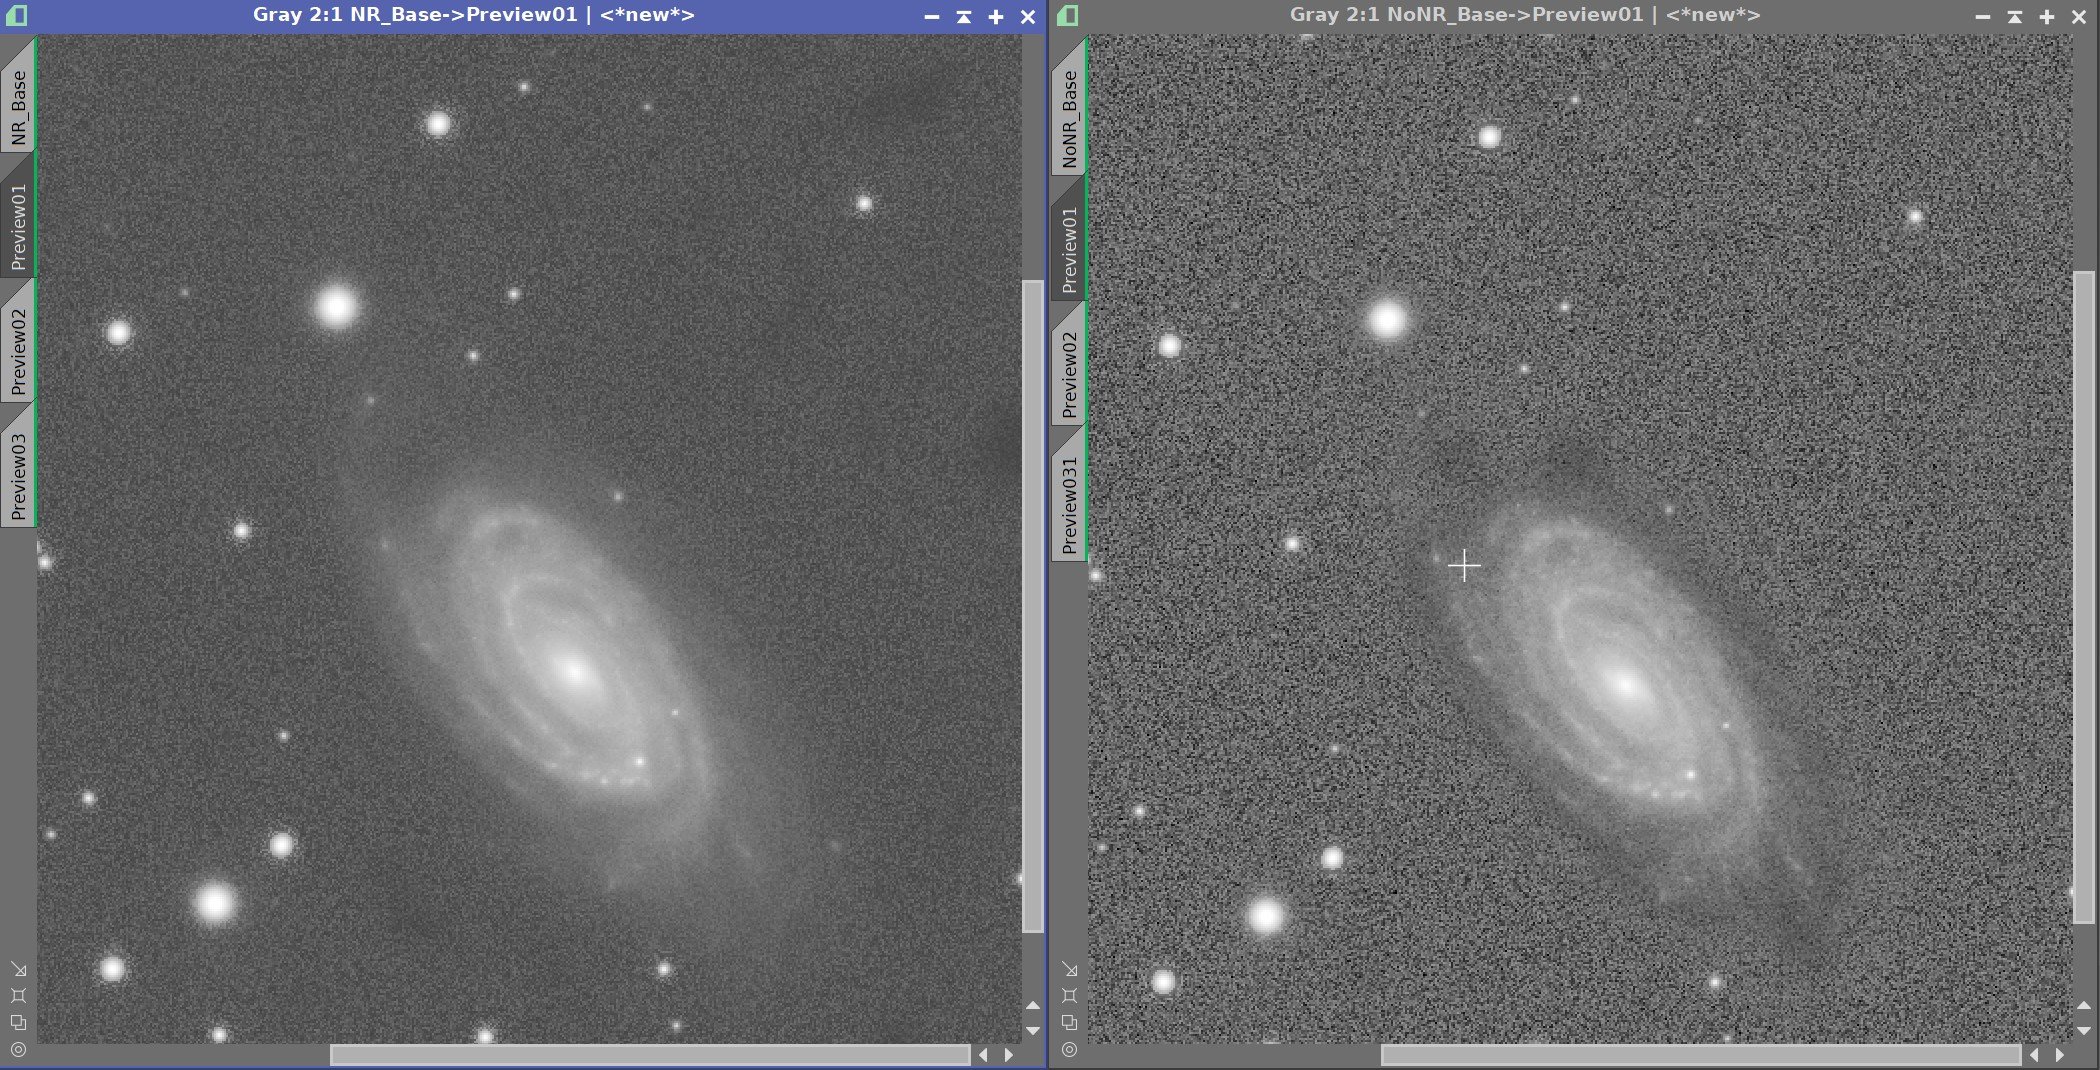
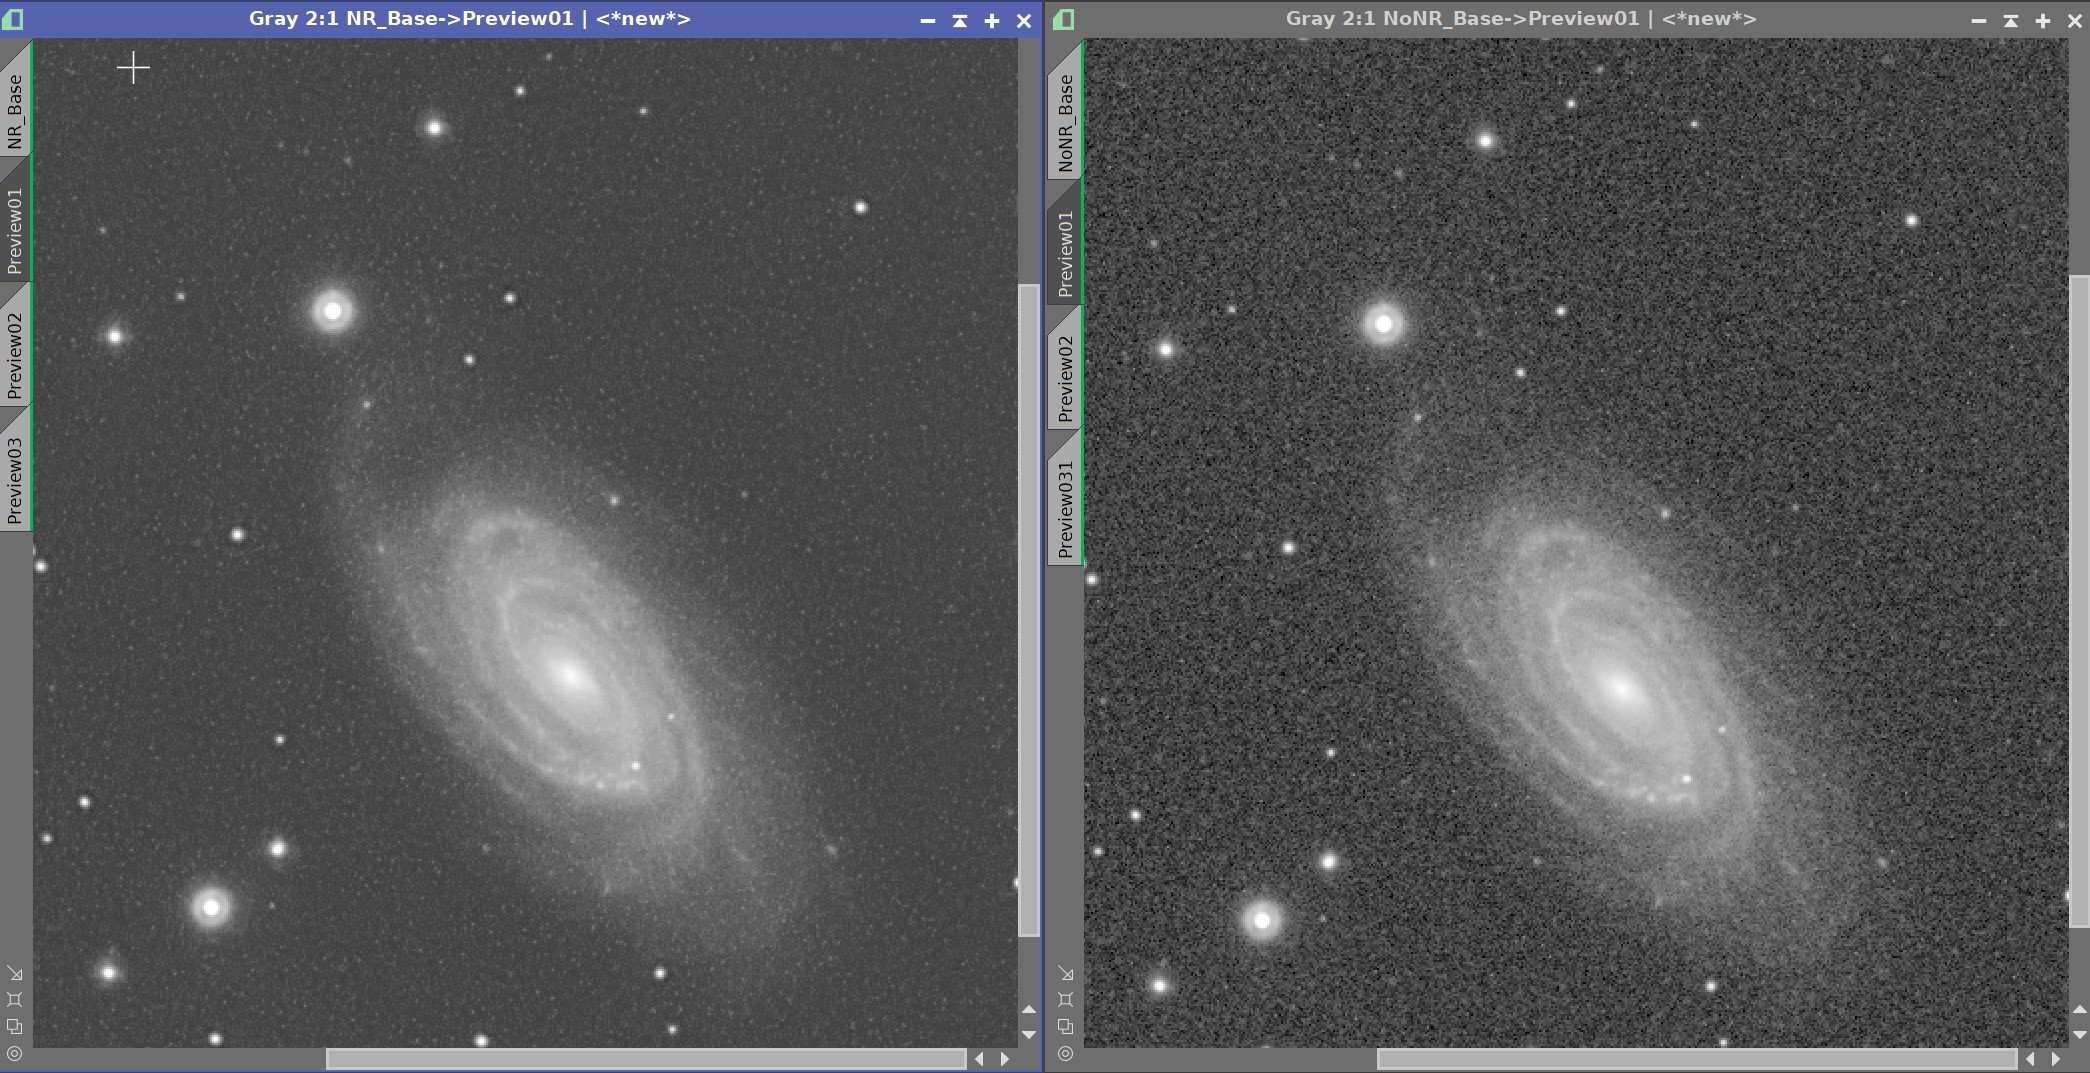
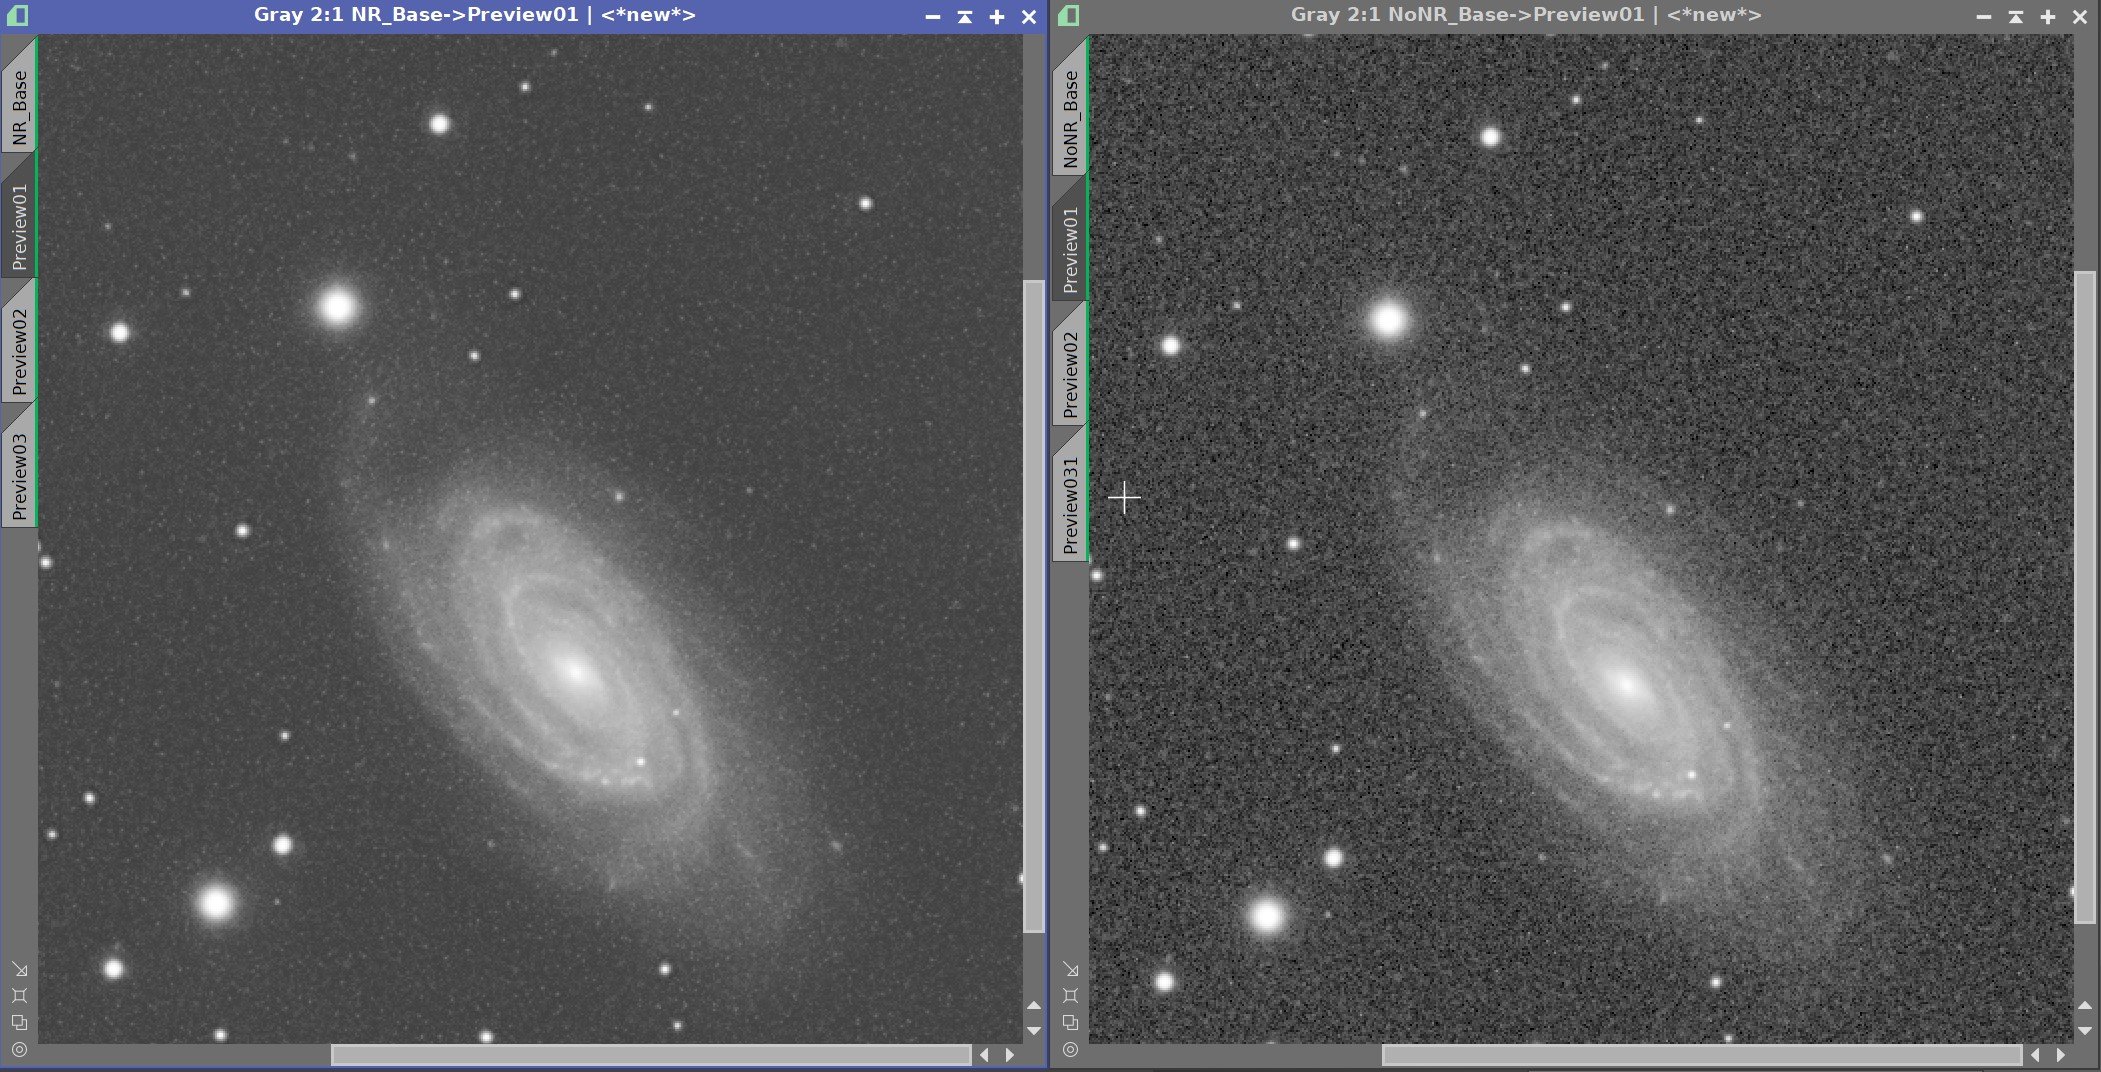
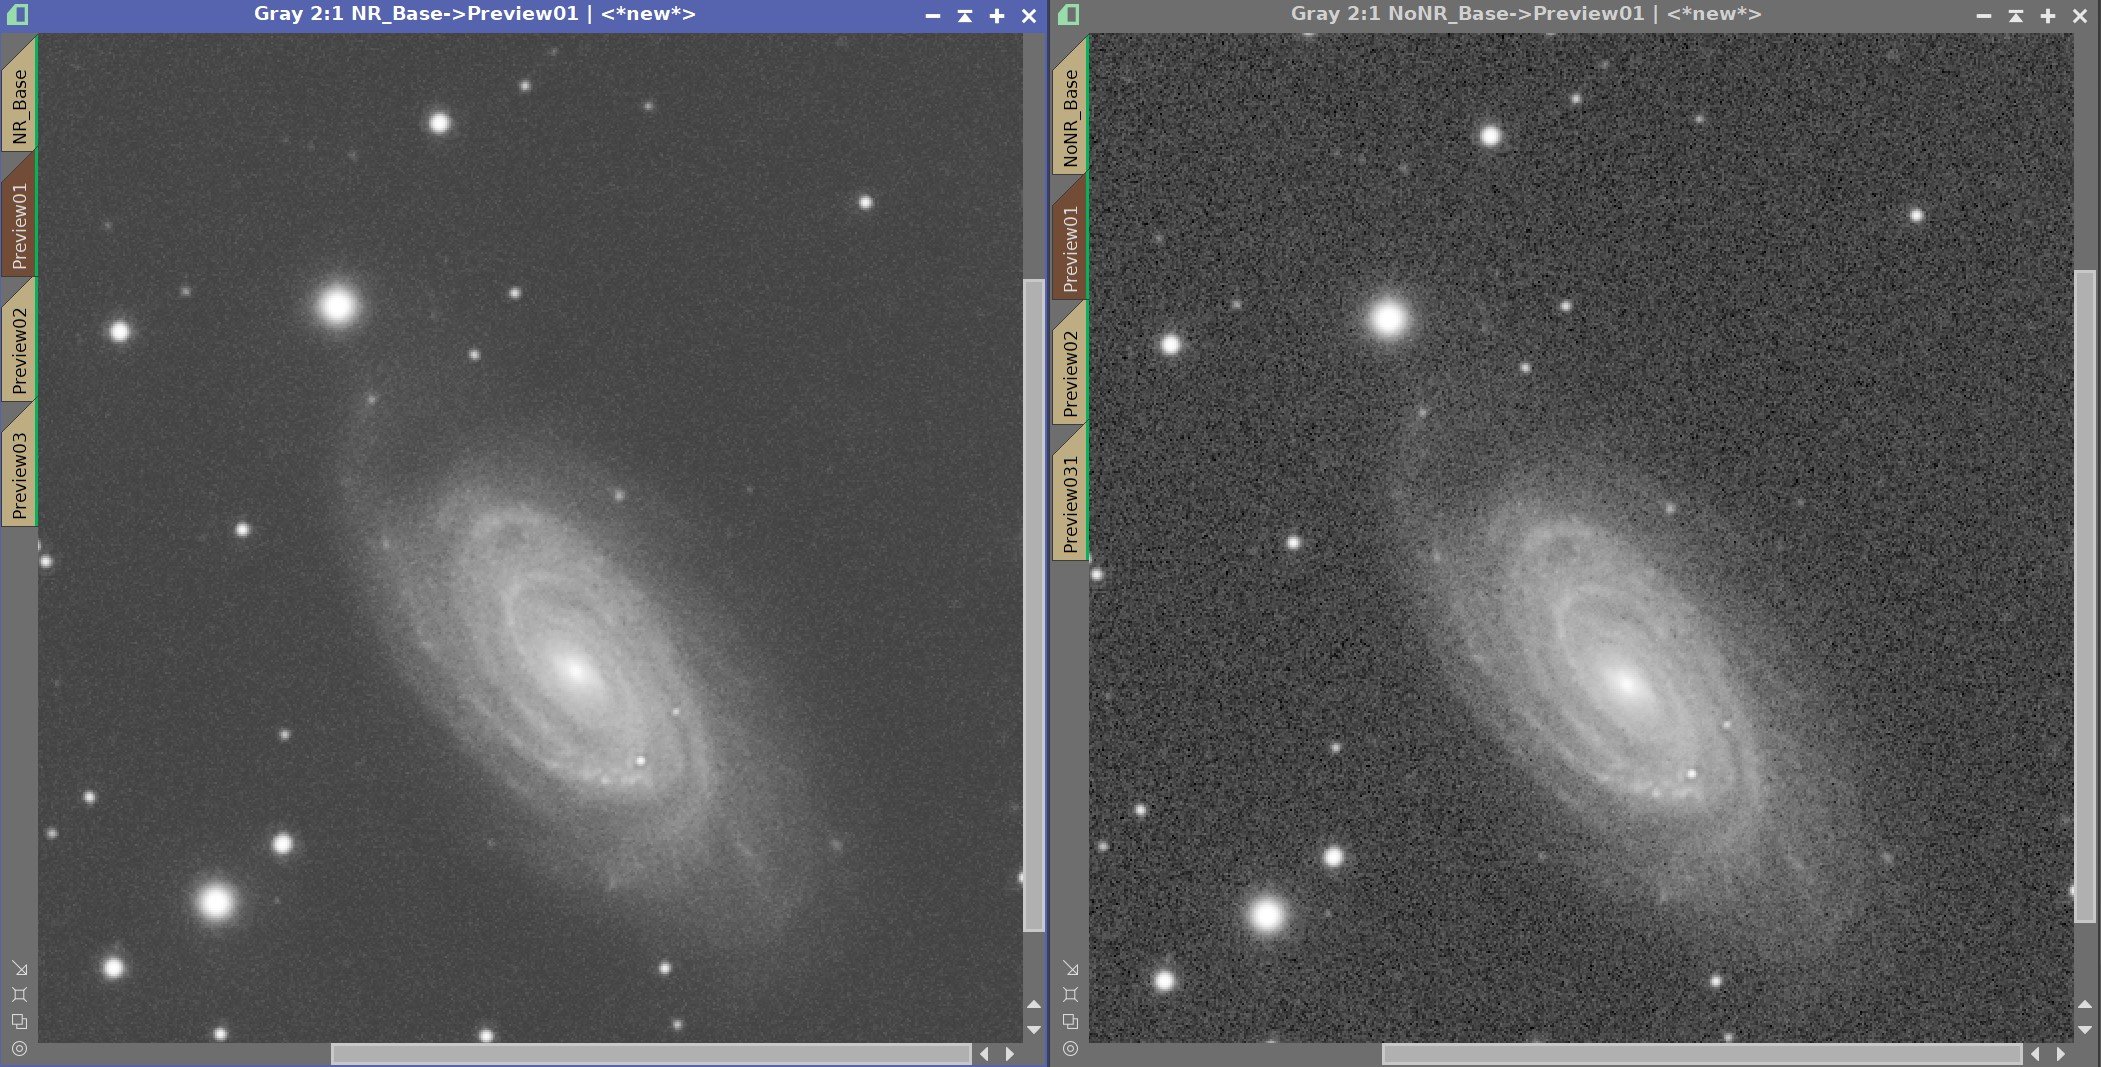
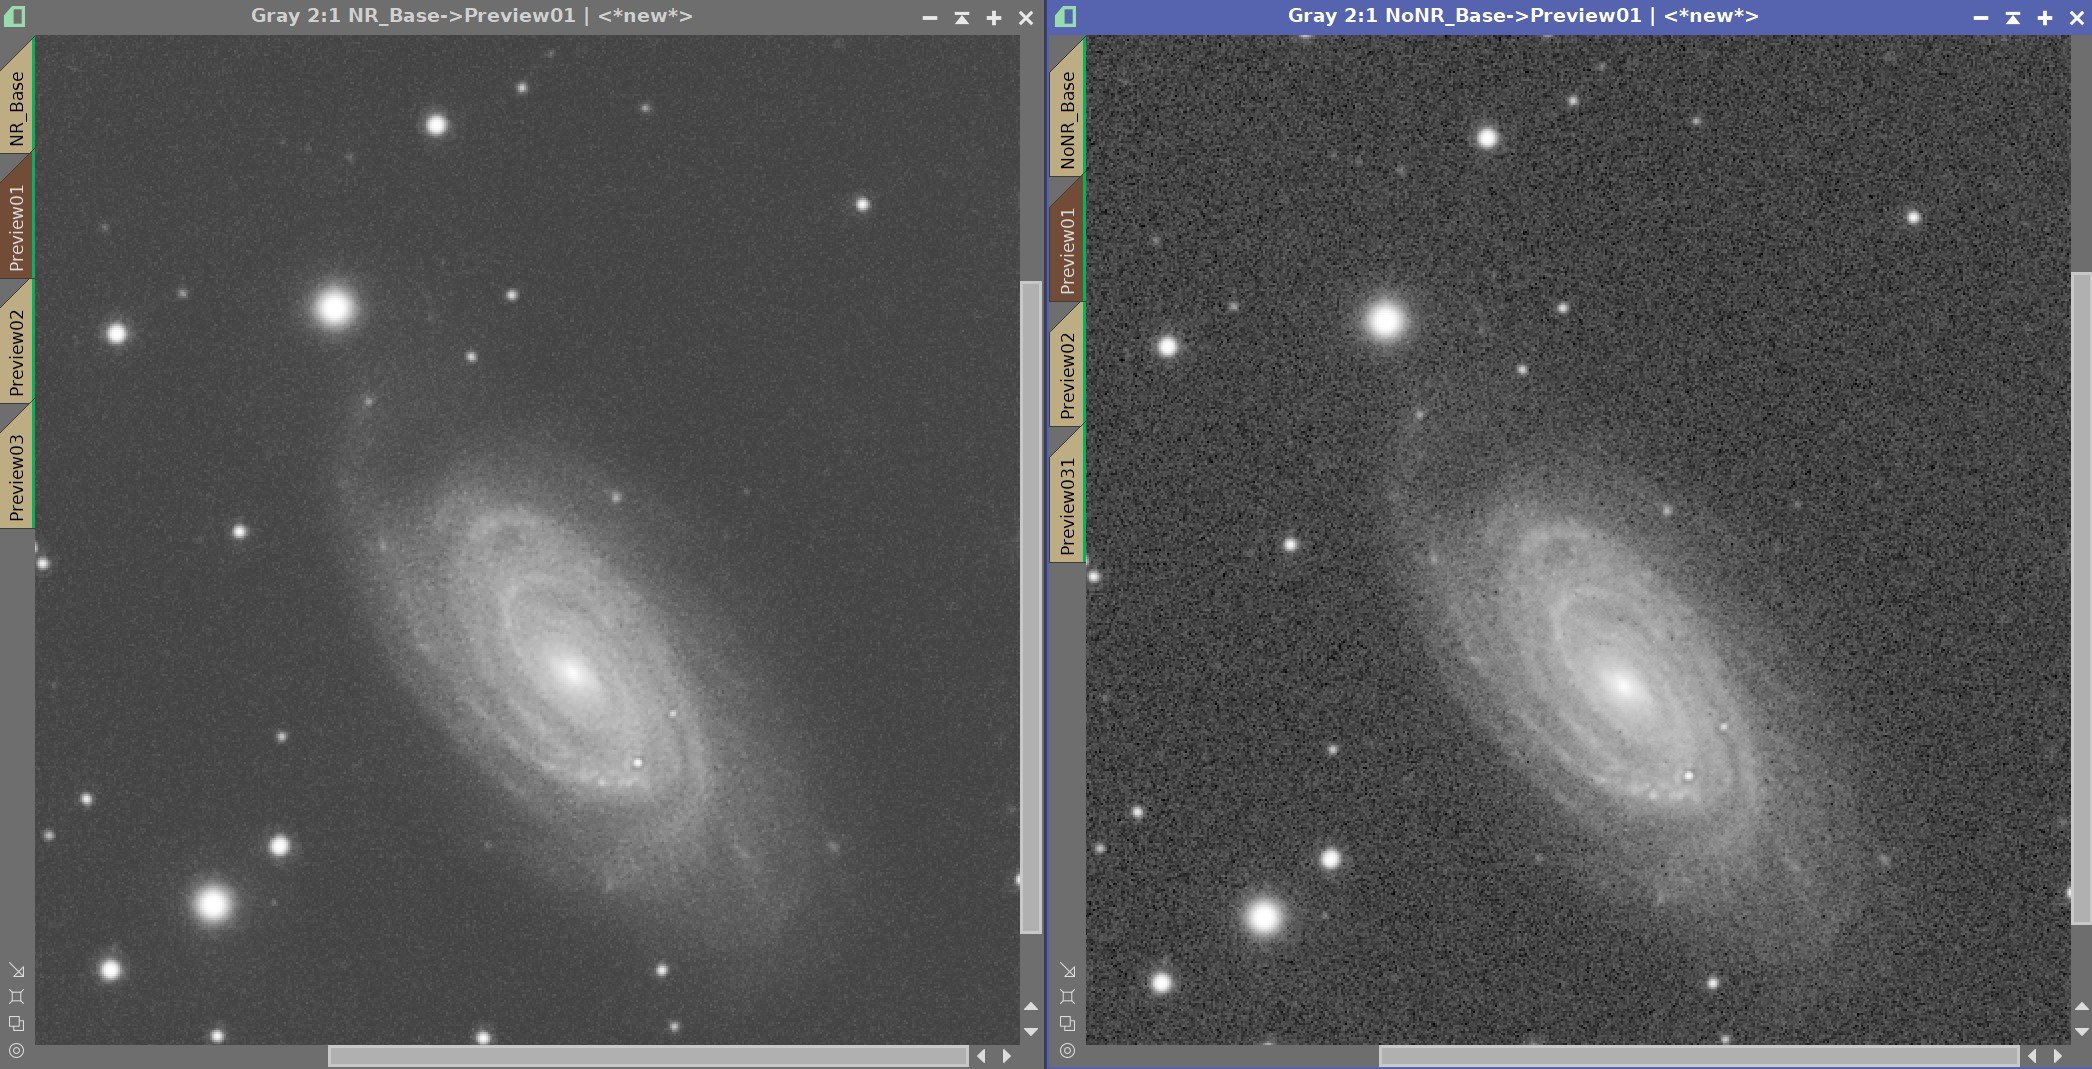
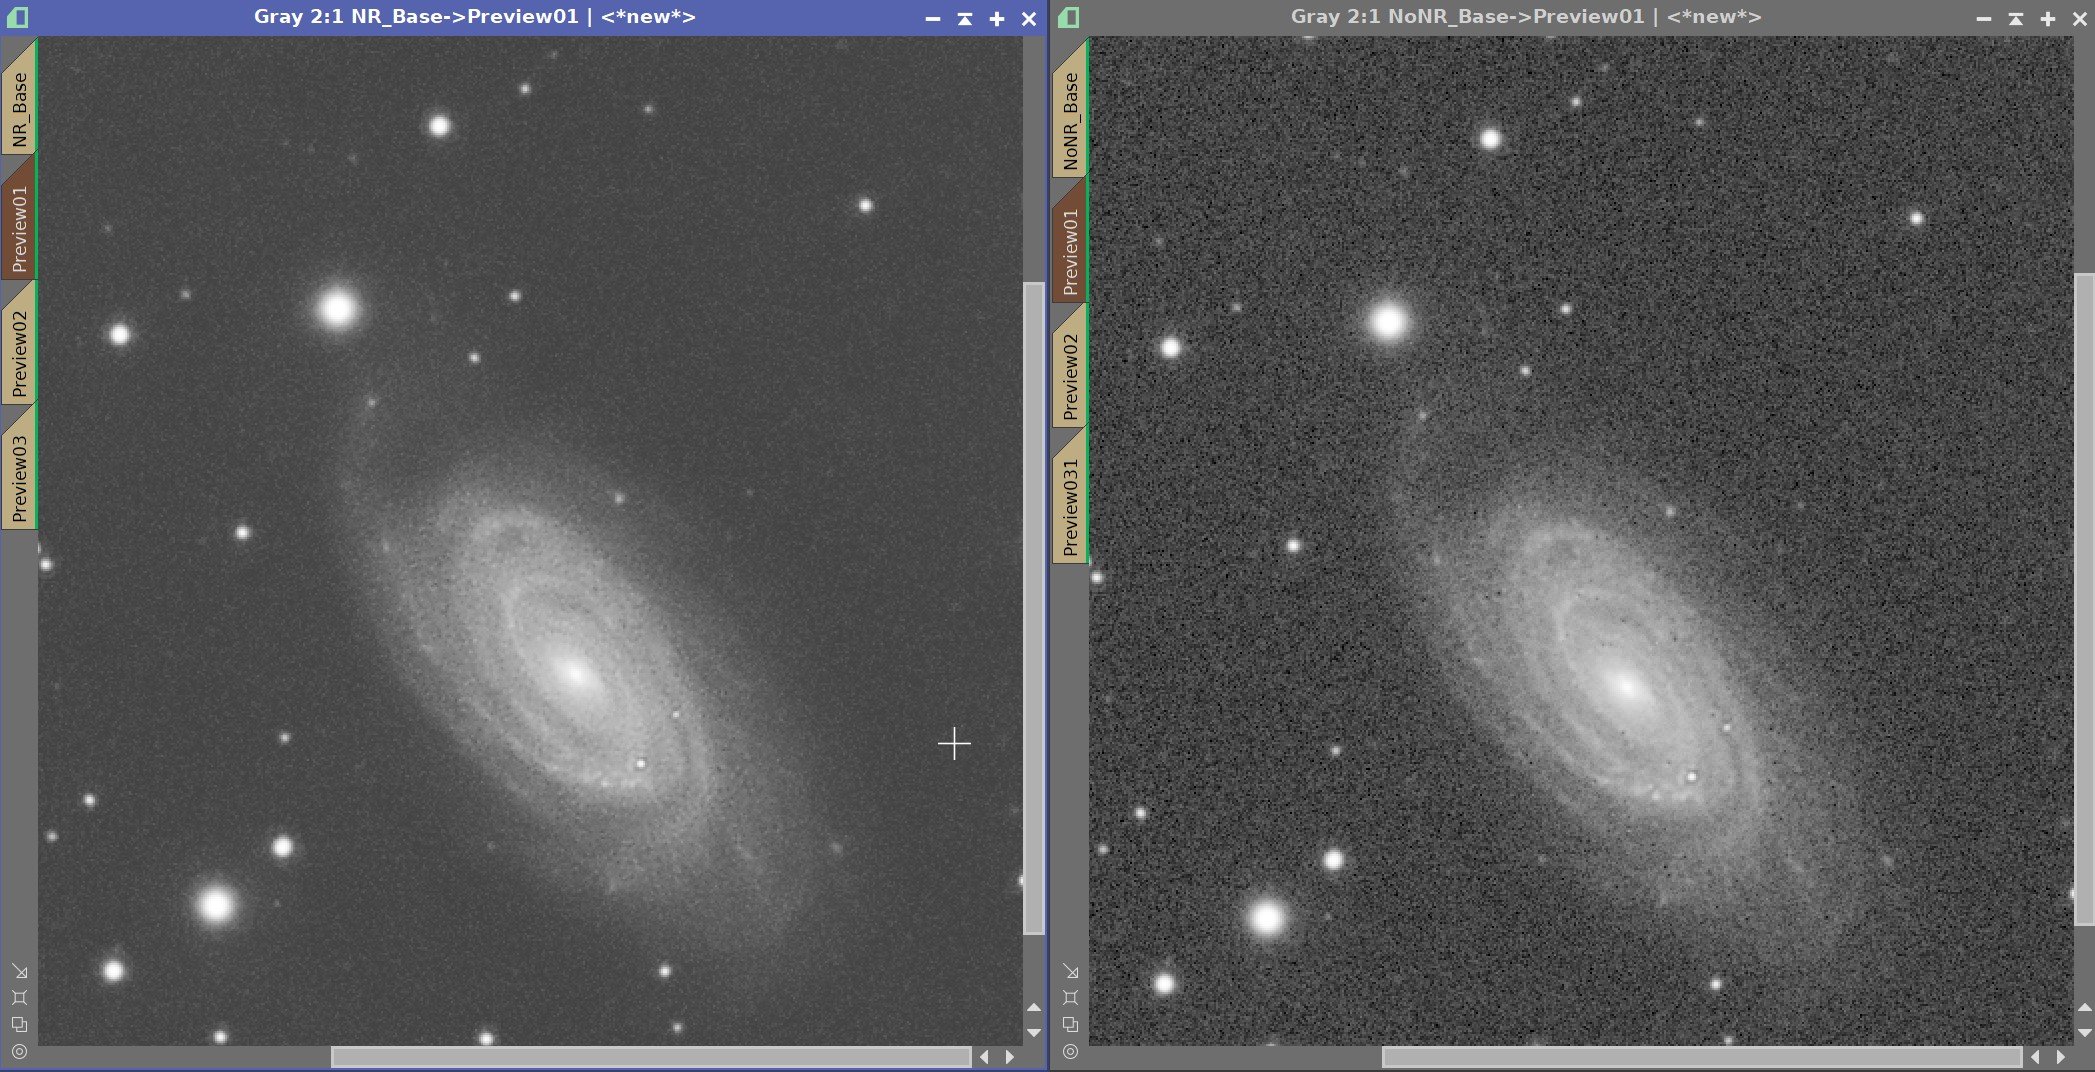
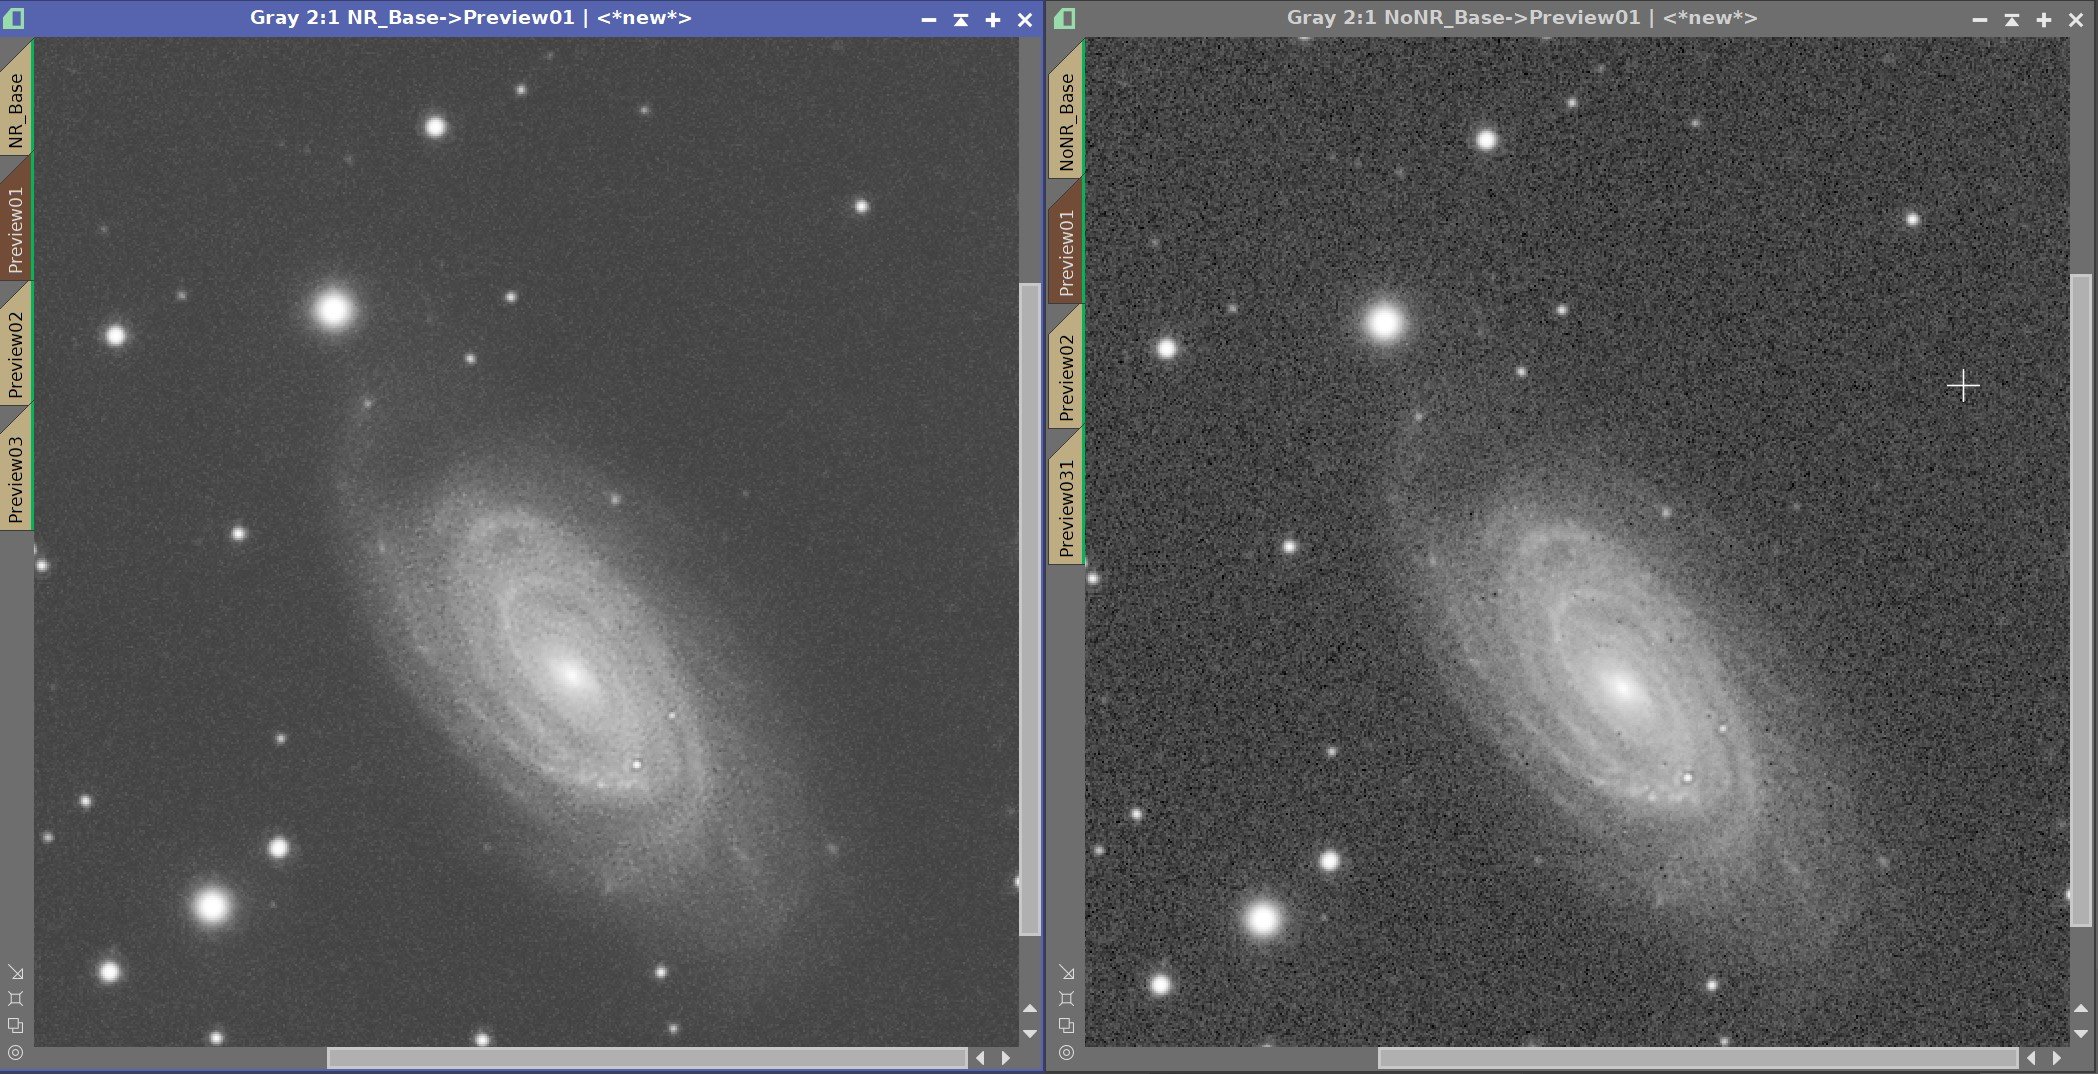
For this series, we will use the main image with and without Linear Noise Reduction applied. This should give us afeel for what the difference would be doing either way.
Global Dark Series
Starting from the left most image: 0.0001, 0.001, 0.01, 0.1, 0.5 - No Object Mask, no Local Deringing
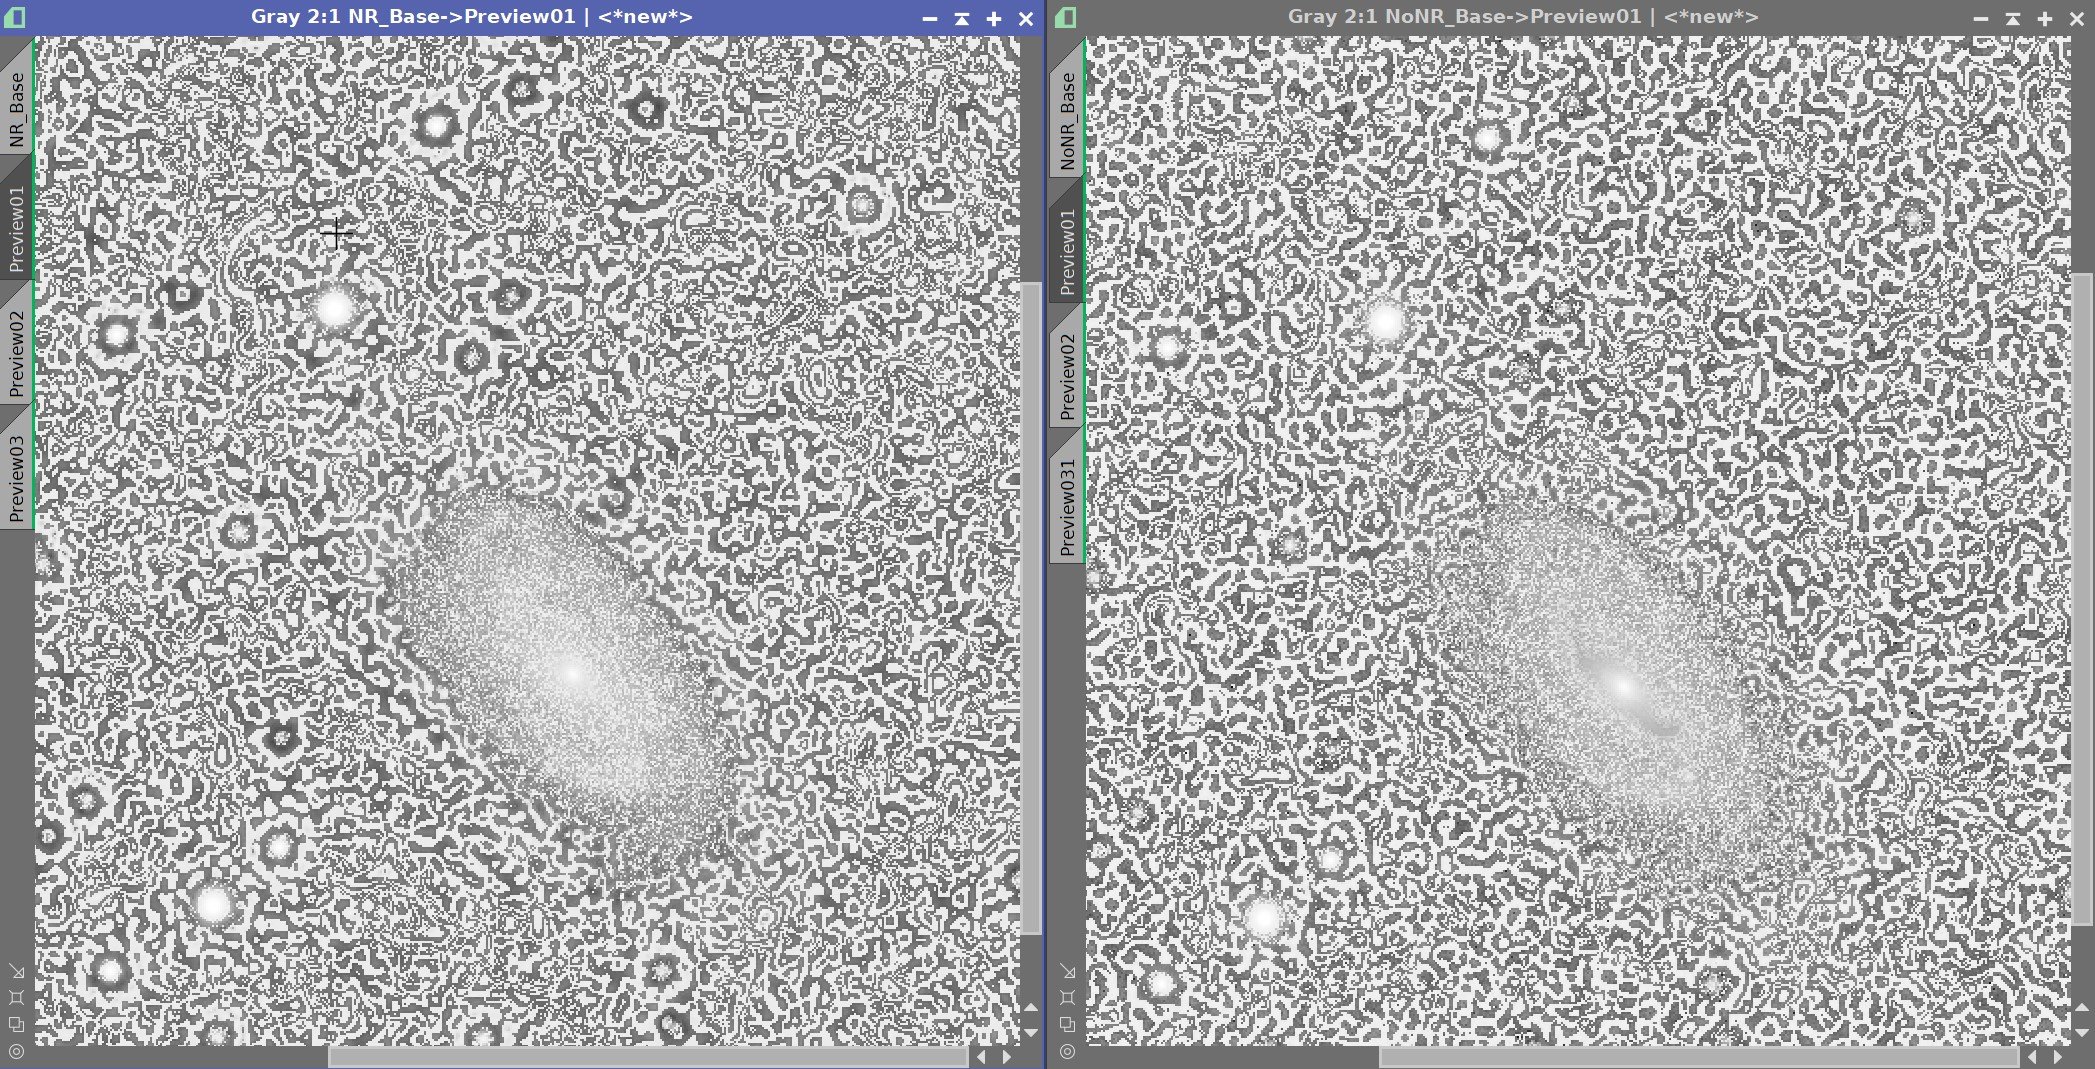
With larger numbers for Global Dark, you can get a very bizarre pattern that reminds me of Damascus Steel. When this happens, the algorithm is no longer converging. When this happens you will see warnings on the main console about divergence.:

The Main console output when you run Deconvolution and the computations are diverging.
As you reduce these the Global Dark values, the disturbing pattern goes away but you still see noise being enhanced and dark ringing artifacts forming. With too low a number you are not getting enough Global Dark protection to compensate for the dark rings. The task here is to find the sweet spot. With the best settings, you will still see some dark ring and some noise enhancement. These will be reduced as we turn Local Deringing back on and re-apply the Object Mask to protect portions of the image.
Now, what happens if you turn on the Local Deringing? How about when you apply the Object Mask? Let’s see what this does.
Contribution of Local Deringing and the Object Mask
Note that when Local Deringing is enabled, the dark rings around the brighter stars are cleaned up. When we apply the Object Mask, the background sky portions clean up as well.
Hopefully, this series gives you some feel for what the Global Bright parameter does and what contribution is provided by local deringing support and the Object Mask.
In practice, I start with the Object Mask in place, and local deringing enabled. I start with a Global Dark of value of 0.01 and use the previews to change these values and see what seems to look best to me. Often I find myself in a range between 0.003 and 0.008. But this does change based on the image, the scope, camera, and filters used, and the conditions. Even if you are using the same camera, filters, and scope, you can find that you need different settings at different times because of atmospheric seeing and guiding variations.
For this particular image, with the protections in place, I can reduce Global Dark dramatically and I seem to get away with it. I have not seen this on other images.
Can you see any real differences between the images with and without Noise Reduction?
In the past, I have always done noise reduction after Deconvolution. But I think I will do more experimentation with doing it before since Deconvolution is sensitive to noise and to me the results look good.
Once you have a setting on the Global Dark that you like - go ahead and test them on the other previews you created. Chances are that you will be equally happy with what you are seeing there, but there have been times when looking at different previews has caused me to tweak my Global Dark Setting further.
Finally, you should end up with a setting that seems to work for all of the previews.
While we have been focusing here on adjusting the Global Dark Paramtere, keep in mind that you also have the power to adjust the Object Mask or the LDSI mask - should you think you need it.
While doing this, if you see the noise pattern in any part of the image made worse, you can edit the Object Mask to reduce the intensity for that part of the image. Remember, when a mask is applied, you can still modify the mask image without having to re-apply the mask. So make adjustments as needed and then drag the triangle to the preview and see how the mask modification changed the output on the preview.
If you see any bright stars with dark rings that are embedded in a bright nebula or galaxy body, your LDSI Mask may have missed this star - you can edit the LDSI Mask with the CloneStamp or the DynamicPaintBrush tool to add it to the LSDSI. Again - drag the triangle over and see if this fixes the problem.
Any Need for Global Bright?
At this point, I look to see if I have any “worm” artifacts. If I do, I can begin a similar task that will allow me to tune the Global Bright parameter. In this image. I do not see clear evidence of worms, so I skipped this step. Note that I will be using GLobal Bright in the next example.
Iterations
Once you are happy with everything, you can then experiment with the iterations. Try increasing them and see if you are seeing any benefit or detriment to the image. I tend to run 20 interactions for my interactive Preview testing, then play with higher values before locking things down. I often end up between 20 and 40. Some people adjust the Global Dark parameters to make a very modest enhancement, and then apply the enhancement with a larger number of interactions. So to each his own - feel free to try both approaches.
In my experience, you get answers when setting Global Dark and Global Bright that are tied to the number of Iterations you are using for the testing cycle. If you test with iterations of 40, you will get values that work well for that iteration count. I tend to use 20 - making the tweaking cycle quicker, but feel free to experiment and go with what works best or looks best to you!


Deconvolution Iteration Series
From left to RIght: 20,40,60, 80, and 100
To my eyes, the results tend to get a little granular as the international go up beyond 50. The differences are subtle, and I tend to use lower values. My understanding is the algorithms will make changes with each interaction and as you go on into the series the changes get smaller and smaller. Often they converge to the point where the change is basically zero.
Once you have completed this, it is probably worth taking the time to apply this setting to the whole image. If you find a problem it is easy to undo and go back to the previous version of the image.


Final Image Comparison
Before Deconvolution, After Deconvolution, After Deconvolution with an adjustment to the LDSI image.
So where did we end up? Using the version of the image that has EZ-Denoise run on it, I selected this very small portion to focus on. Looking at the before and after versions, you can see that the stars and the galaxy have sharpened up a bit, we have revealed a bit more detail on the galaxy, and there are very few artifacts created.
However, if you look very carefully at the star in the lower right portion of the galaxy, you can see a subtle dark ring forming around it with the final parameter settings. You don’t see this on other stars.
The effect is very minor and you may not have even noticed it. So why call it out? Because this is something that that I mentioned can happen. It turns out that the Starmask routine did not pick up this star when we were forming our LDSI image. And because the star is in a bright portion of our Object Mask and was a pretty bright star - it was hit with the full effect of the Deconvolution operation and had no Local Deringing Support.
So what can you do about this? You can change the LDSI image! As I looked at the Galaxy image, I put the cursor on the star in question and recorded its coordinates from the readout at the bottom of the Pixinsight Screen. Then I went into the LDSI image and using the DynamicPaintBrush, I set the size to 4 pixels, and moving the cursor to the same coordinates, I hit the mouse button. This added a “star” image at that location. Voila! I reran deconvolution and came up with the final image shown above where the dark ring is minimized.
Final Image Comparison #2
Before and After Deconvolution
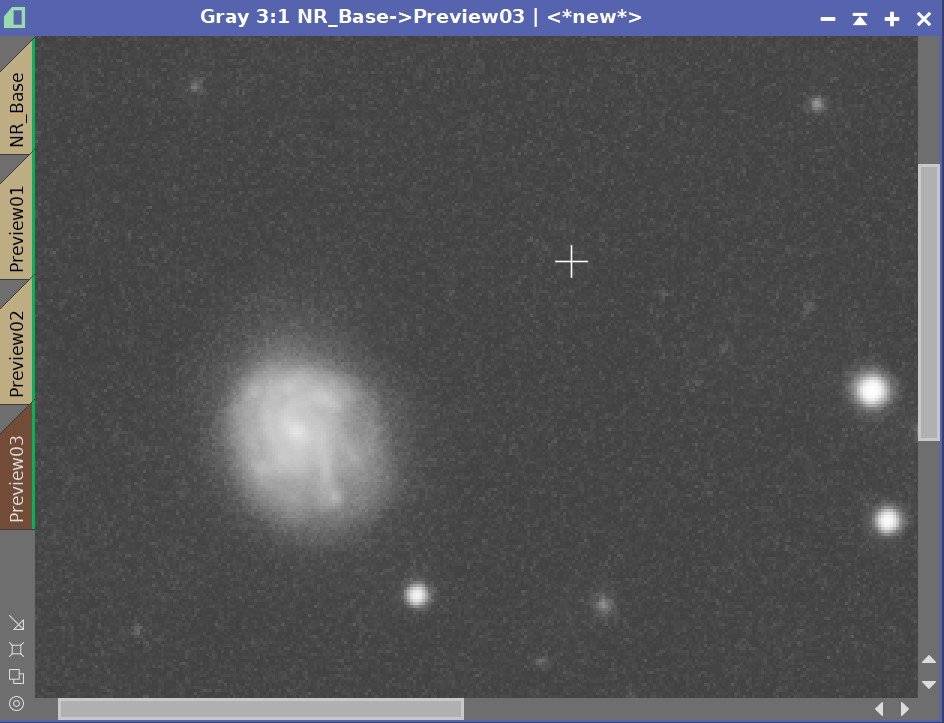
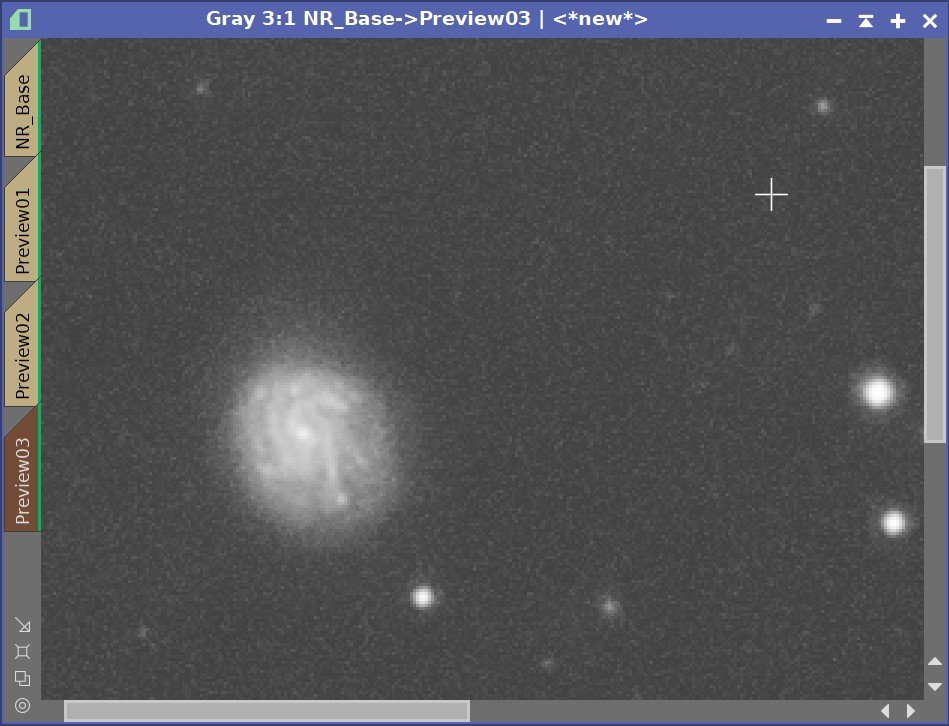
Here is another sample area showing the restored detail.
Now - let’s try another image.
This posting is part of seven-part series: "Using Deconvolution in Pixinsight."
Navigate to other parts of this Series: