
Using Deconvolution in Pixinsight - Part 4: Preparing for Deconvolution
March 2 6, 2022

This posting is part of seven-part series: "Using Deconvolution in Pixinsight."
Navigate to other parts of this Series:
Table of Contents Show (Click on lines to navigate)
Preparing for Deconvolution
An Overview
The key to the successful use of deconvolution in Pixinsight is running a consistent process. Here is a Crib Sheet for what that process looks like at a high level. You can use this to remind yourself of the steps you will need to do:
1) Prepare Support files for Deconvolution Use
Create an Object Mask
Make a copy of your Luminance image
Go nonlinear (use the STF->HT method)
Use HT to clip low signal areas to black and high signal areas to white, with a transition in between.
Use a modest Convolution pass with a StdDev of about 4 to soften things up.
Create a Local Deringig Support Image (LDSI)
Use StarMask with levels = 6-8 and smoothing = 10, and aggregate checked.
Enhance the resulting mask with HT: move the mid-gray slider left to the 25% point and apply it to the Mask
Create a PFS model
Use the PFSImage Script with default parameters to create the PSF
Select 3 Previews in the L image for testing
Try to select areas with both High and low signal regions in each Preview
Apply the Object Mask to the L image
Setup the Deconvolution Panel for use
Point the external PSF to the PSF image you created
Set iterations to about 20-30
Click the box for local deringing
Point to the LDSI File
Set Global Dark to a starting value of 0.1
2) Iteratively test various parameter settings using image previews to find the best values
Run test cycle for Global Dark
Run a series of settings
For each value tested drag the triangle to a Preview
Assess - Hitting control-shift-z to toggle between before to after views
Bracket the best value for GLobal Dark and the using smaller incremented dial it in.
Look for signs of “worm” defects in the background. If seen, do a Global Bright following method of setting Global Dark
Do an Iteration series, similar to what was done for Global Dark
Again, look for signs of “worm” defects in the background. If seen, do a Global Bright following method of setting Global DarkIf signs of “worms” do a Global Bright Series and select the best value for that parameter
Test final parameters on all previews and adjust as necessary
Apply final parameters to the full image and inspect - adjust as necessary
Now let’s do a deeper dive into each of these steps.
Creating the Object Mask
We have learned that is best to run Deconvolution in areas that have high signal content and avoid other areas that do not.
If only there was some way of selectively protecting some areas of the image. Well, there is - it’s called masking, and it’s a technique that is well known and commonly used in Pixinsight. We can use it here as well.
One way of protecting the image is to use a simple Luminance Mask.
Simply make a copy of the image and take it nonlinear to make it useful as a mask. I often use the STF->HT method to do this. Dark areas are protected from Deconvolution. White areas will have no protection. Gray areas will be ramped according to code value. This is very simple to do, and many folks use this method.
I would, however, suggest being more aggressive on this front. I would take the luminance mask as a starting point and then modify it using the Histogram Transformation Tool, in live preview mode, so you can see what you are doing.
I tend to move the zero clip level up into the histogram so that all of the low exposed noisy areas are clipped to black (these will not be touched by deconvolution). I then play with the mid-tone white clip point slider so that high signal areas are pure white. I do allow for a transition zone between these. Please see my examples below.

Here is a Luminance mask for the first image (The Draco Triplet) that we will be using for a processing example.

If you zoom into the Object Mask, you can see the grainy texture found in some of the transition zones.

Using the Histogram Tool, I have clipped the back regions and pushed the galaxy areas into the pure white zone.

I have done a little convolution to smooth this out a bit. How much? That is a judgment call. I usually try and take it about this far.
This object mask will act as a throttle for Deconvolution, ramping it up and down based on your selection.
Another way you could create this mask is by using the RangeSelction Tool. This lets you easily control the mask creation for both the high and low ends of the image.
Regardless of how you do this, at times you will see spotty and grainy patterns in your final mask. I often smooth these out a bit using the Convolution tool.
I would also point out that there are folks out there who would suggest that you don't need to use an object mask here at all.
Jon Rista, a true imaging wizard, suggests that changing the parameters on the Wavelet Regularization panel of the Deconvolution tool will protect against noise and eliminate the need for using an object mask. I believe him. You can see a great reference for this HERE.
I personally don't do this for a very simple reason - I understand how to make an object mask at a very intuitive level. I do not yet understand how to best change the Wavelet Regularization parameters in Deconvolution to accomplish this - and that holds me back. Your mileage may vary.
However, I do plan on experimenting with Jon’s recommendation.
Creating the LDSI Image
LDSI stands for Local Deringing Support Image. What the heck is that, and why do you need it?
This is actually a LOT easier to understand than the name suggests.
Remember when we talked about bright saturated star images? How they don't have a normal-looking PSF? Well if you try to Deconvolve them, you will get a strong ringing artifact that looks just plain bad - but this is only true for these stars only - the rest of the stars might look just fine. So the Pixinsight Deconvolution panel offers a “Local Deringing” feature. This allows you to add an LDSI image- which just turns out to be a star mask just showing the brightest stars in your image! It uses this mask to tell the tool to leave these parts of the image alone!
You can easily create the LDSI mask using the Starmask process. I use the default settings for the most part with the Scale raised to 6. The scale refers to the Wavelet Level used to create the masl. Going up to 6 allows larger stars to be more fully captured in the mask. I also tend to change the smoothness to 10 and click the aggregate box. I am not sure this makes a lot of difference. Sometimes I do this, and sometimes not. The fact that I have never noticed a difference suggests this part is not critical.
Once the mask is created, I often then use the histogram tool process to enhance the resulting mask by moving the center mid-tone slider towards the left to the 25% point. This scales the star images up a bit. This makes sure that the mask is covering the entire star area. The Deconvolution tool will then refrain from processing that part of the image.
As a final check, I often will apply the LDSI Mask to the main image and then hit Cntrl-K to show the mask. Toggling this back and forth allows me to see what stars will be masked, and the coverage of the masked stars. Based on what I see here, I may:
Re-run StarMask and increase the number of levels to get larger stars covered by the mask
Use the MorphotolgyTansform to increase or decrease the size of the stars (dialation vs. erosion)
Run convolution to soften star mask edges
My goal here is to make sure that I mask off the brightest stars and if anything I would rather have larger star images in my mask than smaller, and I would rather have softer edges than hard.
A final note about creating the LDSI mask this way. Sometimes there is a star that is bright but also buried in a nebula or in the body of a galaxy. I have seen cases where these bright stars really needed to be included in the LDSI Mask - but where not! Sometimes everything seems to look great and then I see a black ring around a star in some prominent part of the image (like a nebula or galaxy). This can be fixed by adding a white dot to the LDSI mask using the CloneStamp or one of my favorite new tools the DynamicPaintbrush ($5 if I recall - but super handy).

The Starmask tool set up to create a LDSI Support Map.

AN example of how I set up the HistogramTransform tool to boost the LDSI map a bit.

The starting LDSI Star Mask

After a tweak with the HistogramTransform Tool.
Estimating the Point Spread Function
As we have seen, creating an estimate of the image-wide PSF model is a key thing that must be done to enable Deconvolution. The Pixinsight Deconvoluton tool has two ways you can specify a PSF: External and Parametric. The external method allows you to provide an image file that represents the PSF model to use. Typically this PSF model is computed from your image using one of two tools.

This view of a PSF model and it’s key descriptive elements was taken from Pixinsight Documentation
The first, and traditional method is to use the DynamicPSF tool. When I was first beginning I found the use of this tool was not very obvious nor user-friendly. It basically allows you to select a set of stars from your image and computes some attributes for those stars. It is your job to sort through these selected stars and pick a sub-group that will be used to estimate the PSF model. As previously discussed, the goal here is to avoid saturated stars or stars that are too faint or dim as these are not good samples for PSF estimation. It is also good to focus on stars that are closer to the center of your frame to avoid any edge-of-field issues. The recommendation is to make several culls of your selected stars based on the computed attributes in the table. Once you have finalized the selected group of stars to use, the app then can create the PSF Image which can be saved.
I would have to spend a lot more time explaining how to use this tool well - but I am not going to do that here. There are many tutorials for that out there, and there is even documentation for this tool integrated into the Pixinsight release. Also - because I think there is a better solution.

The DynamicPSF tool in all its glory. It’s not really all that bad to use but it can be quite intimidating when you are first beginning. I tend not to use this tool today.
And that better solution is the PSFImage script by by Hartmut Bornemann.
This is a part of a very useful set of scripting tools that you can add to your Pixinsight environment. You can simply add his repository to your Pixinsight configuration and the tools can be loaded. Details can be found HERE. Once these scripts have been added to your system, you can find PSFImage under the SCRIPTS->Render menu.
All you have to do is select your image then run the script.
A tool panel will open up and at the bottom left of the panel you will see an “Evaluate” button. In general, I leave all values at their defaults and then click on this evaluate button. After a few moments, PSFImage has done all of the work for you and has created a new PSF model image. You can now save this image and you are good to go!
I highly recommend this approach.

The PSFImage control panel. I leave all parameters at their default value and hit “Evaluate”. Once this is done, I hit “View Stars” to see what stars it has selected, and then, I hit “create” to save the PSF Model to file. It can’t get any easier!

Here is a samle PSF file created by PSFImage.
The other option is to use the Parametric approach.
In this case, you specify some parameters that will computationally create a PSF model. Why would you use the Parametric approach If it is so easy use PSFimage to create a custom one?
When the Deconvolution Tool was first introduced in Pixinsight, there was no method available to estimate a PSF from actual star data. The Parametric approach was the only one that was available. Either the default parameters were used, or some trial and error was involved. There is even a tool called DeconvolutionPreview would allow you to try a series of parameter values and show the image results in a grid that would allow you to roughly select the best values.

The output from DeconvolutionPreview. Parameters allow you to define the number of images and how to vary parametric values to create this exploratory grid. Warning - it is very slow and there is no provision for doing anything but Parametric explorations.
I have also recently seen recommendations from Adam Block suggesting that he was getting better results because the parametric method allows him to create a PSF Model that handles the "tails" of the PSF curve differently, resulting in cleaner star images that are tighter.
I have to admit that I have not played with this too much, and therefore cannot comment intelligently on it.
I can say that I have tried using the default Parametric PSF on a few images and was surprised by how well it did!
But for me, I tend to use PSFImage and I have been pleased with my results.
Select 3 Preview Areas
We will soon have to determine some Deconvolution parameters by trial-and-error. If we had to run the full image for each test, it would take too long. Instead, we create 2-3 preview areas of the image. These should be smallish. The goal here is to create a small sandbox we can play in. By choosing small areas to test we can cut down the run time dramatically. I like to pick areas of interest in the image and I try to cover areas of high and low signal in each Preview.

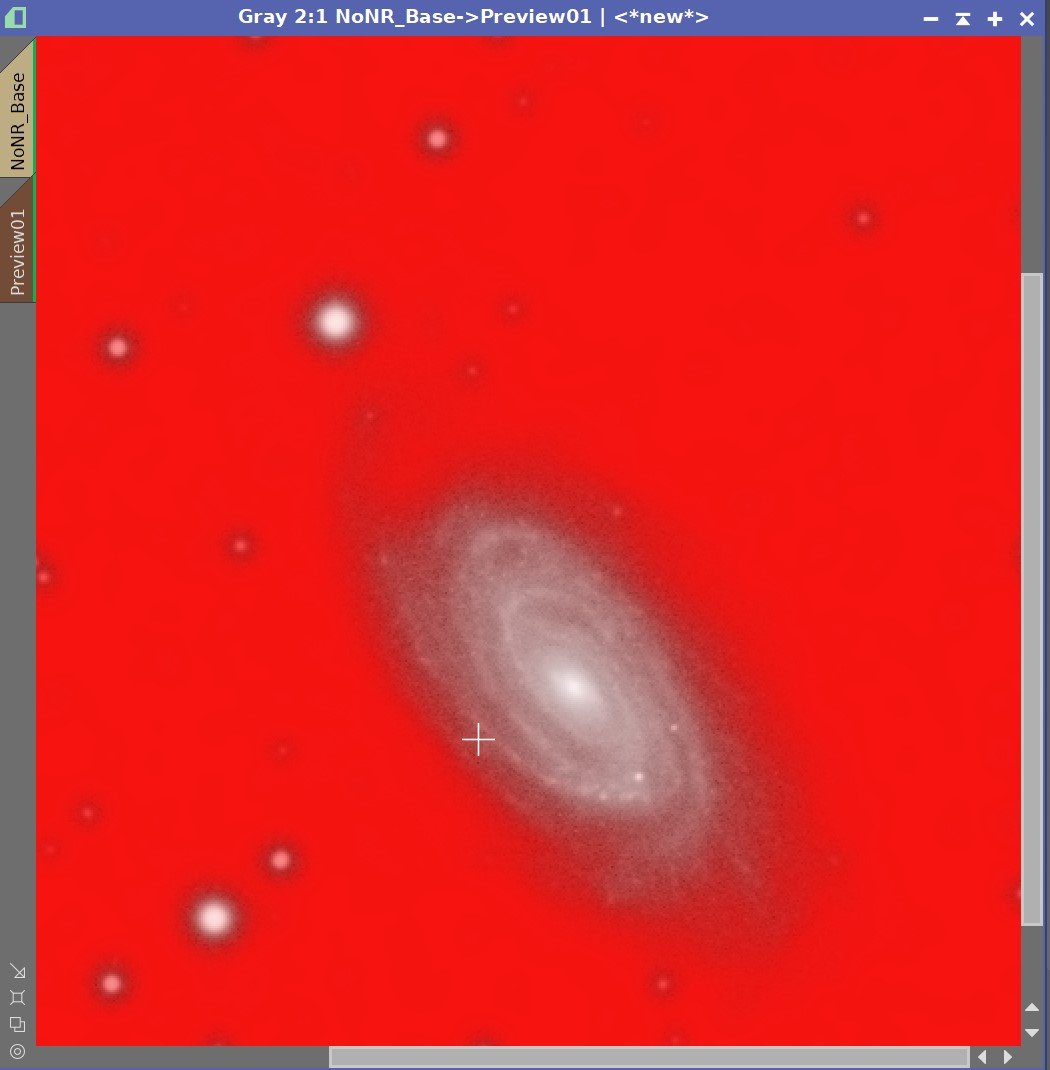
Here is the whole image, showing the three preview areas I decided to use.
Apply the Object Mask
Next, we apply the Object Mask to the image. Using one of our preview regions, we can show how the Object Mask can effect this local area.

Here is my first preview area, centers on the body of the Spiral Galaxy.
Here is the same preview but now showing the coverage of the Object Mask
Set Up the Deconvolution Panel

Next, we will set up our tool panel with some starting parameter values. Some of these I NEVER touch.
Select External PFS and select the PSF image that you have already created.
For the Algorithm, choose the Regularized Richardson-Lucy (this is used for all Deepsky Images).
Set your Iterations. I often set this to 20-30 while experimenting with various values. This just makes the tests quicker to do with previews. Once I have the key parameters worked out, I will then play with this number, sometimes going back to the default of 50, often I do less - say 30-40.
Target: The default is Luminance (CIE Y) which is final for all images unless you have an OSC RGB image, in that case, use RGB/K. Note: Make sure that you have used RGBWorkingSpace set to 1.0, 1.0, 1.0. My recommendation is to extract the L image and work on that - allowing you to use the default setting.
Set up the Deringing Panel:
Put a check in the box in the box marked Deringing.
Global Dark. This is a CRITICAL setting. You MUST get this right to have good results.
Larger numbers apply stronger protections against dark ringing.
The default value of 0.1 is typically (but not always) USELESS! More people have been frustrated by Deconvolution because of this default value than anything else. Usually, you can trust the default value in PI tools to give you a reasonable result on Astro images. Not on this one! A good starting point is O.O1. Most of our work in tuning the response of the tool will be focused on dialing this parameter. Small changes can have a significant impact on the results. Different images can require very different values.
Set this too term too low, and you get dark rings and raccoon eyes around your stars. Set it too high, and your image will be transformed into something that looks a little like Damascus Steel. See the examples below

The “Worms” Artifact!
Global Bright: The Global Dark term helps to manage dark rings forming around stars. Global Bright is a term that helps to manage white rings!
Larger numbers apply stronger protections against dark ringing.
I don’t think I have ever had a problem with white rings around stars so you might think that this is a term that you would never use. But I have run into artifacts forming in flat regions of the image often called “worms”. This is a nonrandom pattern that I have run into before. I usually seem to keep this under control by using the Object mask to protect flat regions. The worm pattern - if you do run into it - is actually of a form of white ring artifact that forms around noise features. As such, Globa Bright can be brought in to bring it under control. I would get a solid value for your Global Dark and then if you see nonrandom patterns in your flat areas, begin a similar process to explore values of Global Bright on your preview areas and find what works. Small changes can make a big difference.
Local Deringing - put a check in this box and point the file to the LDSI support image.
Local Support - select a starmask file with the same size as your main image o provide local deringing protection. As stated - this is a map of the brightest stars.
Local Amount - This is an internal multiplier on the local deringing effect. You can change this to modulate how it works. I tend to leave this alone.
Wavelet Deregularization is checked and I leave it at the default values. See the Jon Risa article already linked above for more details if you want to play with this.
Dynamic Range Extension (low Range, High Range): This lets you specify values that will be mapped between 0.0 and 1.0. I do not use this. (maybe I should - but I haven’t yet!)
Establish Parameters by Trial & Error
Now let's get to business. Starting with Global Dark, we will now try various values on the Previews and see if we can zone in on what works best for this image.
Choose one of the previews on your image and scale it up to fill the window. Drag the triangle from the Deconvolution panel to the preview display. Take a look at what it does to the image.
Keep in mind that these changes are NOT being made to your full image. These are temporary views on the Preview only. The beautiful thing about this is that after you have applied Deconvolution to the preview, you can easily toggle between the view you just created and the previous state by hitting control-shift-z.
Now iteratively experiment with values.
Focus on getting your Global Dark Dialed in First. Then you can work the number of interactions. After setting Global Dark or Iteration, check for worm artifacts. If you see any, do a test series for Global Bright. As you go check across your different selection regions to make sure you like what is happening.
Once you have your parameters all tested and set. Apply them to the whole image and inspect for problems.
Now let’s go try this out with some real image examples!
This posting is part of seven-part series: "Using Deconvolution in Pixinsight."
Navigate to other parts of this Series: