
Messier 101 Supernova SN2023ixf ~3 Hrs in LRGB - Yet Another Supernova Shot - But This One Is Mine!
Date: June 16, 2023
Cosgrove’s Cosmos Catalog ➤#0123
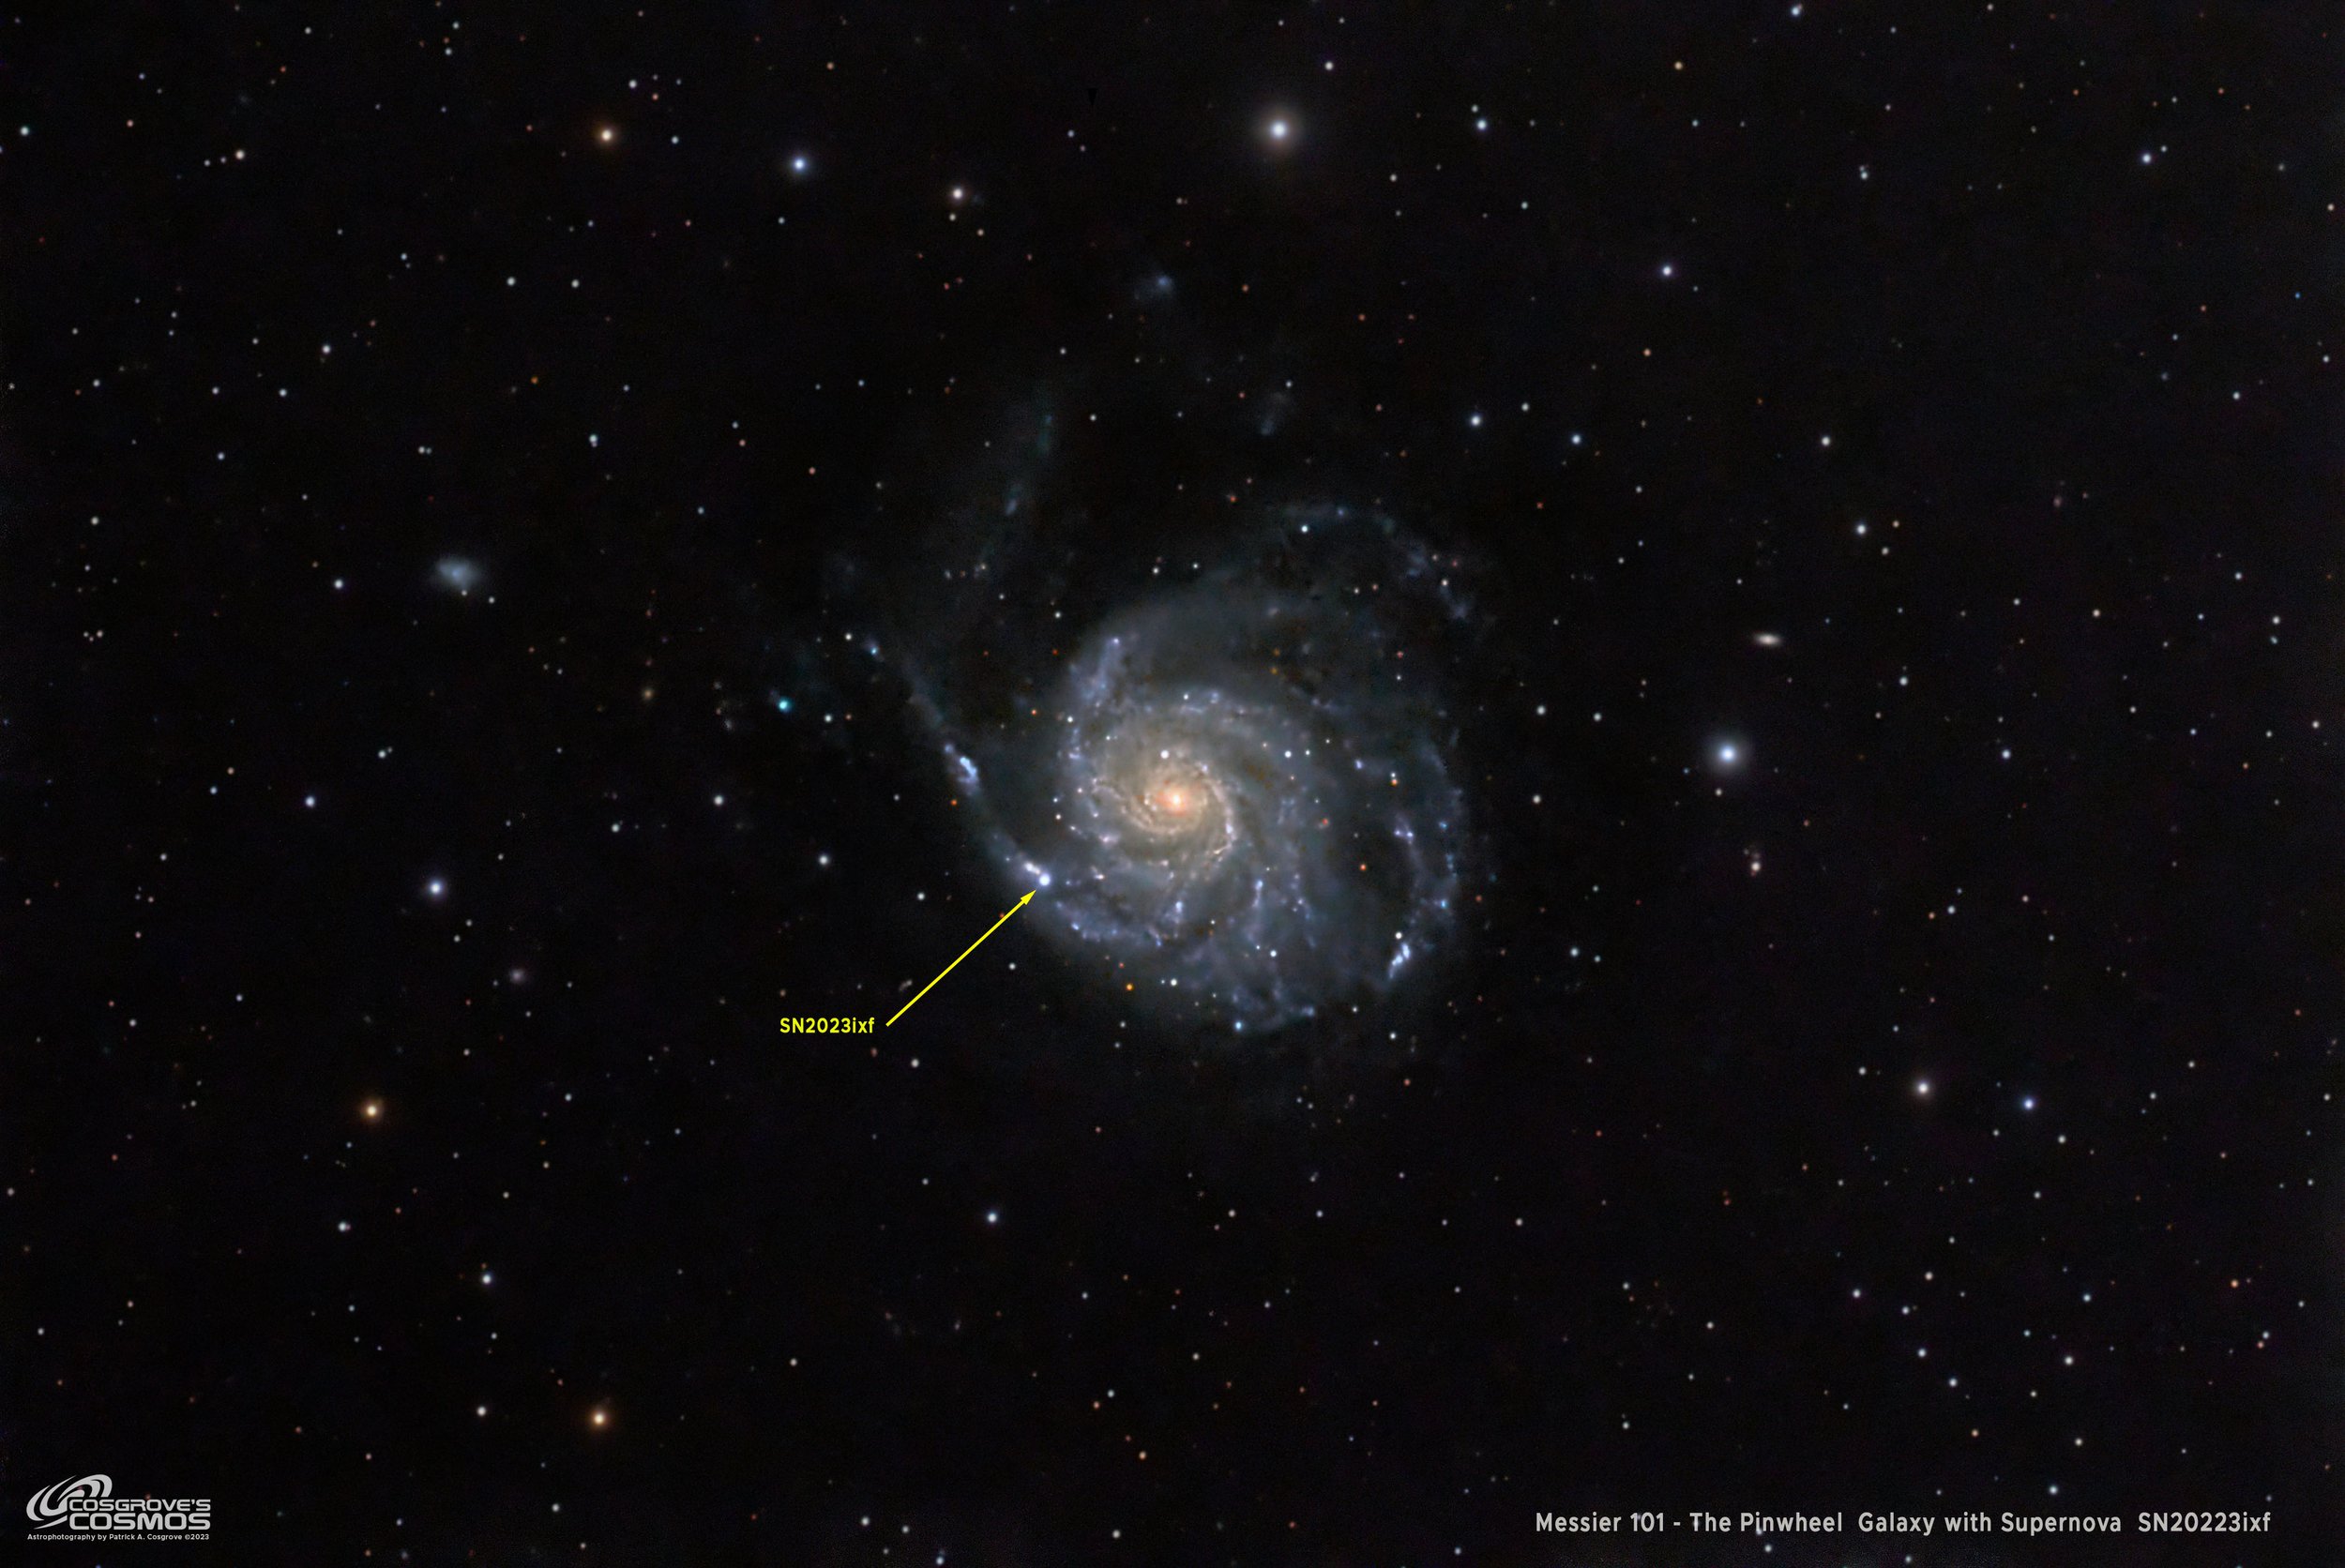
Yet another shot of SN2023ixf! As if the world did not have enough already - but now it has mine as well! (click for high res versions via Astrobin.com)
Table of Contents Show (Click on lines to navigate)
Prelude
With the advent of supernova SN2023ixf, a huge number of images of M101 are being created and shared. Given this is the case, then why did I choose to shoot one as well? Did I think mine would be better than what other people are doing?
Not hardly!
For this current project, I was shooting through a smoke plume with a 400mm focal length scope - not the best combination for making a great galaxy image!
I will get into why this combination was used later on, but the main reason I wanted to do this was to immerse myself in what supernovas are all about.
This is the first I ever captured, and I wanted to dig into what supernovas were all about - using this image as the excuse to do so.
About the Target
The big news here is the supernova, SN2013ixf, found in Messier 101 - so let’s start with talking about the galaxy.
The Galaxy
M101, also known as NGC 5457, and the Pinwheel Galaxy, is a beautiful face-on spiral galaxy located 21 million light-years away in the constellation of Ursa Major.
It is often considered one of the brightest and most photogenic galaxies in the night sky. With a diameter of about 170,000 light-years, it's also fairly large. Messier 101 is home to an estimated one trillion stars, including several massive and bright blue ones at its core. Observations of the galaxy have also revealed the presence of numerous star clusters, gas clouds, and even a series of previously unknown supernovae. Due to its unique shape and stunning details, Messier 101 is a popular object for both amateur and professional astronomers to observe and study.
It was discovered by Pierre Méchain in 1781 and included by Charles Messier in his famous catalog as one of its final entries.
Many previous supernovae have been found in this galaxy - below is a list found in Wikipedia:
Five internal supernovae have been recorded:
SN 1909A, was discovered by Max Wolf in January 1909 and reached magnitude 12.1.
SN 1951H reached magnitude 17.5 in September 1951.
SN 1970G reached magnitude 11.5 in July 1970.
On August 24, 2011, a Type Ia supernova, SN 2011fe, initially designated PTF 11kly, was discovered in M101. It had visual magnitude 17.2 at discovery and reached 9.9 at its peak.
On February 10, 2015, a luminous red nova, known as M101 OT2015-1 was discovered in the Pinwheel Galaxy.
On May 19, 2023, SN 2023ixf was discovered in M101, and immediately classified as a Type II supernova.
Of course, the last entry on the list is the supernova in this image!
The Supernova
This supernova was discovered on May 19th, 2023, by Koichi Itagaki of Japan.
At discovery, it was magnitude 14.9, as seen by an unfiltered CCD. Zwicky Transient Facility project found images from two days before discovery with a magnitude of 15.9. The supernova was seen to brighten to Magnitude 11 on the 22nd of May - just a few days before my image was captured.
It was immediately classified as a Type II Supernova caused by a massive star's collapse. Current supernova theory predicts that either a black hole or a neutron star will be left as a result of this event.
The supernova is located near a prominent HII region, NGC 5461, in an outer spiral arm of the bright galaxy. The star involved is thought to be a supergiant.

The Spectra of SN2023ixf

The AAVSO Light curve chart for SN2023ixf.
First - let’s talk about what a Supernova is.
So, What is a Supernova?
A supernova is a powerful and catastrophic event that occurs when a massive star reaches the end of its life. They are among the brightest events in the universe and can be seen even from billions of light-years away. The peak optical luminosity of a supernova can be comparable to that of an entire galaxy before fading over several weeks or months!
When this happens, the star's core collapses and rebounds, causing a massive explosion. During this explosion, the star releases enormous energy and matter into space. A supernova can release as much energy in one second as the sun will emit in its entire lifetime! The explosion also produces heavy elements dispersed throughout the universe, which can ultimately be the building blocks for future stars and planets. Supernovae are incredibly rare and often occur in distant galaxies, making them a fascinating and awe-inspiring event to observe.
The last supernova directly observed in the Milky Way was Kepler's Supernova in 1604, appearing not long after Tycho's Supernova in 1572, both of which were visible to the naked eye. The remnants of more recent supernovae have been found, and observations of supernovae in other galaxies suggest they occur in the Milky Way on average about three times every century.
Supernovae Naming Conventions
Wikipedia describes how the names for supernovae are created:
Supernova discoveries are reported to the International Astronomical Union's Central Bureau for Astronomical Telegrams, which sends out a circular with the name it assigns to that supernova.
The name is formed from the prefix SN, followed by the year of discovery, suffixed with a one or two-letter designation. The first 26 supernovae of the year are designated with a capital letter from A to Z.
Next, pairs of lower-case letters are used: aa, ab, and so on. Hence, for example, SN 2003C designates the third supernova reported in the year 2003.[55] The last supernova of 2005, SN 2005nc, was the 367th (14 × 26 + 3 = 367). Since 2000, professional and amateur astronomers have been finding several hundred supernovae each year (572 in 2007, 261 in 2008, 390 in 2009; 231 in 2013).
Types of Supernovae
Two main types of supernovae occur in the Universe, classified as Type I or Type II.
Astronomers classify supernovae according to their light curves and the absorption lines of chemical elements appearing in their spectra.
Type I supernovae occur when a white dwarf star in a binary system accumulates material from its companion star, causing it to reach a critical mass and explode. This explosion produces a consistent amount of energy and can be used as a "standard candle" for measuring cosmic distances.

Type I Supernova (Image from Phys.org)
Type II supernovae occur when a massive star runs out of fuel, and its core collapses, then rebounds and explodes. These explosions are much more energetic and can leave behind a neutron star or black hole. Understanding the different types of supernovae is crucial to understanding the life and death of stars, as well as the chemical elements that make up our Universe.

The expanding remnant of SN 1987A, a peculiar Type II supernova in the Large Magellanic Cloud. NASA image.
Supernovas are classified by their spectra or the specific wavelengths of light they emit:
Type I supernovae lack hydrogen and helium in their spectra.
Type II supernovae display strong lines of these elements.
Within each group, supernovas are further classified into several subtypes based on the detailed features of their spectra and light curves. This classification system helps astronomers understand how supernovas form, evolve, and explode, and sheds light on the mysteries of the universe's most spectacular and destructive events.
There are three subtypes of Type I Supernovae:
Type Ia supernovae occur when a white dwarf star (the carbon-oxygen remnant of a once Sun-like star) in a binary system accretes matter from its companion until it exceeds the Chandrasekhar limit (1.4 times the mass of our Sun) and Collapses. The temperature goes up until the carbon fuses causing a carbon-detonation supernova. The mechanism is sometimes described as a Thermal Runaway process.
Their spectra show very little hydrogen and a lot of carbon; they also show silicon, calcium, and elements up to iron (due to fusion during the intense explosions).
Presents a singly ionized silicon (Si II) line at 615.0 nm (nanometers) near peak light.
Type Ib supernovae occur from the death of a massive star at least 25 times the Sun’s mass. The mechanism is referred to as a Collapse:
Their spectra contain very little hydrogen; they also show helium.
Weak or no silicon absorption feature
Shows non-ionized helium (He I) line at 587.6 nm
The star sheds material from its gaseous envelope late in its life (hence the lack of hydrogen in its spectrum). The star then implodes, bounces back, and explodes.
Type Ic supernovas occur similarly to type 1b supernovas, when a massive star loses its outer envelope of hydrogen and helium, leaving behind only the core, which collapses to form a supernova.
their spectra contain very little hydrogen or helium
Weak or no silicon absorption feature
The main difference between these two subtypes is that type Ib/c supernovas result from the explosion of a massive star. In contrast, type Ia supernovas result from the explosion of a white dwarf star in a binary system.
Type II supernovas are further classified into several subtypes:

Intensity plots for Type II Supernovas (taken from Wikipedia)
Type II-P supernovas exhibit a plateau in their light curve after the initial peak, indicating a steady decline in brightness.
Type II-L supernovas lack this plateau and show a rapid brightness decline after the initial peak.
Type IIn shows some narrow absorption lines
Type IIb Spectrum changes to become like Type Ib
The key difference between these subtypes lies in the amount of hydrogen in the star's outer envelope.
Type II-P supernovas have a larger envelope of hydrogen than Type II-L, contributing to the slower brightness decline. Understanding the sub-classifications of Type II supernovas is essential in determining the types of stars that produce these events and how they evolve over time.
The Annotated Image

This annotated image was created in Pixinsight, using the ImageSolver and AnnotateImage Scripts.
The Location in the Sky

This annotated image was created in Pixinsight, using the ImageSolver and FindingChart Scripts.
About the Project
Choosing The Target
This is the fourth and last imaging project from two nights of data capture on May 24 & 25 of this year (2023).
I had a very late start to my imaging projects this year for various reasons I have talked about in other posts, but the most recent issue has been the smoke plumes from the Alberta wildfires plaguing our skies.
On the two nights in question, the Jet Stream was predicted to push most of the smoke to the south of us. Given this opportunity, I was prepared to take advantage of it.

The smoke band moved to the south of us and we had a window for some imaging!
As I prepared for this capture session, I quickly selected the targets I wanted to go after:
I chose two cool galaxies (M102 and M104) for my Astro-Physics 130mm f/8.35 platform
I chose a composition for my newly updated William Optics 130mm f/5.5 platform that would contain both M97 and M108
Then I needed to find a target for my Askar FRA400 platform!
This last one was problematic. Not many targets are suited to this small focal length scope during galaxy season! I had a hard time choosing what to go after.
Then I thought about the new supernova reported in Messier 101. This is a larger galaxy - and I finally decided to target M101 and see if I could get a shot of the supernova.
I did not have high hopes for this. I have shot M101 several times before and found it a challenging target that needed a lot of integration to do well. I knew that was not likely the case here.
Also, the image scale would be such that the galaxy would be tiny. Add to those concerns that I still have some residual smoke issues - well - I did not have high expectations here!
The full Red Master image taken with the Askar FRA400 scope, showing the relatively small image scale (click to enlarge)
Here is the image scale I was getting for M101 with my Astro-Physics 130mm Platform. Quite a difference! (click to enlarge)
So why shoot it when everyone and their brother were also shooting it? Especially with a scope that was not suited for it? And with the smoke?
I’m not sure why, but I wanted to try to get “something” with the supernova in it for myself. I felt it was a pretty cool event and wanted something in my portfolio that included it. Finally, I thought it might be an interesting story when I wrote up an image project post. It was a chance to explore and explain what supernovae were, and how I took and processed the image.
Capture Details
Shooting was done with my Askar FRA400 platform. The subs were captured using 90-second subs in LRGB.
I set things up when it was still light out and then began shooting as soon as it was dark enough.
I shot on the nights of May 24h and 25th. By the 26th, the moon was in its first quarter and up when I needed to shoot M101. This raised the background sky's brightness and reduced the contrast of the galaxy.
I ended up capturing a total of 2 hours and 55 minutes of data. This is a short time for such a target. I would normally want a minimum of at least 8 hours.
Another issue is that M101 was close to one of my tree lines. I was concerned that I might be running into some trouble there.
Image Analysis
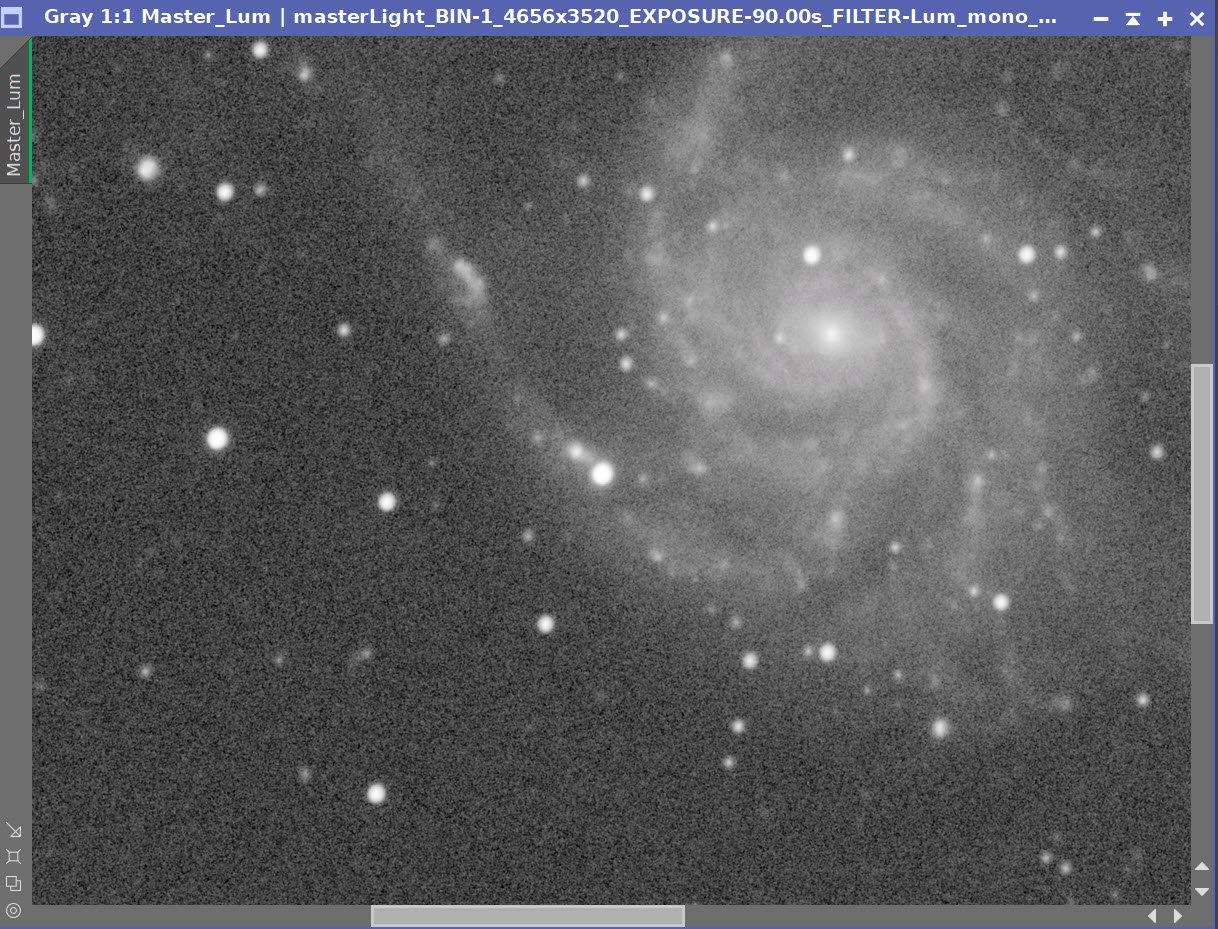
As I blinked my subs, I saw that my concern about the tree line was well-founded. I saw that many subs had encountered branches that obscured parts of the frame and, in many cases, the galaxy itself!
This was mostly an issue with the Lum filter subs.
As I went through them, I culled the ones that obscured the galaxy itself but kept many where the tree branches obscured a portion of the frame. I hoped the rejection logic would deal with many of those, but I was concerned about what I would end up with.
I started with 57 Lum subs and ended up removing 25 of those! OUCH!
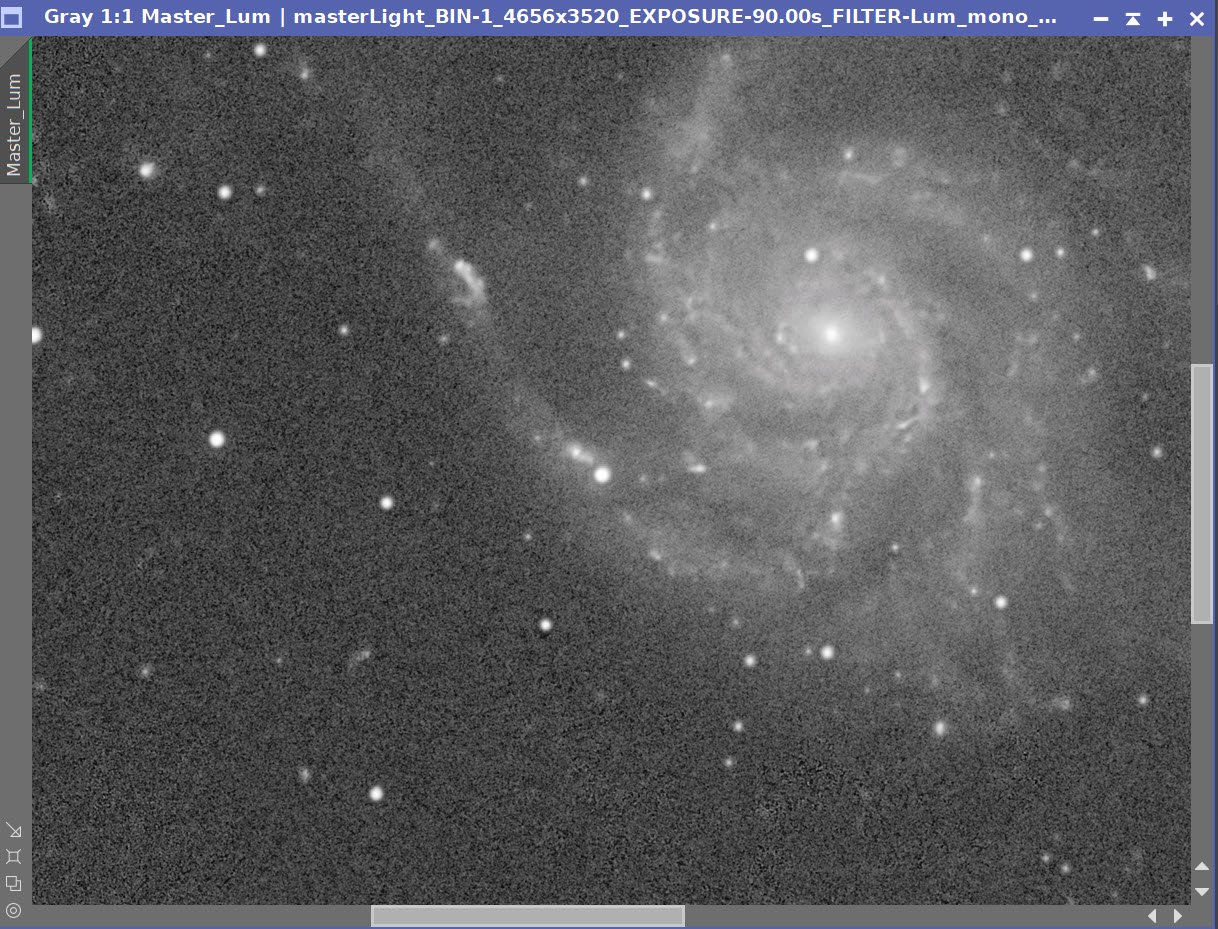
Tree Shadow example #1 (click to enlarge)
Tree Shadow example #2 (click to enlarge)
I did not really see any other concerns.
Past Experience With M101
I have a rather checkered past with M101.
I have shot this target three times. The first two times, I hated - I mean HATED - my results! The last effort finally produced results that I was happy with - but that effort had 11 hours of integration on a scope with a much better image scale. The current effort has only 3 hours at a much smaller scale. My expectations were not high!
These other images, however, do give you a view of M101 before the supernova.
The 2020 Effort can be seen HERE.
The 2021 Effort can be seen HERE.
The 2022 Effort can be seen HERE.

This is my 2020 version. 2.1 hours on a OSC camera. Really bad. (click to enlarge)

The 2021 version. 11 hours of LRGB data. Still bad. (click to enlarge)
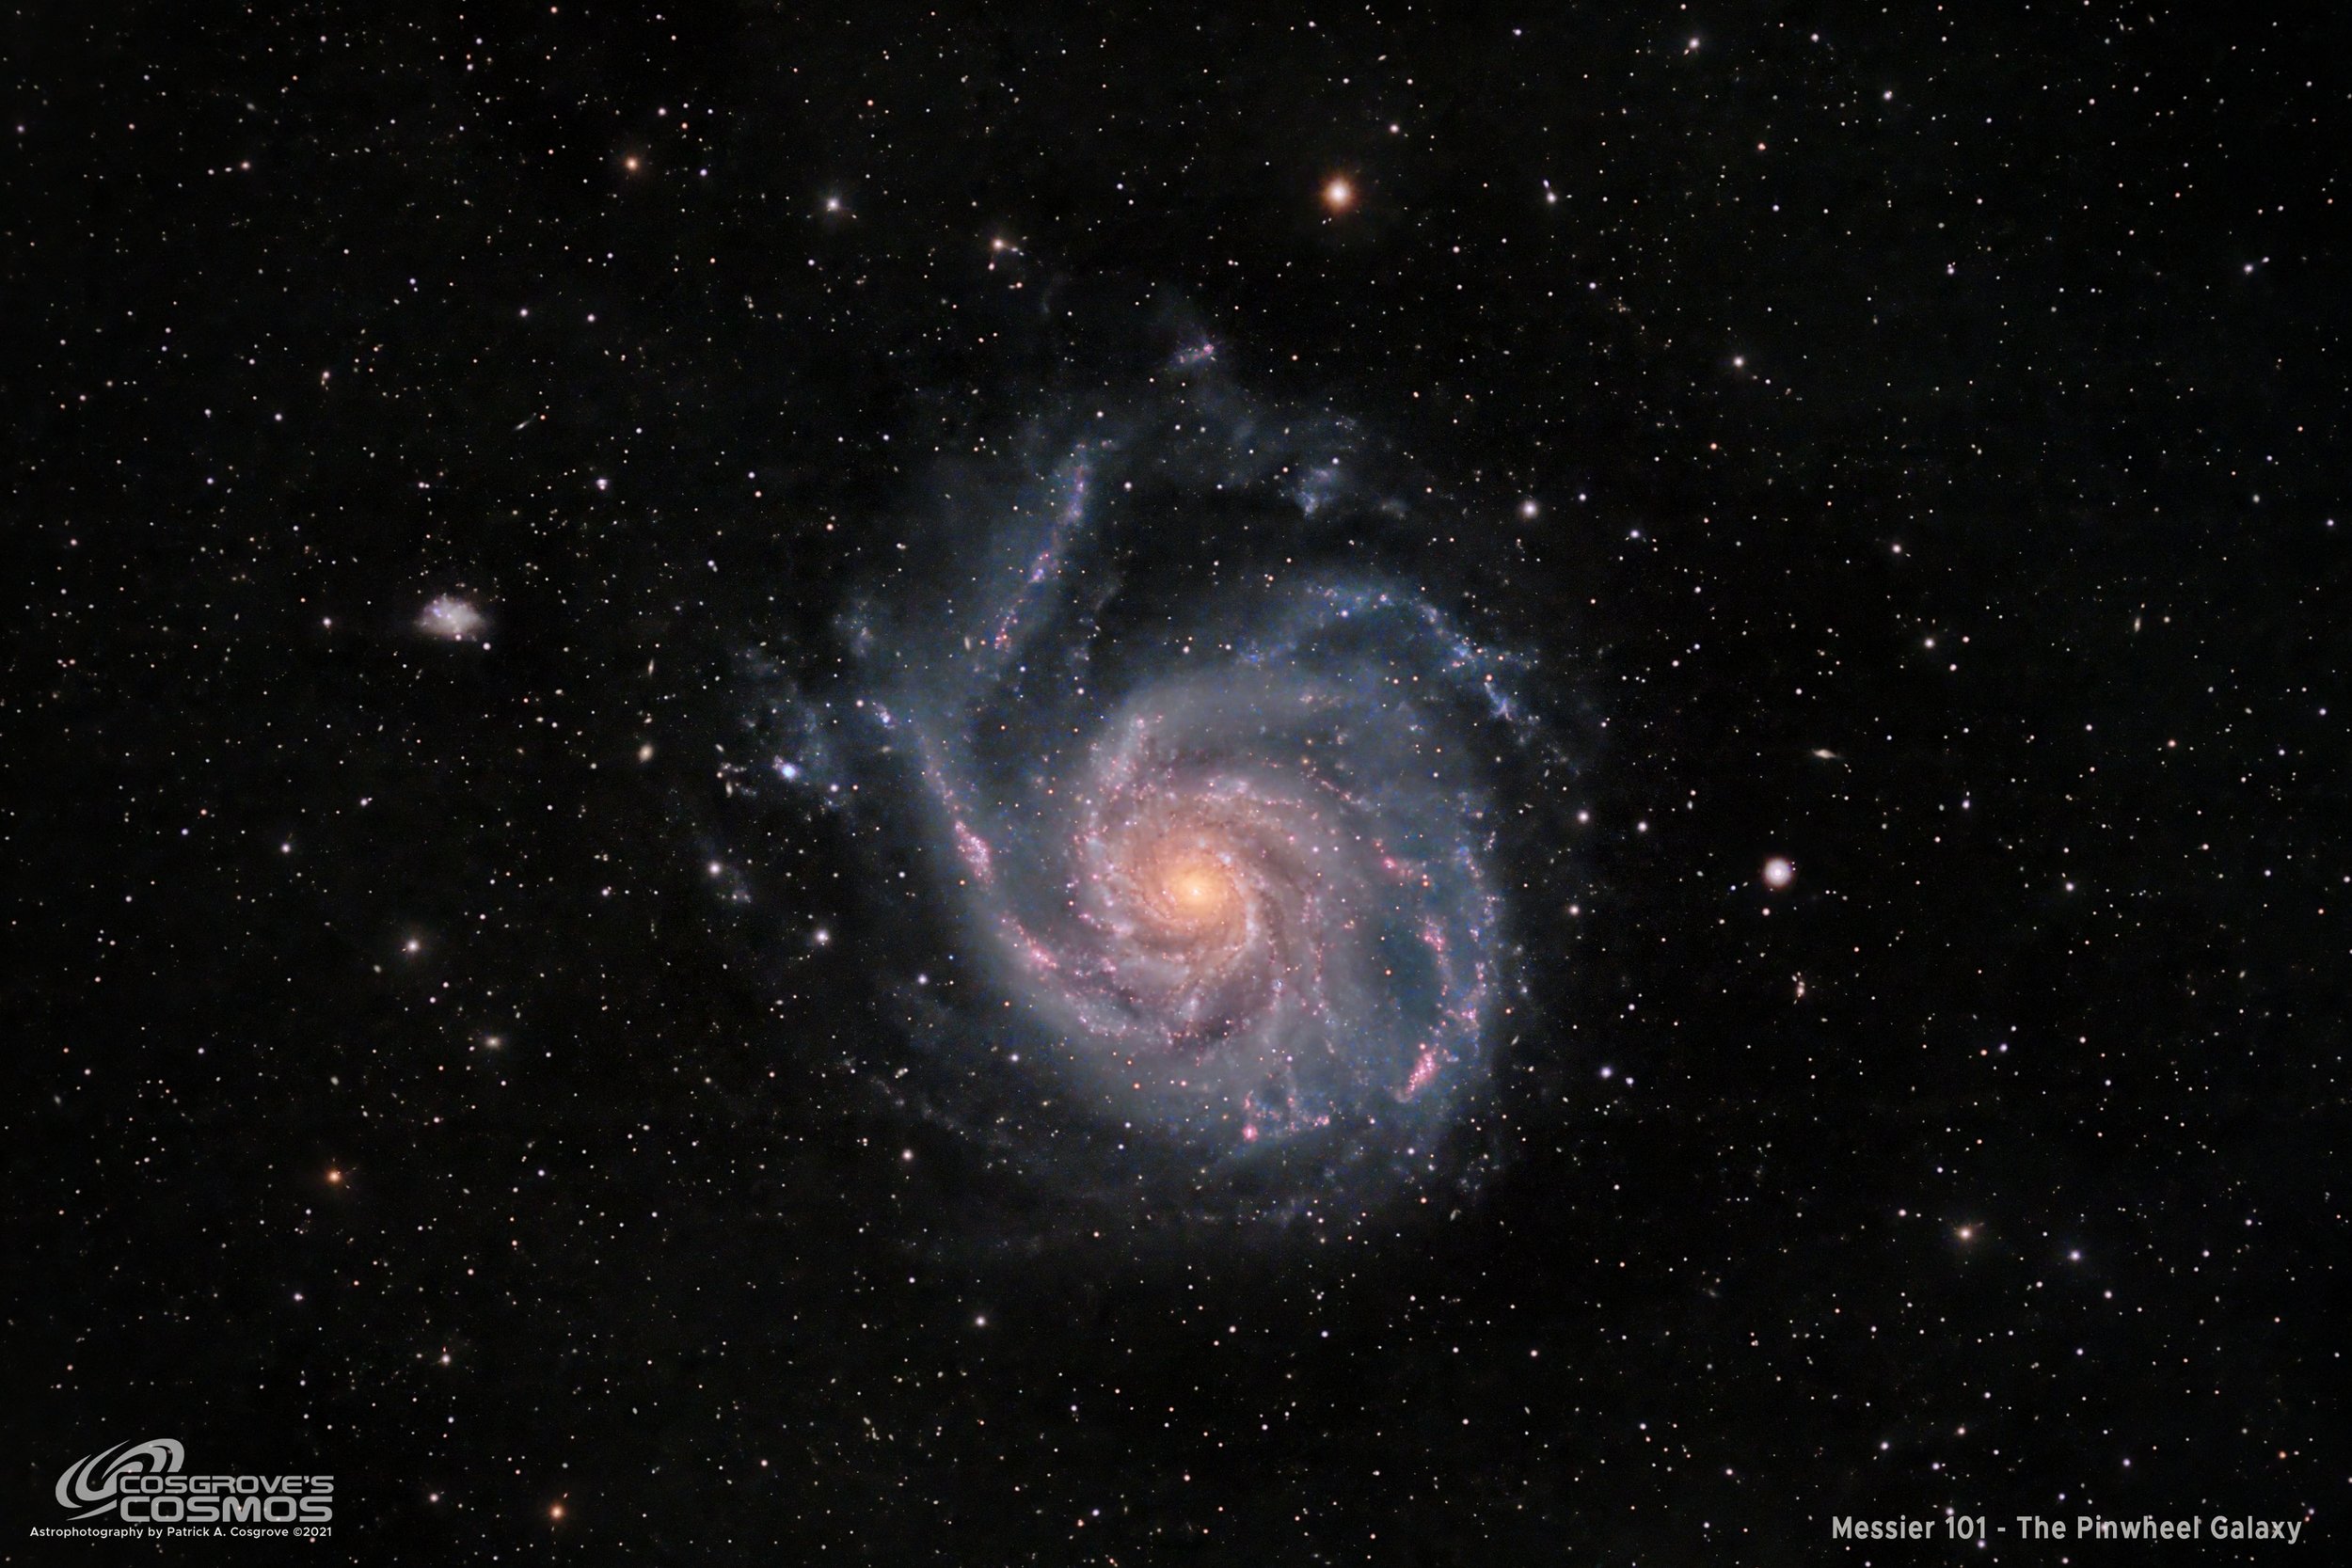
My third attempt, taken in May of 2022. 11 hours in LHaRGB. This This one was the first effort that I was really happy with!
For comparison, here is the current image. ~3 hours LRGB
Image Processing
My goal for this image was to have a good view of the galaxy and the supernova - and go relatively light on the processing so that I could show the supernova well.
To keep it simple, I decided that I would not use a starless processing workflow.
The other concern was regarding the image scale. I knew I would have to do a lot of cropping to make this useful. So I drizzle processed the image at 2X. I needed all of the detail I could get!
So I could only process this LRGB image as I usually do and hope for the best. I planned to avoid the starless approach and deal with bloated stars using Bill Blansans Star Reduction Script.
So - at a high level - my process went something like this:
I used WBPP to process the images and create the Master images.
I created the RGB linear image, and then BXT was applied to both the Lum and RGB color image.
After some NoiseXTermination, I went nonlinear.
The Lum image was processed to enhance detail.
The RGB image was processed for its color position.
Then all images were combined and adjusted with CT.
I created a galaxy mask and protected the galaxy while using the star reduction script to manage the size of the stars OUTSIDE of the galaxy - I did not want to change the size of the supernova or other stars within the galaxy itself.
Once I settled on this, I submitted the image to Photoshop for final tweaks.
I also wondered, given the challenges of this image, whether a simple Neutral image would be better. So to produce it, I did the following:
DBE on all master images
BluXTerminator on all images
NoiseXTerminator on all images
Write all images out to a File
Import into ImageSintegration, turn off rejection logic and create a synthetic luminance image.
Go nonlinear with MaskedStetch
Apply Ct to tweak
Reduce Stars with BillBlanshans Star Reduction Script
Export to Photoshop for final polish
This produced the following image:
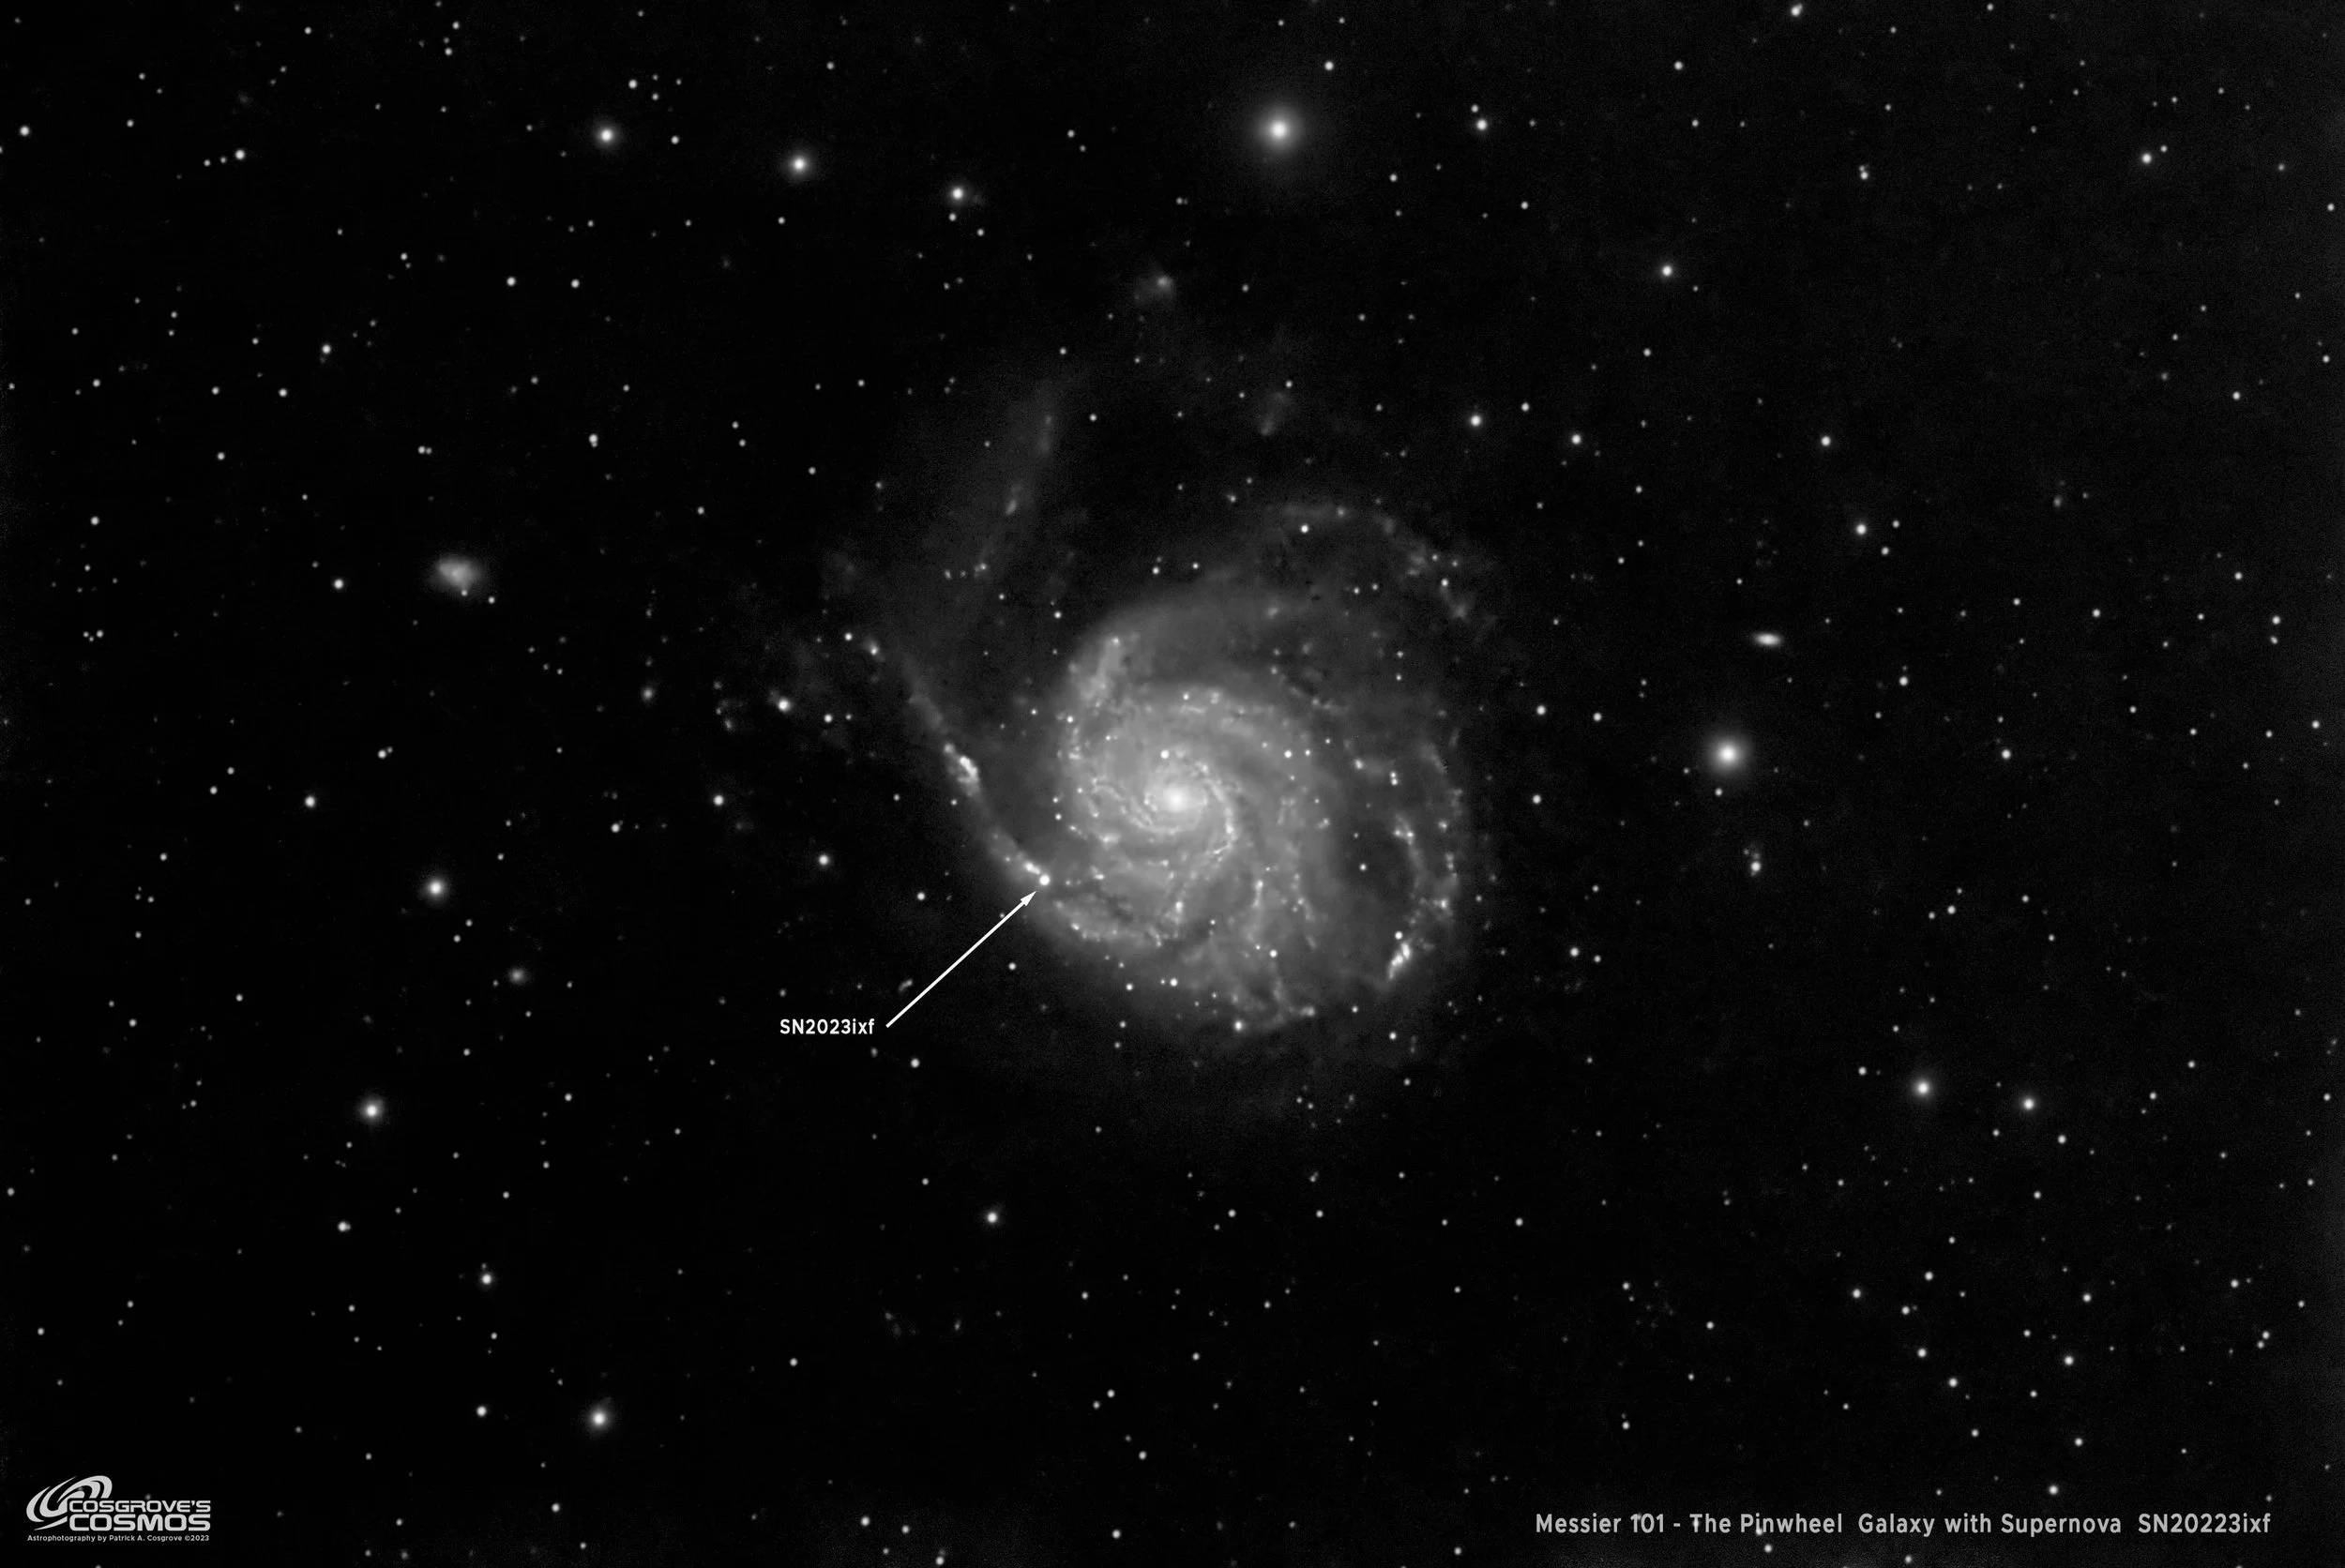
A Synthetic Luminance Image combining all of the master images with ImageIntegration.
I am not sure it is any better than the color - but what do you think?
Results
The Final image was not horrible. I did not hate it as I did with my first two efforts on M101!
Given the short integration time, the significantly smaller image scale, and the smoke issue, I thought it came out OK.
Just that - OK. It was nothing great, but it was an image I could share without embarrassment!
To my eye, the entire galaxy looks a little unsharp. This may be partially due to smoke effects or just the fact that this image is so heavily cropped.
I also think the color is less interesting than in my last version. That image had Ha data folded in, and I did not capture any Ha data at all for the current project.
So I have an image of M101 that shows the supernova. I am glad I did the project, and the image came out OK.
I just wish I had really clear skies and more time to collect subs so that I could produce a more impressive result!
A detailed Processing Walk-Through is provided for this image at the end of the posting…
More Information
Wikipedia: Messier 101
Wikipedia: Supernova (general)
Wikipedia: SN2023ixf
AAVSO.org: SN2023ixf Notice
TimesNowNews.com: Supernova Breaking News
David Bishop’s Supernova Website: Supernova info for all SN Reports
Capture Details
Lights Frames
Data were collected over two nights: May 24 & 25, 2023
All data after rejected frames were culled.
27 x 90 seconds, bin 1x1 @ -15C, Unity Gain, ZWO Lumnace filter 36mm unmounted
30 x 90 seconds, bin 1x1 @ -15C, Unity Gain, ZWO Red filter 36mm unmounted
30 x 90 seconds, bin 1x1 @ -15C, Unity Gain , ZWO Green filter 36mm unmounted
30 x 90 seconds, bin 1x1 @ -15C, Unity Gain , ZWO Blue filter 36mm unmounted
Total of 2 hours 55 minutes 30 seconds
Cal Frames
25 Darks at 90 seconds, bin 1x1, -15C, Unity gain
15 Flats at bin 1x1, -15C, Unity gain - for LRGB filters
25 Dark Flats at Flat exposure times, bin 1x1, -15C, Unity gain
Software
Capture Software: PHD2 Guider, Sequence Generator Pro controller
Image Processing: Pixinsight, Photoshop - assisted by Coffee, extensive processing indecision and second-guessing, editor regret, and much swearing…..
Capture Hardware:
Scope: Askar FRA400 72mm f/5. 6 Quintuplet Air-Spaced
Astrograph
Focus Motor: ZWO EAF 5V
Guide Scope: William Optics 50mm guide scope
Guide Scope Rings: William Optics 50mm slide-base Clamping Ring Set
Mount: ZWO AM5
Tripod: ZWO TC40 Carbon Fiber tripod w/160mm Ext.
Camera: ZWO ASI1600MM-Pro
Camera Rotator: Pegasus Astro Falcon Camera Rotator
Filter Wheel: ZWO EFW 1.2 5x8
Filters: ZWO 1.25” LRGB Gen II, Astronomiks 6nm Ha, OIII,SII
Guide Camera: ZWO ASI290MM-Mini
Dew Strips: Dew-Not Heater strips for Main and Guide Scopes
Power Dist: Pegasus Astro Powerbox Advanced
USB Dist: Pegasus Astro Powerbox Advanced
Polar Alignment
Cam: PoleMaster
Software:
Capture Software: PHD2 Guider, Sequence Generator Pro controller
Image Processing: Pixinsight, Photoshop - assisted by Coffee, extensive processing indecision and second-guessing, editor regret, and much swearing…..
Click below to see the Telescope Platform version used for this image:
Image Processing Walk-Through
(All Processing is done in Pixinsight - with some final touches done in Photoshop)
1. Blink Screening Process
Lum FIlter
Started with 52 frames
Lots of tree branch overlap - rejected 25 subs for that
Some trails seen
Several frames kept have tree intrusion that does not impact the galaxy.
27 frames kept.
Red
Started with 30 frames total
Some trails were seen, and some minor tree shadows
No frames rejected
Green
Started with 30 frames
Some trails
No frames rejected
Blue
Started with 30
Some trails
Everything kept
Flats
Flats were collected for the first night. The flats looked good.
Dark flats
Looks good
Darks
90-sec darks were collected fresh after the first night and used. All looked good.
2. Subframe Selector Analysis
Given the relatively low integration, I did not bother doing a Subframe Analysis and knew I could not remove any more frames.
3.0 WBPP 2.5.3
Load lights
Load flats
Load darks flats
Load 90-sec darks
Select Maximum Quality
Output directory: wbpp
Set Dark Exposure tolerance: 0.0
Lights Exposure tolerance: 0.0
Integration - auto crop, large pixel rejection: high and low set to 2x2
Lights - Enable everything but linear correction
CC set for all filters
Drizzle 2X ser
Enable Autocrop
Executed in 48:31minutes - no errors

WBPP Calibration view.

WBPP Post-Calibration View
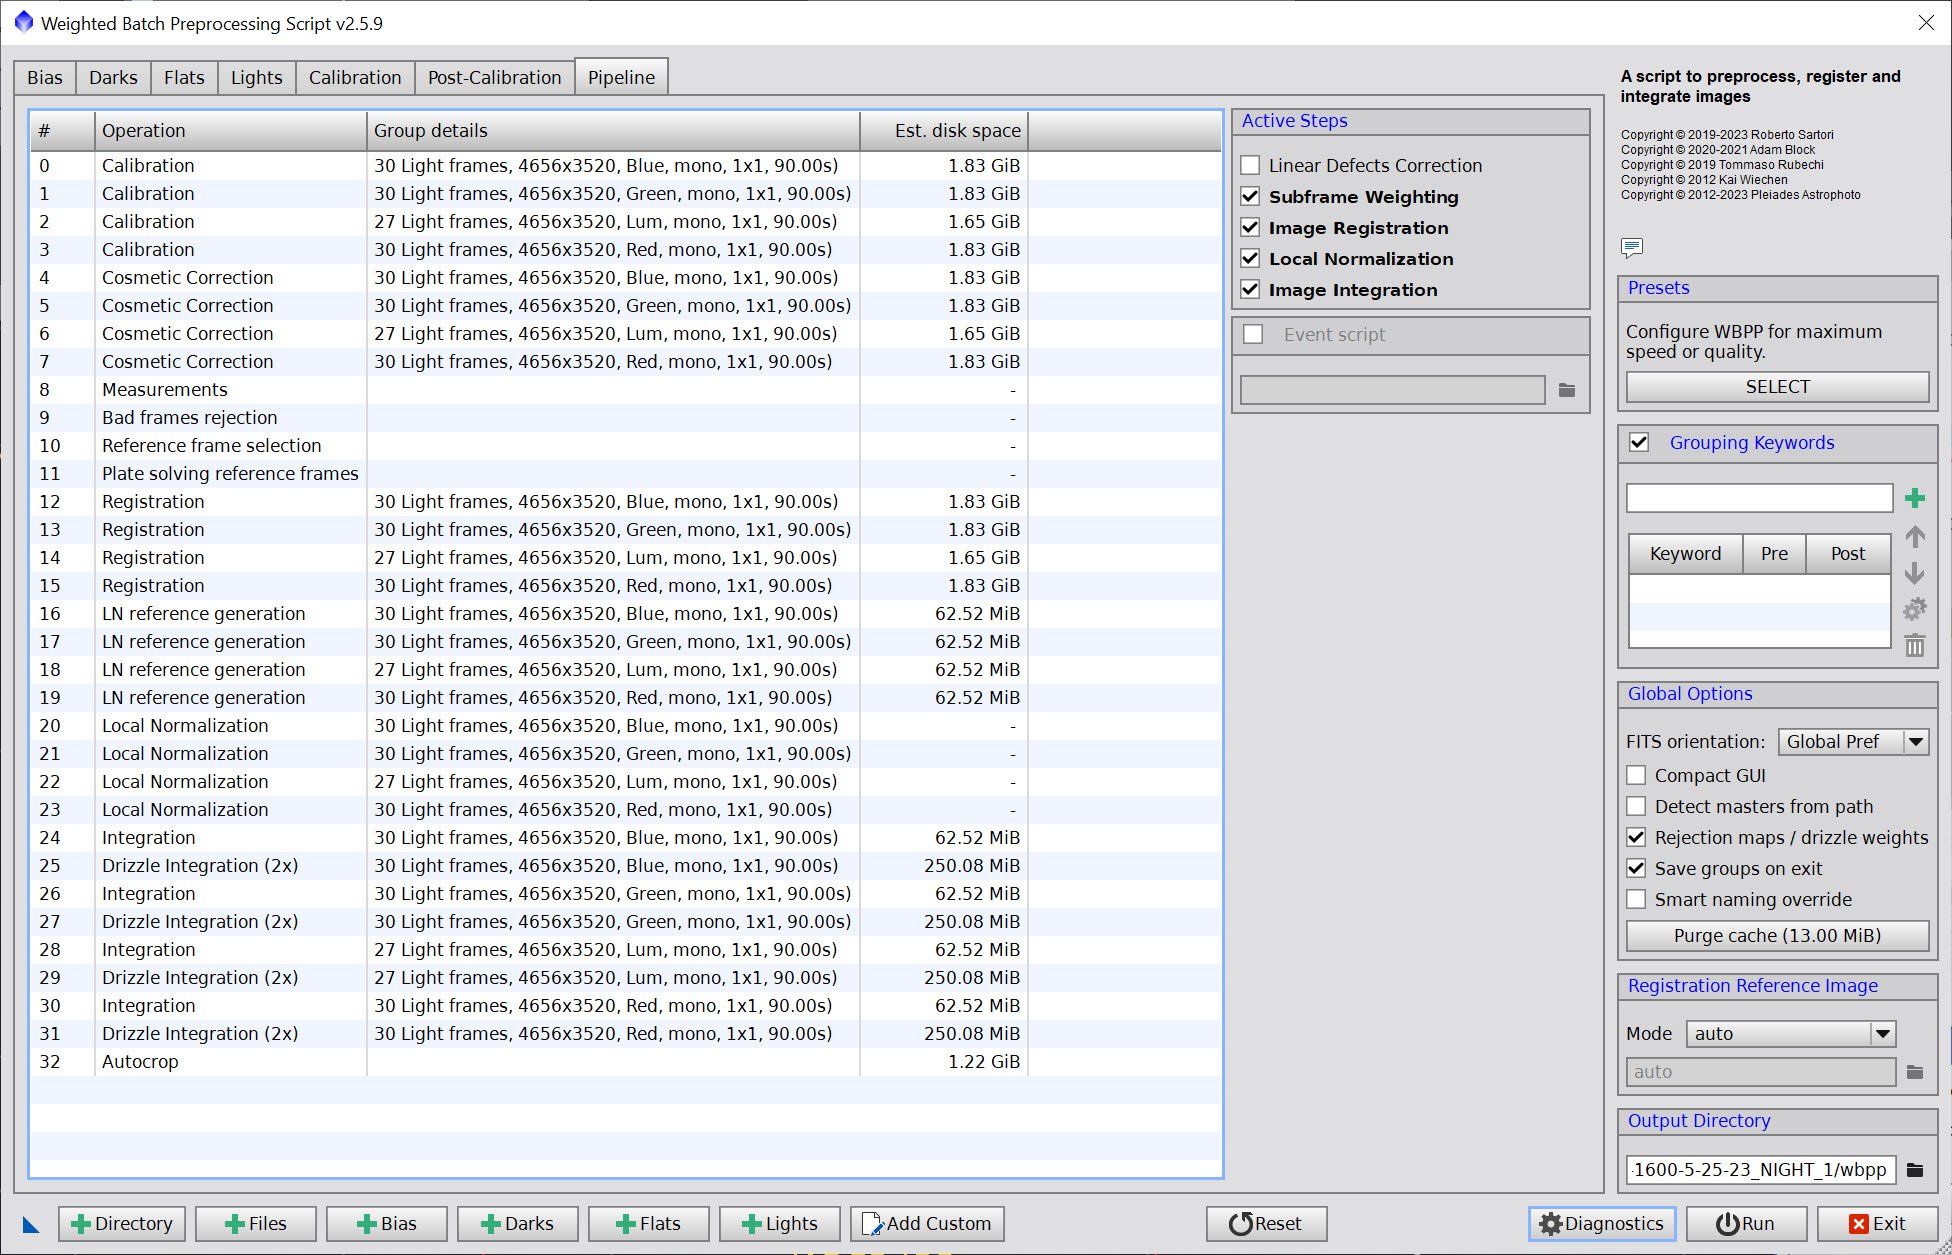
WBPP - Pipeline view
4.0 Load Master Linear Images
Load the resulting Master Linear images and rename them.
Determine the crop desired
Crop all images to the new crop with DynamicCrop

Crop Plan - note the residual tree shadows in the upper corner are mostly eliminated with this crop.

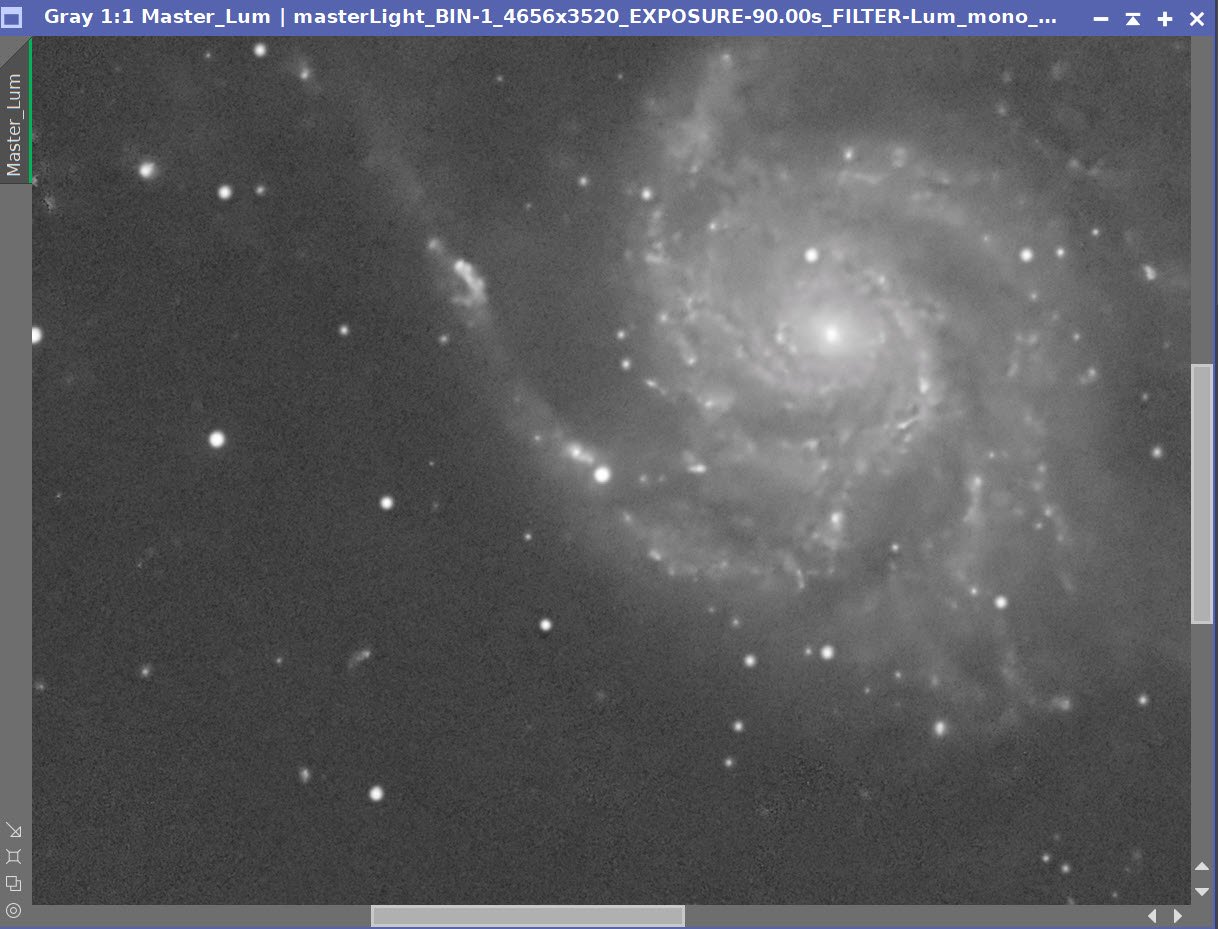
Master Images after the Crop: Lum, Red, Green, Blue.
5. Dynamic Background Extraction
DBE was run on each filter master, as seen below.
Note that the Lum background pattern shows signs of the tree line image - so rejection was not completely successful in removing these pixels, so DBE will fix this.
L Sampling Plan (click to enlarge)
RGB Sampling Plan (click to enlarge)
L Before Image (click to enlarge)
RGB Before Image (click to enlarge)
L After Image (click to enlarge)
RGB After Image (click to enlarge)
L Background (click to enlarge)
RGB Background (click to enlarge)
Master L Image After DBE (click to enlarge)
Master RGB Image After DBE. (click to enlarge)
6.0 Process the RGB Linear Image
Run ImageSolver to create an astrographic solution for the RGB image (the crop operation destroyed this data).
Do Color Calibration:
Create a preview for a background sky reference region
Run SPCC on the image using this region as a reference.
Run BlurXTerminator
Run a test series to experiment with DXT parameters
Run BXT
Correct First
Sharpen stars 0.30, Halos: 0.0
Auto Nonstellar sharpen
Run NoiseXTermintor: 0.7
Master_RGB after Channel Combination and DEB(click to enlarge)

Here is the the set up of the ImageSolver Script.

SPCC Panel config used.

Resulting SPCC Regression lines

Master_RGB after SPCC.
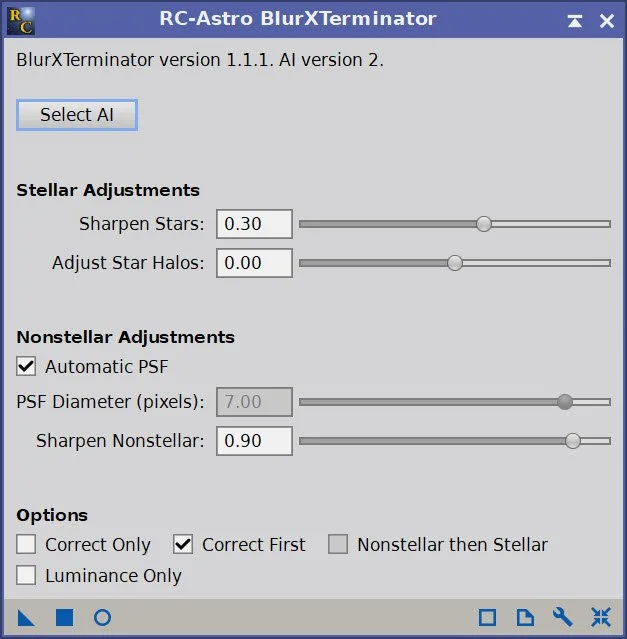
BXT Panel Config Used.
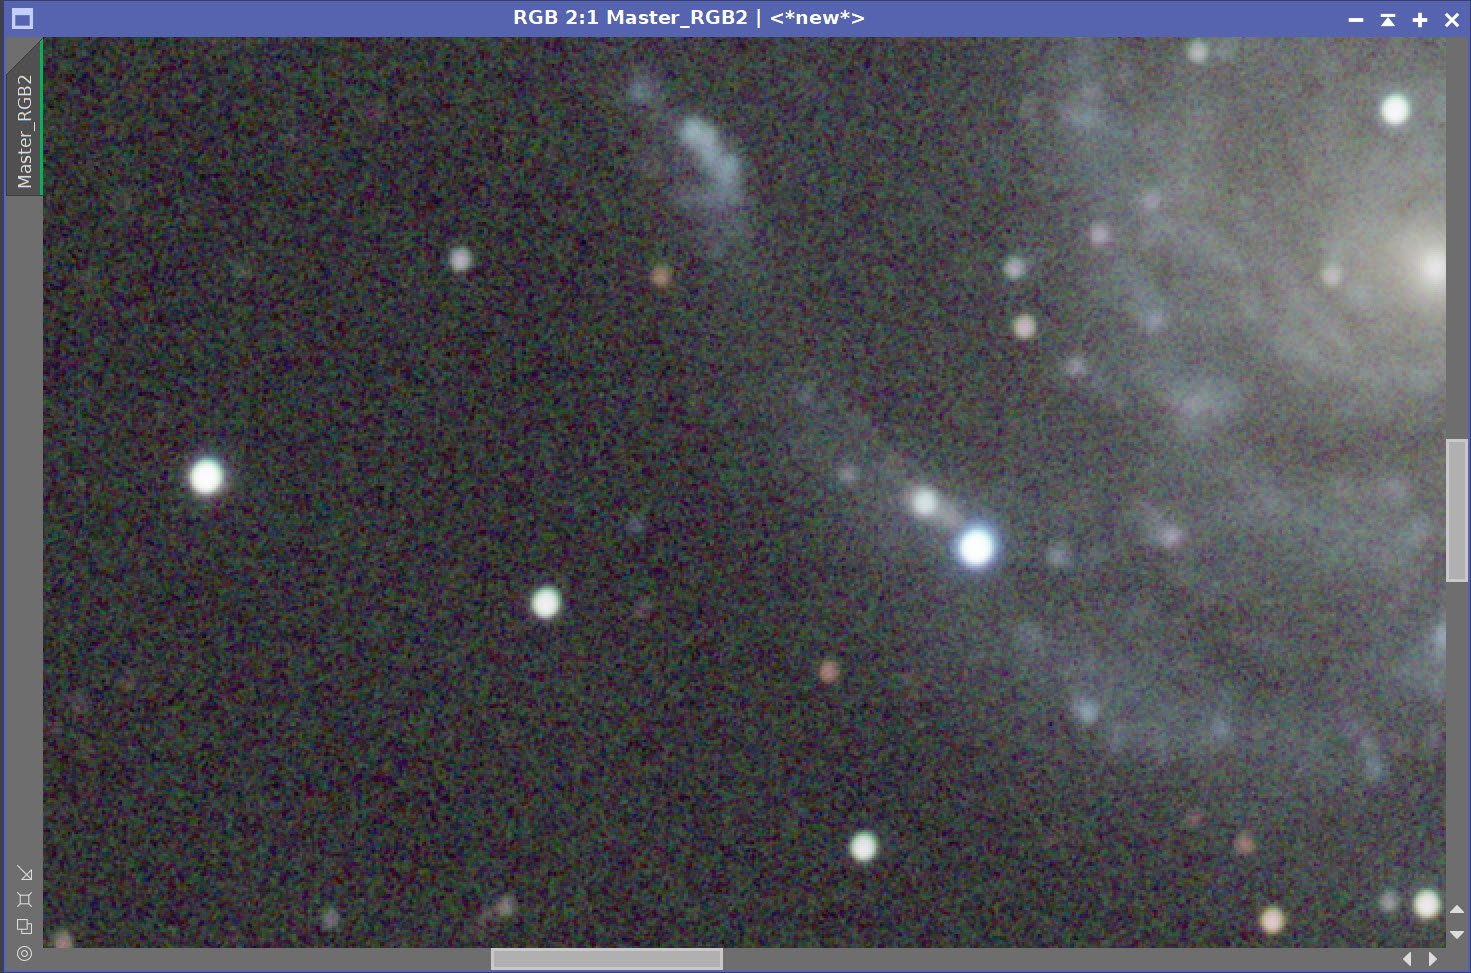
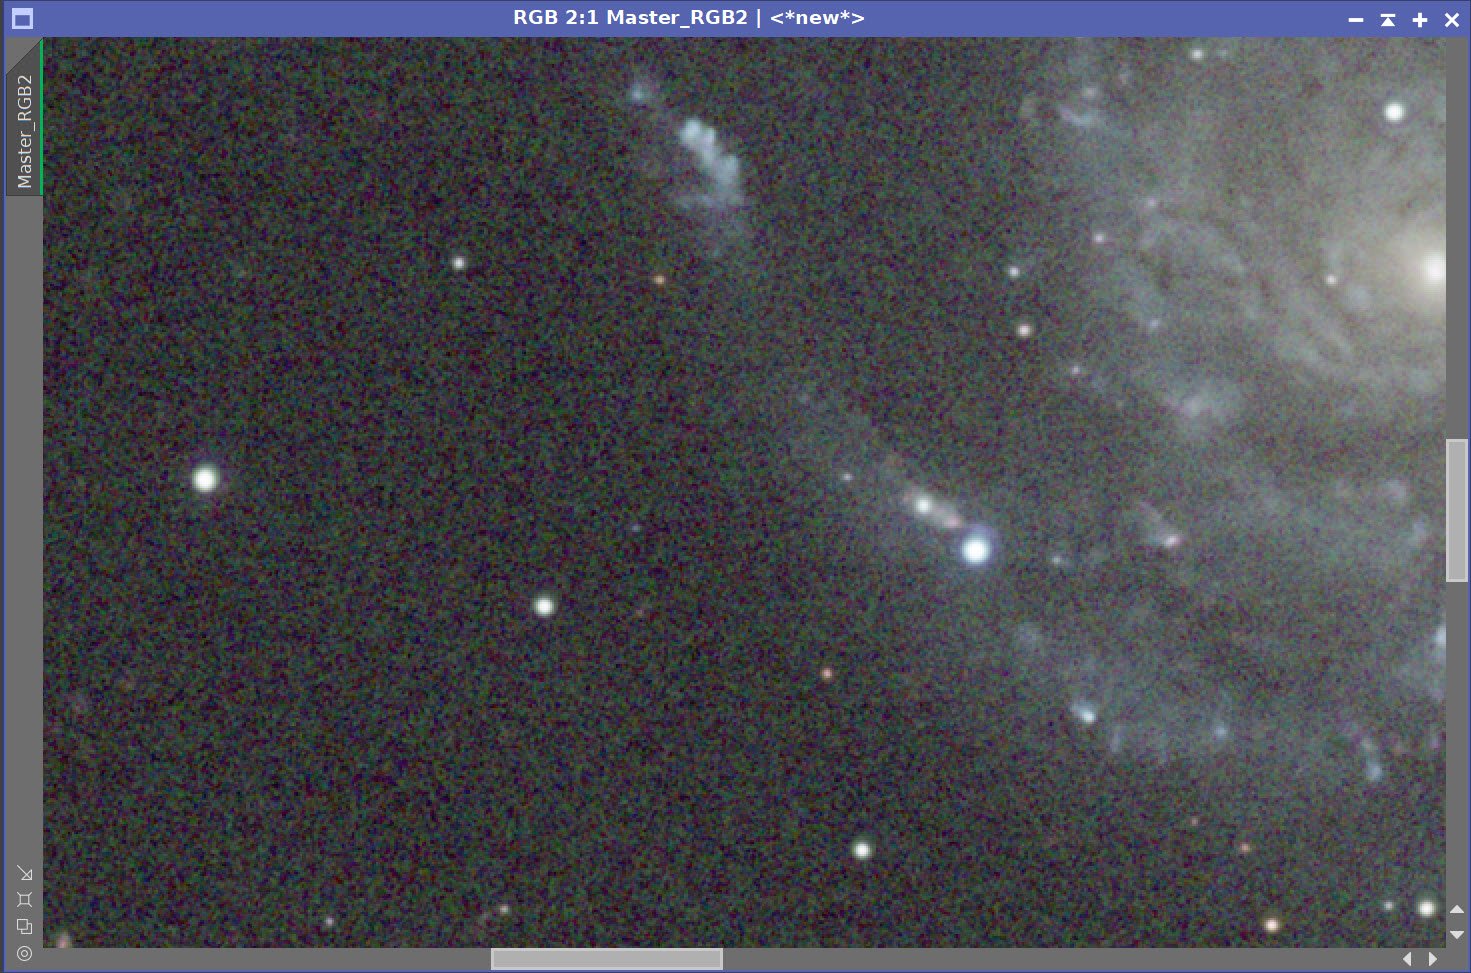
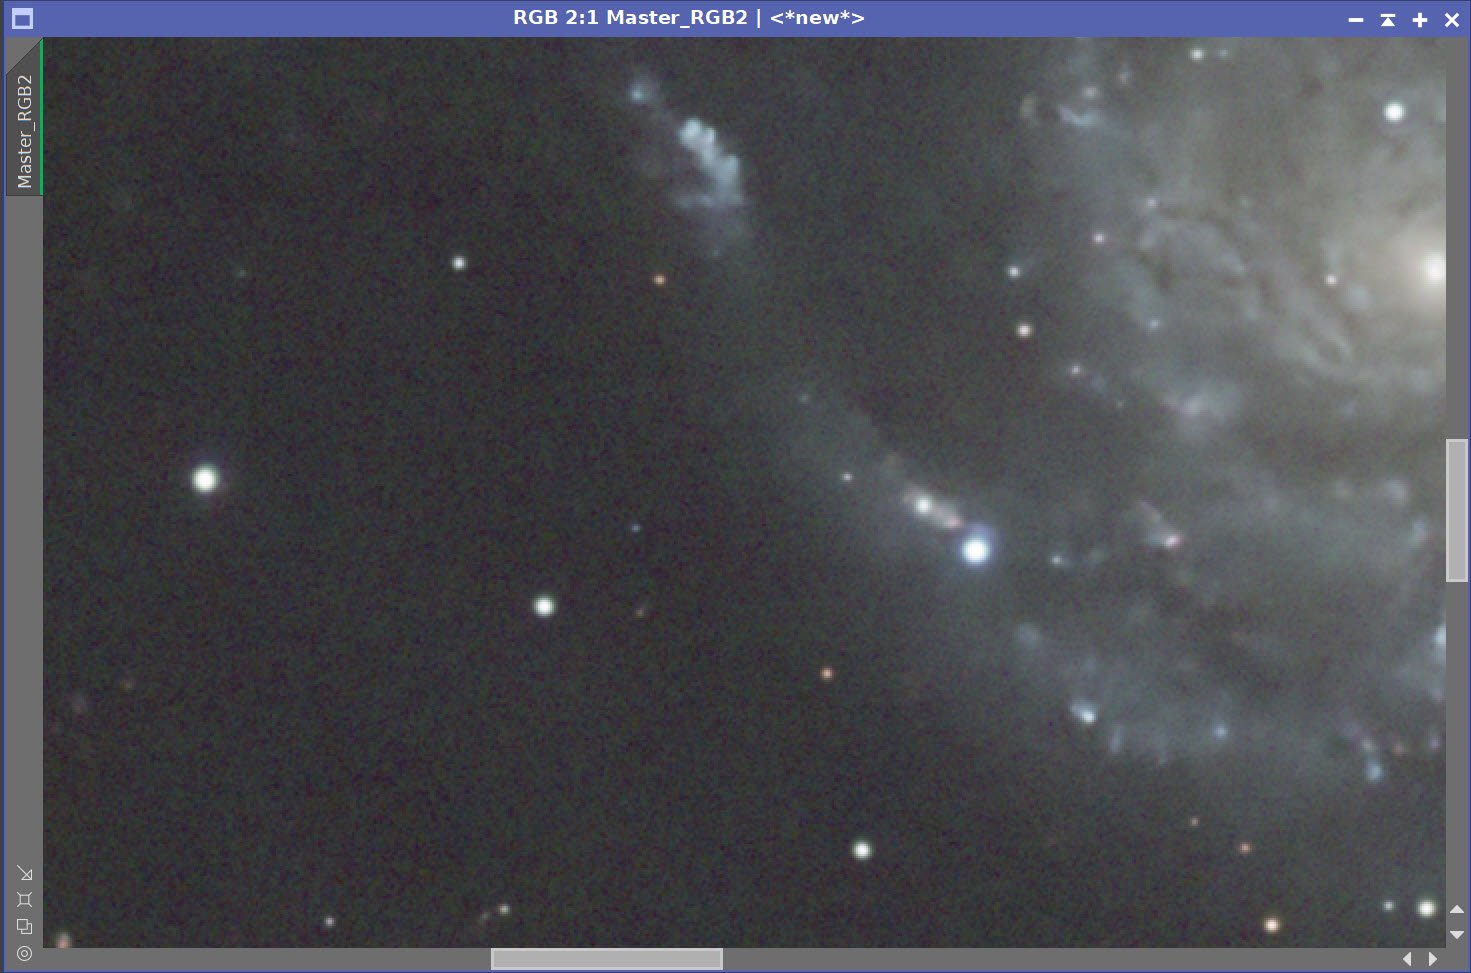
Master RGB Before and After BXT and then After NXT
7.0 Process the Linear Lum Image
Experiment with BXT to get the best Values.
Run BXT
Correct first
Stellar Correction: 0.32, Halo: 0.0
Non Stellar: Auto
Run NXT at 0.7
Lum: Before BXT, After BXT, After NXT=0.7
8.0 Take Images Nonlinear
For both RGB and Lum:
Since we are not using a starless workflow, we will use MaskedStretch to go nonlinear
Select a background preview area
Run MaskedStretch for both L and RGB
Follow up with a CT adjust
Nonlinear Lum image after MaskedStretch(click to enlarge)
Nonlinear Lum image -After CT Tweak(click to enlarge)
Nonlinear RGB image - Initial (click to enlarge)
Nonlinear RGB image -After CT Tweak(click to enlarge)
10. Process The Nonlin Lum Image
My goal here is not to over-process the galaxy. Since the Lum image carried most of the detail operation, I am going just to make sure we have the noise and contrast controlled and do no more. I don’t want any distortions.
Run NoiseXTerminator with a value of 0.7
Nonlin Lum Processing Steps

Before NXT and After NXT = 0.7

Final nonlin Lum image
11.0 Process the RGB Nonlin Image
Create Galaxy Mask
Use RangeSlection to create theimitial Mask
Edit with DynamicPaintbriuhs to remove the stars
Adjust with CT
Apply the Galaxy Mask,
Run ColorSaturation to adjust core and outer colors
Run NXT with 0.7
Run CT to darken RGB image in preparation for inserting the Lum image
Combine L starless image with LRGBCombination Tool
ApllyAdjust with CT
Apply the Galaxy Mask
Run Bill Blanshans SR Tool
Galaxy Mask After running RangeSelection (click to enlarge)
Galaxy Mask after DynamicPaintBrush Edit (click to enlarge)
Galaxy Mask after CT Adjust (click to enlarge)
Galaxy Mask after all final tweaks (click to enlarge)

Color_Sat Panel Settings used.
Nonlin RGB Image Before ColorSat Applied (click to enlarge)
Nonlin RGB image after ColorSat Applied with Galaxy Mask in place (click to enlarge)

Before and After NXT = 0.7

After applying CT to darken the RGB image in preparation for L image insertion

The Nonlin RGB image after Lum image insertion

Bill Blanshan’s Star Reduction Script with value used.

Final LRGB Image after Bill Blanshan’s Star Reduction Script applied
12.0 Export to Photoshop
Save images as Tiff 16-bit unsigned and move to Photoshop
I tweaked things with the camera filter clarity, curves, and color mix - in a global adjustment
I added watermarks and title sections.
Add a pointer and text to mark the supernova
Export Clear, Watermarked, and Web-sized jpegs.
The final Image.
Version 2.0 of my Askar FRA400 Platform consists of a switch in mounts! I have gone from an IOptron CEM26 mount to a new ZWO AM5 Harmonic Drive! This post documents and discusses this change in the platform.