
Messier 102 - The Spindle Galaxy - 2.0 Hrs in LRGB - Still Shooting Through the Smoke…
Date: June 10, 2023
Cosgrove’s Cosmos Catalog ➤#0122
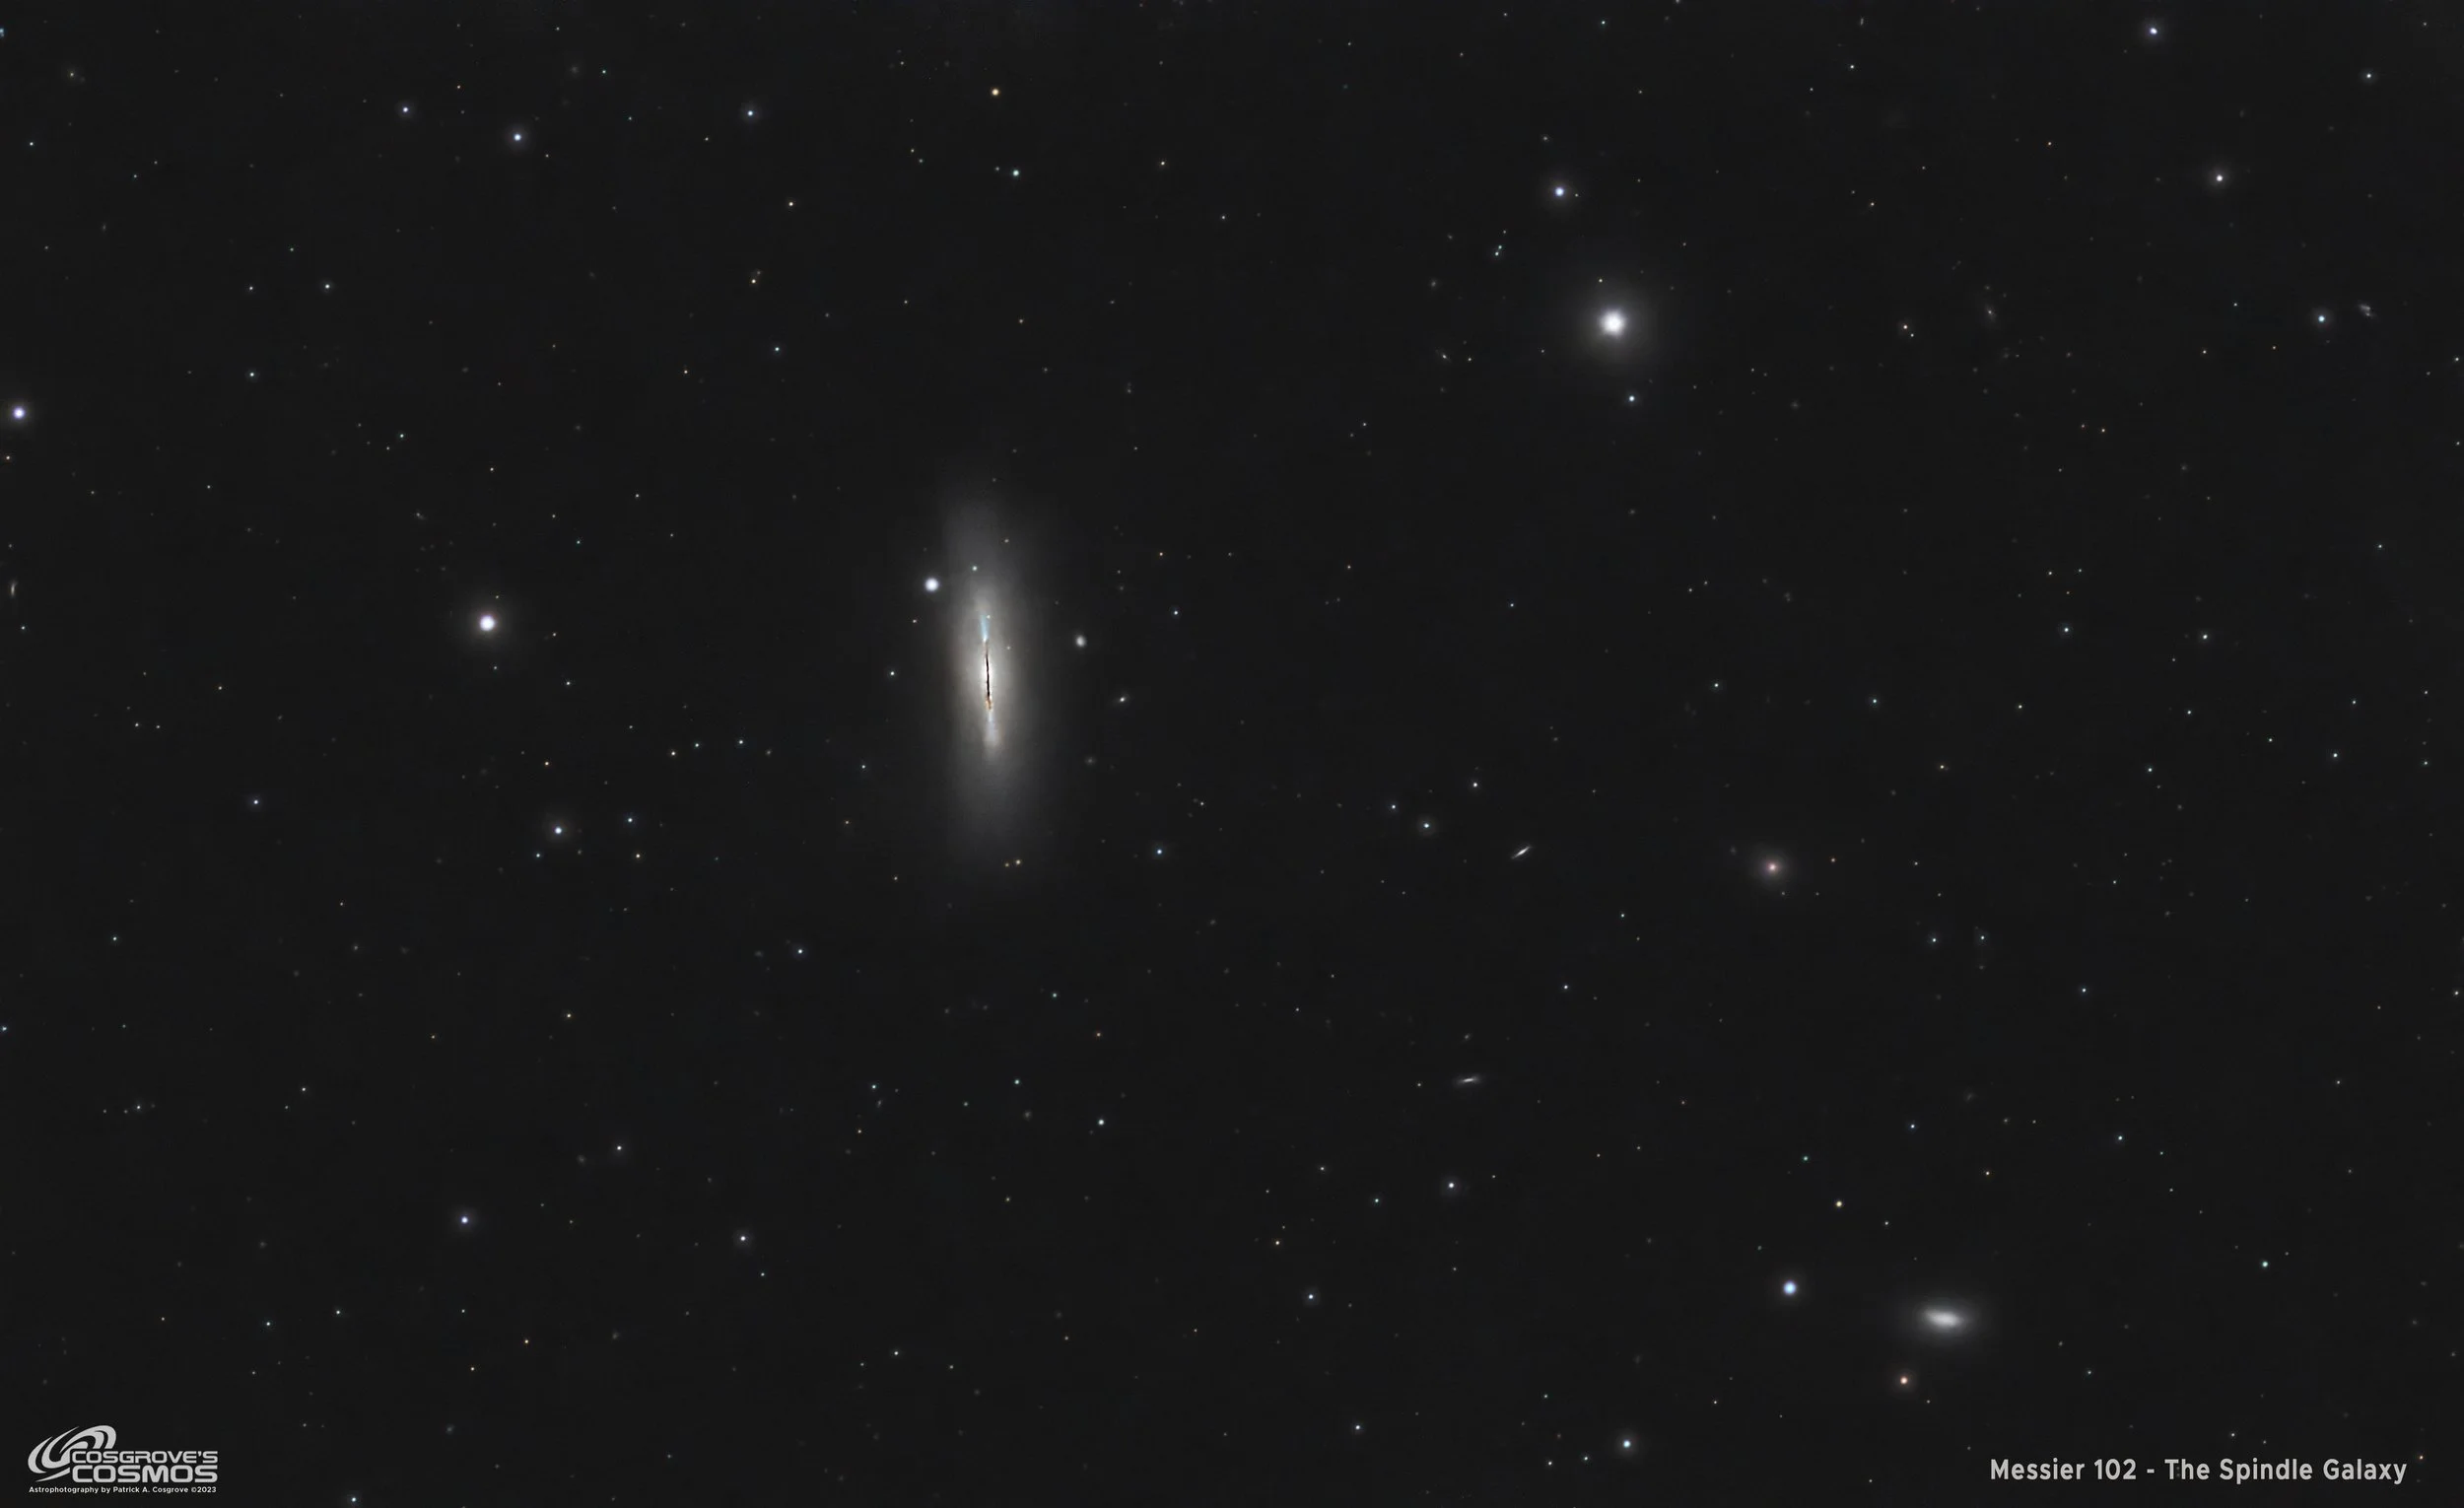
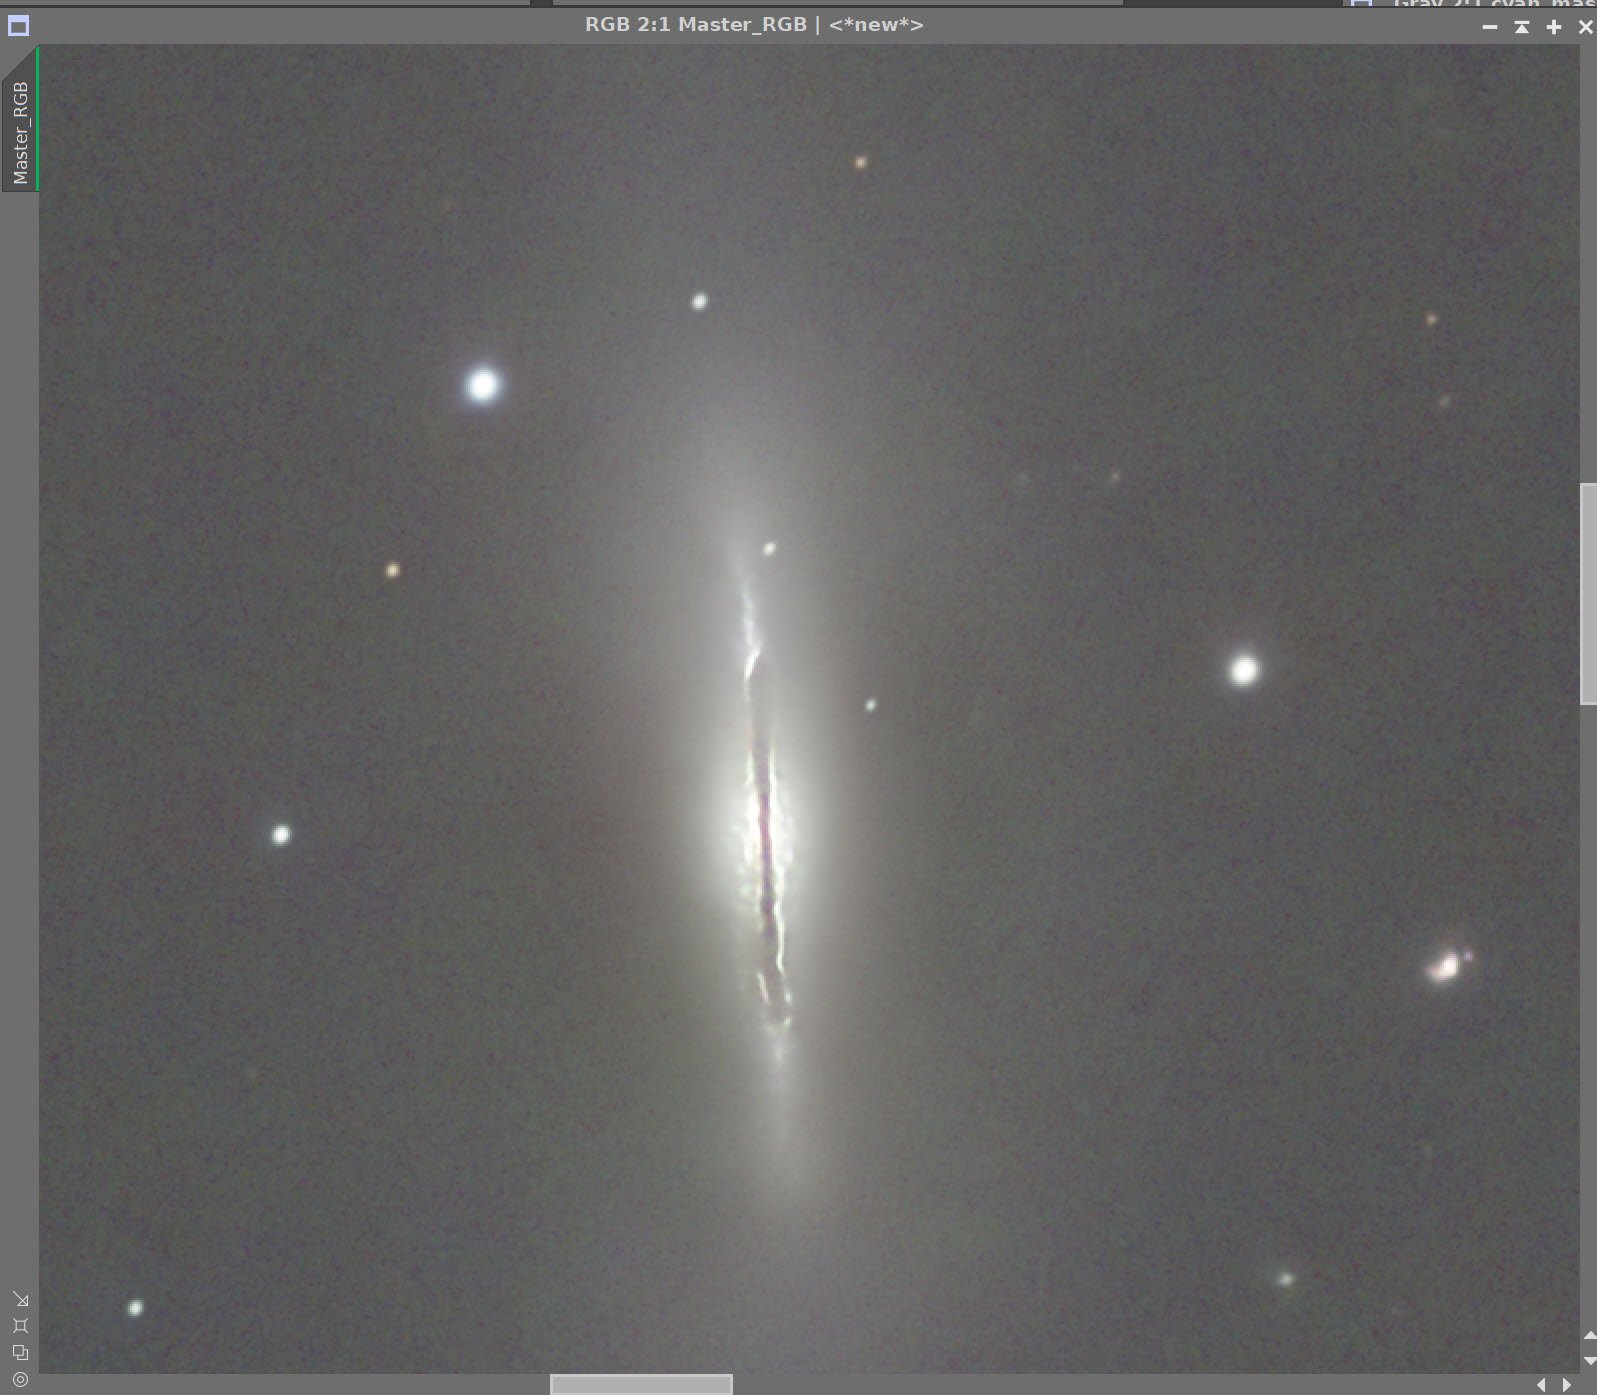
Another project shooting through the smoke! Messier 102 - Only 2 hours of LRGB integration. (click for high res version via Astrobin.com)
Table of Contents Show (Click on lines to navigate)
About the Target
Messier 102, also known as NGC 5866 and the Spindle Galaxy, is located 50 Million light-years away in the constellation of Draco.
M102 is a relatively bright lenticular galaxy seen almost edge-on and is known for having an extended dust lane that runs through the centerline of the galaxy. Lenticular galaxies don’t usually have dust lanes, making M102 a bit unusual. There is some thought that this may be a spiral galaxy seen edge-on and so misclassified.
Its diameter is 60,000 light-years, making it 2/3rds the size of our Milkyway even though it has about the same mass.
NGC 5866 is one of the two galaxies known as the “Spindle” Galaxy. The other, NGC 3115, is an edge-on lenticular galaxy located in the constellation Serpens.
M102, or NGC 5866, is the brightest member of a small group of galaxies known as the NGC 5866 Group. Other galaxies in this group include NGC 4879 and NGC 5907. There are a lot of smaller and fainter background galaxies in this general field, which include NGC 5905/NGC 5908, NGC 5862, NGC 5867, NGC 5874, NGC 5876, and IC 1099.
There is some confusion about the discovery of M102.
It was first reported by Pierre Méchain in early 1781 and was included in the final version of Charles Messier’s list published later that same year. However, Méchain retracted his discovery two years after the list was published, indicating that he believed it was a duplicate reporting of M101. Evidence suggests that M102 was actually NGC 5866. While alternative galaxies have been proposed, NASA considers M102 and NGC 5866 to be the same object.
The Annotated Image

This annotated image was created in Pixinsight, using the ImageSolver and AnnotateImage Scripts.
The Location in the Sky

This annotated image was created in Pixinsight, using the ImageSolver and FindingChart Scripts.
About the Project
Choosing The Target
So far this year (2023), I have only had two nights out collecting subs.
There are several reasons for this, but one of the most recent challenges has been due to smoke plumes from the Alberta wildfires. The smoke has been in our skies for a while now, and then finally, on the nights of May 24th and 25th, the Jet Stream pushed the bulk of the smoke further south, allowing our area to have somewhat better skies.

The smoke band moved to the south of us and we had a window for some imaging!
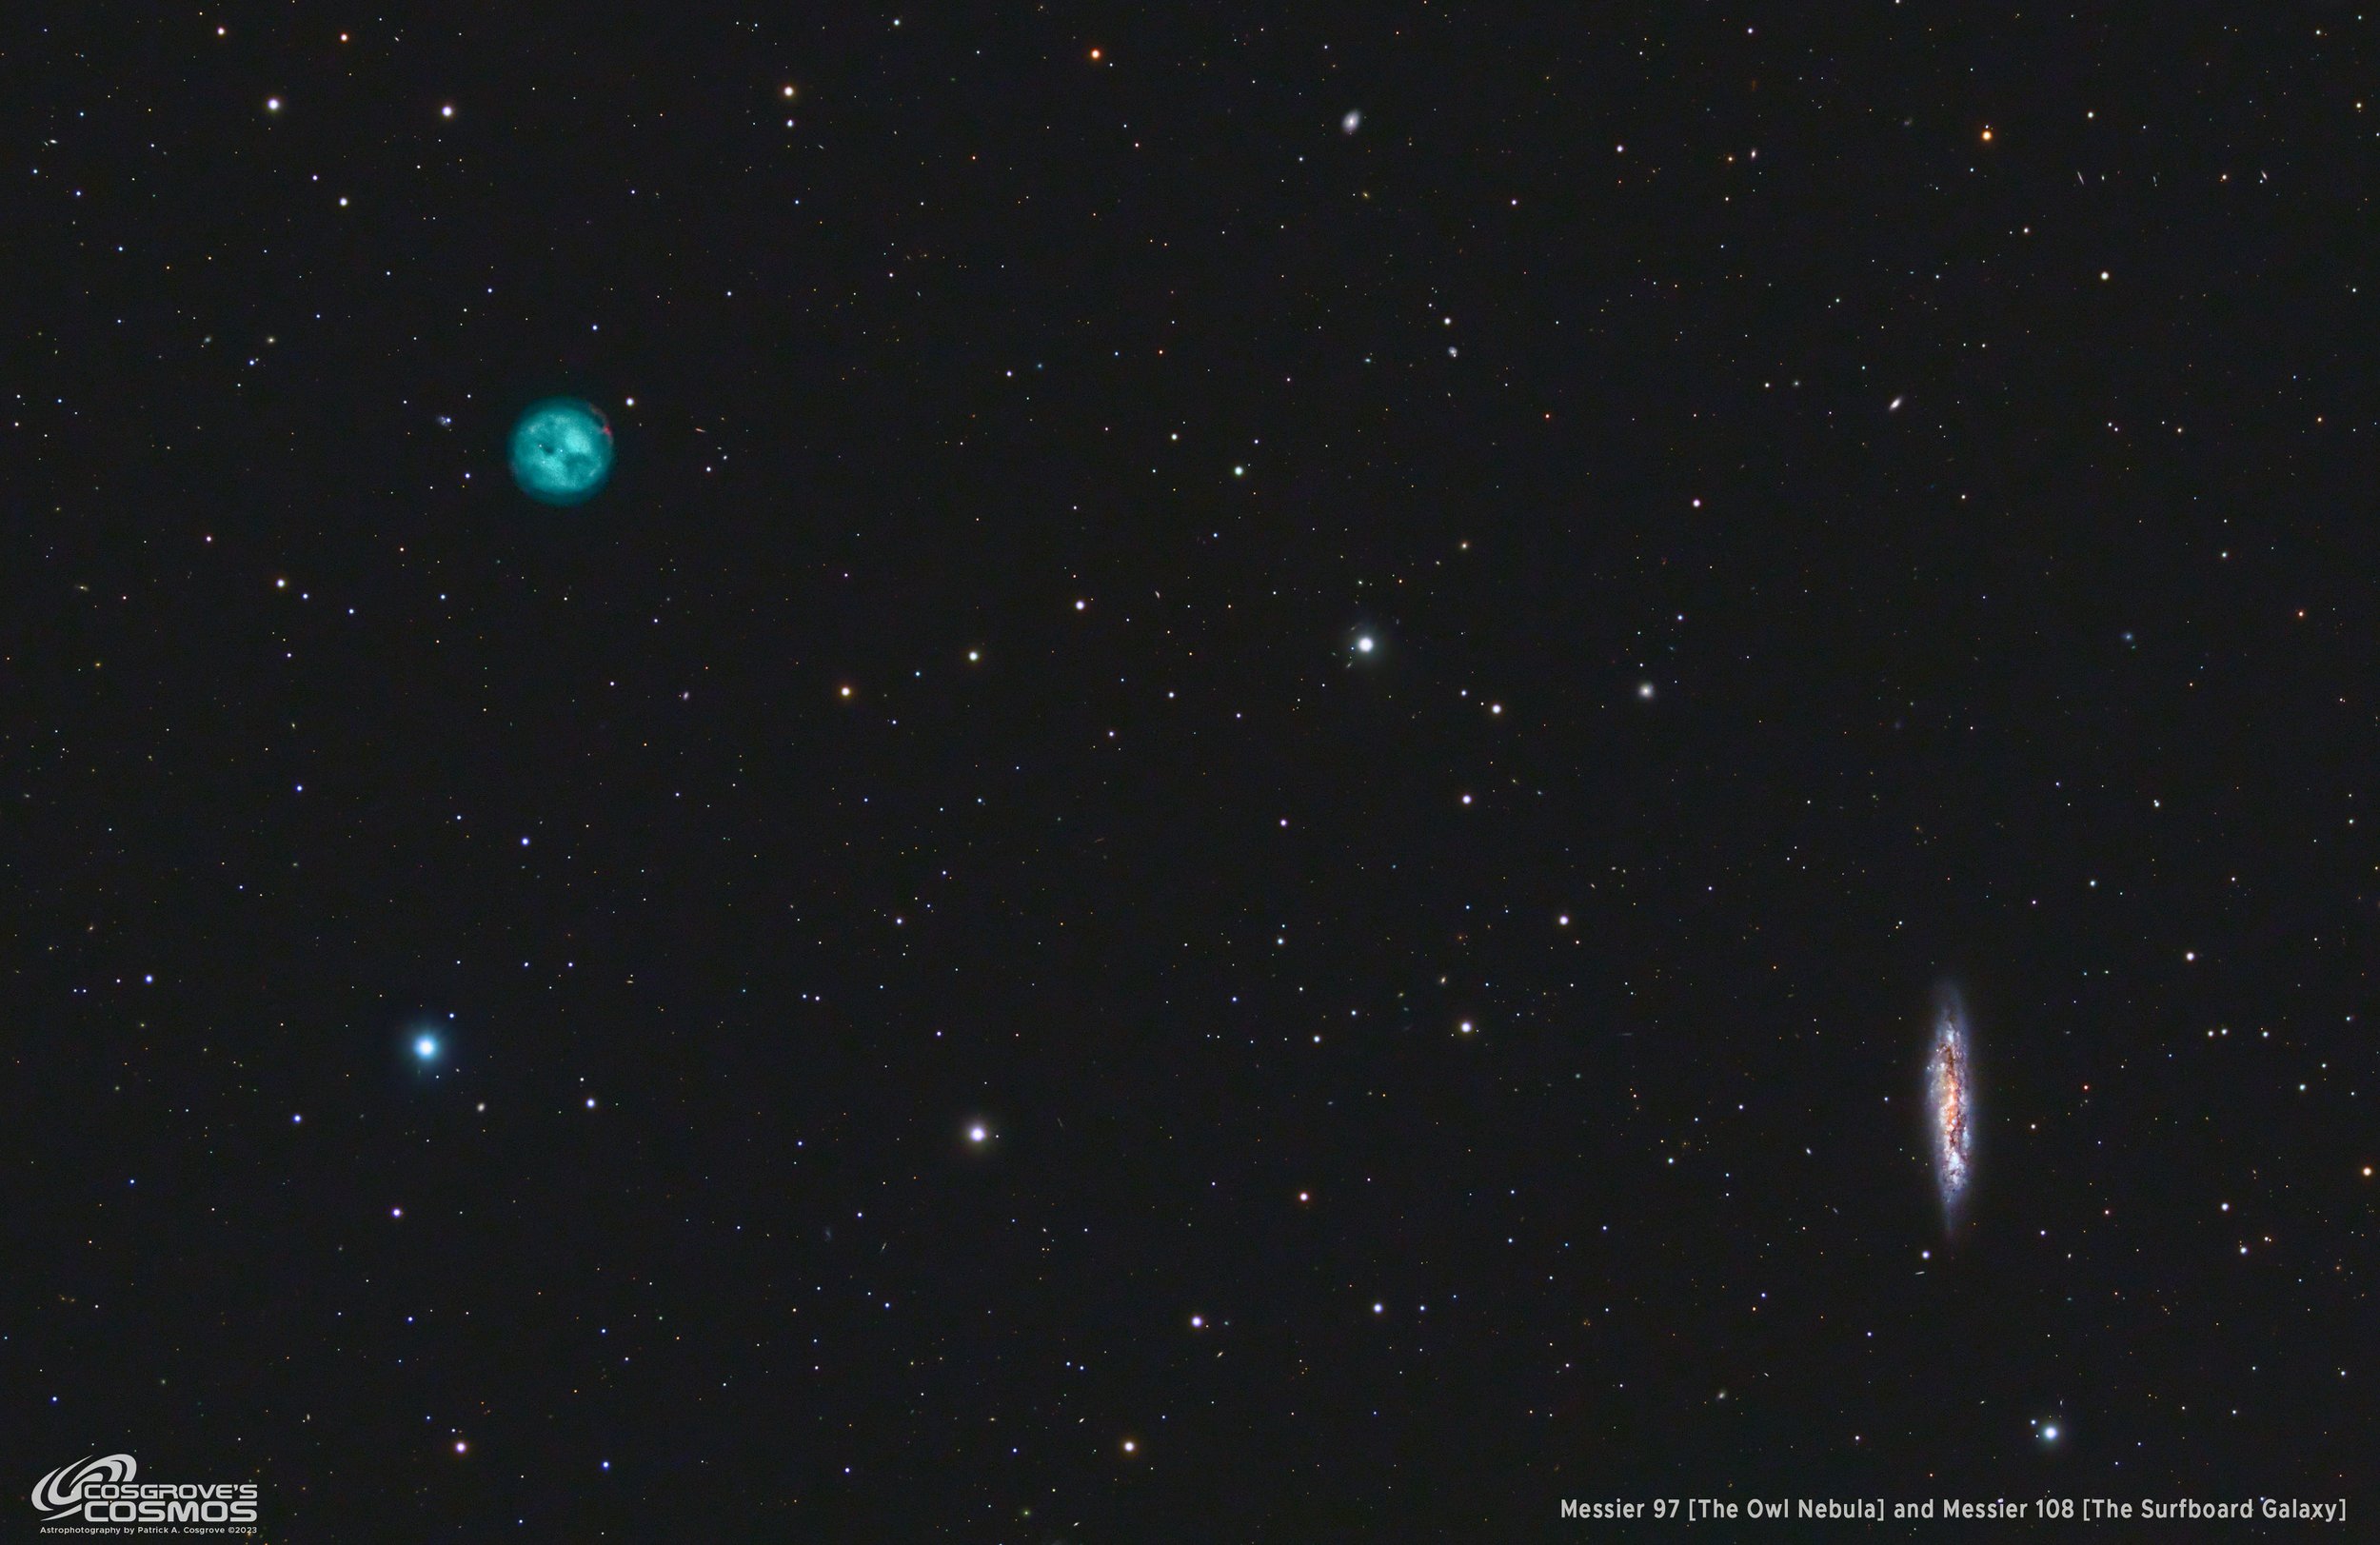
My Image of M97 & M108
I took advantage of this and shot several targets.

A crop of my image of M104 - 1.7 hours in LRGB
One was M97 and M108, which my William Optics 132 FLT platform captured. This was the first light after upgrading the camera stack, so I was very glad to have the opportunity to test this out. This project can be seen HERE.
The primary target I was going after with my Astro-Physics 130mm platform was M104 - The Sombrero Galaxy. I have wanted to shoot his for a long time, and this was the first time weather allowed me to try it. Unfortunately, my time on target was very short because, by the time astronomical darkness fell, M104 was already at the meridian. With the treelines on my property, this meant that M104 was lost around 11:30 pm. You can read about the M104 Project HERE.
So after shooting M104, I needed another target for that scope platform.
After looking around, I noticed M102 was well positioned. I did not know much about M102, and I don’t think this target is shot much. But as I was investigating things, I discovered that M102 had a prominent dust lane that bisected it - and I thought that made it interesting. I have also had some good luck getting excellent details from this scope, so I was hoping to capture and show this dust lane well.
So I added this target to the shoot list.
Capture Details
So on the evening of May 24th, using the AP130 platform, I began collecting subs once M104 had set into the trees.
After collecting a bit over 2 hours of LRGB data, I ended the capture.
I planned to continue grabbing subs on the night of the 25th. However, that did not happen.
I did collect data for my M104 project, but afterward, I was too tired to continue.
While I have pretty much healed up from my recent Kidney surgery, My stamina has not fully returned, and I have been told that it could take as long as six months before it does. So, I ended my collection around 1 am, not wanting to push things.
While I did not have a lot of data, I collected a minimal set of subs for each filter and a set of calibration data.
Image Analysis
All subs were 90 seconds long.
I did not end up with many for each filter. Because of this, I only eliminated the ones so bad that there was no hope of using them. I needed every bit of data I could use!
Typically, I will use Blink to assess all frames and then go to the Subframe selector to look for outliers regarding star size (FWHM) and eccentricity. When I do this and keep only the best subs, I tend to get excellent detail in my shots. But I could not afford to be that selective with so few subs.
Here is a summary of the subs I got - surprisingly, no frames needed to be eliminated:
Lum
24 captured, none eliminated. Some minor satellite trails.
Red
20 captured, none eliminated
Green
17 were captured, and none were eliminated.
Blue
20 captured, none eliminated.
So while I did not have much integration, I was able to keep ALL of the subs captured!
Unfortunately, the data was still impacted by some of the thin smoke clouds still in the area. This reduced contrast and seemed to impact the crispness of the stars.
Image Processing
Like my previous project, this would be an exercise to get the best image from a marginal data set.
The last time I could not drizzle my data as I had too few subs. But this time, I had more integration and could drizzle process the data 2X.
This would help improve my resolution and create huge image files, significantly slowing down some processing.
Since I was mostly interested in the galaxy itself, I decided to crop aggressively early on.
I knew many little galaxies were in the neighborhood, so I did an ImageSolve run, followed by an AnnotateImage run. This provided a map that would help guide my crop, allowing me to keep some local galaxies in the frame. Once cropped, the image files were a bit easier to deal with.
For the most part, I used my standard LRGB workflow, as seen below.

The processing flow for this project.
I knew that my stars were a bit marginal, so I made one change in the workflow - I went starless in the linear domain and then carefully stretched my star image nonlinear to preserve what fidelity I could.
Typically, I only use the star data from my RGB image. But when I did that this time, the resulting stars looked really weak.
I assume that imaging them through the thin smoke caused this. So I did something rare for me - I created my StarsOnly image by combining the L and RGB star images together. This introduced its own problems, but I still liked the results better.
Another issue I ran into was a weird artifact where I had some dark regions on each side of the galaxy. As I worked my way backward to see what caused this, I found it was an artifact generated by being TOO aggressive with BlurXTerminator. I needed to back up and redo a lot of work to correct for this. I ended up having to back off to the default settings to get the best result. This was disappointing as the aggressive settings I originally used really brought out the detail in the dust lane!
So my basic processing flow went as follows:
I used WBPP to process the images and create the Masters
The Masters were aggressively cropped.
I created the RGB linear image, and then BXT was applied to both the Lum and RGB color image.
I created StarsOnly and Starless versions of the L and RGB images.
After some NoiseXTermination, I went nonlinear.
The Lum starless image was processed to enhance detail.
The RGB starless image was processed for its color position.
The L and RGB Star images were combined and modified to enhance color saturation and reduce the star sizes a bit.
Then all images were combined and tweaked with CT.
Once I settled on this, I submitted the image to Photoshop for final tweaks.
Results
Surprisingly, the final image is not bad. I was able to get some intriguing hints of details that Hubble images of this galaxy show.:

M102 as imaged by the Hubble Space Telescope. Note the orthogonal streams from the dust lanes.

Here is an extremely zoomed-in version of my image. Note that there is a hint of the details seen in the Hubble image!
Given the low integration and the poor conditions, I am surprised I could get this much detail!
The glow of the body of the galaxy is not as well defined, and I am sure that more integration would have really helped on that front.
Despite the challenges, I found this to be a fun project to work on. And as in my previous M104 project:
I finally have an image of M102!
I now have an image quality baseline to beat in a future effort!
A detailed Processing Walk-Through is provided for this image at the end of the posting…
More Information
Wikipedia: Messier 102
Wikipedia: NGC 5866
Hubbesite.org: A Hubble Telescope Image of M102 (NGC 5866)
Messier-Obects.com: M102
Capture Details
Lights Frames
Data were collected on the evening of May 24, 2023
No frames needed to be removed.
24 x 90 seconds, bin 1x1 @ -15C, Unity Gain, ZWO Lumnace filter 36mm unmounted
20 x 90 seconds, bin 1x1 @ -15C, Unity Gain, ZWO Red filter 36mm unmounted
15 x 90 seconds, bin 1x1 @ -15C, Unity Gain , ZWO Green filter 36mm unmounted
17 x 90 seconds, bin 1x1 @ -15C, Unity Gain , ZWO Blue filter 36mm unmounted
Total of 2 Hours and 1.5 minutes.
Cal Frames
25 Darks at 90 seconds, bin 1x1, -15C, Unity gain
15 Flats at bin 1x1, -15C, Unity gain - for LRGB filters
25 Dark Flats at Flat exposure times, bin 1x1, -15C, Unity gain
Software
Capture Software: PHD2 Guider, Sequence Generator Pro controller
Image Processing: Pixinsight, Photoshop - assisted by Coffee, extensive processing indecision and second-guessing, editor regret, and much swearing…..
Capture Hardware:
Scope: Astro-Physics 130mm F/8.35 Starfire APO built in 2003
Guide Scope: Televue TV76 F/6.3 480mm APO Dublet
Main Fous: Pegasus Astro Focus Cube 2
Guide Fous: Pegasus Astro Focus Cube 2
Mount: IOptron CEM60
Tripod: IOptron Tri-Pier with column extension
Main Camera: ZWO ASI2600MM-Pro
Filter Wheel: ZWO EFW 7x36
Filters: ZWO 36mm unmounted Gen II LRGB filters
Astronomiks 36mm 6nm Ha, OIII, & SII filters
Rotator: Pegasus Astro Falcon Camera Rotator
Guide Camera: ZWO ASI290MM-Mini
Power Dist: Pegasus Astro Pocket Powerbox
USB Dist: Startech 7 slot USB 3.0 Hub
Software:
Capture Software: PHD2 Guider, Sequence Generator Pro controller
Image Processing: Pixinsight, Photoshop - assisted by Coffee, extensive processing indecision and second-guessing, editor regret, and much swearing…..
Click below to see the Telescope Platform version used for this image:
Image Processing Walk-Through
(All Processing is done in Pixinsight - with some final touches done in Photoshop)
1. Blink Screening Process
Lum FIlter
Started with 24 frames
Some trails seen
The data looks good, and no frames were removed.
Red
Started with 20 frames total
Some trails seen
No images were removed!
Green
Started with 17 frames
Some trails
No images were removed!
Blue
Started with 20
Some trails
No images were removed!
Flats
Flats were collected for the Lum image, but the RGB frames' flats were all clipped to white! Something was messed up, so I needed to process the image with no flat calibration. Fortunately, the AP130 platform is pretty reasonable without the flats, and since I expect to crop a lot, I should be able to get away with it.
Dark flats
Looks good
Darks
90-sec darks were collected fresh after the first night and used. All looked good.
The Smoke Plumes were diminished for these two nights, but some remained and drifted into view.
2. Subframe Selector Analysis
Given the ridiculously low integration, I did not bother doing a Subframe Analysis, and I knew that I could not remove any more frames
3.0 WBPP 2.5.3
Load lights
Load LUM flats - RGB flats were bad!
Load darks flats
Load 90-sec darks
Select Maximum Quality
Output directory: wbpp
Set Dark Exposure tolerance: 0.0
Lights Exposure tolerance: 0.0
Integration - auto crop, large pixel rejection: high and low set to 2x2
Lights - Enable everything but linear correction
CC set for all filters
Drizzle processing 2X set for each channel
Enable Autocrop
Executed in 48:18 minutes - no errors

WBPP Calibration view.

WBPP Post-Calibration View

WBPP - Pipeline view
4.0 Load Master Linear Images
Load the resulting Master Linear image and rename them.
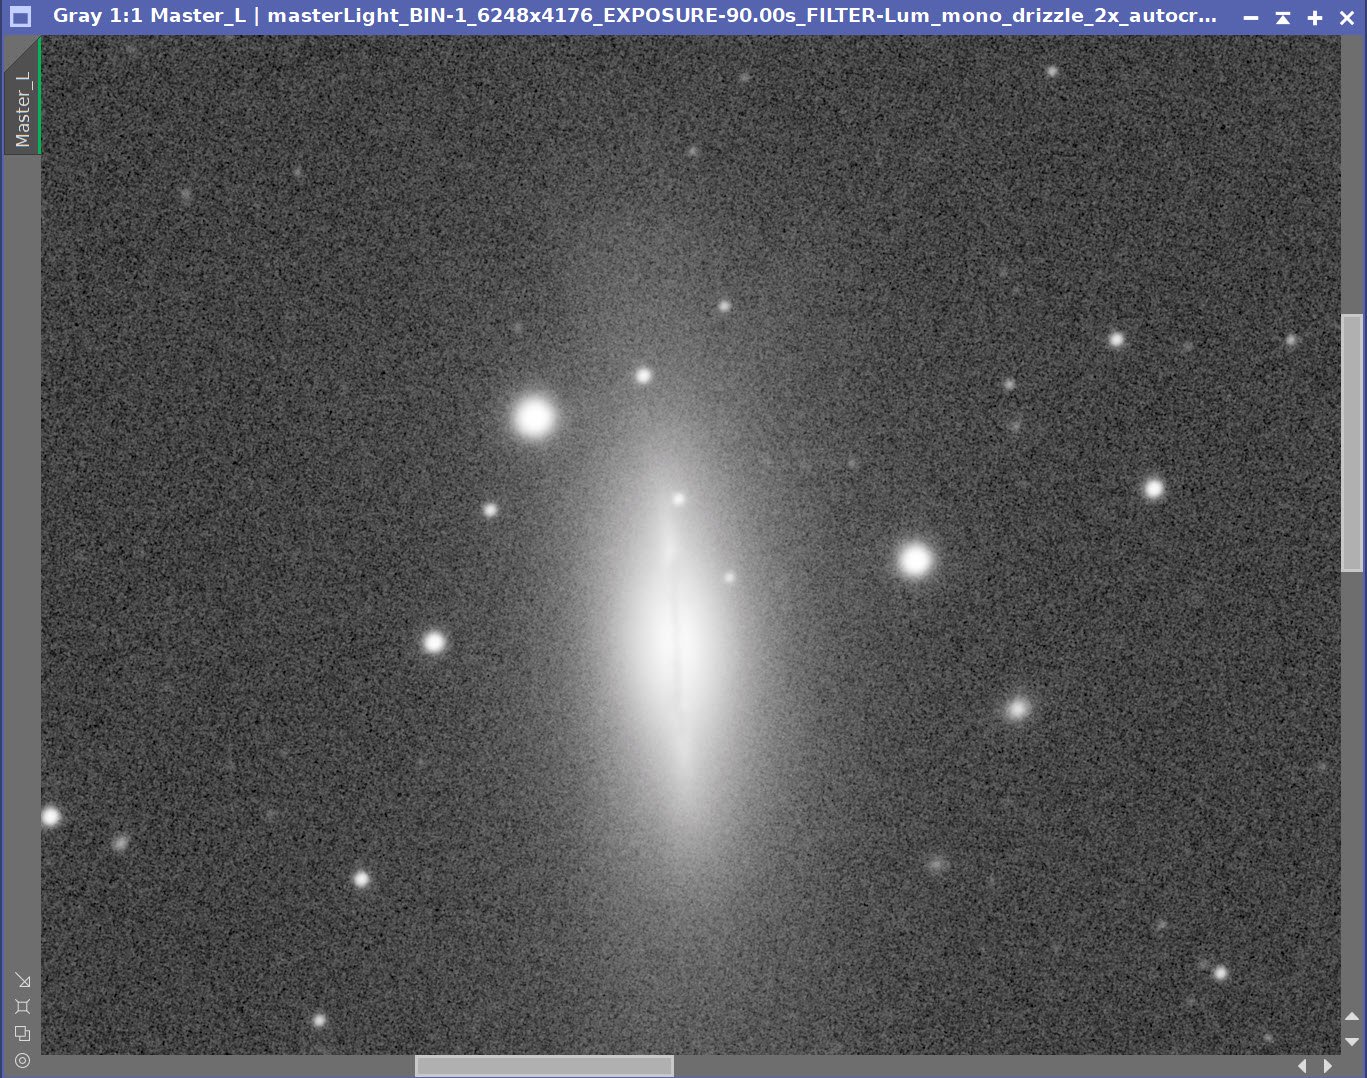
Master Lum Image (click to enlarge)
Master Green Image (click to enlarge)
Master Red Image (click to enlarge)
Master Blue image (click to enlarge)
5. Determine and Apply Crop
Make a copy of the Master_Lum image
Run AnnotateIage Script.
Use this annotated image to determine the best crop (including rotation) and create a process icon for DynamicCrop.
Apply to each image and create new and updated cropped masters.

The Annotated Master Lum image used to set the Crop with the DynamicCrop tool.

The newly Cropped Master Images.
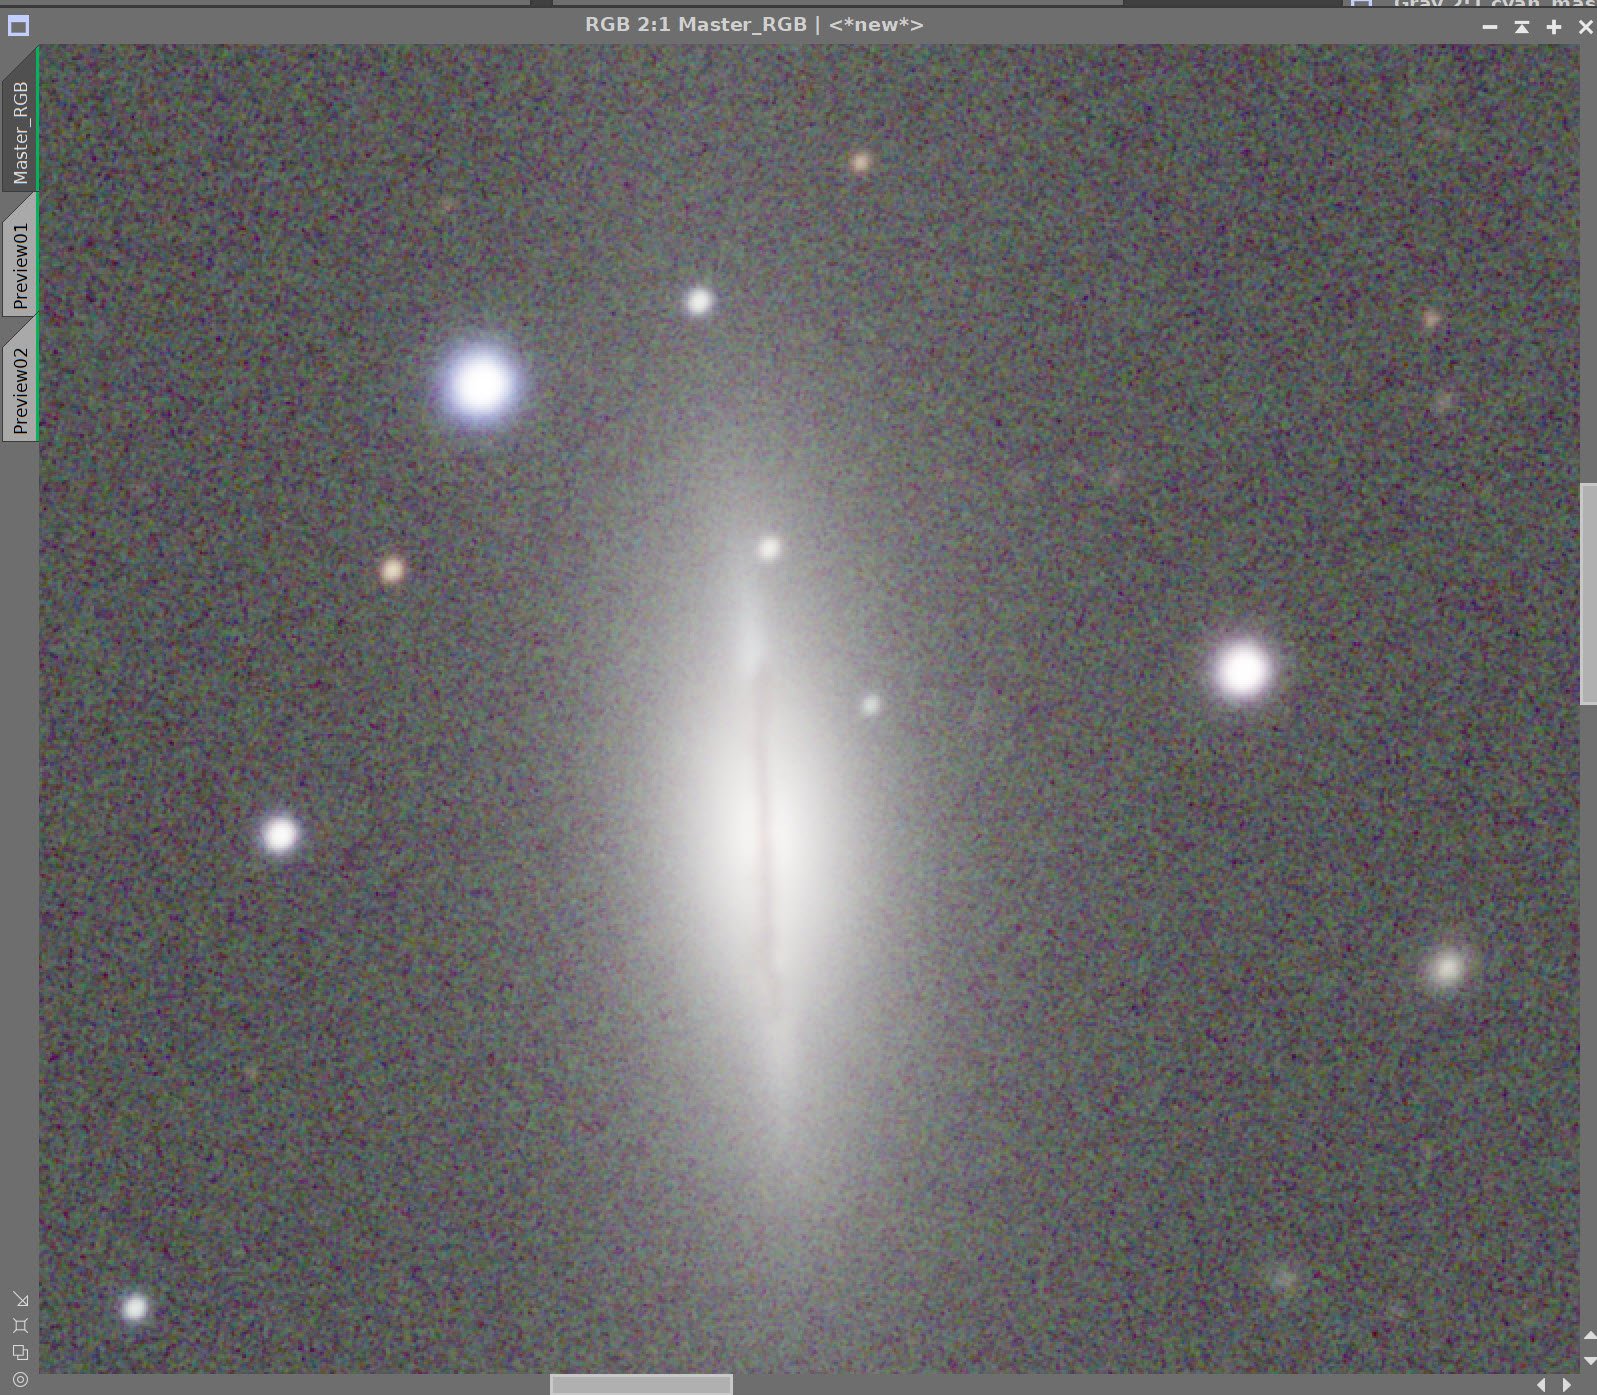
6. Create the Initial Color Image
Apply ChannelCombination tool to create the initial RGB master image.

Initial Master RGB image.
7. Dynamic Background Extraction
DBE was run on each Lum and RGB image as shown below.
L Sampling Plan (click to enlarge)
RGB Sampling Plan (click to enlarge)
L Before Image (click to enlarge)
RGB Before Image (click to enlarge)
L After Image (click to enlarge)
RGB After Image (click to enlarge)
L Background (click to enlarge)
RGB Background (click to enlarge)
8.0 Process the RGB Linear Image
Do Color Calibration:
Create a preview for a background sky reference region
Run ImageSolver to get a new Astrometric solution lost due to the crop operation.
Run SPCC on the image using this region as a reference.
Run BlurXTerminator
Run a test series to experiment with DXT parameters - Default chosen
Run BXT
Correct First
Sharpen stars 0.25, Halos: 0.0
Manual Nonstellar sharpen - auto
Run NoiseXTermintor: 0.8
Master_RGB after Channel Combination (click to enlarge)

SPCC Panel config used.

Resulting SPCC Regression lines

Master_RGB after SPCC.
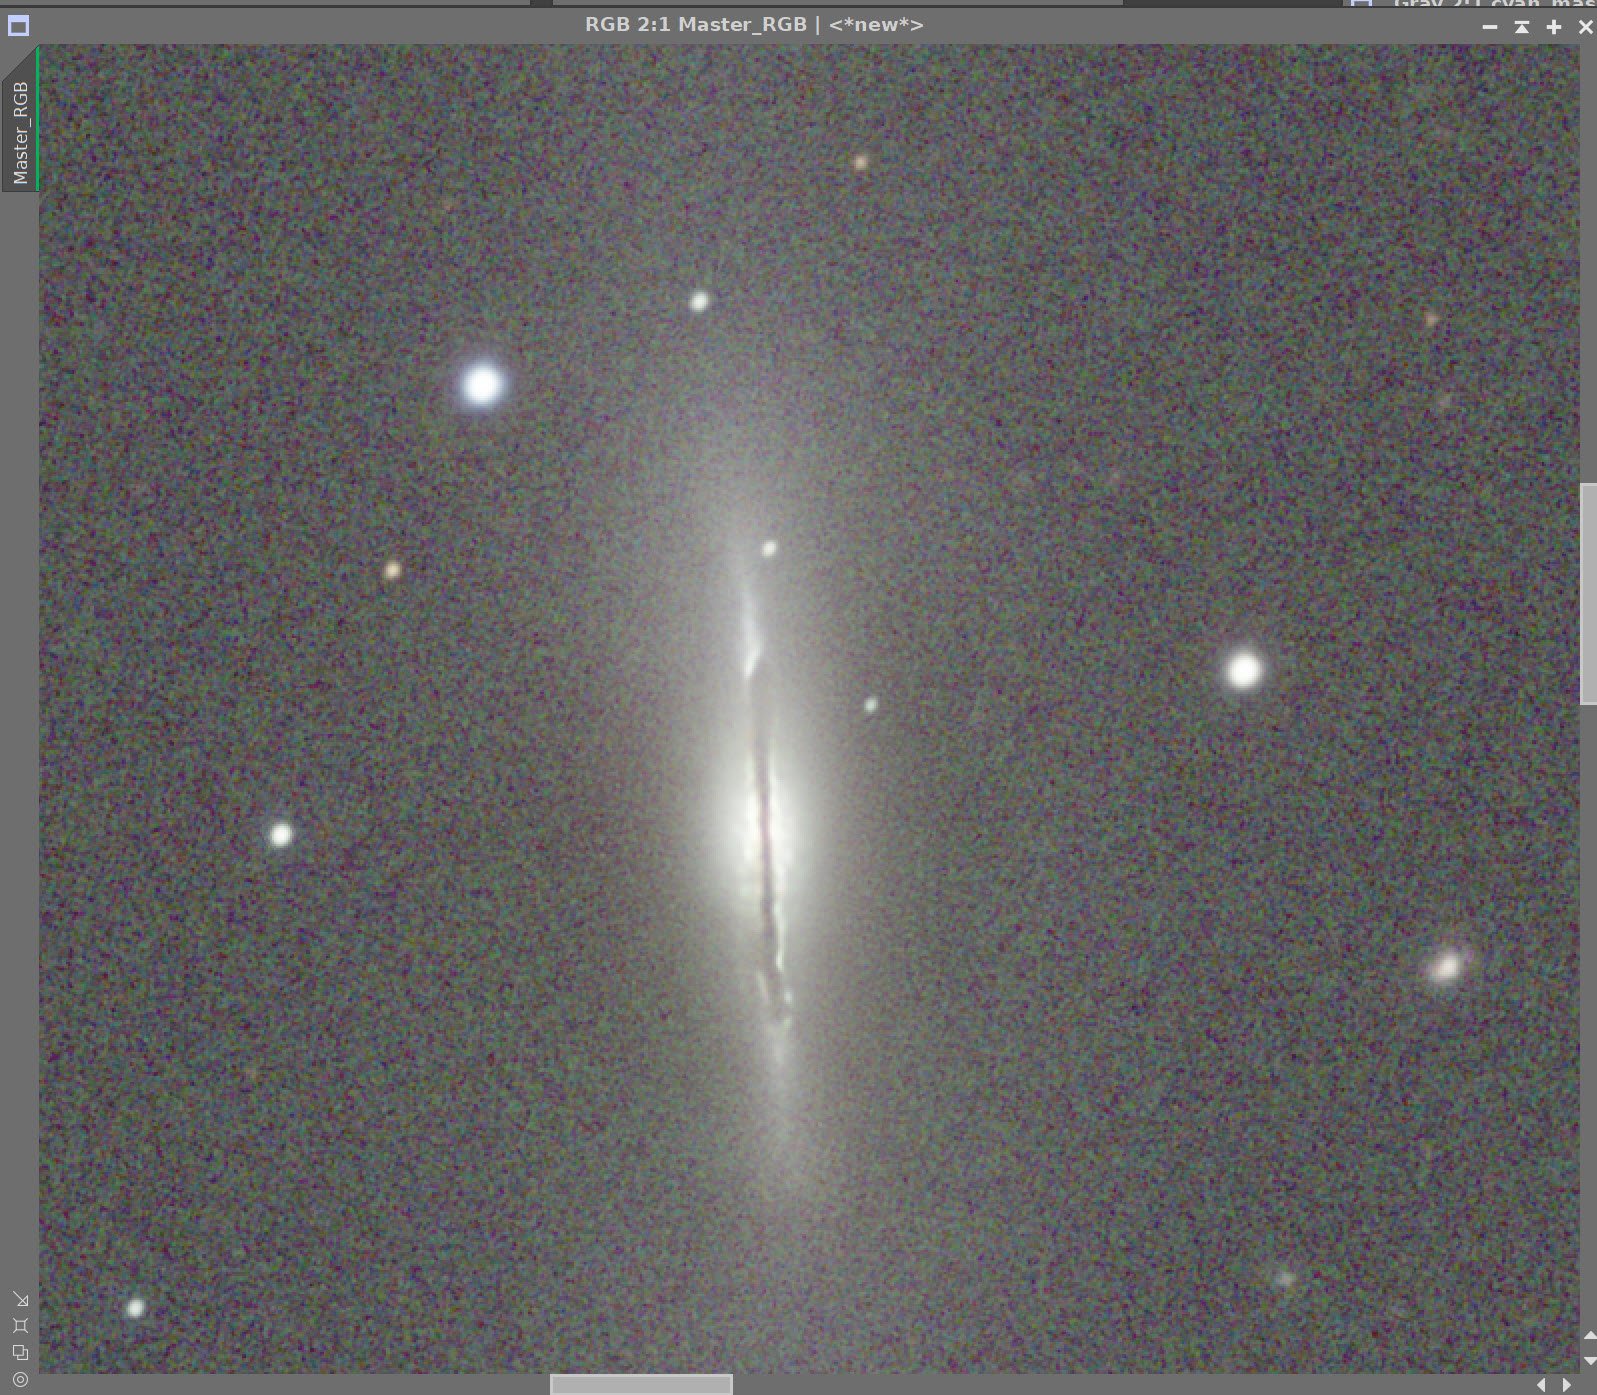
Master RGB Before and After BXT and then After NXT
9.0 Process Lum Image
Experiment with BXT to get the best Values - Default chosen.
Run BXT
Correct first
Stellar Correction: 0.25, Halo: 0.0
Non Stellar: auto
Run NXT at 0.7

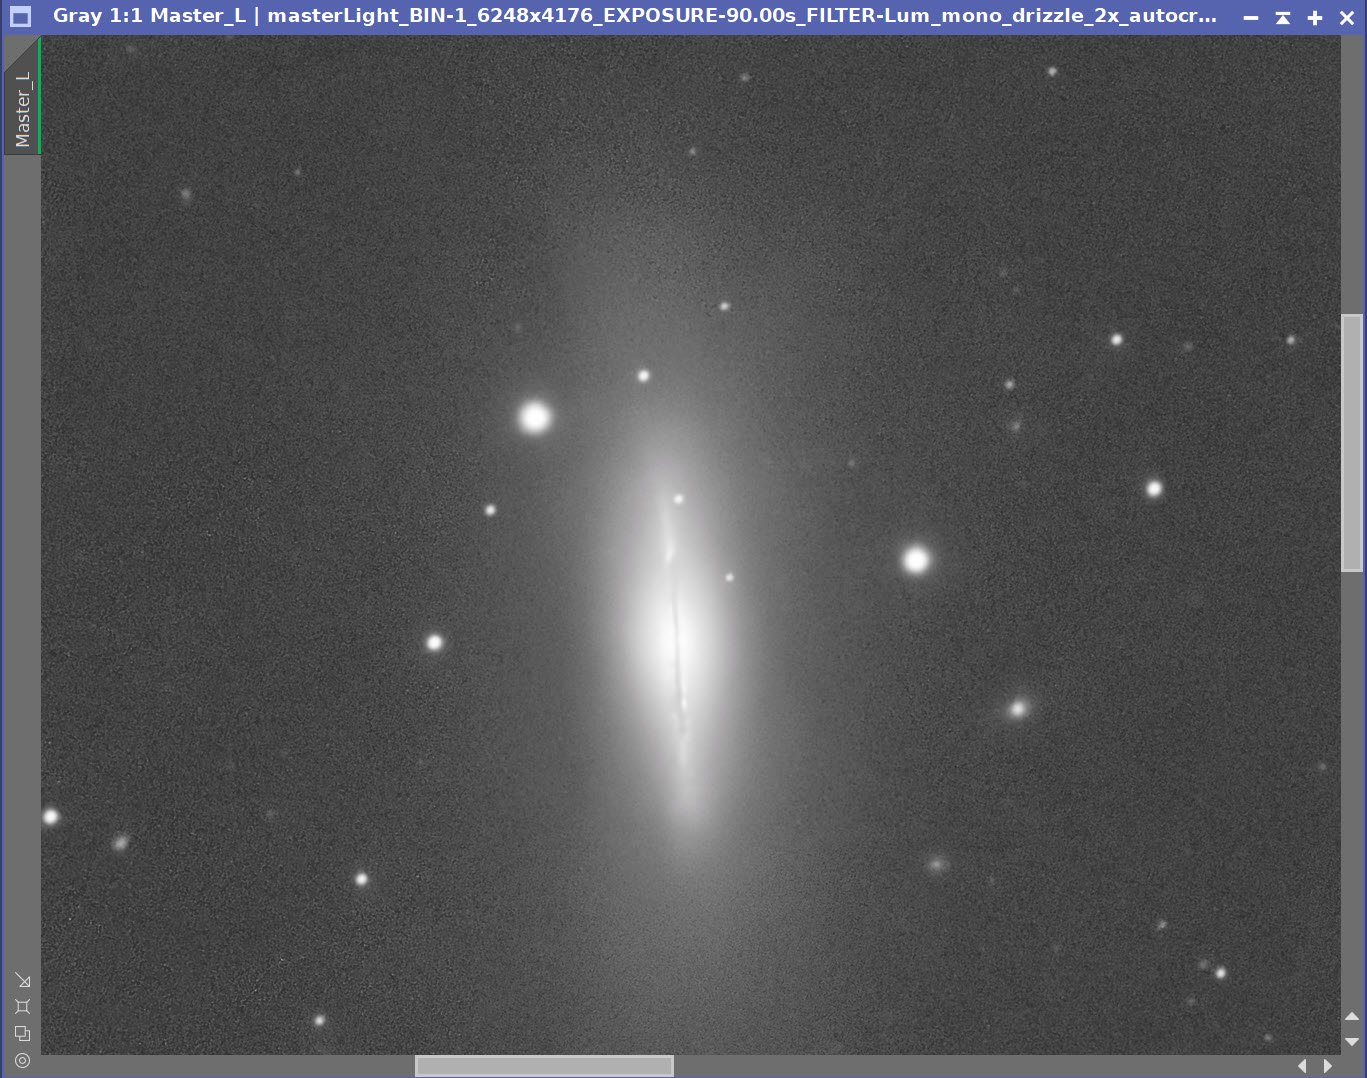
Lum: Before BXT, After BXT, After NXT=0.55
10.0 Go Starless and then NonLinear
Run StarXTerminator on the Nonlinear RGB image - creating a stars-only image and a Starless image using the Unscreen Method.
Run StarXTerminator on the Nonlinear Lum image -creating a stars-only image and a Starless image using the Unscreen
For both RGB and Lum Starless Images :
Since we will be using a starless workflow, use the STF->HT method to go nonlinear
Do a final adjustment with CT.
For both RGB and Lum StarsOnlt Images:
Use HT to go nonlinear
Use CT to adjust color and tonescale

Master_RGB Image (click to enlarge)
Master_L image (click to enlarge)
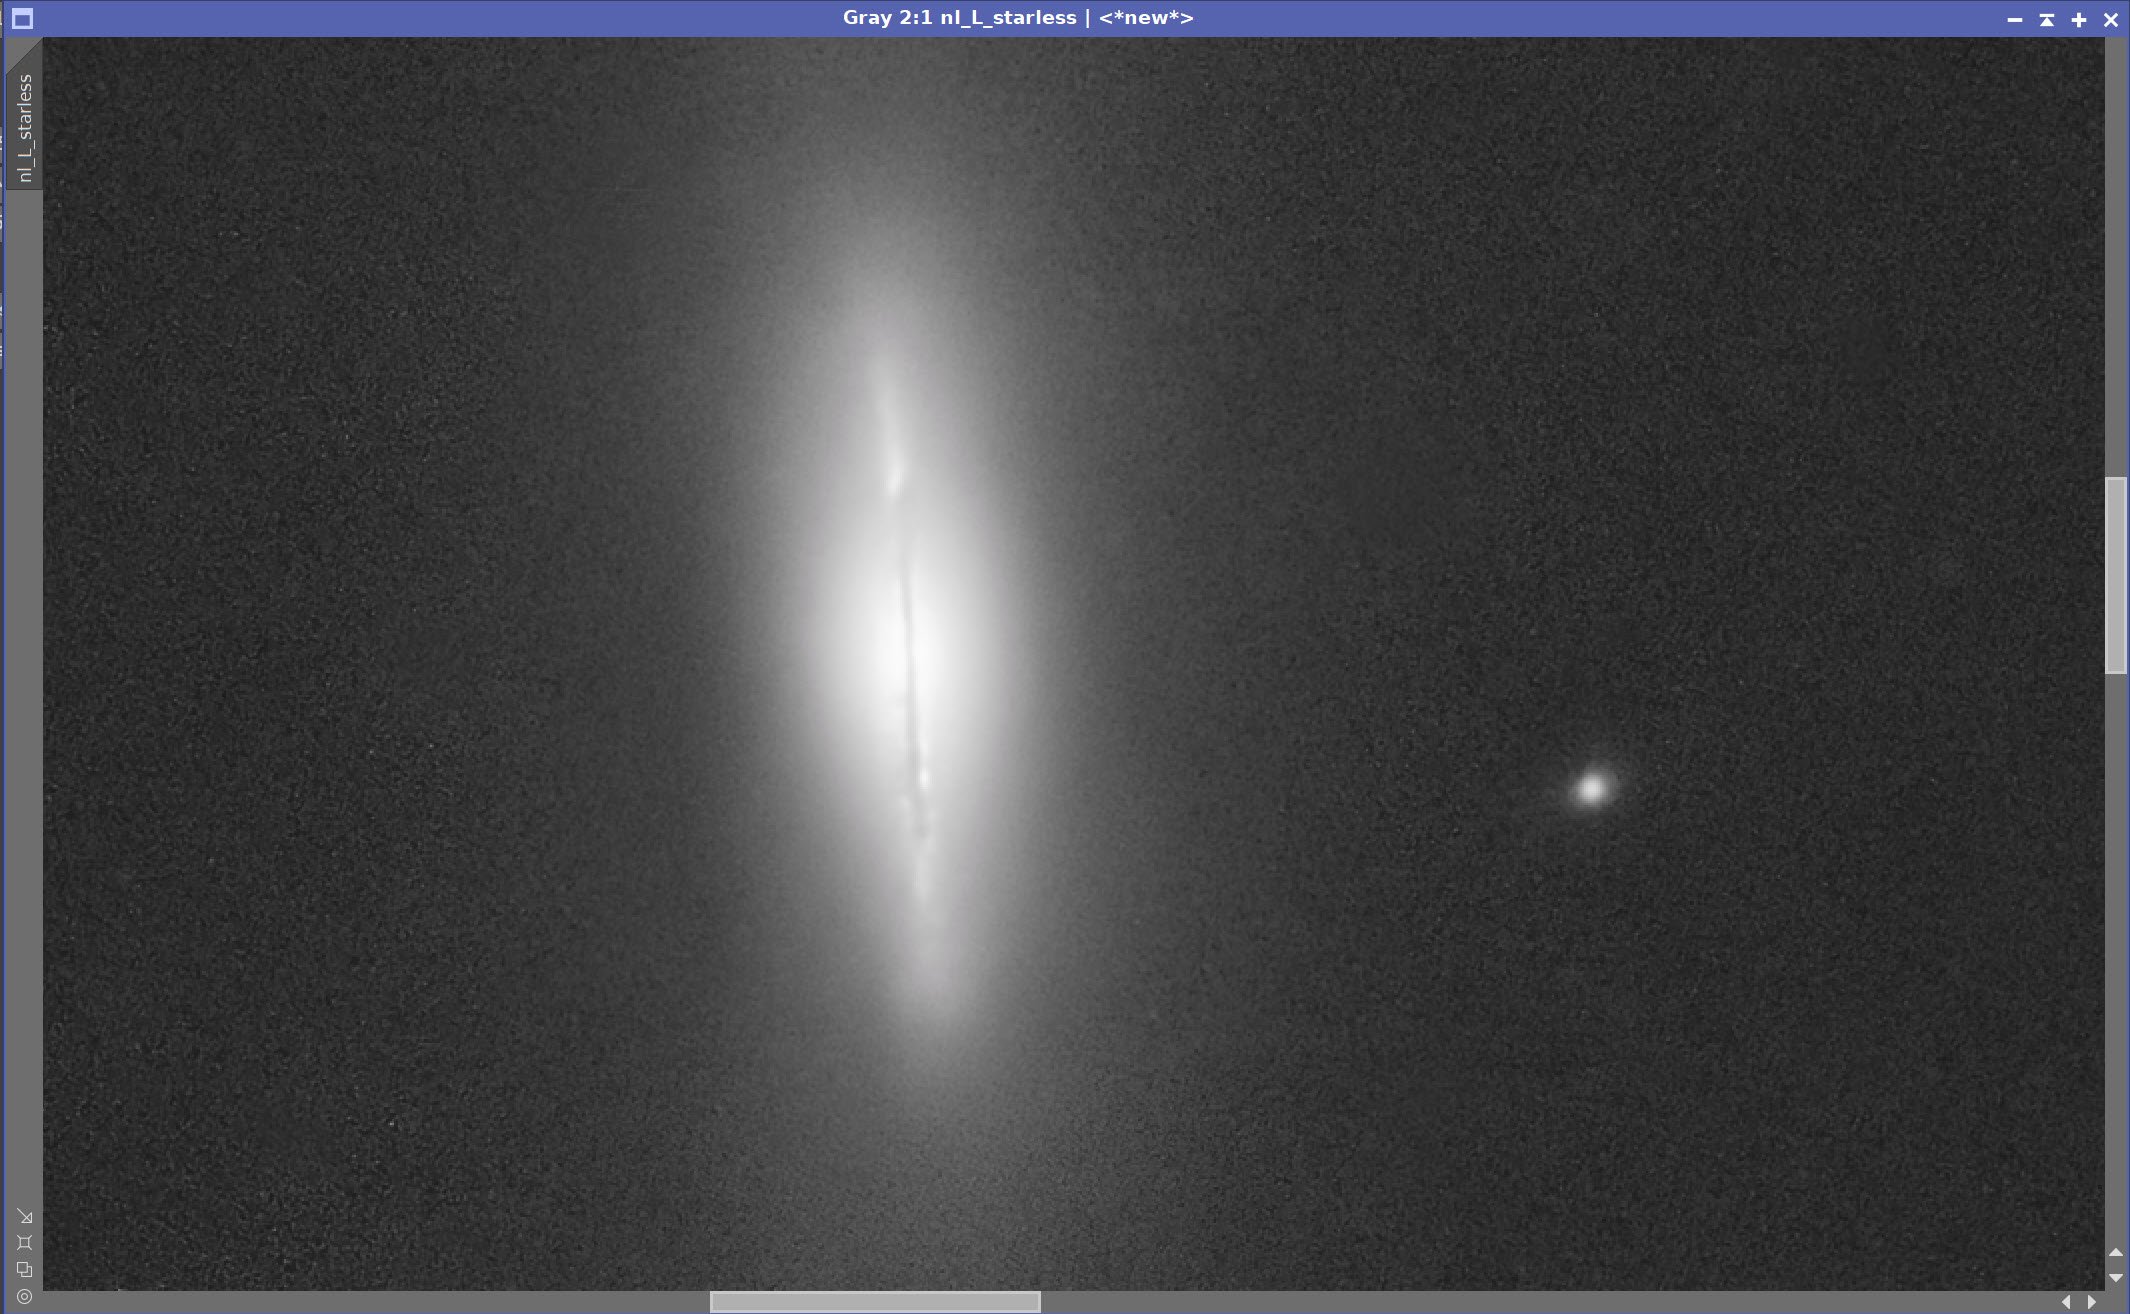
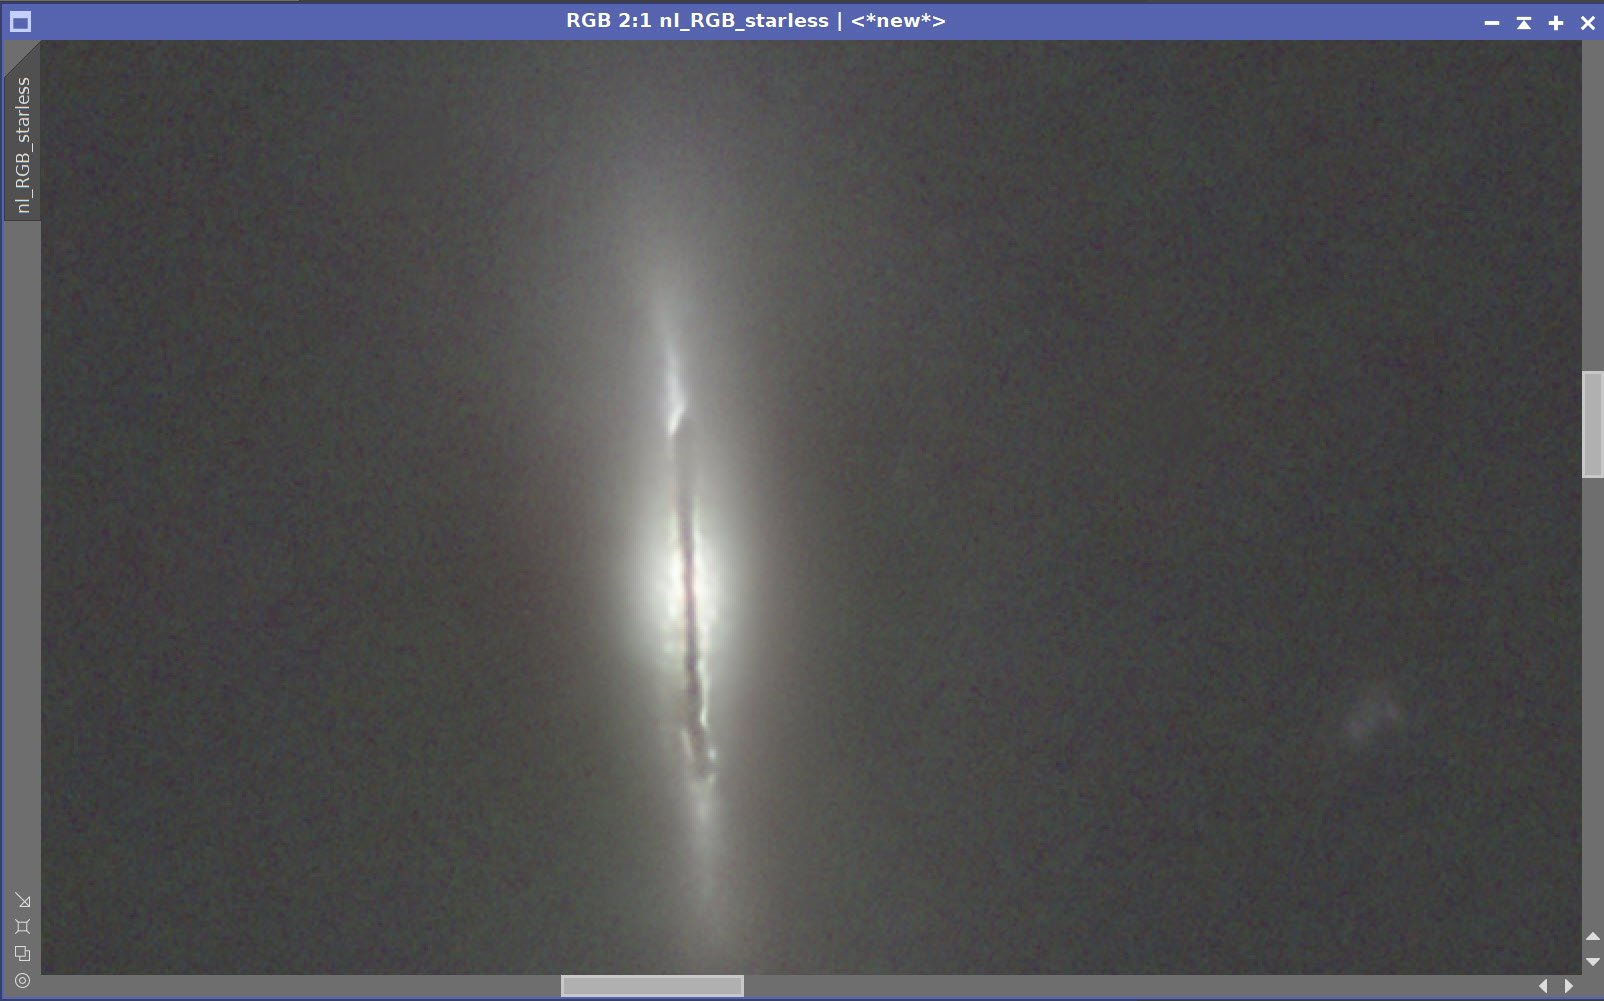
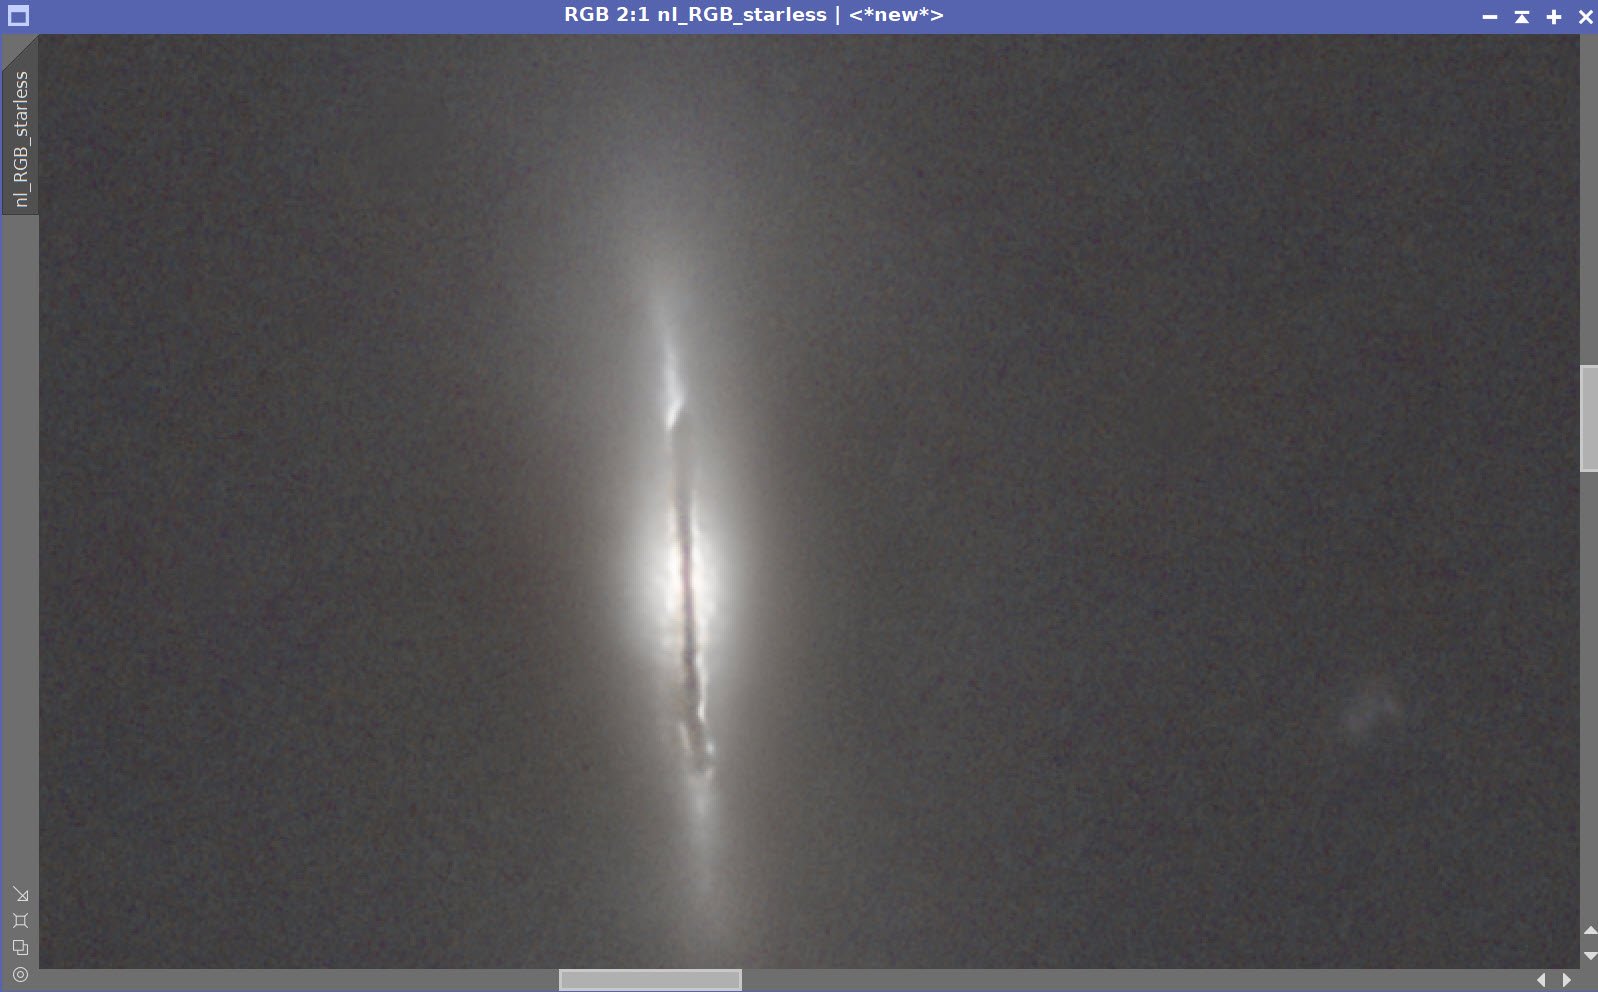
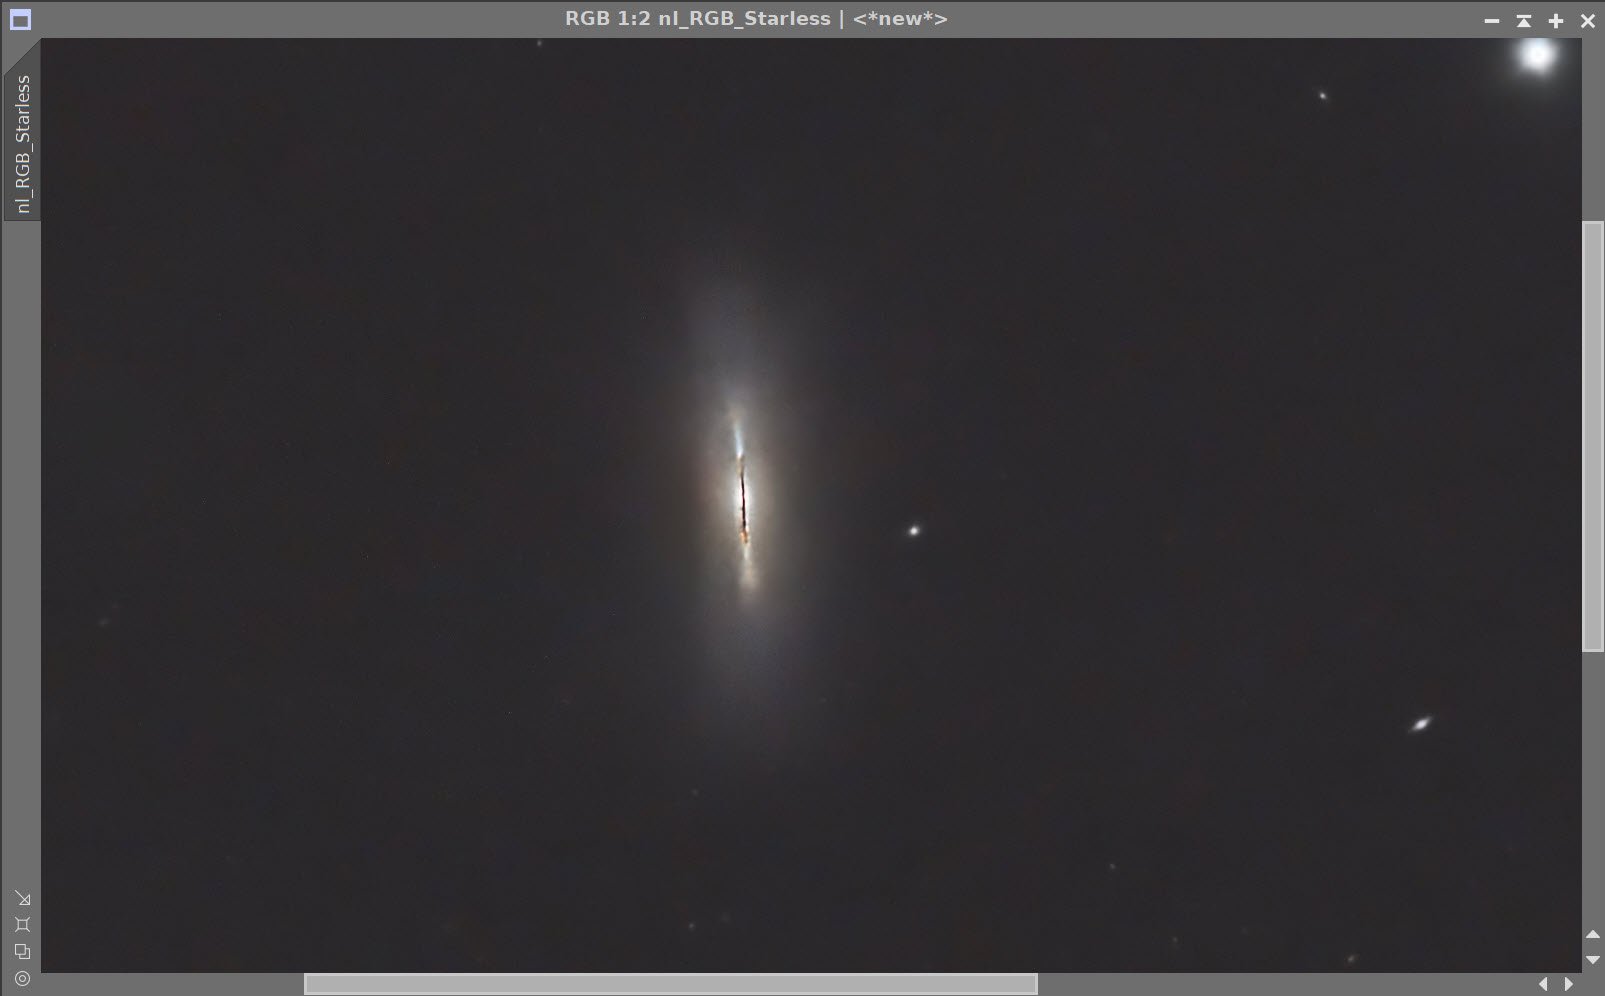
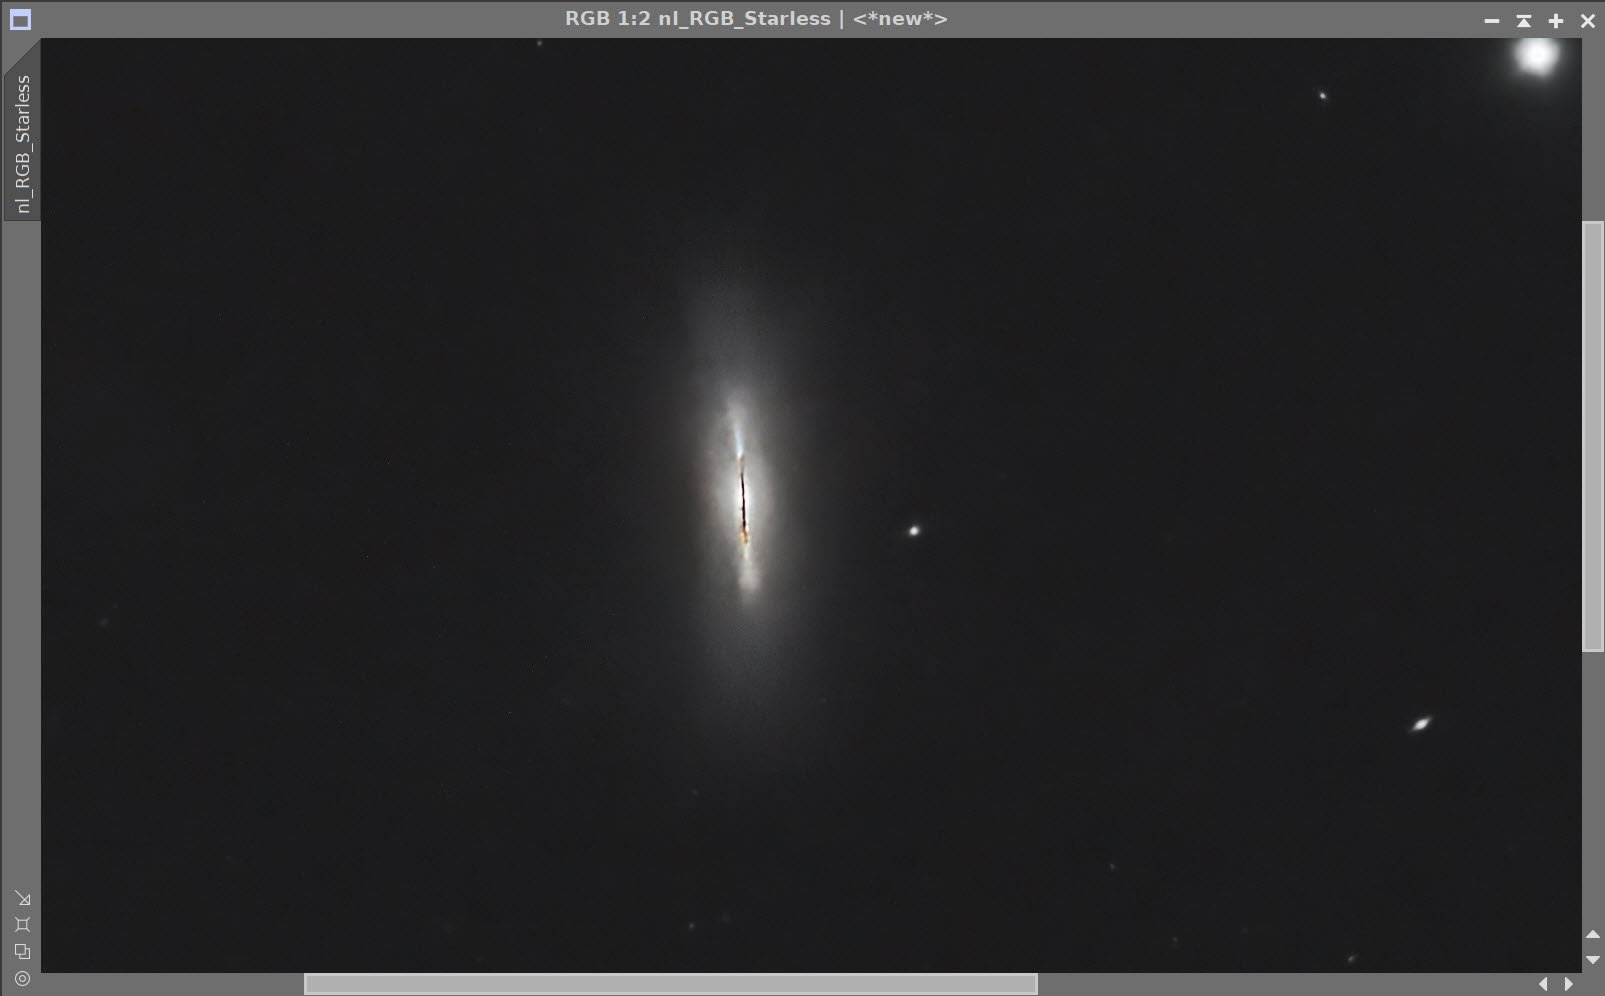
Master RGB Starless image (click to enlarge)
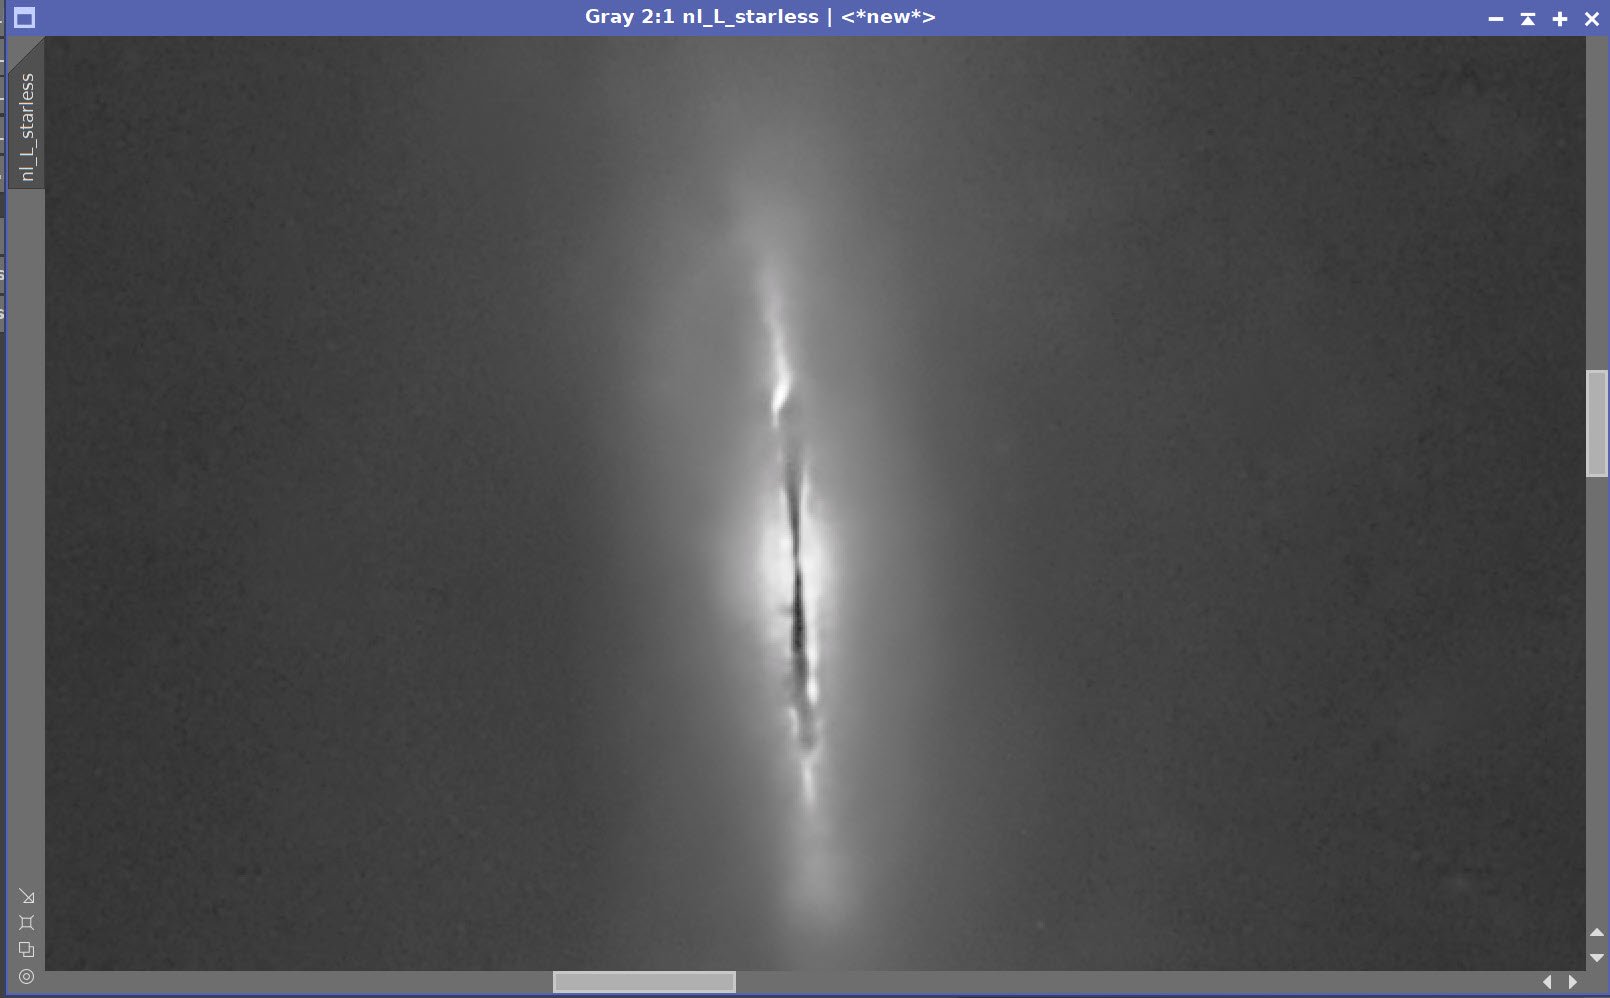
Master_L Starless (click to enlarge)

Master RGB StarsOnly (click to enlarge)
Master L StarsOnly (click to enlarge0
After using HT to go Nonlinear:
Nonlinear RGB Starless Image (Click to enlarge)
Nonlinear L Starless Image (Click to enlarge)
Nonlinear RGB StarsOnly (click to enlarge)
Nonlinear L StarsOnly image (click to enlarge)
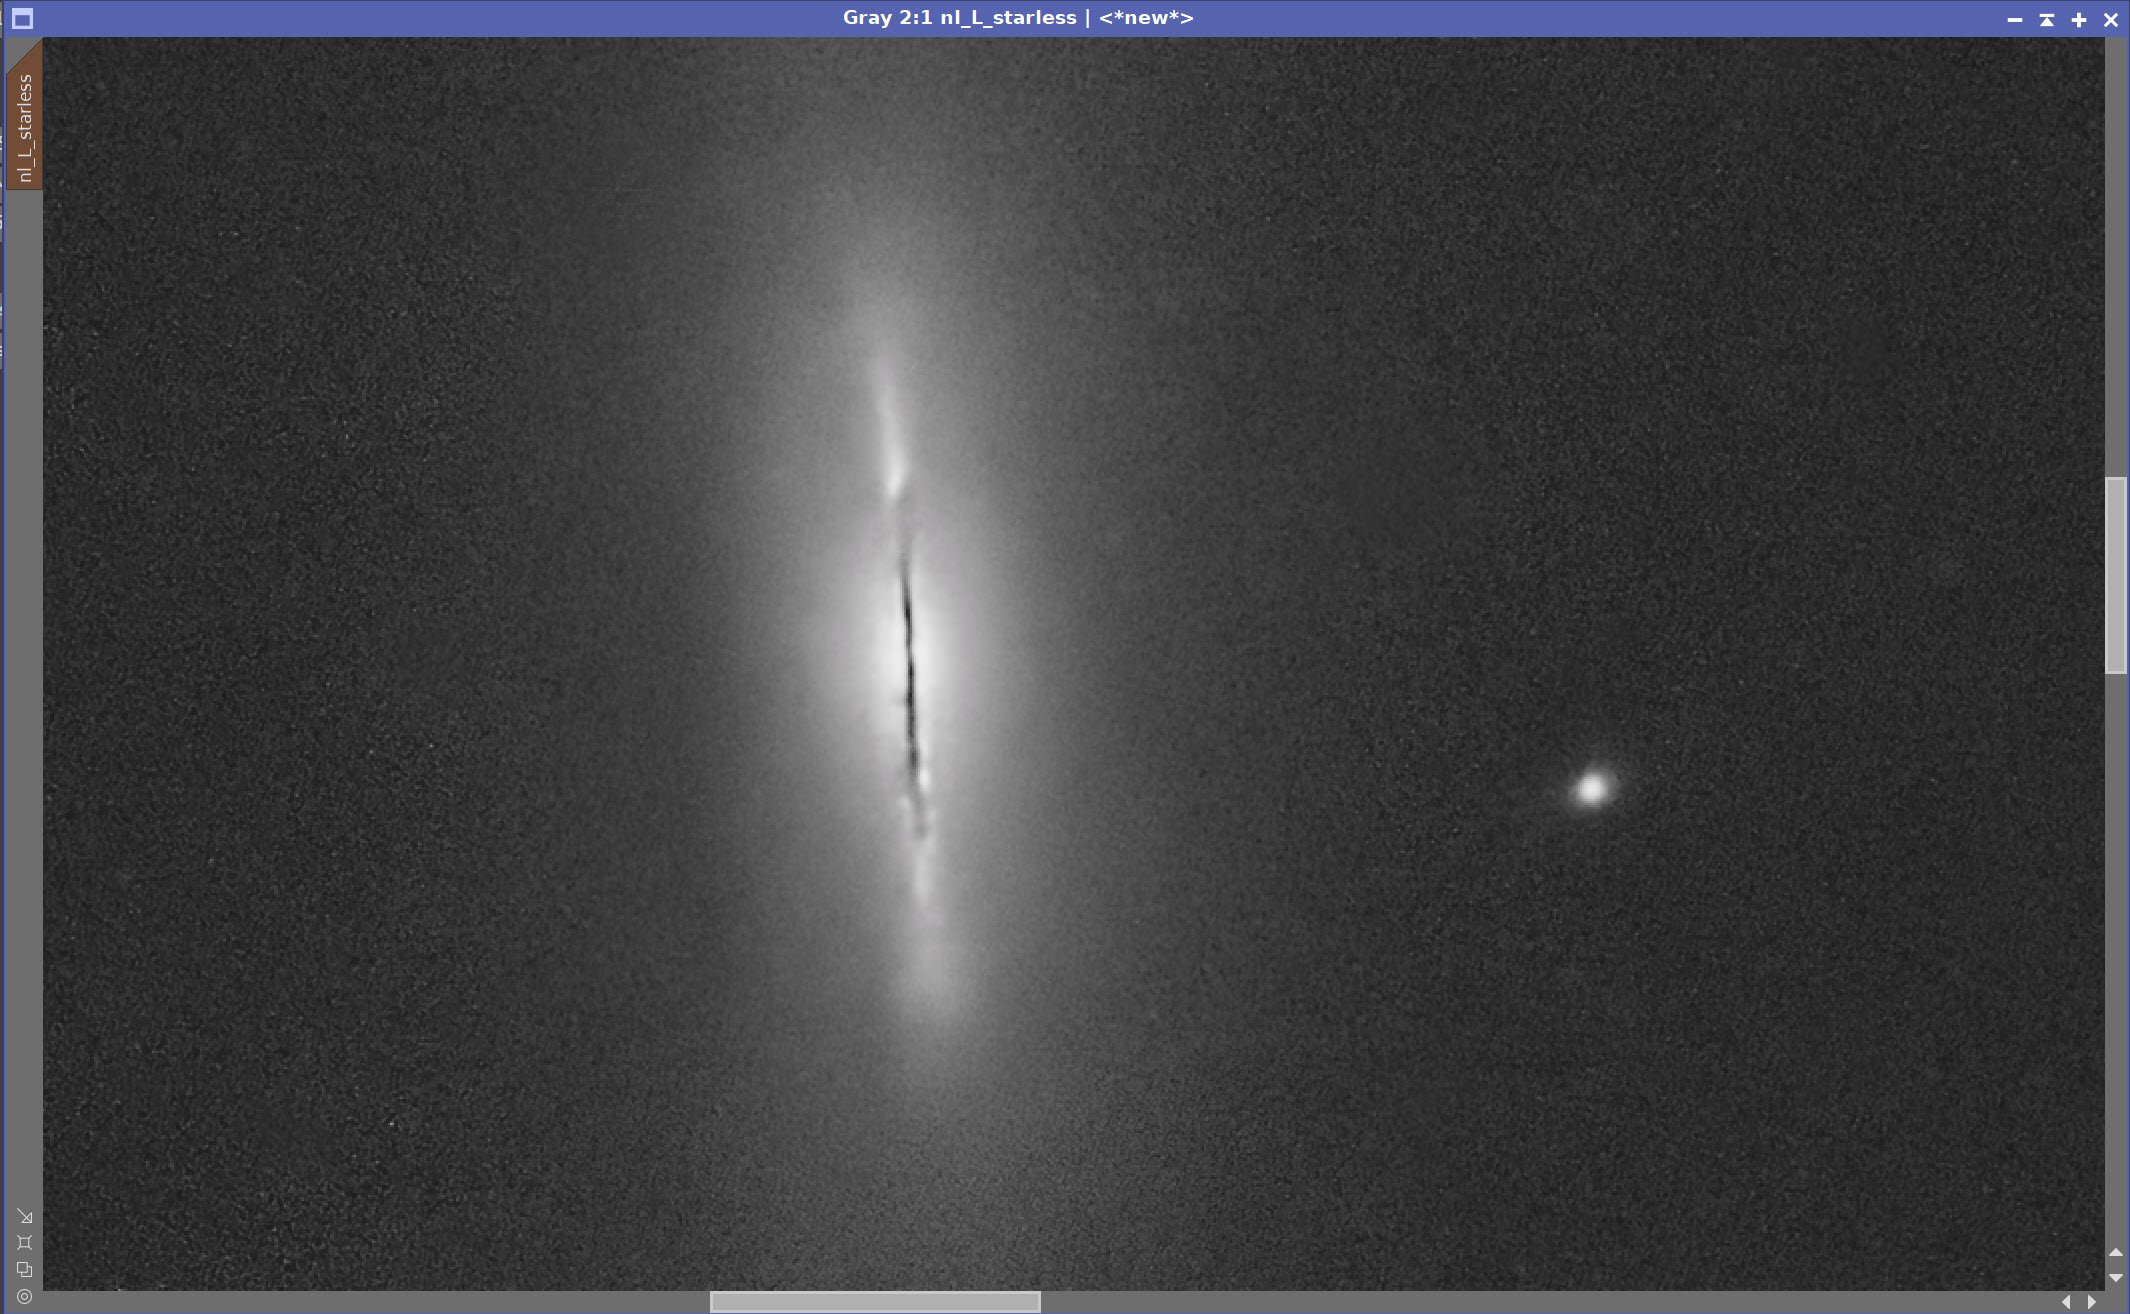
11. Process Lum Starless Image
Run an HDRMT series to determine the best Level to run at: level 4 through level 7
Run HDRMT, using level 5, and “To Lightness”, and “Lightness Mask” options
Using GAME, make a gradient mask to cover the galaxy
Apply Mask
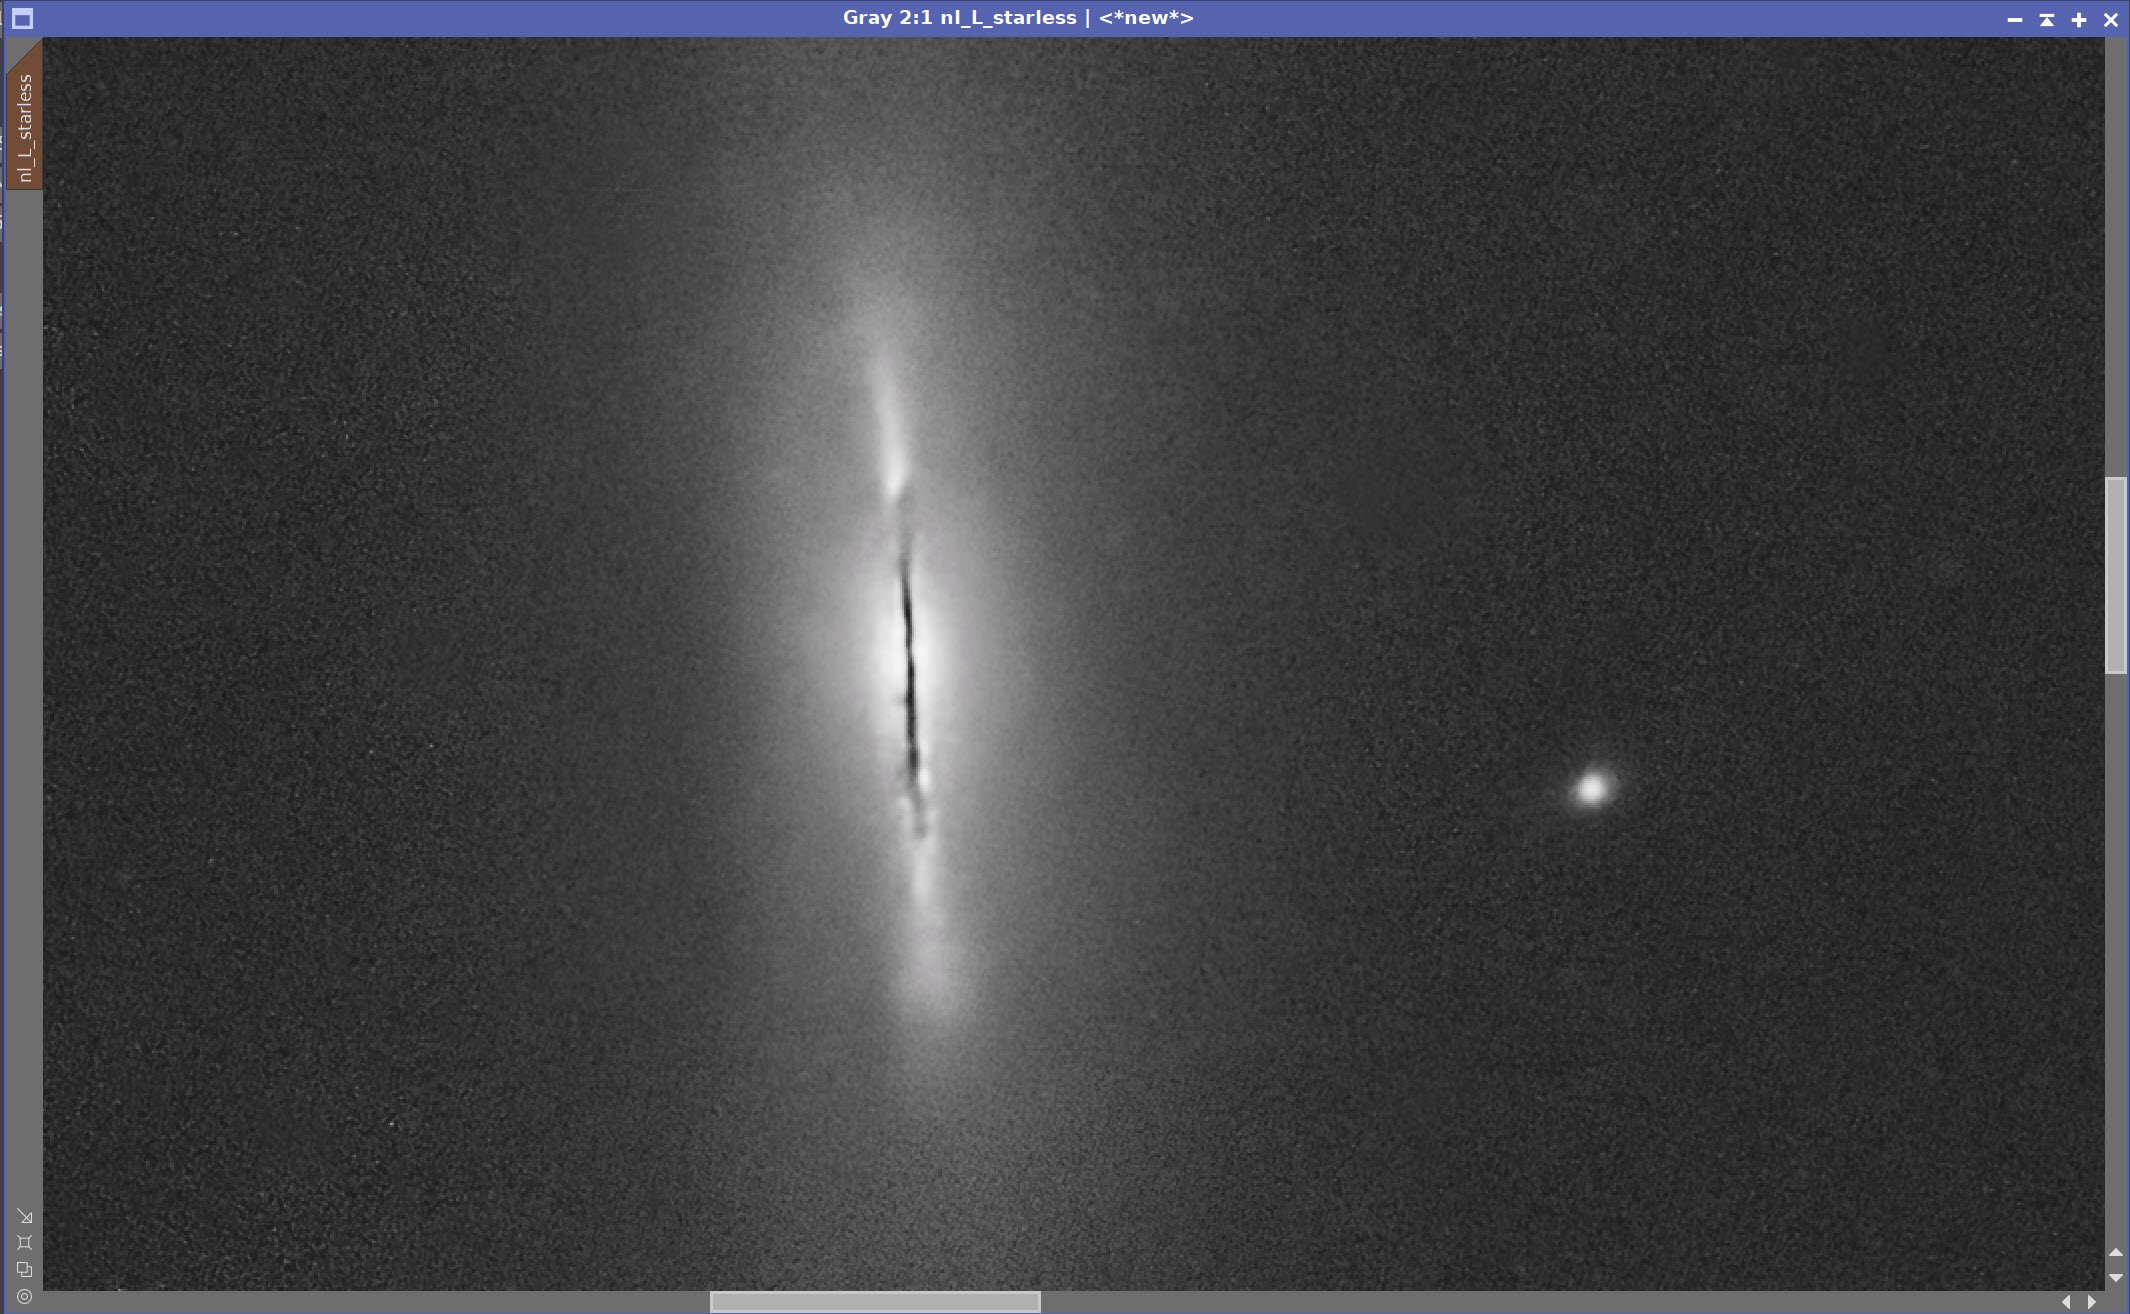
Apply LHE: Radius=66, Constast Limit=2.0, Amount= 0.5, 8-bit histogram
Apply LHE: Radius=22, Constast Limit=2.0, Amount= 0.2 8-bit histogram
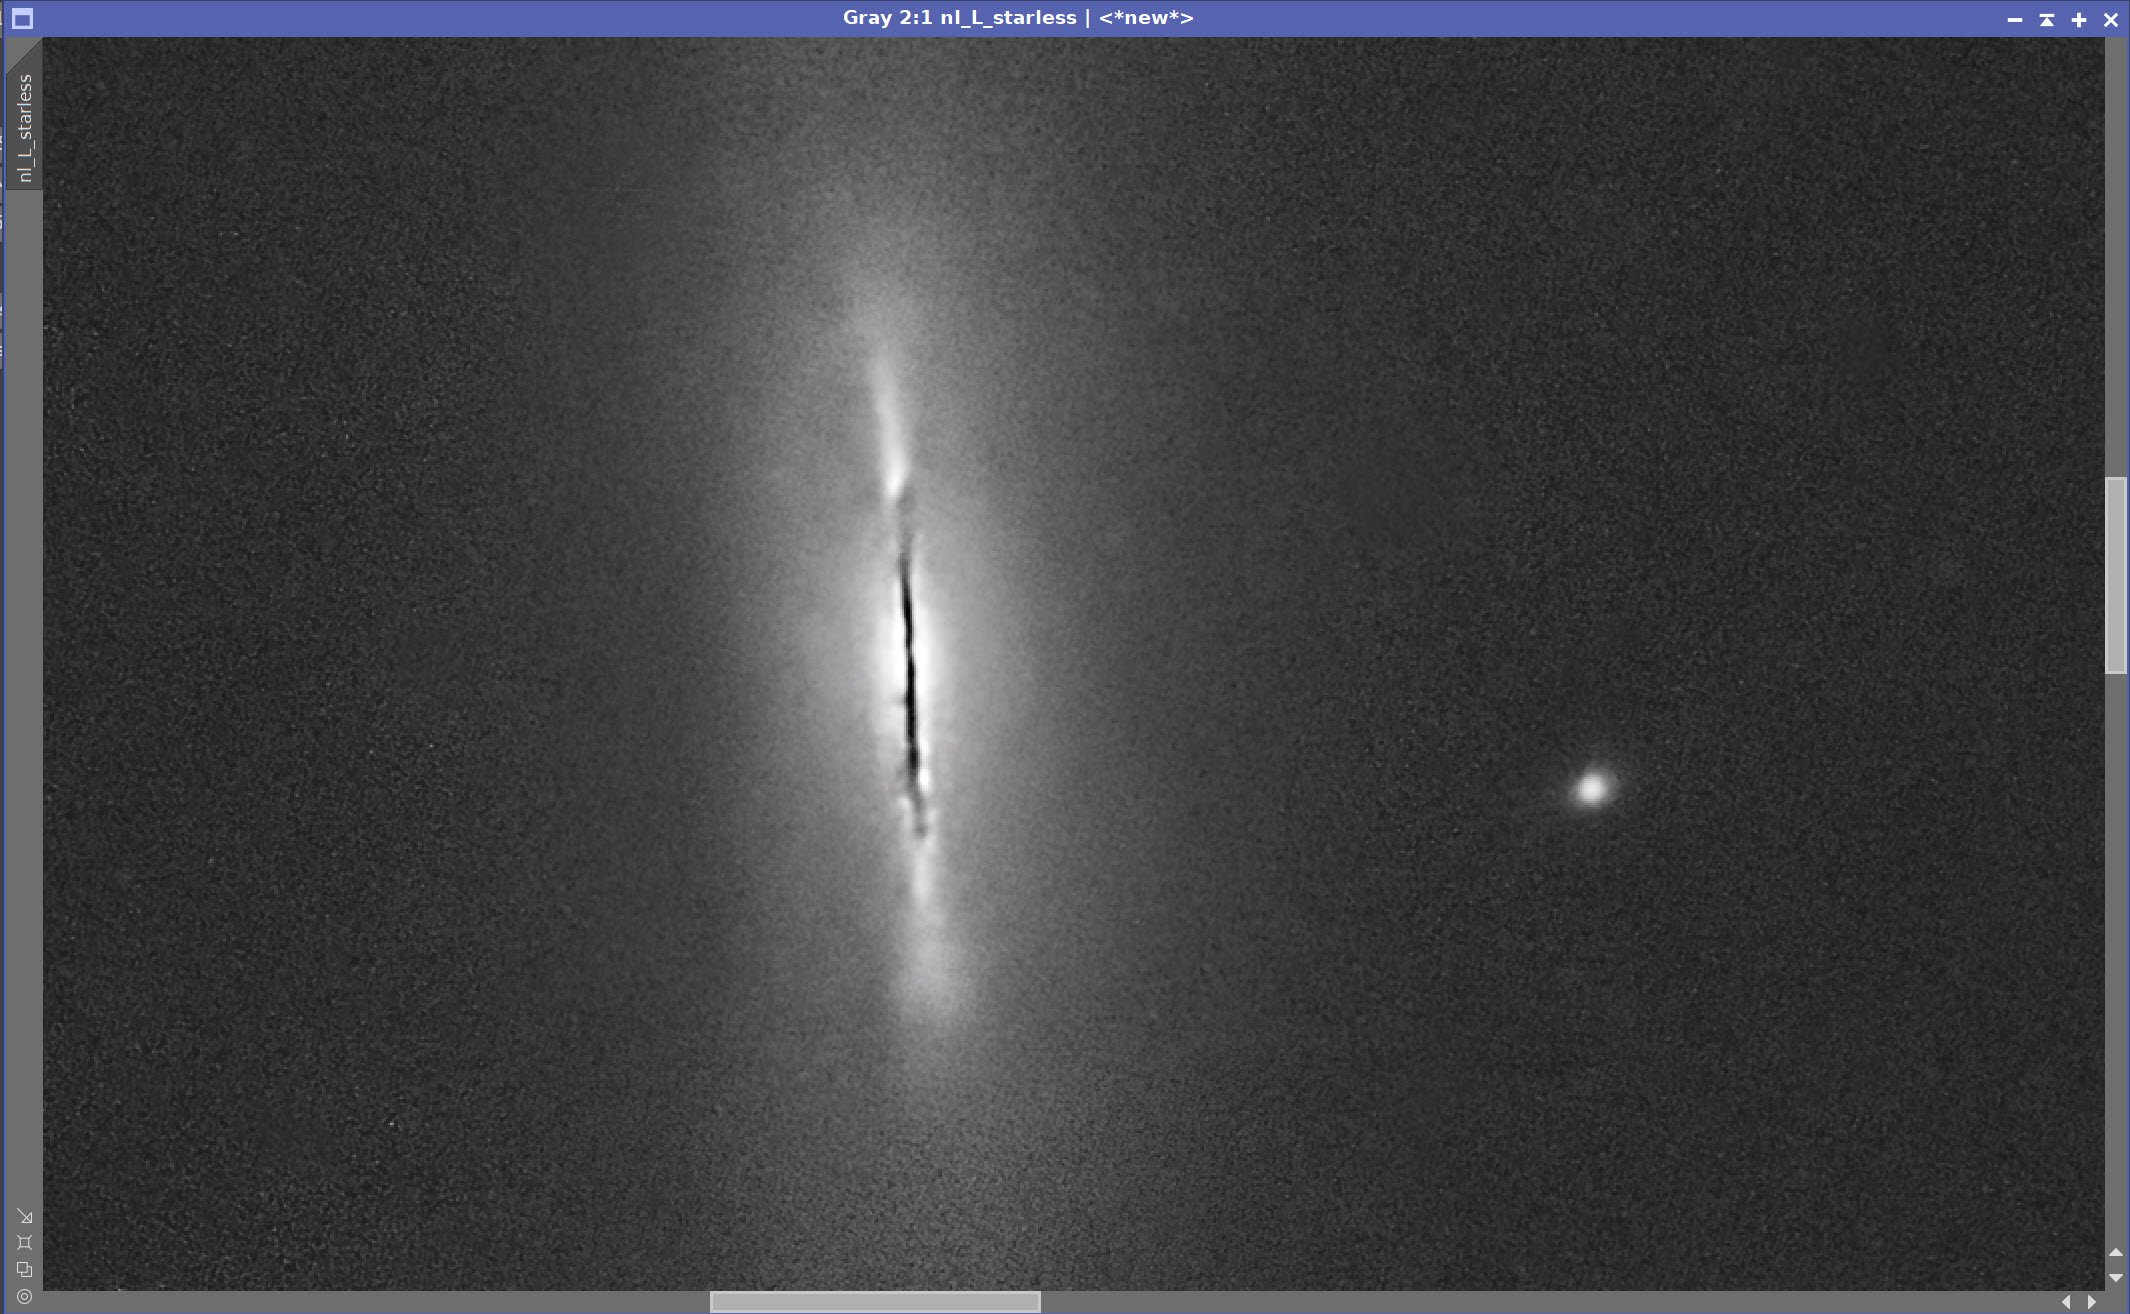
Run MLT in sharpening mode - see panel screenshot below for parameters
Remove the mask
Run NoiseXTerminator with a value of 0.7

Starting L Starless Image

HDRMT series: Starting point, Levels 4,5,6, &7. Level 5 looks best!

MDRMT Panel with Parameters used on the Global Image

Galaxy Mask
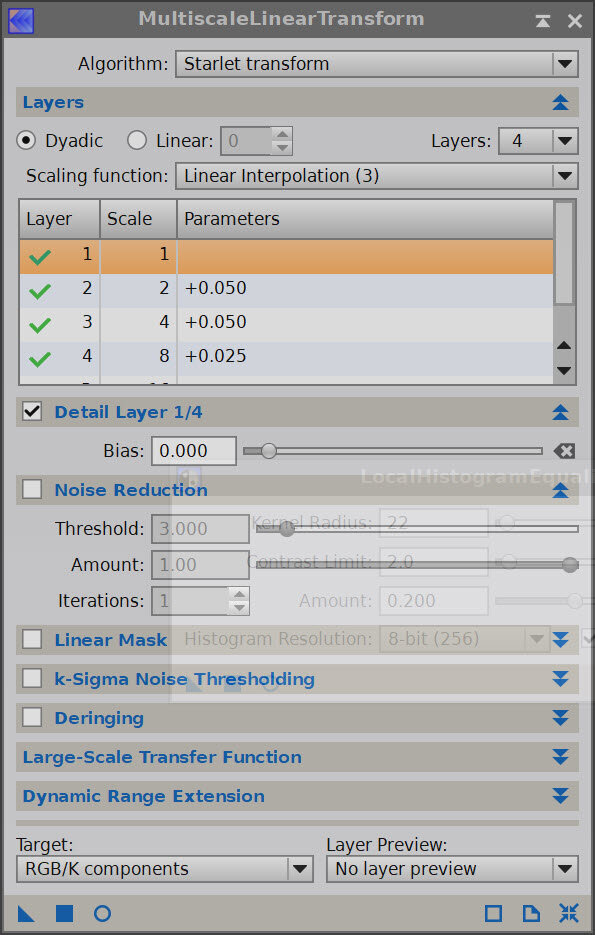
The MLT Sharpening Params used.
Nonlin Lum Processing Steps


Process Steps Shown
Starting Nonlin Lum Image
After HDRMT levels=5
After LHE 66,2.0,0.5, 8-bit Histogram w/ Galaxy Mask
After LHE 22,2.0,0.2, 8-bit Histogram w/ Galaxy Mask
After MLT Sharpening w/ Galaxy Mask
After NXT 0.7 No mask
12.0 Process the RGB Starless Image
There are some green noise pixels, so run SCNR Green 100%
Adjust with CT
Run NXT with 0.8
Adjust color
Create A dust mask by using RangeSelection and Editing with DynamicPaintBrush, and apply CT to tweak
Create a Cycam Mask for the ends of the dust lanes by running ColorMask_mod for cyan, and then clean up with DynamicPaintbrush and adjust with CT
Apply the Dustlane Mask and adjust with CT
Apply the Cyan Mask and adjust with CT
L Image Insert with LRGBCombination Tool
FInal CT Adjust
Nonlin RGB Processing Sequence - Part 1
Process Steps Shown
Starting Nonlin RGB Image Zoomed
After SCNR Green
After NXT 0.8

The Dust Lane Mask

The Cyan Masks
Nonlin RGB Processing Sequence - Part 2


Process Steps Shown
RGB Before Tweaks
After Dustlane Mask Tweaks
After Cyan Mask Tweaks
After L-Insertion
After Final CT Adjust
13.0 Process The Stars
Apply CT to reduce star intensity and increase color saturation for RGB StarsOnly
Apply CT to adjust L StarsOnly
Insert L image to RGB using LRGBCombination
Final CY adjust

Initlal RGB Stars Only image

RGB Stars Only Image After CT Tweak.

L StarsOnly image after CT Tweak

RGB StarsOnly image after L insertion

RGB StarsOnly image after final CT Adjust.
14.0 Add Stars Back in
Use PixelMath and the Screening equation to add the star images to the starless images.

PixelMath Screening Equation used to add star and starless images back together.

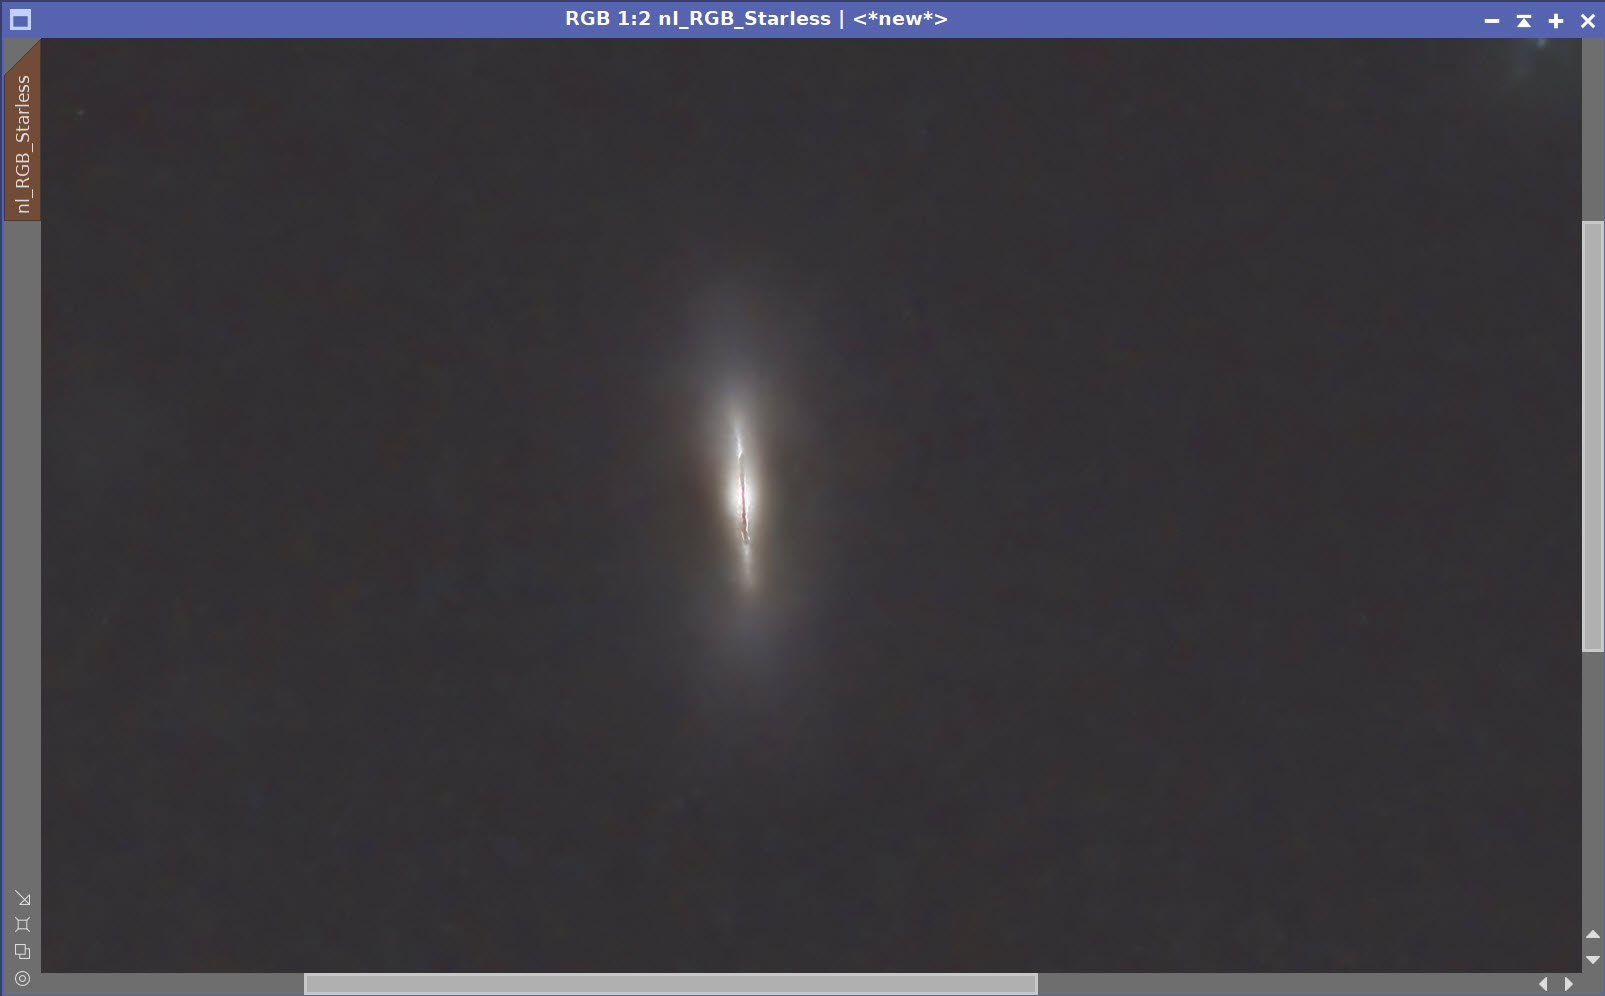
The Image with stars now added back in!
15.0 Export to Photoshop
Save images as Tiff 16-bit unsigned and move to Photoshop
I tweaked things with the camera filter clarity, curves, and color mix - in a global adjustment
I added watermarks and title sections.
Export Clear, Watermarked, and Web-sized jpegs.
The final Image.
Adding the next generation ZWO ASI2600MM-Pro camera and ZWO EFW 7x36 II EFW to the platform…