
Messier 97 - The Owl Nebula and Messier 108 - The Surfboard Galaxy - 4 hours LRGB
Date: May 29, 2023
Cosgrove’s Cosmos Catalog ➤#0120

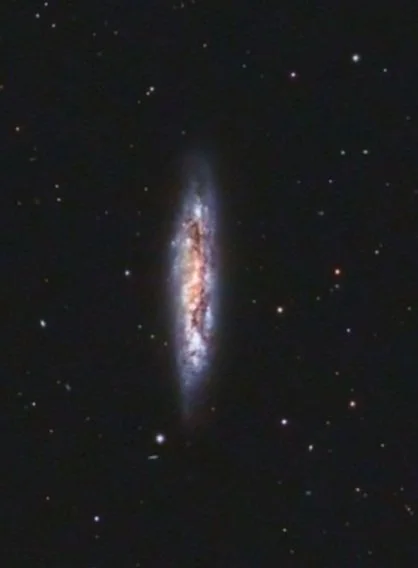
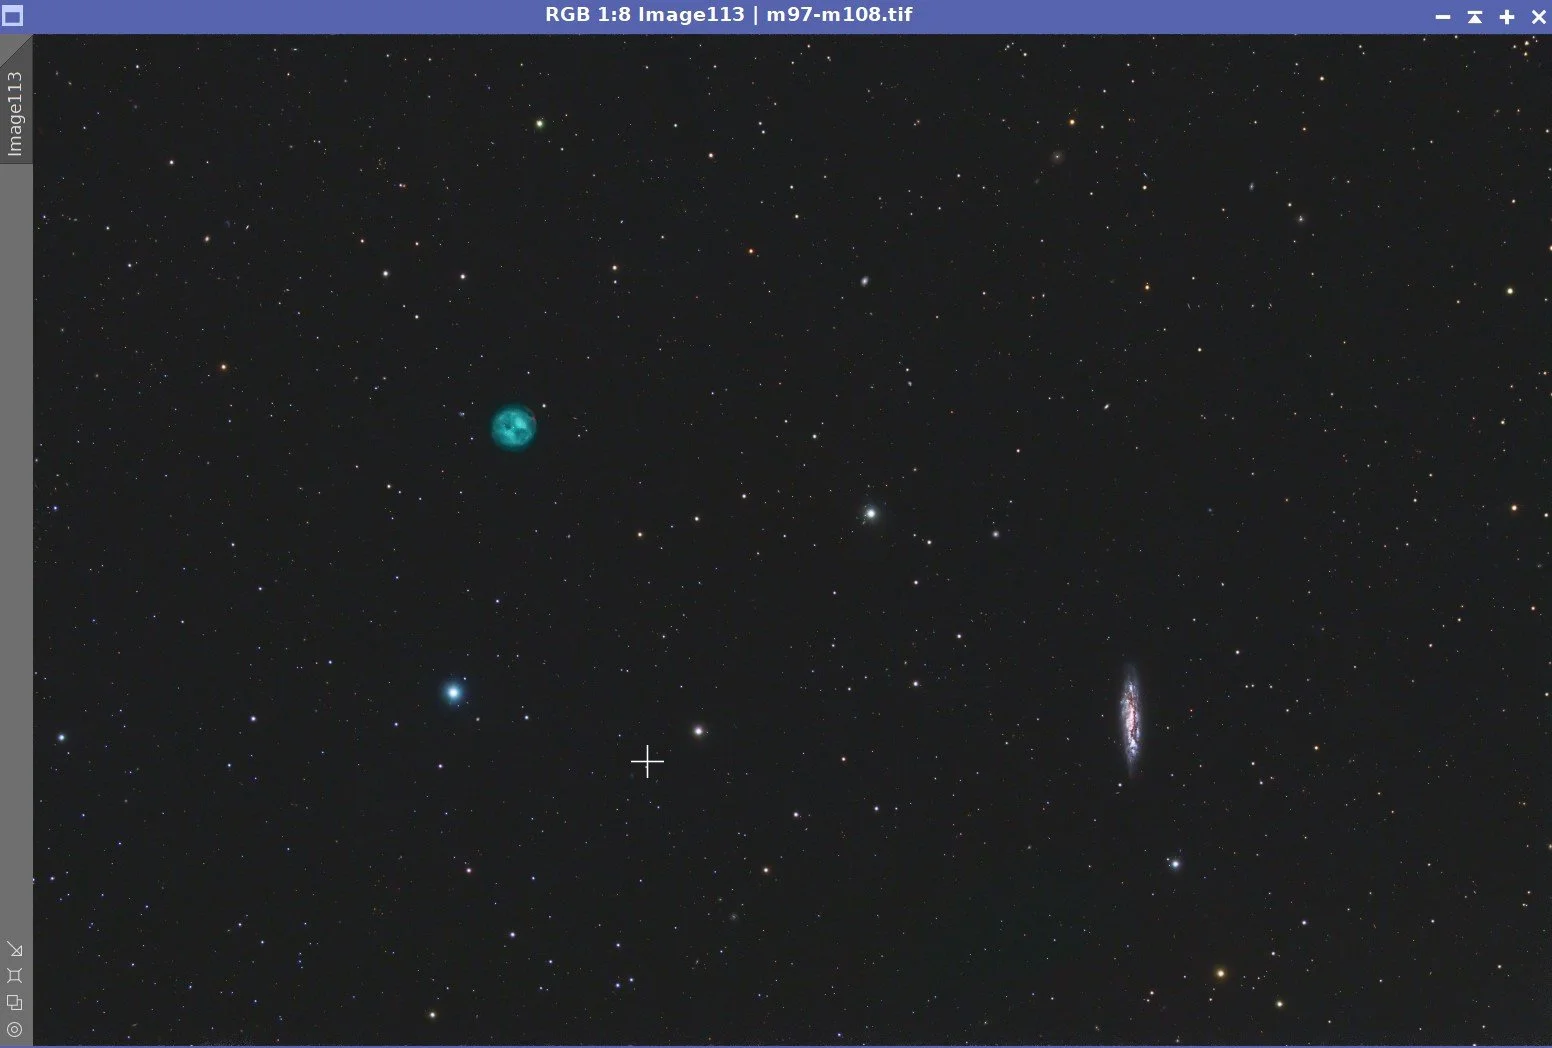
The Owl Nebula (Messier 97) and the Surfboard Galaxy (Messier 108) The first images from the upgraded Williams Optics 132mm Platform. (Click for High Res version via Astrobin.com)
Table of Contents Show (Click on lines to navigate)
About the Target
Two well-known targets can be seen in this frame. The first, Messier 97, is a Planetary Nebula, and the second, Messier 108, is a galaxy. With the reducer in my newly upgraded William Optics 132mm scope, I found I could fit them both into the same field of view!
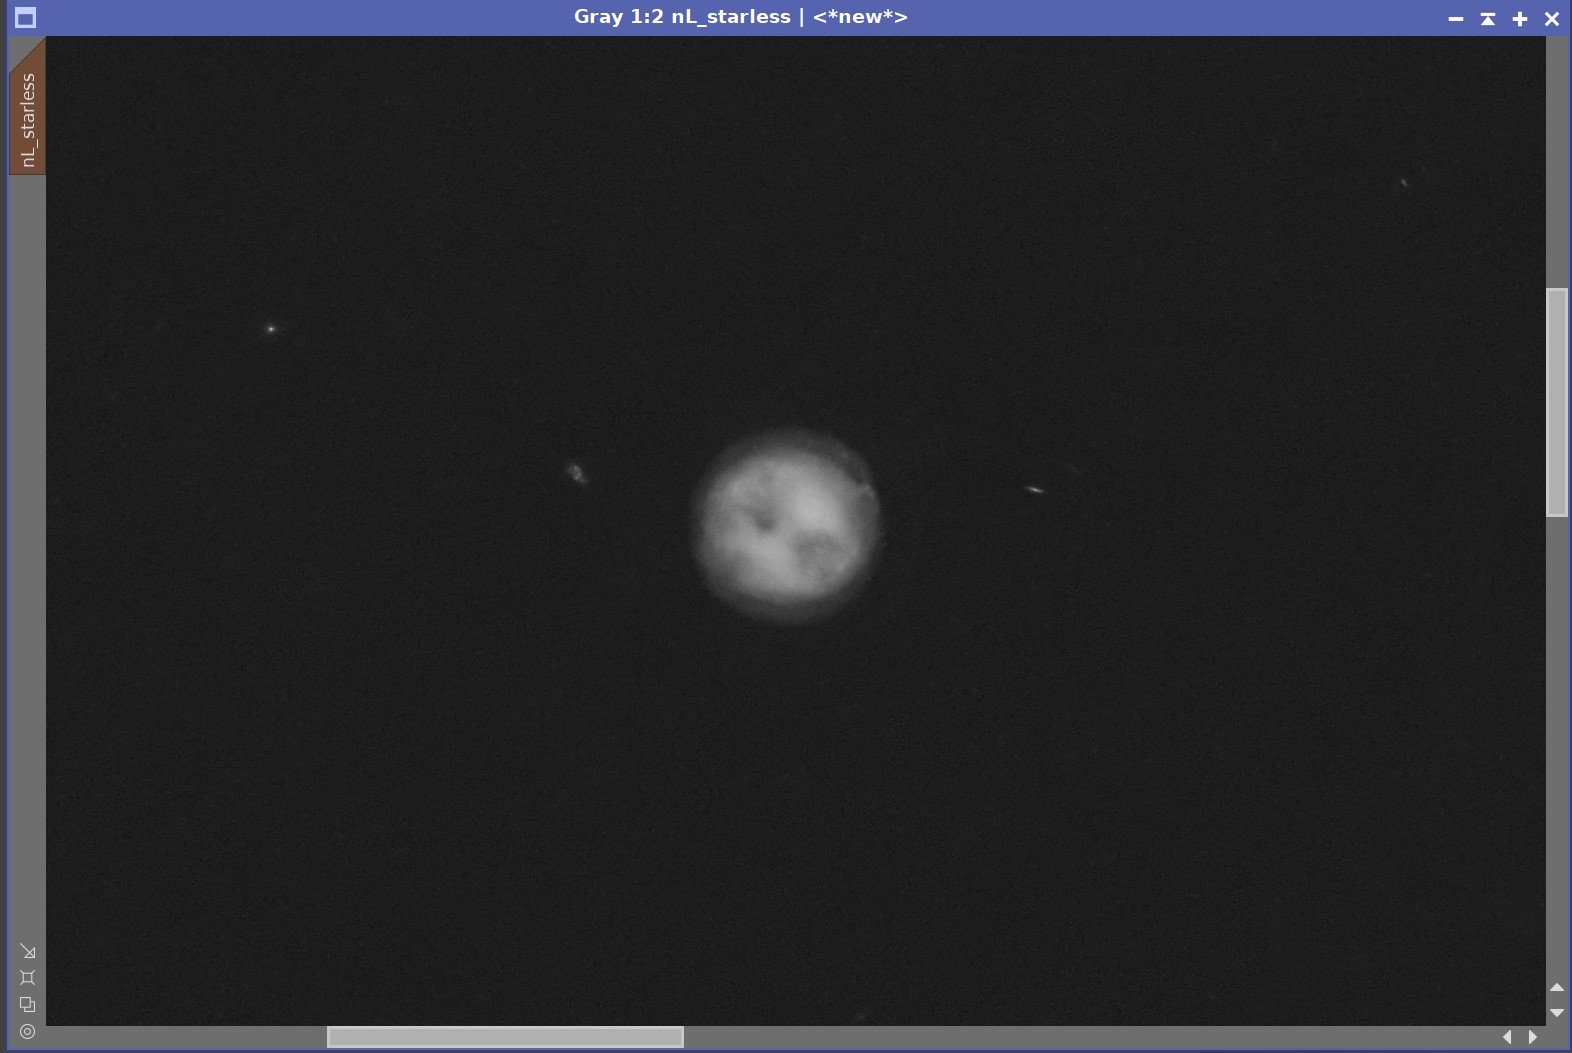
Messier 97
Messier 97, better known as the “Owl Nebula” and NGC 3587, is a planetary nebula found 2,030 light-years away in the constellation of Ursa Major.
The nebula measures about 3.3’, which makes its actual size to be about 1.82 light-years across. It is believed that this nebula was formed about 8,000 years ago.

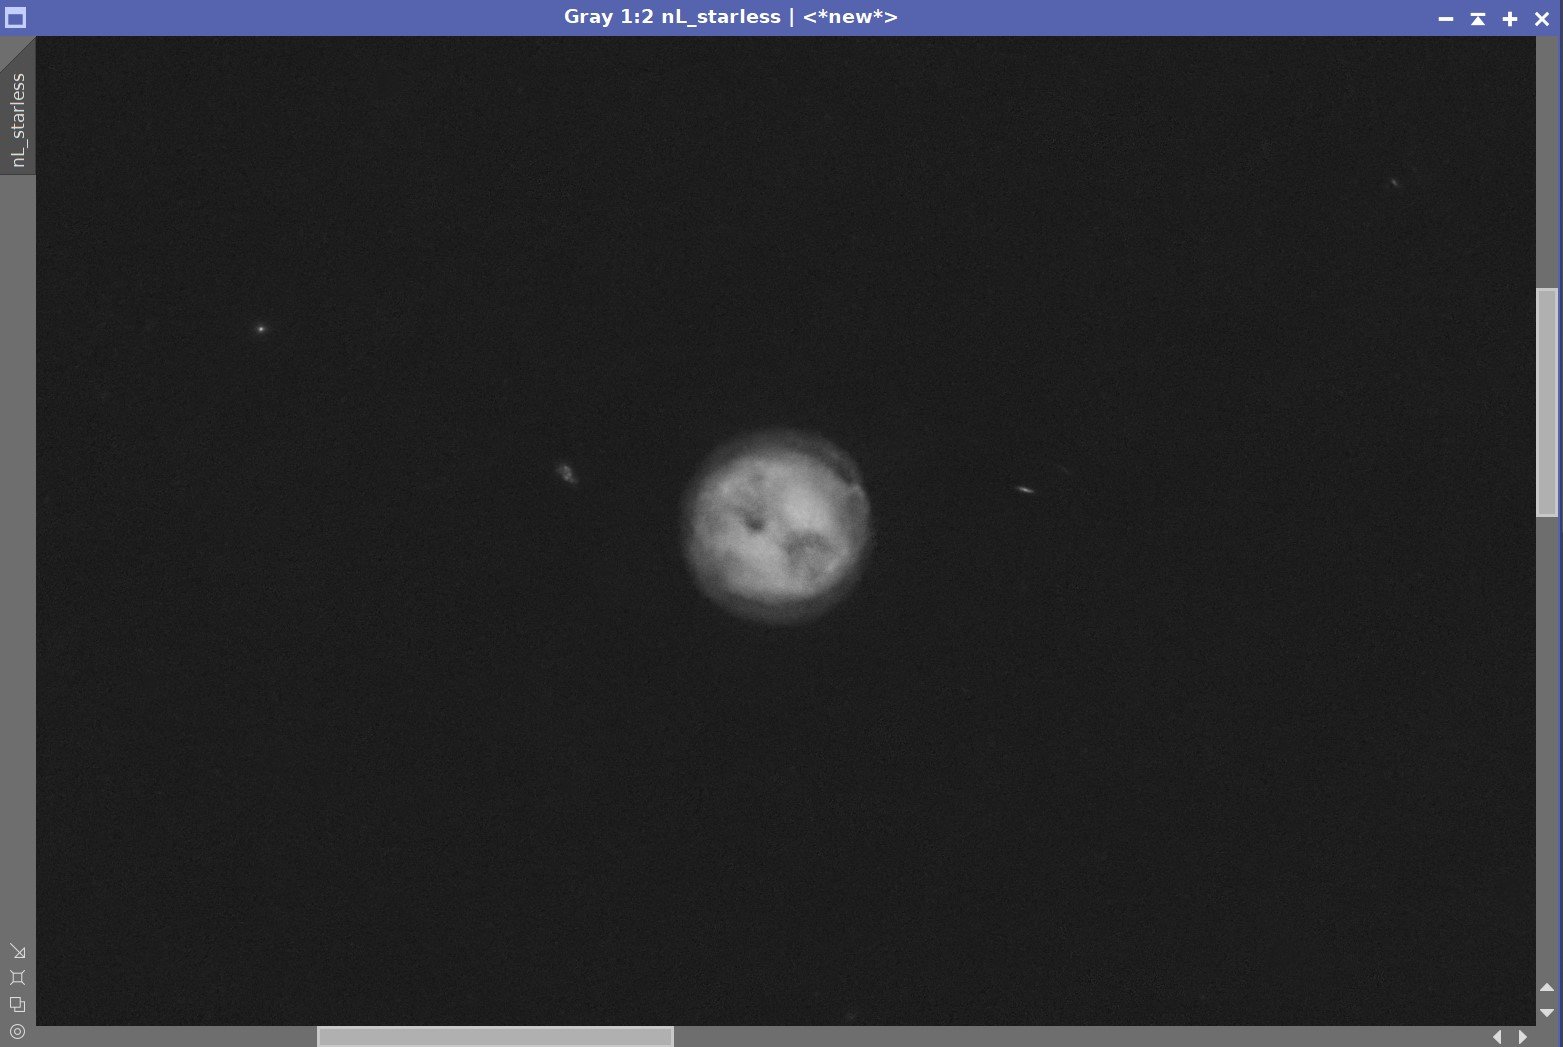
A zoomed in portion of M97.

The drawing of M97 by William Parsons.
It results from the outgassing of material from its central 16th-magnitude star, which has now transitioned to the White Dwarf stage. In the process, three distinct shells of material have been ejected from the star. The central shell is asymmetric and forms the two voids seen as the “eyes” of the Owl.
It was first discovered by Pierre Méchain, the French Astronomer, on February 16, 1781. Pierre was a colleague of Charles Messier, who observed this object a few weeks later and added it to his now-famous catalog.
When William Parsons, 3rd Earl of Rosse, observed the nebula in Ireland in 1848, his hand-drawn illustration resembled an owl's head, and it has been known as the “Owl” nebula ever since.
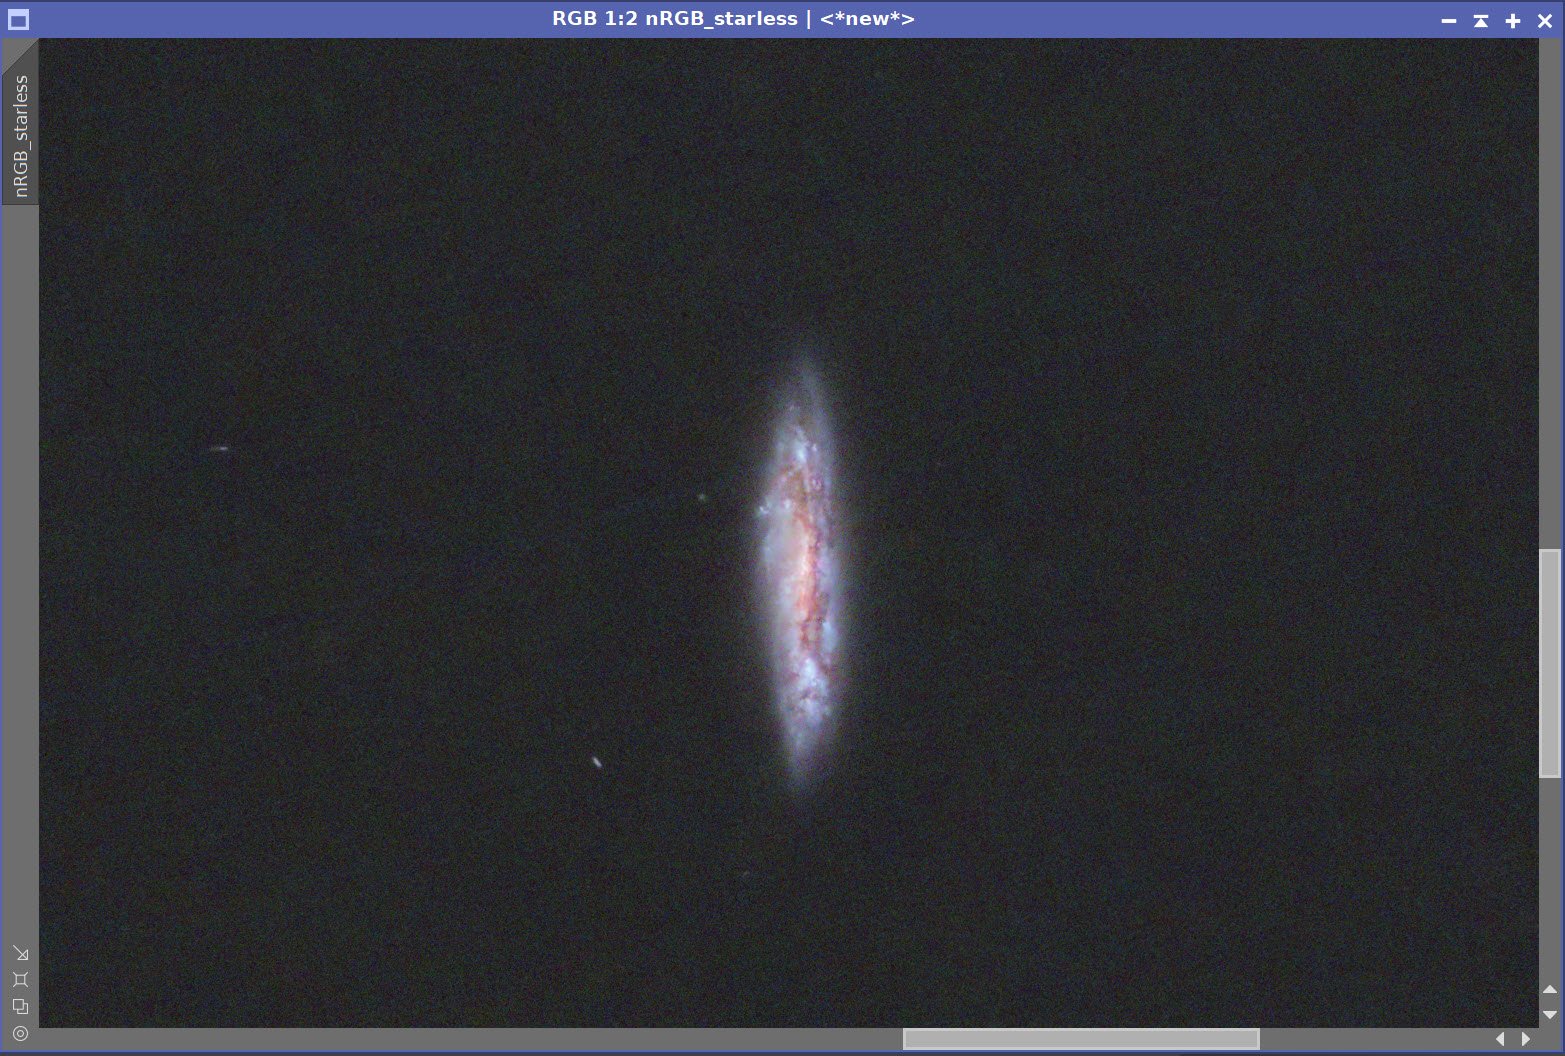
Messier 108
Messier 108, also known as NGC 3556 and nicknamed the “Surfboard Galaxy,” is located 50 arc minutes to the northwest. It is a barred spiral galaxy seen almost edge-on. It is 28 Million light-years away in the same constellation as Messier 97.
M108 is the largest and brightest member of the Ursa Major Cluster of Galaxies, however, it is somewhat isolated from the rest of the group.

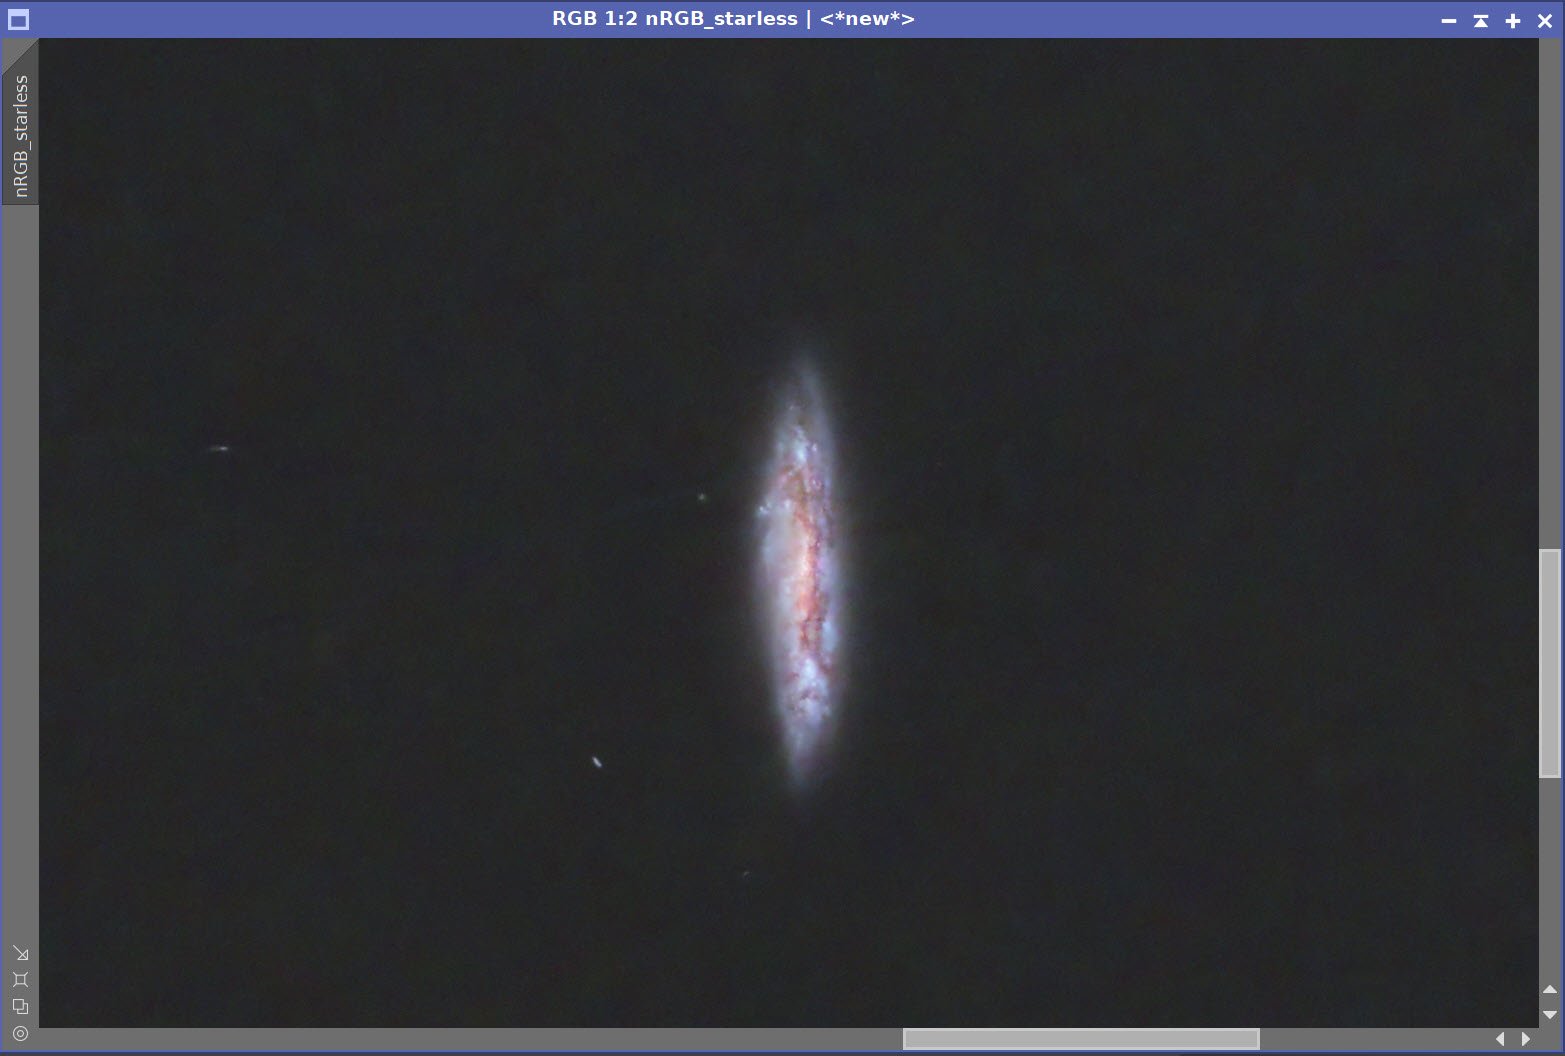
Zoomed in portion of M108.
Classified as an SBcc spiral with loosely wound arms that measures 11.1 ‘× 4.6’ in size.
The galaxy does not have an obvious core or central bulge. But you can see a great deal of structure that comes in the form of a dusty mottled appearance. The central region of M108 is bright and irregular, with a large central bar.
Pierre Méchain also discovered this object in either 1781 or 1782.
The Annotated Image

THis finder chart was created with the ImageSolver and FinderChart tools in Pixinsight.
The Location in the Sky
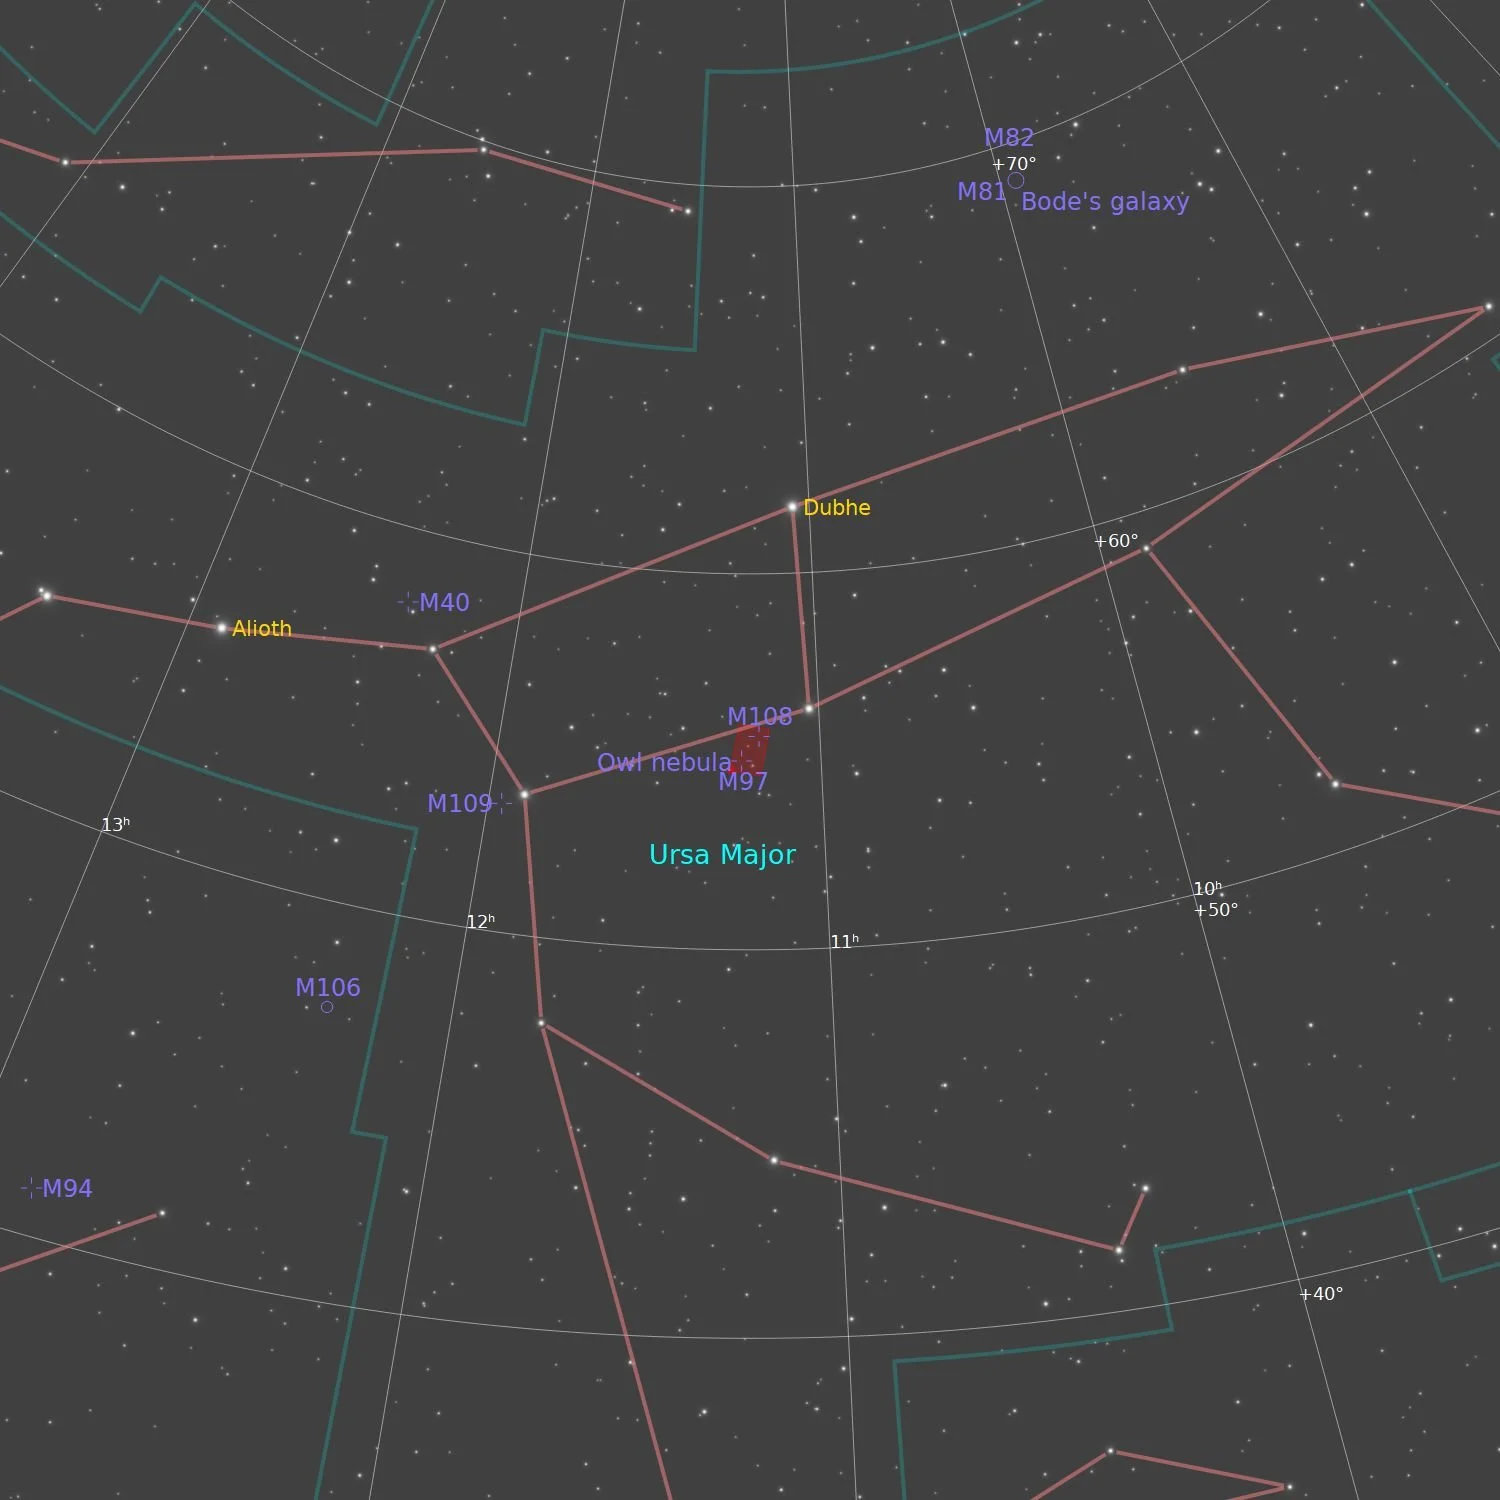
This annotated image was created using the Pixinsight ImageSolve and ImageAnnotation scripts.
About the Project
First Image of the Year
We are at the end of May, and I am finally collecting new photons!
At first, I was held back due to medical restrictions resulting from a surgery I had in the early spring. Finally, I was cleared to go back to normal activities.
Then I was shut down either by poor weather or smoke.
Smoke? In May?
I am used to having to dodge smoke from wildfires originating on the west coast during later portions of summer - but now?
This time we are getting hit by smoke from the tragic wildfires in Alberta, Canada. We have visited this area, and the Canadian Rockies are just beautiful - what is happening with these fires is terrible!
The smoke gets picked up by Jet stream, and this carries it over northern NY state.

The Smoke Plume from the Alberta Wildfires.
Finally, we caught a break. No - the fires have not gone out.
Rather, the Jet Stream carried the smoke to the south of us on May 24th and 25th! This gave us a window allowing some imaging before the Moon came back into the picture.

The smoke band moved to the south of us and we had a window for some imaging!
First Image from the Modied Williams Optics 132mm Platform
While waiting for the skies to clear, I undertook a project to upgrade my Williams Optics 132mm platform. I added a flattener and reducer that took the focal length from 920mm down to about 736mm - changing the system f/ratio from f/7 to f/5.5.
I also upgraded the camera from a ZWO ASI1600MM-Pro to the newer ASI2600MM-Pro! I already have one ASI2600MM-Pro camera on my AP130 platform and I love the performance I get from that camera - so I was excited about this change.
The details of this upgrade can be seen in this post HERE.
A video showing the update being done can be seen below:
Once the upgrade was complete, I tested to ensure I could reach the focus point and the back focus was tuned right. But this was the first chance to capture some photons with it.
I was excited to see how this would all work out.
Choosing the Target
One result of the upgrade is that I now have three distinct fields of view from my three telescope platforms.
The FRA400 platform has the widest, and the AP130 platform has the narrowest. With the upgrade, the WIlliam Optics 132 Platform is wider than it was and fell in the middle of the pack.
So when it came to targets, I was looking for something a bit larger to shoot.
This can be difficult during Galaxy Season. But as I looked around, I saw M97. This was always a favorite object of mine to view visually when I was younger, and I have not had a chance to image this object as of yet.
Then I remembered that there was a galaxy not too far away. This turned out to be M108. I wondered if I could get both into the same field of view.
I pulled up Sequence Generator Pro and used the Framing and Mosaic Wizard to try it out.
Sure enough - they fit just fine. So I decided to give them a shot.
Data Capture
Data was captured on the nights of May 24th and 25 of 2023.
For some reason, I was having auto-focus failures on the first night. The focus profiles were really flat, and I wondered if the coupling had loosened up. I was able to pause things and get the focus I wanted dialed in when I shifted filters, but I was going to have to look at the problem. The next morning I tightened up the couplings and increased the step size used by the SGP auto-focus routines.
On the second night, things worked just fine.
In general, conditions were good, but it was very cold out for this time of year. I ended up wearing a heavy parka to keep warm.
The sky was not always as dark or clear as I would have liked, and the transparency was sometimes poor.
I suspected that we still had some thin smoke wafting through the area. This was more pronounced the second night - at one point, all of the star tracking on all three platforms were lost, and I could not see any stars in the sky! Thankfully this passed relatively quickly, and I could get back to work.
Finally, I found I was still dealing with some effects from my surgery. While the incisions had healed, I found that my normal stamina had not yet returned. I discussed this with my surgeon, and he said it was not uncommon to take up to 6 months to return to my normal stamina.
So I was pretty tired the first night, and the second night I was not just tired - I was exhausted. I could not keep my eyes open, so I shut down at about 2 am - I decided not to push things.
It felt horrible not being able to finish the night, but I had to be careful.
Data Analysis
I blinked all of the data and was surprised by a few things.
First, I saw a lot of satellite trails - much more than usual. That may have been because of the now wider field of view.
But I also saw a lot of frames with a brighter sky - the variance in the sky background was significant. So I rejected the bad images, then used SubframeSelector to analyze images for WHFM and Eccentricity and eliminated the worst of those.
In the end, I dropped a total of 23 frames. That accounts for 34.5 minutes of integration! I hate to remove hard-fought-for subs, but when they are bad, they need to go.
This reduced my integration to just slightly under 4 hours.
Full details on the blink and SubframeSelector Processing can be seen in the detailed image processing workflow shown below.
Previous Efforts
I have never shot M97 before, but I have shot M108.
This was done back in March of 2021. My AP130 platform was used, giving me my largest image scale with a focal length of 1080mm. On the other hand, this was before I had upgraded the camera to the 2600. So I thought this would be an interesting comparison. A lower focal length with a better camera and longer focal length with a less capable camera.
The original Imaing Project for M108 can be seen HERE.
And here is a comparison:
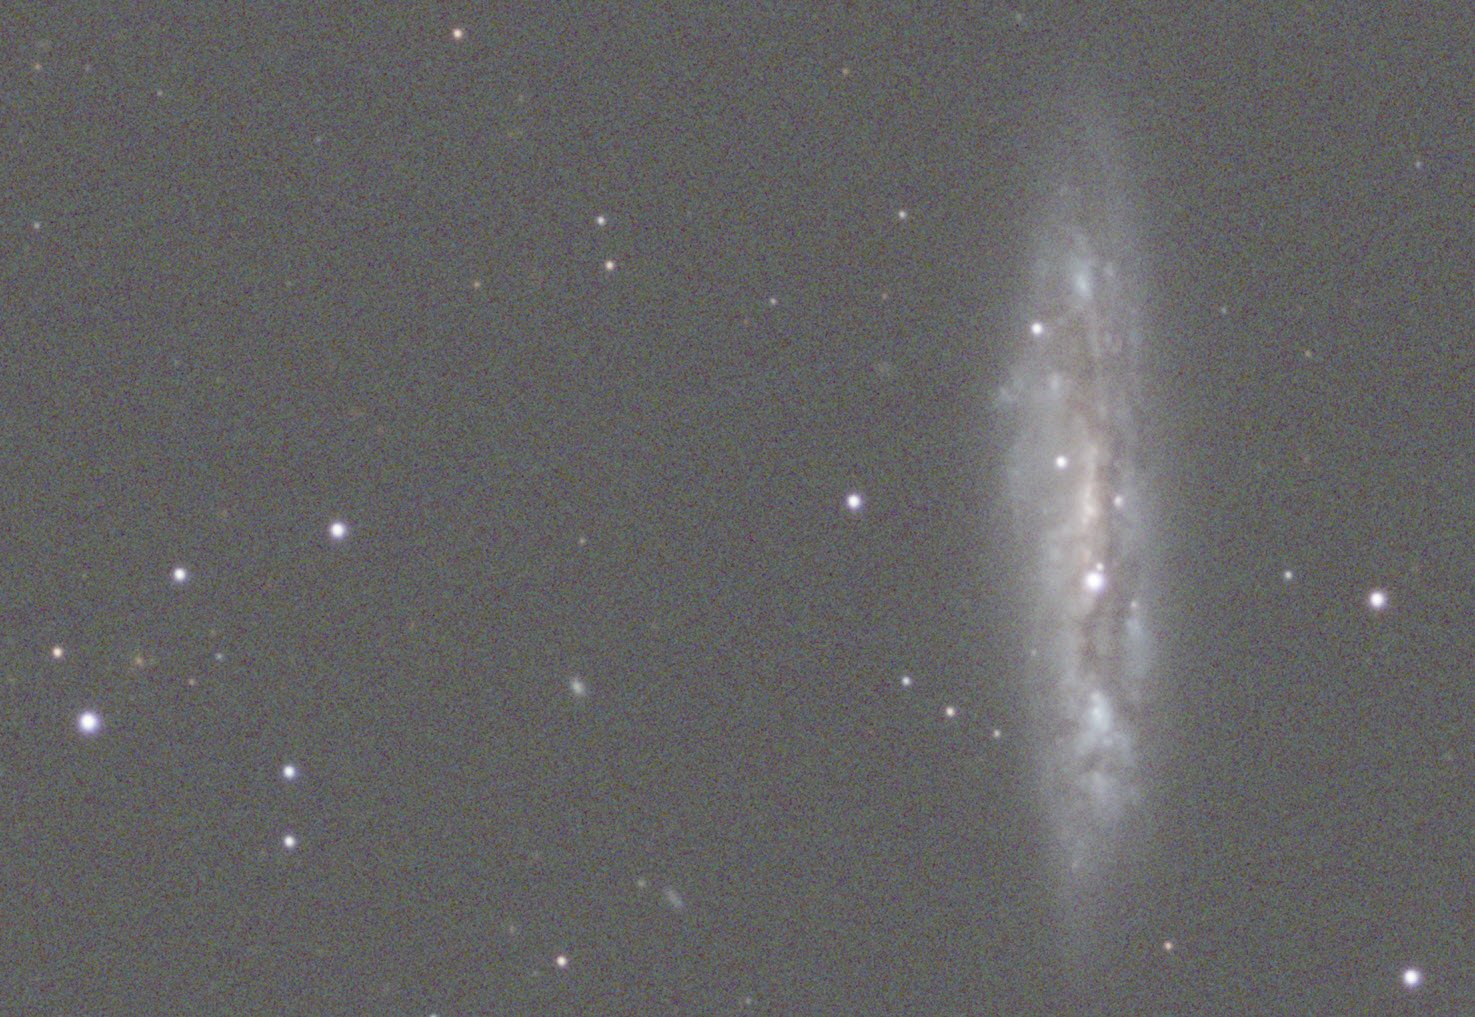
The March 2021 Version (click to enlarge)
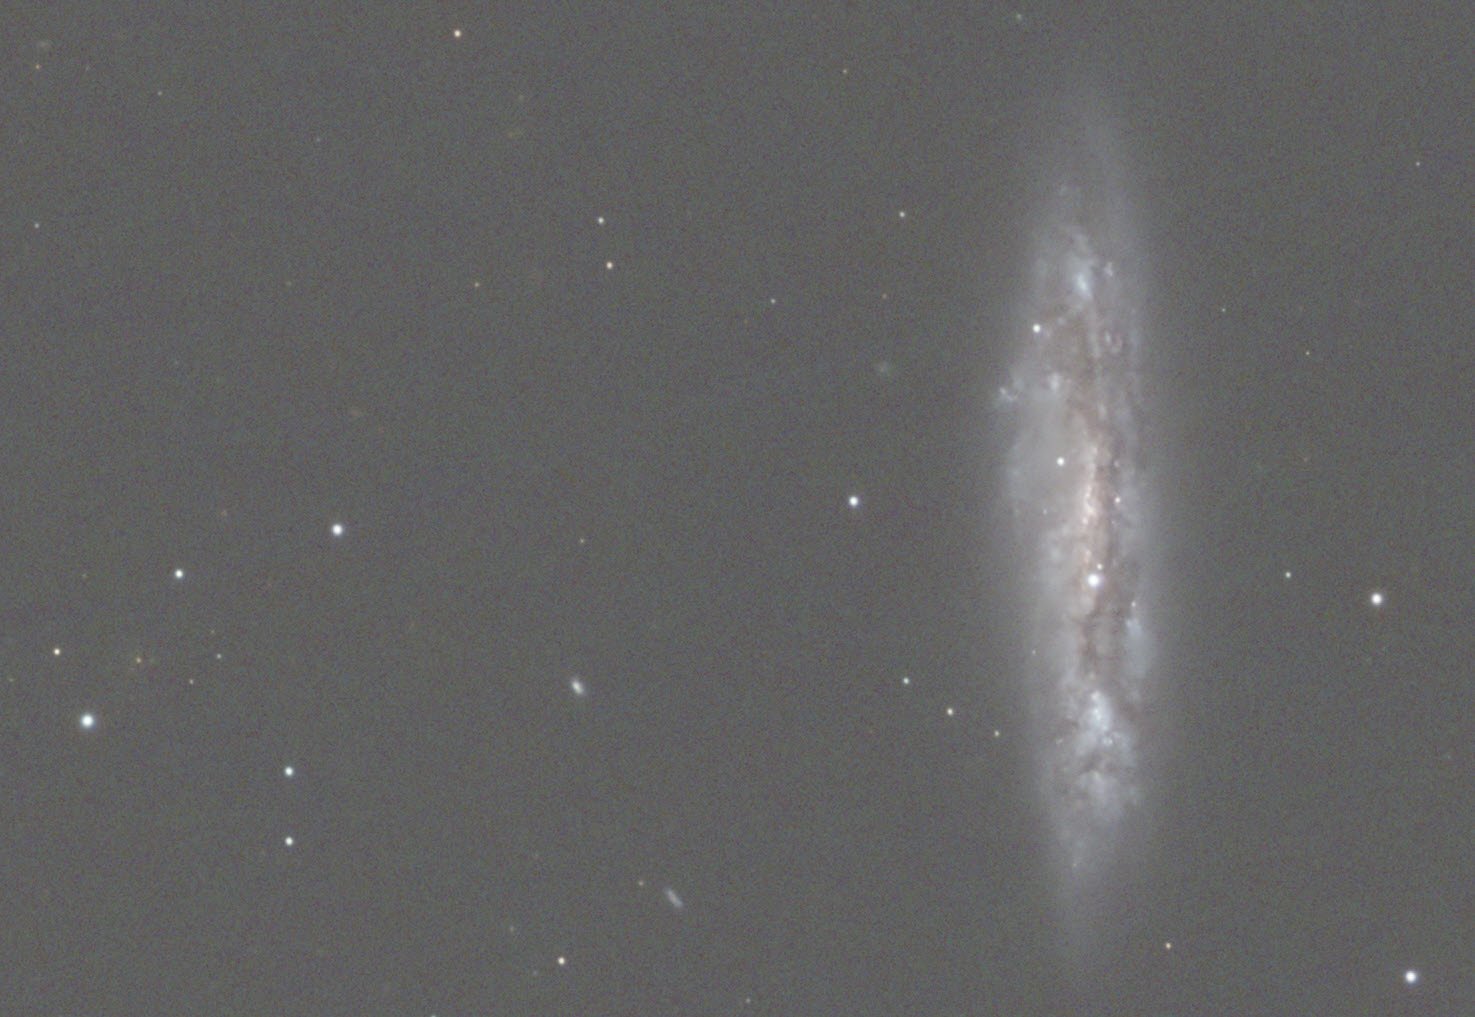
The Current Version (click to enlarge)

Here is a crop of the March 2021 Version. Some great detail is captured here!
Here is a cropped view of the Current Version. Not bad but missing some detail. Some of this is the difference in the focal length, but some of this is probably due to poor skies with some smoke hanging around.
I would say that the older image has better detail. This, I think comes partially from the longer focal length from the AP130 scope, and part comes from the fact that I think the skies were a lot better back in 2021 when I did not have to deal with wildfire smoke plumes!
Image Processing
The basic image processing flow I followed here precisely matches the workflow chart I have previously shared using my LRGB BXT-enabled workflow:

The processing flow for this project.
The Master images were created with Drizzle processing at 2X. The system is slightly undersampled, which should maximize image detail - especially when used with the BlurXTerminator.
I created the RGB linear image, and then BXT was applied to both the Lum and RGB color image. I was not worried about matching star sizes between the Lum and RGB image, as I would use a starless workflow, and the final stars would come from just the RGB image.
After some NoiseXTermination, I went nonlinear and then starless.
The Lum starless image was processed to enhance detail using a mask to isolate the galaxy and the nebula, and these were individually enhanced with LocalHistogramEqualization.
The RGB starless image was processed for its color position.
The Star images were modified to enhance color saturation and reduce the star sizes a bit.
Then all images were combined and submitted to Photoshop for final tweaks.
Results
I’m pretty happy to gather photons again - it’s been a LONG since I had fresh data.
I’m also pretty happy with the scope's performance after the upgrade. Everything worked well, and the data quality, given the night skies I was dealing with - looks good!
But honestly, the resulting image is not one of my favorites.
The Owl Nebula and the Galaxy alone came out fine, but they are small, and because of that, I don’t think the composition is that compelling.
I am usually worried about going too far on color saturation and contrast - but dialing those parameters back on this image left an image with even less drama. So I went with the stronger position.
While I am delighted to have fresh data and things to be processing again after a long gap, this result is just OK.
What do you think about this image?
A detailed Processing Walk-Through is provided for this image at the end of the posting…
More Information
Wikipedia: Messier 97
Wikipedia: Messier 108
Messier-Obects.com: M97
Messier-Objects.com: M108
Deep-Sky Coner: M97 & M108
Capture Details
Lights Frames
Data were collected over two nights: May 24 & 25, 2023
All data after rejected frames were culled.
46 x 90 seconds, bin 1x1 @ -15C, Unity Gain, ZWO Lumnace filter 36mm unmounted
42 x 90 seconds, bin 1x1 @ -15C, Unity Gain, ZWO Red filter 36mm unmounted
37 x 90 seconds, bin 1x1 @ -15C, Unity Gain , ZWO Green filter 36mm unmounted
33 x 90 seconds, bin 1x1 @ -15C, Unity Gain , ZWO Blue filter 36mm unmounted
Total of 3.95 Hours
Cal Frames
25 Darks at 90 seconds, bin 1x1, -15C, Unity gain
15 Flats at bin 1x1, -15C, Unity gain - for LRGB filters
25 Dark Flats at Flat exposure times, bin 1x1, -15C, Unity gain
Software
Capture Software: PHD2 Guider, Sequence Generator Pro controller
Image Processing: Pixinsight, Photoshop - assisted by Coffee, extensive processing indecision and second-guessing, editor regret, and much swearing…..
Capture Hardware:
Scope: William Optics 132mm f/5.5 FLT APO Refractor
Focus Motor: Pegasus Astro Focus Cube 2
Cam Rotator: Pegasus Astro Falcon
Guide Scope: Sharpstar 61EDPHII
Guide Focus Motor: ZWO EAF
Mount: Ioptron CEM 60
Tripod: Ioptron Tri-Pier
Camera: ZWO ASI2600MM-Pro
Filter Wheel: ZWO EFW 7x36mm II
Filters: ZWO Gen II 1.25” LRGB,
Astronomiks 6nm Ha, O3, S2 Filters
Guide Camera: ZWO ASI290MM-Mini
Dew Strips: Dew-Not Heater strips for Main & Guide
Scopes
Power Dist: Pegasus Astro Pocket Powerbox
USB Dist: Startech 8 slot USB 3.0 Hub
Polar Align Cam: Polemaster
Software:
Capture Software: PHD2 Guider, Sequence Generator Pro controller
Image Processing: Pixinsight, Photoshop - assisted by Coffee, extensive processing indecision and second-guessing, editor regret, and much swearing…..
Click below to see the Telescope Platform version used for this image:
Image Processing Walk-Through
(All Processing is done in Pixinsight - with some final touches done in Photoshop)
1. Blink Screening Process
Lum
Some trails and gradients
4 frames were removed for bright skies
Red
Some trails or gradients
5 frames were removed for bright skies
Green
Some trails or gradients
3 were removed frames
Blue
Some trails or gradients
A lot of frames with brighter skies
4 of the worst were removed frames - but others left.
Flats
Flats were collected for the first night and used for both nights. The flats looked good.
Dark flats
Looks good
Darks
90-sec darks were collected fresh after the first night and used. All looked good.
The Smoke Plumes were diminished for these two nights, but some were still around and drifted into view.
2. Subframe Selector Analysis
LUM
2 removed for FWHM
2 Removed for Eccentricity
Red
2 removed for FWHM
1 removed for Eccentricity
Green
Short on green subs, so I left these alone
Depending on rejection to clean up what is there.
Blue
Kind of a strange pattern here - but since I am low on Blue I left it alone.
Eccentricy -also strange but I kept them all
SubframeSelector for Lum-> FWHM (click to enlarge)
SubframeSelector for Red-> FWHM (click to enlarge)
SubframeSelector for Green-> FWHM (click to enlarge)
SubframeSelector for Blue-> FWHM (click to enlarge)
SubframeSelector for Lum-> Eccentricity (click to enlarge)
SubframeSelector for Red-> Eccentricity (click to enlarge)
SubframeSelector for Green-> Eccentricity (click to enlarge)
SubframeSelector for Blue-> Eccentricity (click to enlarge)
3.0 WBPP 2.5.3
Load lights
Load flats first night only
Load darks flats
Load 90-sec darks
Select Maximum Quality
Keyword: Night
Output directory: wbpp
Set Dark Exposure tolerance: 0.0
Lights Exposure tolerance: 0.0
Lights - Enable everything but linear correction
CC set for all filters
Map missing flats and darks
Drizzle - 2
Enable Autocrop
Executed in 1:15:46 - no errors

WBPP Calibration view.

WBPP Post-Calibration View
4.0 Load Master Linear Images
Load the resulting Master Linear image and rename them.

LRGB Master Linear Images.
5. Dynamic Background Extraction
DBE was run on each filter master, as seen below.
As you can see - there was a strong gradient running top-left to bottom-right.
L Sampling Plan (click to enlarge)
R Sampling Plan (click to enlarge)
G Sampling Plan (click to enlarge)
B Sampling Plan (click to enlarge)
L Before Image (click to enlarge)
R Before Image (click to enlarge)
G Before Image (click to enlarge)
B Before Image (click to enlarge)
L After Image (click to enlarge)
R After Image (click to enlarge)
G After Image (click to enlarge)
B After Image (click to enlarge)
L Background (click to enlarge)
R Background (click to enlarge)
G Background (click to enlarge)
B Background (click to enlarge)
6.0 Create and Process the RGB Linear Image
Use Channel Combination to create the initial RGB Image
Do Color Calibration:
Create a preview for a background sky reference region
Run SPCC on the image using this region as a reference.
Run BlurXTerminator
Run PFSIMage to determine the FWHM for X and Y: 4.33, 3.86
Run a test series to experiment with DXT parameters
Run BXT
Correct First
Sharpen stars 0.38, Halos: 0.0
Manual Nonstellar sharpen with the value of 4.0, 0.90 correction
Run NoiseXTermintor: 0.55
Master_RGB after Channel Combination (click to enlarge)

SPCC Panel config used.

Resulting SPCC Regression lines

Master_RGB after SPCC.

BXT Panel Config Used.

Master_RGB Before and After BXT and Then NXT
7.0 Process Lum Image
Run PFSImage to get FWHM for X and Y: 5.5, 4.97
Experiment with BXT to get the best Values.
Run BXT
Correct first
Stellar Correction: 0.32,, Halo: 0.0
Non Stellar: 5.0, 0.9
Run NXT at 0.55

The PSFImage results showing the FWHM for X and Y.

BXT Panel config for Lum Image
Lum: Before BXT, After BXT, After NXT=0.55
8.0 Take Images Nonlinear
For both RGB and Lum:
Since we will be using a starless workflow, use the STF->HT method to go nonlinear
Do a final adjustment with CT.
Nonlinear Lum image - Initial (click to enlarge)
Nonlinear Lum image -After CT Tweak(click to enlarge)
Nonlinear RGB image - Initial (click to enlarge)
Nonlinear RGB image -After CT Tweak(click to enlarge)
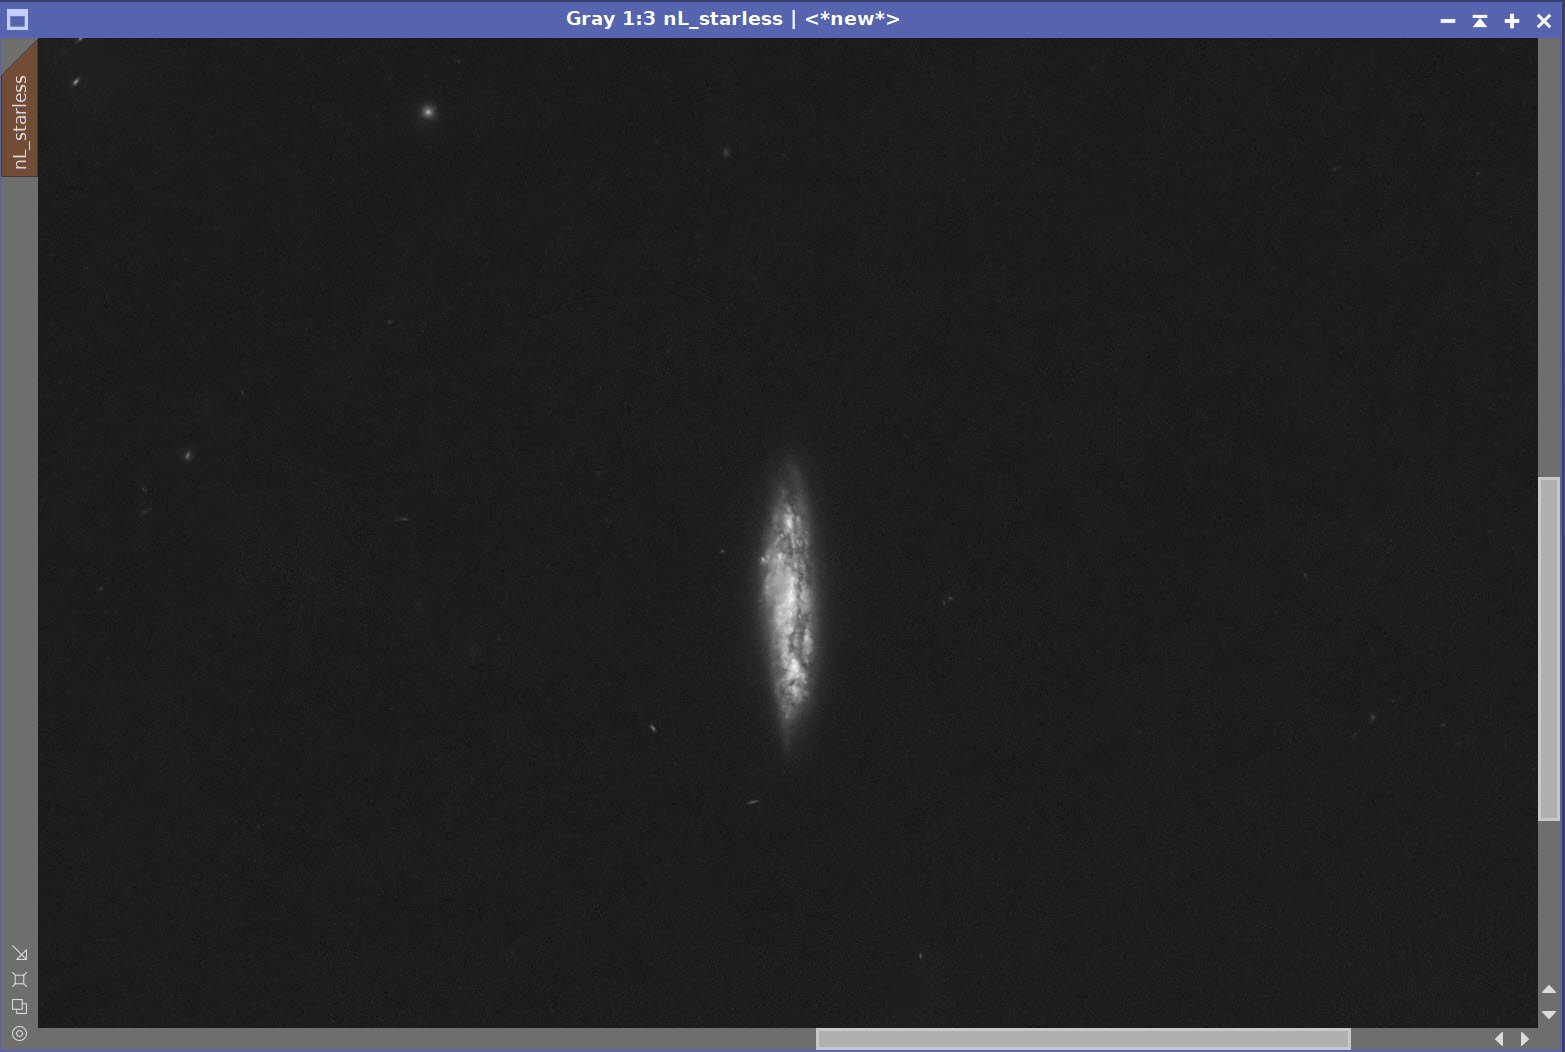
9.0 Go Starless
Run StarXTerminator on the Nonlinear RGB image - creating a stars-only image and a Starless image using Unscreen.
Run StarXTerminator on the Nonlinear Lum image - creating no stars-only image.
Initial RGB Starless Image (click to enlarge)

Nonlinear Lum Image (click to enlarge)
RGB Stars-Only Image (click to enlarge)
10. Process Lum Starless Image
Using the Game Script, create an Owl Nebula Gradient Mask
Using the Game Script, Crete a Galaxy Gradient Mask
Apply the Galaxy Mask
Apply LHE1: Radius=24, Constast Limit=2.0, Amount= 0.32, 8-bit histogram
Apply LHE2: Radius=62, Constast Limit=2.0, Amount= 0.32, 8-bit histogram
Apply the Owl Mask
Apply LHE: Radius=30, Constast Limit=2.0, Amount= 1.0 8-bit histogram
Remove Mask and apply a final CT Tweak

Galaxy Mask

Owl Nebula Mask

Galaxy Mask In Place, Before and After LHE1 & LHE2
Owl Mask In Place, Before and After LHE

The Final Lum Starless image, after a final CT tweak.
11.0 Process the RGB Starless Image
Apply the Galaxy Mask
Tweak tone scale and color saturation with CT
Apply the Owl Mask
Tweak tone scale and color saturation with CT
Run NXT with 0.76
Combine L starless image with LRGBBCombination Tool

The starting image

After a CT tweak using the Owl Nebula Mask (sorry - hard to see in this view - I should have zoomed in before capture!)

After a CT tweak using the Galaxy Mask (sorry - hard to see in this view - I should have zoomed in before capture!)
RGB Starless Image Before and After NXT=0.76

RGB Starless After Lum Starless Insertion
12.0 Process The Stars
Apply CT to reduce star intensity and increase color saturation.

Initlal RGB Stars Only image

RGB Stars Only Image After CT Tweak.
13.0 Add Stars Back in.
Use PixelMath and the Screening equation to add the star images to the starless images
Crop image to highlight the nebula and the galaxy bettter

PixelMath Screening Equation used to add star and starless images back together.
Recombined Image

Crop done to better show the nebula and the galaxy

The final image format
14.0 Export to Photoshop
Save images as Tiff 16-bit unsigned and move to Photoshop
I tweaked things with the camera filter clarity, curves, and color mix - in a global adjustment
I used the lasso tool with a feather of 40 pixels and selected the galaxy and the nebula, and adjusted clarify and color mix
I added watermarks and title sections.
Export Clear, Watermarked, and Web-sized jpegs.

Version 4.0 of the Williams Optics 132mm platform is a major upgrade that involves adding a new 2600 series mono camera, a new 7x36mm EFW and filters, and a new WO Flattener and 0.8X Reducer that will support the larger format sensor and covert the scope to a much faster f/5.5 system.
This post documents the changes and discusses how I planned this change and how it was executed.