
Using Richardson-Lucy Wavelet Regularization Parameters in Pixinsight Deconvolution
April 25, 2022

Edit Log
04-25-22 pm: Added a “Using Both” section about using both Wavelet Regularization and object masks at the same time.
05-04-22 pm: Updated the final test discussion based on feedback comments by Jon Rista.
Table of Contents Show (Click on lines to navigate)
Background
I recently posted my seven-part series on Pixinsight Deconvolution and followed up shortly thereafter with a post on using the EZ-Decon script in Pixinsight:
Using Deconvolution In Pixinsight - Part 1 - An Introduction
Amongst other things, these posts described using an object mask to protect low signal areas from deconvolution operations, thus preventing the enhancement of noise by the algorithm.
I also mentioned the Wavelet Regularization Panel in the deconvolution tool. I shared an article by Jon Rista that suggested that the appropriate setting of these parameters would obviate the need for an object mask in most circumstances.
I admitted that I did not understand how to work with these parameters. My recommendation, at the time, was to use the object mask to protect low signal areas. This seemed like good advice since using such masks was something that most Pixinsight users were familiar with.
I also said that I would endeavor to learn more about using the regularization parameters and write a follow-up post once I did.
This is that follow-up post!
Learning About the Wavelet Regularization Parameters
Getting a handle on using the regularization parameters was trickier than I thought it would be.
I assumed there must be good documentation somewhere, and I just needed to find it and go through it.
However, this does not seem to be the case. I did not find such documentation that was helpful in a practical sense.
So I started once again with Jon Rista's excellent posting:
Proper use of regularized Richardson-Lucy Deconvolution
This gave a great overview of the concepts involved and provided some guidance around their use. However, the posting looked like it ended prematurely - with some placeholders for future topics that Jon has not yet written up.
So I contacted Jon directly, and through that correspondence, he graciously provided me with some additional perspective that I will share in this posting.
In addition to this, I also found two posts in the Pixinsight forum where Juan Conejero, who implemented the deconvolution code, discussed the concepts. These were also very helpful:
https://pixinsight.com/forum/index.php?threads/deconvolution-problems.10509/
Note: that in the last article here, Juan Conejero seems to be saying that deconvolution may not have much value for many images - but I, for one, find that I can often enhance harness in a very useful way in my images, so I must respectfully disagree with his takeaway in that post.
Finally, I spent a lot of time experimenting with the parameters and seeing what they actually did. After a while, I began to get a feel for things and was able to deepen my understanding.
My goal with this post is to share my current understanding and hopefully help you begin to take fuller advantage of Wavelet Regularization.
Viewing Note: some of these effects are subtle, and I would strongly recommend viewing the image samples on a large monitor at full scale, so you have the best chance to see the subtle differences being shown!
Protecting Low Signal Areas with a Mask
Let's go back for a moment and discuss using the object mask to protect low-signal areas. The idea here is to use the mask to attenuate the action of the deconvolution tool.
Where the mask is:
Pure white: deconvolution has a full effect
Pure black: deconvolution has no effect
Shades of Gray: deconvolution has some effect
When building the object mask, you adjust it to clip the blacks and clip the whites so that you have areas where there is both full and no convolution effect. You will also have gray transition areas in the mask, which means some partially scaled deconvolution effect will be allowed.
These gray areas are both good and bad.
The good news is that areas with mixed-signal and noise areas will still get some enhancement.
The bad news is that the noise in these areas will also be acted on.
Masks are easy and somewhat intuitive to use, but we can see that they can restrict possible benefits, and due to the gray areas in your mask, you may still be enhancing noise.
The Idea Behind Richardson-Lucy Wavelet Regulation
The problem stems from the iterative nature of deconvolution and the fact that it is very sensitive to noise.
The algorithm can pickup up a noise kernel in the image and enhance it during one of its passes, creating an artifact. Subsequence passes will build on this artifact, little by little, until you now have an observable pattern. What makes it even worse is that often, the pattern is no longer random, allowing it to have an even greater visual impact.
The Richardson-Lucy algorithm uses a wavelet regularization scheme to separate significant image structures from noise at each image scale that it operates over. Deconvolution is run on the significant structures while the noise components are suppressed.
So how does the algorithm determine what is considered noise and what is considered image structure?
This is where the Wavelet Regularization Parameters come in. They define this separation at each scale defined, up to five layers. Each layer has a threshold and a noise suppression parameter customized to that scale.
There is a key point here that should be stressed:
An object mask protects image noise from Deconvolution operations.
Whereas Wavelet Regularization protects Deconvolution from Image Noise.
As described to me by Jon Rista:
"The general idea is you are protecting the algorithm from the noise. Most people think of it the other way around, but it is really incorrect to think of protecting the noise from the algorithm. The algorithm can have problems with noisy data, so regularization "regularizes" the noise at each wavelet scale, thus allowing the algorithm to identify ACTUAL details, and enhance them, rather than enhancing the noise."
So if you can set these parameters correctly, you should be able to get deconvolution action across your entire image without needing an object mask. This suggests that you could improve not only on the stars and major high signal features but also significant structures in the lower signal areas.
As Jon describes it:
"One thing to note about masks...they "attenuate"... So, if you mask your image, unless you use pure white in your mask, then what the mask is doing attenuating, ore mitigating, how much the algorithm affects those areas. That is different than what regularization does, which is effectively to eliminate the noise, so that the algorithm operates only on true details. With just attenuation, the algorithm could still produce artifacts in noisy areas, because you are just reducing how much the algorithm affects those areas. This can "work", but it isn't as effective as using regularization."
This sounded pretty good to me, and I soon thought, "I really have to start using this," - but then I realized that I already was! In fact, every user of deconvolution in Pixinsight uses it in a basic form each time they run it.
The Wavelet Regularization section of the deconvolution control panel is enabled by default and is used each time deconvolution is run! The default parameters are considered an excellent starting place - so Wavelet Regularization is already helping you.
Let’s explore this further.


Exploring the Role of Masks and Default Wavelet Regularization
Starting Linear Image, Best Results with Traditional Decon, Object Mask Removed, Updated Global Dark, Regularization Disabled.
This turned out to be a very interesting exercise.
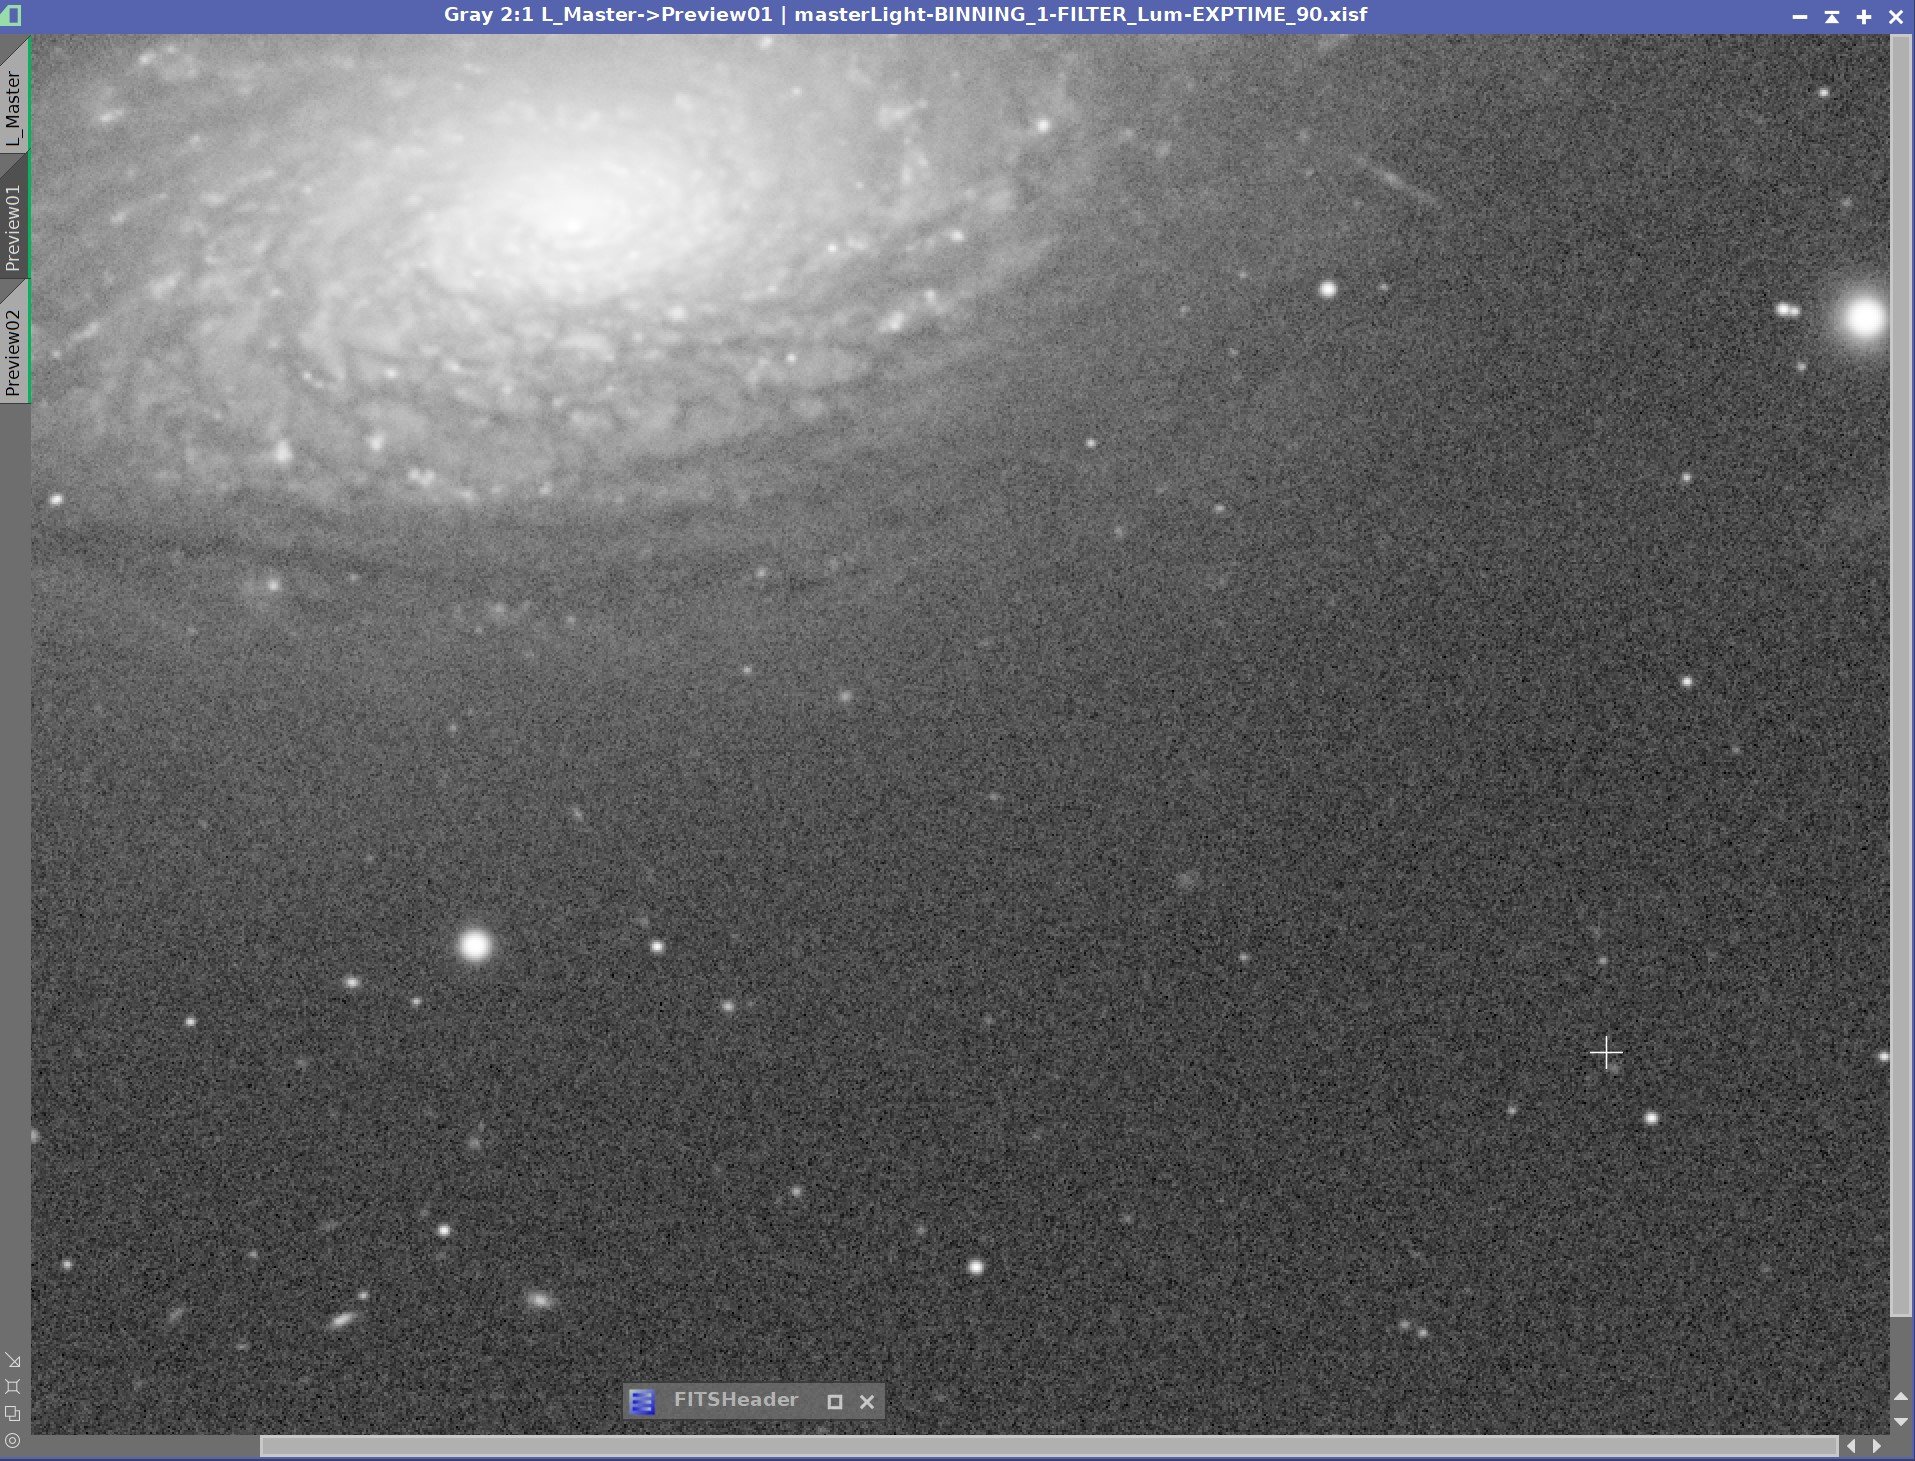
The first two images show the starting linear image and the best result I could get using the traditional deconvolution method. Nothing new here - we have seen this before.
Then I removed the Object Mask.
Immediately, two things jump out - one expected and one that was not expected. First, I can see that the background noise is enhanced. This is expected as we are no longer protecting the background areas with the mask. But the other thing that is apparent is that I now have some ringing stars that were not ringing before!
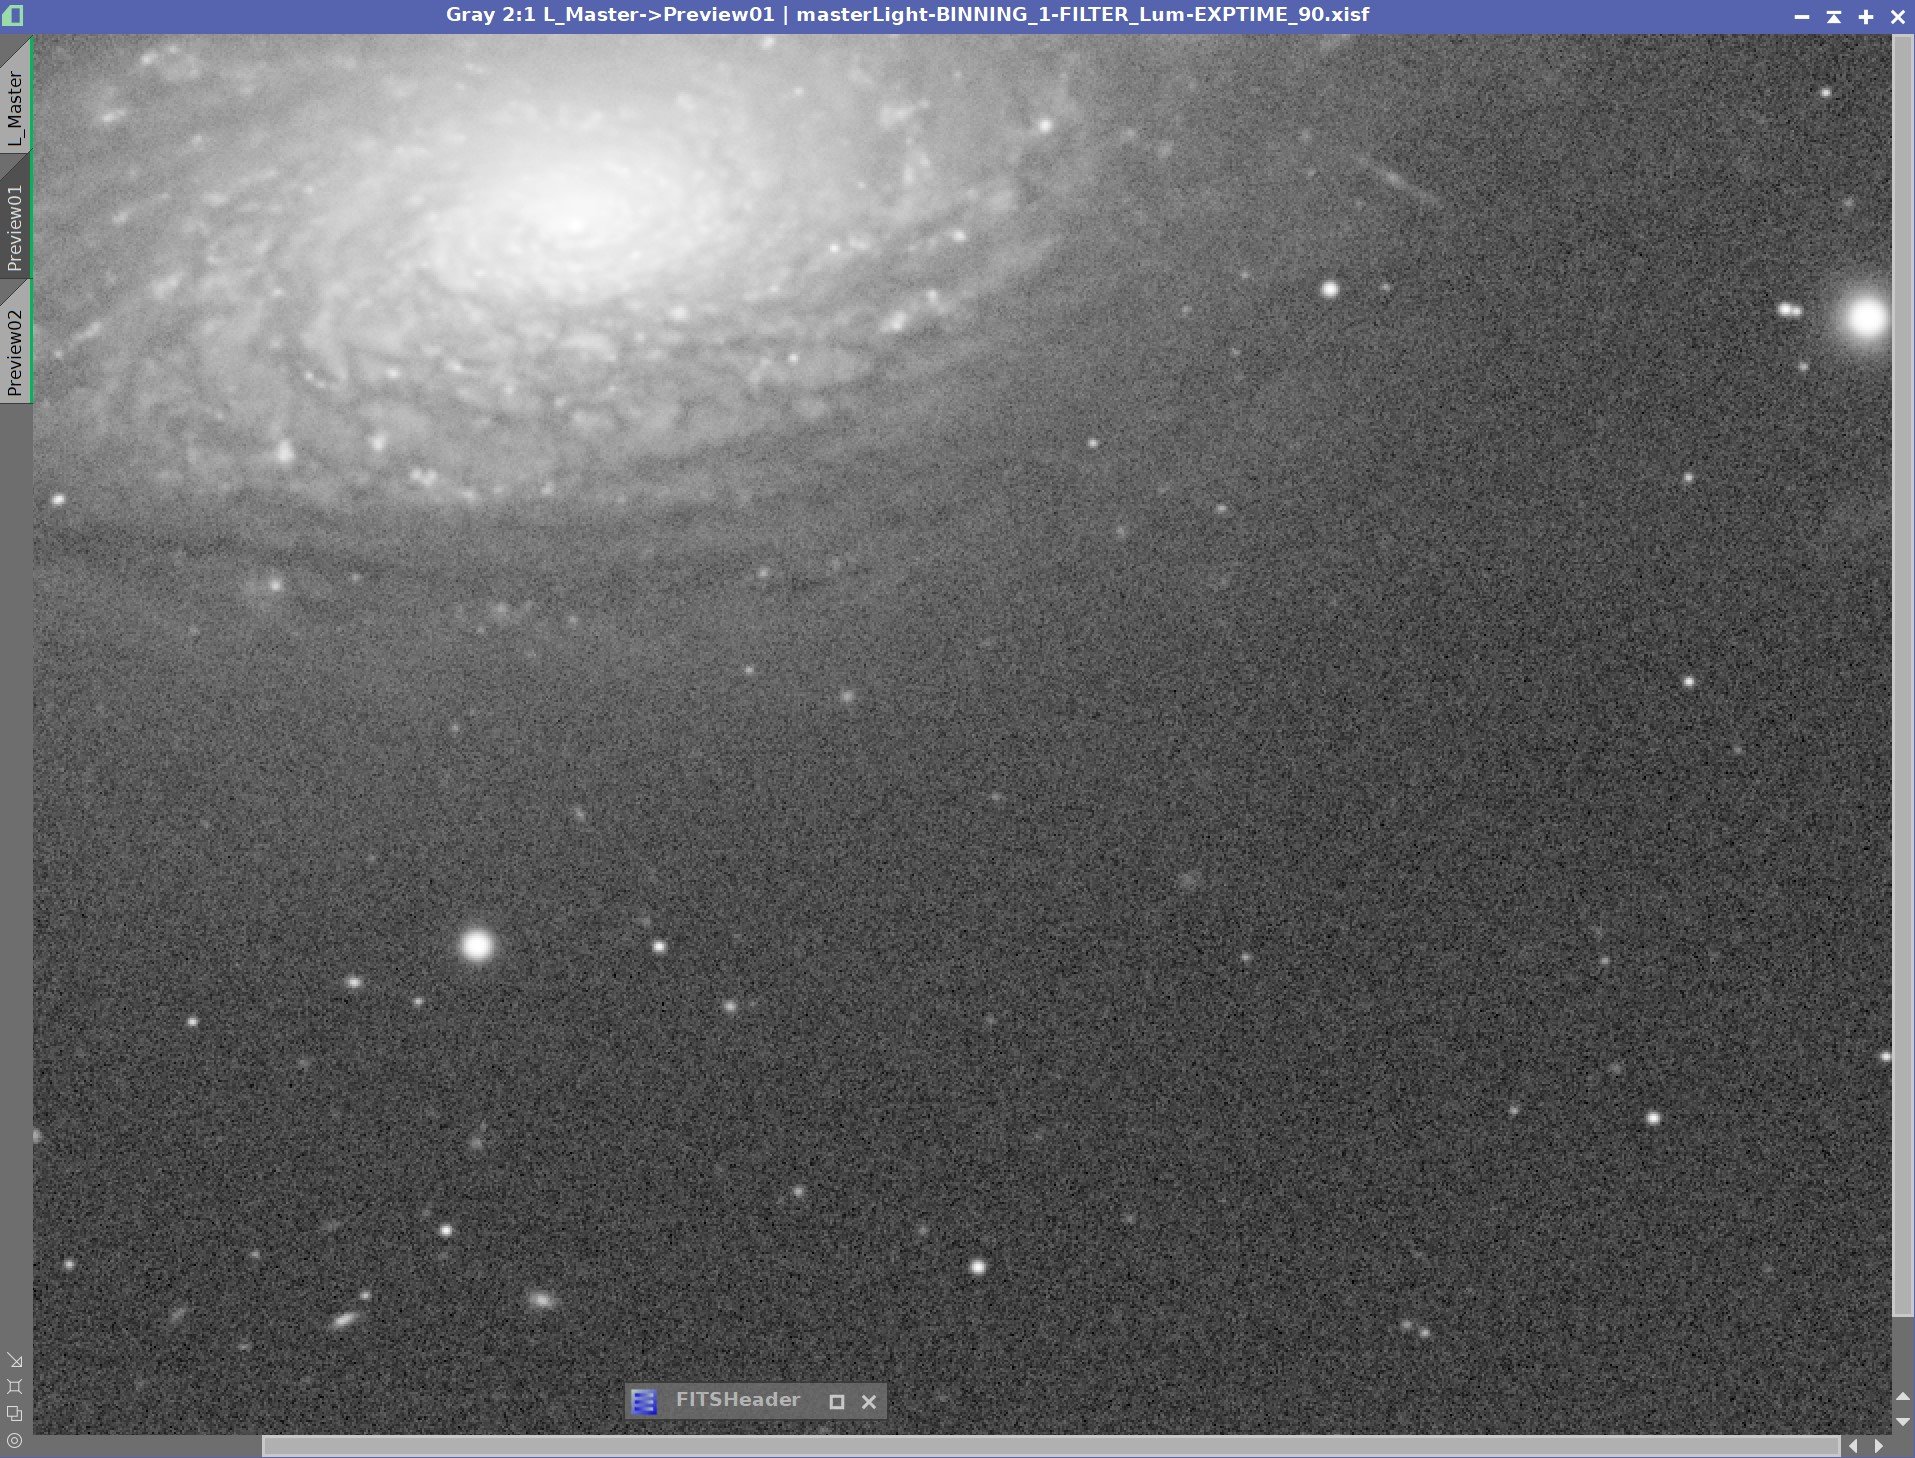
Without the Object Mask, it would seem that I need a new value for Global Dark! Once I adjusted this, I got a better result, seen in the 4th image above!

Original Deconvolution Panel

New Panel - note change in the Global Dark value.
While the new Global Dark value has fixed the rings, we still have the noise enhancement issue.
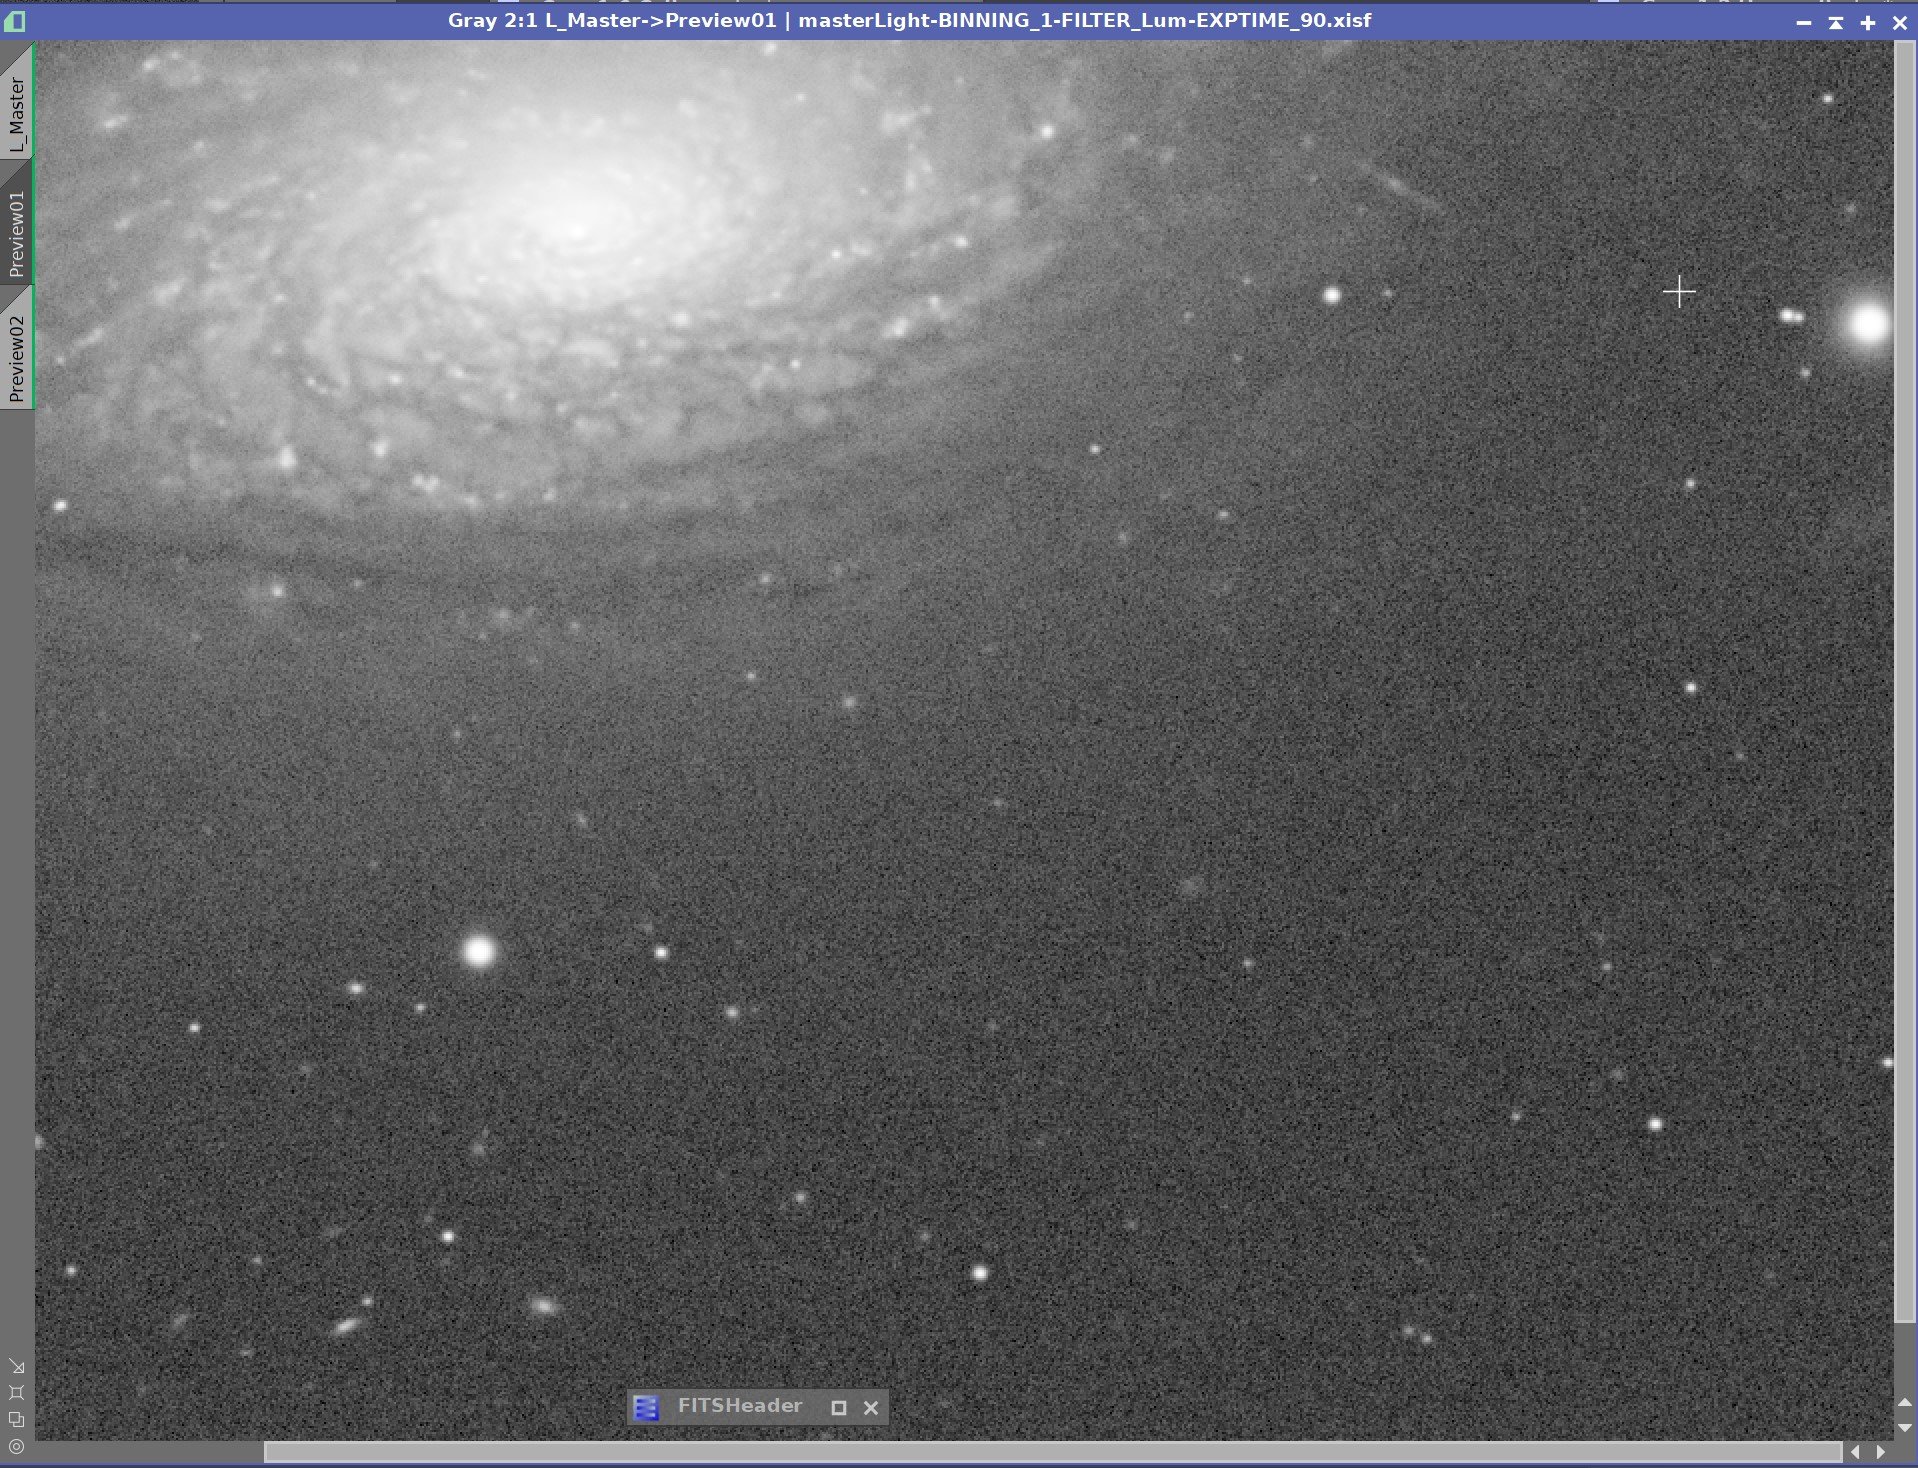
Finally, we disable the Wavelet Regularization function, finding that the noise pattern worsens.
What’s our takeaway from this?
Global Dark settings depend on the deconvolution processing state, and if you change that configuration, you may need to address your Global Dark settings.
The Default Values of the Wavelet Regularization panel are already helping to suppress noise enhancement!
After seeing this, it’s not hard to believe that different settings could better suppress noise issues.
Now let’s look at those parameters and discuss how and why you would adjust them.
An Overview of Wavelet Regularization Parameters
Noise model:

The Wavelet Regularization Panel
To separate noise from the signal, you must determine what noise model you want to use. The Pixinsight implementation supports both a Gaussian and a Poisson model, with the Gaussian being the default.
Most sources suggest that there is not much of a difference between the two, but in some cases, images taken with very short integration times or with a CMOS sensor might get better results when using the Poisson model.
Try both and see what seems to work better for you.
Wavelet layers:
Parameters can be set for up to 5 layers of wavelets. Each level deals with features that are of a particular image scale:
Level 1: deals with an image feature scale of 1 pixel in size
Level 2: deals with an image feature scale of 2 pixels in size
Level 3: deals with an image feature scale of 4 pixels in size
Level 4: deals with an image feature scale of 8 pixels in size
Level 5: deals with an image feature scale of 16 pixels in size
The default is set to use two layers, as these are the scales where noise typically lives. As you add more layers, you can suppress larger scale noise, but you are also likely to begin suppressing fine image structures as well. So the goal here is to keep the number of layers as low as possible while still managing noise. I have found that noisy images often need three layers or more. While images with less noise often get by just fine with two layers.
Wavelet Scaling Function:
This defines the low pass filter used in the wavelet transforms. The default is the B3 spline function, and this seems to be the most recommended one for use. You can also choose the linear function - which may be better for low-scale noise. The final choice is Small Scale - but I have not found anything that suggests that this function has any real value. I saw minor differences in my experiments and tended to stick with the default.
Noise Threshold:
Regularization thresholds are stated in sigma units. Remembering back from your statistics classes, +/- 3 sigma will include 99.7% of a normal distribution. Regularization uses this to define what portion of the distribution is considered a noise structure for a given layer or scale. The default value of this threshold for layer 1 is topically 3.0 since most of the noise will be found in this layer.
As you go up in layers, the scale of the structure increase. By the time you get to layer 5 - with a scale of 16 pixels -you are probably beginning to deal with mostly signal rather than noise, so you would expect to use smaller thresholds as you get to the higher layers.
The basic behavior here is as the threshold goes up, more structures will be treated as noise.
If you use too high of a threshold - especially for the higher layers - you will protect the convolution algorithm from signal rather than noise - and you don't want to do that. The trick is to keep this as low as possible while still suppressing noise growth.
Noise Reduction:
Now that you have identified pixels as noise, you will want to suppress them. The Noise Reduction parameter defines how much suppression is to be done. Values run from 0.0 to 1.0:
A value of 1.0 means that those structures will be suppressed completely
A value of 0.0 means that those structures are not suppressed at all.
A value between 0.0 and 1.0 means that the structure will be scaled by the specified fraction.
When talking about noise suppression via Regularization, we are talking about “hiding” noise from the deconvolution algorithm so it can not act on it. There is NO noise reduction being applied to the image data itself. Instead, this is about filtering out the noise, so the algorithm never sees it and can not enhance that noise.
Convergence:
As we have discussed, convolution is an iterative process. After each deconvolution pass is done, the standard deviation of the image is reduced. Deconvolution will run until the number of iterations is complete, or the delta of the standard deviations of two image runs falls below the convergence threshold. The unit for this parameter is delta standard deviations.
Disabled:
This disables the convergence process, forcing the full run of integrations specified for deconvolution. The recommendation is to leave this checked. An easy once for me as I was unsure of what delta value to put in (color me lazy!).
Parameter Setting Strategy
With all of this as background, we can now summarize by providing a few guidelines when it comes to optimizing these parameters:
Use the default noise model of Gaussian - for the most part.
Use as few layers are you can - adding too many puts your signal structure at risk.
Use the default B3 scaling factor.
Disable the Convergence function
The default threshold and noise reduction values are a good starting point for most images.
The threshold and noise reduction value should be reduced as you use more layers.
Keep threshold and noise reduction values as low as possible while still reducing noise artifacts.
Once you have things tweaked where you want them, you may want to revisit the work you have already done to optimize local de-ringing parameters.
I’d like to expand upon point 7 above. You may see patterns of value that look like this:
Layer 1: Threshold 3.0. Noise Reduction: 1.0
Layer 2: Threshold 2.0. Noise Reduction: 0.75
Layer 3: Threshold 1.0. Noise Reduction: 0.5
Layer 1 is set to a threshold of 3 sigmas, which means that 99.7% of these pixels are seen as noise, and complete suppression is done with them. We are aggressive here, as this layer will consist mostly of noise. As we add another layer into the mix, we drop the aggressiveness accordingly, as we are likely to start encountering significant image structure here. The third layer is rolled back even more. Your testing will fine-tune this, but this approach is helpful as you tune these parameters.
This may sound like a lot of work, but it’s not that bad once you get into it.
The good news is once you have dialed in a set of values for a specific camera/optical system - you can likely use those parameters again as starting point for other images produced by that combination.
Jon Rista gave me some good points about this:
"For any given data SOURCE, which would be some camera+scope combination, you will have to experiment to get a feel for what the best settings are for that particular system. Once you have figured that out, you should be able to use the same or similar settings for regularization each time you deconvolve data for that system. A different system may need different regularization settings. For example, a high-resolution SCT with an image scale of say 0.5"/px will need some particular regularization settings, whereas a wide field FSQ106 with an image scale of 1.2"/px would likely need different regularization settings. This is because the size of each detail relative to the noise will be different. With the high-resolution system that is well sampled (3-4x across the FWHM), you are more likely to be able to reduce noise more aggressively and on more layers, than a low-resolution system that maybe samples at 1-2x across the FWHM."

Instances of Deconvolution saved as icons with Wavelet regularization params pre-set for specific camera-scope combination
This suggests that once you have dialed things in, you could create an instance of deconvolution saved on the desktop as an icon - with the parameters set the way you want so that each time you use it! If you shoot with multiple scope platforms as I do, you can set up several instances with customized parameters and name them appropriately.

Full value Thresholds and Noise Reduction for all layers mostly shuts down deconvolution action.
Exploring the Regularization Parameters
Now let’s see what Wavelet Regularization can do with some extreme parameters.
I often do this when exploring some parameters I want to adjust.
Trying some extreme settings lets, you see what the action of the parameter is so you know which way to go when you are tuning things up.
Extreme High Action
If I turned all of the layers on, increased the thresholds for each layer to their maximum allowed value (16), and then set the corresponding Noise Reduction value to 1.0 - what should happen?
It should mean that all image structures would now be seen as noise, and all of it would be suppressed completely. In this configuration, deconvolution should have minimal impact on the image. This should pretty much shut down deconvolution. let's see if that is true.
Extremely High Wavelet Regularization Settings
Default Settings, Extreme High Settings
In this case, deconvolution has little impact on the image. The only things showing change are some of the more prominent stars. These can be seen to shrink a bit. Why? Their sizes are beyond the 16-pixel scale size covered by layer 5. Wavelet Regularization does not suppress things at this scale as noise does not live there!

Extreme Low Action Values
Extreme Low Action
Now - let's do just the opposite.
We’ll turn on all layers and set all of the layer regularization parameters to the lowest levels. This should effectively turn off the regularization feature. We should then expect to see noise problems develop in a way that should be similar to turning off Wavelet Regularization. Let's see if that's true.
Default Parameters vs. Extreme Low Action Parameters
The test shows just that! With the parameters as low as they are, very few structures are seen as noise, and almost no suppression is being done - and we can see noise growth and “worms” beginning!
Layer Contributions
Now let’s explore the contribution of the various layers to our test image. We will turn on one layer at a time, setting the Threshold at 4.0 and the Noise Reduction to 1.0. These settings should cause most structures in a given layer to be seen as noise and then it will act to fully suppress them.
What should happen then?
We should expect the first layer to eliminate small-scale noise. When we get to the second layer, the noise should get better, but at this point, we may also start to lose some of the benefits of deconvolution at this scale. As we turn on more layers, the benefits of deconvolution are slowly lost.

Start point - Low Action

Now change layer 1 to high action

Add layer 2 as high action

Add layer 3 as high action

Add layer 4 as high action

Add layer 5 as high action.

Layer Contributions
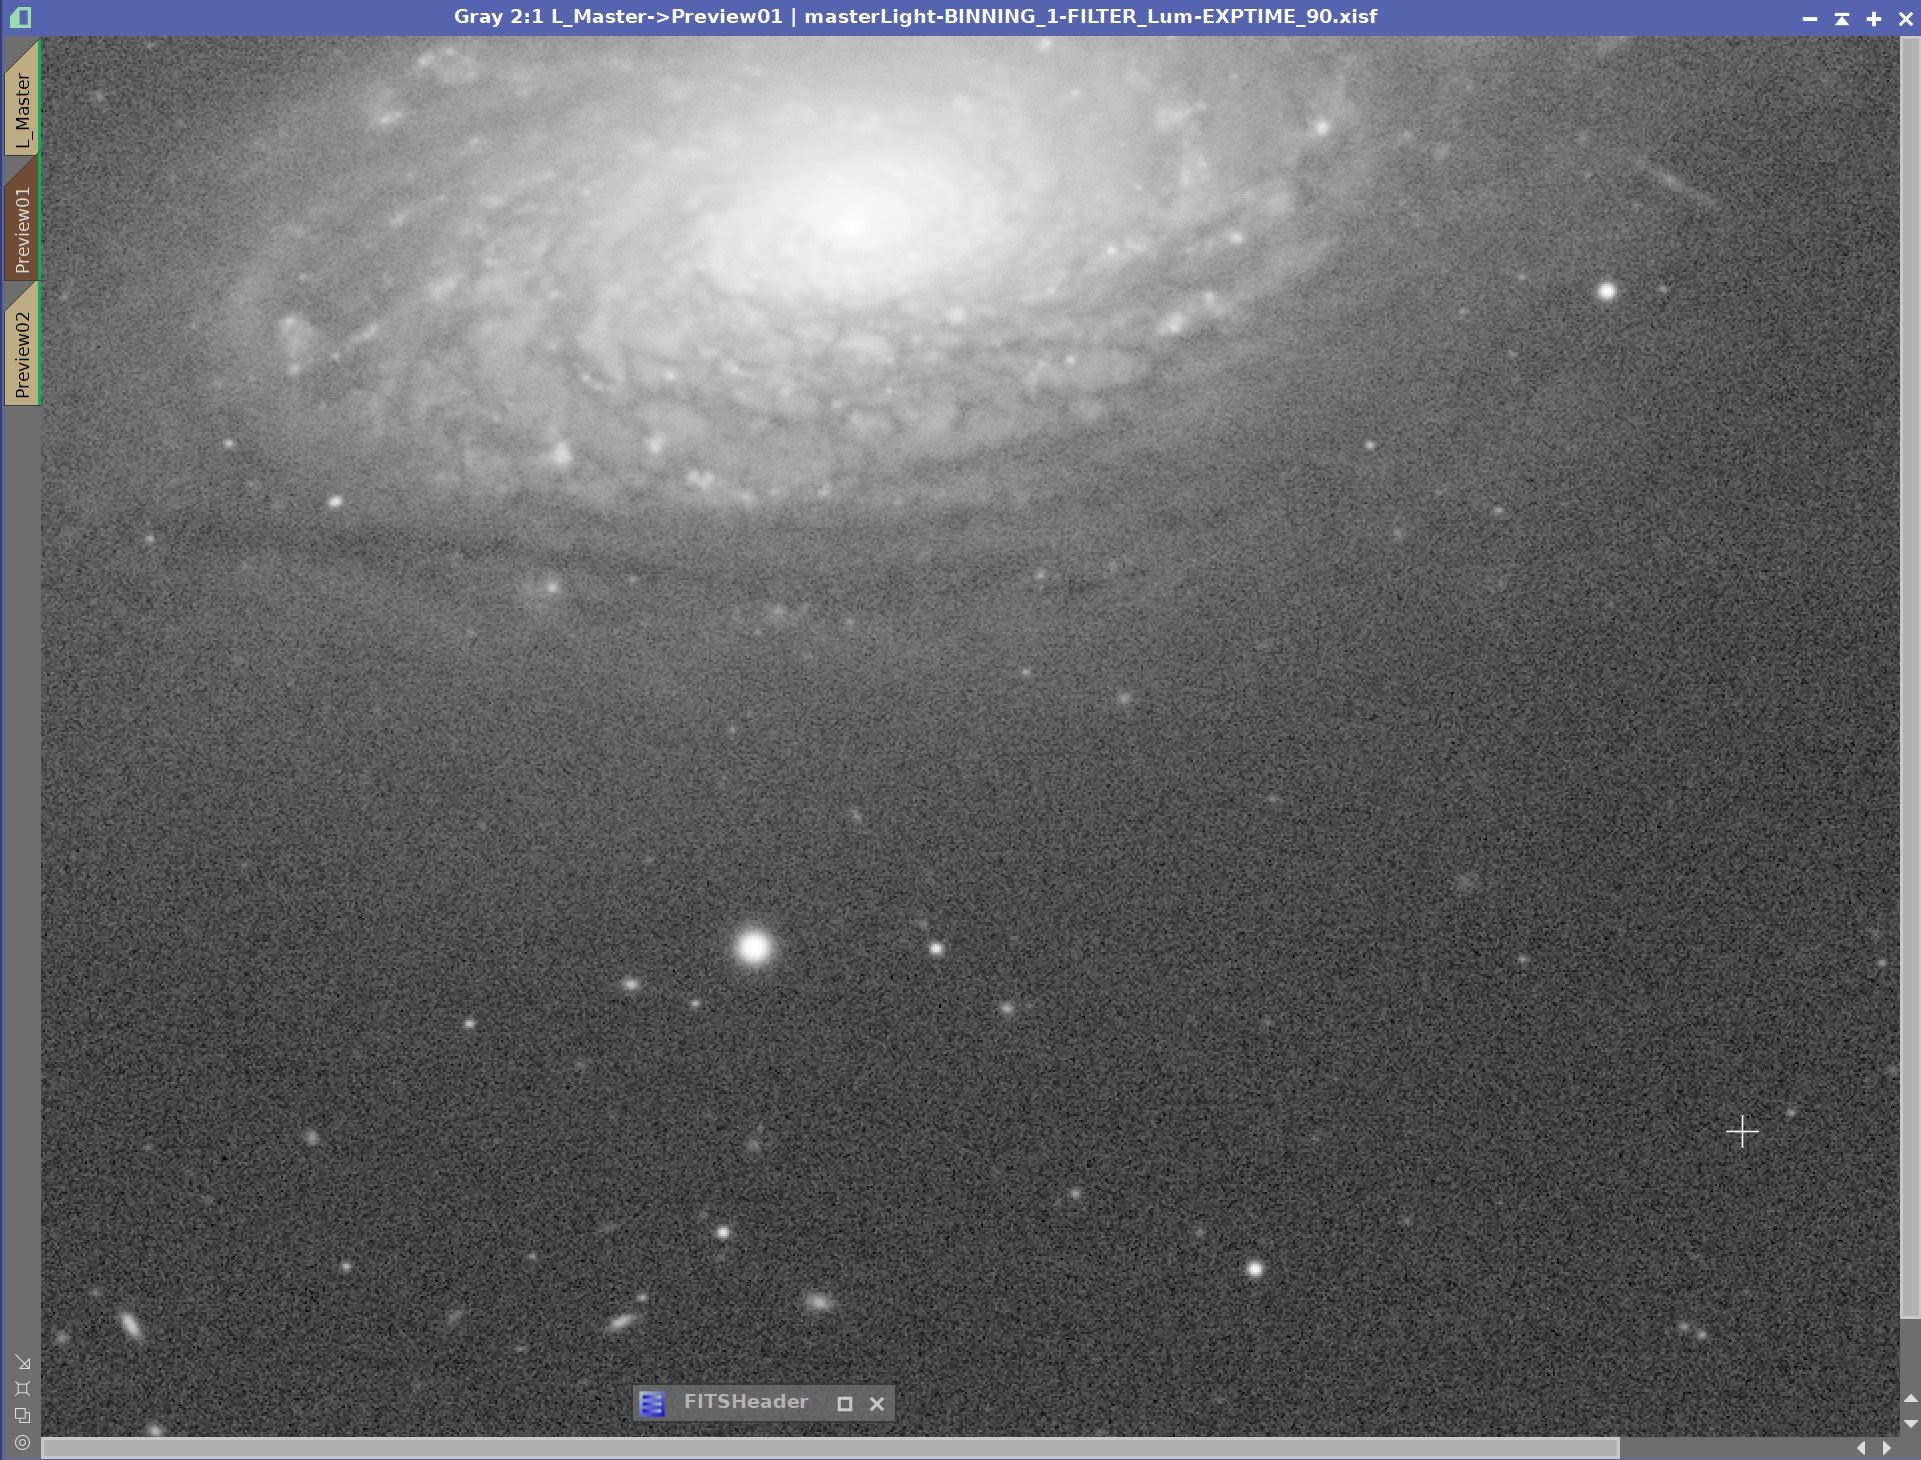
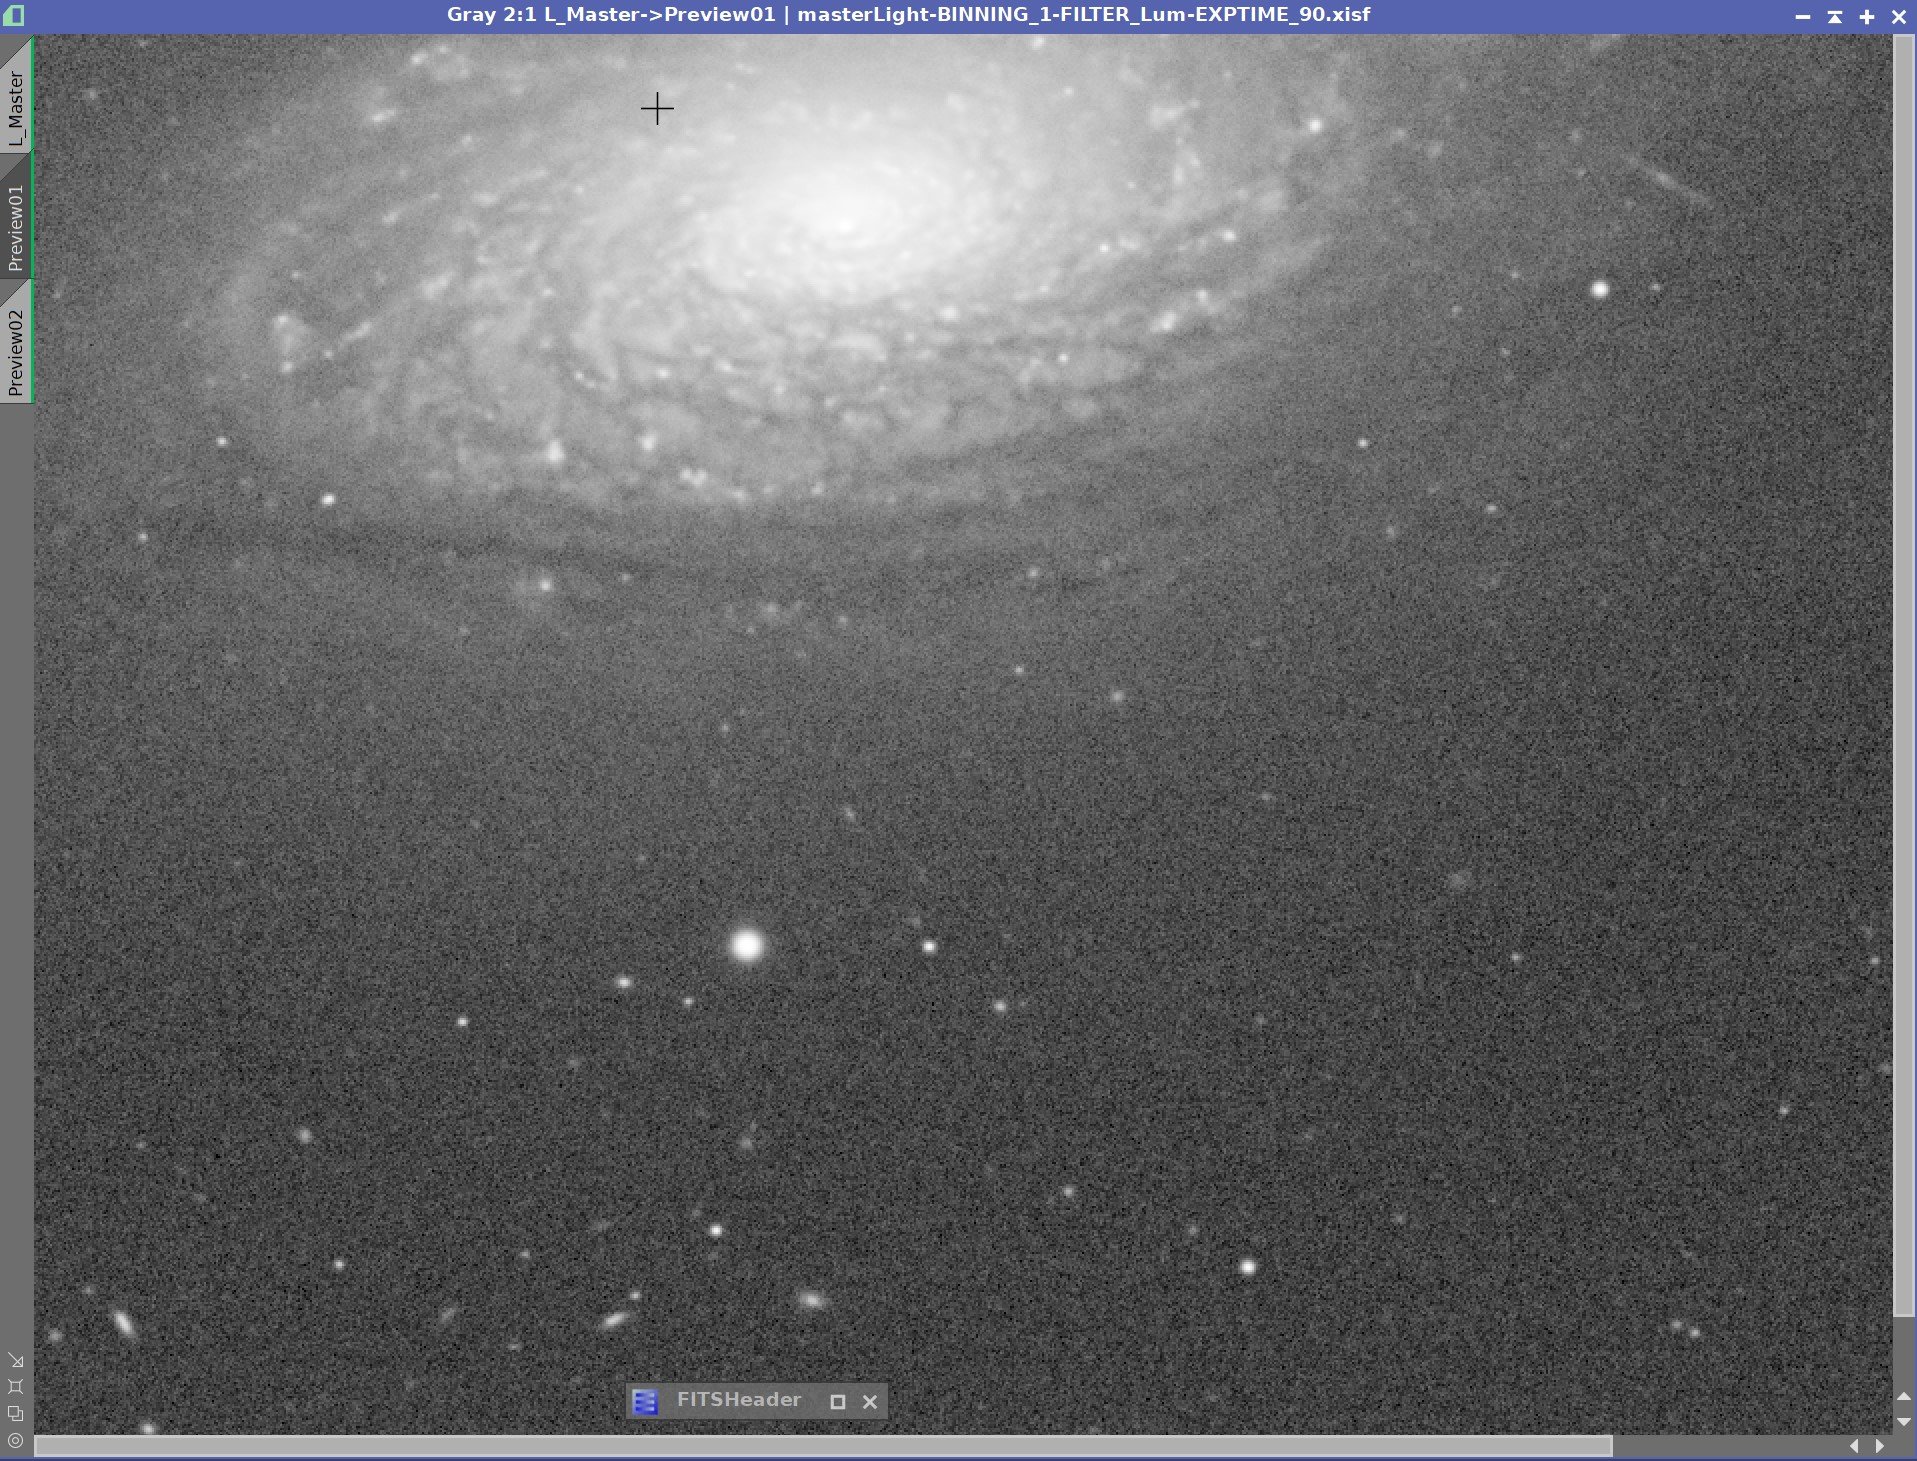
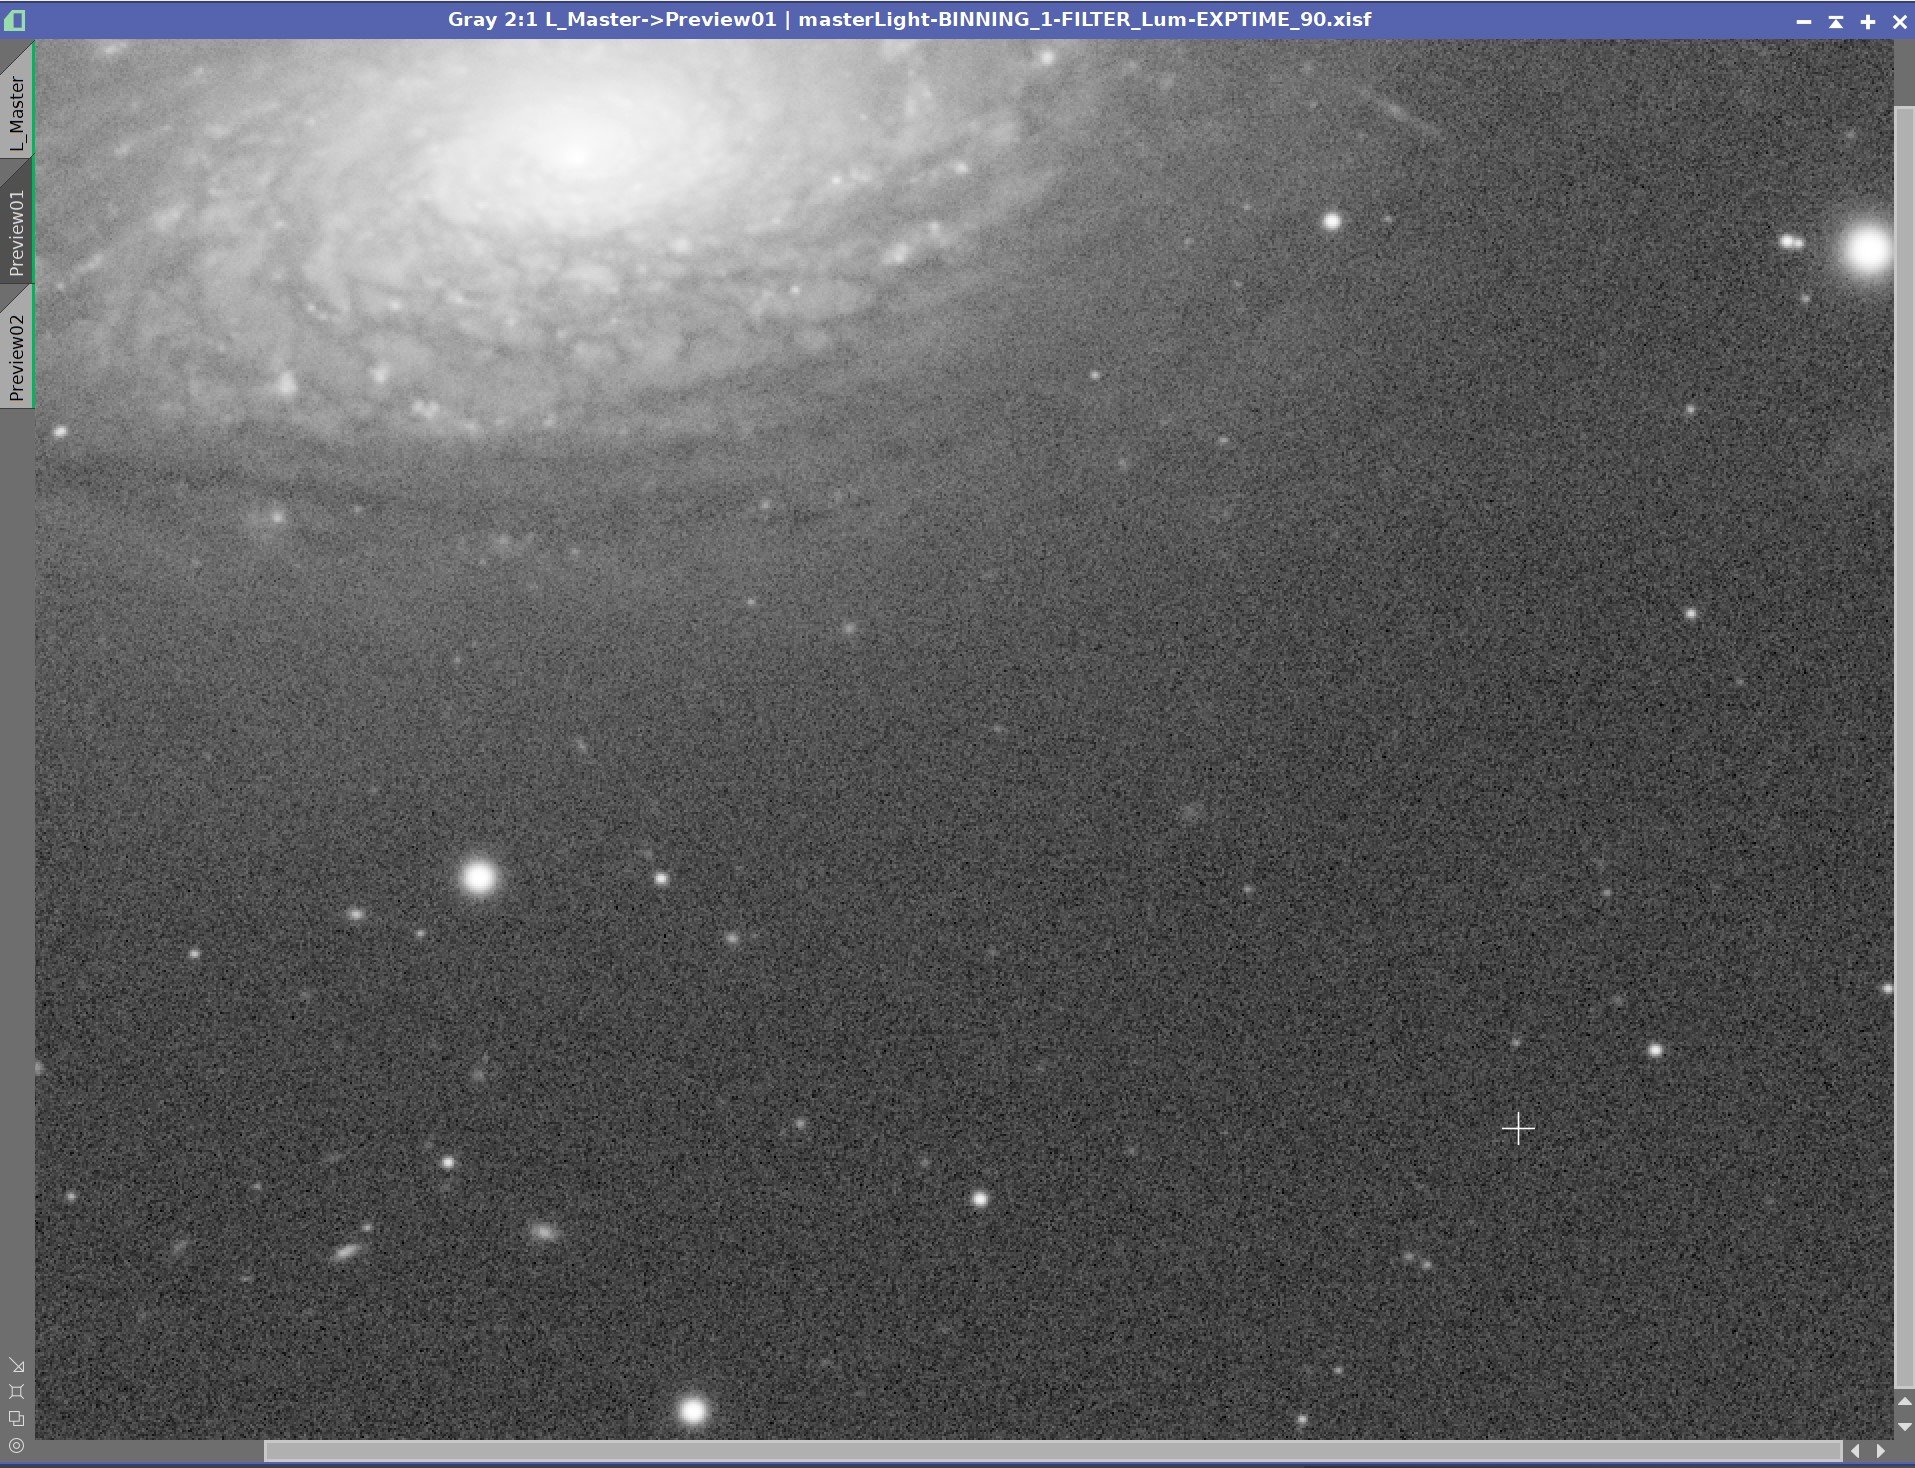
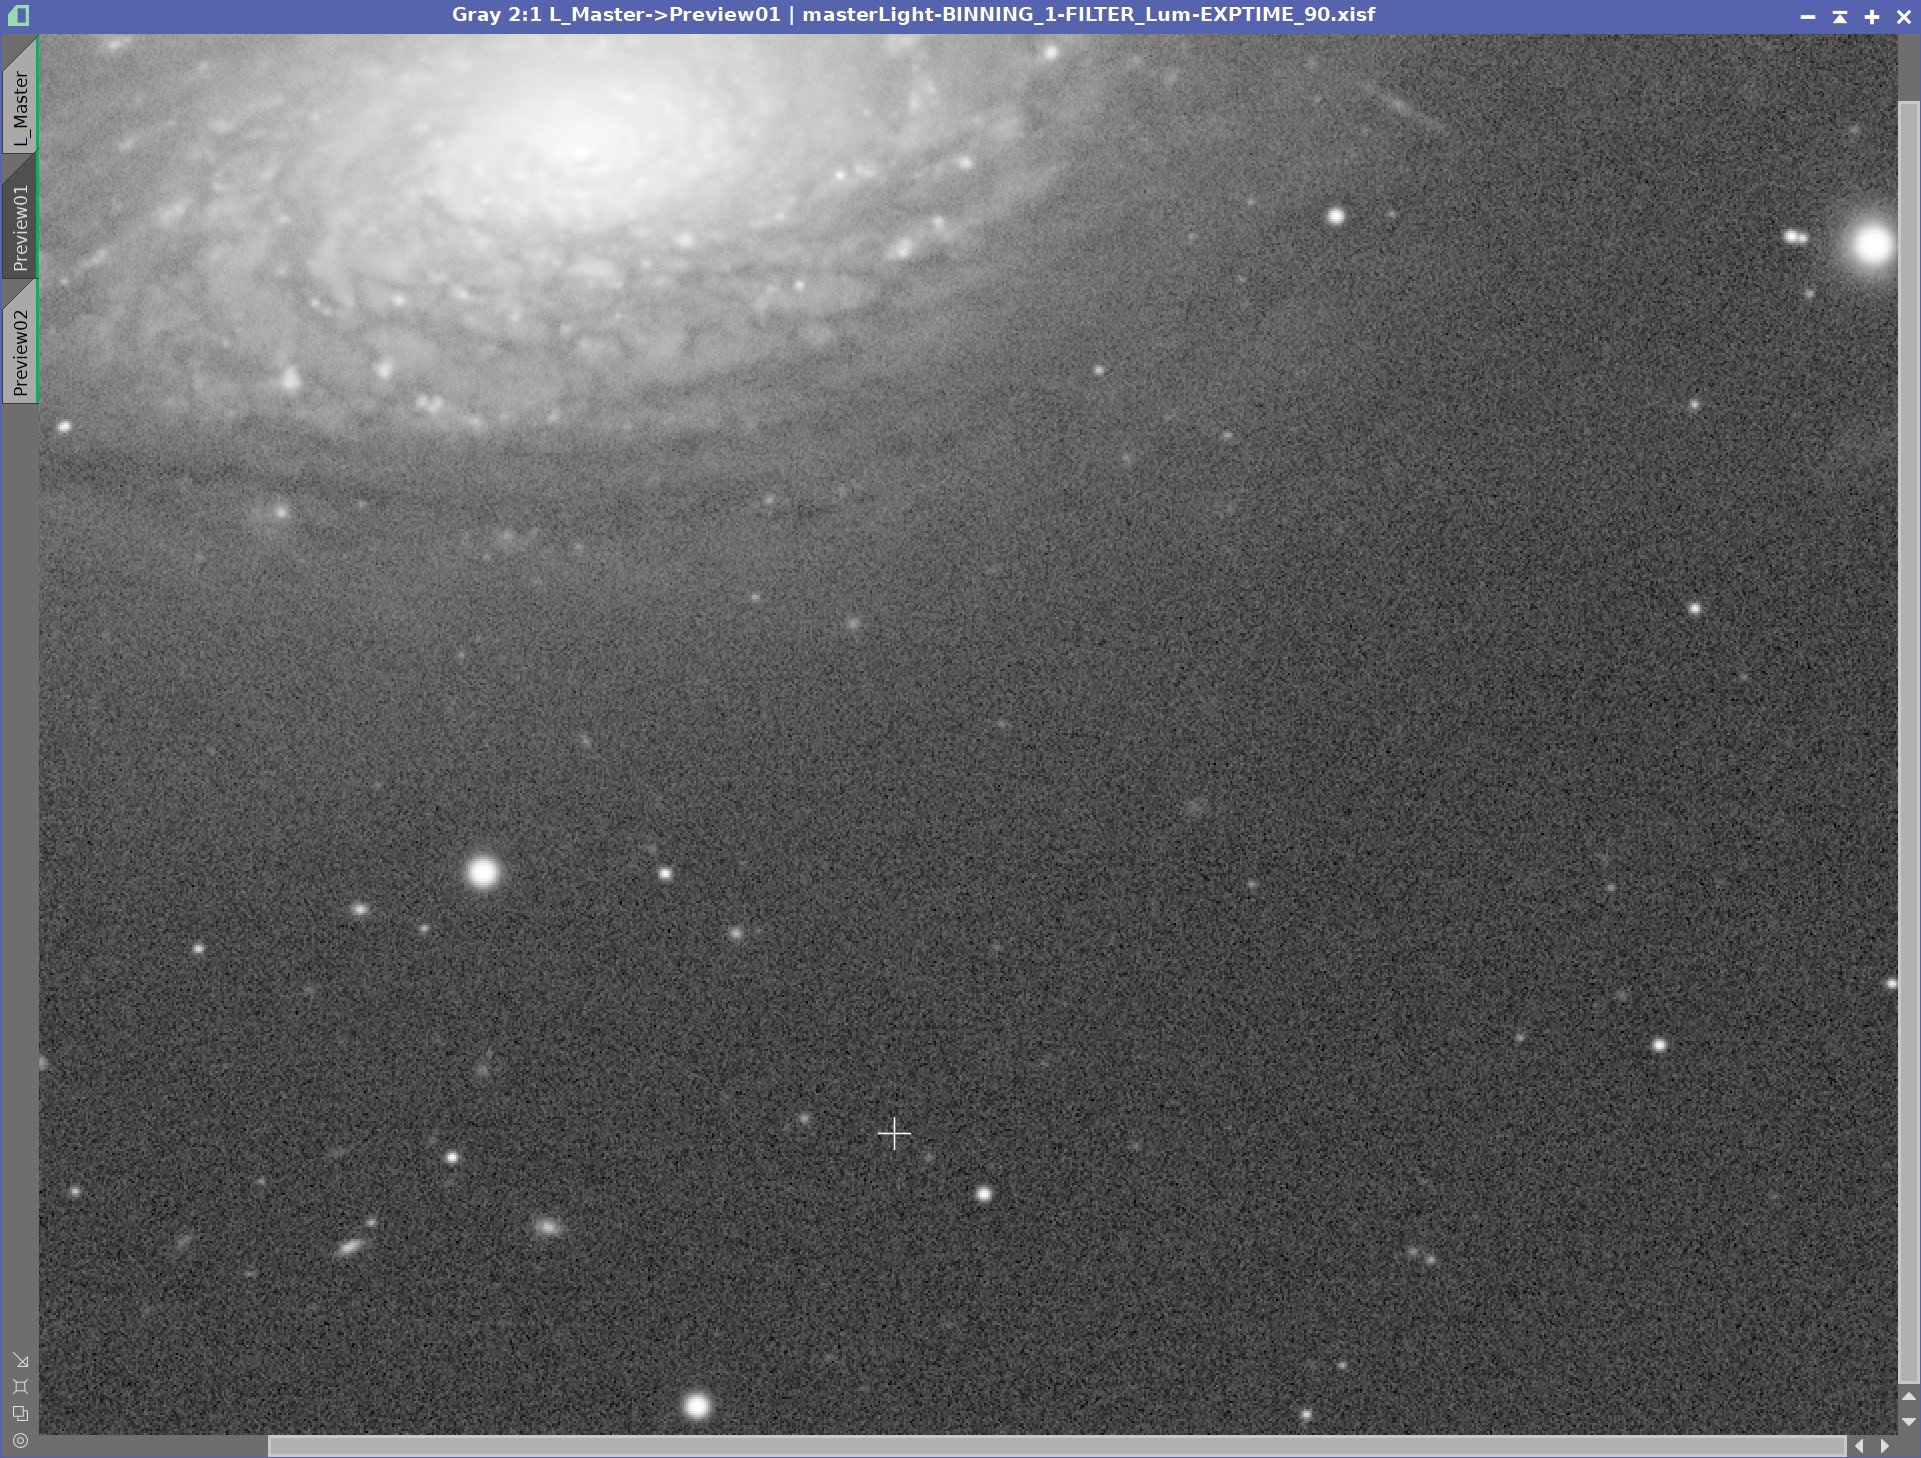
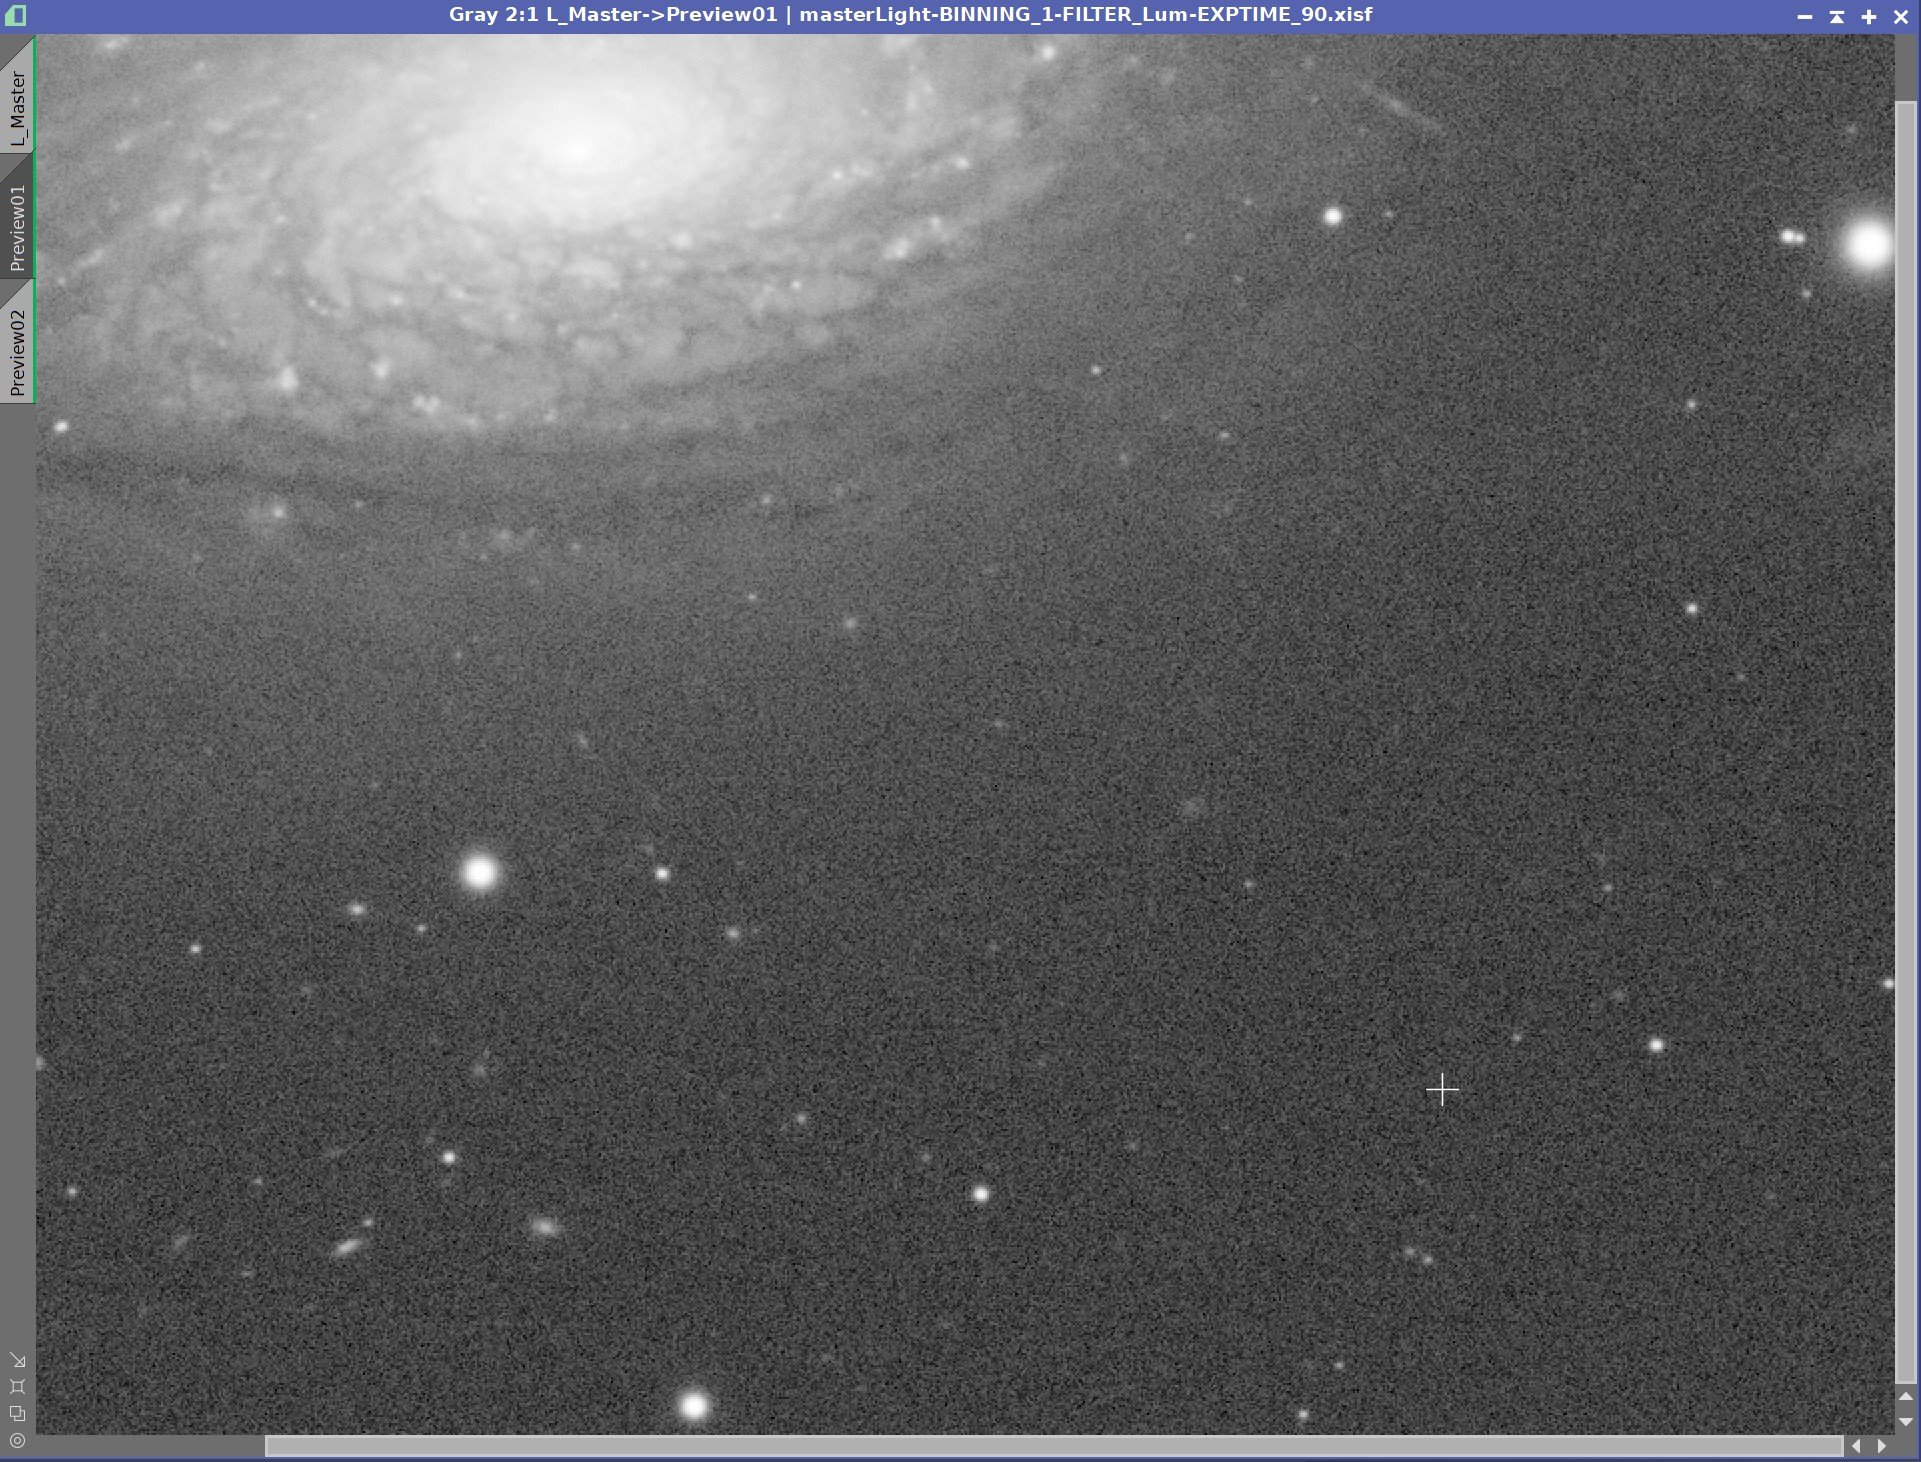
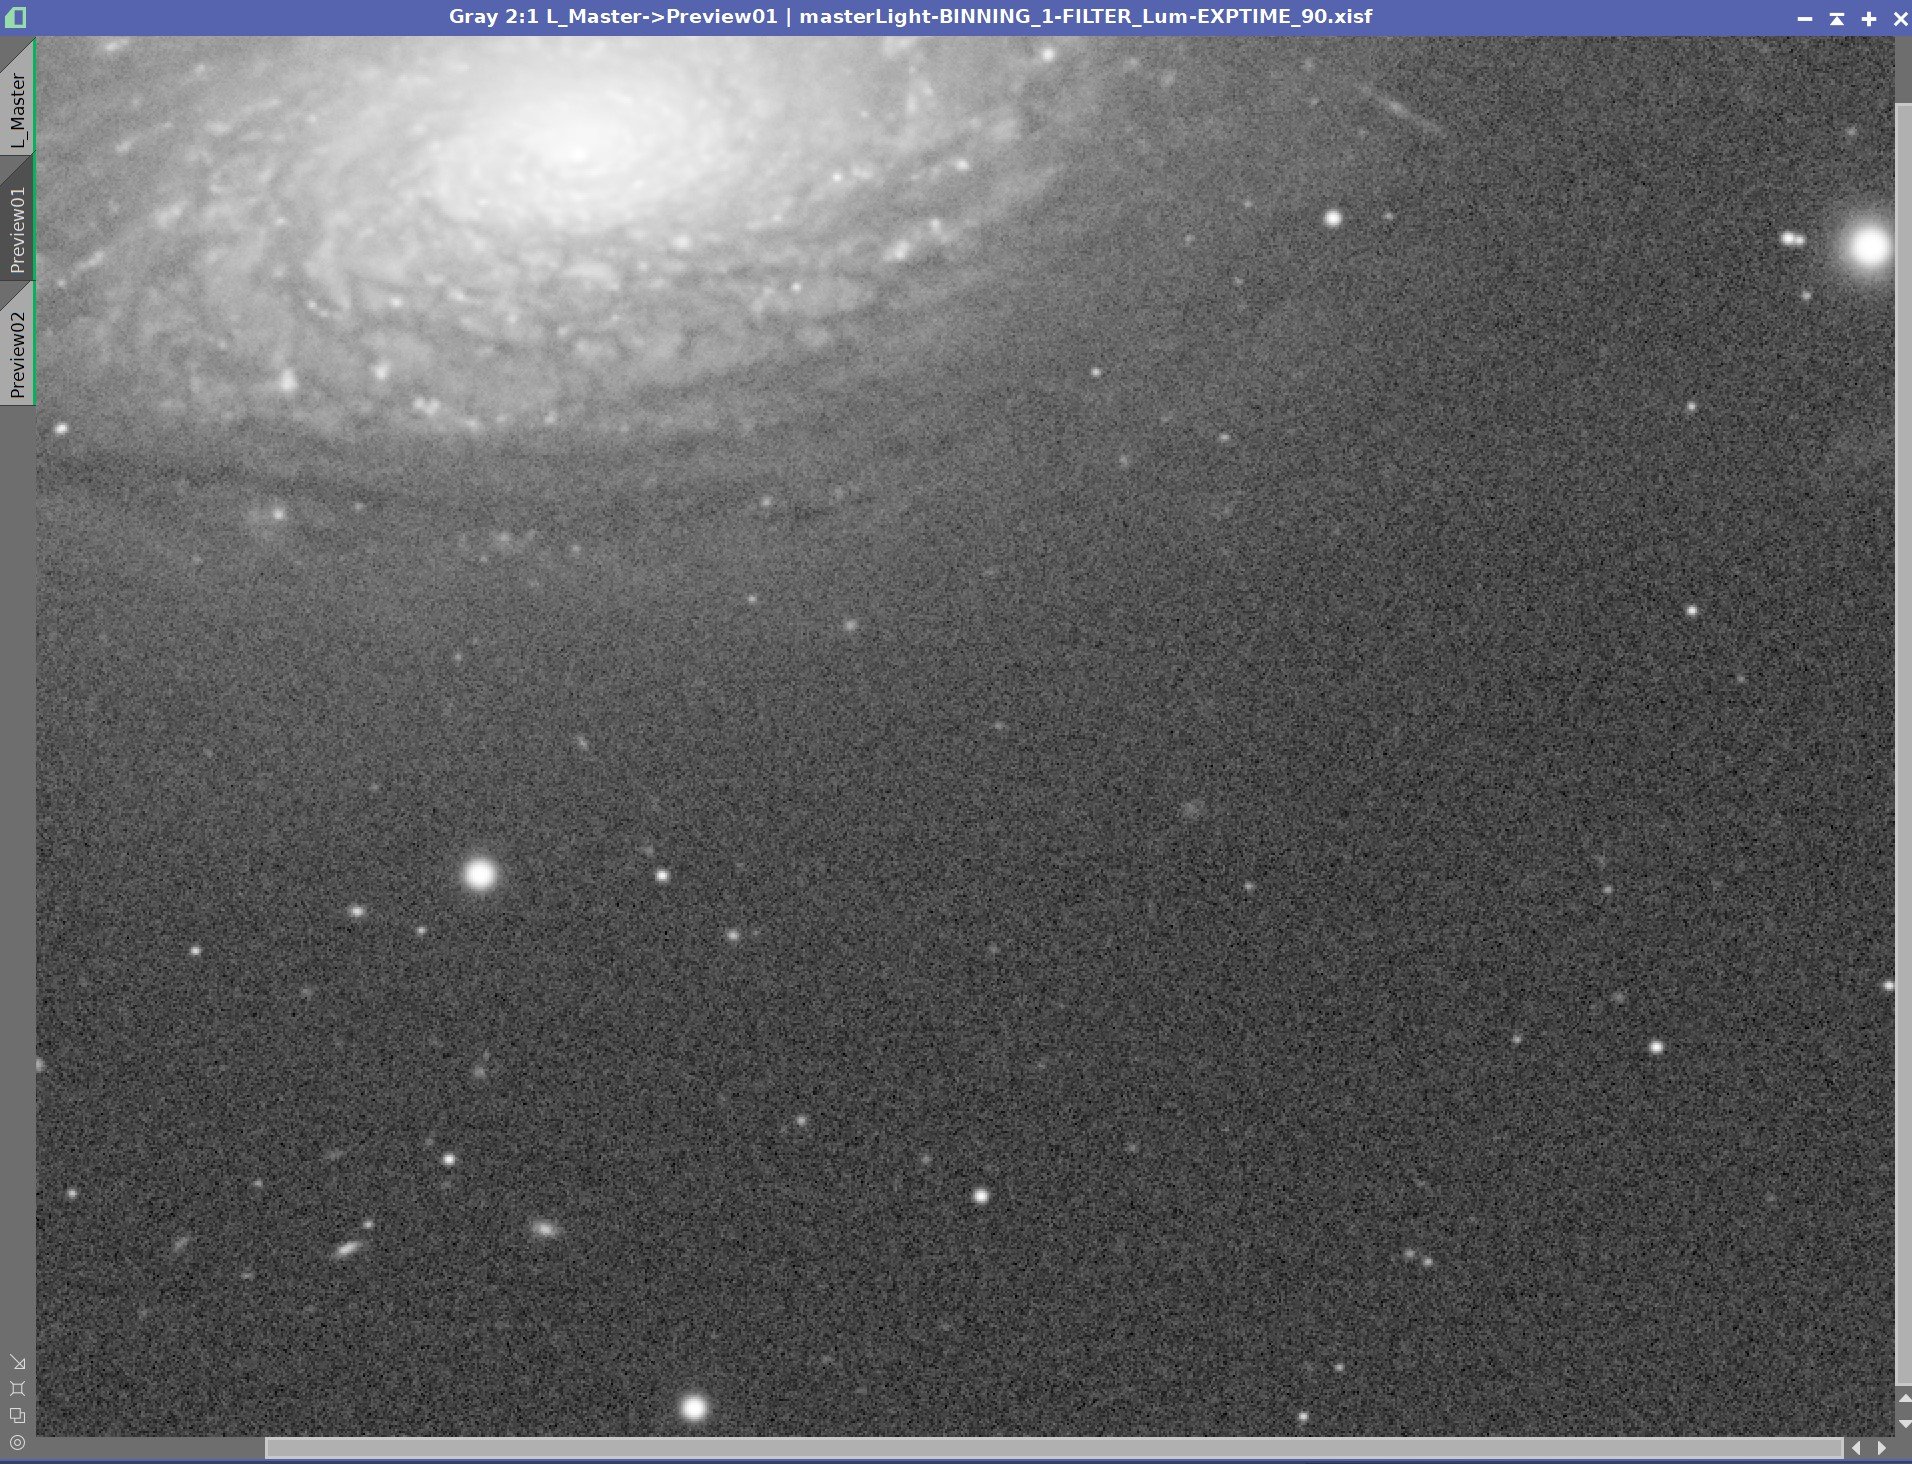
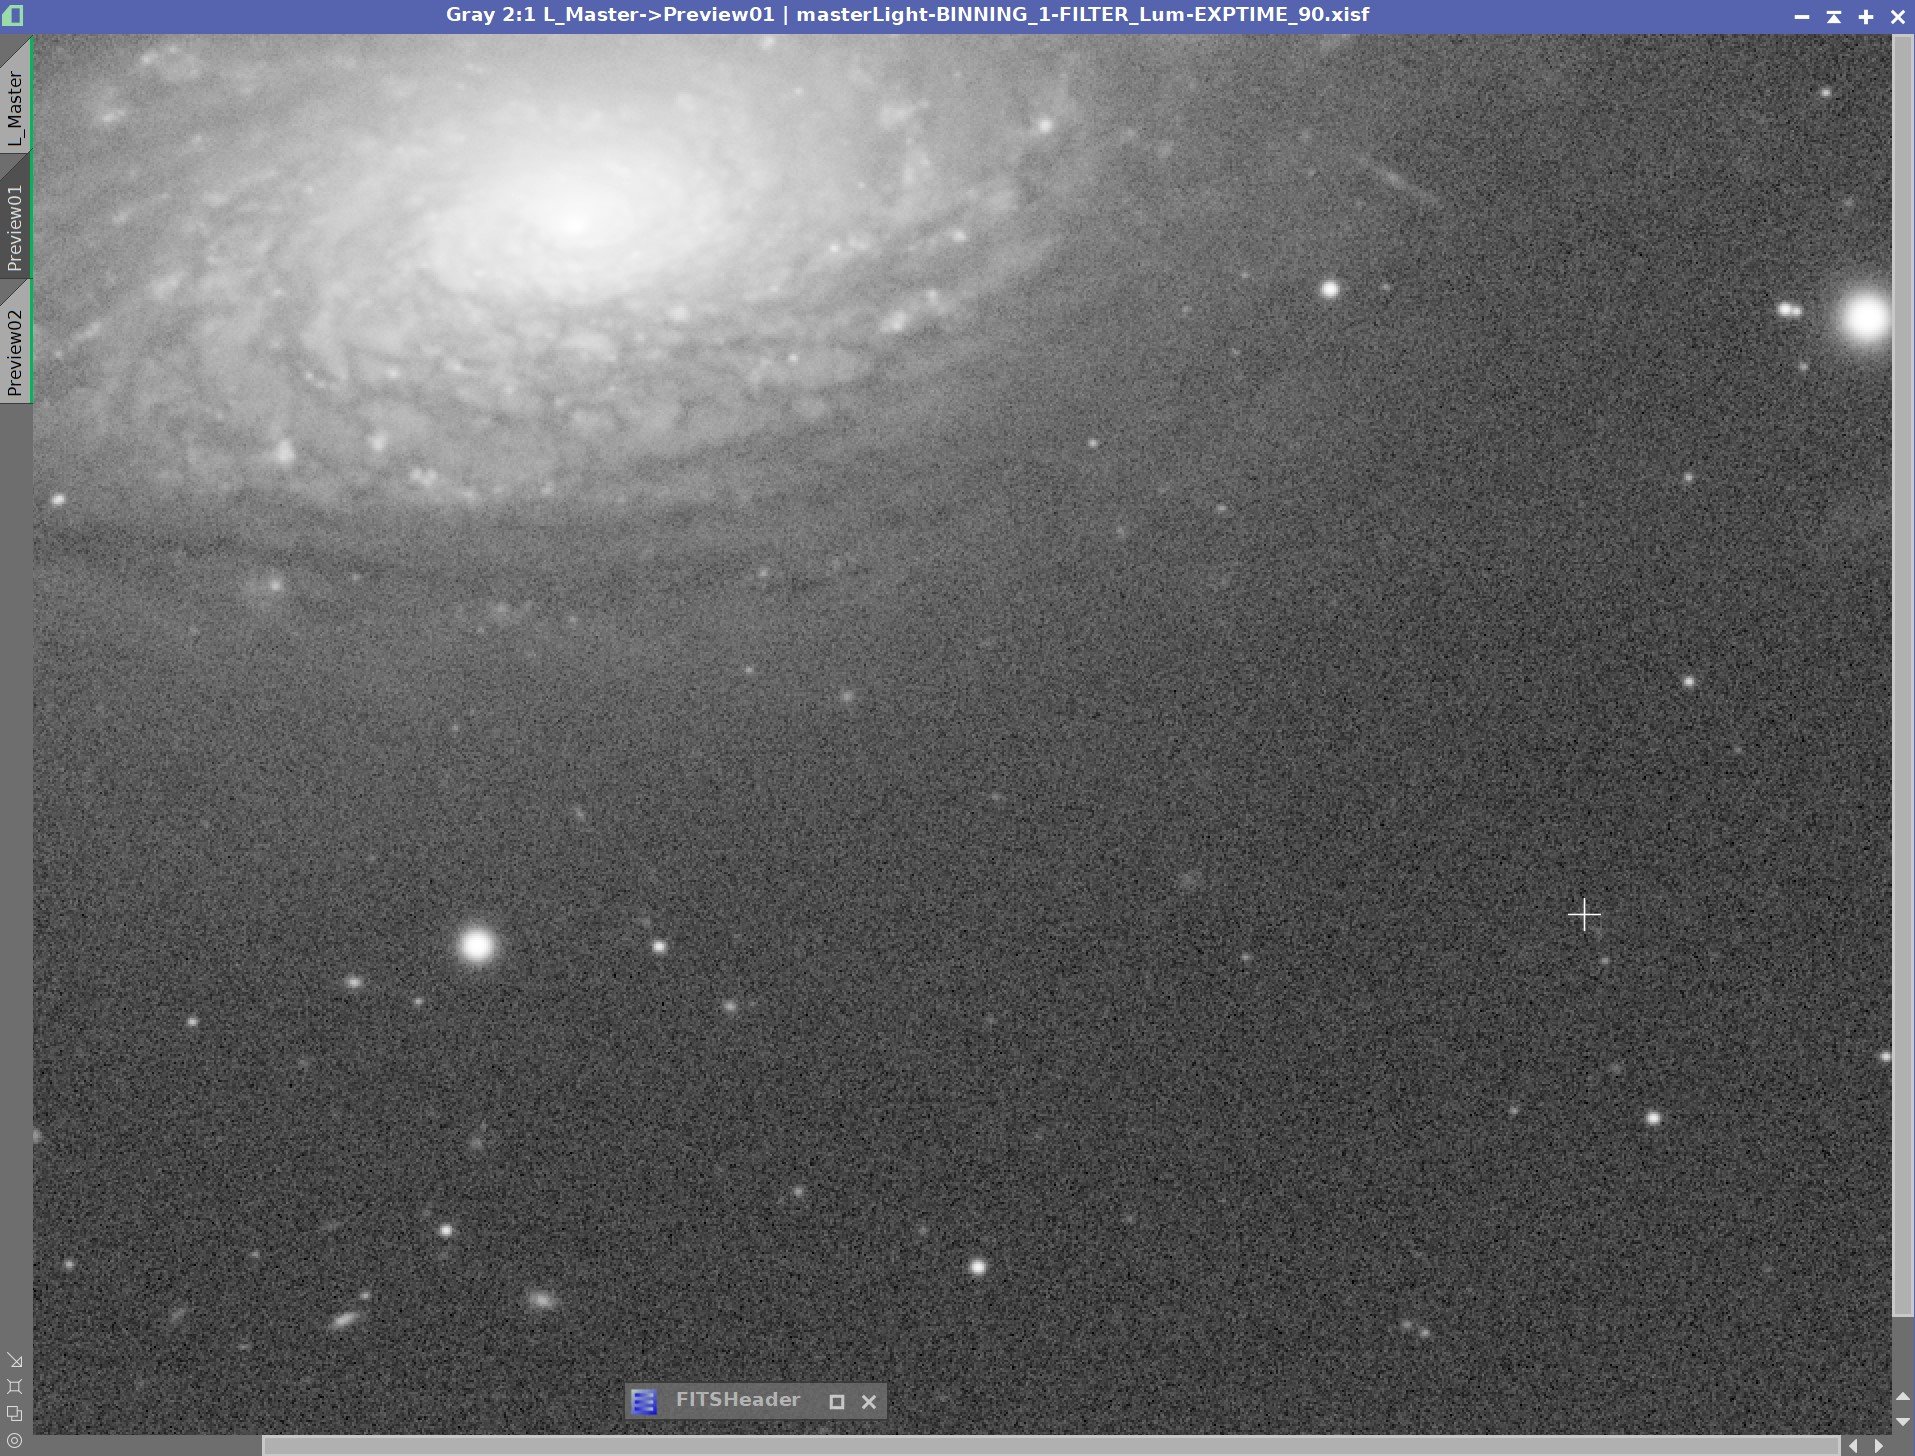
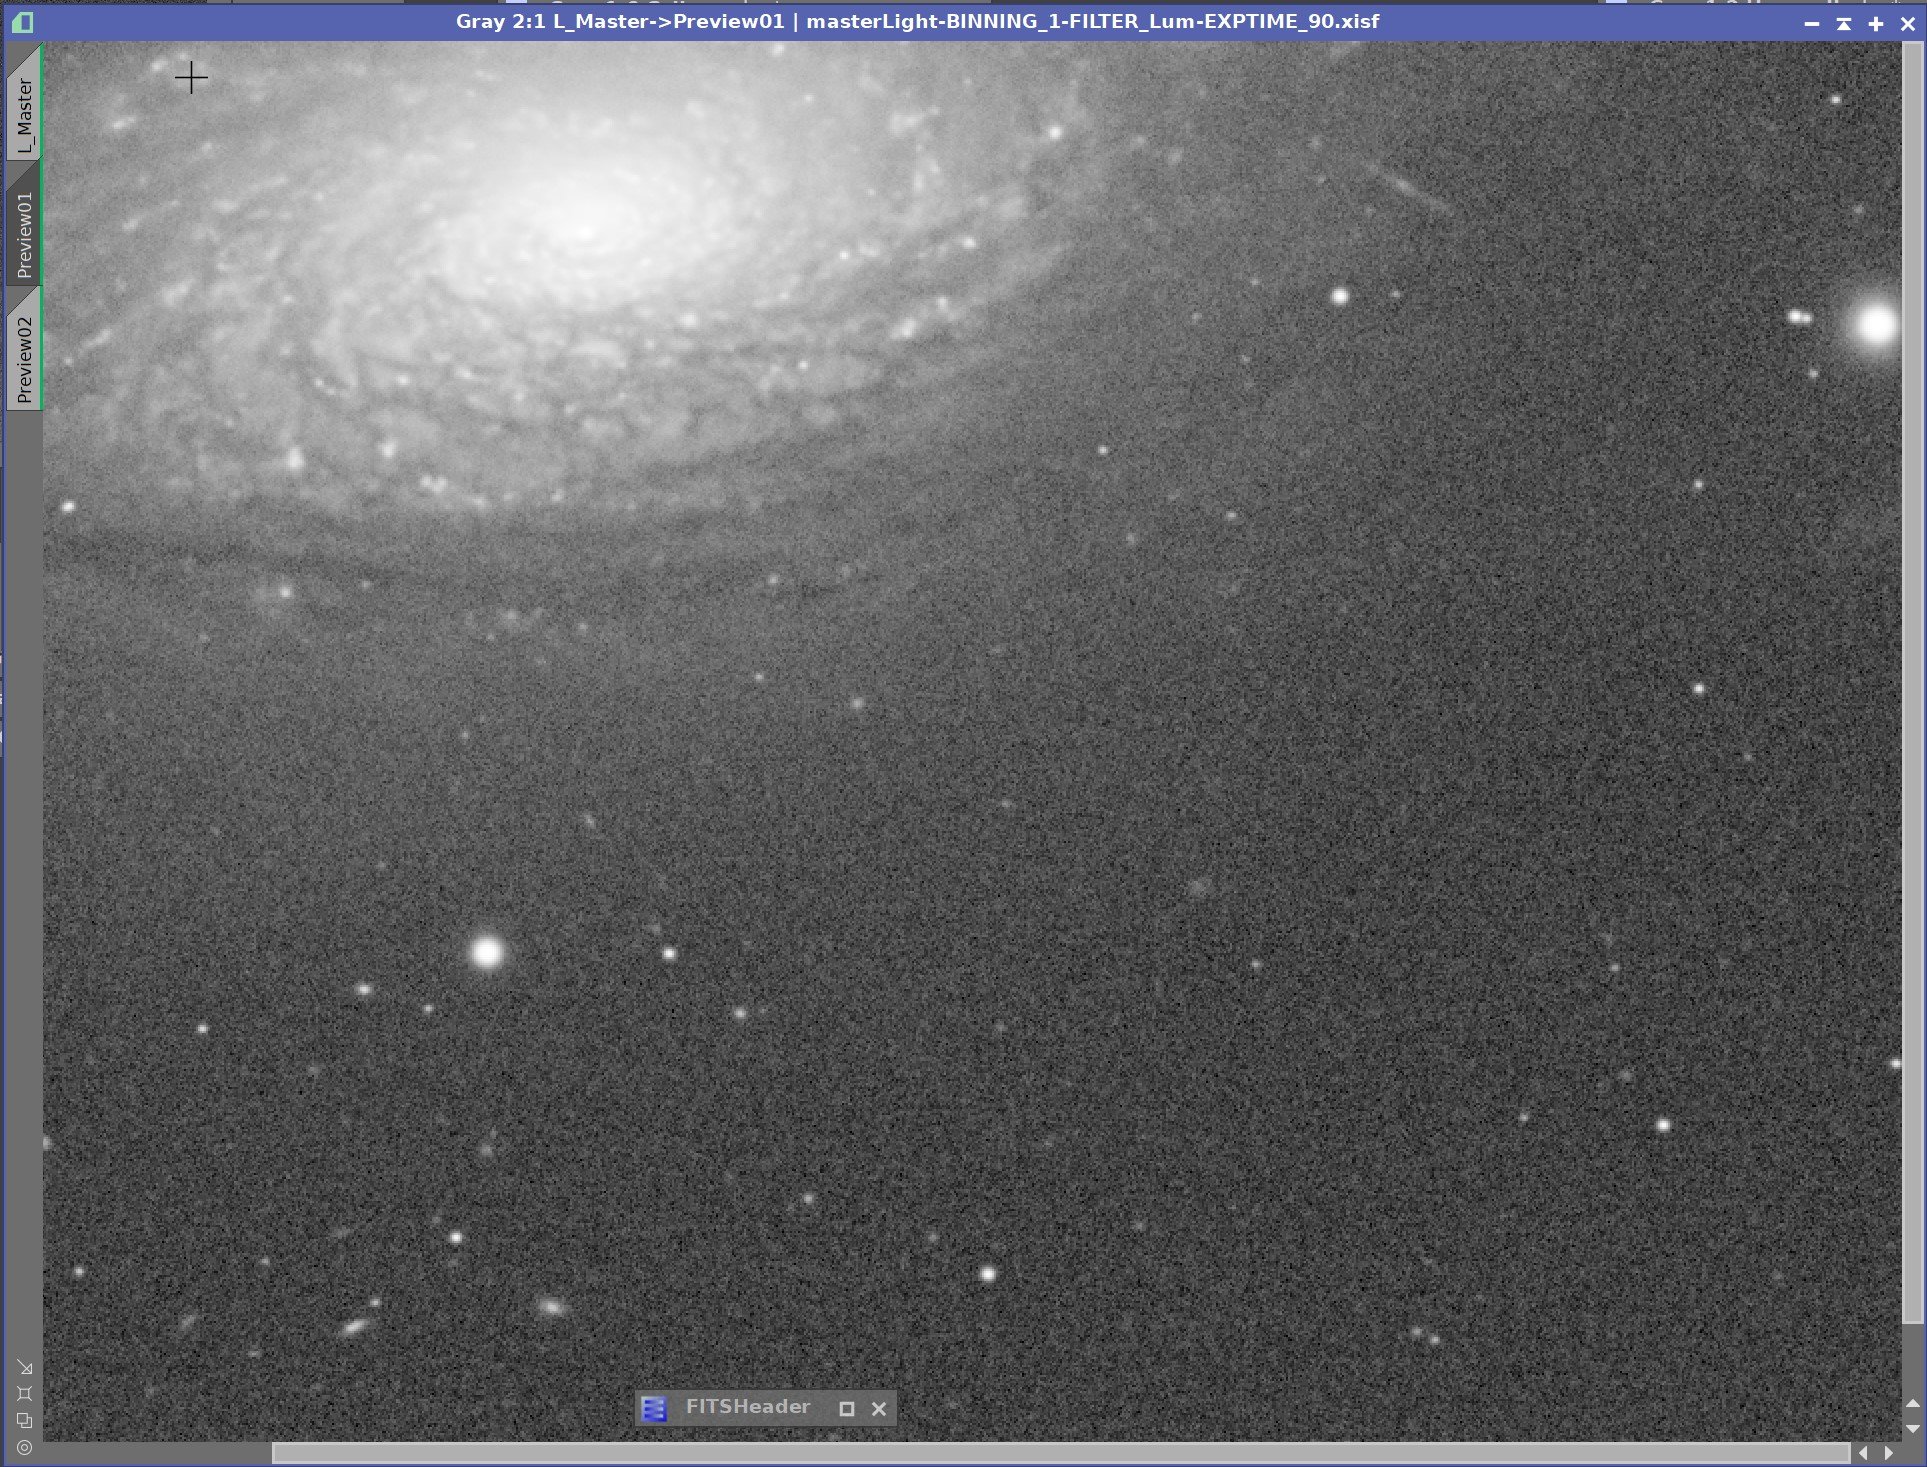
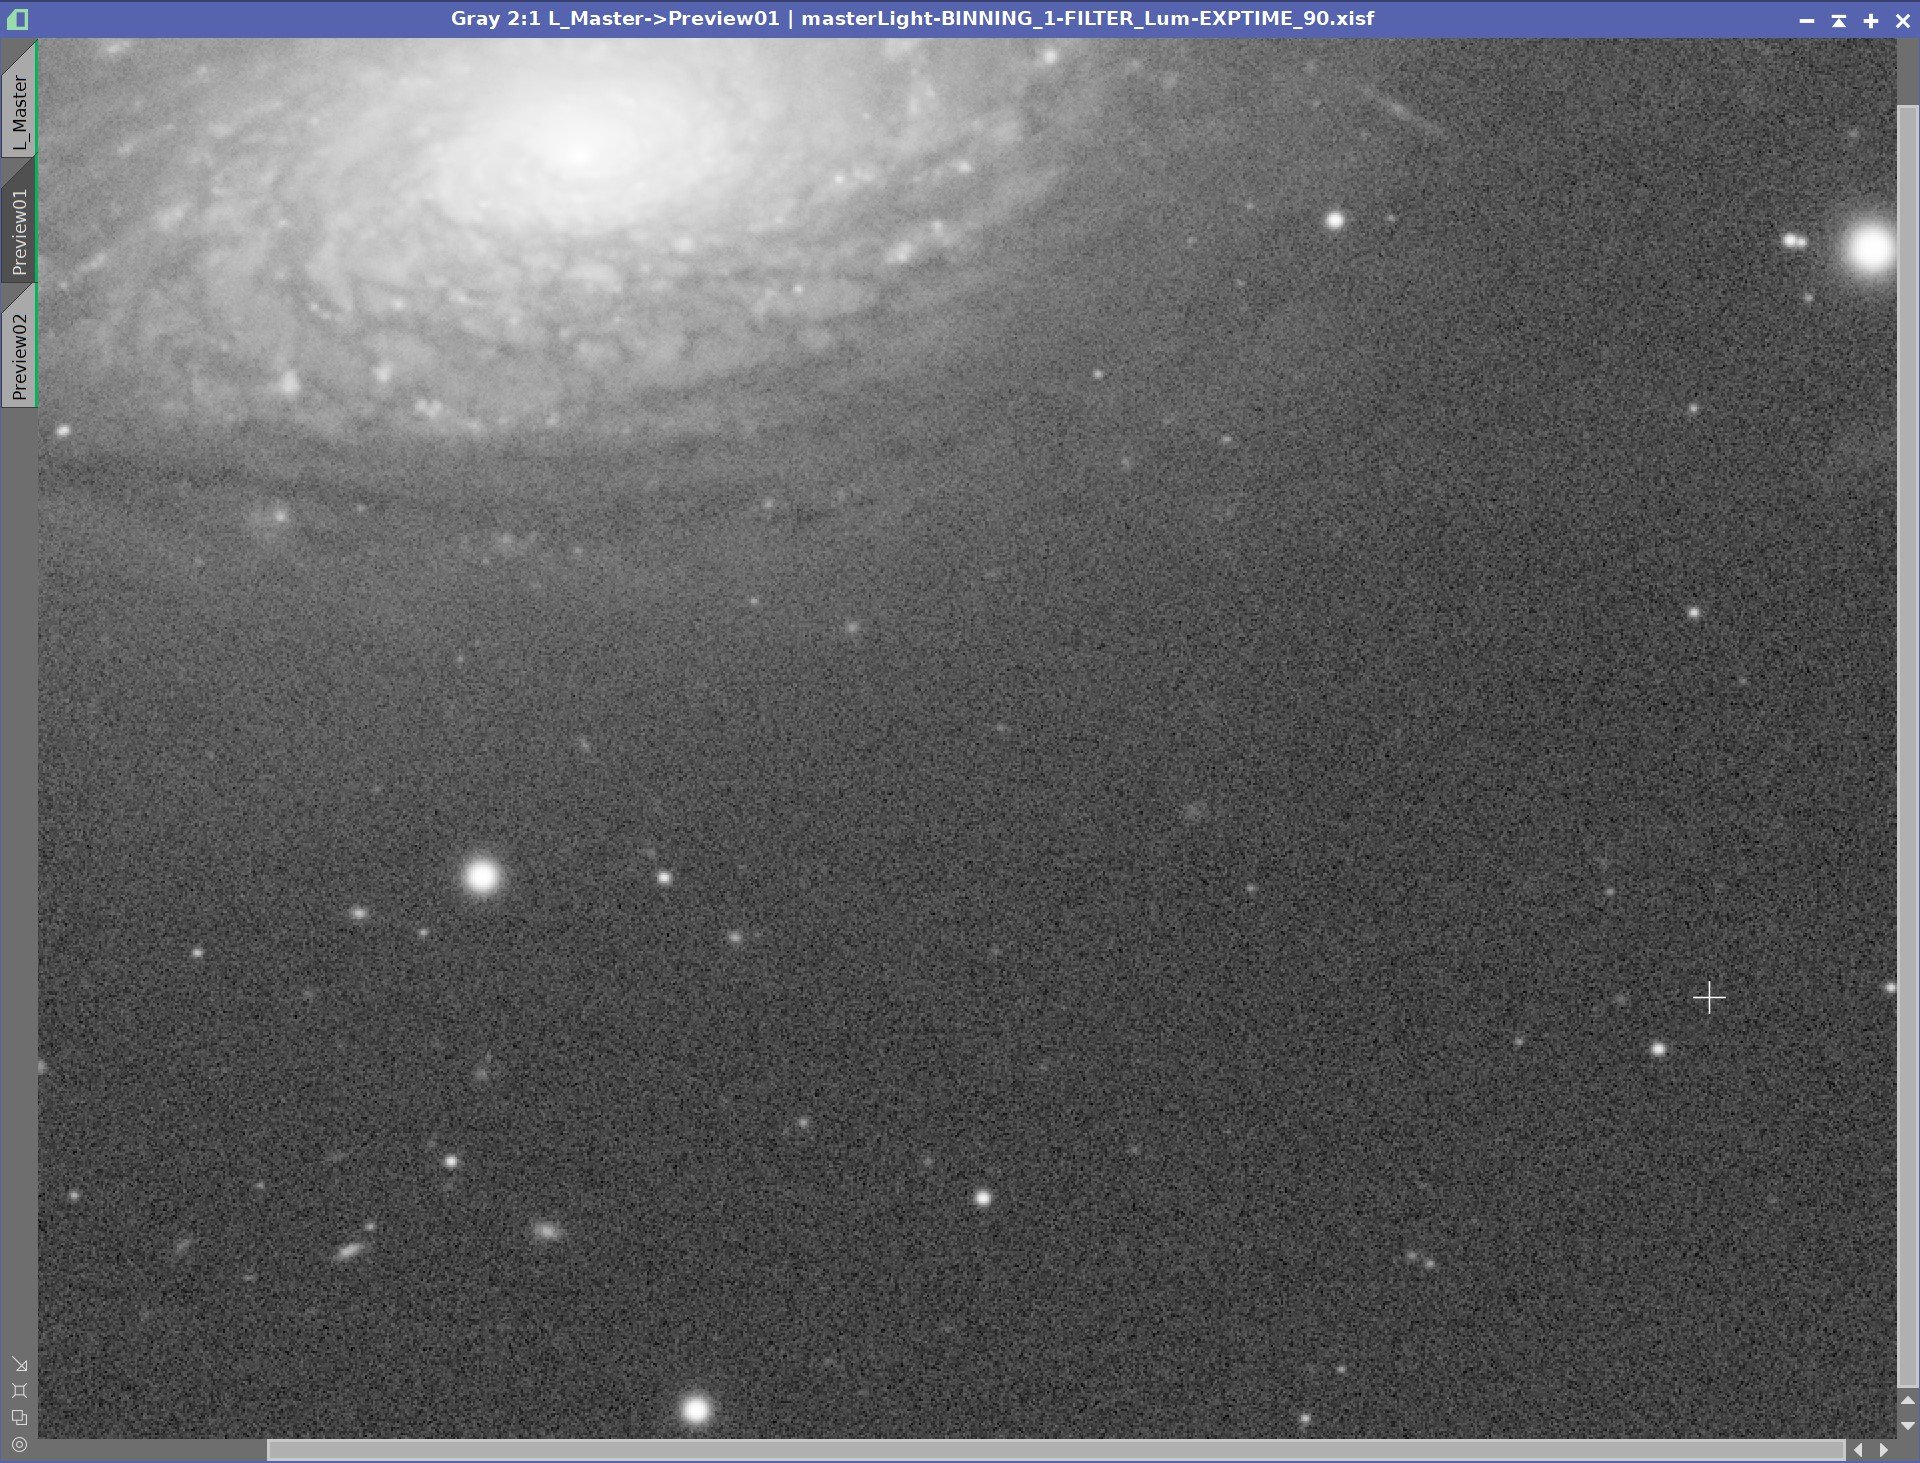
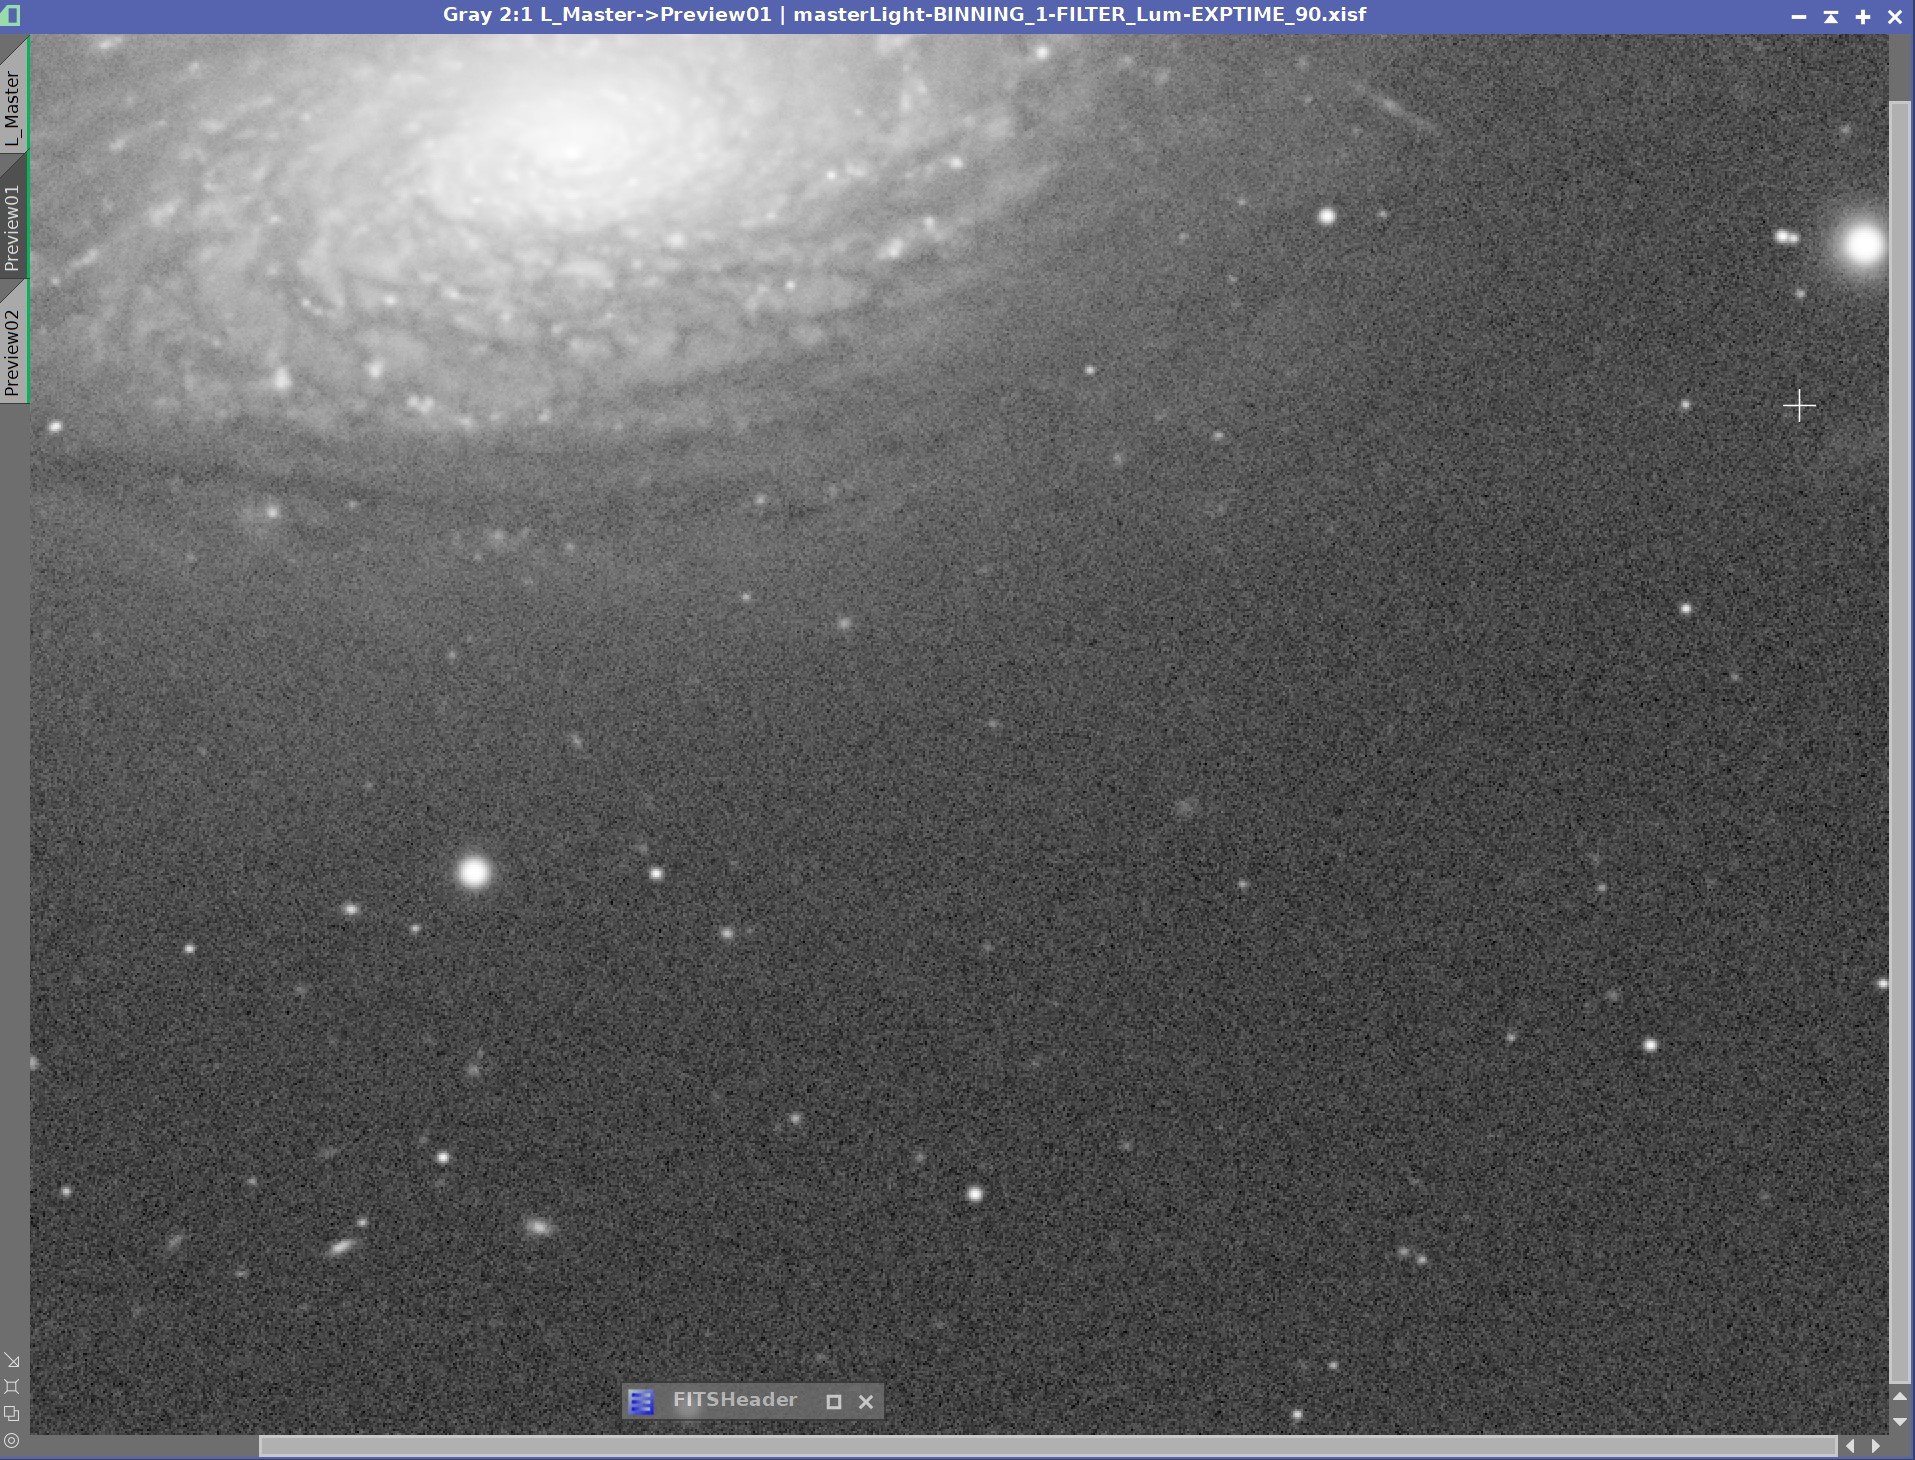
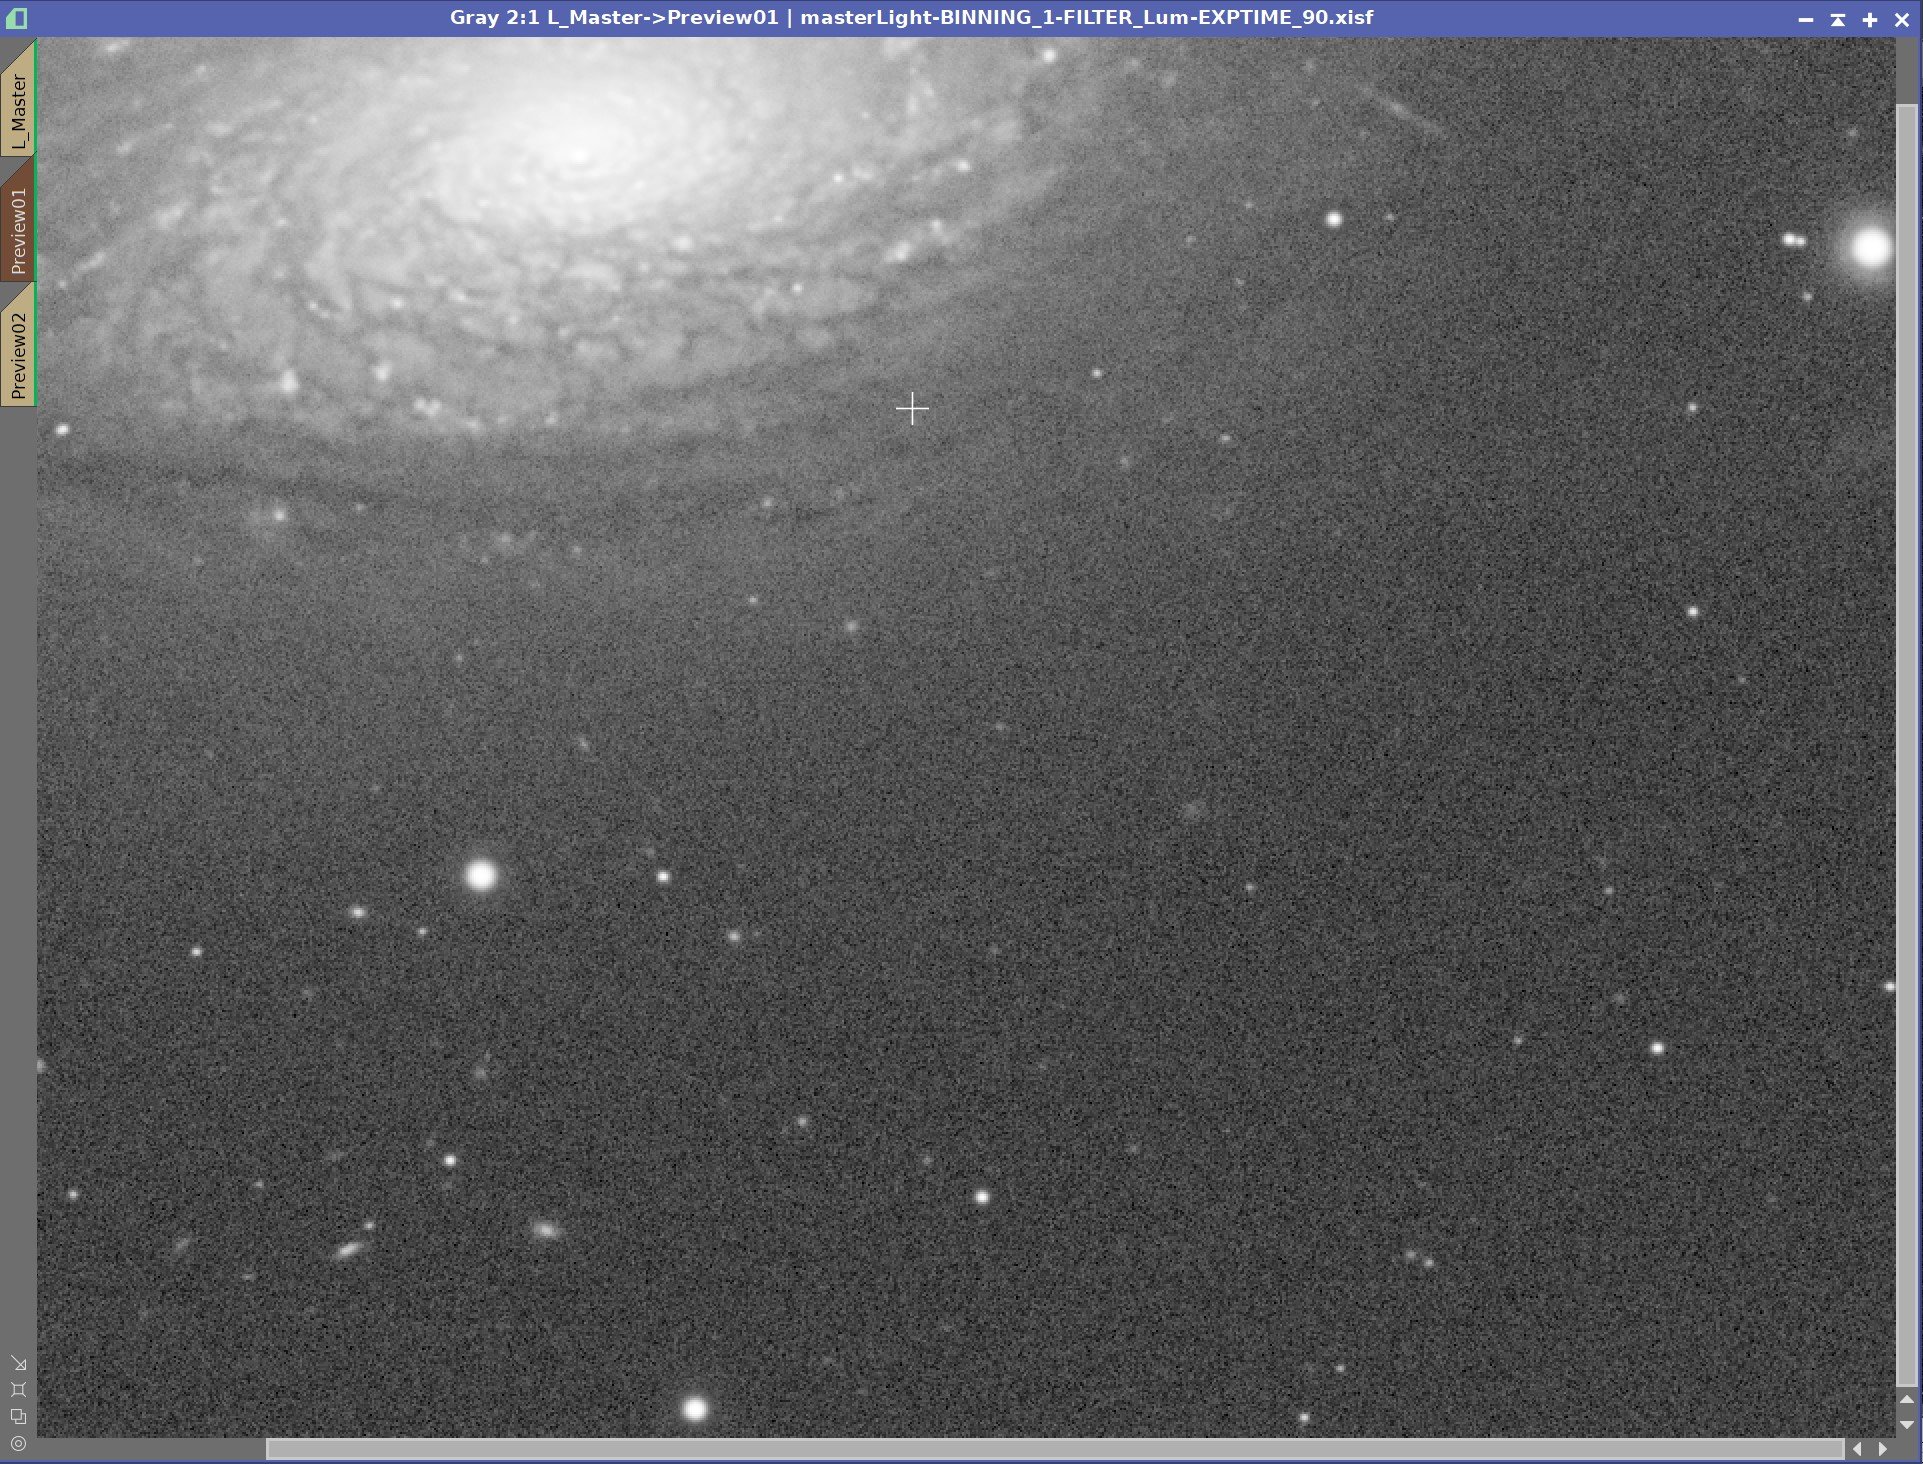
No Decon, Min Action, Layer 1 High Action, +Layer 2 High Action, +Layer 3 High Action, +Layer 4High Action, +Layer 5 High Action
See what do we see here?
The first image is raw, and then we apply deconvolution with the regularization parameters set for very low action. The resulting image shows the result of this, and you can clearly see both a sharpness restoration in the galaxy and stars, but also a noise pattern that is being enhanced.
As we enable more layers that are configured for aggressive noise action, we can see that around layer 3, the noise pattern is beginning to abate. By the time you get to layer 5, there is no longer evidence of enhanced noise, but you are beginning to impact the sharpness of the galaxy.
Some of this may be hard to see on your screen - Squarespace dynamically maps the size of an image into the window size on your browser, so it is best to look at these sample images with a full screen as you will lose subtle details with a smaller image rendering.
This suggests that we will likely need to engage layer 3 and perhaps more to control the noise of this image.
This test is pretty crude, and I have hit things with a big hammer to see how things behave. But it does let us get. feel for how things work.
So now, let’s take everything we have learned and see where we end up with this image.
Final Results
Using the guidelines we have already covered, I went about the process of tuning the Wavelet Regularization Parameters for this image. After some trial and error, I came up with a set of values that seemed to work pretty well. After application, I was pleased with the results. The real comparison, I guess, would have to be between the best results I was able to achieve here with the best results I can achieve with the traditional method using an object mask.
Let’s look at the comparison!
First - let’s look at what the differences were in the settings:

These were the final settings used for the Traditional Method where an object mask was applied to the image.

These were the final settings used for the Regularization method, where no object mask was used.
Masking vs. Wavelet Regularization
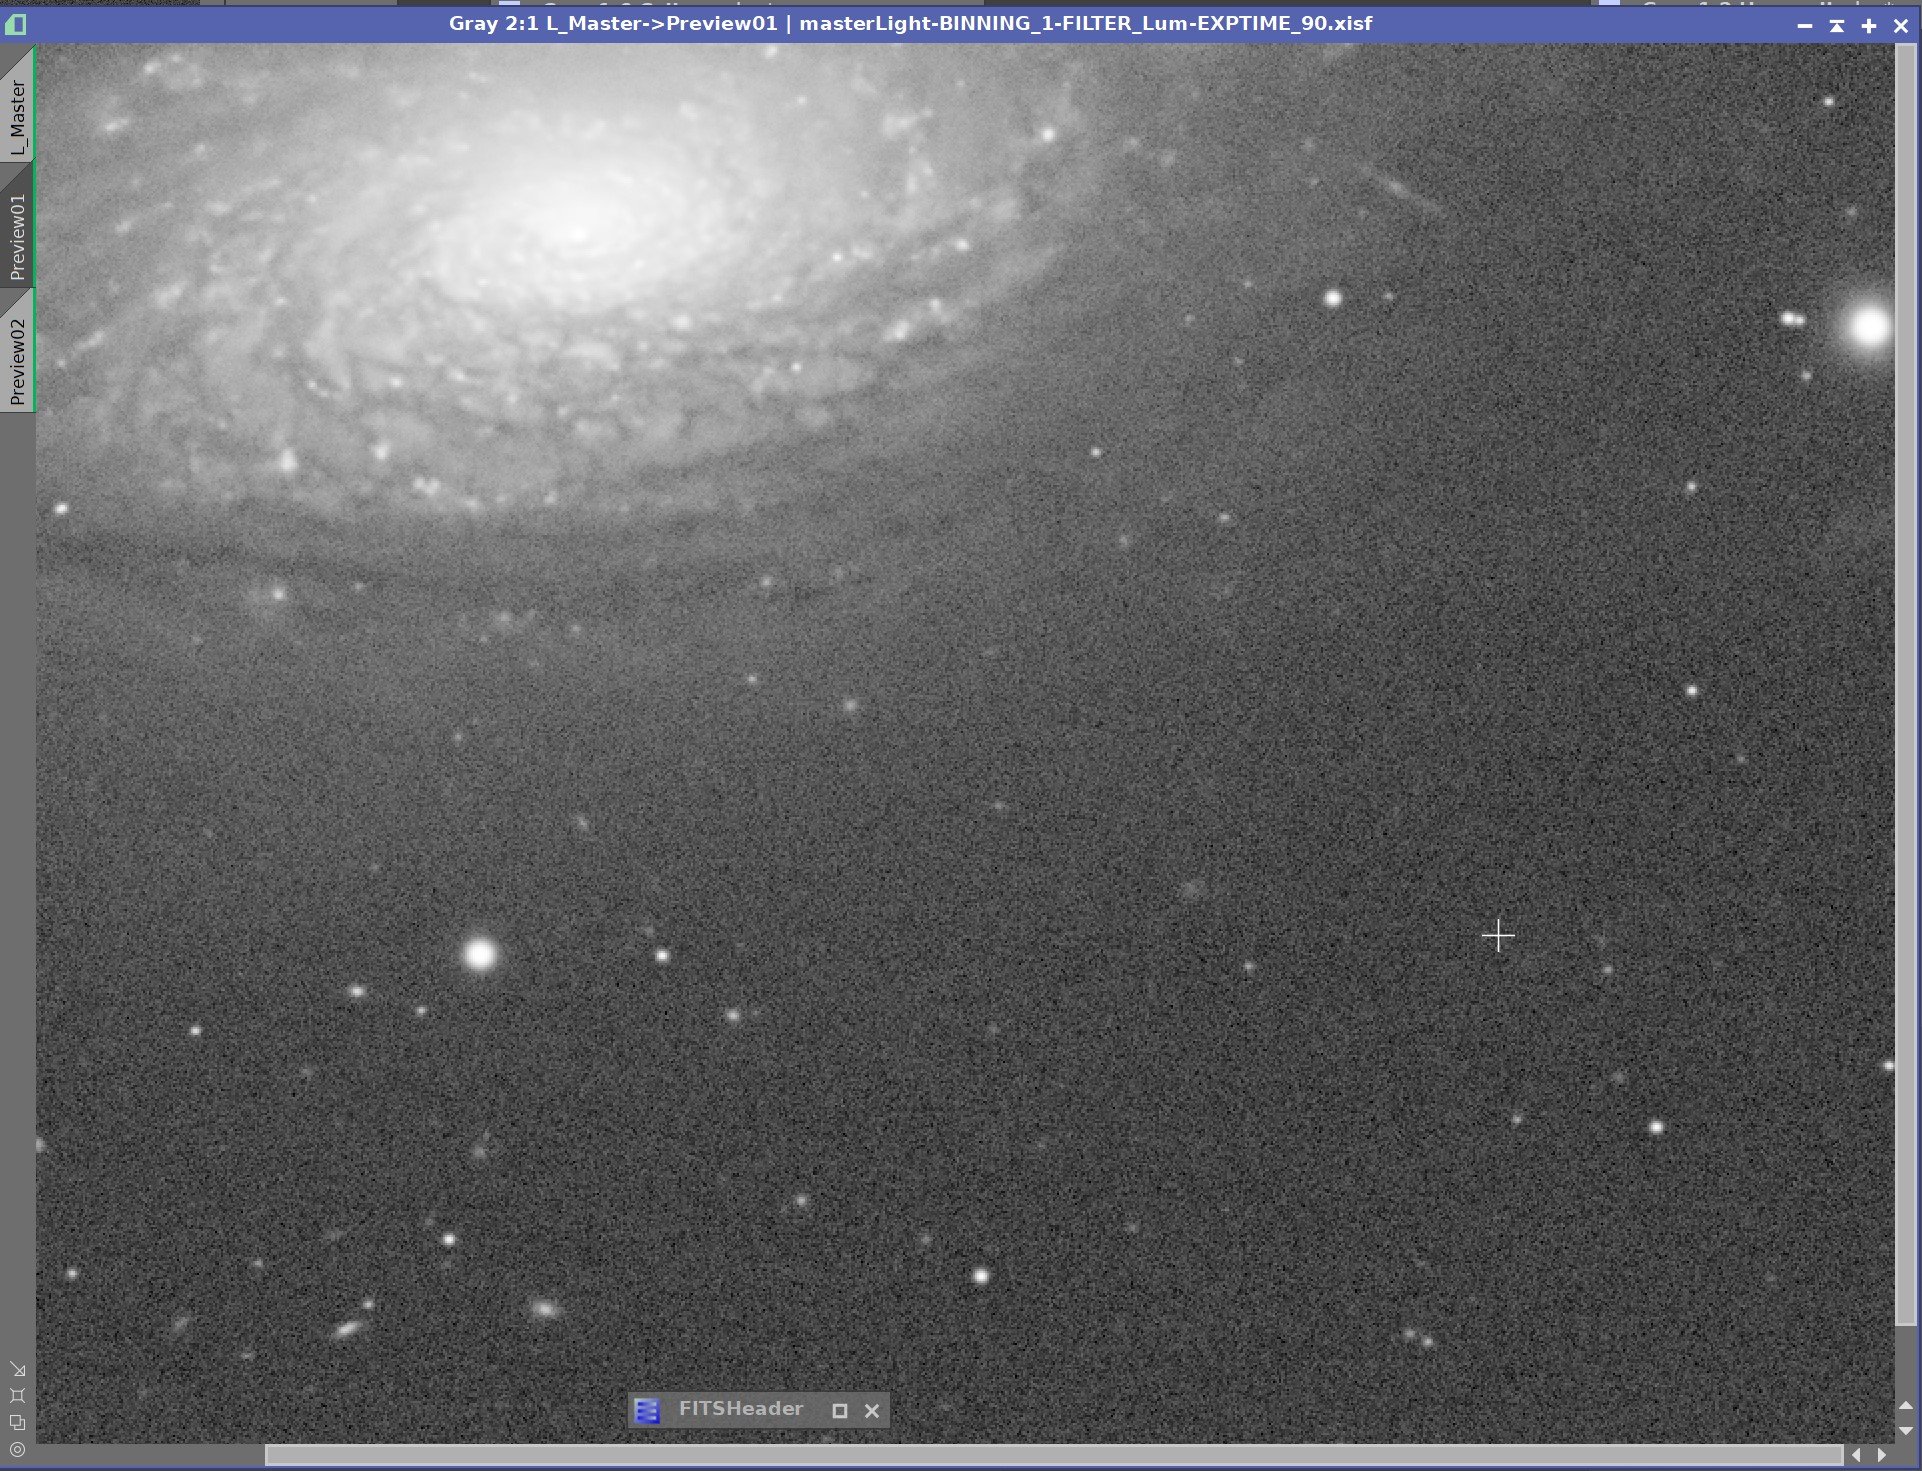
Before Decon, Decon with Wavelet Regularization, Decon with Object Mask
The final results are showing sharpness improvements.
Both show good star reduction. Both show significant sharpness restoration in the galaxy. While there is significant noise in the image, the noise has not been made worse in a significant fashion in either image!
You will also notice a difference in two of the brightest stars in the image. Regularization shows a well-formed star where you can begin to see some ringing artifacts in the mask-based approach.
Wavelet Regularization should have an advantage for image features seen in noisier portions of the image and If I look carefully, I can these improvements - but they are subtle.
Based on these results, it seems clear that you can eliminate the object mask and still manage noise growth by using Wavelet Regularization. There are several advantages to this approach:
Less work to do - no need for creating the Object Mask
Starting parameters can be created for a unique camera-optics combination and used as a good starting point for all images using that combination.
You have the potential for more areas receiving deconvolution sharpness restoration.
You can completely avoid artifacts from deconvolution as you are protecting the algorithm from the noise itself.
Using Both?
In general, it would seem that Wavelet Regularization should allow you to do away with the need to use a mask to protect regions of the image.
Having said that, I have run across comments where folks have ended up using both. That certainly is your prerogative, but it was not clear to me why you would want or need to do that.
Shortly after I first published this post, I got a note from one of my astrophotography colleagues in the local area, Dan Kuchta. He raised an interesting point:
“You mention that using Regularization is better than using a mask because of the effects in gray areas. Why not use both? If you use regularization, it should free you up to make your mask more “harsh”. In other words, stretch it to mostly black and white, with the white areas emphasized to be larger than the stars and other bright features you want to deconvolve. Then, using the mask would completely protect the very dark areas, and you only have to worry about how deconvolution and regularization affect the areas that are bright or very near the bright areas. Not sure if it buys you anything, but just a thought.”
This was an interesting thought.
Completely protect the background sky. Completely target high signal areas or even just non-background areas. Leave no transitional grays in the mask. Instead, let regularization manage areas of mixed noise and signal.
Seems like that could work. I have not experimented with working this way, but I could see a case where a simple mask such as Dan is describing might make it a little easier to get the regularization tuned more easily. It was interesting enough that I thought I would share it.
Conclusion
When first looking at the Wavelet Regularization parameters, it is unclear what they are, how they work, and the rationale you would use to adjust them. This is not helped by the fact that formal documentation is scarce or nonexistent.
Hopefully, my detective work will help you to better understand how to use them. They offer a robust set of tools that are probably underused in the Astro processing community.
I would like to thank Jon Rista, for his postings on this subject and his willingness to engage to help me better understand what is going on here.
I am sure there is a lot more to learn on this subject - I feel as though I am just scratching the surface!
If you have any tips that would make this article better - please leave a comment or contact me! I will
update this posting and - of course - give full credit where it is due!