
Using The EZ-Decon Script in Pixinsight
March 30, 2022

Table of Contents Show (Click on lines to navigate)
Background
In my previous deconvolution effort, I released a 7-part series on the “Use of Deconvolution in Pixinsight.”
In this post, I would like to review the EZ-Deconvolution script by darkarchon.
But, first, let's review a bit on the traditional use of Deconvolution.
Deconvolution is a powerful tool that applies the inverse of a Point Spread Function (PFS) to restore lost detail in an image due to the convolutional effects of the optical path and atmospherics.
Its propensity to create ringing and noise artifacts can make its use difficult. These are avoided by adding protections to the image:
An Object Mast protects background and low signal areas from deconvolution
An LDSI protects the brightest stars from ringing artifacts
A carefully tuned Global Dark parameter provides deringing protection around stars
A carefully tuned Global Bright parameter protects against white rings and "worms" artifacts.
Tuning these protective mechanisms take time, effort, and not a little skill.
EZ-Decon Works Differently
I had not really tried the EZ-Decon script before, but I assumed that its main focus was creating a framework that facilitated the creation of these protective mechanisms. I quickly realized this was not the case as I dug into things.
EZ-Decon takes a very different path.
Noise and low signal areas are protected by a Background Mask and the Wavelet Regularization parameters. This is not so different from normal deconvolution.
However, Instead of tuning parameters to prevent the creation of star artifacts, it simply REMOVES the stars from the image so they cannot be impacted by deconvolution! It creates through the use of a comprehensive star mask using Starnet++ (which must be set up and working in your system).
Now, think about this for a minute.
If you remove all of the stars, then there is no reason to do local deringing! That does away with the LDSI mask and the tuning of Global Dark and Global Bright Parameters.
At a high level, the script:
removes stars
runs deconvolution on the starless image
restores the original background before it was processed
and then restores the stars (which have never been touched by the Deconvolution algorithm!)
Implications of This New Approach
There are a few implications of this that we must talk about.
Quicker/Easier?
Because the stars are removed, you don't have to waste time iteratively optimizing deringing parameters - this is a real time saver! The iterative method of testing parameter values on multiple previews seems to be more of an art form than a scientific process. This aspect of the deconvolution setup is greatly simplified.
To do this, EX-decon does run Starnet++ to create a star map. This does take some time to do. But it’s time spent by the computer, not by you - you can zone out or waste time in your browser while waiting.
The Need for Good Star Maps
Another implication is that you better hope that you have a darn good star map because if your star map misses stars or does not cover the full area of a star, then it will get clobbered by the full strength of the deconvolution mechanism.
The good news is that StarNet++ does a pretty good job at star mask creation, to begin with. If you need to adjust the map if EZ-Decon offers convenient tools that make it easy to adjust it in a global sense. It even offers the ability to add small ellipses of arbitrary size to the mask so that large stars or other features might be masked as needed.
Stars Not Improved
But - because stars are NOT processed, they are also NOT improved!
While we did protect some stars from being operated on by the normal deconvolution process, many stars were still operated on. The PSF was used to tighten their distributions, causing the stars to shrink. Deconvolution can help reduce star bloat, but this will not happen with EZ-Decon.
As a result, EZ-Deconvolution restores lost sharpness to extended features like nebulae, galaxies structures, Planetary nebula structures, and the like.
This sounds like a net loss - but perhaps not.
We have other mechanisms that work well to reduce star sizes (EZ-StarReduction, MorphalogicalTransfoms, etc.), and they can still be used. And with the stars out of the way, perhaps you can sharpen other features even more aggressively now that you are less concerned with generating star artifacts.
Installing EZ-Decon
The easiest way to install The EZ-Processing Suite - and keep it up to date - is to add the URL “https://darkarchon.internet-box.ch:8443/” to the list of repositories found in "Resources -> Updates -> Manage Repositories".
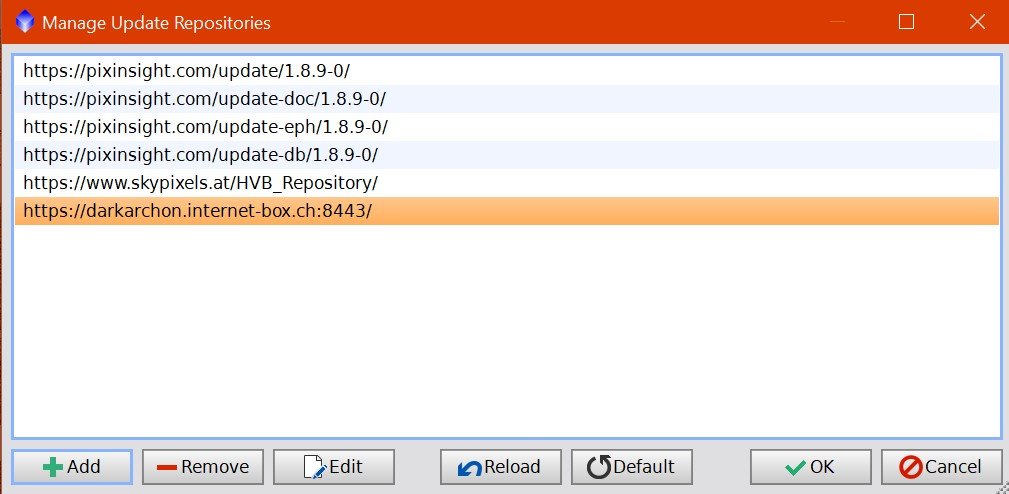
The URL for the EZ-Processing Suite installed in the list of update repositories.

The EZ Processing Menu
Once you have done this and done an update, you will find the EZ Script under your Script Menu in Pixinsight.
You will also need to ensure that Starnet++ is available and working in your Pixinsight setup. This feature is now bundled as part of Pixinsight, but you may have to point to the network weight tables.
The Basic Steps to Running EZ-Deconvolution
Mask Panel Operations
Create some Previews on your main image
Run the EZ-Decon Script
Expand the script panel to fill your screen
Add a good preview under the master image
note: when working on a preview EZ-Decon is smart enough to use the whole image for key operations like mask creating and PSF
Create your Star Mask
Press "New Processed Star Map"
This will create and display the starmap
Make sure all stars are well masked, adjust the map as necessary
Create your Background Mask
Press "Create Background Mask"
Leave the blend slider alone
Deconvolution Panel Operations
Click on the Decon tab
Click on Create PSF
Choose the preview image
Set iterations (default of 25 is good)
Press "Evaluate EZ Decon Run"
Compare it with a starting point
Run with other previews
If ringing is seen:
Make sure the star mask is covering the star that is ringing - adjust if necessary
Try increasing PM iterations
If over-sharpened:
Reduce iterations
If noise is an issue:
Increase wavelet “Noise Reduction” strength for layers greater than one.


If happy, go back to the main image, and press the "Run Decon" button at the bottom
Let’s Do a Deep Dive into An Example Image
For this example, we will once again use my image of Messier 63.

Messier is 63 - The Sunflower Galaxy
First, let’s select a good preview to use for this image.
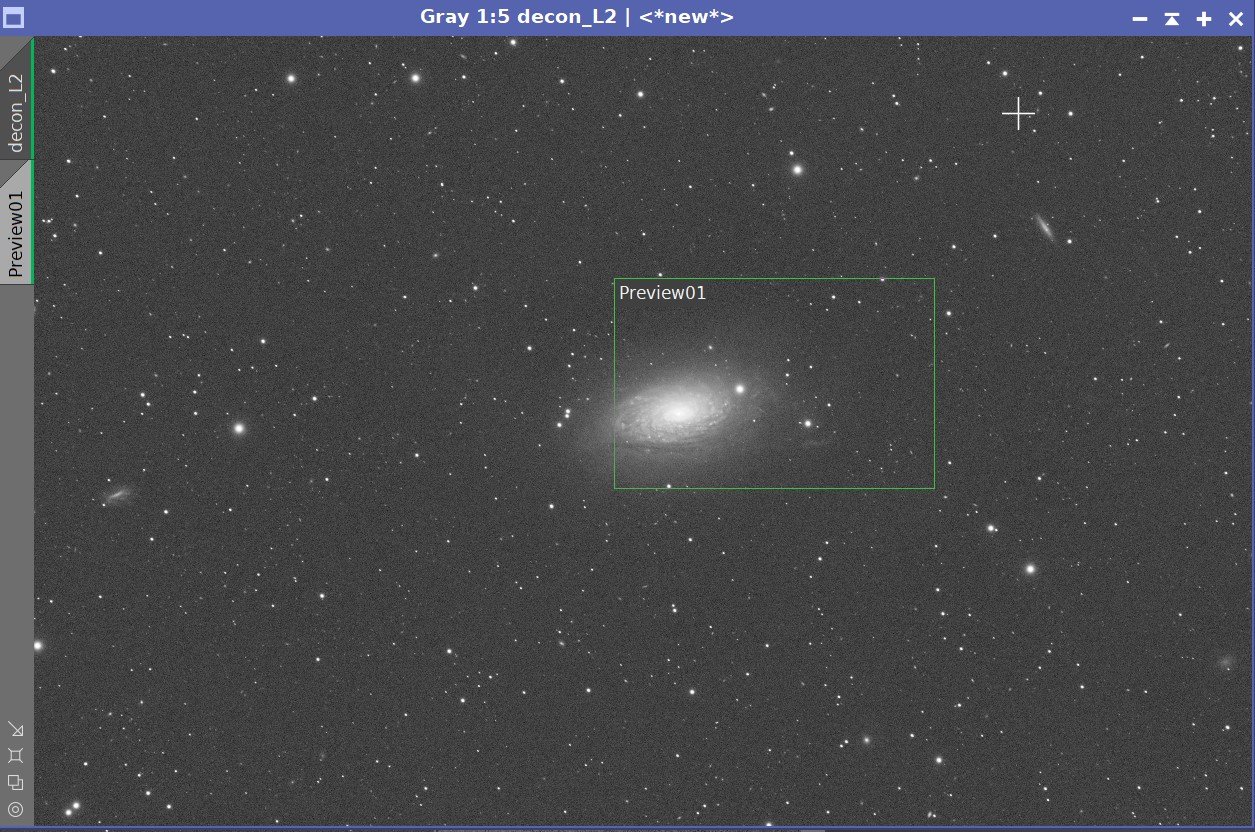
In this case, I chose a single preview that covers the body of the galaxy as well as some of the surrounding areas.
Open Script and Expand to Fill Screen.

Create or Select the Star Map
If you already have a good star mask for this image, you can skip the computations here and just indicate the view to use.
Otherwise, Select "New Processed Star Map.”
This step will take a while to use Starnet++ to create the mask. Once the mask is created, the following processing is also done to the Mask:
Apply STF
Binarize
Dilate
Convolve
Dilate
What is going on here? The mask is made nonlinear and then clipped to make it binary. At this point, the image is each star is made larger and softer.
The goal here is to ensure that every star is on the map and that each star is well masked and covered up completely by the mask.
This is a critical point. Make sure anything that might create an artifact is completely covered by this mask.
Take a moment to review this mask. If stars are missed, you can edit the mask and use the tool panel to the left to modify your mask:
STF->stretch
Boost
Dilate
Convolve
Binarize

Most of these tools are focused on increasing the size of the mask stars to ensure star coverage. But if you missed a star completely, you can use the tool panel on the right to create an ellipse of whatever size you need to cover the star and add it to the mask.
You could also Click on "Create Raw Star Map". This will use StarNet++ to create the mask and then allow you to process it yourself with the tools already listed -this give a great deal of control over the process.
Later in the processing, if you notice an artifact forming in your image, you will most likely be coming back to this spot to work in the mask a bit more.
This mask looks pretty good as it is, so we will not make any modifications here.

This the Star Mask created by the “Create Processed Star Mask” button.
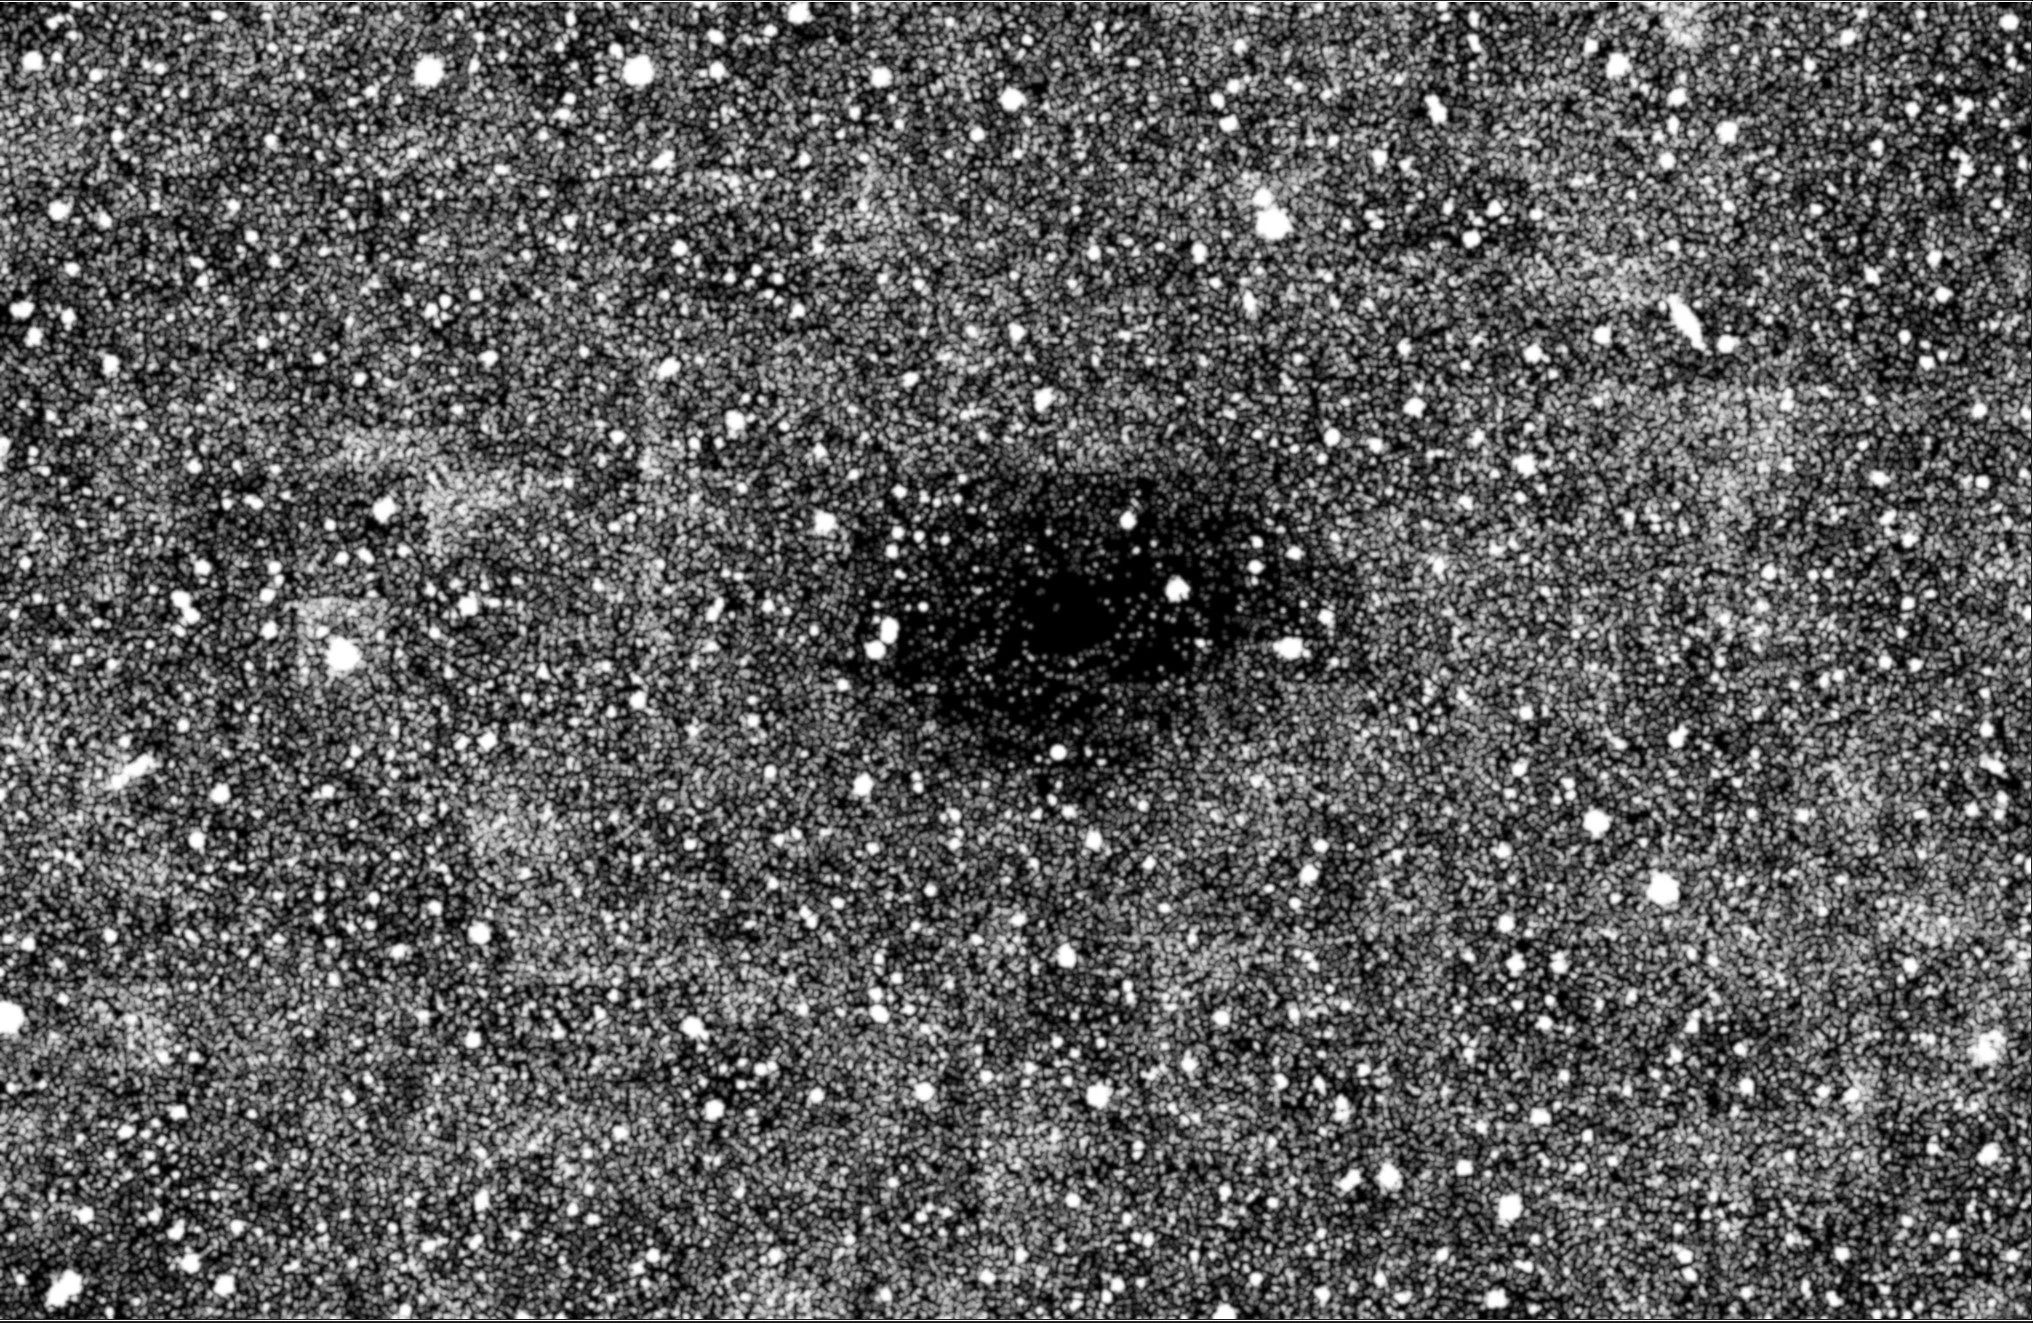
Here is the alternative Star Mask view

Here is the instructions offered within the script itself.
Create the Background Mask
If you already have a mask - you can just select the view here.
This is done by pushing the "Create Background Mask button."
Based on my testing, the blending slider did not seem to do anything, so I would just leave that alone. The resulting mask looks pretty good, so we will proceed.
If you already have a mask - you can just select the view here.

The Background Mask created by EX-Decon
Create the PSF File
Press the Decon tab and then generate the PSF. You can compute this outside of the script using DynamicPFS or the PFSImage script if you like. Or you can use a PSF previously computed by EZ-Decon by selecting the view.

Test EZ-Decon
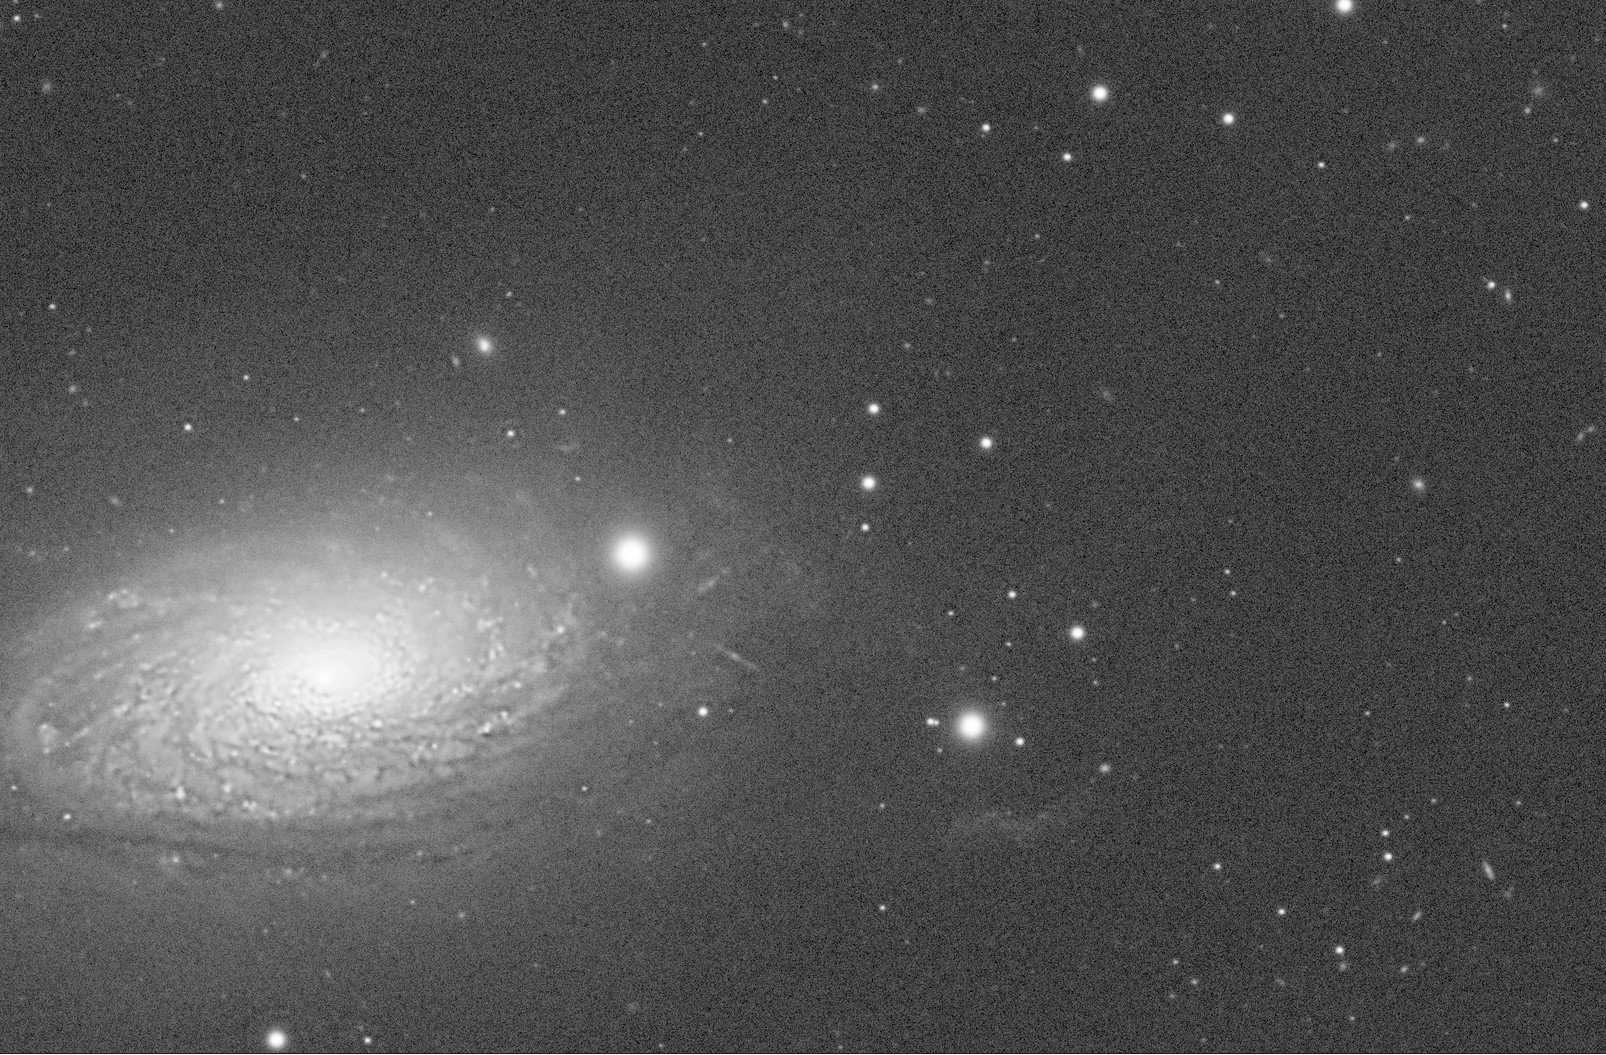
We use the default iterations of 25 and PM iterations of 5 and run on the preview image. Here is our result.


It looks pretty good - a solid improvement in detail and sharpness. However, do you see a ringing artifact showing up In the core of the Galaxy? The Star Mask failed to cover this region, and now we have a ringing artifact. To fix this, we will pull up the Star Mask image, zoom in a bit and then add an ellipse sized to cover the core of the galaxy.

If you look carefully, you can see the ellipse tool setup to create a circle over the core of the galaxy.

The ellipse is now filled and in place.
With the Star Mask now modified, I can rerun the Decon and see if it has solved the problem.


Before and After the Star Map Fix for the Galaxy Core
This seems to done it - problem resolved!
Set Iterations
The default iterations are set to 25.
What happens when you change the number of iterations? Let’s find out.
I ran a series of iterations from 10 to 100 and then added in one at 150 - which is the max value permitted in the Iterations field.


Iteration Series
Values = 10, 20, 30, 40, 50, 60, 70, 80, 90, 100, and the max value 150
It appears to be getting sharper as you go up, but the changes are fairly subtle frame-by-frame when you are using a step size of 10. I would probably pick 40 based on this test - higher than this, and it starts looking overly sharp to my eyes.
What about PM Iterations? I have not found a lot of detail and what exactly is being done here, but clearly, there is an iterative series of Pixel Math operations, and I have read that if you see some ringing, you could fix it by modifying the star mask, or perhaps by increasing the number of PM Iterations. Let’s look at a series of PM iterations and see what is going on here.


PM Iteration Series
Values of 1, 2, 3, 4, 5, 6, 7, 8, 9, 10, and a max value of 20
With only one PM iteration, I see ringing going on, but right after that, I don't see much of any change on this image. Even at the extreme range of 20, nothing obvious seems to be changing. Based on this, I would keep it at the default value of 5 Iterations.
Noise
I have not seen noise being an issue with this image through this process.
Yes - there is noise in the image that will have to be dealt with, but I don’t see that noise changing with deconvolution. I think the main reason for this is the Background Mask protecting low signal areas of the image.
I also understand that if there was a noise issue being seen here, one should adjust the parameters in the Wavelets Panel. The Wavelets Panel looks similar to the Wavelet Regularization Panel in the Pixinsight Deconvolution tool.
To be honest with you, I am still figuring Wavelet Regularization out. The best reference that I have come across for this so far is an excellent article posted by Jon Rista - you can see that HERE.
But it should be noted that the Wavelet Regularization Panel in EZ-Decon does not quite look the same as what is included in the Pixinsight Deconvolution Tool.

This is the Wavelet Regularization Panel on the Pixinsight Deconvolution Panel.

This is the Wavelet Panel in EZ-Decon.
Normally, one would attempt to manage noise with Wavelet Regularization by:
Changing the noise model
Changing the number of layers
Change the spline function
Adjusting the noise thresholds and noise reduction parameters.
But the Wavelets Panel in EZ-Decon is much simpler. All you can change is the threshold and noise reduction strength.
My best advice would be to leave the thresholds aloe and increase the Noise Reduction perms on the layers you think will best impact the noise you are seeing.
If anyone has better guidance - please let me know, and I will update this section!
Apply to the Full Image
We now seem to have the maps reasonably defined and the key parameters set. Now we hit “Apply Decon” and apply towards the full image.
The result is seen below, along with the results we get when running Deconvolution manually in Pixinsight.
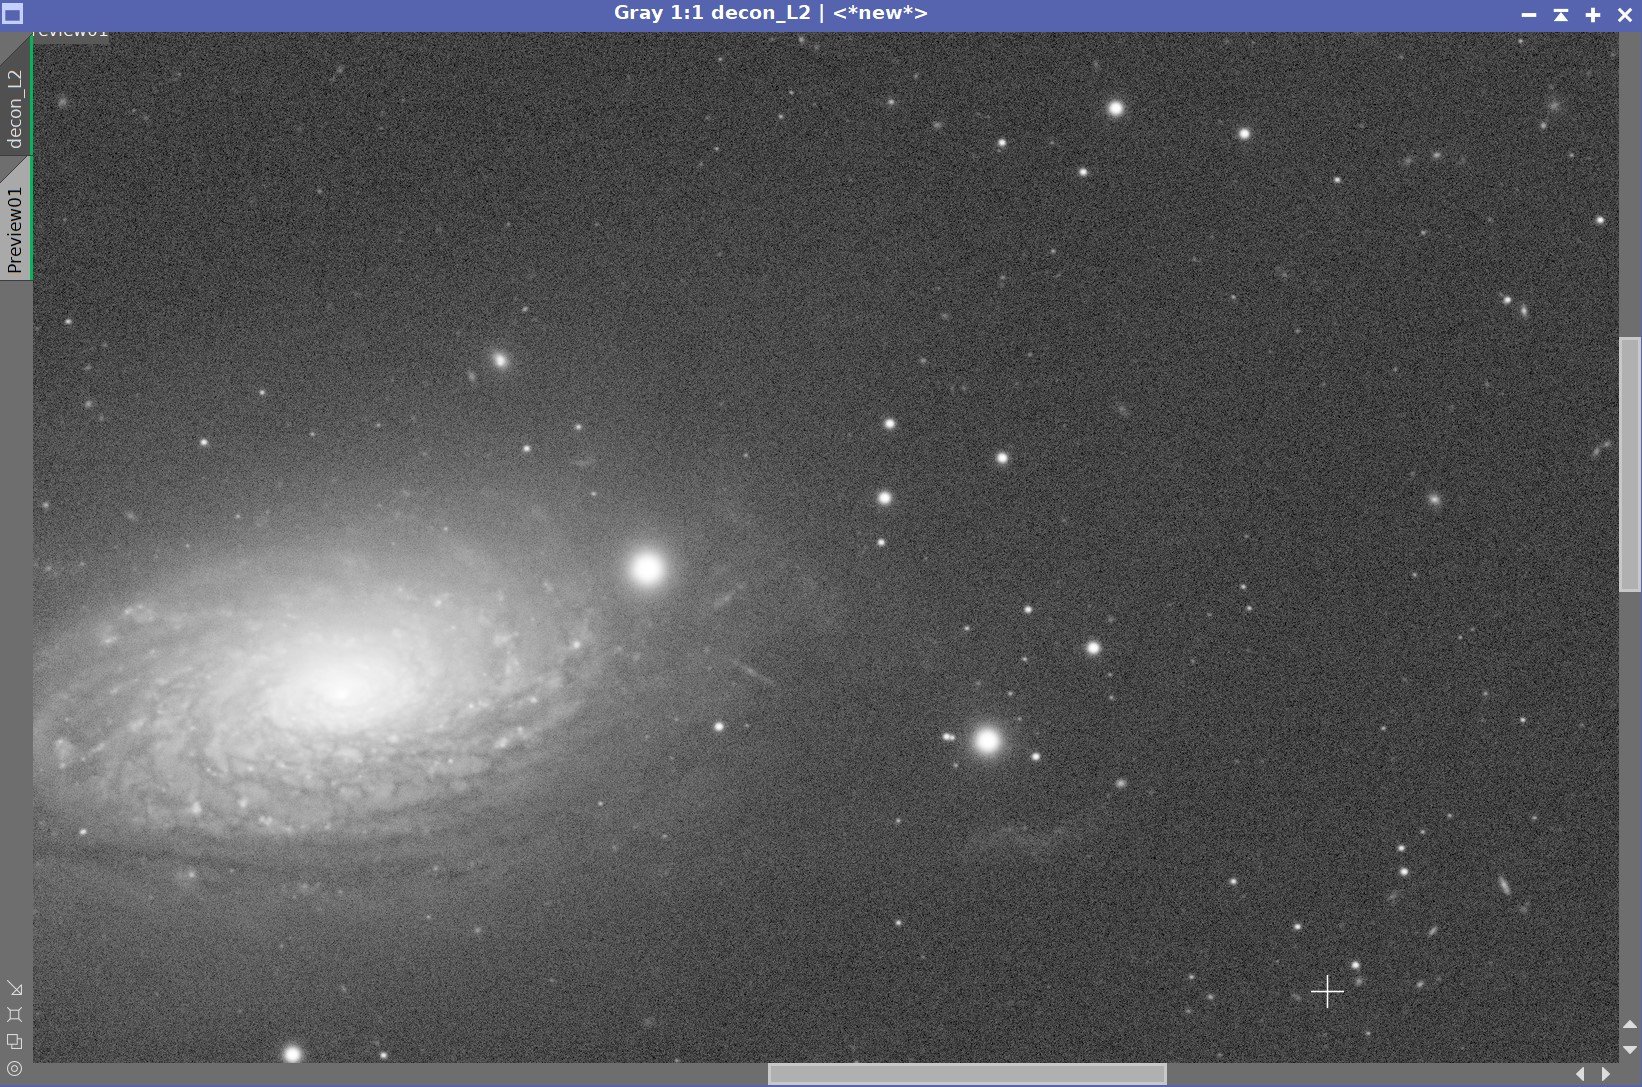
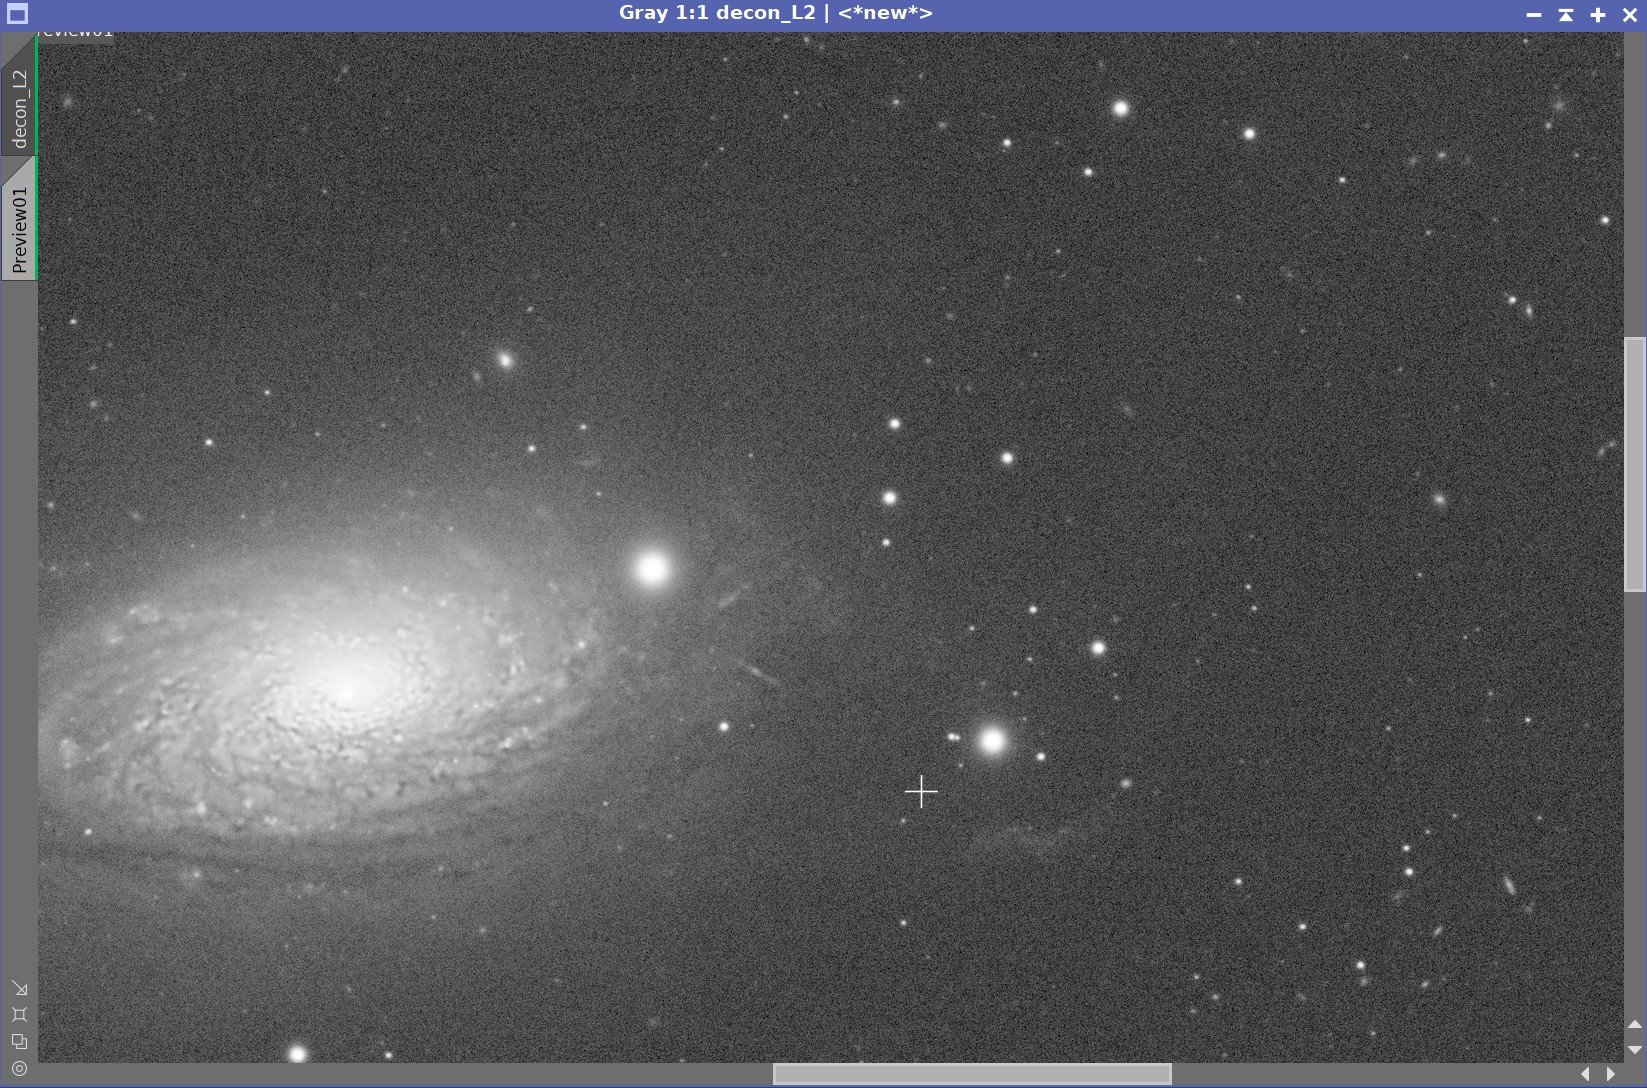
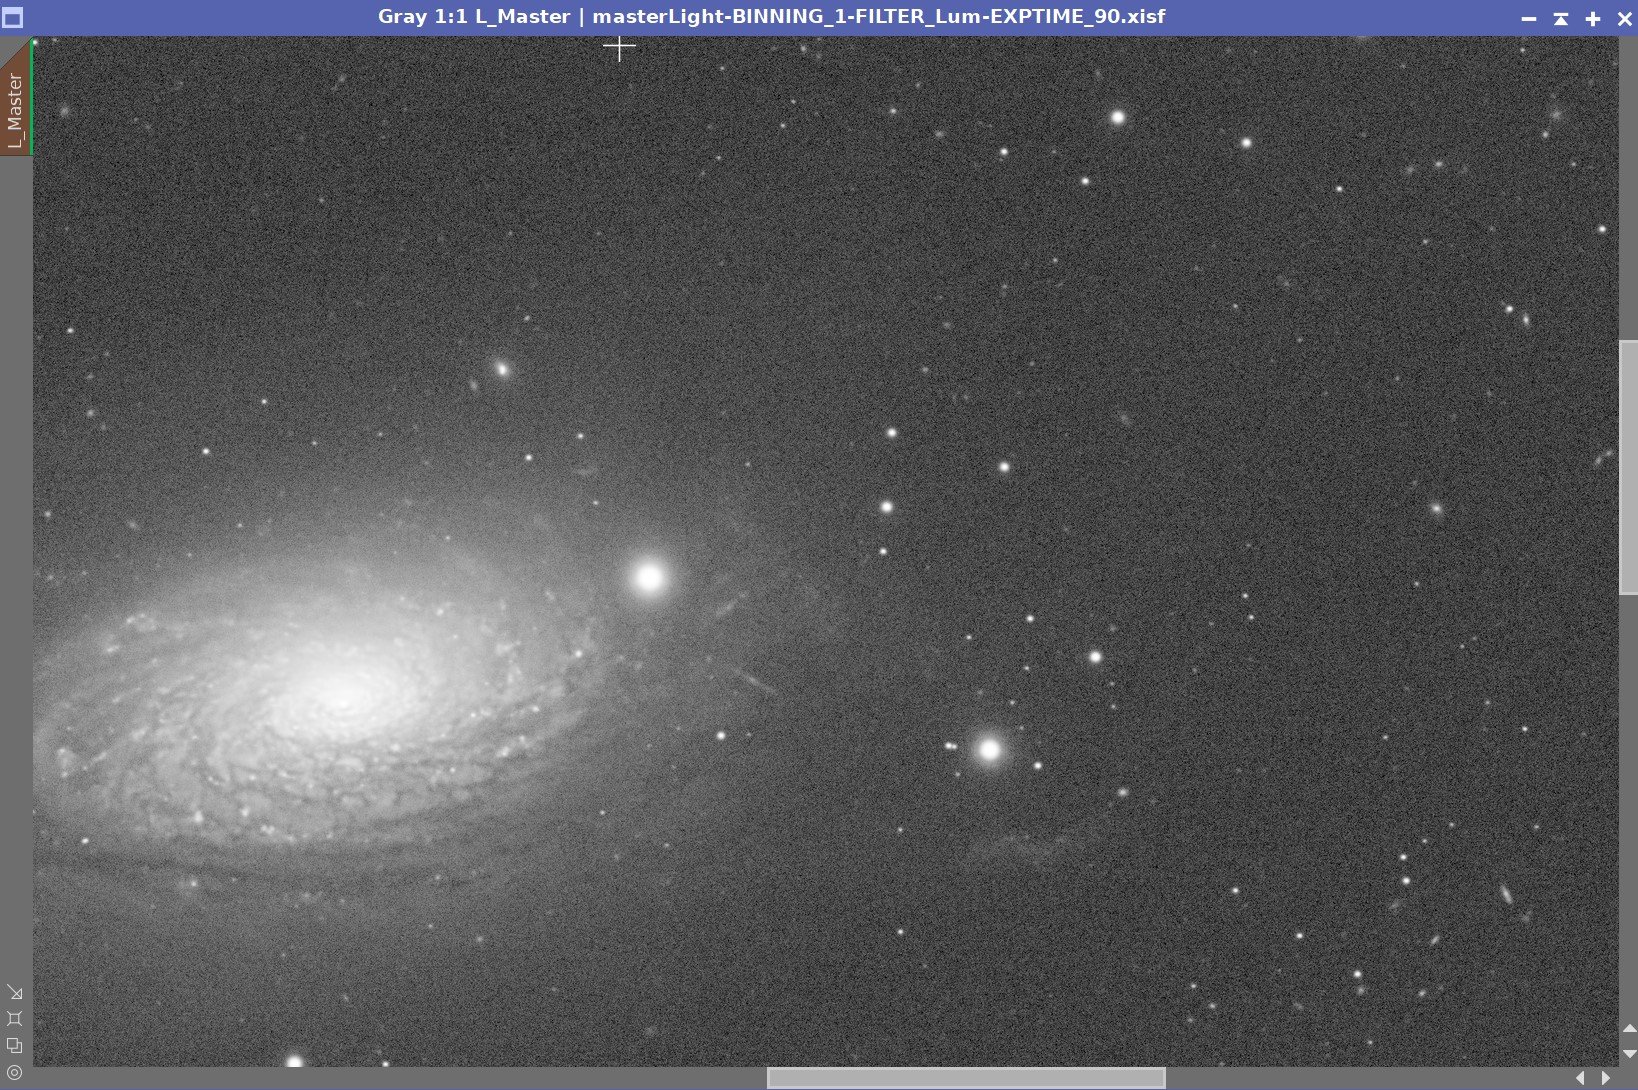
Before and After Deconvolution Comparisons
Before Deconvolution, After EZ-Decon, After Manual Deconvolution
In my eyes, I think that the difference between the Before and After EZ-Decon is very significant. We have restored a significant amount of detail in the body of the Galaxy.
But is it better than what we achieved with the traditional Pixinsight Deconvolution Method?
These two results are very close.
I think the EZ-Decon is just a bit sharper in the detail of the galaxy body than what I am seeing with the traditional method - but I really have to study the images to see it.
On the other hand, the stars in the traditional deconvolution method do shrink just a little bit, and of course, the stars in the EZ-Decon method are not processed at all. Again the differences are small.
Conclusions
I found it very easy to use EZ-Decon and very convenient. I was surprised to see that this method removes stars to avoid ringing issues, but it simplifies things a bit.
I typically spend a lot of time getting things right with the traditional method, but EZ-Decon removes a lot of the time-consuming and frankly tedious iterative testing of deringing values.
Yes - it is true that you need to spend a little time to ensure that your star mask is covering all of your stars adequately - but the starting point seems awfully good (at least on this test image), and the tools to modify this map are locally available in the script panel.
Now that I was able to restore a bit more lost detail in the body of the galaxy - that’s just icing on the cake!
A final comment - I have not been able to find any kind of detailed documentation on EZ-Decon. Maybe it is out there, and it has eluded me. For such an interesting tool, I would feel better if I had some more detail that described what was going on under the hood. I am getting some of that by studying the output of the Process Console as it runs but a bit more documentation would be helpful.
If anybody can point me at some existing documentation, I would be grateful!
I know that EZ-Decon will become part of my processing routine going forwards.
PostScript
If I have further learnings using this tool, I will update this posting in place and add a changelog to the bottom.