
Using Masks as a SUPERPOWER in Pixinsight!
9-30-22
Table of Contents Show (Click on lines to navigate)
Introduction
I have to admit that I was not an early admirer of Pixinsight.
I have been a Photoshop user since the dawn of digital imaging, and I am comfortable with it. I liked that changes made to an image were WYSIWYG and real-time. The Pixinsight concept of previews, parameter testing cycles, and then application to the image seemed like taking a step backward to me.
But I stuck with it, and as I learned more, I found a few things that started to win me over.
The idea of certain operations being done in the linear state and others being done in the nonlinear state made sense.
The idea of advanced tools like PCC leveraging external databases and plate solving was eye-opening. The idea of Multiscale Image routines leveraging wavelets was also appealing.
But I think the one thing that won me over early on was its use of masks.
Pixinsight made it amazingly easy to create, modify and use masks in your image processing. Sure, you can use masks with Photoshop, but I found something appealing about how masks were handled in Pixinsight. With the right mask, you can process elements of an image with surgical precision.
For brevity, I will refer to Pixinsight as PI for the rest of this article.
As of this writing, I have been using PI for two full years.
I now get the power and convenience of PI. At this point, I am completely dependent upon PI and can't imagine doing Astrophotography without it! But one of the early things that sent me down this track was the power of how PI uses masks.
The Motivation for this Article
I now routinely include a detailed processing walkthrough for every imaging project I post on my website.
In my past few posts, I have documented the masks used for specific processing steps, and I also showed how I created and tuned those masks. This in itself is not novel. Most practitioners of PI routinely make extensive use of masks in their processing. I know many people who may create dozens and dozens of custom masks as part of a typical processing session.
What was novel was the response I received to my descriptions of mask use. Some people told me they rarely used masks and that my write-up inspired them to do more with them.
As I thought back on it, I was certainly using masks very soon after starting to work with PI - but with time and experience, I found that my use of masks became more extensive and sophisticated. They had become a critical part of my processing workflows.
I am unsure how I learned to use them - probably from seeing bits and pieces of how others used them - and I slowly integrated those methods into my own personal tool kit.
To become proficient in Pixinsight, one must learn the environment, processes, and scripts it provides. When masks are added to the mix, you can take things to the next level.
When you think about it, the ability to target and protect image areas selectively during processing is a kind of superpower! Learn it and use it wisely to up your processing game!
The goal of this article is to provide an overview of masking in PI, geared toward those that are in the early stages of learning PI or those that would like to up their Masking game.
Caveat: This overview is based on my own mask use and experience. It’s not necessarily the right way or the best way - but it’s a way that seems to work for me.
So, What is a Mask?
Let's start at the very beginning.
In PI, a mask is simply an image that uses standardized pixel values between 0.0 and 1.0 - just like any other image.
In General, most images can be used as a mask for another image. But there are some rules around this.
Mask Rules in Pixinsight
A color image can have a mask that is either a color image or a gray-level image.
When a color image is used as a mask, each color layer acts as a mask to its corresponding target image color layer (i.e., red-on-red, green-on-green, and blue-on-blue).
When a gray-level image is used as a mask, it covers all the color channels simultaneously.
A gray-level image can only use another gray-level image as a mask
An image cannot be the mask for itself! But you can duplicate the image, and the duplicate can be used as a mask.
Two images cannot be masks for each other - this would be a cyclic definition and is not permitted.
One image can be used as a mask for several other images simultaneously.
A mask image must have the same size (rows and columns) as the target image(s) using the mask.
There is no way for a mask to be applied to a preview image - to have a mask active in a preview, it must be applied to the parent image.
Changes made to a mask will be seen by all images using that mask - This property means that if you are doing an operation on a masked image with a live preview, changes to that mask will be propagated in real-time to what is seen in the preview!
Changes made to a mask that cause these rules to be violated will render that image unusable as a mask (for example, rotating a non-square mask will mean it no longer has the exact row-column dimensions as the target image - thus, it can no longer be used as a mask. )
Linear vs. Nonlinear
Just like any image, Masks can be in the linear or nonlinear domain. Nonlinear masks will be hard to see unless the STF is applied to them - just like any other non-linear image.
I tend to see linear space as the place where I take care of residual image calibration and normalization issues. So my use of masks in the linear domain is a bit more limited. For example, I typically like to do some light Noise Reduction in the linear state - just to “knock the fizz off.” For this operation, having a linear mask to protect the high signal areas can be advantageous.
Most of my masking efforts deal with image enhancement, trying to bring out faint features, and shaping the final look of the image. This is all about creating the final rendering for consumption by the human eye. This kind of processing occurs almost exclusively in the nonlinear domain and thus is the area of my focus for the use of masks.
What does a mask do?
The mask, when applied to an image, modulates the operation of a process or script based on the value of the mask at a particular pixel location.

Example of a Cyan color Mask of NGC 6888.
A mask value of 0.0: operations have no effect
A mask value of 1.0: operations take full effect
A mask value of 0.5: operation takes effect with a 50% weighting
Other mask values will change the operational effect based on their value.
Let's explore that a bit further:
A uniform mask of all 0.0 values, when applied, will allow no operations to have an effect. The whole image is protected by the mask.
A uniform mask of all 1.0 values would allow operations to have full effect. No areas of the image are protected in any way! The entire image is in full focus for the operation.
A uniform mask of 0.5 would allow 50% of the operation to have an effect.
It’s simple. The pixel value of a mask is the weighting factor placed on an operation. A value of 1.0 gets the full operation. 0.0 gets none. “White Selects, Back Protects.”
Masks can be binary in nature - where some parts of the mask have values of 1.0, and other portions have a value of 0.0. White or black - but no shades of gray. For some operations, this is just what you want.
But for other operations, this kind of border is often too harsh. It is sometimes best to have a transition zone with values that smoothly vary between 1.0 and 0.0. This provides a processing gradient that will typically create a more natural look and blend operations smoothly into the image.
Why use a Mask at all?
So we now know what a mask is - how would you use one to help with your image processing?
We use a mask to protect or select where we want processing to occur - and to specify the transition zones between these areas.
This ability to fine-tune the application of a process or script is very powerful.
Sometimes this can be as simple as “object versus background.”
Say you have an image of a galaxy on a field of the background sky. Some of the processing you may want to do on the galaxy may not be the appropriate processing for the background sky.
You could make a gradient mask of the galaxy (we will learn ways of doing this later on), apply it, and then the processing steps taken will affect the galaxy (the focus of the mask) - but the background sky will be left alone (as it is protected by the mask).
What if you now wanted to do some different processing on just the background sky and not the galaxy? You could create another mask - or use the same mask and invert it! This would shift what is protected and what is focused upon. We will discuss this more later on.
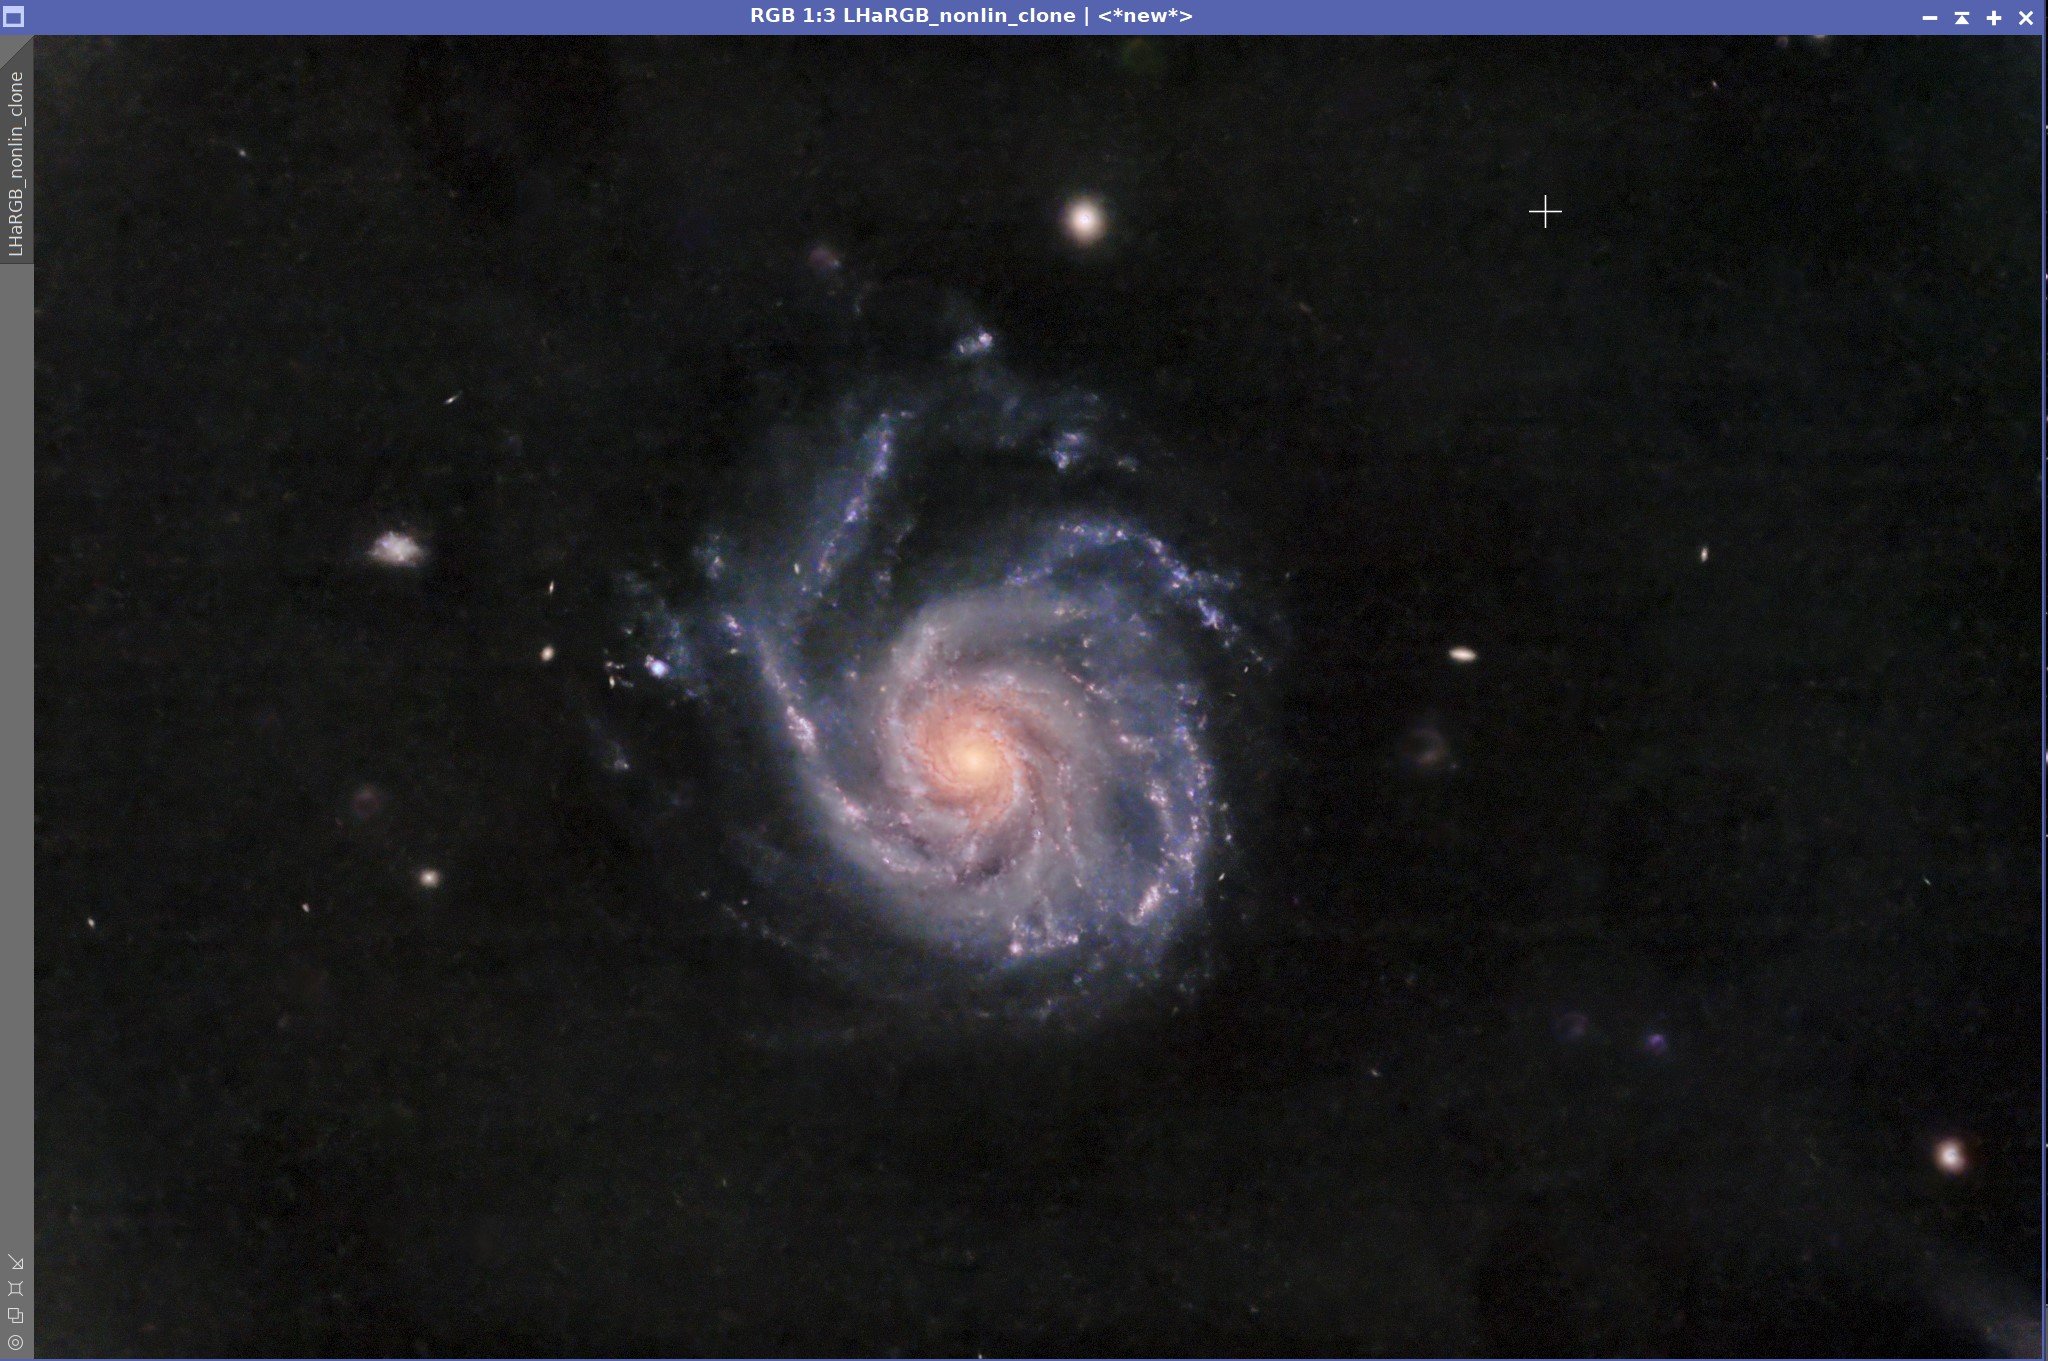
My image of M101 in LHaRGB (click to enlarge)
A galaxy mask made with an edited range mask. This provides focus on the galaxy and protection for the background sky. (click to enlarge)

This is an inverse mask. The focus is now on the background sky. The galaxy is protected. (click to enlarge)
How do you use a Mask?
A mask is applied to an image by dragging the image identifier tab of the mask onto the lateral tab of the target image - under its identifier tab. (Don't drag it onto the identifier tab of the target image itself, as this will do something completely different!)
When a mask is applied, the color of the target identifier tab will change to brown to indicate that a mask is in place. You can also apply a mask by using the Menu Mask->Select Mask at the top of the screen or when right-clicking on the image.
Image with no mask - note the identifier tab is gray. (click to enlarge)
Image with the mask applied - The identifier tab is now shown in brown. (click to enlarge)
Once applied, the mask can be shown on the image or hidden, with Cmd-K toggling between these two states. When the mask is shown, the protected areas are shown in red (or the color set in your preferences). You can see what portions of the image are impacted by the mask and to the extent they will be impacted.

M101 image - mask is applied but not shown (click to enlarge)

M101 image - the mask is applied and shown with a Cmd-K. (click to enlarge)
Once a mask is in place, you can remove it by using the menu mask->Remove Mask option at the top of the screen or by right-clicking on the image. You also have other options available as you can see below:

The options available on the Mask Menu - are available on the main menu bar or by right-clicking on the target image.
Finally - you can invert the mask with the mask->Invert Mask command. This is very powerful. With our galaxy example, by inverting the mask, you turn the galaxy mask into a not-galaxy mask - something that now shifts focus to the background sky.
The target image (click to enlarge)
The target with mask showing. (click to enlarge)
After a mask inversion (click to enlarge)
Processes and Scripts that I most often use with Masks
Not all operations and scripts will allow for the use of a mask. If you run into one of those, an error message is generated. The reason for this limitation may well be that they are using internal masks themselves, and your mask would conflict with the internal ones. When in doubt - just try it out. You won’t hurt anything.
But there are many processes and scripts that work well with a mask in place.
I find that there are certain operations that I most often use with masks.
CurveTransform (CT)
Neutral tone scale adjustments, color channel adjustments, saturation adjustments
Used with a mask, this tool becomes much more valuable!
HistogramTransformation (HT)
Similar to the above
MulitscaleLinearTransform (MLT) and MultiscaleMedianTransform (MMT)
Often, it’s just nice to focus your operations here on smaller elements of an image.
Both tools can use their own built-in Mask - which can be adjusted via the tool panel.
HDRMultiscaleTransform(HDRMT)
Sometimes, I just want this affecting a galaxy or another target area of interest and not the rest of the image
Local Histogram Equalization (LHE)
I use LHE a lot. I also use this in multiple passes to enhance detail at various scales. Often I like to work on portions of an image at a time, and mask and LHE blend very well together.
Convolution
A standard tool for me. I use this to soften my masks and provide significant edge gradients.
I also use this in conjunction with star maps to manage artifacts that sometimes can impact how stars look.
Deconvolution
Mask use is a little different here. LDSI masks are used by the deconvolution algorithm to avoid processing saturated stars as they are distorted and won’t be well represented by the computed PFS model. Luminance masks were used to protect the background from being processed by the algorithm. Today, I no longer use the luminance mask - instead, I take advantage of the regularization parameters to accomplish this goal.
PixelMath (PM)
When PixelMath expressions are carried out on a target image, the Masks applied to that image modulate the results from this tool.
Types of Masks
There are several types of masks that you will likely be using at some point or another. These include:
Lightness or Luminance Masks
Range Masks
Color Masks
GAME Masks
Star Masks
Dark Structure Masks
Now let’s explore each type further.
Lightness or Luminance Masks
What are they?
Luminance Masks are based on the luminance of the image. The more signal is seen, the higher the mask value. This is very handy for doing certain operations that are signal or noise-dependent.
Common Uses
Noise Reduction is best applied to low signal areas where noise is dominant, but you'd like to protect higher signal levels where signals are the strongest and noise is less of an issue.
Another example is sharpening. You don’t want to sharpen the noise found in the low signal levels of the image - you want to sharpen the higher signal levels of the image. So an Inverted luminance mask can protect the low signal areas and focus operations on the high signal areas.
How do you create one?
A Luminance map is created from the image itself. If you are working with a mono image, you can simply duplicate that image.
If you have a color image, you can extract the luminance image by:
Setting the RGBWorking space to 1.0, 1.0, 1.0
Extract CIE L* Component on the main menu bar.

Make sure that your RGBWorkingSpace is 1:1:1 before extracting your Luminance image.

Use the toolbar icon shown to extract the luminance image that will be used as your mask.
A luminance mask extracted from the color image. (click to enlarge)
While a luminance mask can be used without modification, it is common to adjust the tone scale of the mask to emphasize or deemphasize certain portions of the tone scale. For example, you might want to drop out the background and lower signal levels of the image while ensuring that higher signal levels get a fuller application of the considered process.
This is common in Noise Reduction, Deconvolution, and in the inverse case, sharpening.
Range Masks
What are they?
Range masks are created by selecting the minimum and maximum code values from an image. All the pixels of the image that fall within these two limits are set to a value of 1.0 in a new mask image, and those that fall outside these two limits are set to 0.0.
Common Uses
Range masks often target specific portions of an image's tone scale. They are also used to isolate a region of the image if it seems tied to a select portion of the tone scale.
One could create a mask that starts at 0.0 and has some other low value as an upper limit - this would tend to select the background sky.
Or one could have a range starting with a fairly high value and 1.0, which tends to capture bright stars.
A galaxy against a dark sky background could be isolated by selecting a min and max value most closely associated with the galaxy.
How do you create one?
There are many ways you could create a range mask but by far the most convenient way to use the RangeSelection Process. With a Live preview, you can vary the upper and lower limits and see the mask is created in real-time. This tool will also allow you to adjust the fuzziness and smoothness of the created mask.

The RangeSelection panel.
Here is another example of using RangeSelection in my M27 imaging project. I had some narrowband images with fascinating - yet faint - gas shells surrounding the main nebula in the Ha and O3 images. I wanted to enhance those selectively. To do this, I used a range mask for each. This allowed me enhance these fail features.
My Ha image of M27 has a faint outer frill. (click to enlarge)
I had the same situation with my O3 image. (click to enlarge)
Using RagneSelection, I create a range mask to cover the frill. (click to enlarge)
I create the range mask in the same way (click to enlarge)
Using the range mask, I used CT to enhance the frill and bring it out more. (click to enlarge)
This allowed me to bring out the outer detail selectively. (click to enlarge)
You can see the full story with all the details on the processing of M27 HERE.
Color Masks
What are they?
A color mask is a mask created from a color image where the pixels match some color selection criteria—for example, selecting all of the blue areas of an image.
Common use
Color masks are often used to isolate regions of color so that they can be modified or enhanced. For example, you may select the blue areas of an image to increase its saturation, change its hue, or even modify the luminance of those areas. You could also choose to enhance the detail in those regions.
This can be very handy while dialing in your color treatment.
It is also often used to deal with color problems.
For example, the initial color image for an SHO narrowband image is very green due to the preponderance of the Ha signal mapped to the Green channel. This is typically removed with SCNR. In the aftermath of this operation, some regions and stars may have a magenta cast. Creating a color mask for magenta can allow you to dial this back selectively.
A final use case example is where some forms of narrowband processing can sometimes create stars with color rings around them. A carefully crafted color mask can target these color rings so they may be desaturated and better blended into the star.
M101 starting Image (click to enlarge)
Blue color Mask (click to enlarge)
How do you create one?
The most common way is to use the ColorMask script. You can choose a primary axis like Red, Green, Blue, Yellow, Magenta, and Cyan and create a mask for those regions. You can also choose an arbitrary range of hues for the selection criteria. The tool also provides the means to blur the resulting mask by removing Multiscale layers.
The final mask created is typically a chrominance mask, but the tool also provides the option of creating a lightness mask or a linear mask for the selected color regions.

The ColorMask Script Panel
Another method for creating a color mask is to use Bill Blanshan's PixelMath scripts for color masking. Bill provides a script for each color primary you might choose. You can also modify the hue range used by the script to customize things beyond that. Once you have the color mask, you can use Bill's Blur tool to provide a smoother gradient form of the mask. You can apply this blur as often as you like to get the desired blurring effect.
I find these scripts convenient to use. In my own testing, I have found that these primary color vector masks created with the Blanshan scripts are nearly, if not precisely, the same as what would be created with the built-in ColorMask script.

Bill Blanshan’s Color Mask Scripts
You can learn more about these scripts in Lukamatico’s video:
https://drive.google.com/drive/folders/138L6Z2vbTzNAutbfe5cuhL9Pl0-iltRp
And you can download the scripts from his google drive:
https://drive.google.com/drive/folders/138L6Z2vbTzNAutbfe5cuhL9Pl0-iltRp
Note - Adam Block has pointed out that the hue angle used for these color masks is wrong. Even so, it seems to work well enough for me, but check out his video to see the issue here:
GAME Masks
What are they?
GAME stands for "The Interactive Galaxy Map Editor" script, which allows users to create circular, elliptical, or multi-point masks of various kinds, such as Gradient Masks, Luminance Masks, Brightness Masks, Binary Masks, and even Star Masks. etc.
Most of the masking types we will discuss start by using the actual image data as the starting point for the mask.
GAME is different. GAME allows you to quickly create masks with arbitrary masking regions.
The tool shows you the underlying image and allows you to place mask structures upon it. When such definitions are complete - the tool will create the mask. This allows for the quick creation of both simple and complex masks.
Common use
I have used GAME to create galaxy masks by following the shape of a galaxy with the ellipse tool. I have also used it to create multiple galaxy masks for images where more than one galaxy is in the field of view. This allows me to treat the galaxy regions of a group as one entity for processing and the inverse to process the background sky.
Brilliance and Luminance masks help capture the pattern of the underlying image. This can assist in correcting artifacts like complex halos around bright stars or sensor microlensing artifacts. These patterns can be adapted to a mask which is then used to mute the undesired artifacts.
How do you create one?
Run the GAME script - this will bring up a window showing the image in question.
This image can be zoomed and shifted from left to right so that you focus on a smaller region. For circular or elliptical regions, add an ellipse and drag it by the center handle to where you want it centered on the image. At this point, you can change its scale or eccentricity by dragging on the appropriate handles.
If you need more than one masking area, you can add additional ellipses, which can then be centered and shaped similarly to the first one.
When done, you choose the type of mask you want - typically, this is a gradient mask - then you press the “OK“ button, and the mask is created.

The GAME Script Panel in Ellipse Mode. With this one circle, I can create several types of masks as can be seen below.

Top-Left: Luminance Mask for the selected region. Top-Center: A Gradient Mask. Top-Right: A Gradient Edge Mask, Bottom-Left, A Binary Mask, Bottom-Center: a Brightness Map, Bottom-Right - A Gradient Star Mask.
As mentioned, GAME Luminance and Brightness masks can be useful when dealing with artifacts. Two artifacts I have dealt with are halos and sensor microlensing - both being caused by bright stars in the field. For example, look at the problem I had with one image taken with the bright star Alnitak. Both haloes and sensor microlensing artifacts are very evident.
The nonlinear RGB image - notice the multiple halos and sensor pattern around Alnitak. (click to enlarge)
Here is the GAME Brightness Mask created. (click to enlarge)

Here is the final image after using the Brightness mask to target the artifacts - they were mitigated through the use of MLT and CT - primarily on the Lum image. Not perfect - but much better! (click to enlarge)
For more details on how I dealt with these artifacts, see the image post HERE for complete details.
GAME also allows you to create custom masks for arbitrary shapes by using the tool in Multi-point mode. In this mode, masks can be created by drawing a series of connected line segments that allows you to specify complex shapes.
To be honest, I have not found much use for this feature. If you have a good use for it, please let me know, and I will update this section!

GAME in Multi-point Mode

The output of the Multi-point Mask in gradient mode.
Star Masks
What are they?
Star Masks are designed to cover the stars in your image.
Common Use
Star masks have been traditionally crucial for Astro image processing as the aggressive tone scale stretches that are needed to enhance faint nebulae would also act on bright stars and cause them to bloat, saturate, and otherwise distort. Applying a star mask will protect the stars from these harmful processing effects.
Another common use of a star mask is to focus on just the stars so that they may be processed themselves. Brightness and color issues can be dealt with in this fashion, but they also can be used to deal with artifacts that sometimes occur in the stars after aggressive processing is done. Sometimes a light touch of convolution is needed to make the stars look more natural.
Finally, some processes in PI require a star mask for specific purposes. For example, Deconvolution can use a star mask consisting of just the bright stars for use as a Local Deringing Support Image (or LDSI).
How do you create one?
There are several ways to create star masks, and creating a good one is an art form that goes well beyond the scope of this article.
I should also point out that the need for some of these star masks is going away with the advent of smart neural-network AI tools designed to remove stars from an image.
These have become very effective at separating an image into starless and star-only versions. Being able to process a starless image means you no longer need a star mask to protect the stars. There is no need to protect stars during processing when no stars are in the image!
These tools also provide a means to create high-quality, comprehensive star masks.
Either the tool can create the star-only image directly when asked, or you can subtract a starless image from the original image and create a star-only image.
This resulting image is a full-color image of just the stars. You can use this as a great starting point for a star mask - just extract the luminance image! From there you can use Binarization if you need a hard-edged mask. You can also use CT and the MorphologicalTansform Tool to adjust star sizes as required.
My recommendation is to leverage these smart tools rather than struggle with the traditional methods.
StarMask
Creating a comprehensive star map using traditional methods often needs several passes, creating a mask of bright stars, another mask with very small faint stars, and finally, a mask with mid-range-sized stars. These are then combined with PixelMath.
Here are a few links that discuss creating comprehensive star masks using the more traditional approaches:
https://www.chaoticnebula.com/2020/04/17/pixinsight-star-mask/
https://petelawrence.space/view.php?page=116
Star Mask is a key process in PI used for star mask generation when discussing traditional approaches.
I tend to use it for creating my Local Deringing Support Images for deconvolution.
It allows the use of many parameters to constrain the action of the process. While this provides great flexibility, it can be a challenge to master. One of the critical parameters here is the Scale value which deals with the number of wavelet layers to use - this drives the scale of stars that will be included in the mask. You can also play with smoothness parameters and terms that process the resulting star mask.
Most people use the default mode of this tool to create a mask and then adjust the parameters based on the results they get.
If you want to learn to use this tool better, I would suggest this Pixinsight link for a more detailed overview:
https://pixinsight.com.ar/en/info/articles/46/mask.html#StarMask
I used to use this tool a lot. To be honest, the only time I use it now is the create my LDSI images for deconvolution. I tend to use the star mask generation capabilities of the other tools in this section.

The StarMask Panel

A typical Local Deringing Support Image (LDSI) for Deconvolution Use- This is a star mask consisting of just the brightest stars in your image
Starnet, Starnet2, StarXterminator
Starnet was the first breakthrough tool that used neural networks trained in star removal. It was a revolutionary piece of work by Nikita Misiur.
It did a good job, but not a perfect job - but since it was offered for free, a lot of people experimented with it. Since then, Starnet has been updated to a new version: Starnet2. This new version significantly improves over the original version and is still offered at the same great price - Free! Starnet is easy to use - typically, you can just use the default parameters. You can also use this on linear and nonlinear images, and the star masks they create (when that option is selected) are great!
Starnet can be downloaded here:
StarXterminator is a premium tool created by Russell Croman.
There seems to be a bit of an arms race in this area which is exciting to watch.
The original StarXterminator was a much better performer than the original Starnet, earning its premium fee. But then Starnet2 came out and - to my eyes - was better than the original StarXterminator.
But Russell has not been idle! He has continued working and has now released version 2 of StarXterminator - using network version 11 - which does a fantastic job. It also can deal with star diffraction spikes exceptionally well -even the 6-sided ones from the JWST!
StarXterminator can be gotten here:
https://www.rc-astro.com/resources/StarXTerminator/
Either Starnet2 or StarXterminator is my tool of choice these days. I use them for starless processing and to create star masks when needed.

The Starnet, Starnet2, and StarXterminator Panels.
The Starless version of M101.
The color Stars-Only version. (click to enlarge)
An extracted Lum Stars-Only version. (click to enlarge)
Dark Structure Masks
What are they?
This is a special purpose mask that is designed to put the focus on the dark dust and structures in an image. This is primarily a kind of Range Mask, but it is based on the output of the DarkStructureEnahce script. The tool produces a very convenient output mask as an option that can be used for other processing of dark regions if so desired.
Common Uses
Most of the processing cycle is focused on bringing out faint detail and making sure that brighter details are not lost in the glare. Somewhere towards the end of my processing efforts - once I have most of the image where I want it - I tend to focus on ensuring that the dark dust lanes, dust clouds, and globules are shown at their best. For this, I want a mask that isolates those features from the rest of the image.
How do we make one?
One way to do this is to create a range mask and edit it to get the right focus. Of course, if you did it this way, the entire category would just be part of the Range Mask section, and there would be no need to call it out separately.
However, I tend to create these masks using the DarkStructureEnhance script, choosing the extract mask option. This produces a dark structure mask, which the tool uses internally to do its enhancement. Often this enhancement does not go far enough for me, and then I can use the mask with other processes to get the result I am interested in.

The DarkStructureEnhance Script, with the Extract Mask box highlighted.

Our Starting image of M101 shows the DarkStructureEnhance Script panel.

After the script is applied, we get some enhancement of the spiral lanes and a new Dark Structure mask we can now use in other processing.
Customizing Masks
Why would you need to modify a mask?
Sometimes masks need to be modified. The main reasons for modifying a mask are to narrow or broaden its focus or protection regions.
Here are some examples for you to consider:
1. Mask Clean-Up. You are using a range mask to isolate a galaxy, but the mask still includes too many stars and regions of nebulae, and these need to be removed.

This range mask does not isolate the galaxy.

After editing out the extraneous bits, we have a much better galaxy mask.
2. Segmenting Masks. You have created a red color mask, but you want to narrow its focus so that one red region can be treated differently than another red region. So you need to segment the mask to achieve this.

Final Image

The Red Mask. But we want to treat the Flame Nebula Differently than the Horsehead Nebula.

Now we have a mask for just the Flame Nebula

And one for just the Horsehead Nebula
3. Mask Union. You have three galaxies in the field and have created a mask to isolate each one, but now you want a mask with all three galaxies so that all can be processed at once.
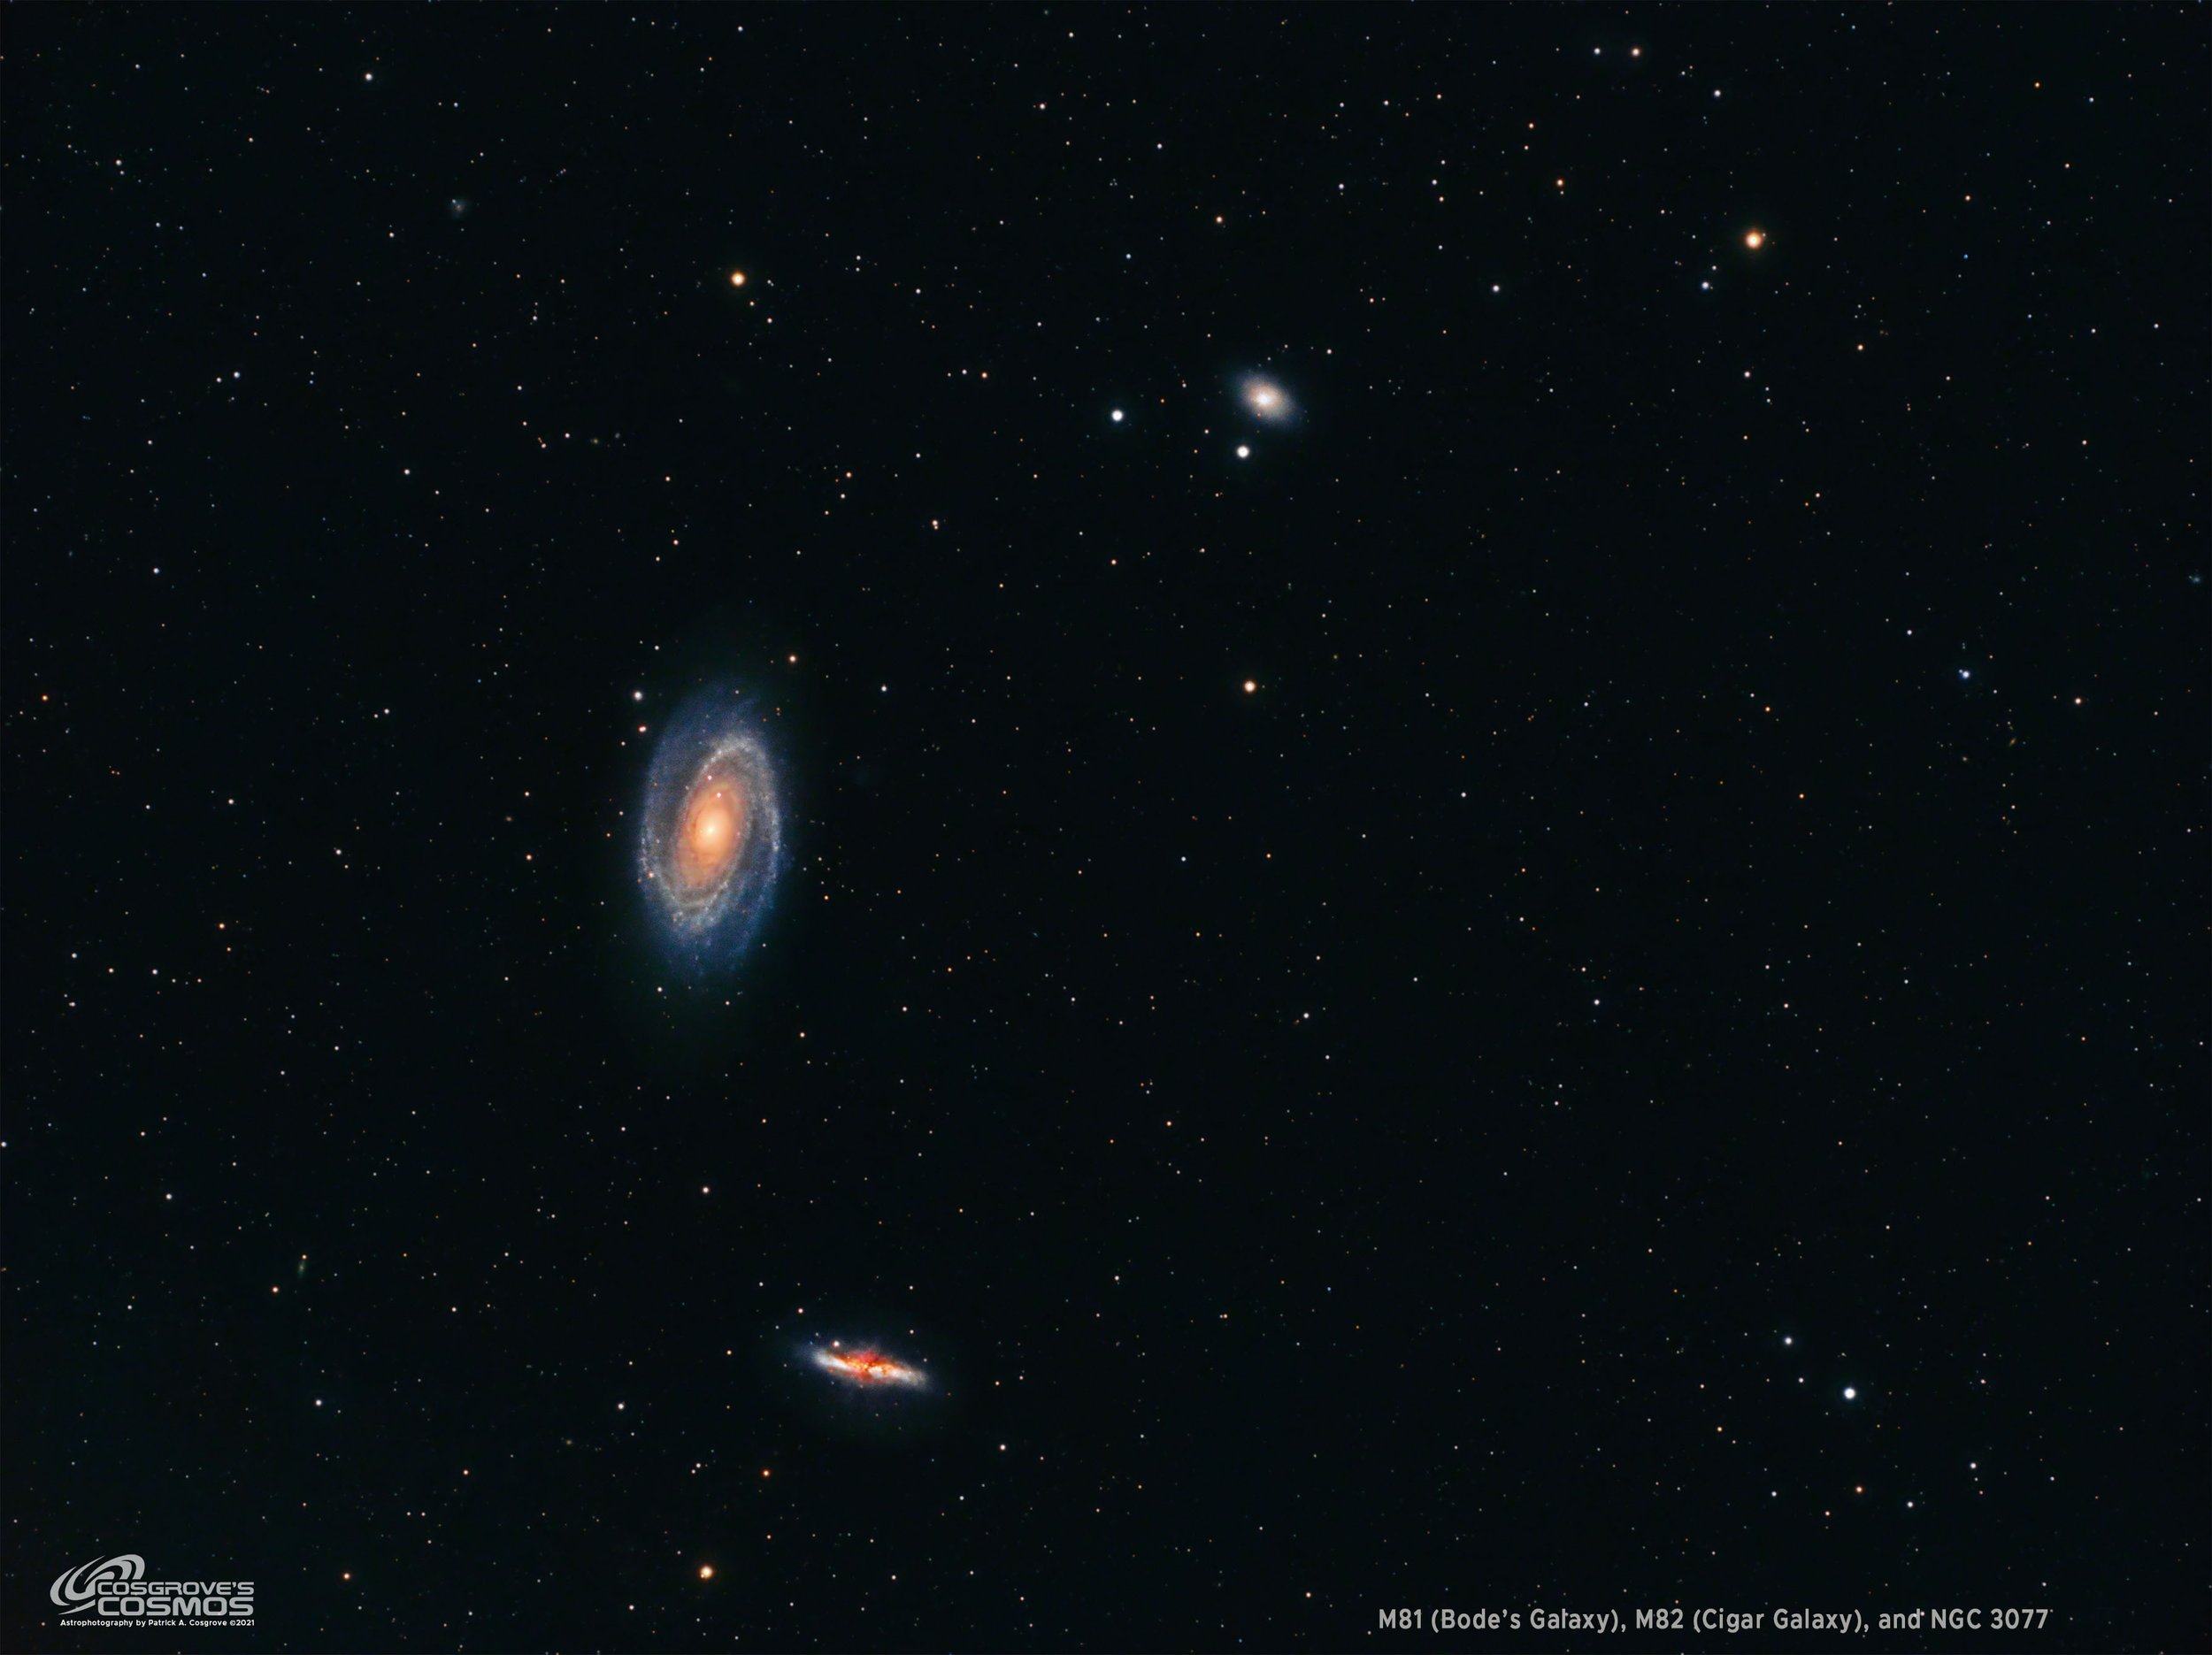
M82 and M82 Image with three galaxies.

M81 Mask (ignore the “+” sign!)

M82 Mask

Mask for third galaxy in the field

Combined Galaxy Mask (ignore the “+” sign - this is a screen capture artifact)
4. Adjusting Star Masks. Your star mask does not seem to completely cover your stars, and you would like to grow the elements of the mask so that it does.
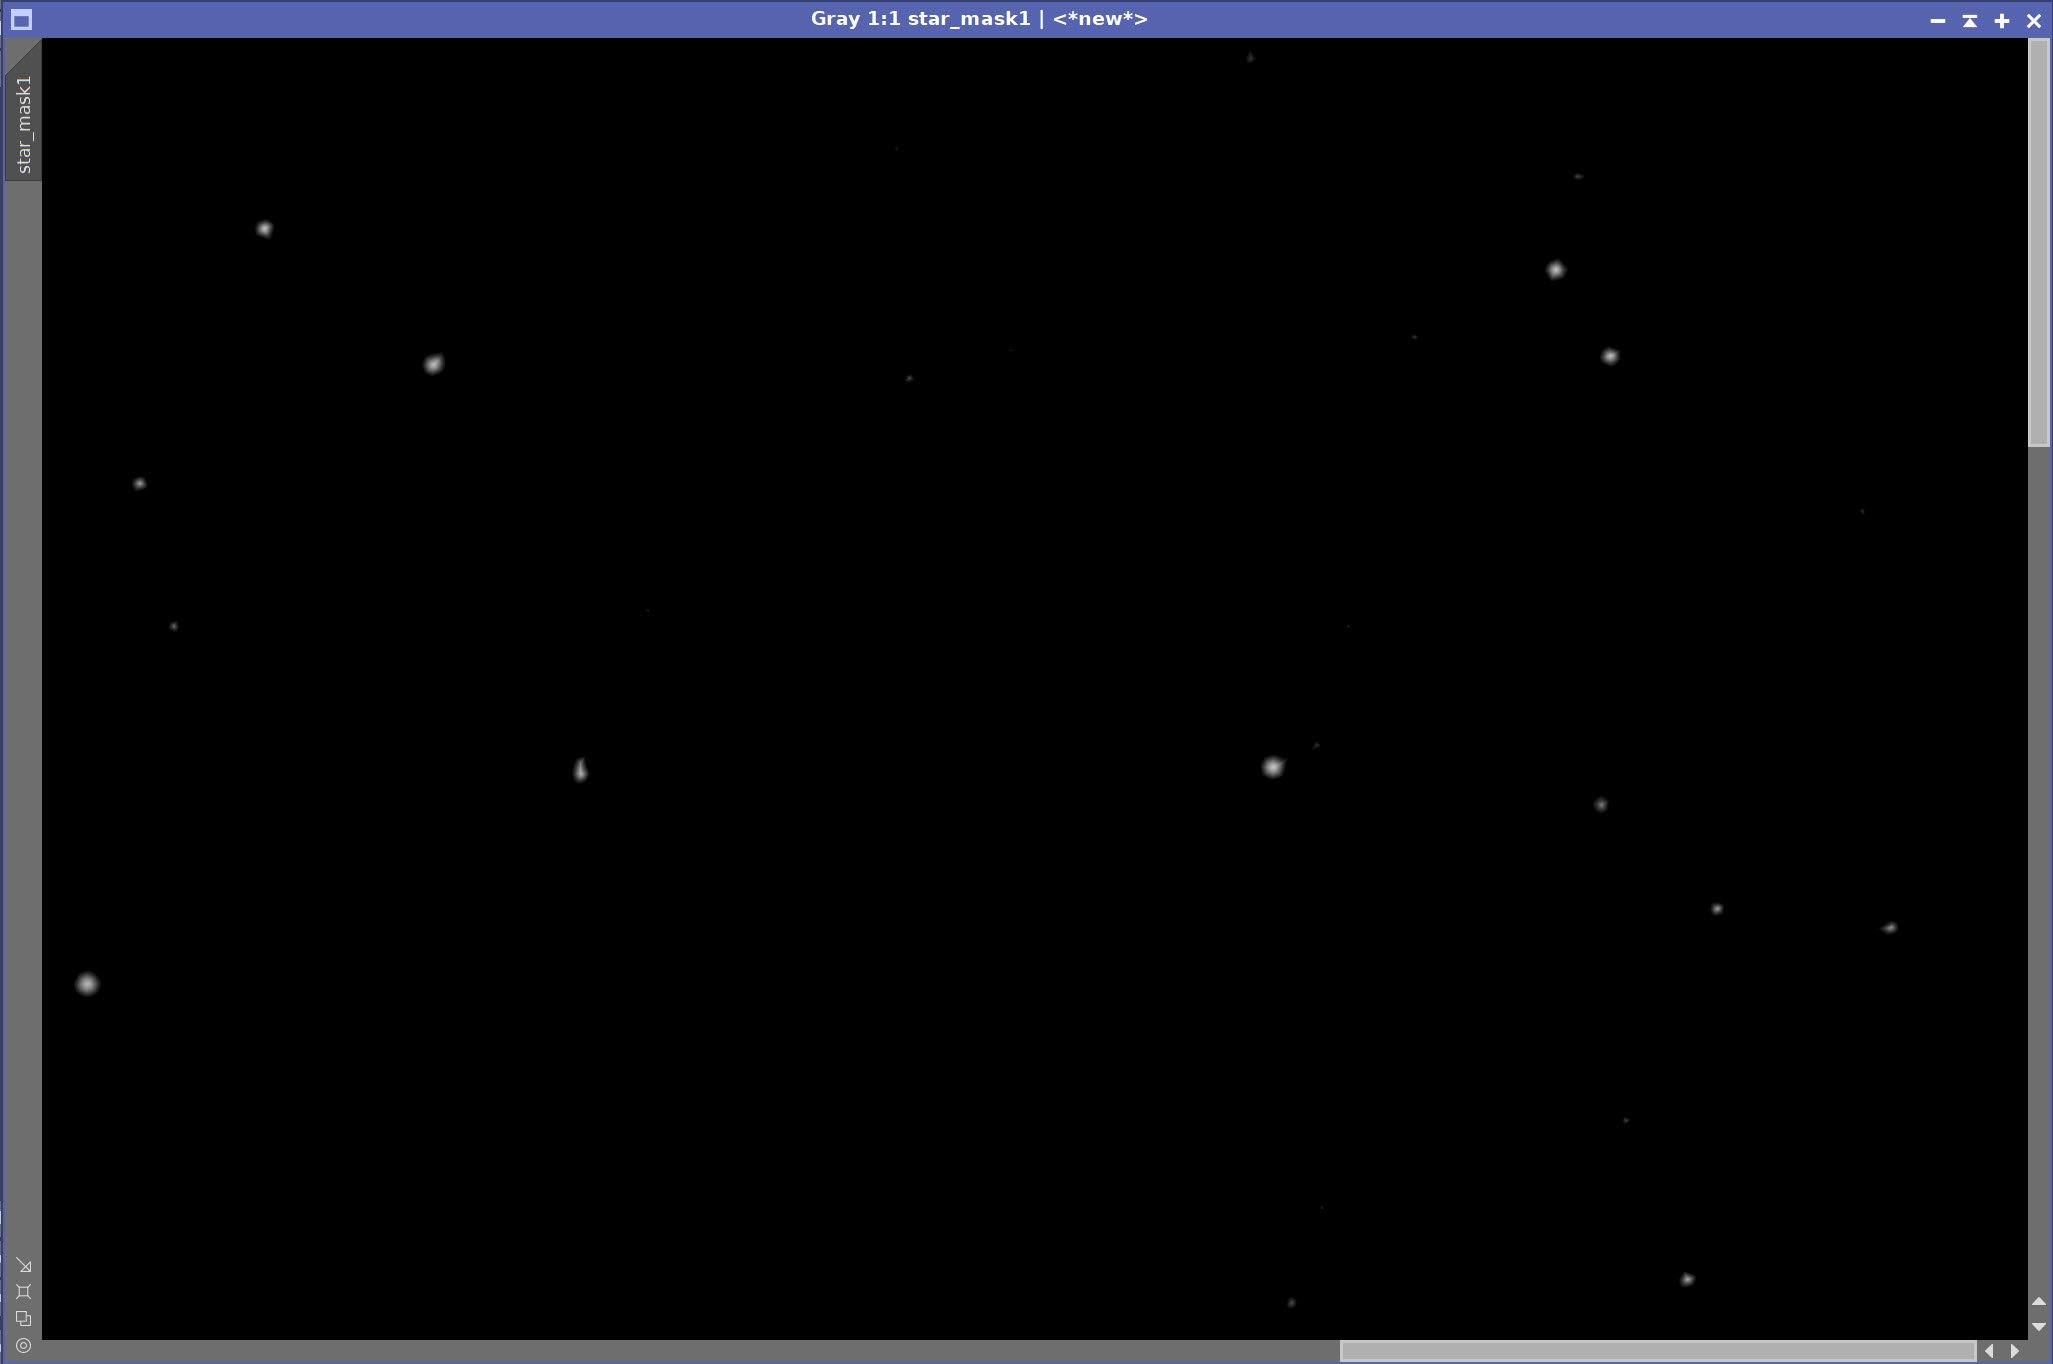
Star Mask compared to Original Stars
5. Adjusting Lum Masks. You want your luminance mask to protect the lower signal levels from sharpening and keep sharpening focused on the highest signal level. However, your luminance mask is not providing sufficient protection. You would like to boost the contrast of the mask.
Starting Lum Mask does not protect low signal levels adequately. (click to enlarge)
You need to boost the tone scale to better protect the lower signal areas. (click to enlarge)
6. Softening Mask Features. Your mask has a hard edge, and the transition is too noticeable when operated on - so you would like to soften or blur out the mask edges more.

Your mask has to sharp an edge. (This is kind of an extreme example, but I hope it gets the thought across!)
Mask shown on the target image. (click to enlarge)

A CurvesTransformation tool change highlights this harsh boundary. You need to soften the edge and make a gradient.
7. Dealing with Color Rings on Narrowband Stars. Narrowband imaging is fun and can produce excellent results, but sometimes the stars can come out a little funky. I’ve had cases where my Narrowband stars developed color rings towards the end of the processing run. If you have developed a star mask - it may not be sized right to deal with these rings.
One solution is to increase the size of the stars in the mask to ensure they cover the areas of the ring. Then the stars can be desaturated with the CurvesTranform process.
Another solution is to make the stars in the mask large enough to cover the rings. Then create another version where the mask covers the star's core and not the rings. Subtracting these two masks with PixelMath creates a ring or halo mask that can then target adjustments to the stars.
Zoomed in image showing color rings. (click to enlarge)
This is another sample of color rings on narrowband stars (click to enlarge)
After a fix using a larger star image on the mask. Probably went a little too fare. (click to enlarge)
This fix was done using a ring mask. The is subtle, but is definitely improved. (click to enlarge)
The nice thing is that you can easily modify a mask to meet your needs. As I have mentioned, you can even make these changes and see the results in real time. All you need to do is apply a mask to the image, then do some operations with a live preview. You can now change the mask image with another tool and see the change in the preview! Pretty cool!
Methods for Mask Modification
So let's look at some common changes that can be made and how we might make them.
Remove or Add Elements
CloneStamp
This tool will allow you to clone pixels from one part of an image to another. As such, it can be used to modify your mask. To paint parts of the image in pure black or white, you can clone from other areas that have these colors, or you can use the "paint bucket" method - where a new image is created that has the same size as the image being edited and filling it with either 1.0's or 0.0's with PixelMath. This becomes the clone source allowing you to paint white or black easily.
This allows you to remove elements from your focus areas or protect areas from the operations you are using.

The CloneStamp control panel.
More detail on the “Paint Bucket" method can be seen here:
https://www.cloudynights.com/topic/536723-pixinsight-masking-an-area-of-an-image-clone-stamp-tricks/
DynamicPaintbrush
DynamicPaintbrush is a premium tool ($5! And well worth it) that allows you to paint white or black areas without having to fool with "paint buckets." I love using this tool for making changes to masks and highly recommend it!

The DynamicPaintBrush Panel.
See more about this tool here:
https://www.deepskycolors.com/RBATools/DynamicPaintbrush.html
Photoshop
Some folks simply export the mask image as a 16-bit TFF file and then open them up in Photoshop and use all and any of the tools there to modify the mask. The new mask is written back out as a new 16-bit TIFF image - which is imported into PI and used.
Shaping
Shaping deals with changes brought about by tone scale adjustments, blurring operations, and growing or shrinking elements.
CurvesTransformation Tool
This well-used tool is an excellent resource for mask shaping. It can be used to change the tone scale of a Luminance image. It can be used on a star mask to increase or decrease the size of stars in a mask by boosting or reducing contrast.

A live preview of the mask with no changes yet made with the CurvesTransformation tool.

The mask is changed as we modify the curve of the CurvesTransformation tool. .
HistogramTransformation Tool (HT)
This is another tool that can be used to modify the contrast of a luminance mask. HT is very similar in many ways to using the CurvesTransformation Tool above. However, HT makes it easier to clip the dark and light areas - if that is your goal - while still allowing for some tones scale in the areas between.
M101 starting luminance Mask. (click to enlarge)
HT has been used to clip the blacks and increase the contrast - pushing the rest of the tone scale towards the upper limit. (click to enlarge)

Here is the HT panel used for the M101 mask transformation. Note the clipped blacks and the higher contrast from moving the mid-tone triangle to the left.
Convolution
This is a great tool to blur the edges of a mask.

Using Convolution to soften hard mask boundaries.
MorphologicalTransform
This is great for adjusting the size of the stars in your mask. Erosion will shrink the stars while dilation will grow the stars larger. I usually start with a 5xx5 structuring element (or larger) and select the circular structure.
PixelMath
This powerful utility can be used in thousands of ways to modify a mask - limited only by your imagination. PixelMath’s entire purpose is to manipulate images, and masks are just images. So there are many possibilities here, and I will not attempt to cover them all!
I will touch on some typical ways to use PixelMath with a mask.
One great area is composition. There is often a need to compose several masks covering different regions into one summary mask by using the Max() or Min()function. Creating a new mask that is the union of two different masks can be done like so:
Max(Mask1, Mask2) -> this will create a union of the protected white areas
Min(Mask1, Mask2) -> this will create a union of the unprotected black areas

Another is simple image addition and subtraction. A great example of this is when making star reductions. You could imagine creating a star mask that covers the entire area of all of the stars in the image. Then imagine you had a second-star mask that was made smaller - perhaps through the MorphologicalTransform process using the erosion filter. One could subtract the smaller star image from the larger star image, and the resulting image would be a ring consisting of the outer regions of a star! These ring masks could be used to do star reduction or to process the outer portion of stars when needed.
Summarizing my Most Common Workflow Mask Use
Like most folks, I have a basic workflow that I adhere to when processing my images. This workflow can change based on the type of capture (LRGB, HaLRGB, Narrowband HOO, Narrowband SHO, SHOrgb.) It can also change based on the nature of that target being shot.
But having said that, I can summarize the most common places where I focus on masked processing.
Linear Processing
Protecting high signal areas during NR
LDSI in Deconvolution
Occasionally, a Luminance Mask in Deconvolution - if I am having an issue with setting Deregularization parameters
Nonlinear Processing
Often, I go starless here, and if I do, I still use masks as listed below
Range Masks to isolate key portions of the target
CurvesTransformation
Neutral tone
Color layer adjustments
Saturation adjustments
HDRMT
Local Histogram Equalization - often at multiple scales
Range Masks to isolate extremely faint details
examples:
Ha gas shells around M57
Ha and O3 gas shells around M27
Local Histogram Equalization - often at multiple scales
MultiscaleLinearTransform - detail enhancement at specific scales
CurvesTransformation
Range Mask to Select Background
CurvesTransformation
Noise Reduction - Especially when using traditional methods. I have not needed this as much since I started using NoiseXterminator.
Color Masks
To reduce Magenta background and stars in narrowband images
To adjust each prominent hue in an image
using Local Histogram Equalization at various scales to enhance color detail selectively.
Dark Structure masks to enhance dust structures
CurvesTransformation
Local Histogram Equalization - often at multiple scales
Noise Reduction
Lum Mask
MLT sharpening - protect low signal areas
Noise Reduction - protect high signal areas
Starmask
Used to deal with any star artifacts
CurvesTransformation
Convolution
Ring masks to deal with color rings on stars
CurvesTransformation
GAME Masks
Isolating small image features for enhancement
Dealing with Artifacts
Depends on the artifact
Brightness masks are often used.
Conclusion
Masks - when used creatively - can give you a superpower to drive your image processing to the next level!
So now we know what a mask is and what masks can do for your image processing.
We have learned how to apply and manage the mask during its use.
We have seen the most commonly used forms of masks, as well as some typical use cases for these.
We have also seen why you might need to modify a mask - along with the tools that can be used to make those modifications.
These are the key elements you need to use masks in Pixinsight.
The rest comes from experience - trial and error - your own experimentation.
It took me a while to recognize where I had opportunities to improve my image processing through masks. But once you solve one problem using a mask, you will internalize the learnings and add that to your toolbox.
A lot of what I have shared in this post is based on my own experience and how I use Masks today.
How about you?
Do you have any mask tips that I have missed? let me know - I will add them here and give you credit!
More Information
Masking Facts in PI: https://www.pixinsight.com/doc/legacy/LE/15_masks/masking_facts/masking_facts.html
Using Masks in PI: https://www.pixinsight.com/doc/legacy/LE/15_masks/using_masks/using_masks.html
Detailed Masking Article from PI: https://pixinsight.com.ar/en/info/articles/46/mask.html