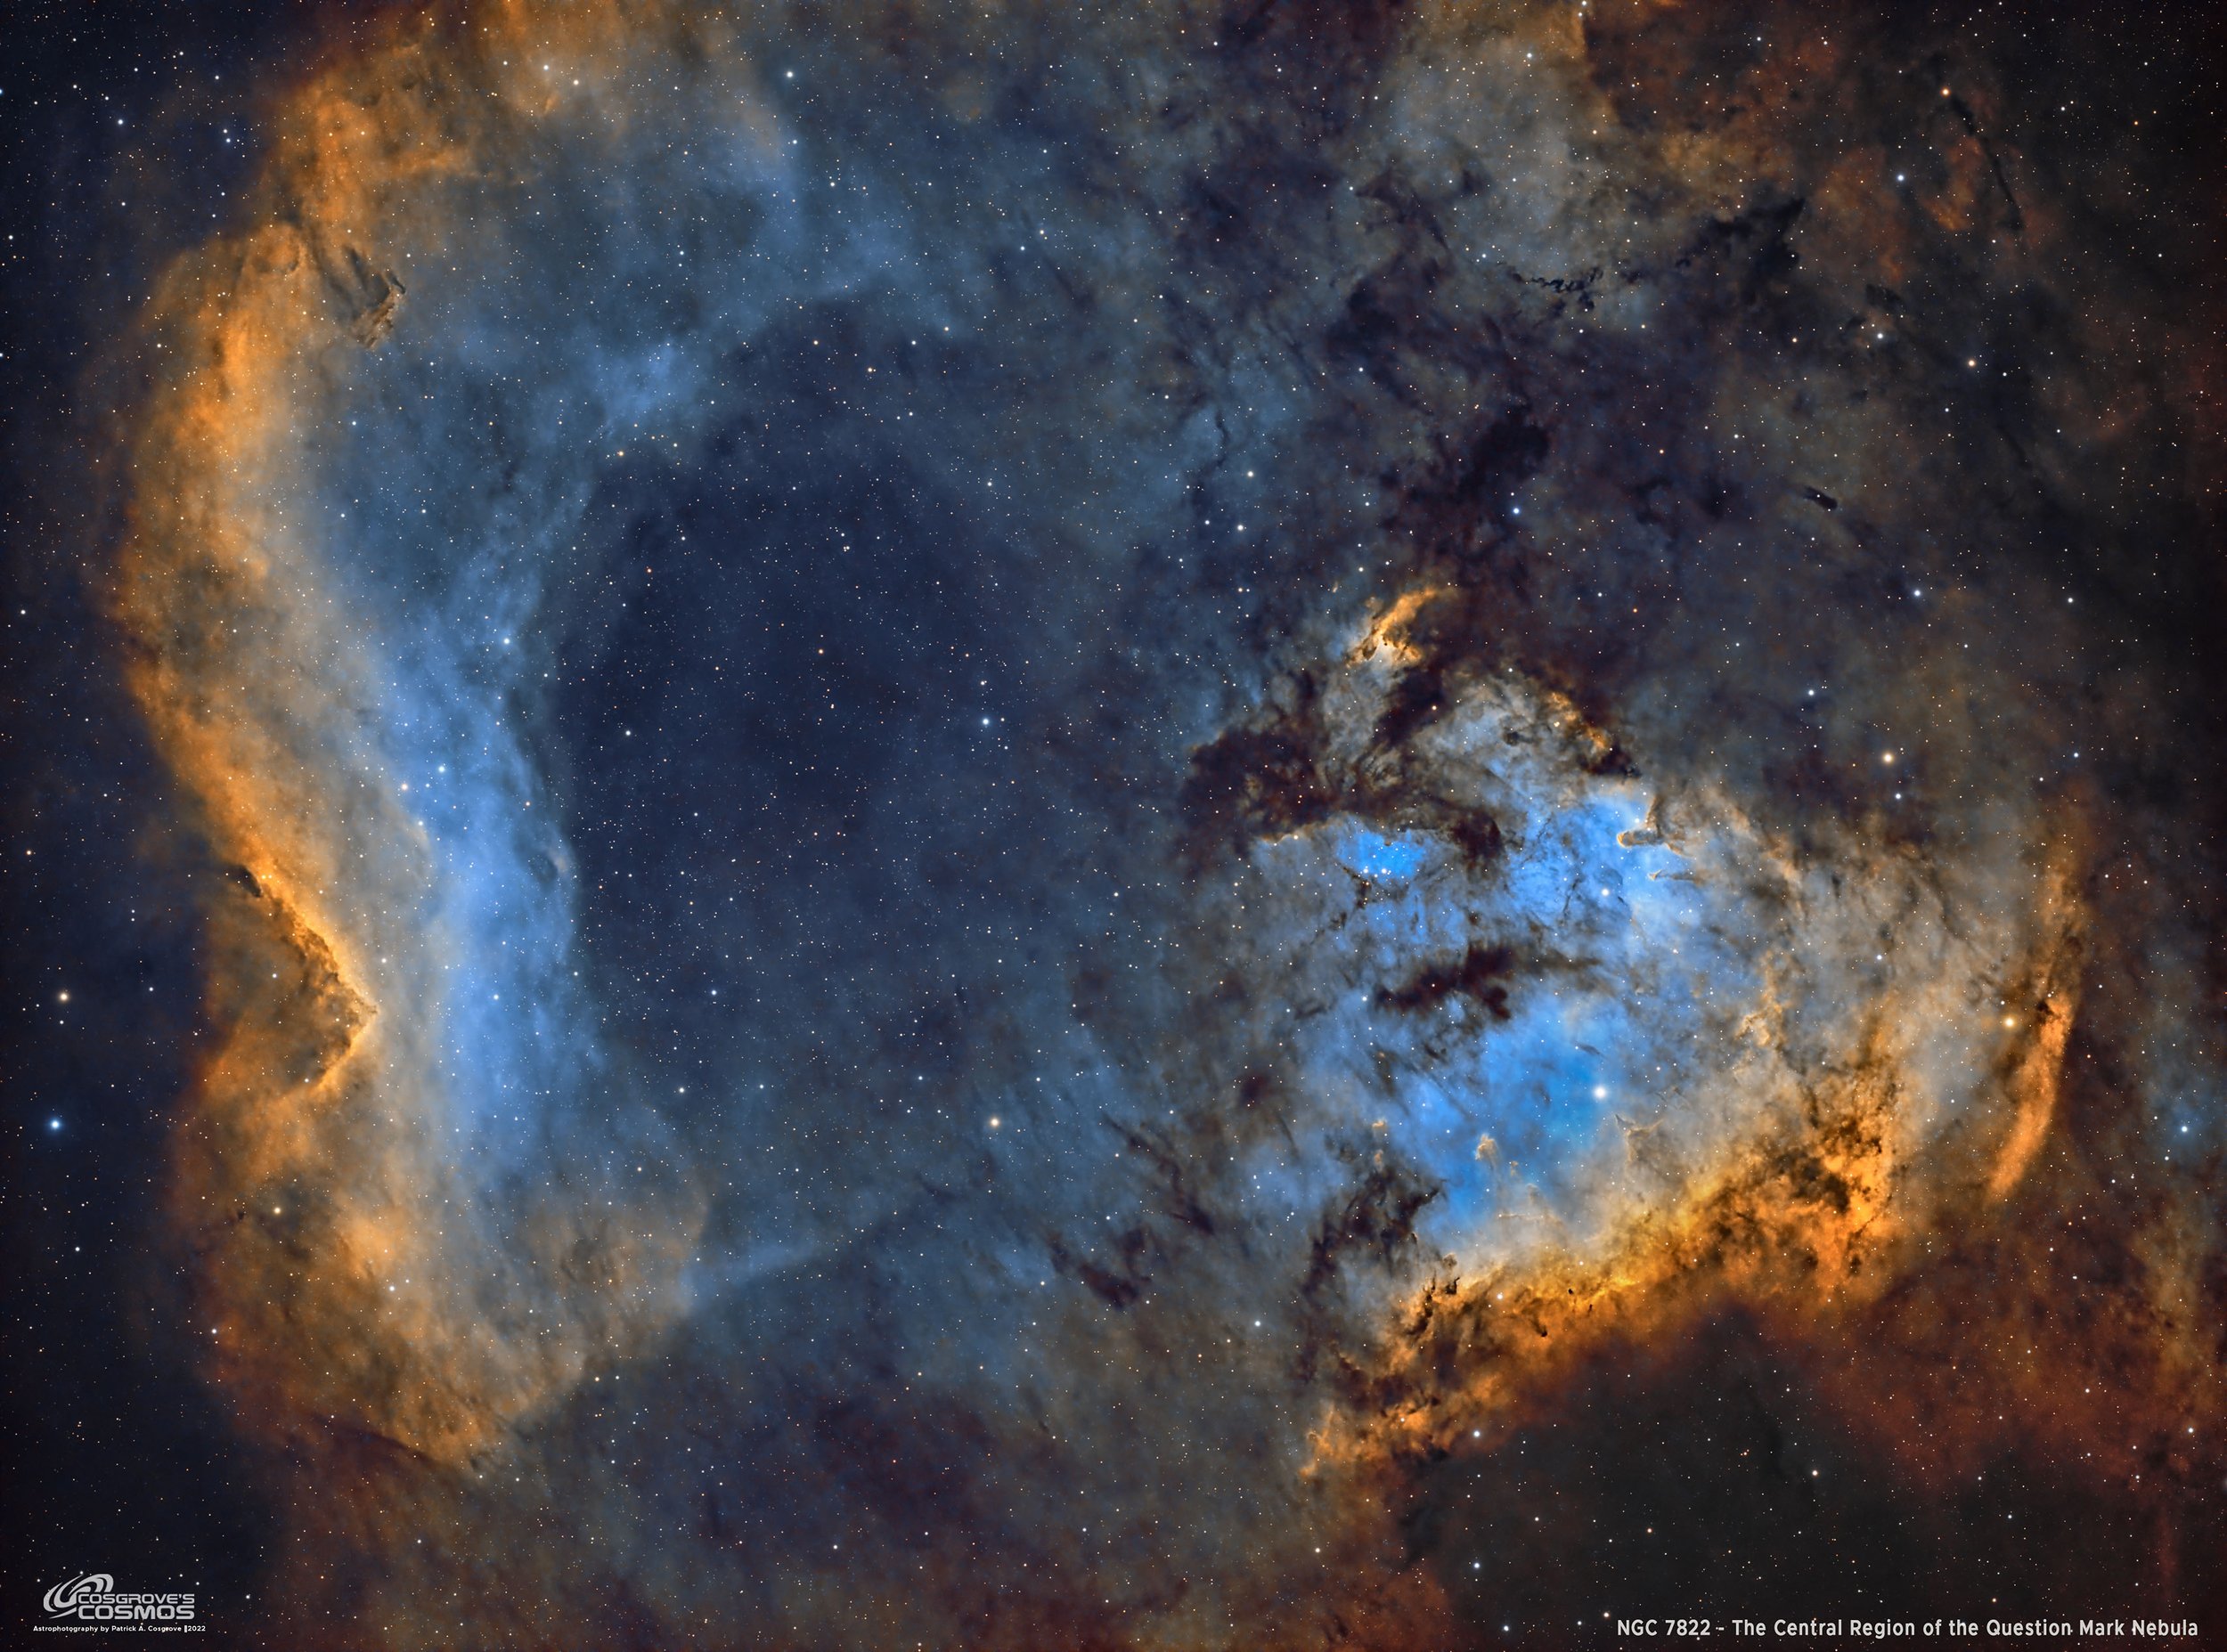
NGC 7822 - The Central Portion of the Question Mark Nebula (~14 hours in SHOrgb)
Date: Octobe 9, 2024
Cosgrove’s Cosmos Catalog ➤#0134
Table of Contents Show (Click on lines to navigate)
Granted Flickr Explore Status!
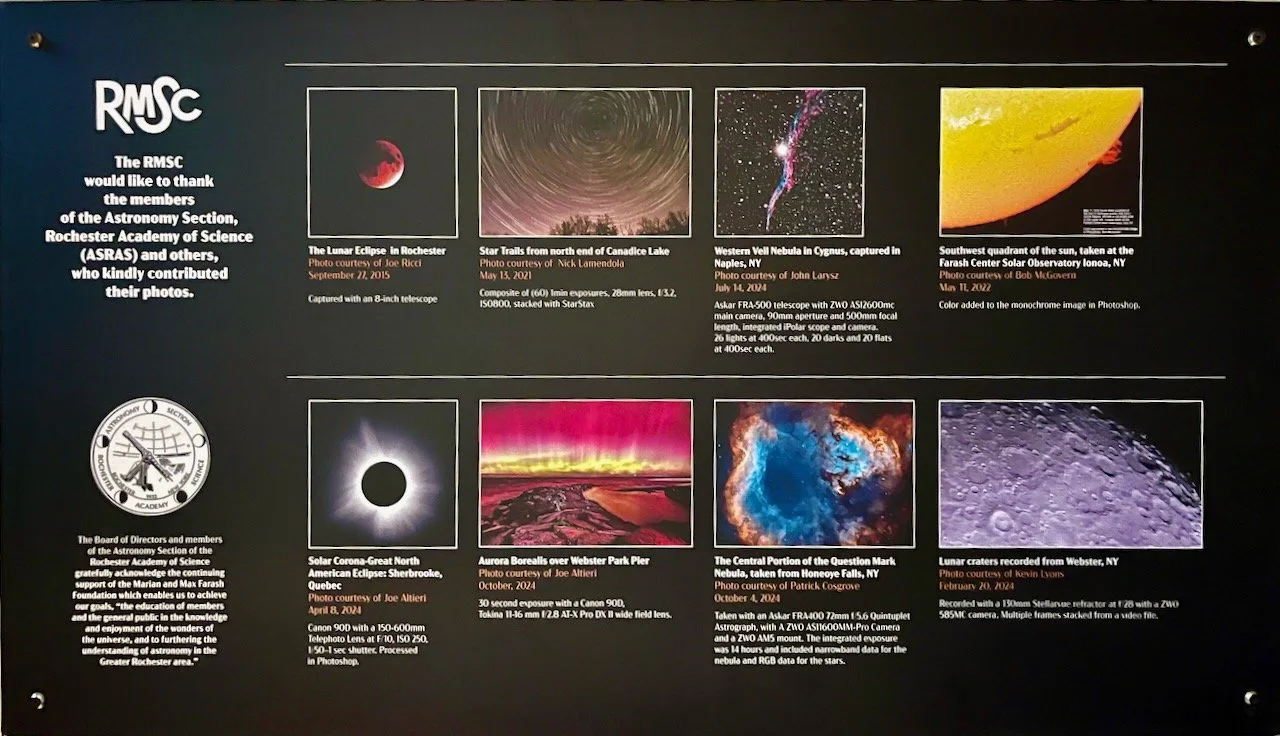
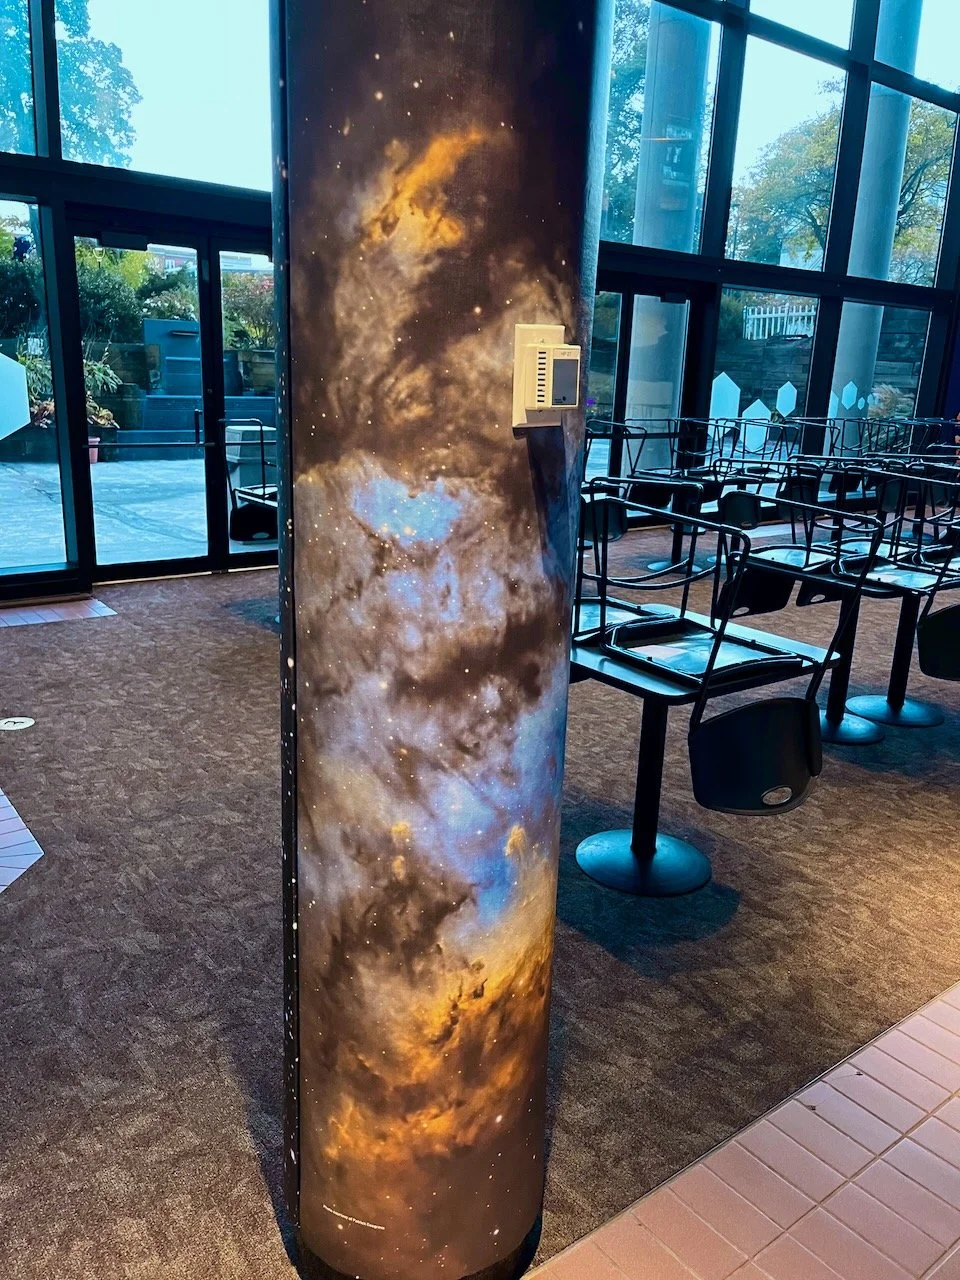
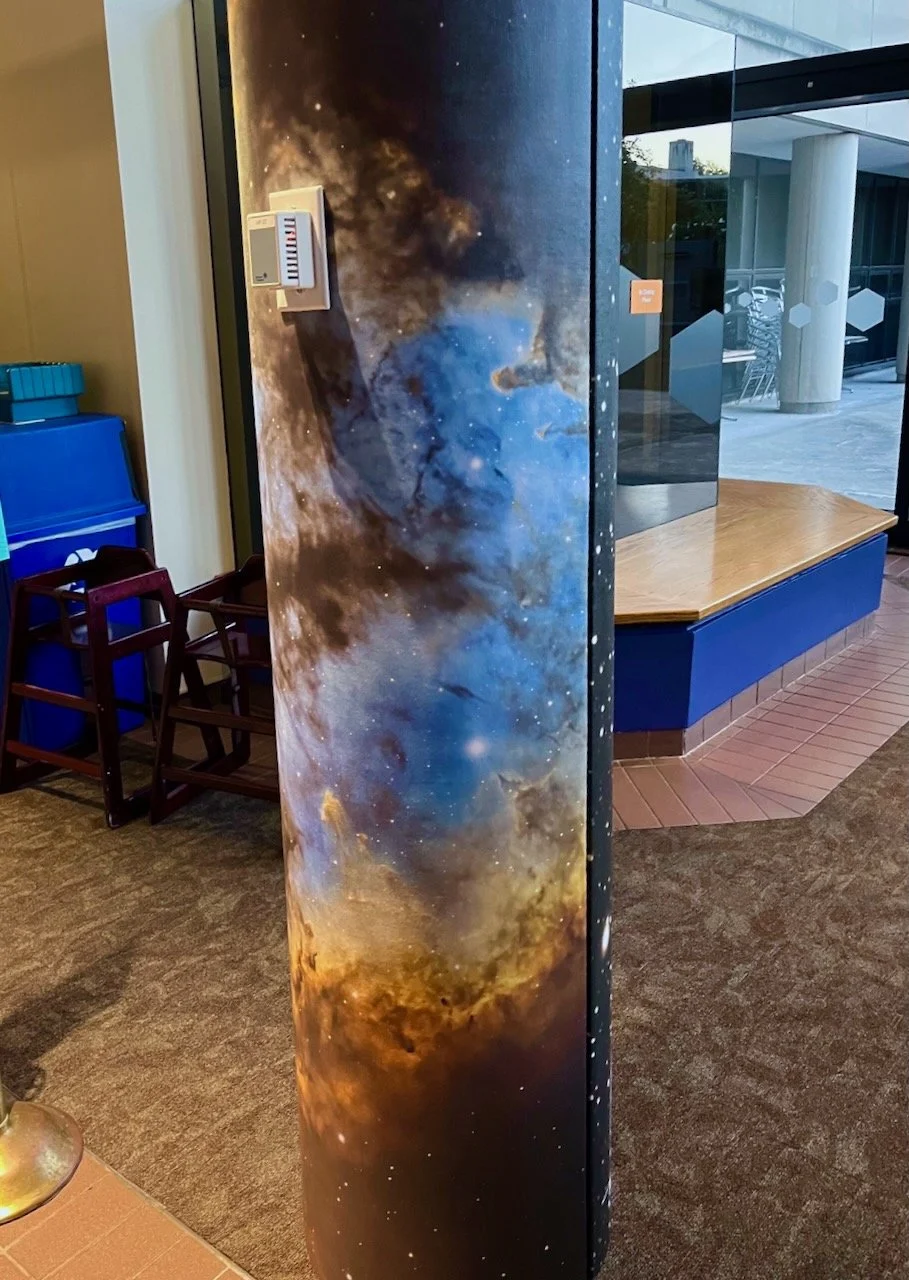
Chosen for One of the ‘Astro Pillars’ in the Rochester Museum And Science Center!
My image, along with others shown in the poster below, was chosen to be printed on the pillars in the museum cafe!
A poster nearby catalogs the images used on the pillars. (photo curtesy of Kevin Lyons)
One view of ‘my’ column (photo curtesy of Kevin Lyons)
Another view (photo curtesy of Kevin Lyons)
About the Target
The question Mark Nebula - seen in its full form. Taken from the entry for NGC 7822 from Wikipedia
NGC 7822 is a striking and visually captivating emission nebula in the constellation Cepheus, located approximately 2,900 light-years away. The complex encompasses the emission region designated Sharpless 171 and the young cluster of stars named Berkeley 59.
This vibrant and colorful region forms part of the larger star-forming complex called the Cepheus Flare. In this grand area, the dynamic interplay of radiation emanating from young, hot stars illuminates the surrounding gas and dust. The youngest portions of this complex are only a few million years old - very young by stellar standards!
The complex also includes one of the hottest stars discovered within one kpc of the Sun, namely BD+66 1673, which is an eclipsing binary system consisting of an O5V that exhibits a surface temperature of nearly 45,000 K and a luminosity about 100,000 times that of the Sun! The star is one of the primary sources illuminating the nebula and shaping the complex's formations.
The nebula showcases intricate and fascinating structures, including dark dust lanes intertwined with glowing pockets of ionized hydrogen, making it an endlessly intriguing subject for astrophotography enthusiasts.
The nebula gets its name from the shape when seen in a very wide field of view. You can see that the image below is taken from its entry on Wikipedia. The region covered by this image is a close-up that focuses on the void in the larger mass of the nebula at the top of the image. More detailed framing info will shared later on.
The Annotated Image
Note: When I tried to create this image in Pixinsight, the app hung up! So, I used Astrobin to create this view and captured it.
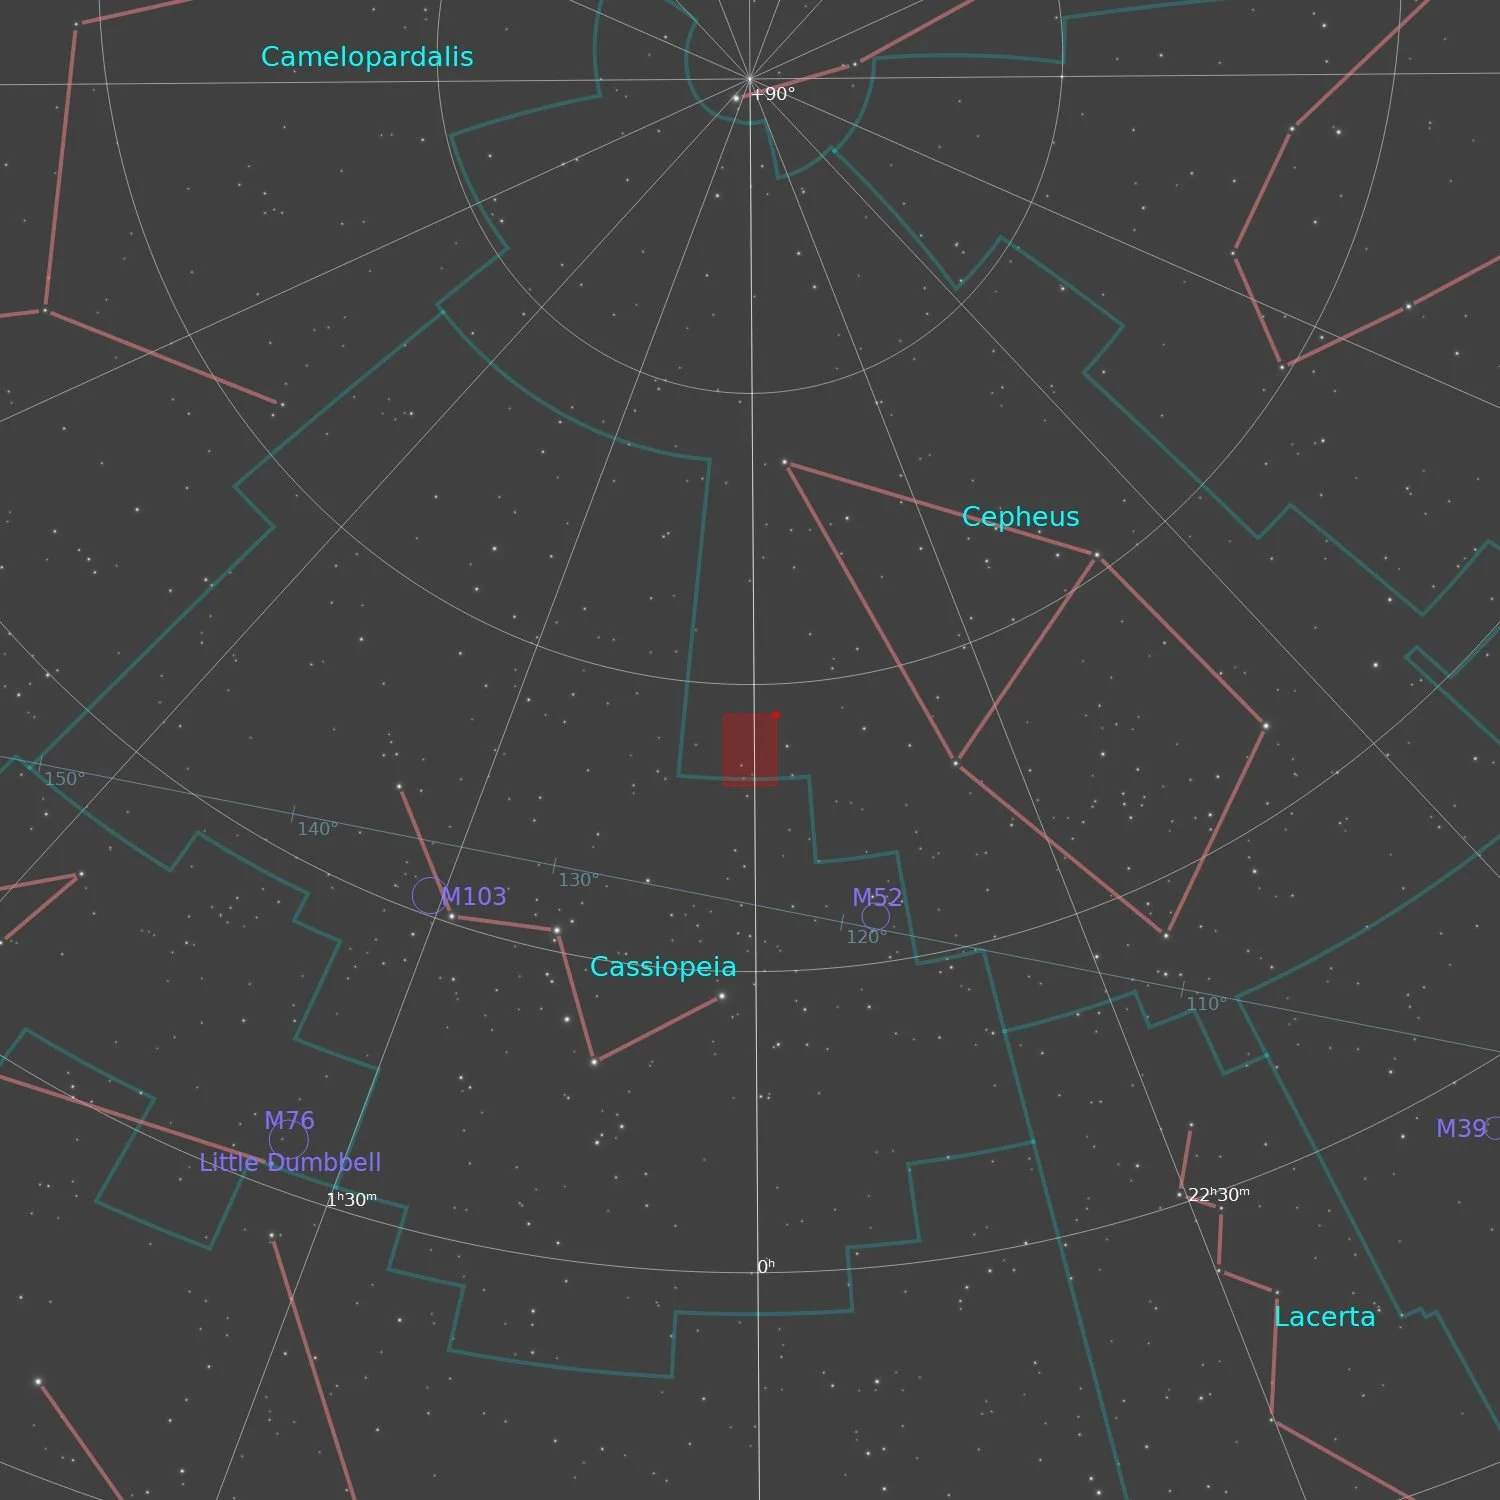
The Location in the Sky
This annotated image created with Imagesolver and Annotate Image Scripts in Pixinsight.
About the Project
Picking the Target
My last target, SH2-119, the Clamshell Nebula, resulted from testing while learning the NINA sequence control platform.
I was excited to use NINA and most of its features for the next project!
As I looked ahead, it seemed as though I would have clear nights on Wednesday, 9-28-24, and the following Saturday, 10-4-24. With this in mind, I started hunting for a possible target.
Again, I used the Sharpless Catalog and as I flipped through it, I found SH2-171:
The entry I found for SH2-171 - also known as NGC 7822!
This target looked large, bright, and complex - and I was instantly interested in it. Only later did I realize that this target was also known as NGC 7822.
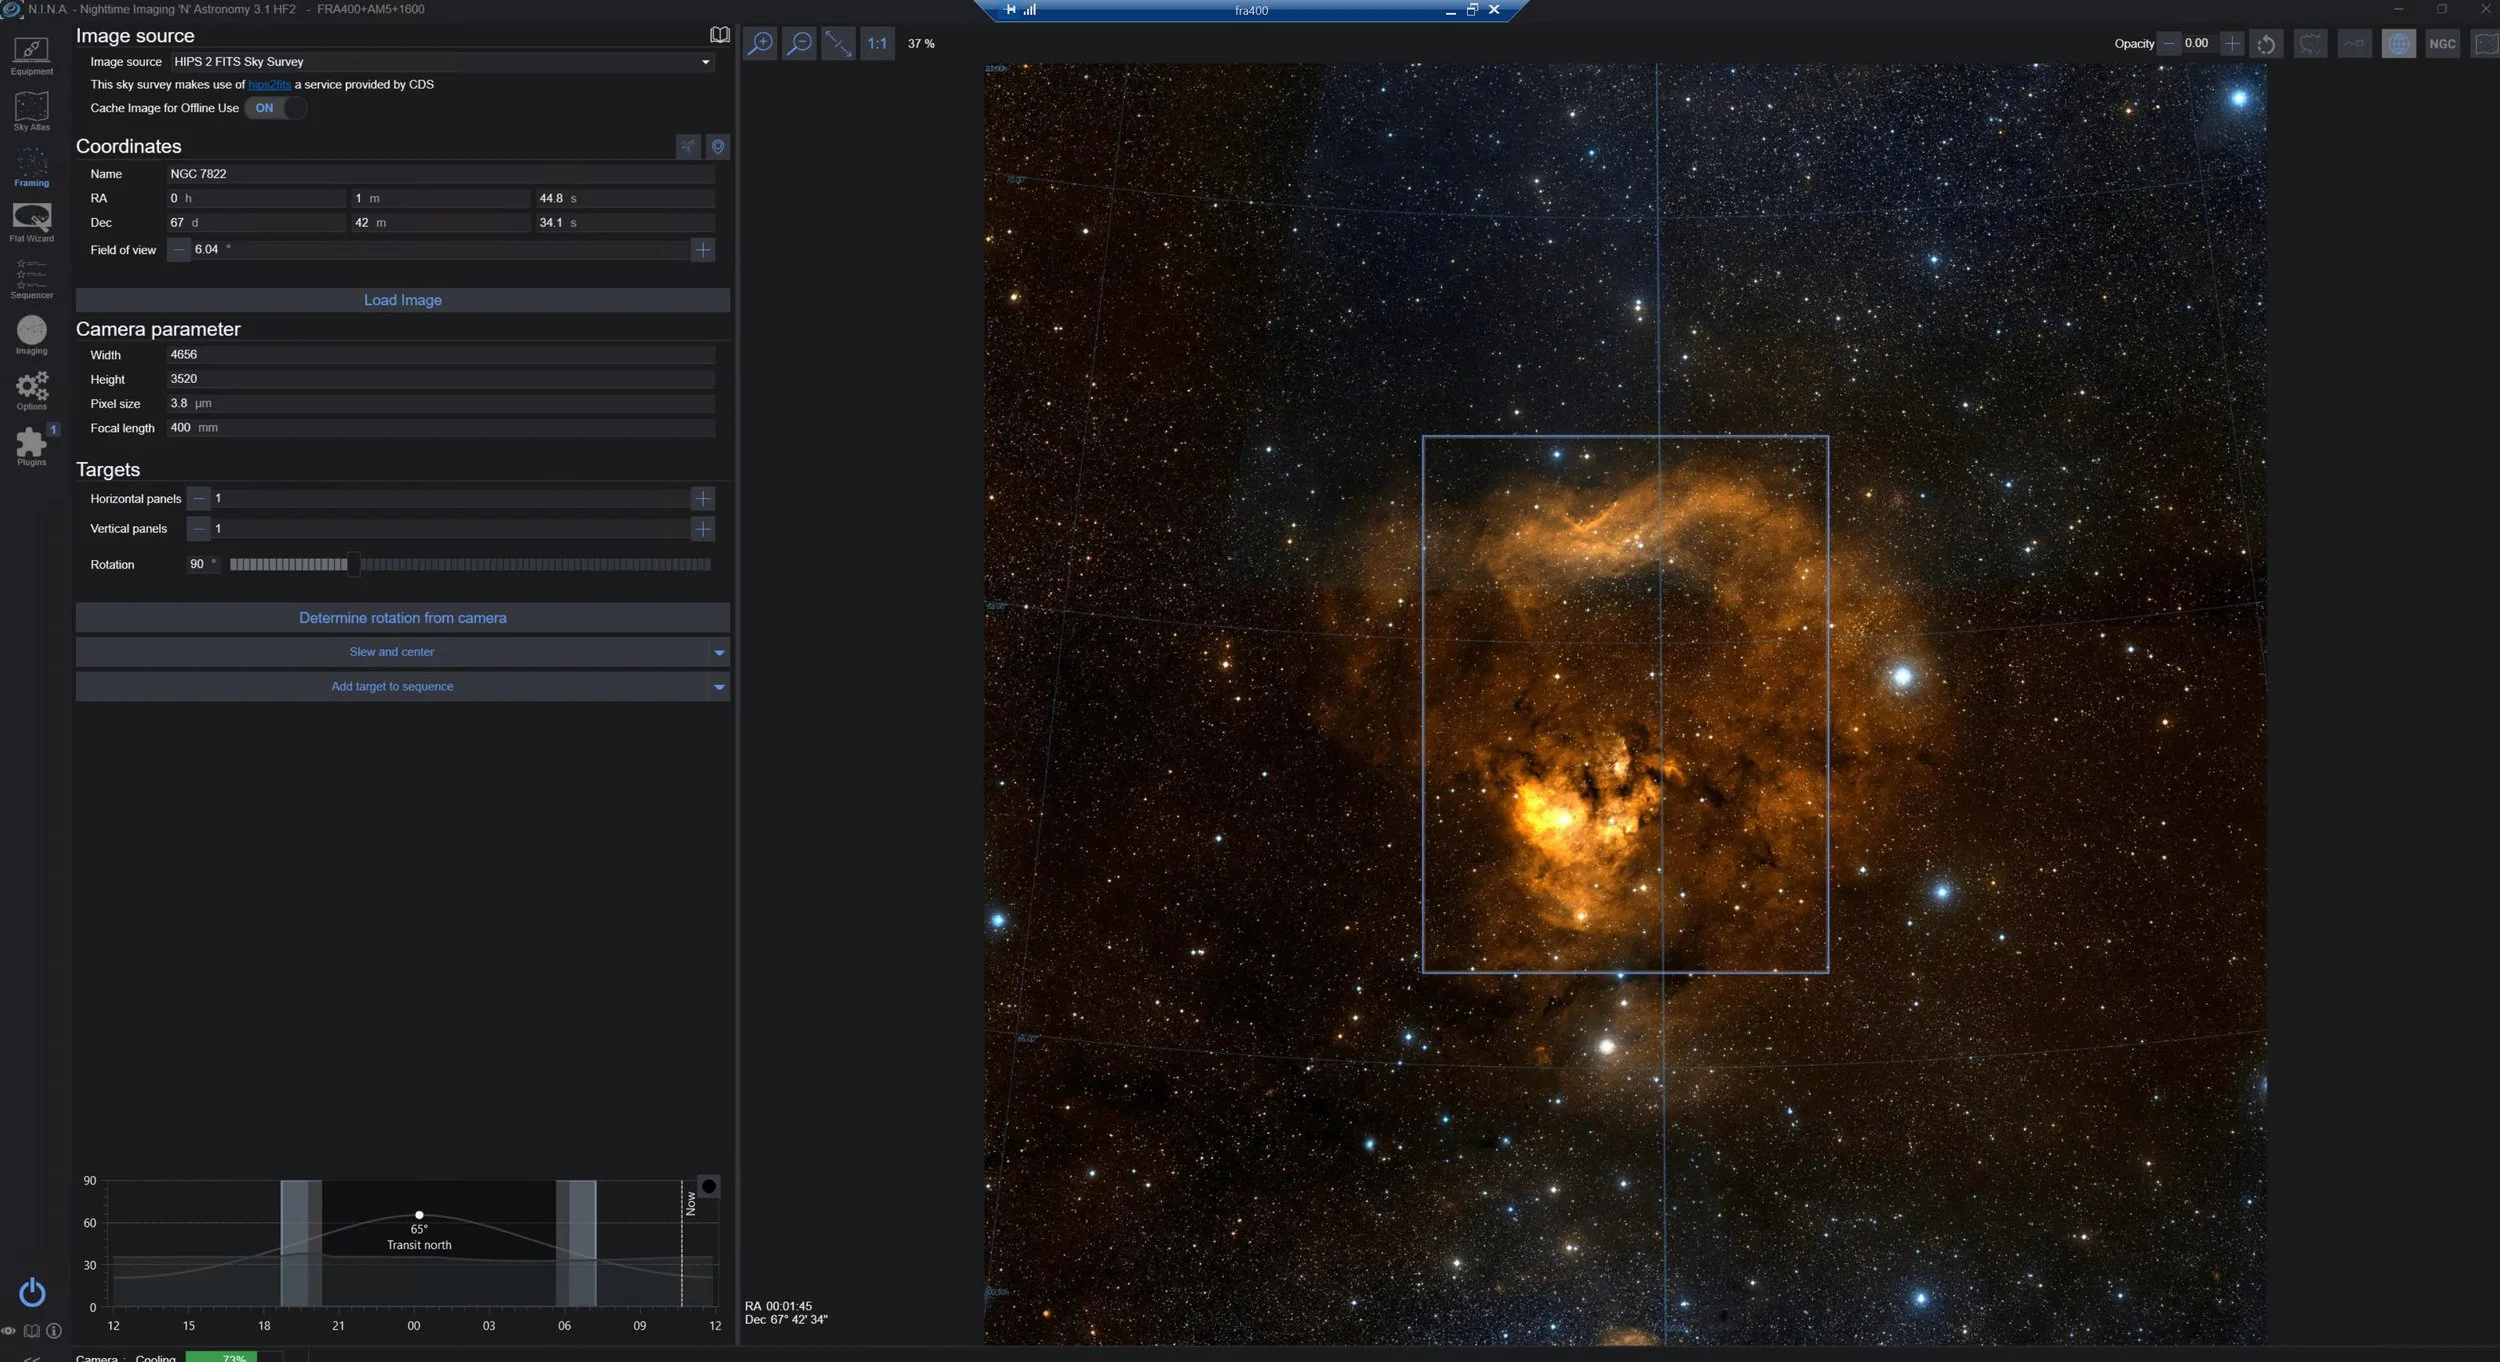
I was unbothered by the large size of the nebula, as I would be using my smallest platform that covers a reasonably wide field of view: the Askar FRA400 Scope platform. I searched for the target in the NINA Star Atlas, and when I found it, I decided how to frame it.
A screen shot of my NINIA App Framing Tool, showing the framing I chose for this image.
While I could not fit the entire “Question Mark” into my field of view, I chose what I thought was the best framing for what I wanted to accomplish.
Next, I checked out when the target would be in the sky. Looking at the rise/set chart, I saw that it was very well-placed for me right now!
The target was well positioned at astronomical dusk and hit Zenith right at midnight.
The target would be above my horizon at Astronomical Dusk, hit zenith around midnight, and still be available until Astronomical Dawn. It looked like I could get as many as 9 hours or so with the long nights we have at this time of year!
So I had my target! Time to get started!
Data Collection
So, I set my scope up at the top of my hill and took advantage of the gravel pad the excavators created for my upcoming Observatory build.
This would also be the first time that I used NINA to handle everything in the sequence, and I had also added the ability for the sequence to send me updates on my phone!
I have found NINA easy to learn, and with the help of some downloaded Sequence Templates from PatriotAstro, I created my own sequence template that also used a custom horizon line that maps the tree line from my new property.
The sequence I used for this capture session.
I should also mention that I am not doing autofocuses at the change of filters now.
This has always been my practice, but NINA makes it very easy to automatically calculate the focus offsets needed between filters, so I do an initial focus with the L filter and then only auto-focus when the star images are growing in size.
This saves a lot of time in unneeded and long narrowband focus cycles. When I do have to redo autofocus, I can do it with the L filter. Since this passes the most possible light, it is also fairly short and efficient.
The session was designed to wait until astronomical darkness -8 minutes to start things up.
At this point, it would:
cool the camera
unpark the scope
Set the track rate
Then, it would wait until the target was over the treeline and would then:
Slew to a predetermined Alt/Az location that was safe
autofocus the camera
Start guiding with PHD2
Do a platesolve and sync the mount
At this point, it would start the target sequence:
Slew, center, and rotate on the target
Capture a fixed set of RGB star subs
Start a loop that goes on until we hit Astronomical dawn
Capture 8 Ha, O3, and S2 subs
Dither every frame
repeat
At astronomical dawn, it parks the scope and warms the camera - Job Done!
I also had triggers set that would:
Do an autofocus if star sizes get too large
Restore guiding if lost
Platesolve in the background, and if we are off target by too much, recenter and keep going.
Do a meridian flip when conditions are right.
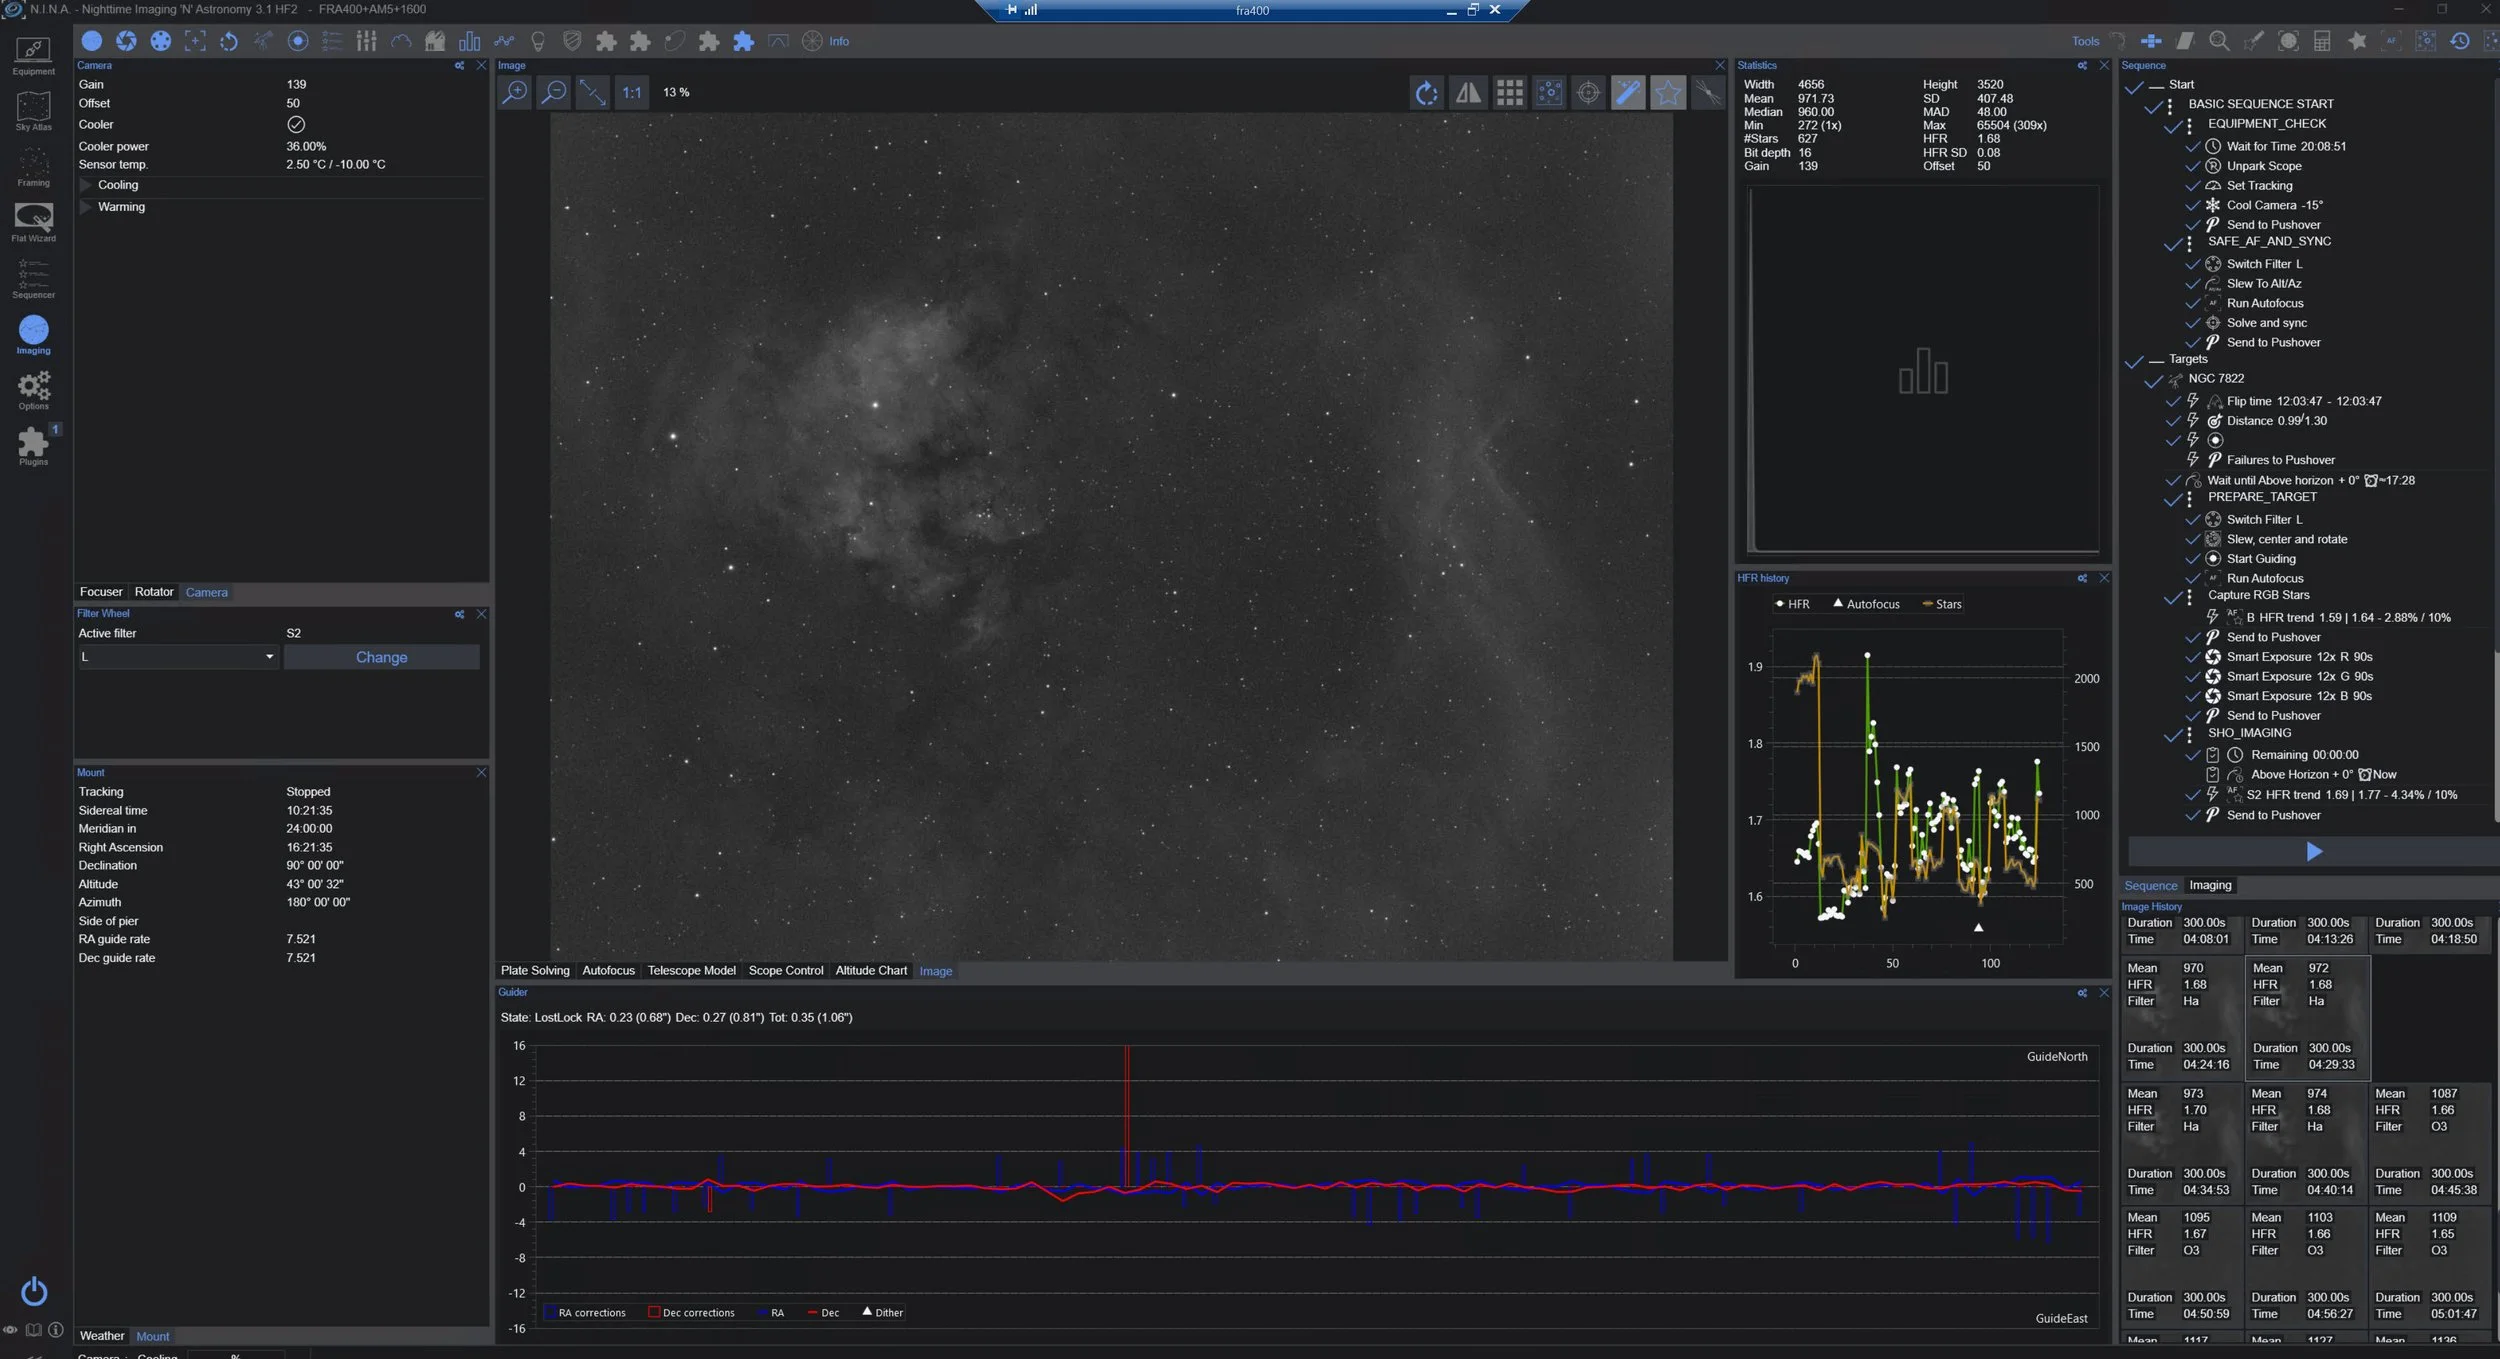
NINA in action capturing Ha subs...
I collected images on both nights, and the weather was excellent.
I did have one problem Wednesday night near the meridian flip when an image showed star trails!
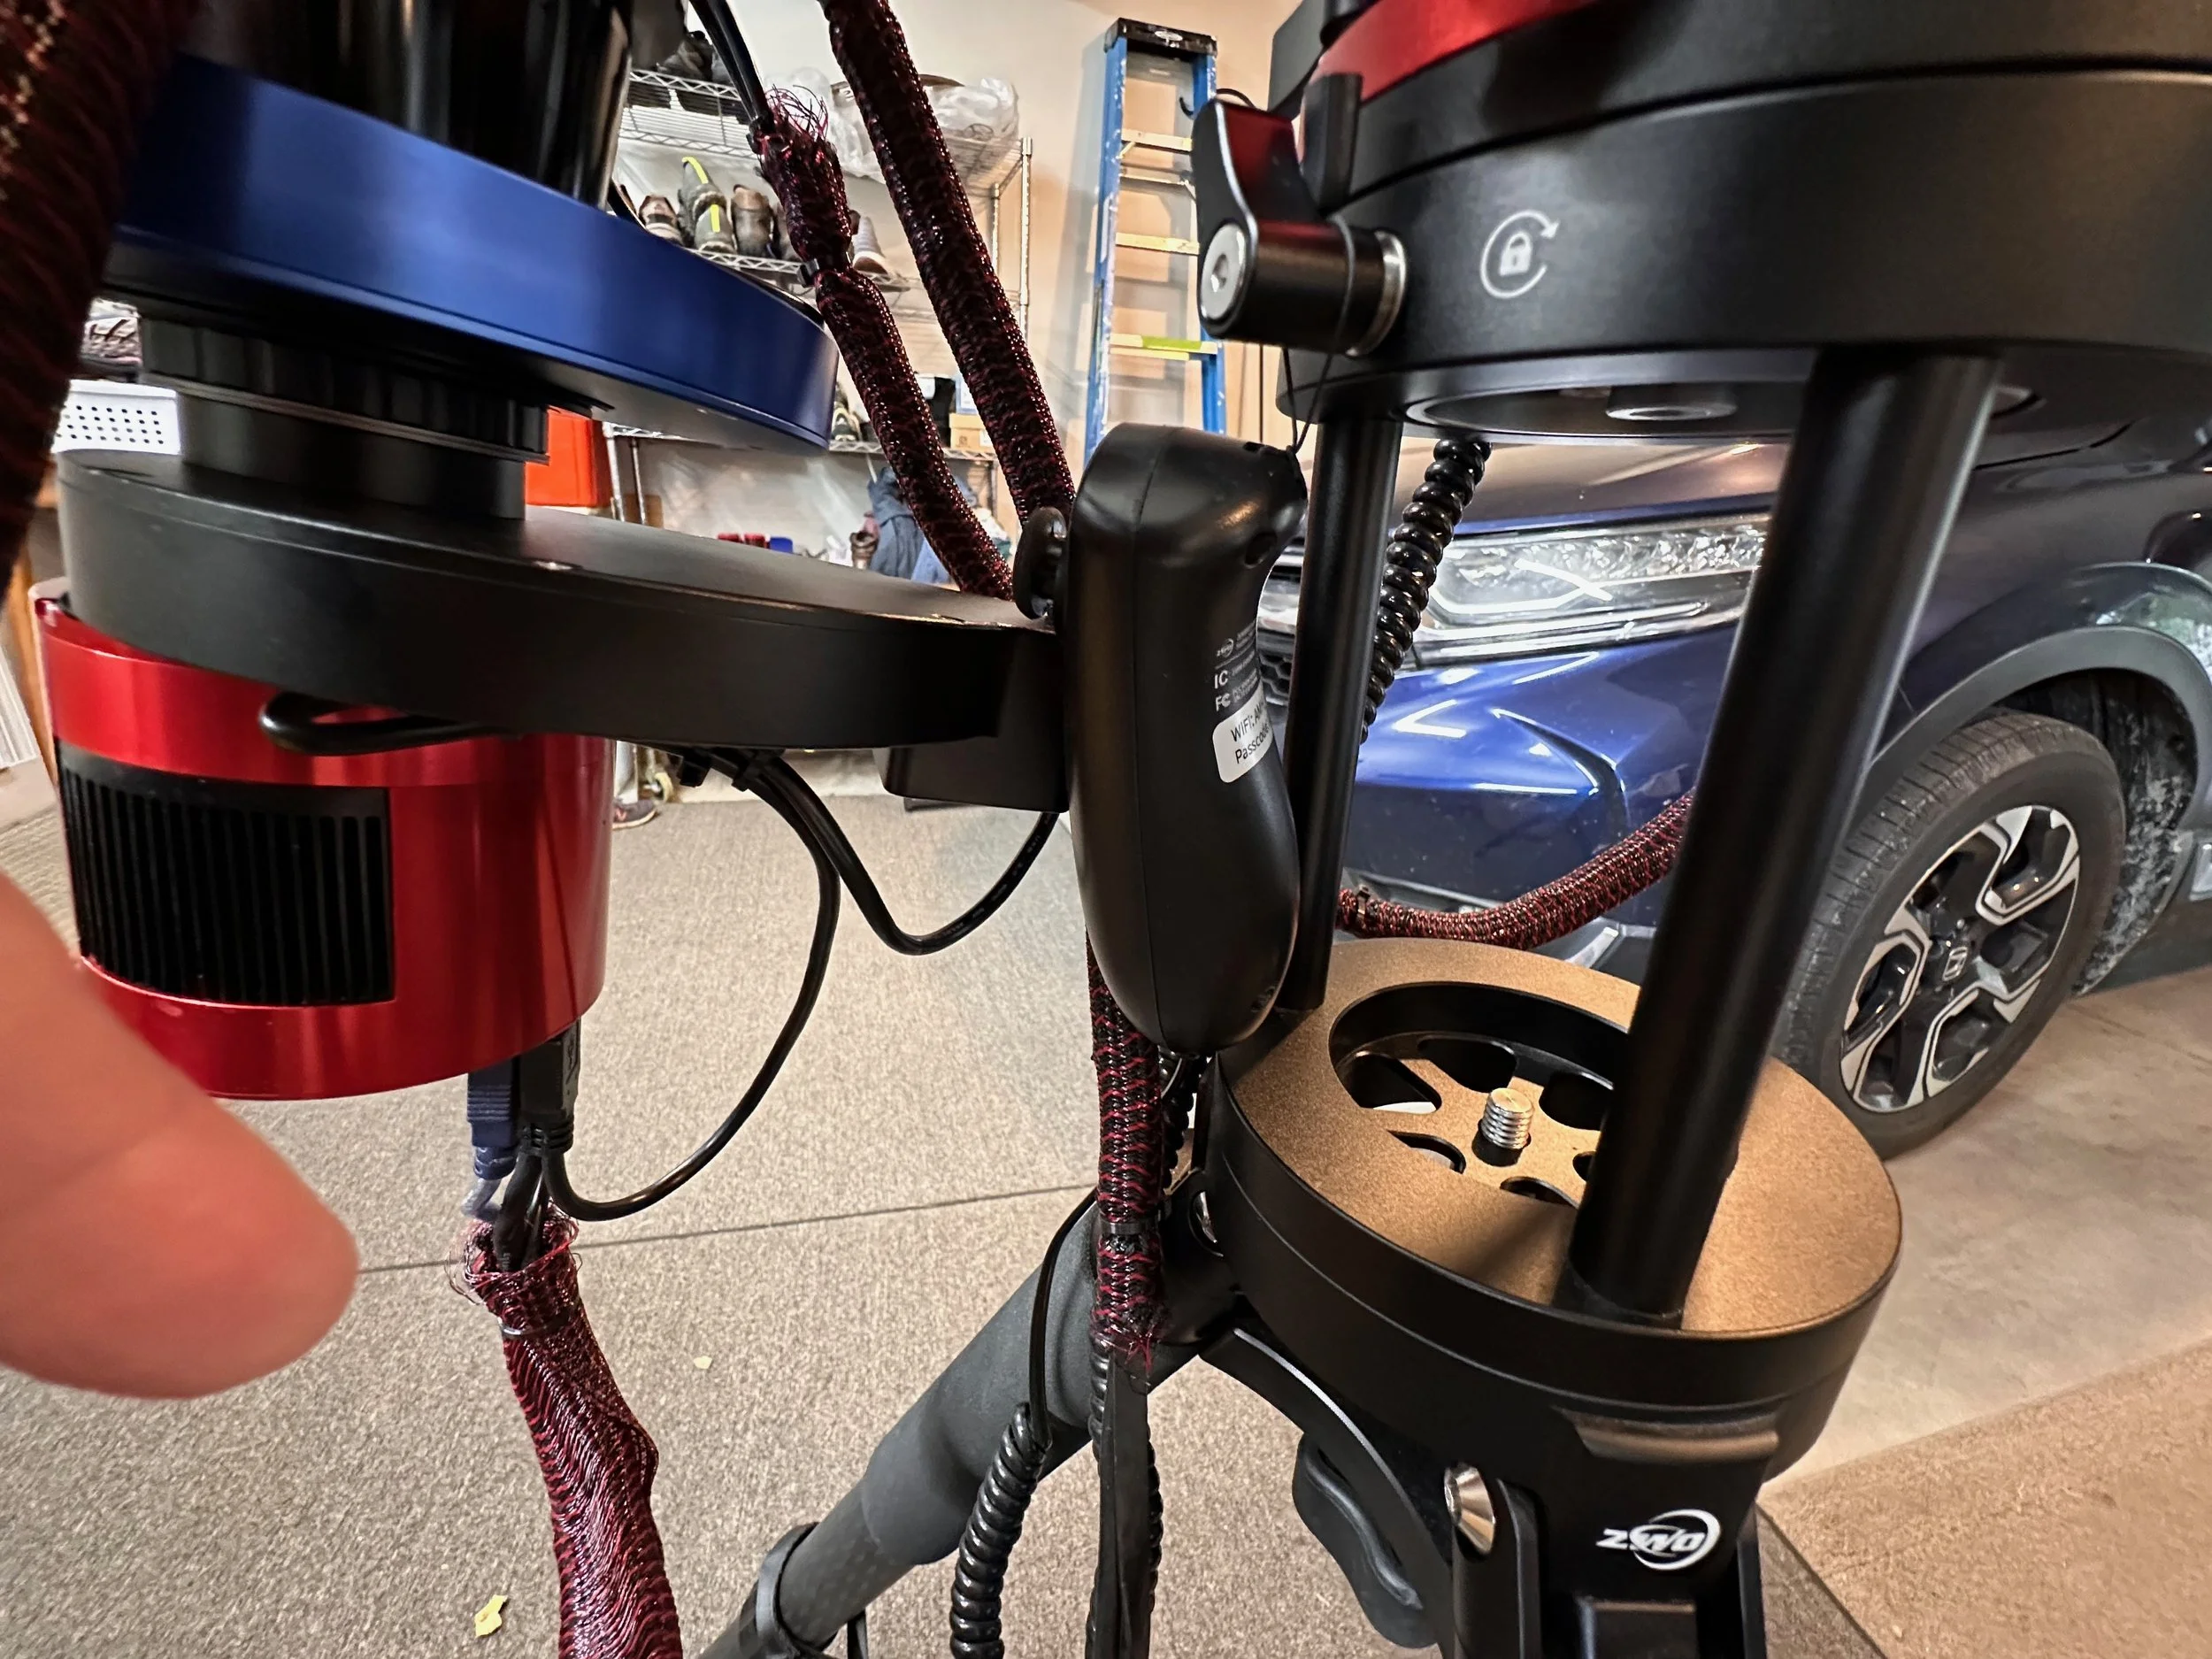
Some investigation revealed that the mount, when pointed near the zenith, was hitting the AM5 controller joystick when I hung it in what turned out to be absolutely the worst possible place on the mount!
The star trail problem I was seeing just before the meridian flip! (click to enlarge)
The cause. A case of the mount pushing it's own buttons - or - joystick in this situation! ( I moved the controller!)
Some clouds moved in Wednesday night around 4:40 am, and I things shut down early. This was a mistake as soon after, the clouds moved out, and I could have kept going!
Something extraordinary happened Saturday night!
I went to bed at midnight, and NINA woke me up when it was done at 5:30 in the morning - so I slept for the night for the first time!
In the old house, I would have had to change targets every 3 hours. Here, I could run the whole night - even a long fall night - on a single target!
Yahoo!
Processing Overview
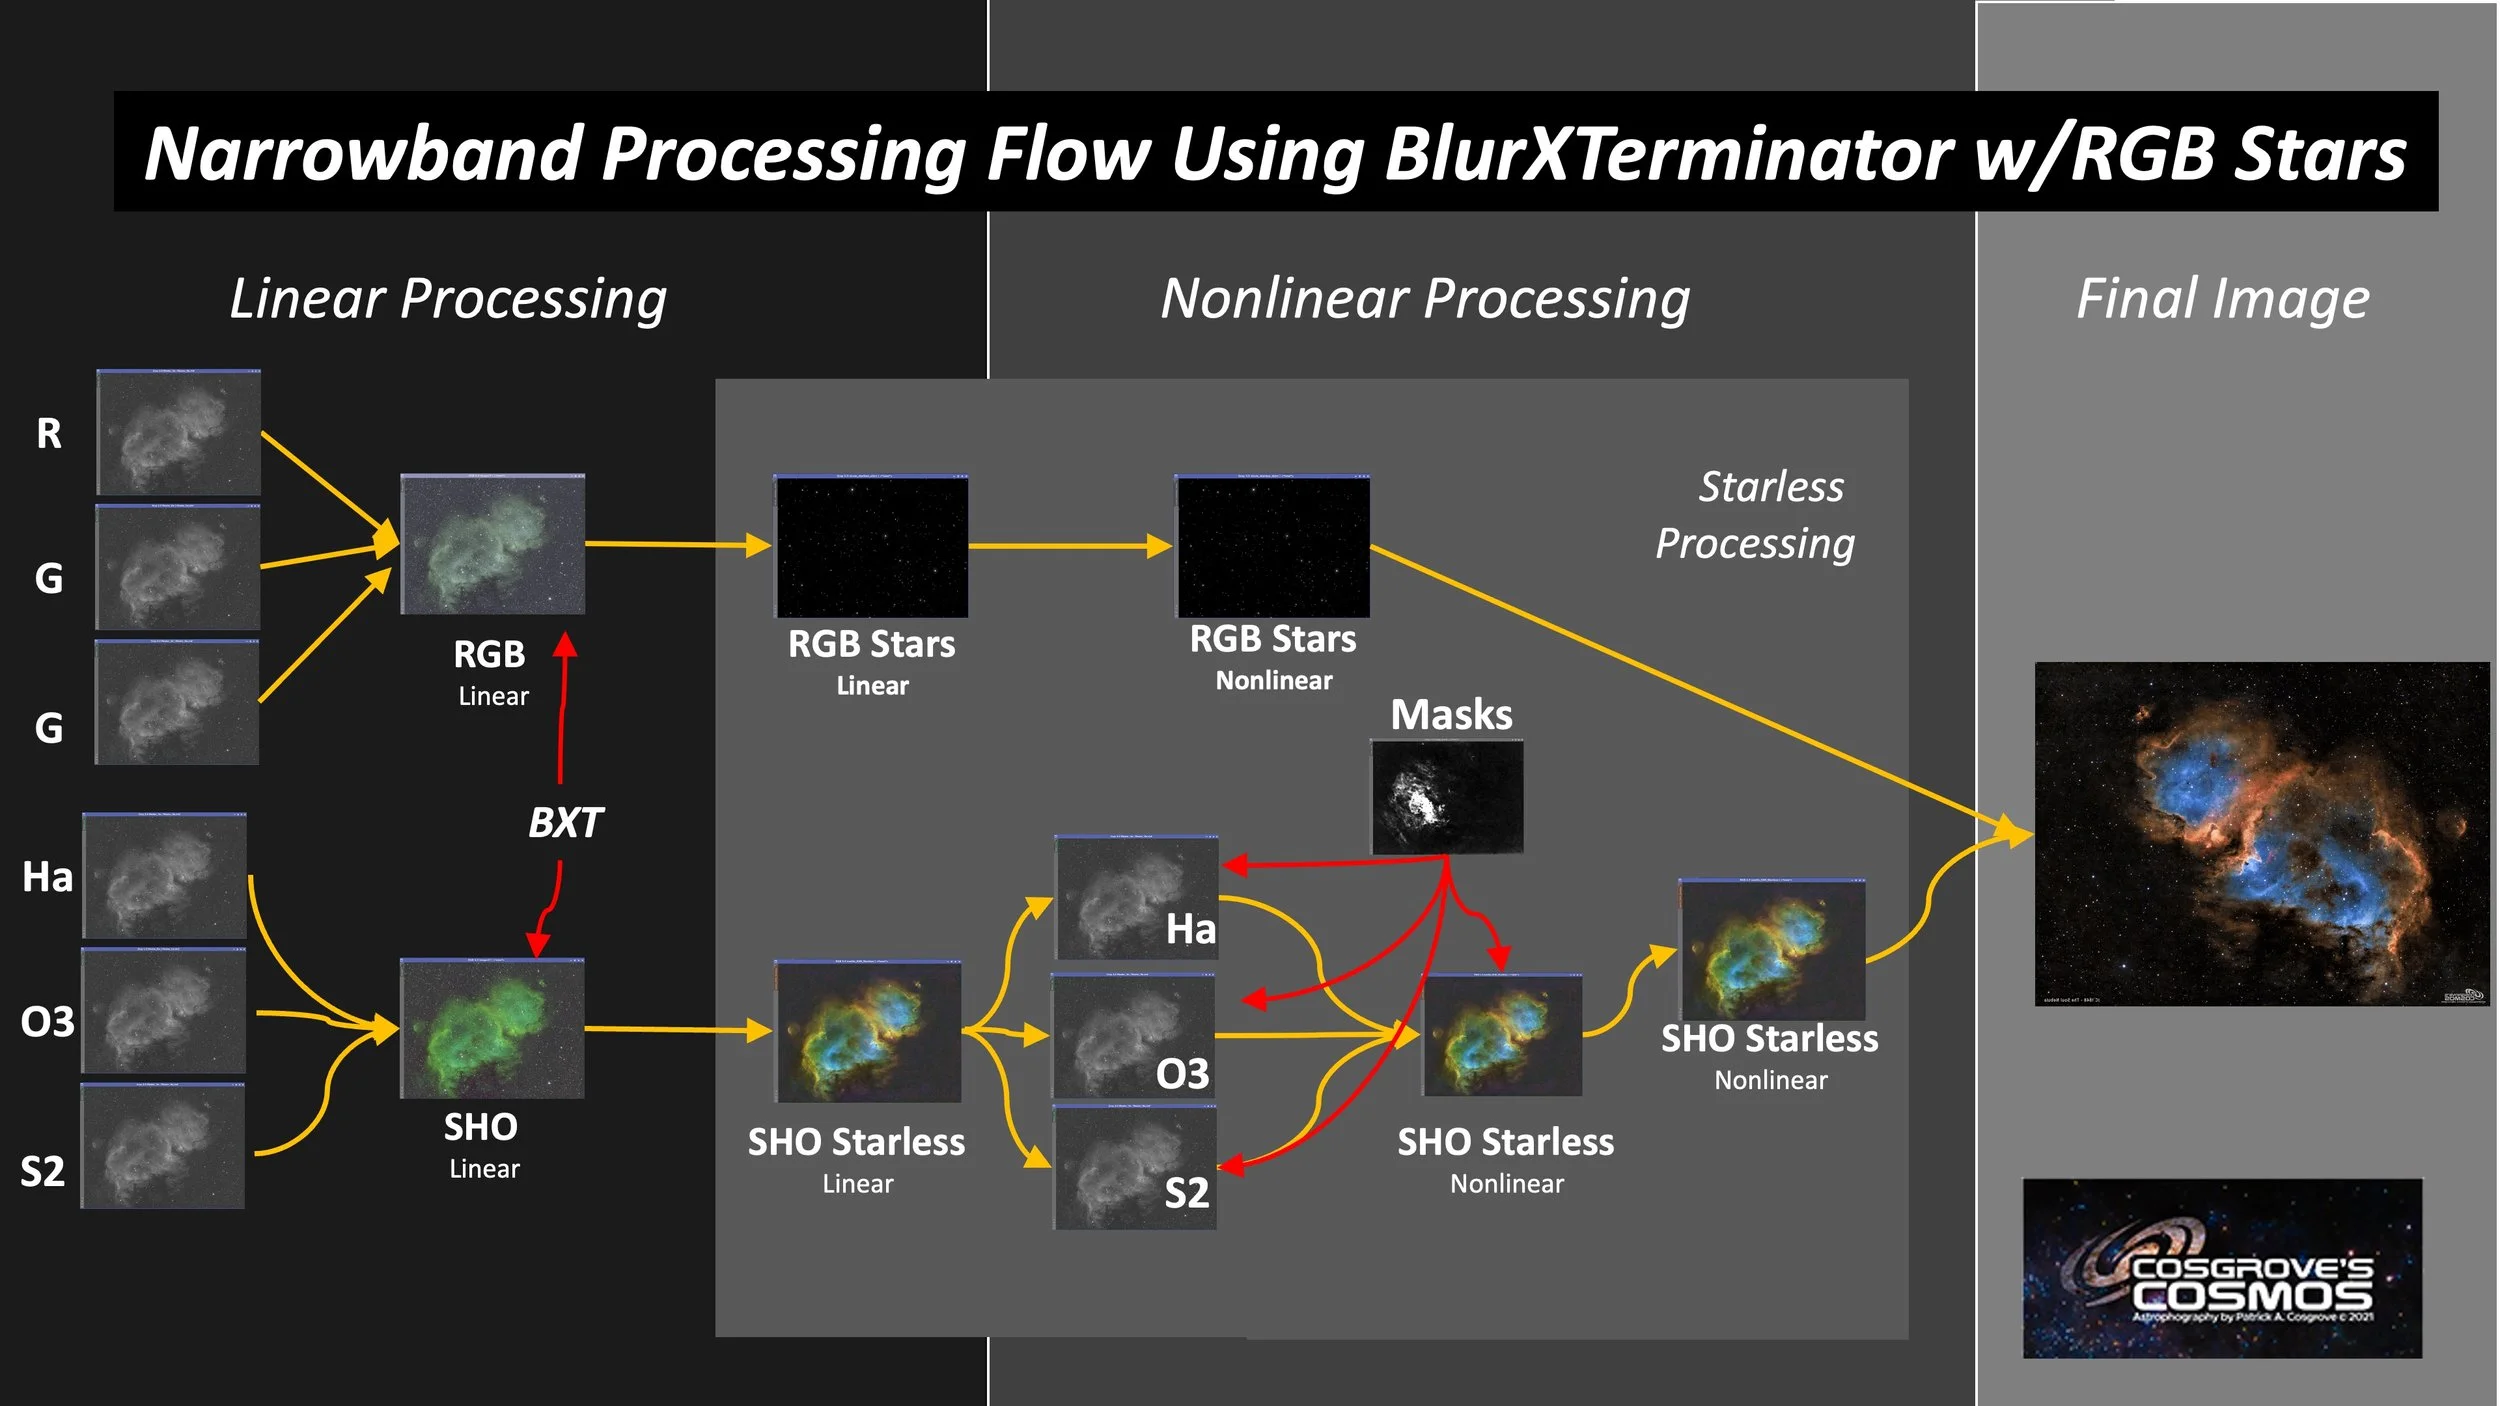
This was a SHOrgb image, so I intended to use a workflow like shown in the chart below.
My standard SHOrgb workflow.
So, I used it this time around.
Or tried.
I used NarrowbandNormalization to color correct the Linear SHO image before going starless. The corrected color looked great, but I was surprised to see that the starless image produced by StarXTerminator left a significant amount of magenta star ring artifacts that kind of ruined the image.
Looking closely, you can see magenta - a and a few blue - star rings. Too many!
A zoom into the flatish blue areas - Ewww! (click to enlage)
Here are some bigger stars (click to enlarge)
I am not sure why I am seeing this now, as I have not encountered this in the past.
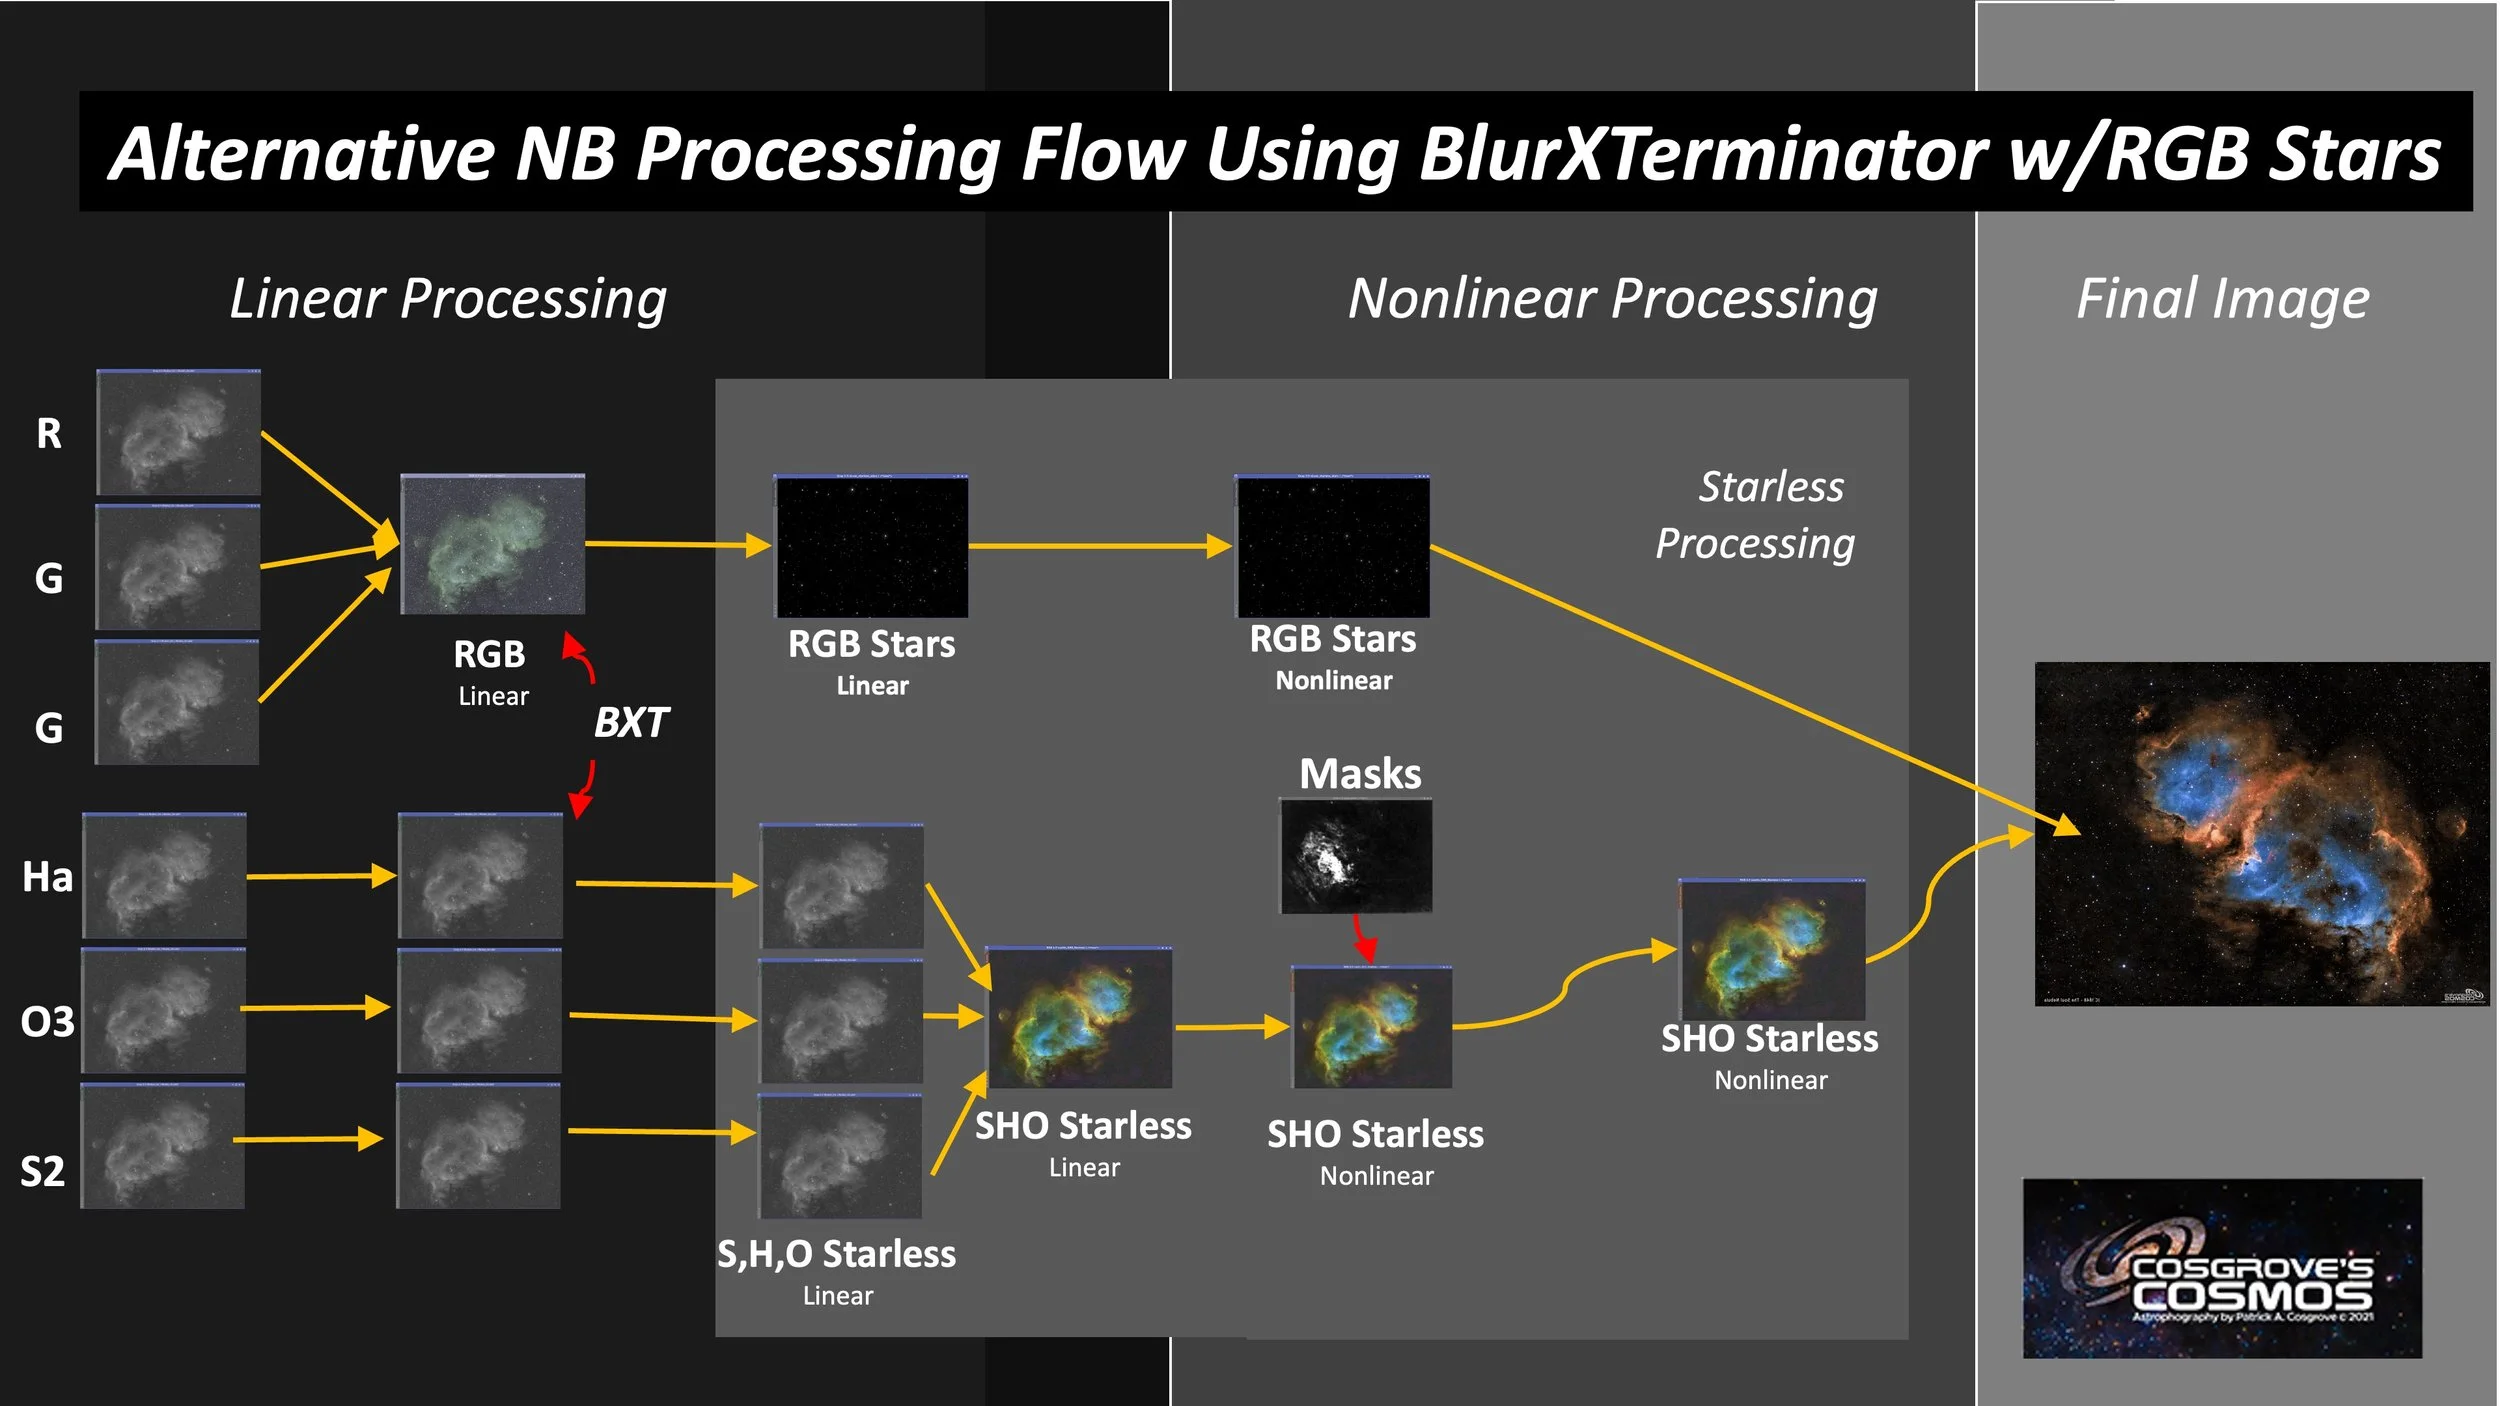
The trick, in this case, seems to be to go starless before we create the first color SHO image. Since I am replacing the stars with RGB stars, why deal with weird color SHO stars at all?
So, I tried a different workflow that looked like this:
The Workflow I ended up using for this image.
In this case, I processed the mono master separately.
I applied BXT and NXT to the separate mono image before first creating the color SHO image.
I read that BXT does a better job with color images as it can adjust its action based on all of the image layers. There is risk in doing it on the mono images - if the star sizes are different in each layer, you get color rings on your stars. Running BXT on a color image with all three layers adjusted simultaneously eliminates this risk. And - in general - this has been my experience.
But in this case - who cares about getting the SHO stars “right?”
I want to eliminate them anyway.
So I processed each separately and then went starless separately. Now, when they are combined to form the SHO Starless image - I no longer have to care about residual str rings as there are no stars at all to deal with! With this approach, I could get with the color look I wanted without artifacts messing things up!
Following this workflow gave me the results I wanted!
Look below for the complete step-by-step processing walkthrough! Note: This walkthrough is based on Pixinsight.
Final Results
I have to say I was pretty happy with the final results. It has a nice color, and the dust lanes are fairly detailed and sharp.
The final color position is a bit high, but I am a high-color guy - so I do what I like on this front!
In hindsight, though, I wish I had taken more subs for the RGB stars - my color is a little weak there, and more signal would have helped!
Capture Details
Lights Frames
Taken the nights of September 28th and October 4, 2024
57 x 300 seconds, bin 1x1 @ -15C, Gain 139.0, Astrodon 5nm Ha Filter - 1.25 inch
52 x 300 seconds, bin 1x1 @ -15C, Gain 139.0, Astrodon 5nm O3 Filter - 1.25 inch
46 x 300 seconds, bin 1x1 @ -15C, Gain 139.0, Astronomiks 6nm S2 Filter - 1.25 inch
12 x 90 seconds, bin 1x1 @ -15C, Gain 139.0, ZWO Red Filter - 1.25 inch
12 x 90 seconds, bin 1x1 @ -15C, Gain 139.0, ZWO Green Filter - 1.25 inch
12 x 90 seconds, bin 1x1 @ -15C, Gain 139.0, ZWO Blue Filter - 1.25 inch
Total - after culling bad subs - of 13 hours and 49 minutes.
Cal Frames
25 Darks at 300 seconds, bin 1x1, -15C, gain 139
5 Darks at 90 seconds, bin 1x1, -15C, gain 139
30 Dark Flats at Flat exposure times, bin 1x1, -15C, gain 139
One set of Flats done:
15 Ha Flats
15 O3 Flats
15 S2 Flats
15 R Flats
15 G Flats
15 B Flats
Capture Hardware
Scope: Askar FRA400 72mm f/5. 6 Quintuplet Air-Spaced
Astrograph
Focus Motor: ZWO EAF 5V
Guide Scope: William Optics 50mm guide scope
Guide Scope Rings: William Optics 50mm slide-base Clamping Ring Set
Mount: ZWO AM5
Tripod: ZWO TC40 Carbon Fiber tripod w/160mm Extention
Camera: ZWO ASI1600MM-Pro
Camera Rotator: Pegasus Astro Falcon Camera Rotator
Filter Wheel: ZWO EFW 1.2 5x8
Filters: ZWO 1.25” LRGB Gen II, Astrodon 5nm Ha &OIII,
Astronomiks 6nm S2
Guide Camera: ZWO ASI290MM-Mini
Dew Strips: Dew-Not Heater strips for Main and Guide Scopes
Power Dist: Pegasus Astro Powerbox Advanced
USB Dist: Pegasus Astro Powerbox Advanced
Polar Alignment
Cam: PoleMaster
Software
Capture Software: PHD2 Guider, NINA
Image Processing: Pixinsight, Photoshop - assisted by Coffee, extensive processing indecision and second-guessing, editor regret and much swearing…..
Click below to visit the Telescope Platform Version used for this image.
Image Processing Walkthrough
(All Processing is done in Pixinsight - with some final touches done in Photoshop)
1. Blink Analysis
Ha Subs:
3 removed for star trails (these were close to Meridian Flip)
O3 Subs:
2 frames removed -electronic garbage - this sometimes happens with this specific camera
2 frames had thin clouds - not removed
A few satellite trails were noted
S2 Subs:
A few satellites noted
Some thin clouds
None removed
Red Subs:
A few Satilite trails noted
None removed
Green Subs:
A few Satilite trails noted
None removed
Blue Subs:
A few Satilite trails noted
None removed
All Flats and Darks:
All looked good!
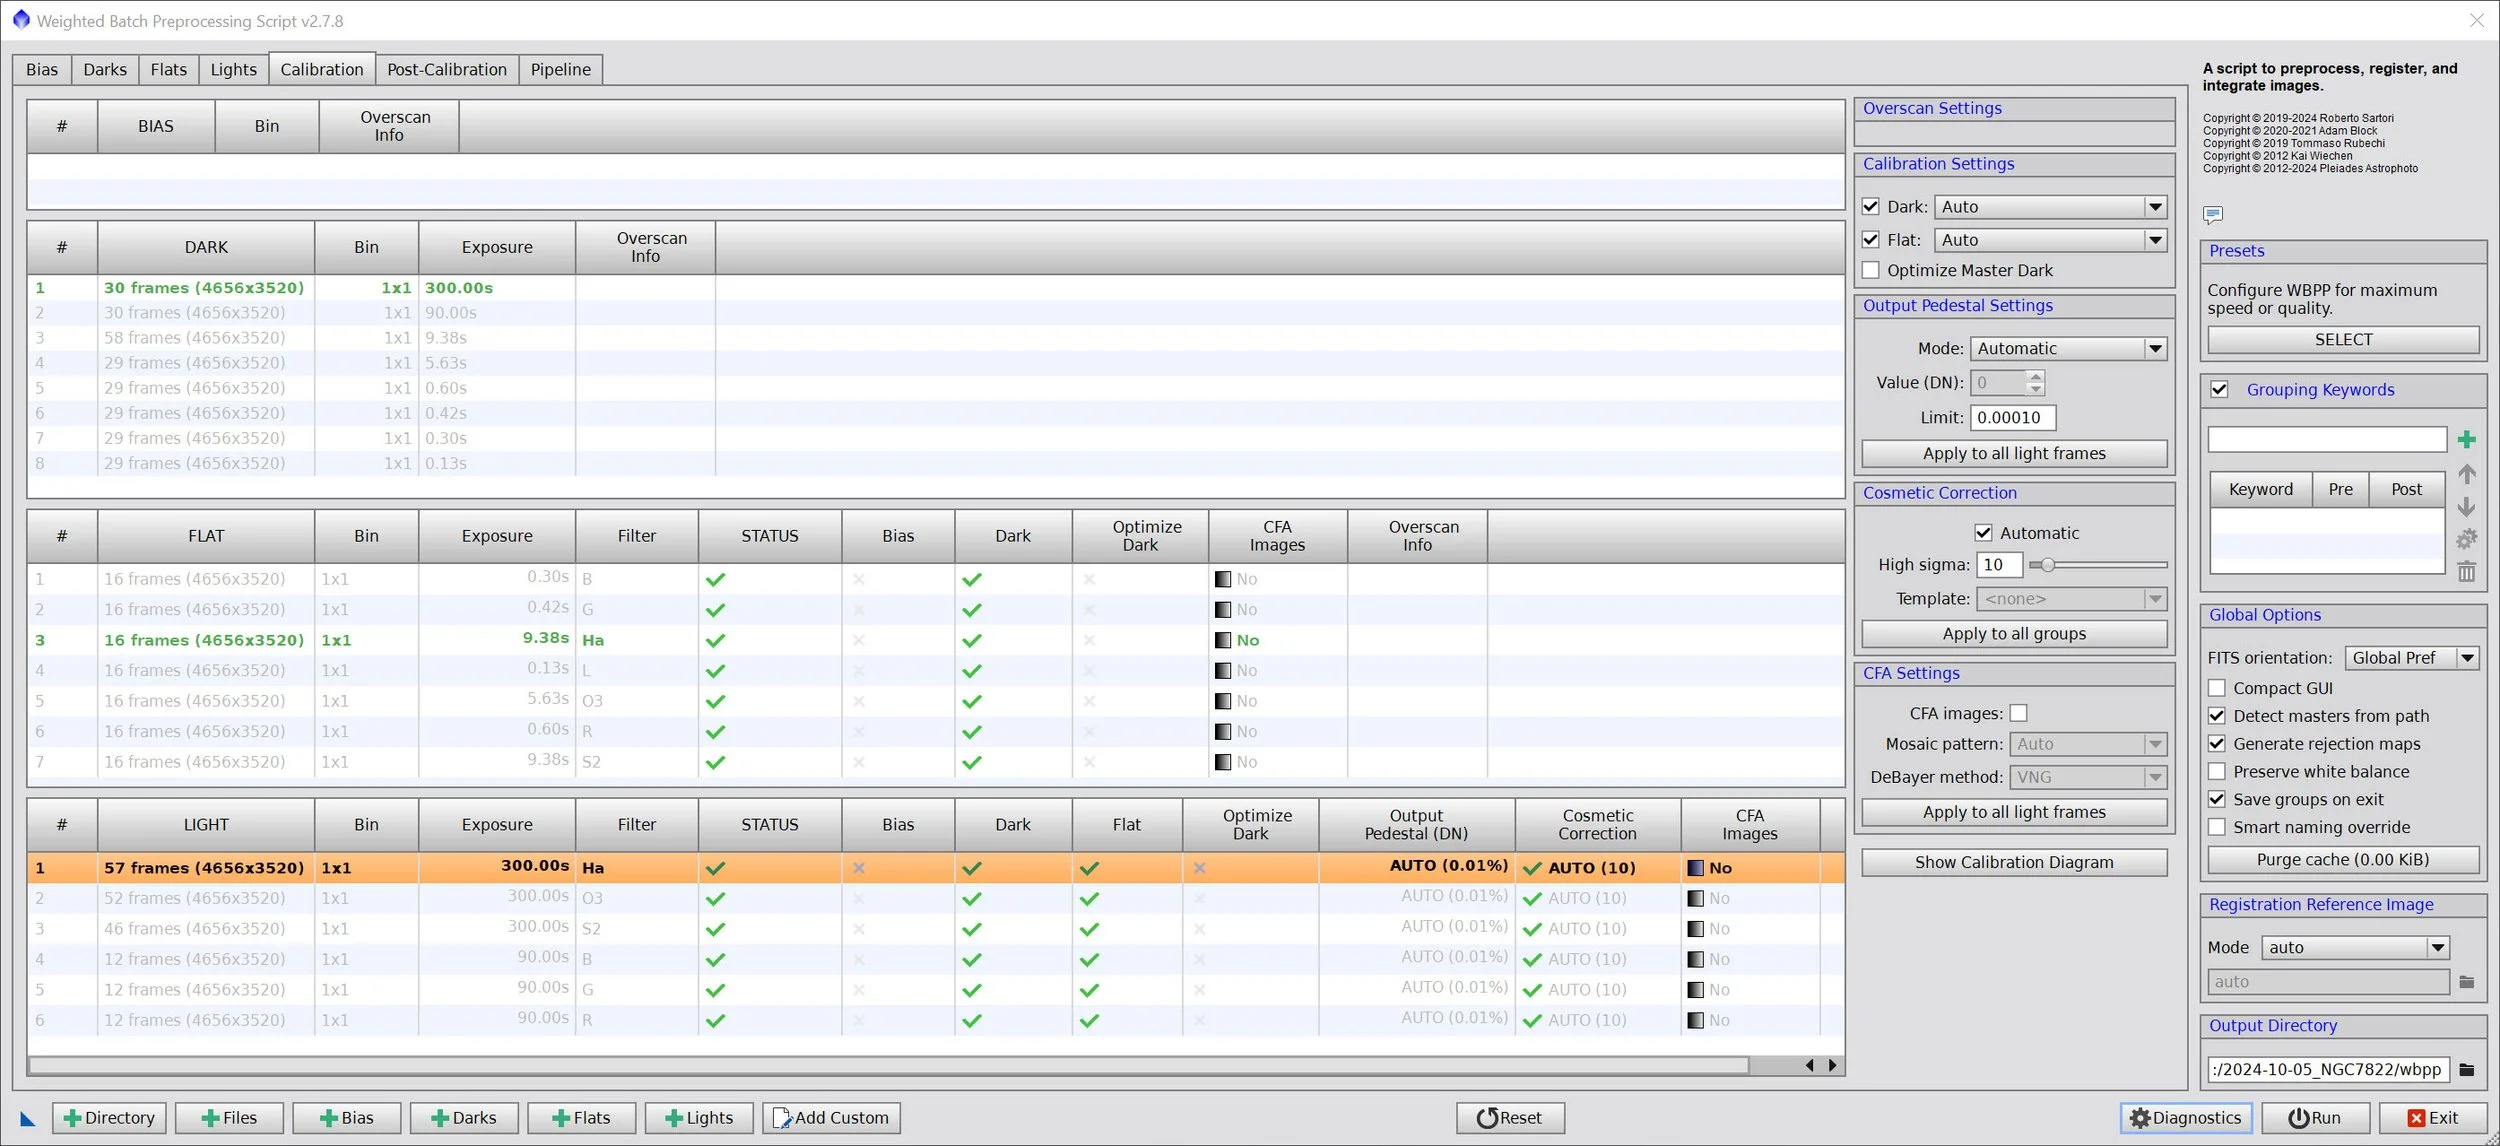
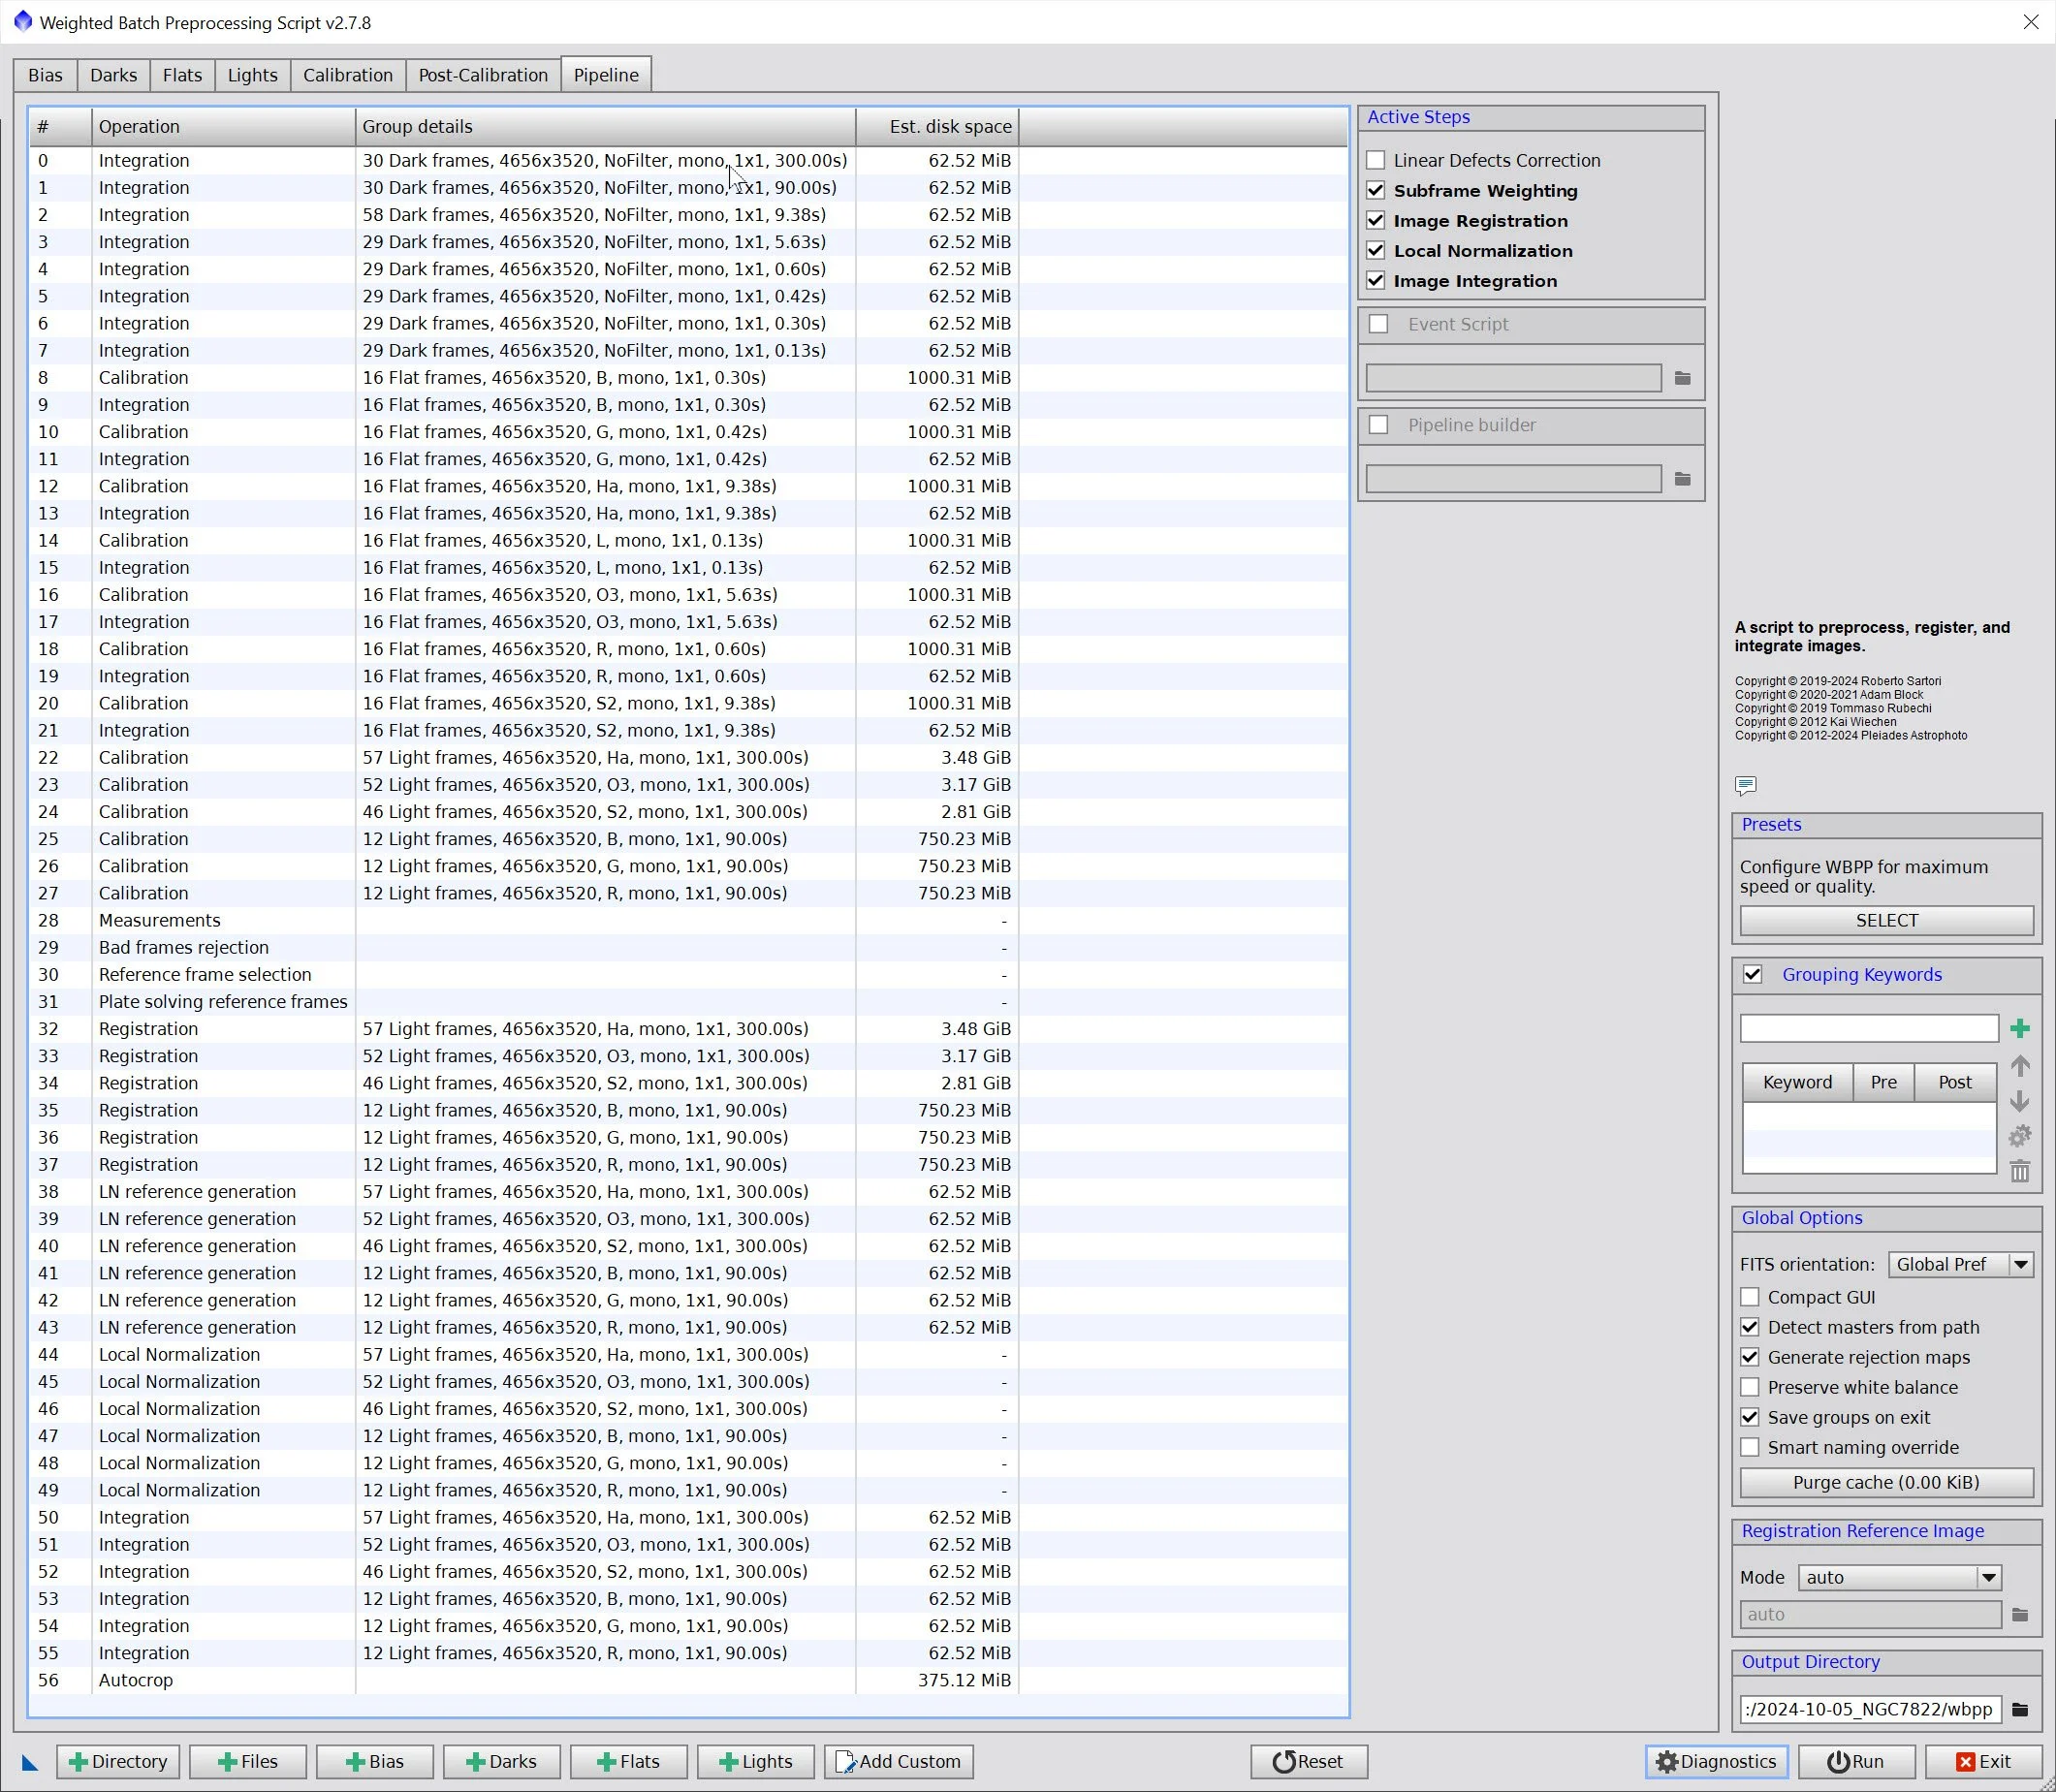
2. WBPP 2.7.3
Reset everything
Load all lights
Load all flats
Load all darks (note: darks for 300 seconds and 90 seconds are from 9-16-24)
Select - maximum quality
Reference Image - auto - the default
Select the output directory to wbpp folder
Enable CC for all light frames
Pedestal value - auto for all NB filters
Darks -set exposure tolerance to 0
Lights - set exposure tolerance to 0
Lights - all set except for linear defect
Integration - large-scale rejection layer 2x2
set for Autocrop
No Drizzle
Executed in 43 minutes - no error!
WBPP Calibration View
WBPP Post Calibration View
WBPP Pipeline View
3. Load Master Images
Load all master images and rename them.
Master Ha, O3, and S2 images
Master Red, Green, and Blue Images
4. Process Linear RGB data
I decided to create the color RGB image and work on that first
Channel Combination was used to create the initial RGB color image
The gradients were mild, but with so little nebulosity, there was no trouble running IDBE:
Setup sample pattern as shown
Fix with subtraction
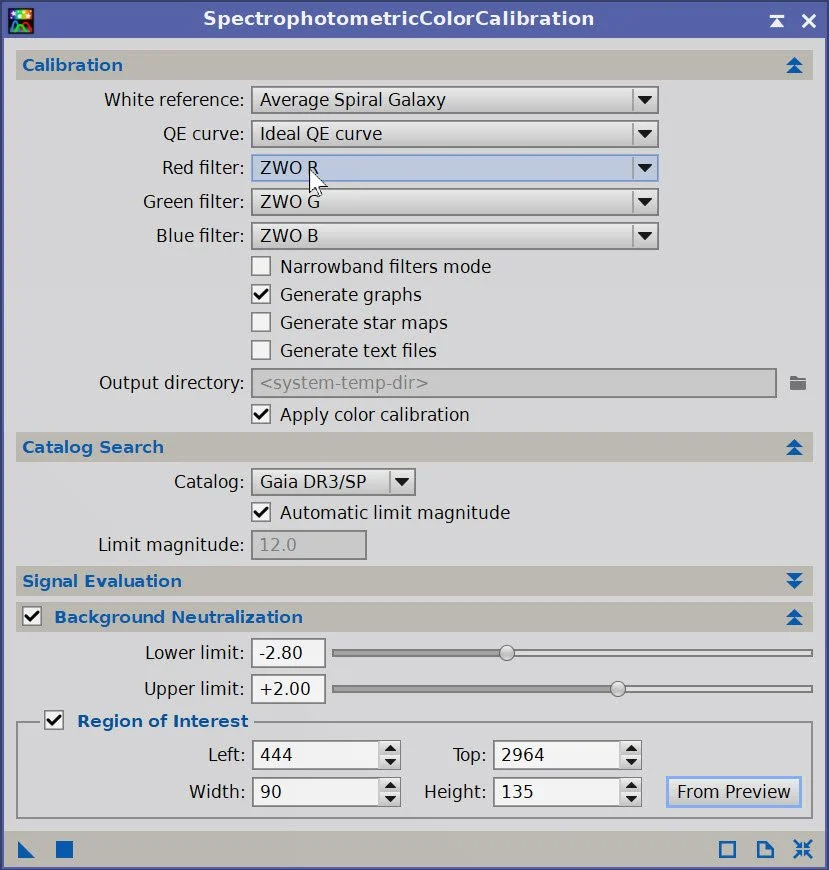
Run SPCC and calibrate color. See the panel setup below.
Run BXT correct only
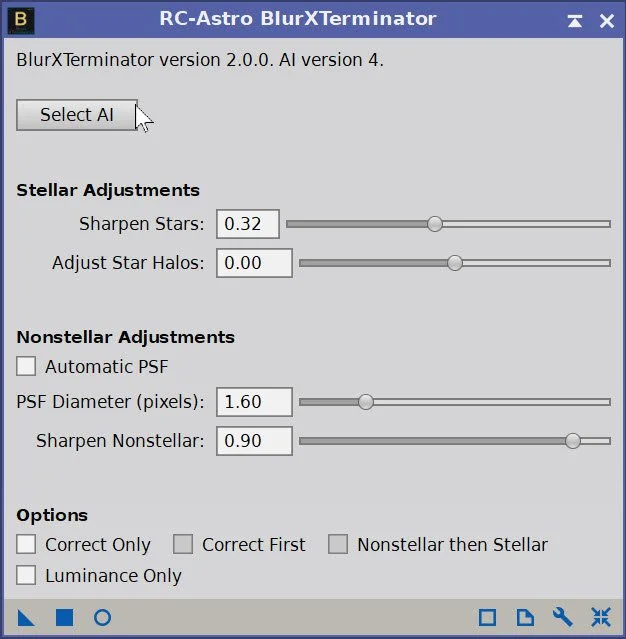
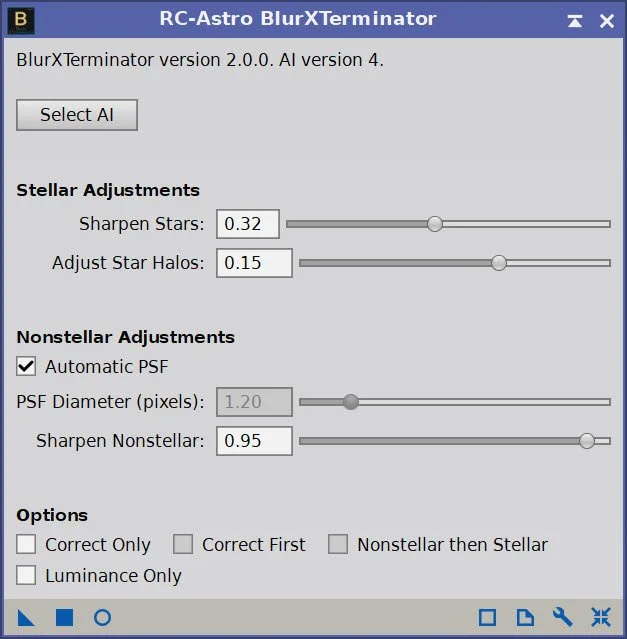
Run BXT Full correction - see settings used on the panel shot below.
Apply NXT to remove noise. Be aggressive here, as I want smooth star edges. Level = 0.7.
Use STX with Saving Stars and Unscreen Stars selected to create RGB Stars and RGB Starless images. What we want here is the stars, and we will not be using the RGB Starless Image.
The initial RGB Linear Image.
Master RGB Sample Pattern (click to enlarge)
Master RGB Before DBE (click to enlarge)
Master RGB after DBE (click to enlarge)
MasterSHO Background
SPCC panel setting used.
The final regression result.
The RGB image before SPCC. (click to enlarge)
RGB image after SPCC. Note prview region used for a background estimate. (Click to enlarge)
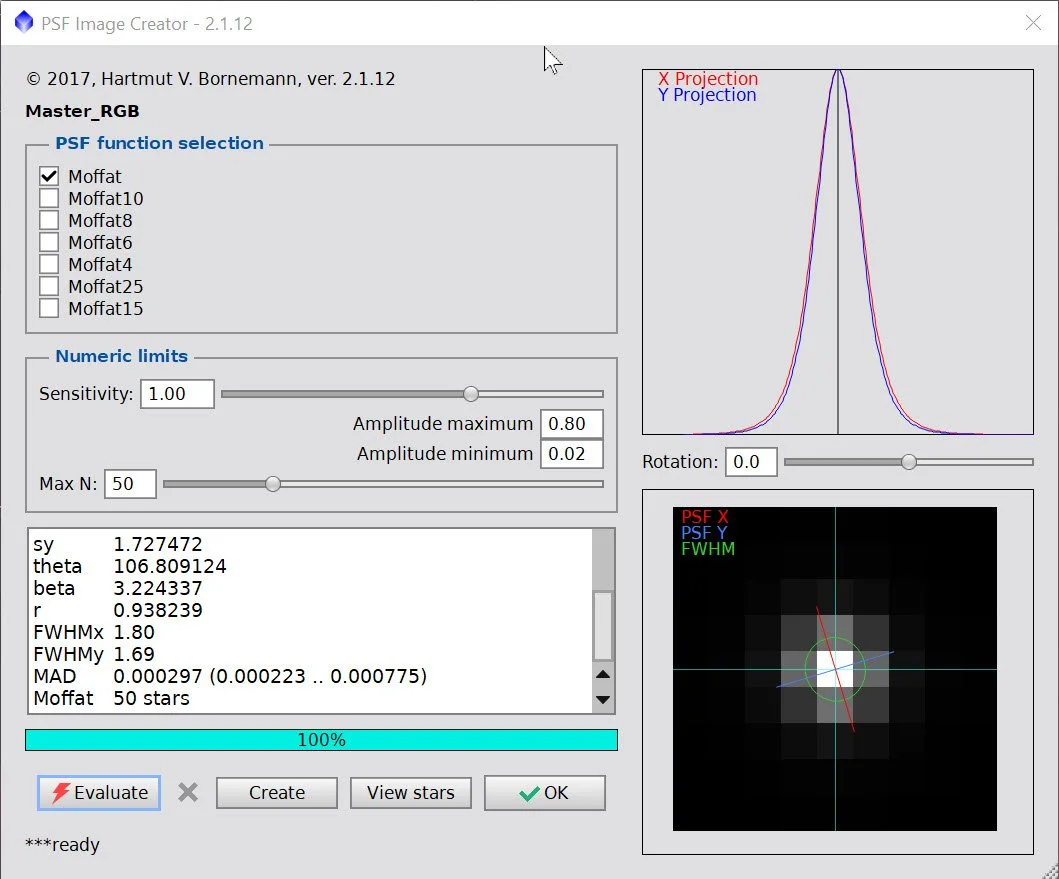
The Output from PSFImage for the Master RGB image.
How the BXT tool was configured for the Master SHO image
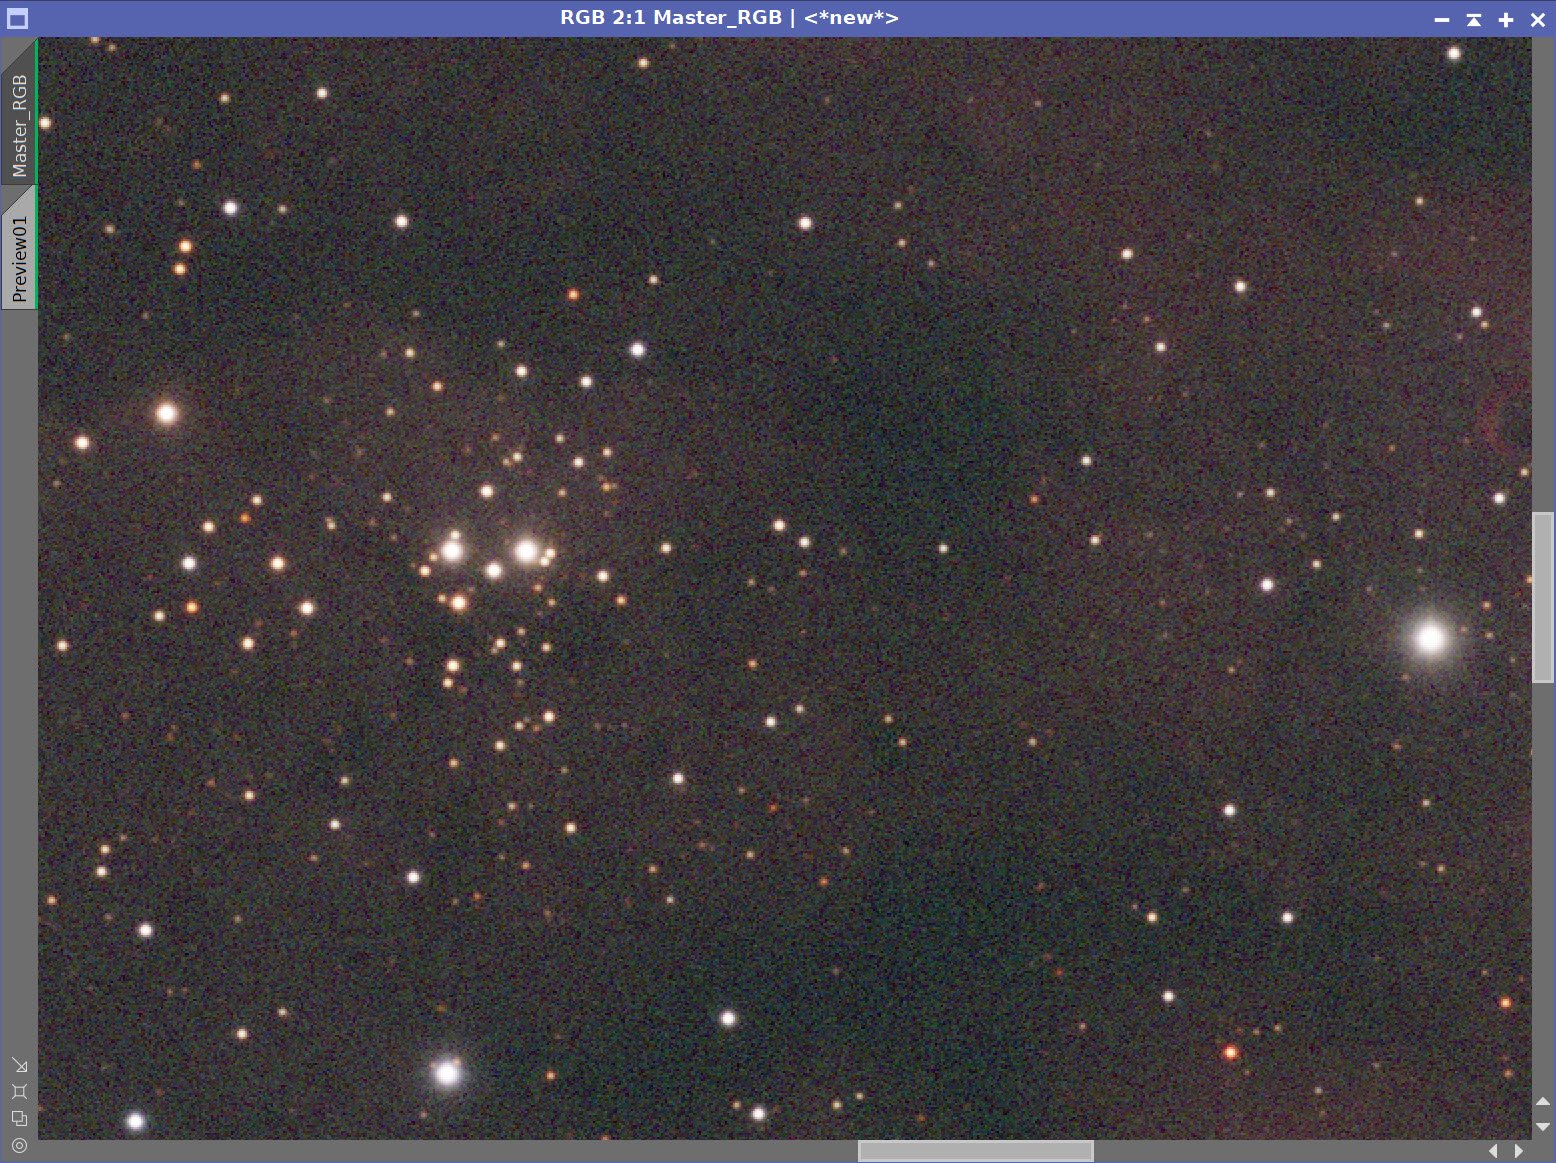
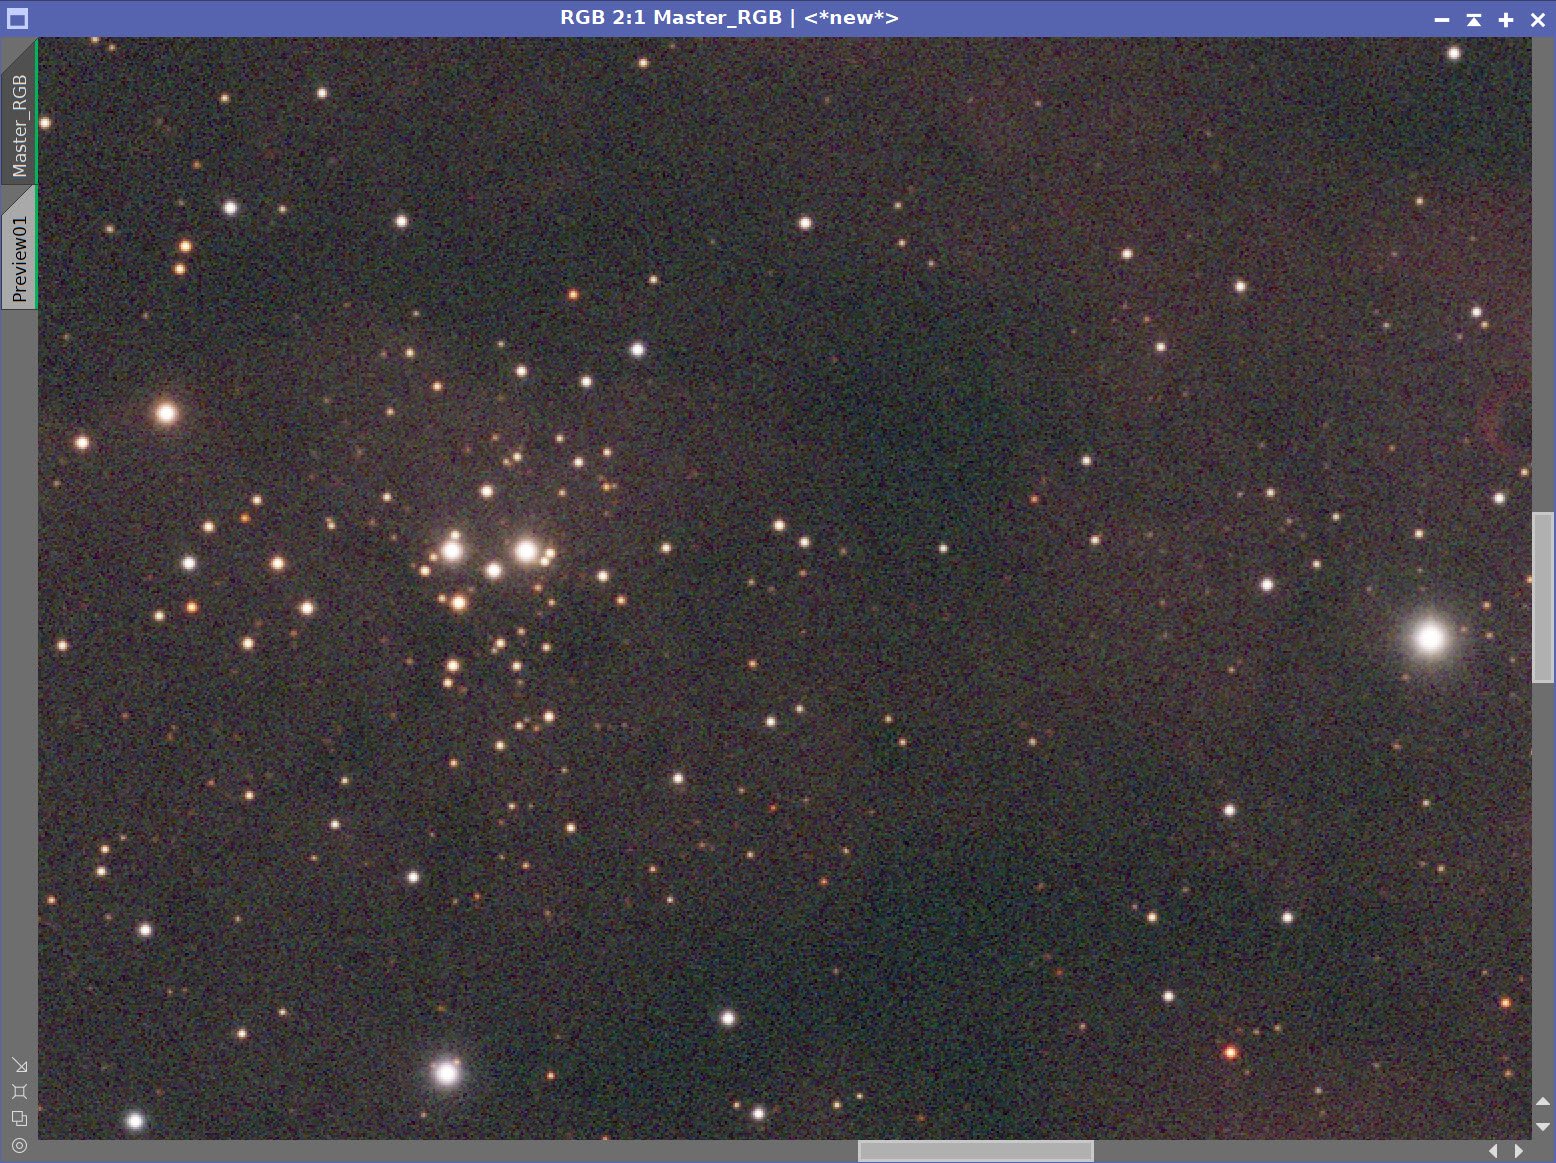
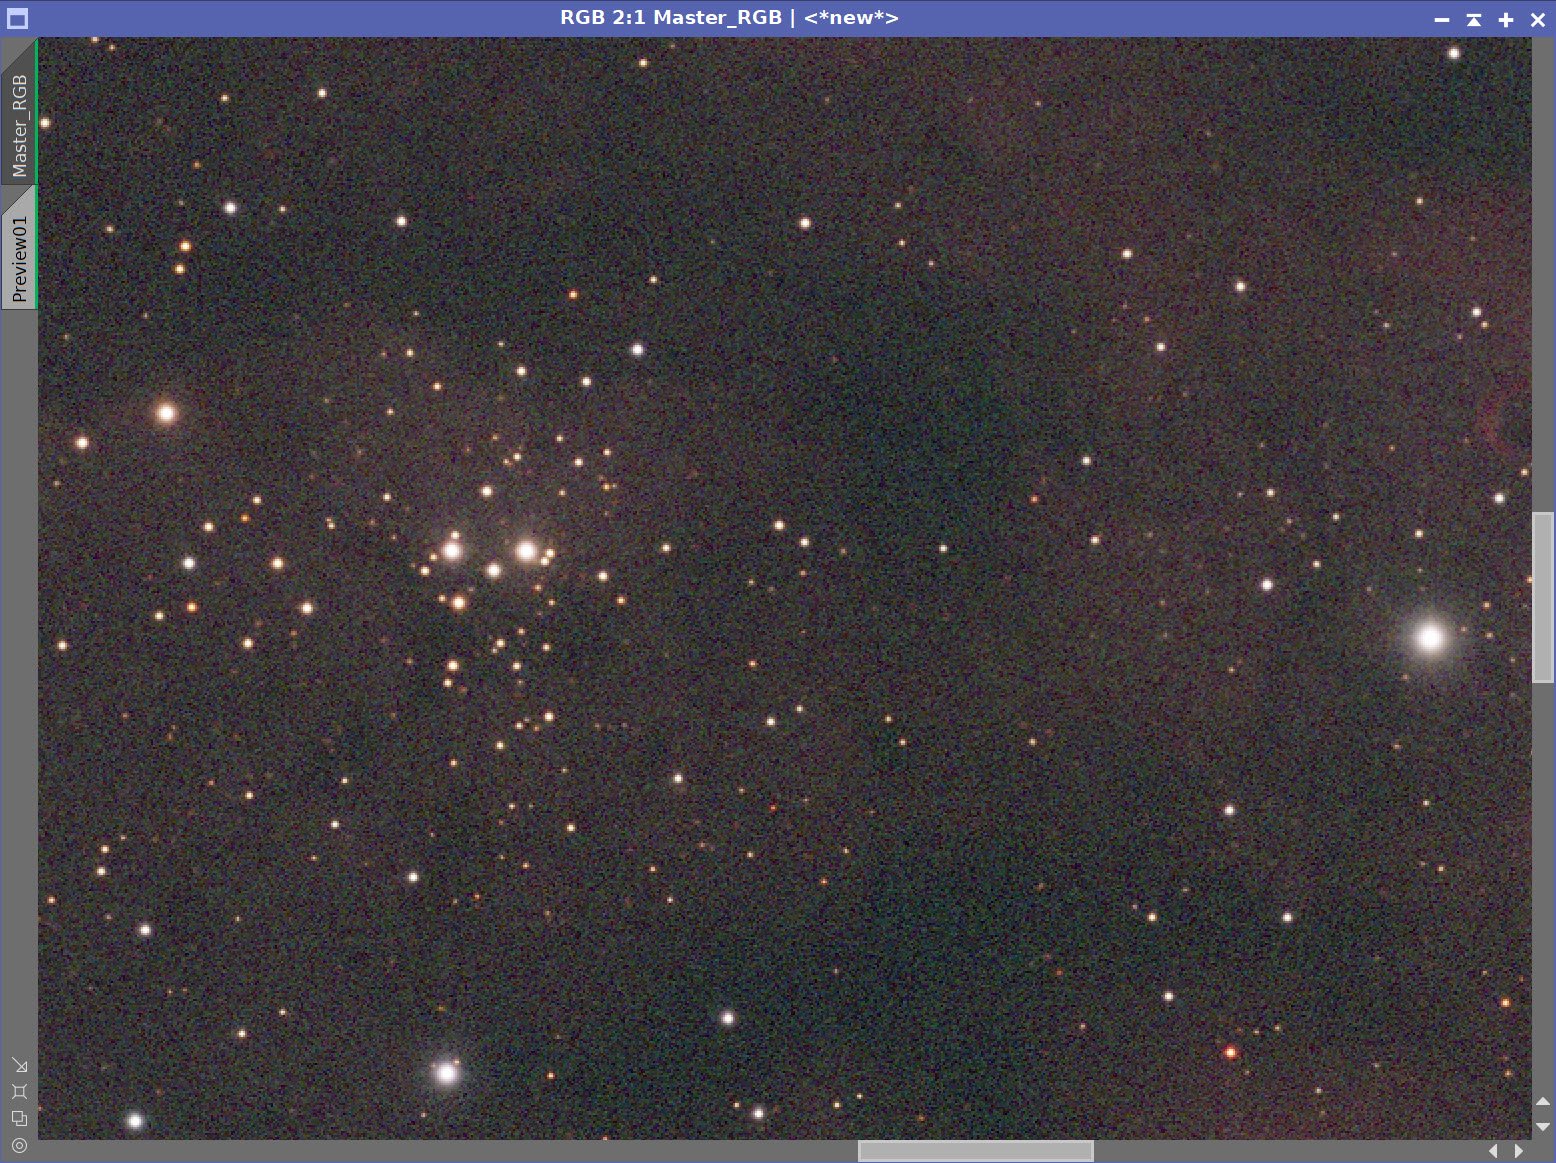
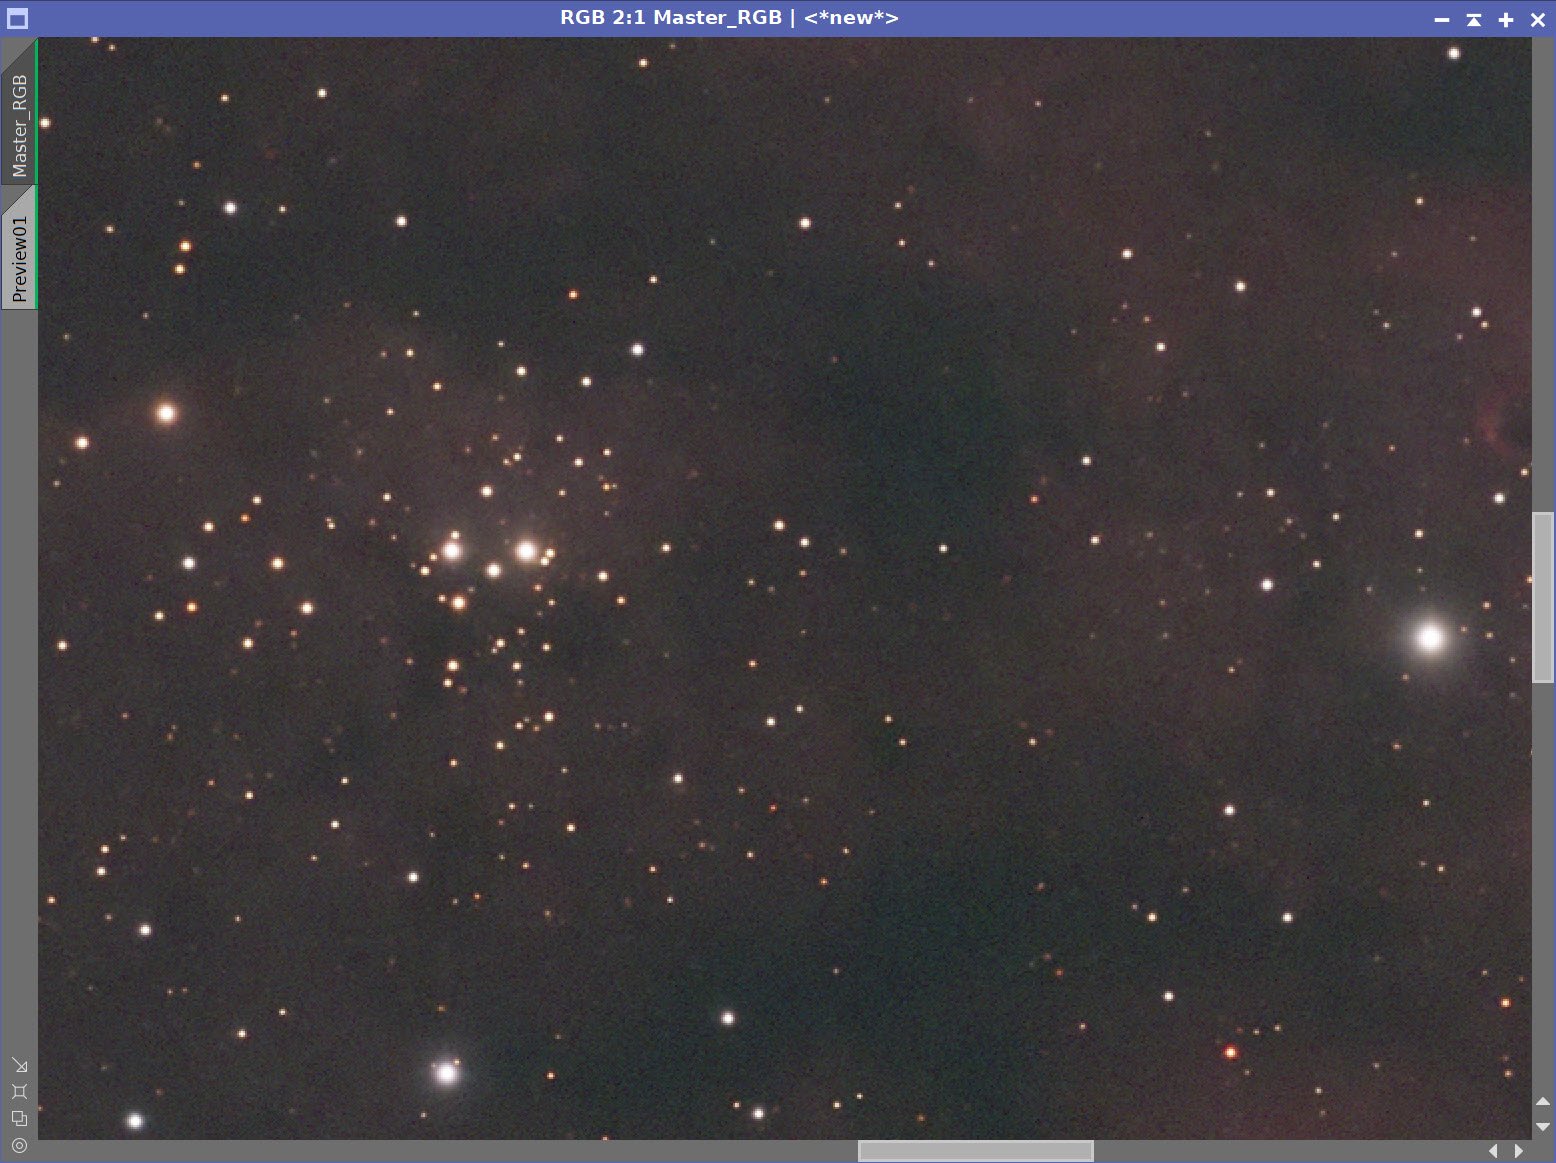
The Master RGB Image before BXT, After BXT Correction only, After BXT Full Correction, and After NXT=0.7
RGB Stars Image resulting from STX. (click to enlarge)
Master RGB Starless Image after STX (click to enlarge)
6. Process the Linear SHO Images
For each of the linear Mono Narrowband images, do the following:
BXT Correct Only
Full BXT correction (see panel shot for values used)
Apply NXT (very light) of 0.3
Take each image starless with STX
Using ChannelCombination, create the first SHO Starless Color Image
Run SCNR Green at 0.95 to remove the excessive green signal.
Invert the image - this converts strong magenta areas to green
Run SCNR Green at 0.95 again to remove.
Invert the image again.
The image now looks like there is no color - but it is indeed there and we just need to bring it out!
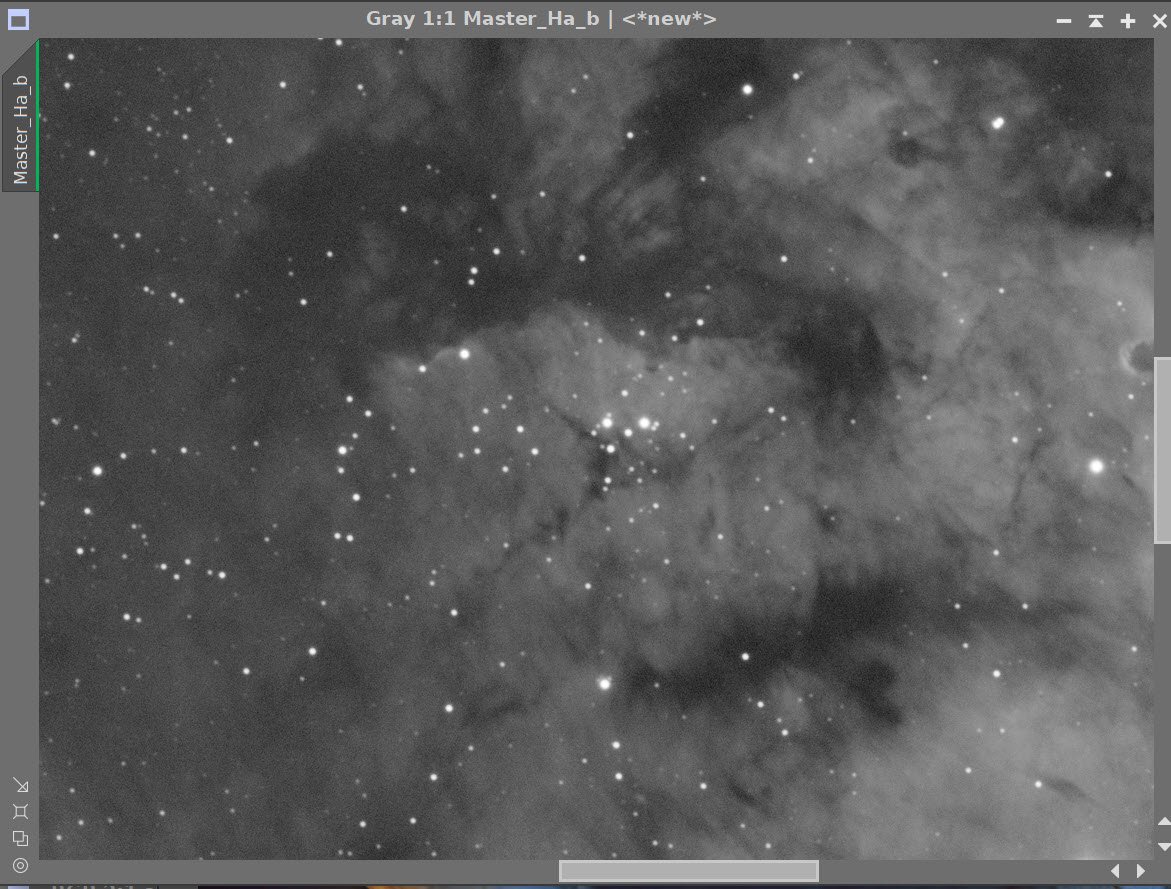
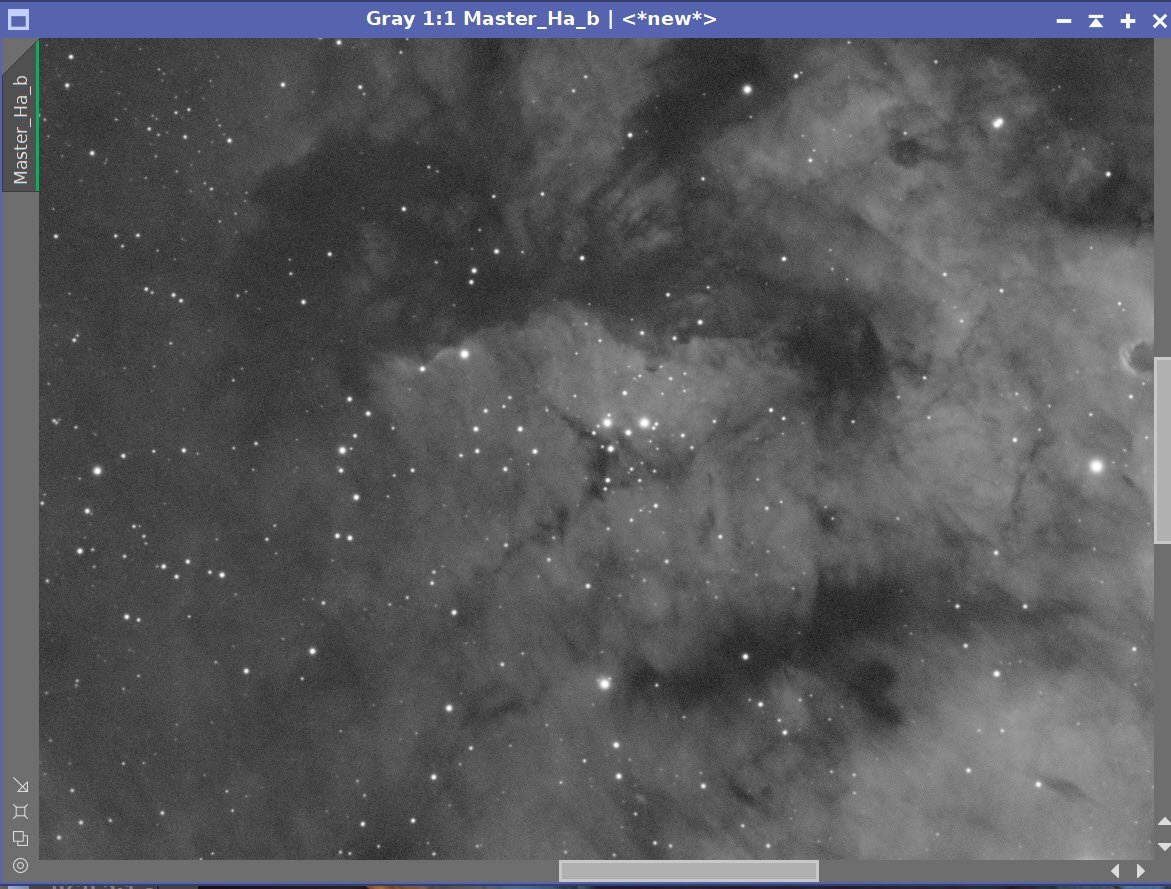
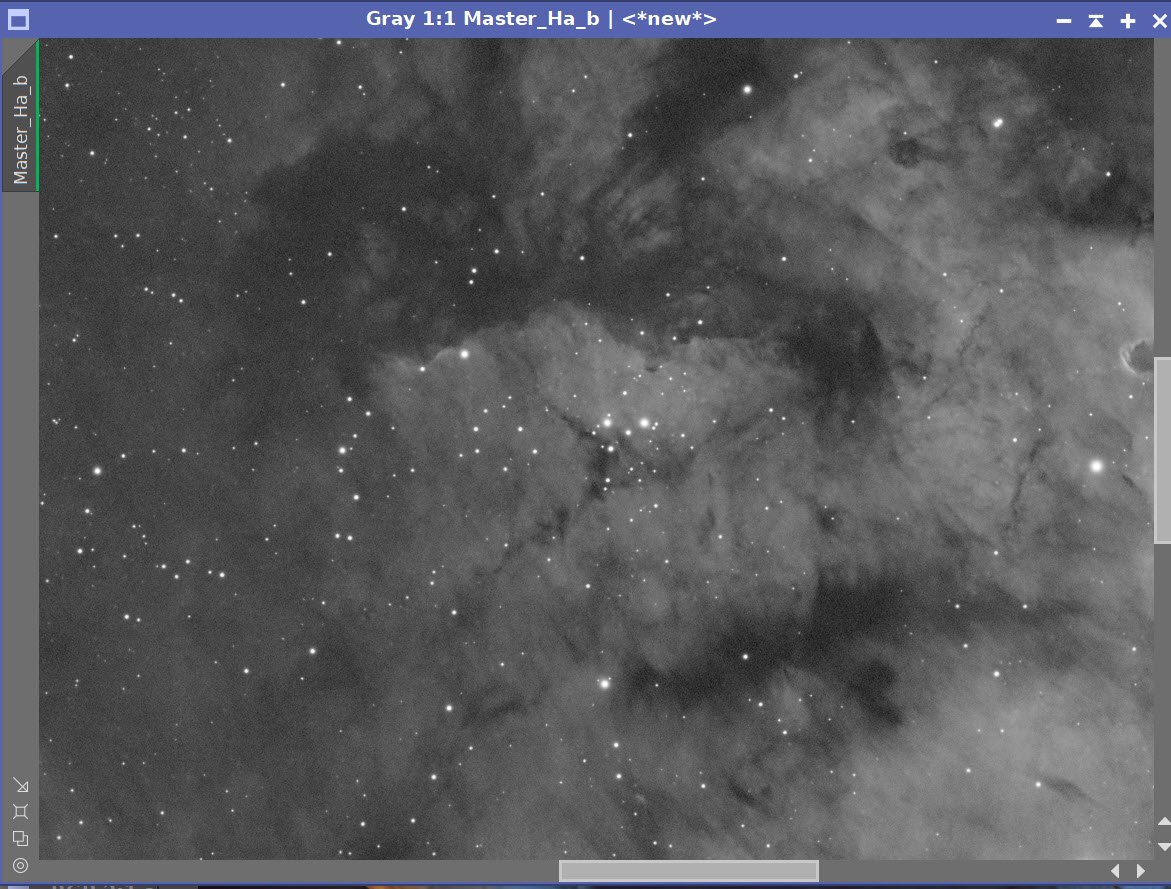
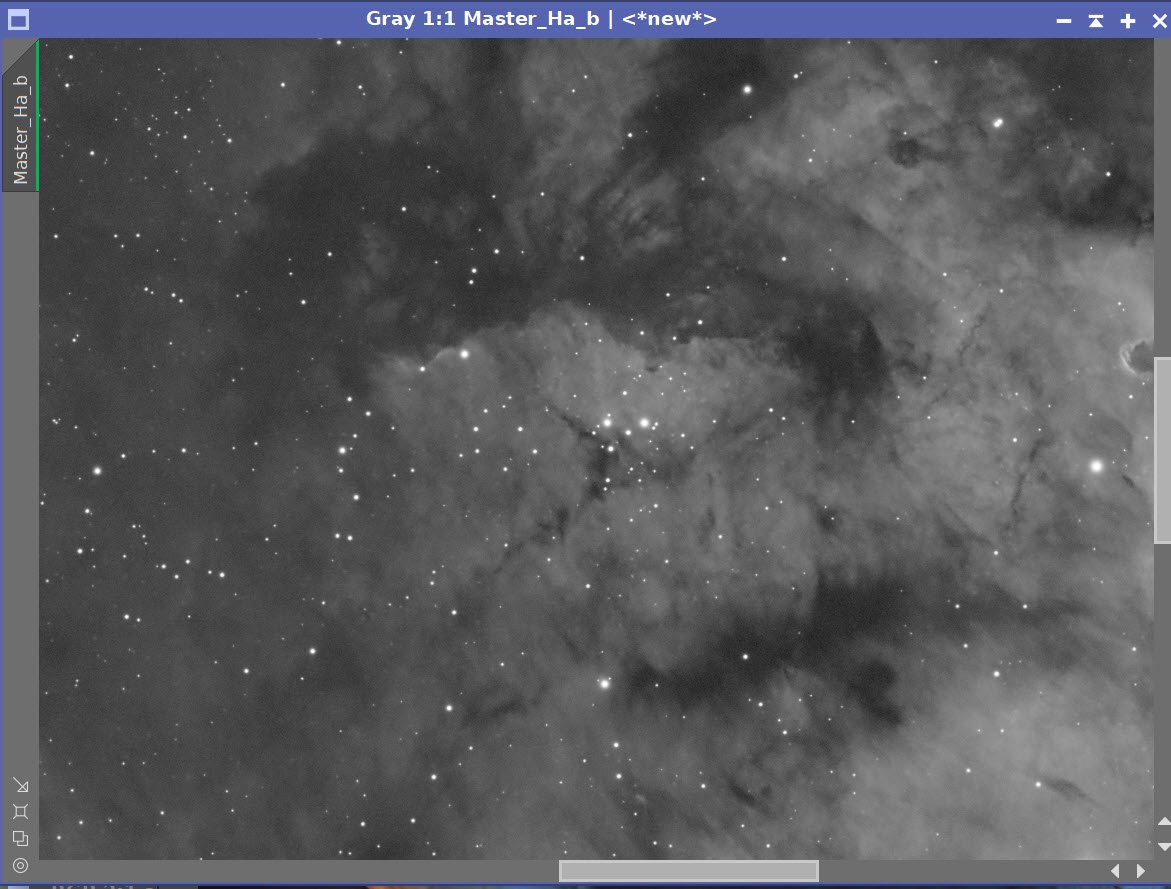
Ha Before BXT, After BXT Correct Only, and NXT=0.35
O3 Before BXT, After BXT Correct Only, and NXT=0.44
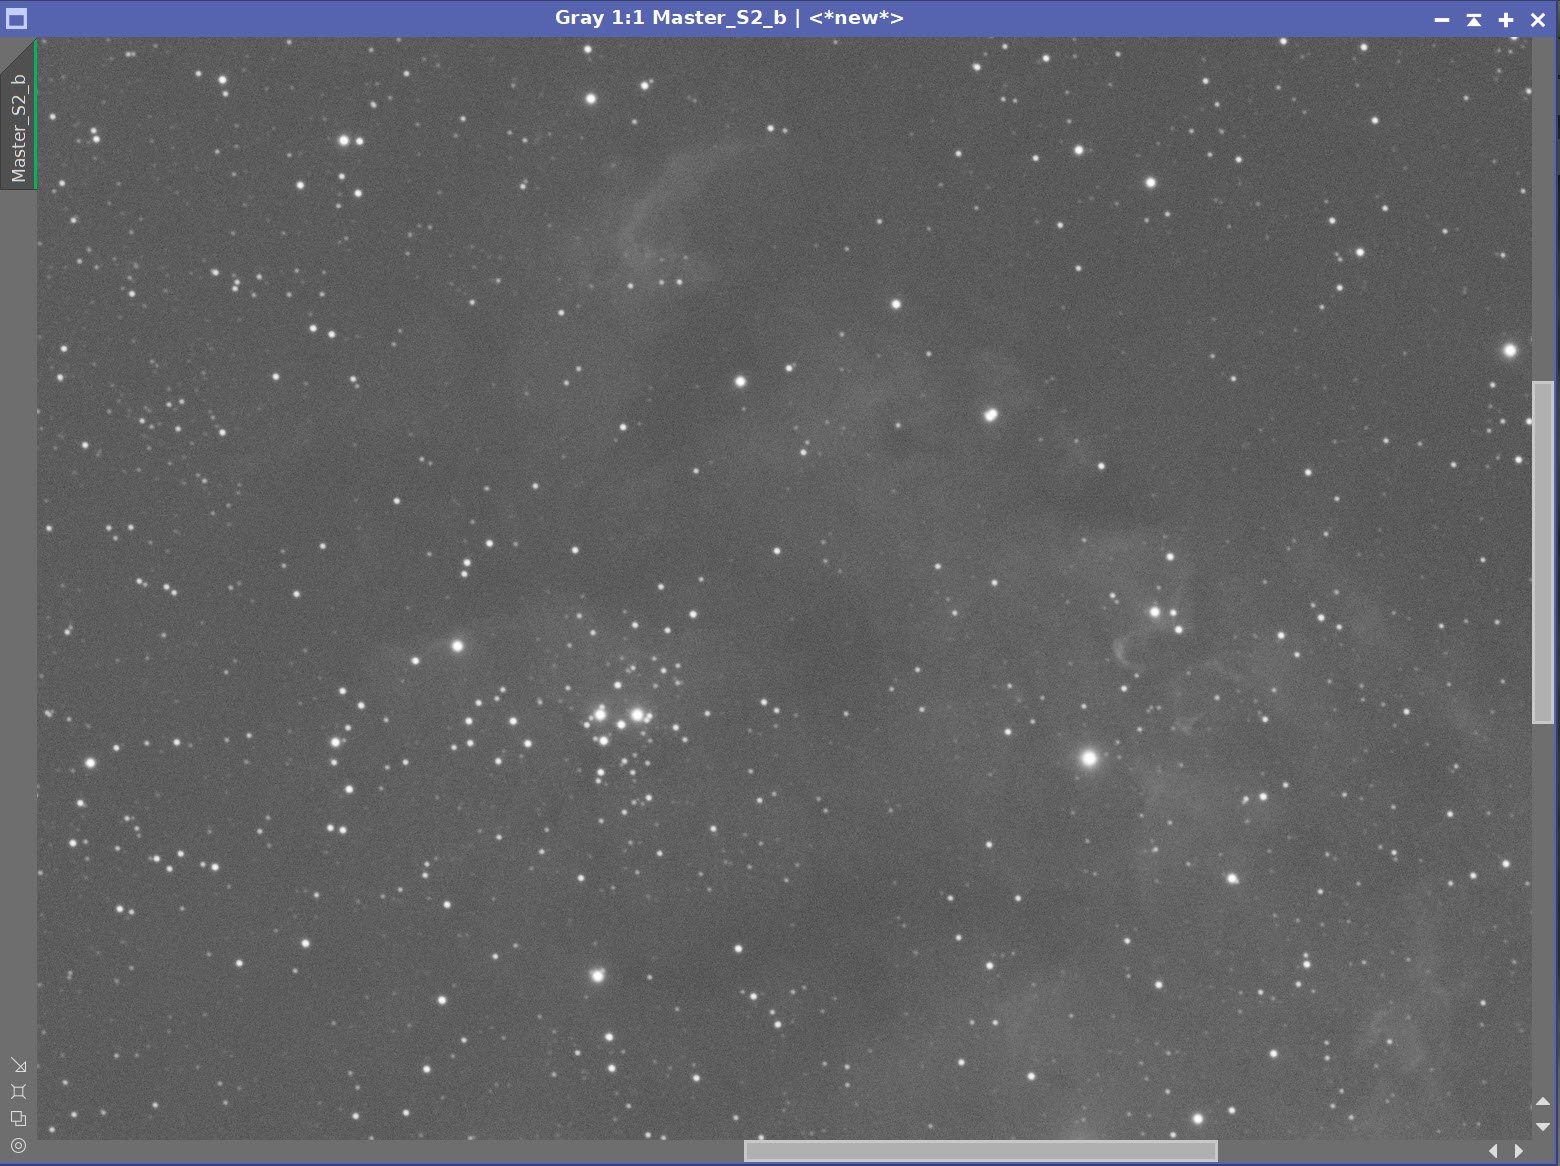
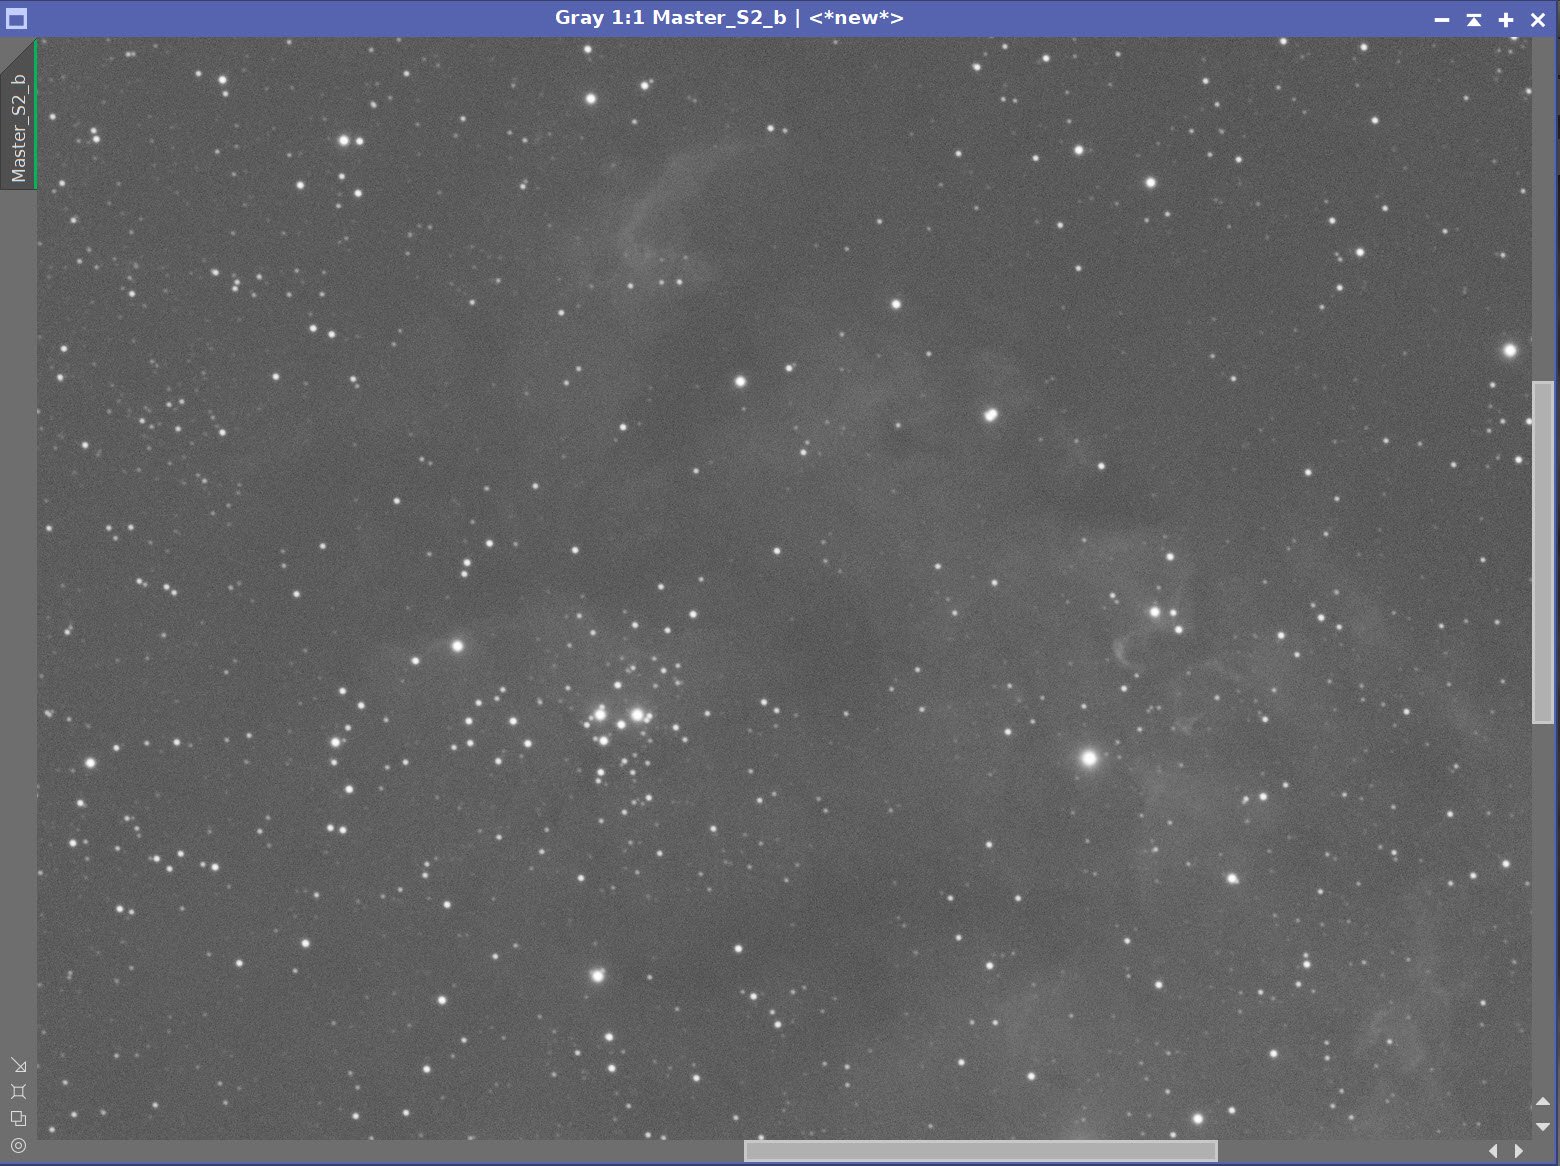
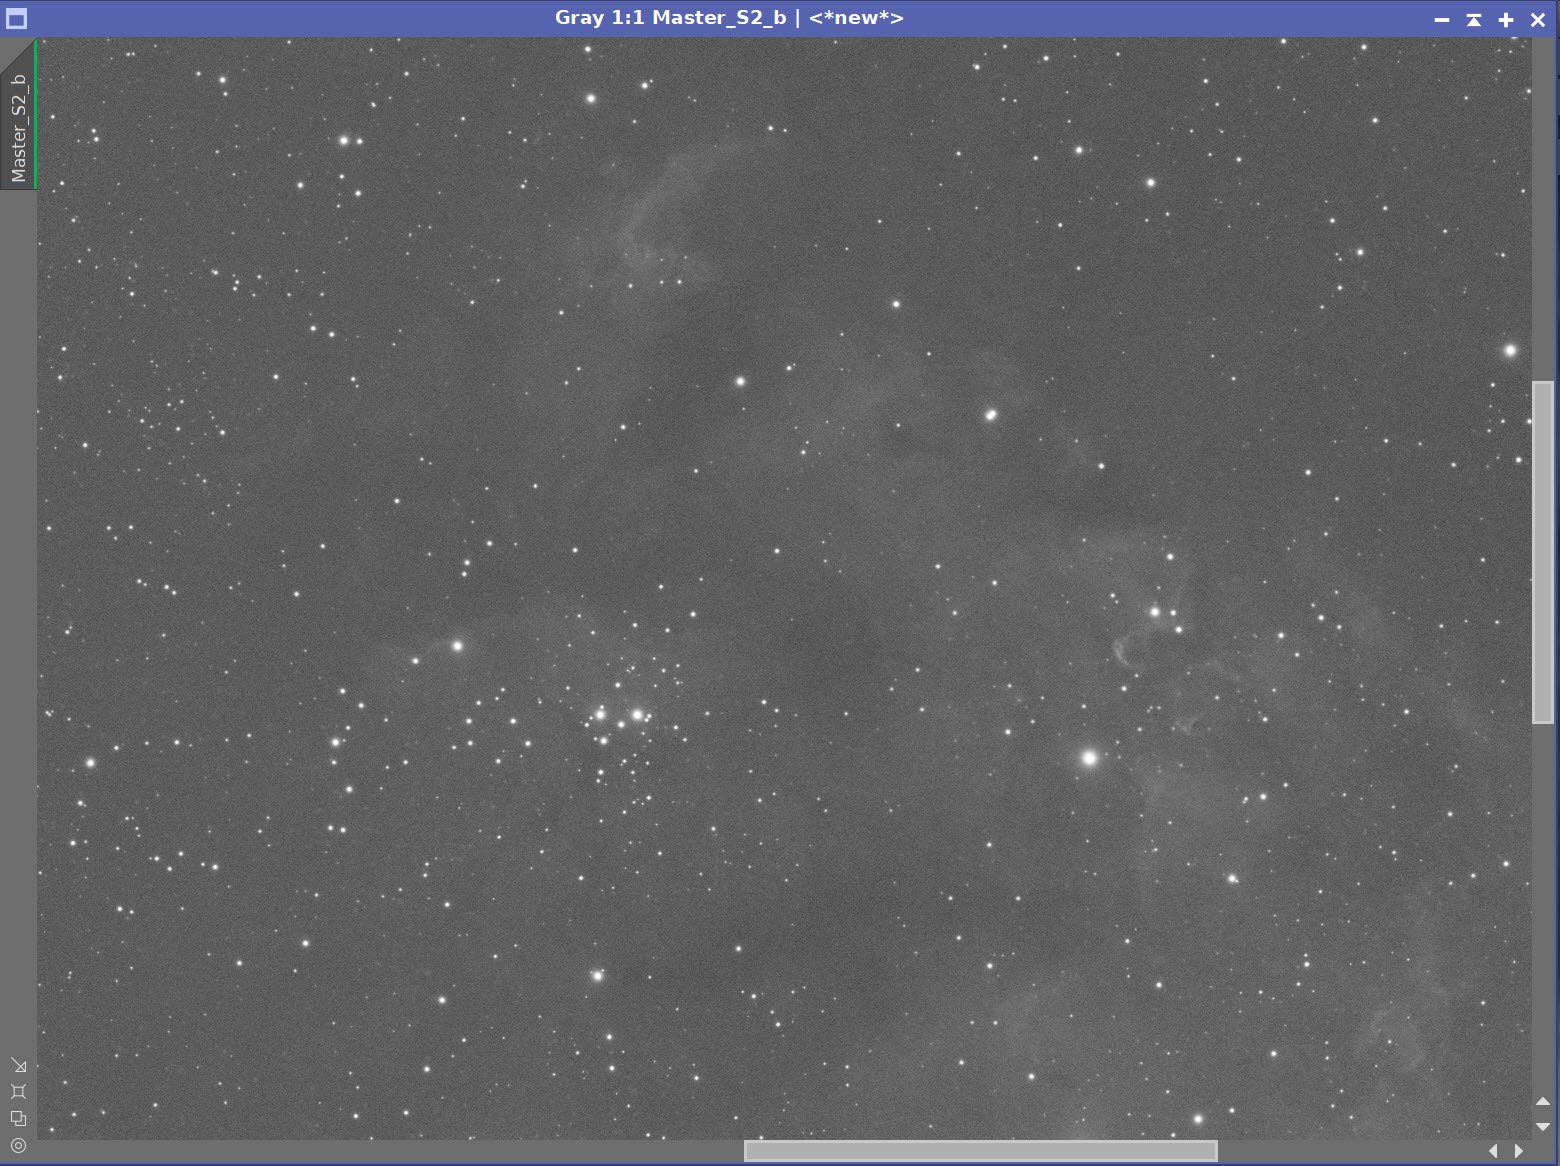
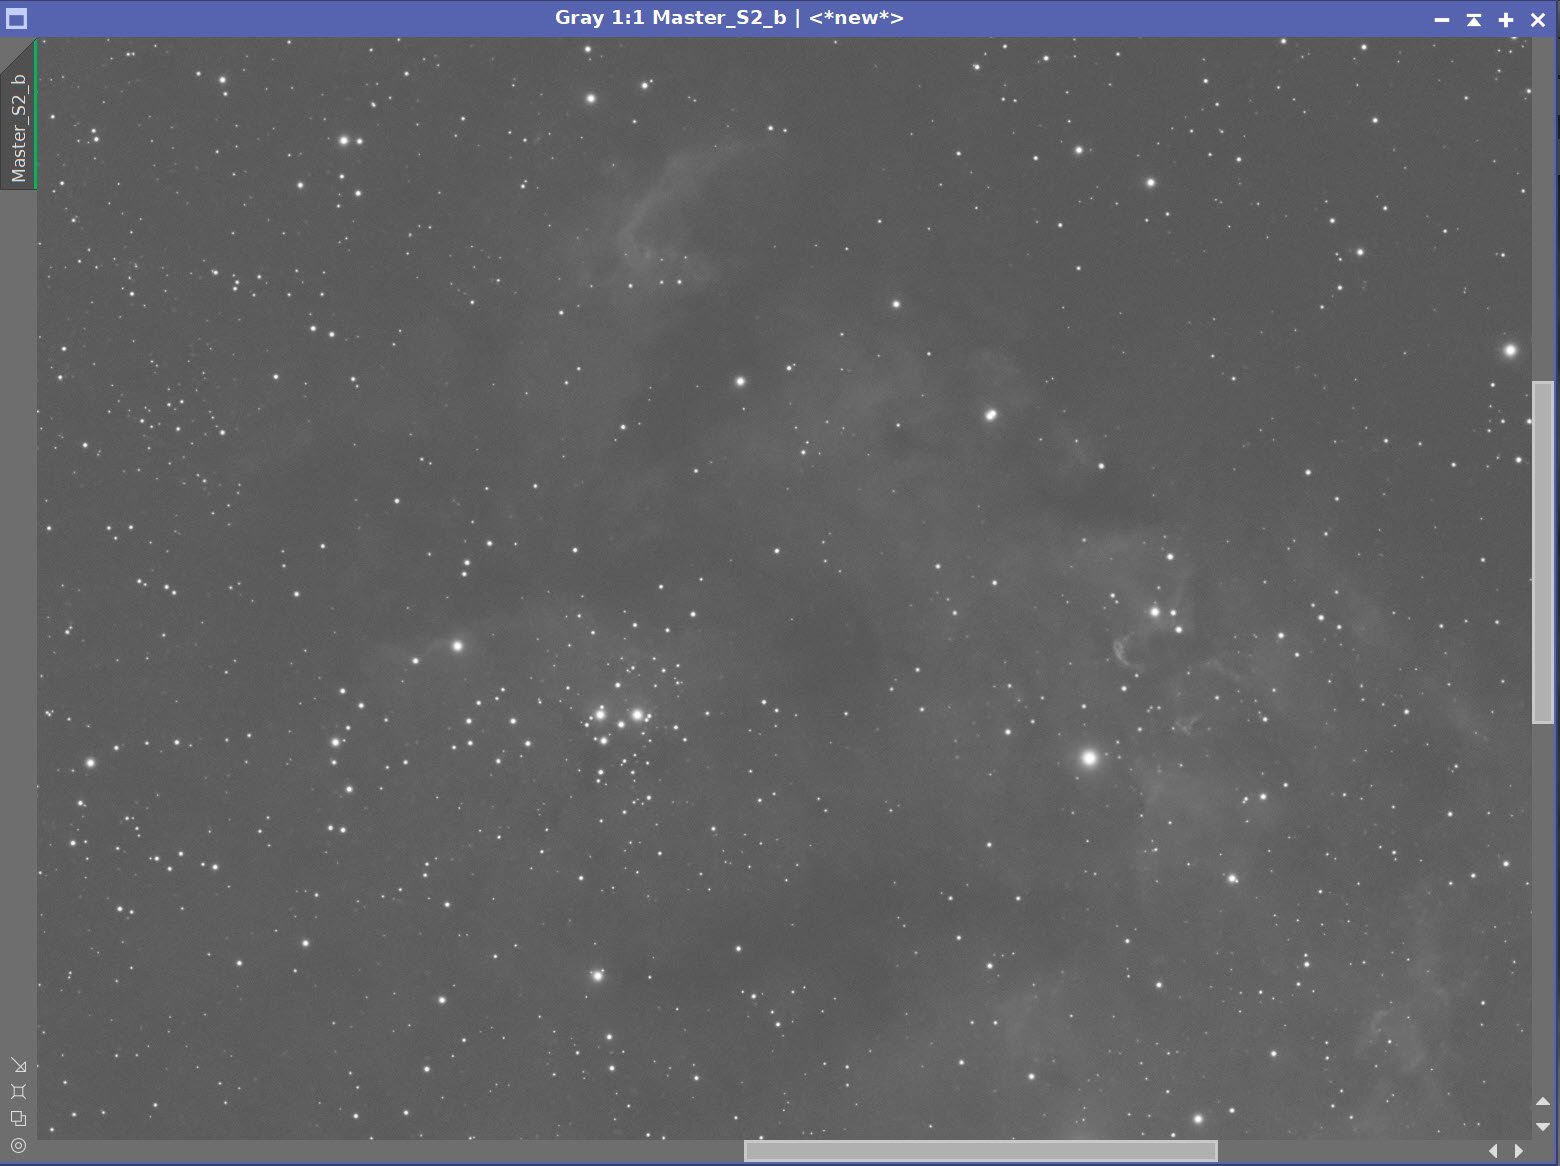
O3 Before BXT, After BXT Correct Only, and NXT=0.55
The linear Narrowband images are now starless after STX: Ha, O3, S2
The initial SHO Starless image. (Click to enlarge)
Invert the image so the magenta areas are now green. (click to enlarge)
After SCNR Green 0.95 applied (click to enlarge)
Run SCNR Green 0.95 again - this removes excessive magenta (click to enlarge)
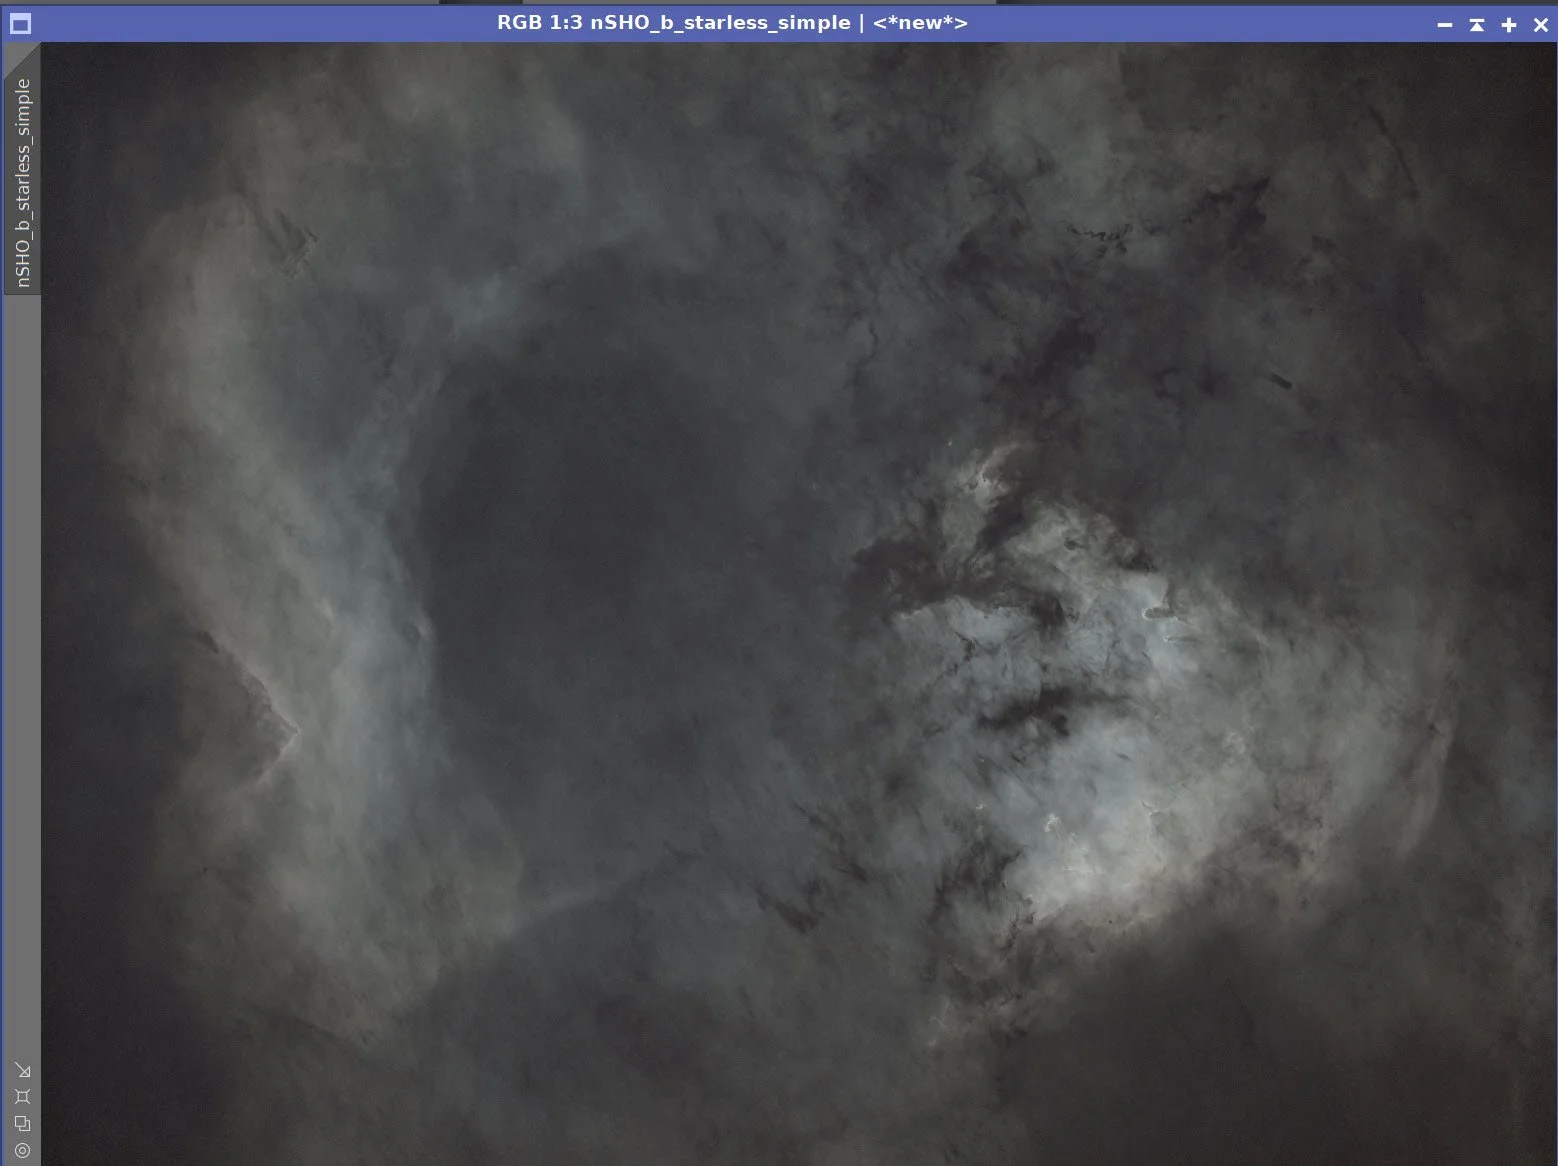
The final SHO image ready to go nonlinear.
7. Move Images to the Nonlinear State
For RGB Stars, use HT to adjust with STF disabled until I like the resulting star field.
For SHO, use the current STF->HT method to go nonlinear.
With starless imaging, I can be much more relaxed about my nonlinear conversion as I can more easily protect my stars from being blown out!
Initial Nonlinear RGB Stars Image (click to enlarge)
Initial Nonlinear SHO Starless image (click to enlarge)
8. Process the Nonlinear RGB Stars Image
Use the CT tool to adjust Saturation
Use SNCR to remove some residual green tones
Initial RGB Image (click to enlarge)
After Curves tool increase in color saturation (click to enlarge)
After SCNR to take out some residual green. (click to enlarge)
The curve used for this.
9. DO the Initial Processing of the Nonlinear SHO image
Apply the CT with a sat boost to bring out the colors.
Repeat to boost the color some more - The color is just starting to come out
Apply CT to adjust the tone scale
Do an NXT run at .6 to lower the noise as we bring the image up
SCNR Green at 1.0 to take out more green
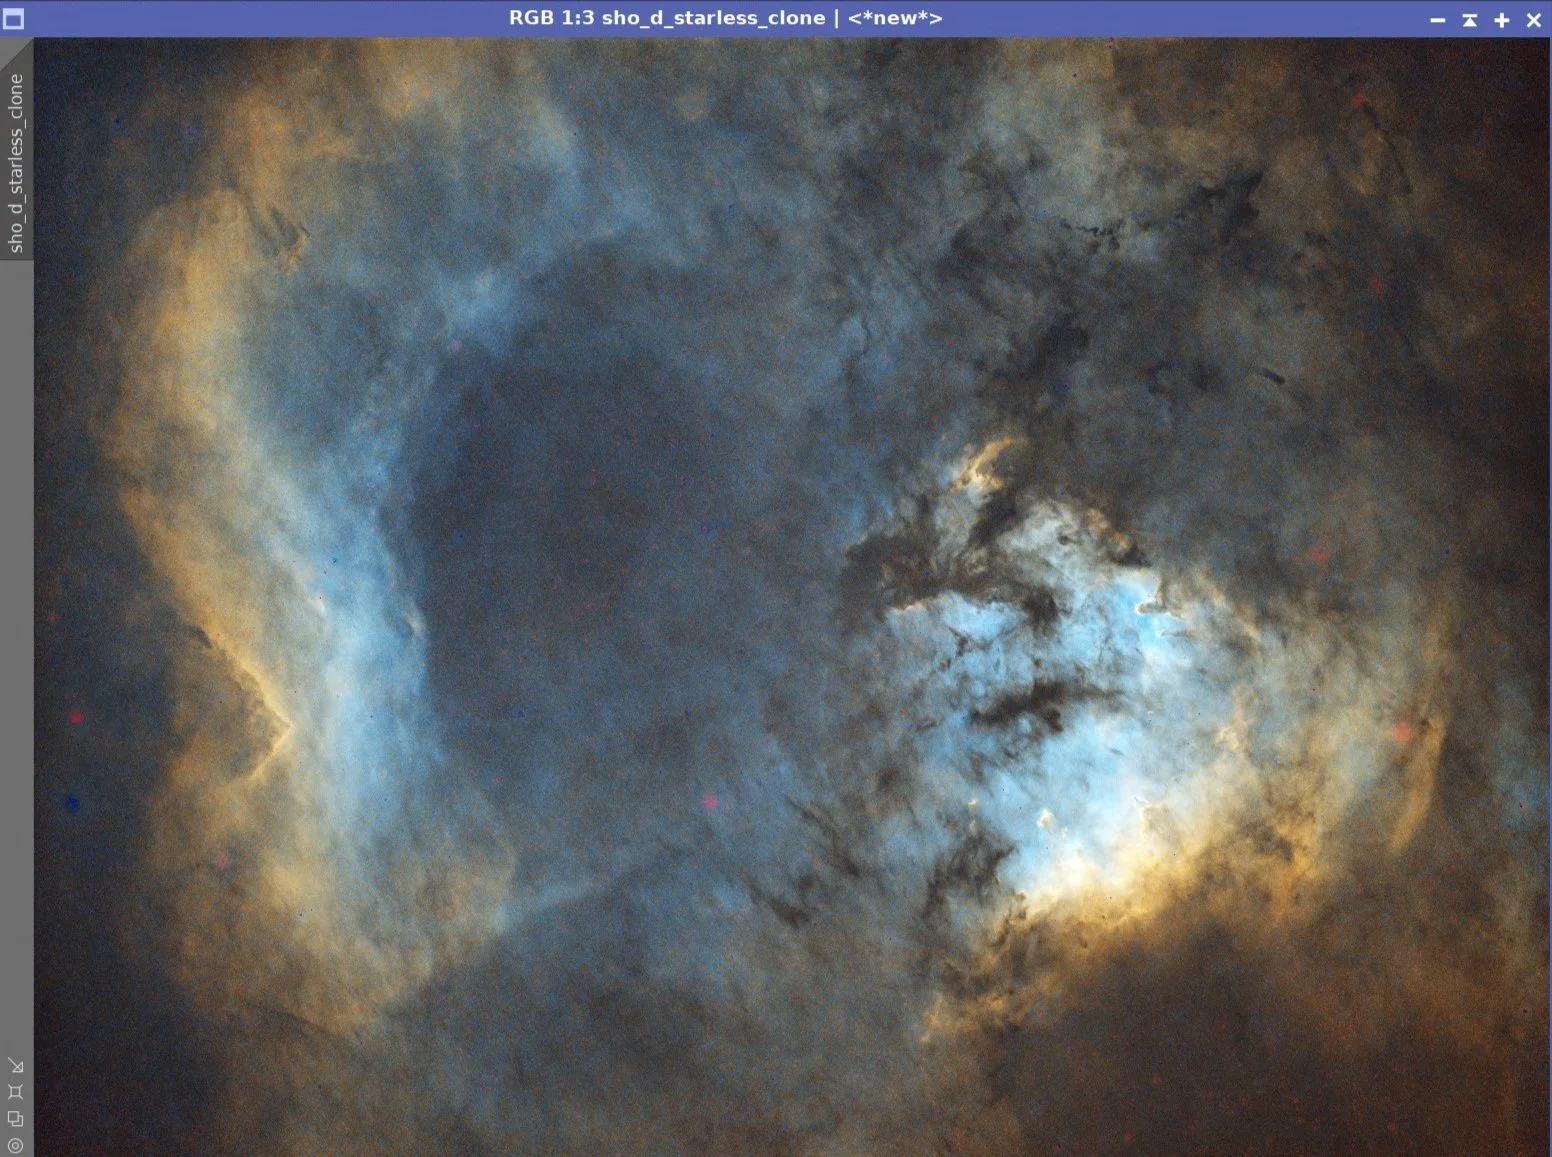
The Initial SHO image (click to enlarge)
After another CT sat boost(click to enlarge)
After NXT = 0.6. (click to enlarge)
Apply CT to boost Sat (Click to enlarge)
CT to adjust the tone scale(click to enlarge)
SCNR Green done to remove bias (click to enlarge)
10. Create Masks
Create a Warm Tone Mask:
We will use this to adjust the color, sat, and sharpness of warm-toned features.
Use the ColorMask_Mod Script to create a warm mask covering hues 330 to 61
Boost the contrast with CT
Use Bill Blanshan’s PixelMath script to blur the mask
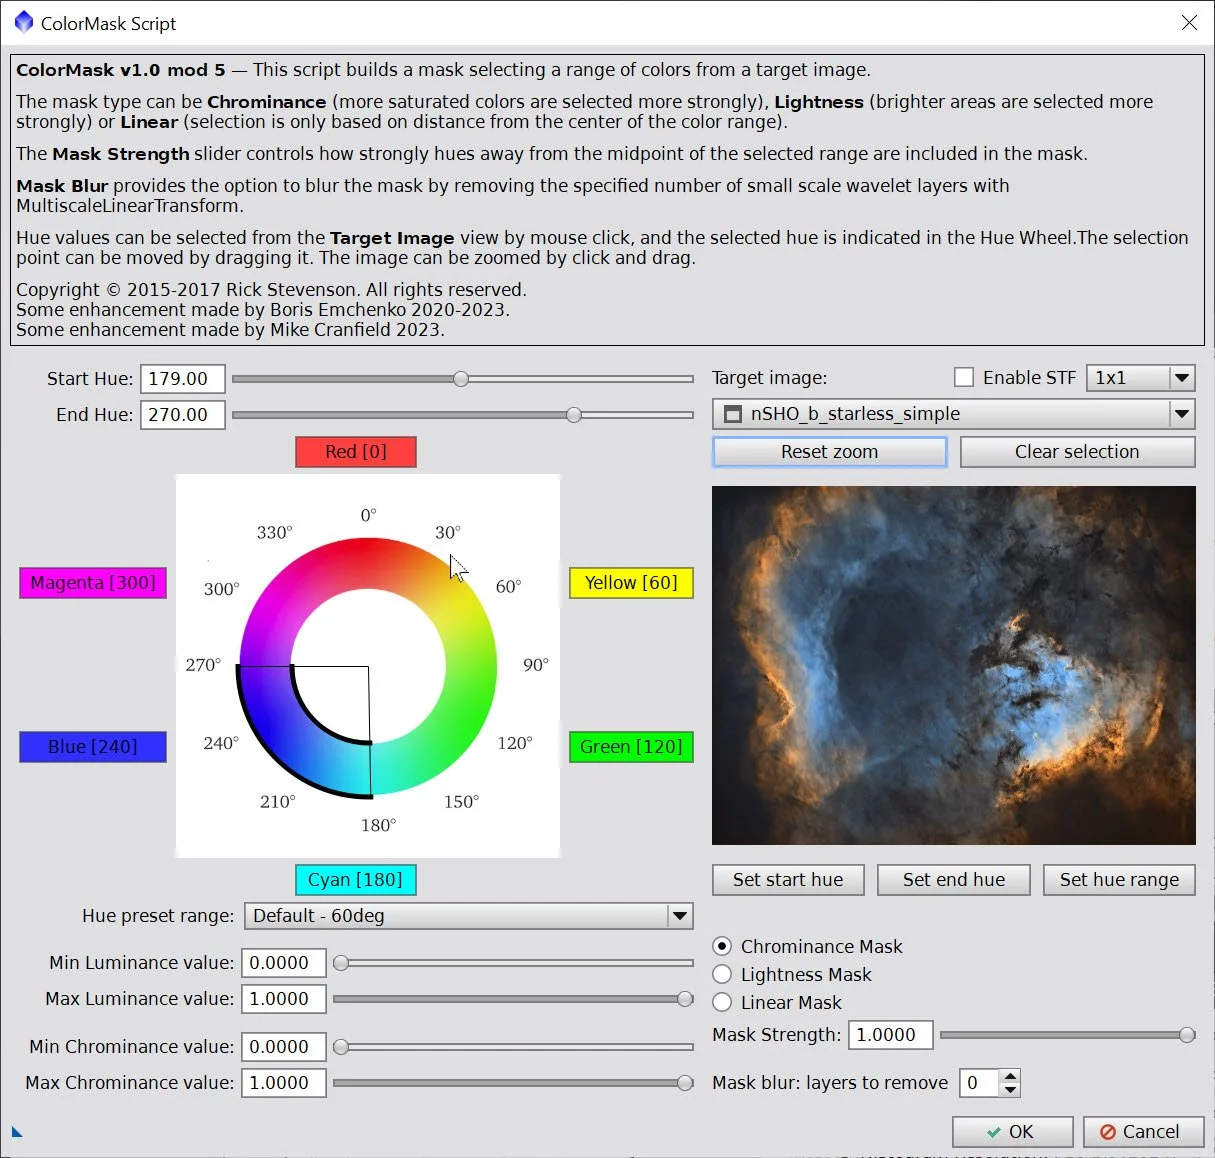
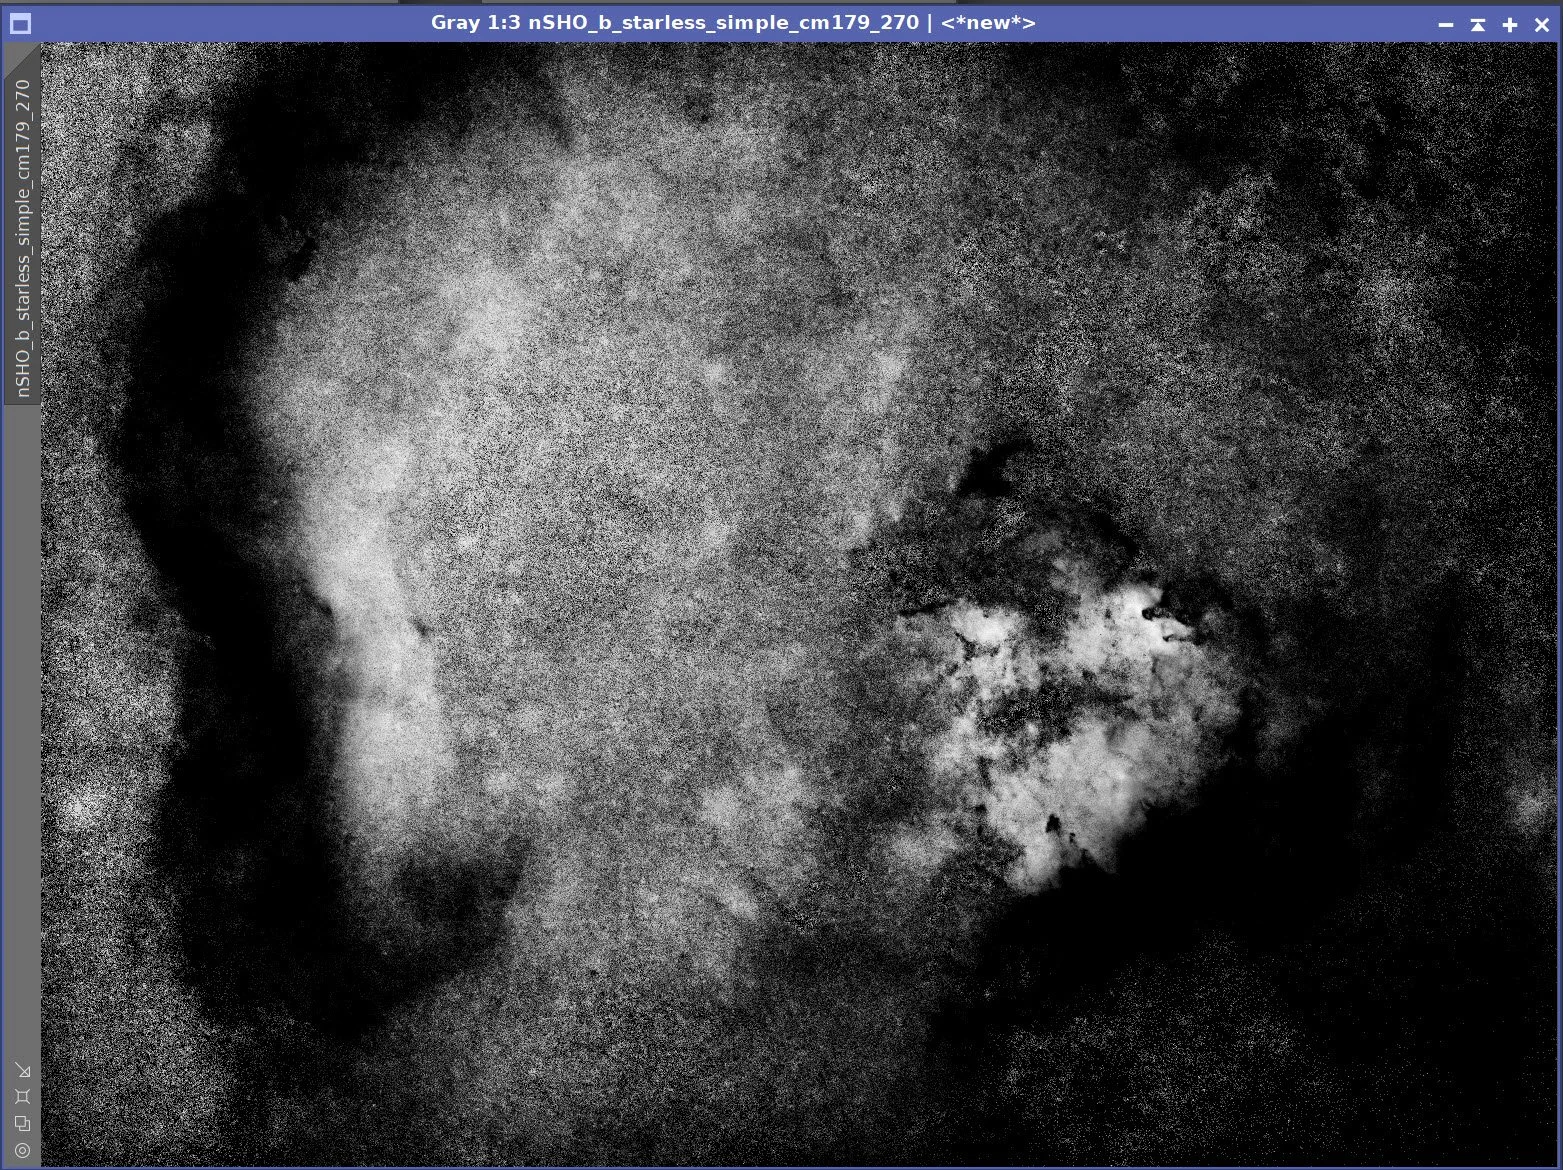
Create a Cool Tone Mask:
We will use this to adjust the color, sat, and sharpness of cool-toned features.
Use the ColorMask_Mod Script to create a warm mask covering hues 179 to 270
Boost the contrast with CT
Use Bill Blanshan’s PixelMath script to blur the mask
The Setup for creating the WarmMask.
The Setup for creating the CoolMask.
Initial Warm Tones Mask (click to enlarge)
Initial Cool Tones Mask (click to enlarge)
After CT contrast Boost (click to enlarge)
After CT contrast Boost (click to enlarge)
After smoothing - Final Mask (click to enlarge)
After smoothing - Final Mask (click to enlarge)
11. Complete the Processing of the SHO Starless Image
Apply the Warm Mask
Apply CT to adjust the tone and saturation of the warm areas. The goal here is to make the colors pop!
Apply LHE 1 - which uses the parameters of a Radius of 55, a contrast limit of 2.0, an Amount of 0.65, and an 8-bit histogram. This enhances smaller-scale features.
Apply LHE 2 - which uses the parameters of a Radius of 216, a contrast limit of 2.0, an Amount of 0.40, and a 10-bit histogram. This enhances larger-scale features.
Do a final CT to adjust things.
Apply The Cool Mask
Apply CT to adjust the tone scale and color saturation
Apply LHE 1 - which uses the parameters of a Radius of 55, a contrast limit of 2.0, an Amount of 0.23, and an 8-bit histogram. This enhances smaller-scale features.
Apply LHE 2 - which uses the parameters of a Radius of 200, a contrast limit of 2.0, an Amount of 0.23, and a 10-bit histogram. This enhances larger-scale features.
Remove the mask
Apply NXT with a value of 0.55 to tone down the noise a bit
Apply the Warm mask again
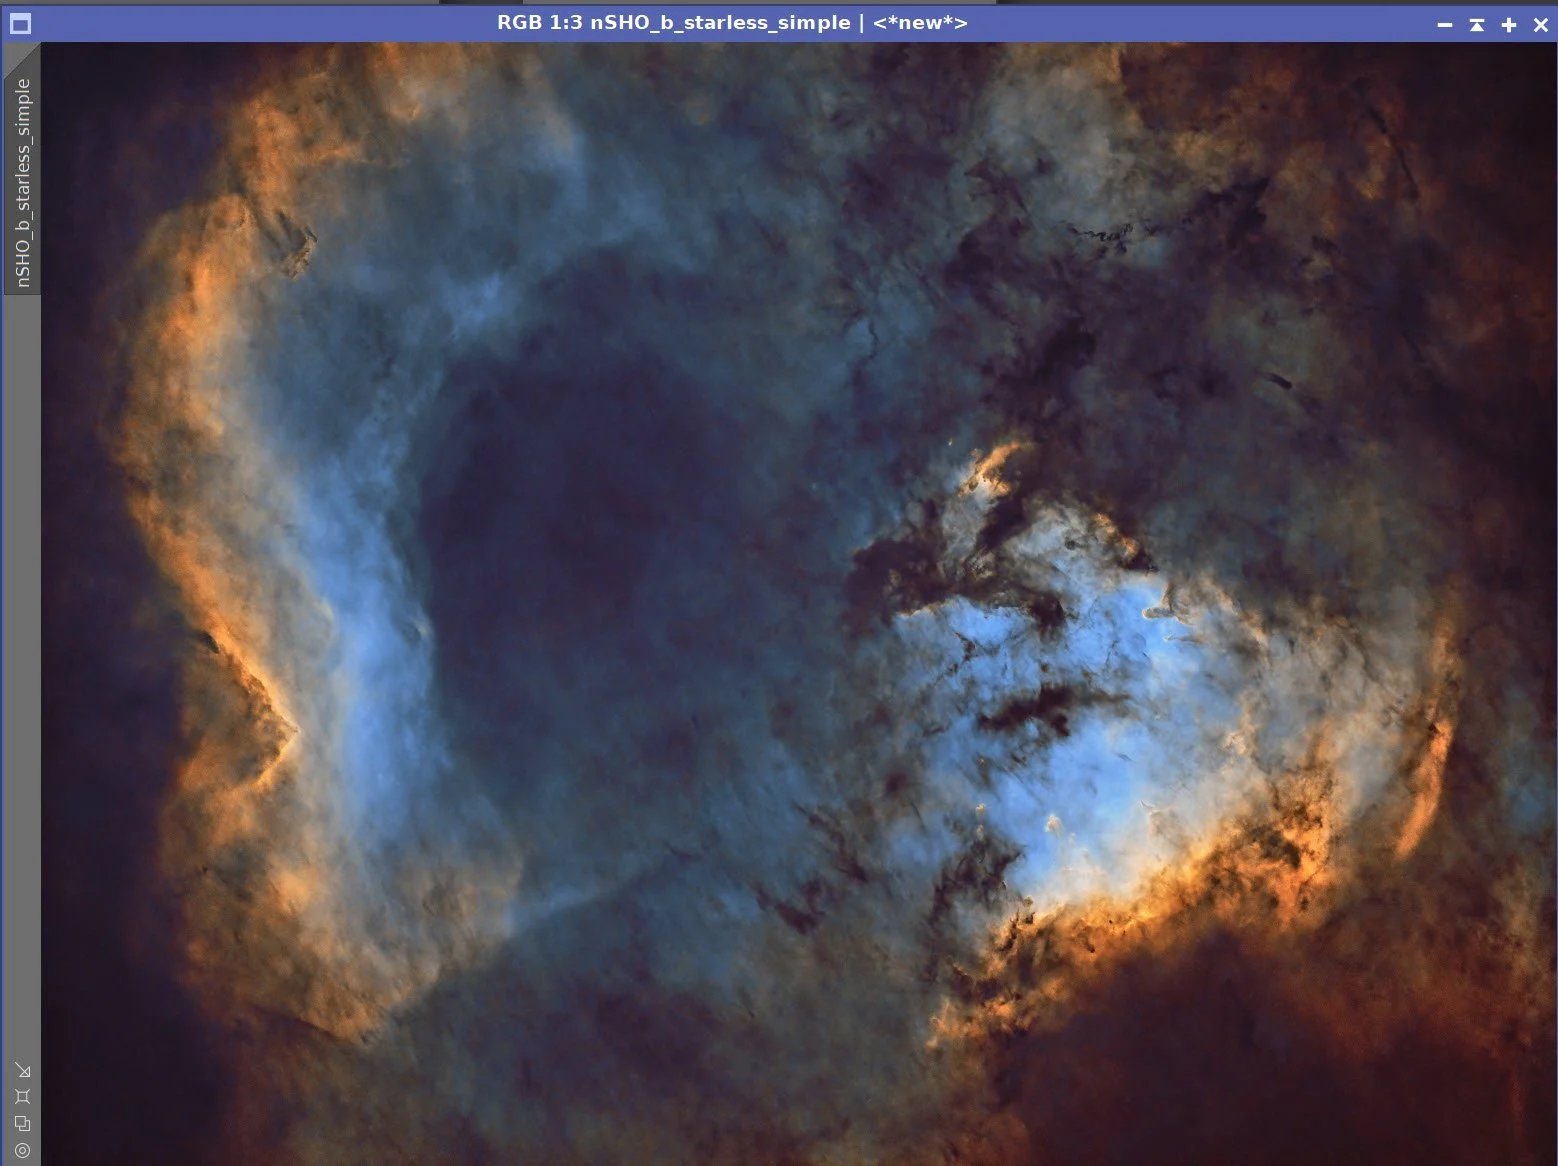
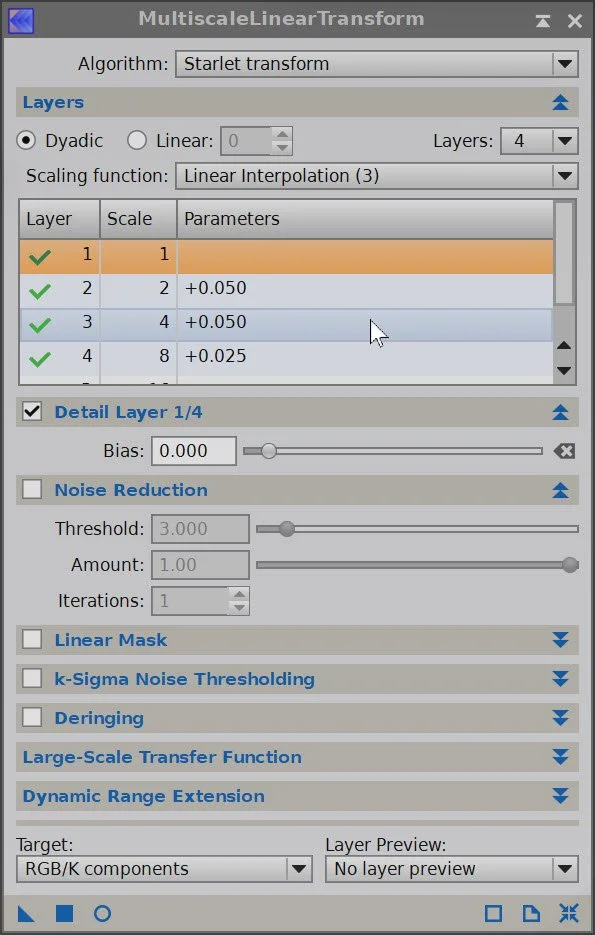
Do an MLT-based sharpening - see panel snapshot for details. Most of the interesting details are in the warm regions so that I will focus on some sharpening there.
We still have some magenta tones coming out after all of that, so let’s get rid of them:
Invert the image
Run SCNR Green at 0.9
Invert the image
After CT with Warm Mask (click to enlagre)
After LHE 2 w/ Warm Mask (click to enlarge)
After LHE 1 w/ Cool Mask (click to enlarge)
After LHE 1 w/ Warm Mask (click to enlarge)
After CT with Cool Mask (click to enlare)
After LHE 2 w/Cool Mask (click to enlarge)
After NXT = 0.55 - no mask (click to enlarge)
The MLT Sharpening panel paramters.
After MLT Sharpen using the Warm Mask
Invert the image so magenta areas are now green (click to enlarge)
Run SCNR Green at 0.9 (click to enlarge)
After Image Invert - Final SHO Starless Image
12. Combine the SHO Starless with the RGB Stars Image
Use the ScreenStars script to add the RGB Stars back in
The RGB Stars Image (click to enlarge)
The Final Starless SHO image (click to enlarge)
The image with RGB Stars inserted!
14. Export the Image to Photoshop for Polishing
I am pretty happy with the image and ready to polish it in Photoshop. At this point, I took a break, and when I came back, I noticed that I had some magenta-red tone on the sides of the image. I guess that this is some residual gradient that got scaled in processing. So, I decided to use Photoshop to deal with this.
Save the image as Tiff 16-bit unsigned and move to Photoshop
Make final global adjustments with Clarify, Curves, and the Color Mixer
Select some feature areas with a lasso with a 100-pixel feather, and use clarity to tweak selected detail areas.
Select the sides with the lasso tool and adjust the color to remove the magenta red tones.
Add Watermarks
Export Clear, Watermarked, and Web-sized jpegs.
The Final Image!
















The portable scope platform is supposed to be, well, portable. That means light and compact. In determining how to pack this platform for travel, I realized that the finder scope mounting rings made no sense in this application and I changed them out with something both more rigid and compact - the William Optics 50mm base-slide ring set.