
NGC 5907/5906 - The Splinter Galaxy - 8 hrs in LRGB
Date: June 8, 2022
Cosgrove’s Cosmos Catalog ➤#0101

This image was awarded “Flickr Explore” Status on June 9th, 2022!

NGC 5907 - The Knife-Edge or Splinter Galaxy (Click for full resolution image via Astrobin.com)
Table of Contents Show (Click on lines to navigate)
About the Target
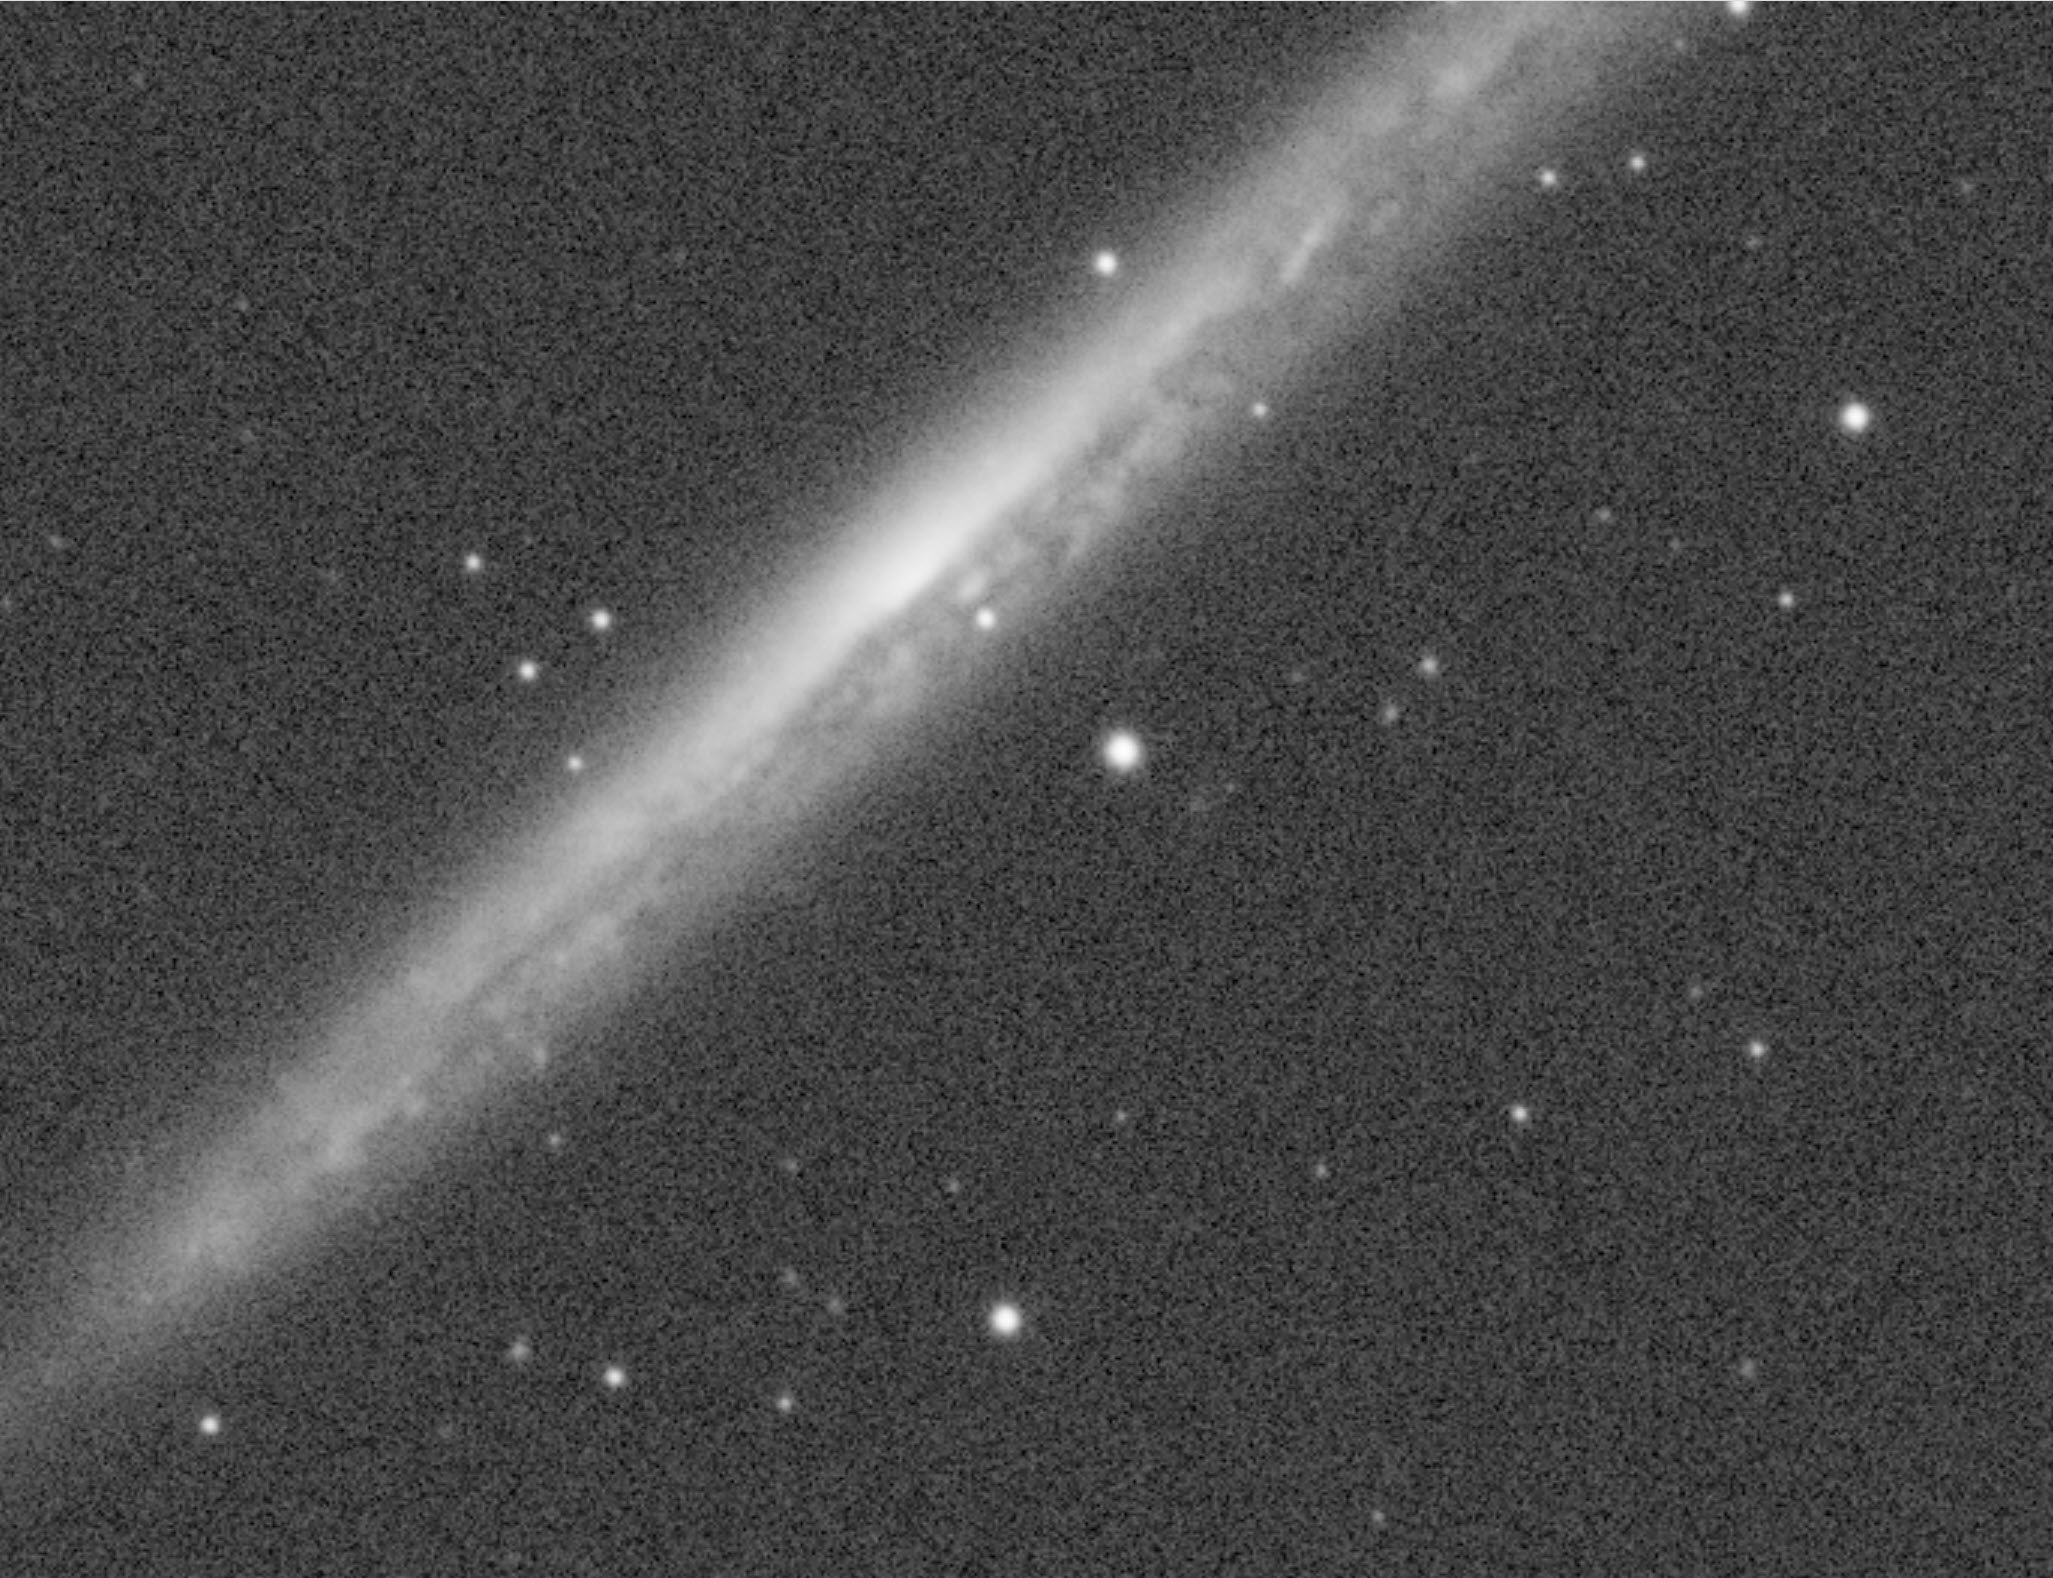
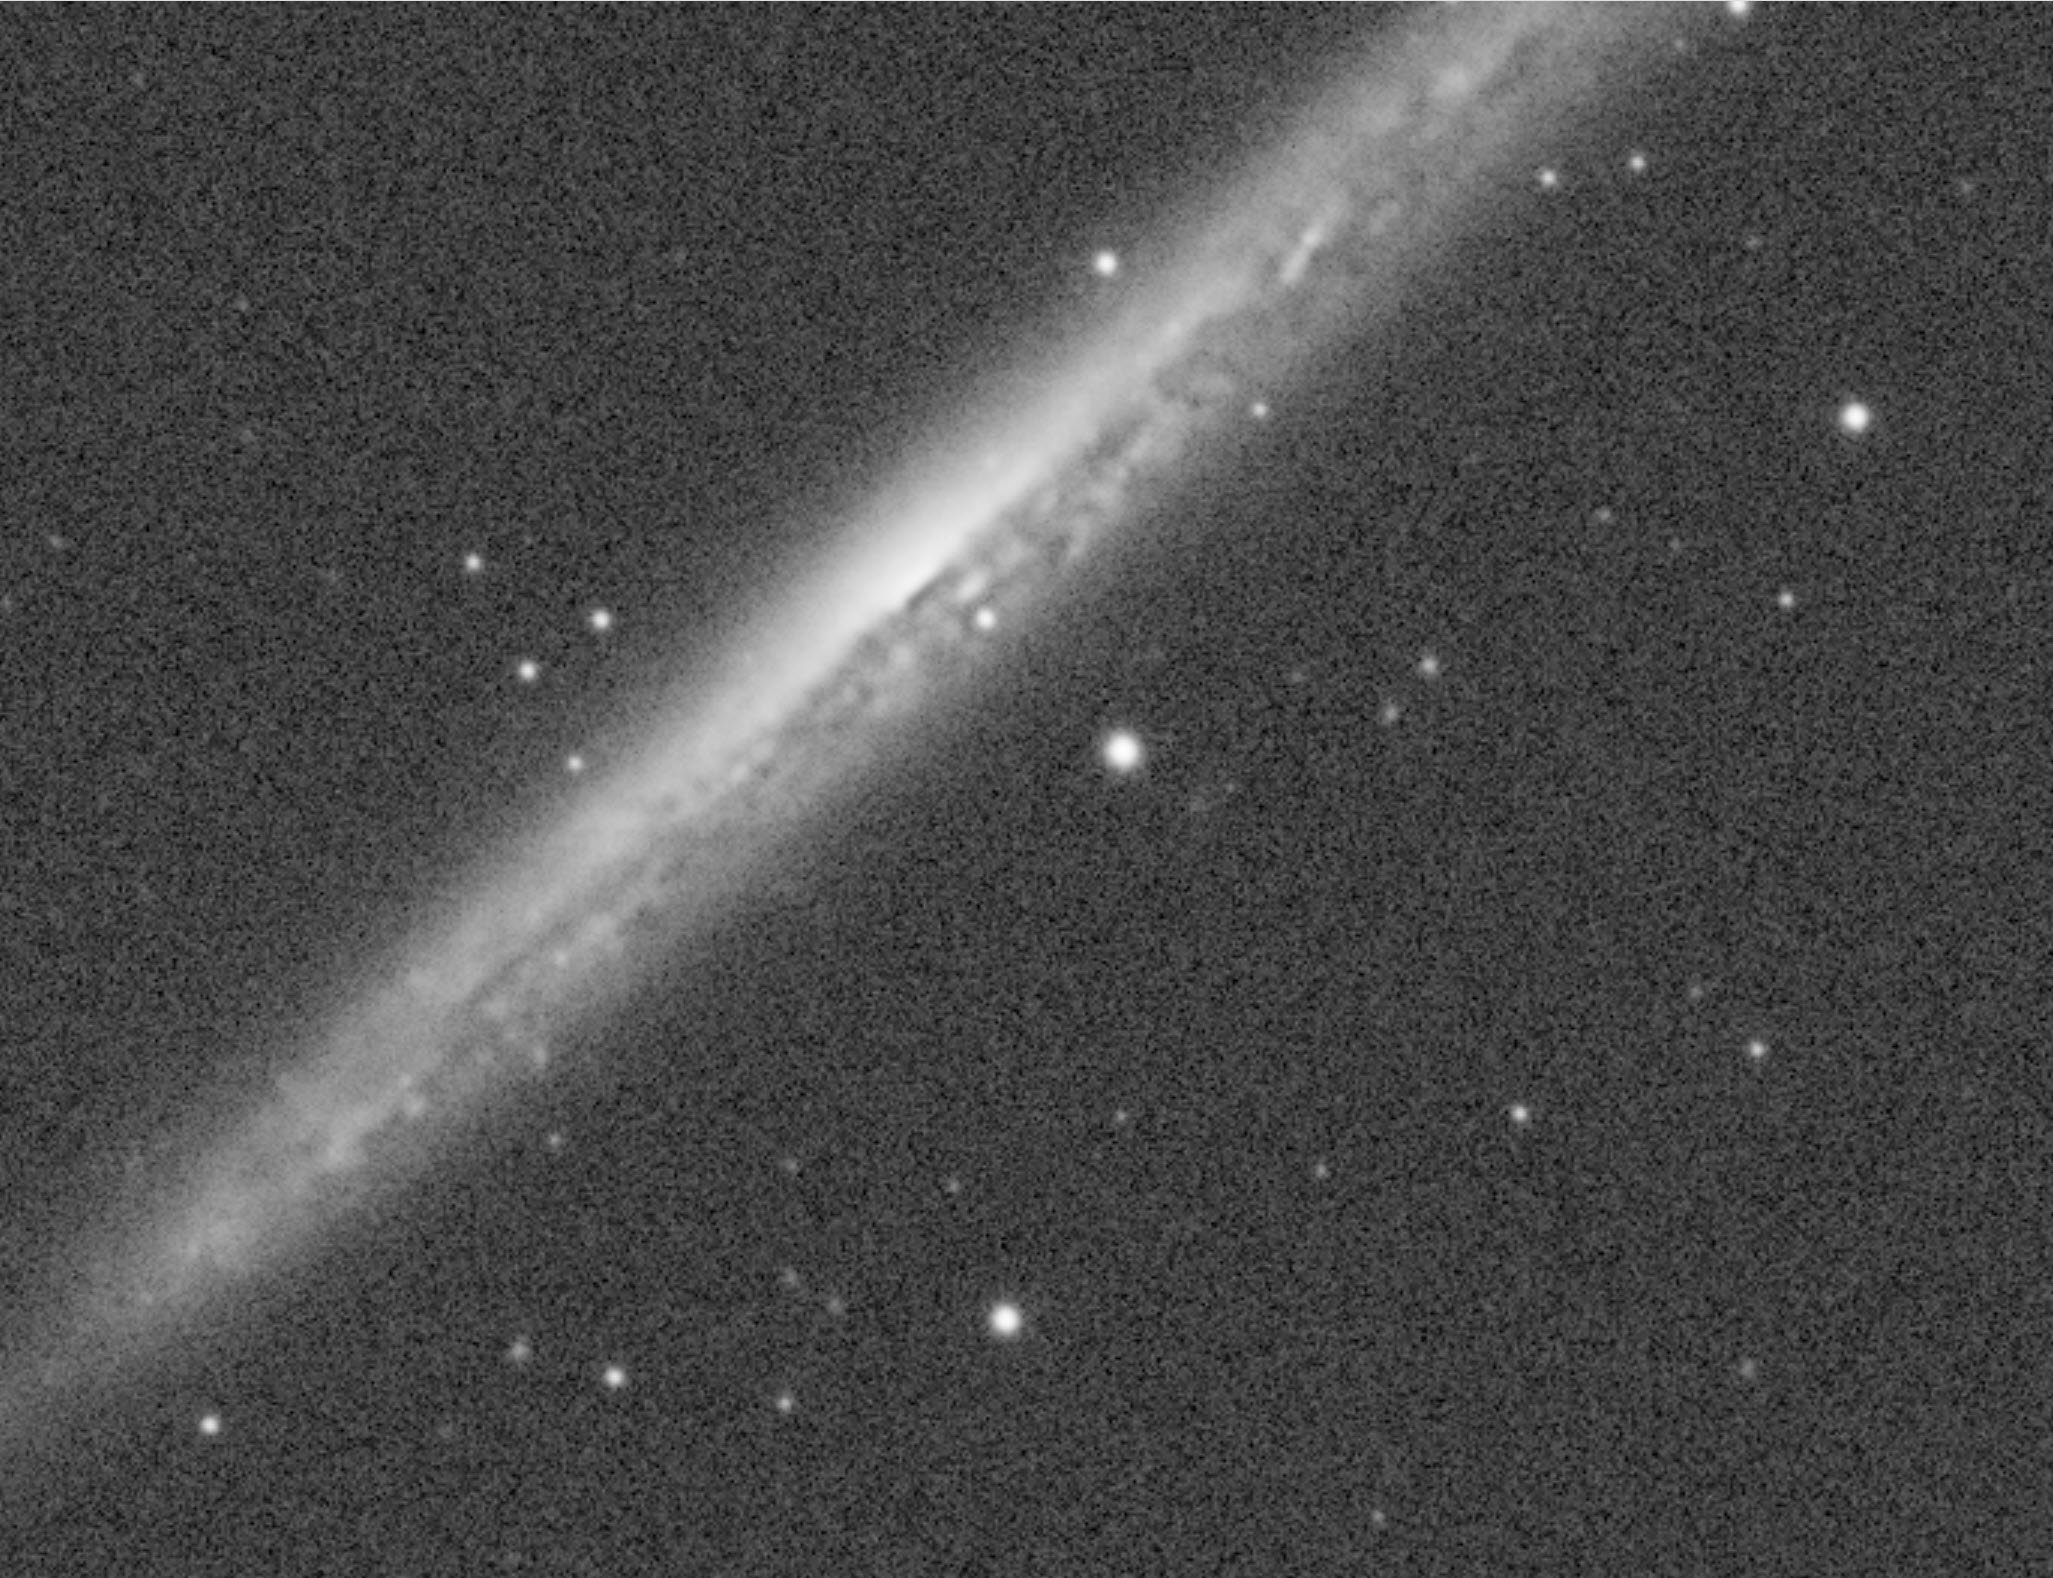
NGC 5907, also known as the “Splinter Galaxy” and the “Knife-Edge Galaxy,” is an edge-on spiral galaxy with a prominent dust lane located approximately 55.4 million light-years from Earth in the constellation of Draco. NGC 5906 is also associated with this galaxy and is identified with a faint portion of the galaxy towards the west of the dust lane. It is a member of the NGC 5866 Galaxy group.
NGC 5907 was discovered in 1788 by William Herschel, while NGC 5906 was cataloged by George Johnston Stoney in 1850.
William Herschel 1738-1822
George Johnstone Stoney
1826-1911
There are a few attributes of this galaxy that make it stand out from many other galaxies.
For one thing, It has an abnormally low amount of heavier atoms - described as having a low Metallicity.
It also seems to have an absence of giant stars - at least very few have been detected - leading astronomers to conclude that this galaxy may be comprised primarily of dwarf stars.
Finally, this galaxy was considered an example of a warped spiral. Most such galaxies have companion galaxies nearby, whose gravitational interaction distorts both galaxies. However, NGC 5907 has no such companion. In 2006, a group of astronomers discovered the presence of a faint extended looping tidal stream that may have come from an early companion, which was dissipated and consumed by NGC 5907 as a consequence of their interaction. Now only these ghostly tidal loops remain.
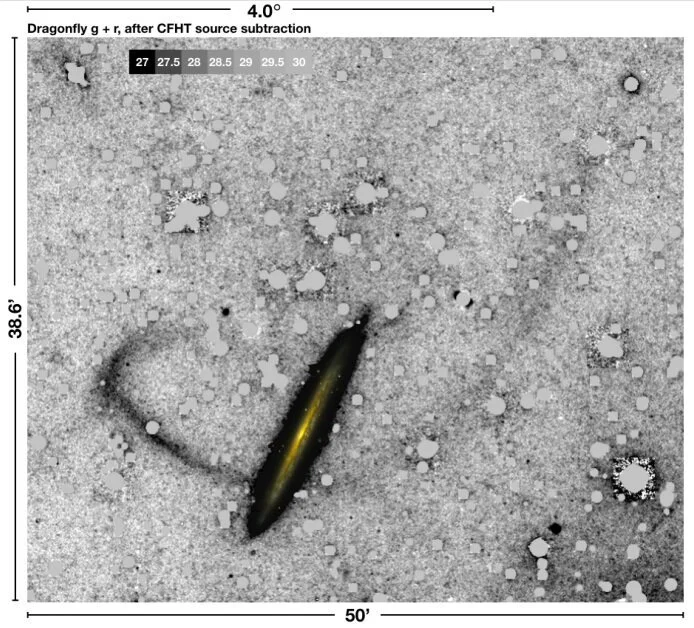
Dragonfly imaging of the NGC 5907 field, with North up and East to the left. Credit: van Dokkum et al., 2019.
These loops are only visible in very deep exposures - of course with only about 8 hours in my version of the image, there is no hint of these loops to be seen. The picture above shows one version of this. Check on the link HERE to see a better version of it as well as an article that goes deeper into the subject.
The Annotated Image

Image annotation created with the ImageSolver and AnnotateImage scripts in Pixinsight.
The Location in the Sky
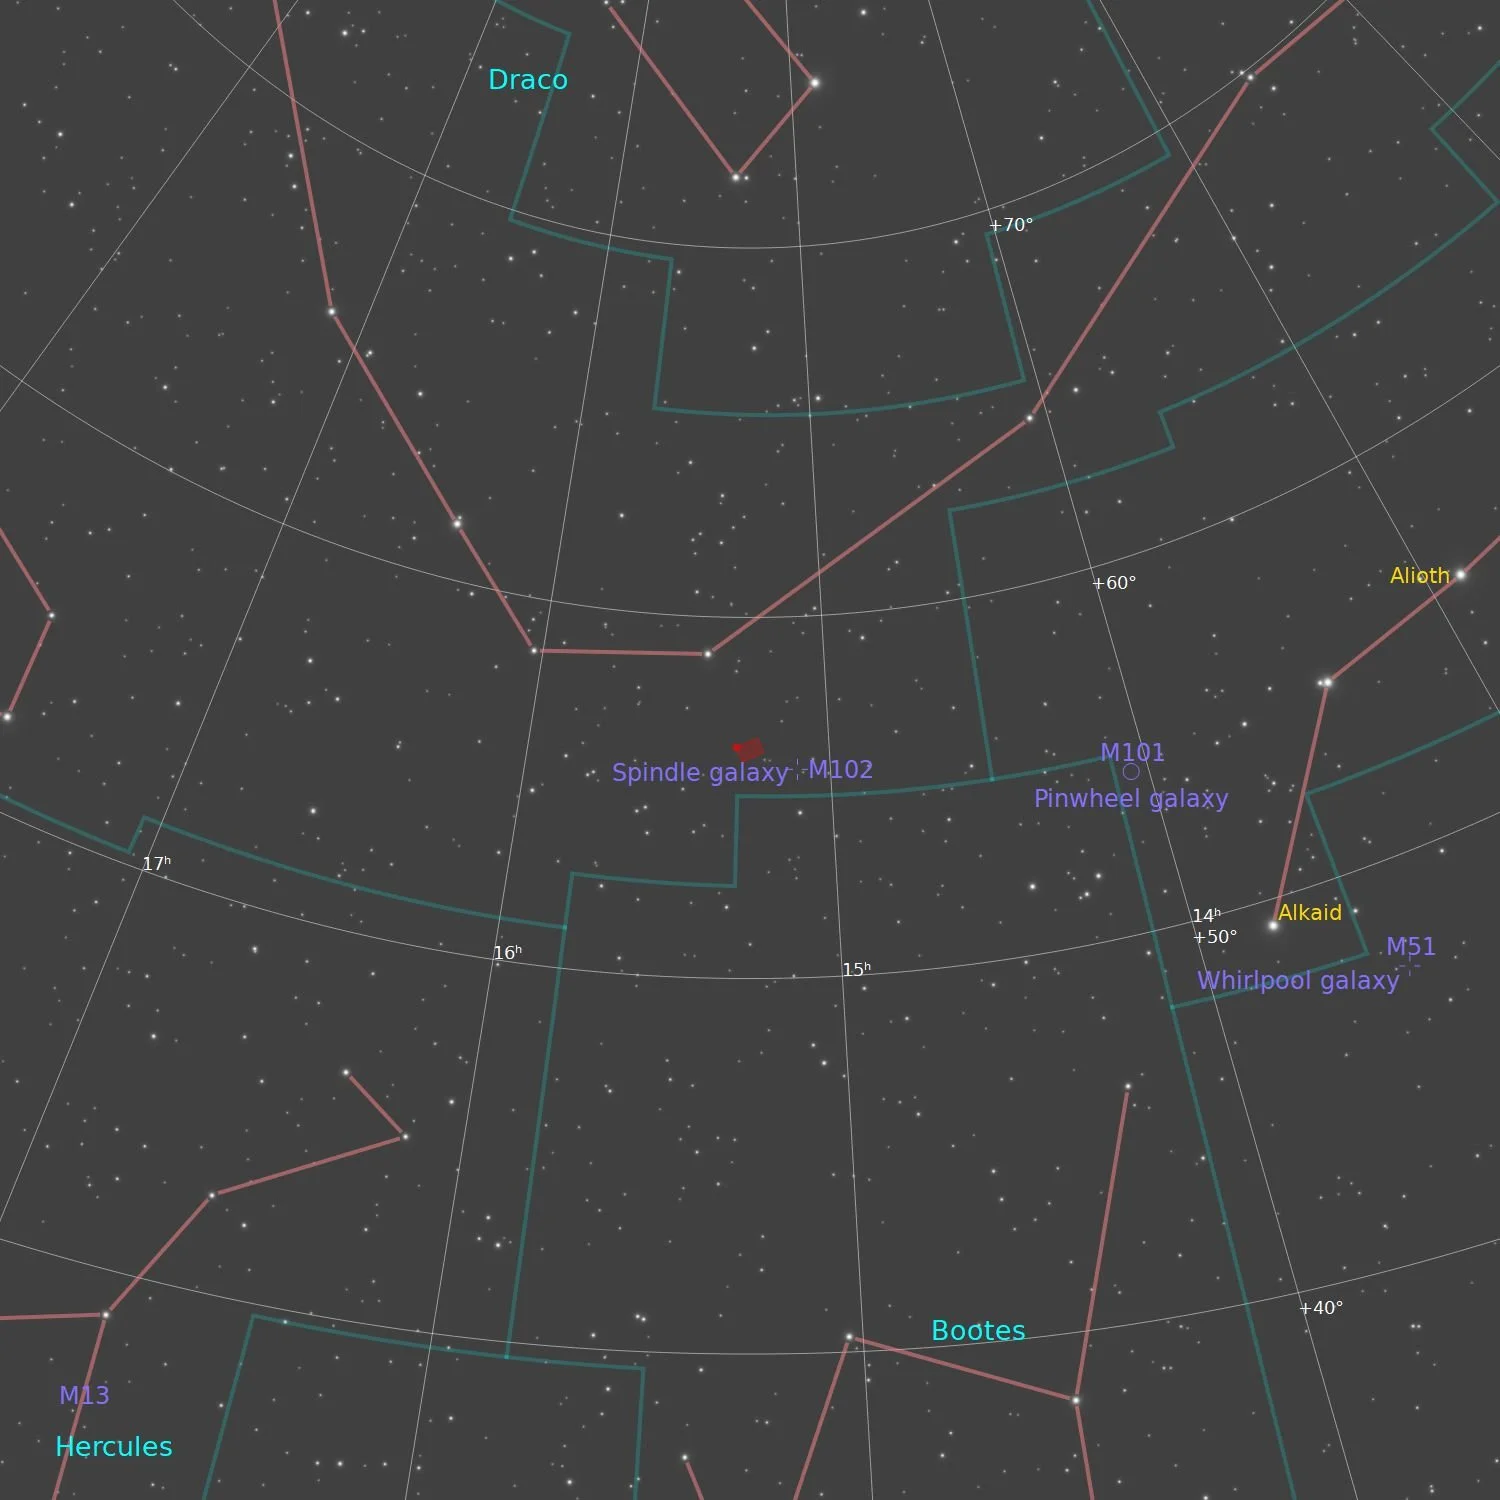
This Finder Chart was created using the ImageSolver script and FinderChart process in Pixinsight
About the Project
Choosing the Target
We are still in galaxy season, and when we had a few clear nights during the most recent New Moon cycle, I was looking for suitable targets. NGC 5907 is interesting because it is another excellent example of an edge-on spiral displaying a predominant dust lane across its center. Since I had recently captured NGC 4565 - The Needle Galaxy - I thought it might be an interesting comparison target - but I also realized that it would also be a challenge.
The galaxy has a size of 12.7 x 1.4 arcminutes. It also sits in a field that has few other objects nearby. This object really wants a long focal length to provide the image scale necessary to bring out the details in this tiny target.
My Astro-Physics 130mm platform has a focal length of 1085mm and when combined with the ZWO ASI2600MM-Pro camera, provides an image scale of 0.72 arcseconds per pixel. This was probably my best bet for going after this target.
Image Capture
Imaging was done on the nights of May 29th, 30th, and 31st. The weather was somewhat unsettled during this period, and it was not obvious that it would cooperate. The night of the 28 started fine, but many thin clouds came and went. The kind of clouds that would not disrupt guiding but would harm the subs. The night of the 30th was cloudy until almost midnight, so I had a late start and a shorter opportunity for capture - but once the skies cleared, they stayed clear. On the final night, we had excellent conditions, and the capture went very well.
Because of the small size of the target, one would expect that I would Drizzle Process this image. But in the past, when I tried this with the larger image sizes of the ASI2600MM-Pro camera, my image processing hard drive filled up and prematurely ended my processing session! So I decided to forgo that option. This meant that I needed to be extra careful to get the sharpest images I could.
Image Processing
I did this in two ways.
First, I blinked all images and eliminated any subs that were obviously impacted by clouds. Then I ran SubFrameSelector and culled any subs with an FWHM or Eccentricity that were too high. While this reduced my integration time, it also meant that the subs that were integrated would have the best quality to contribute to the final image.
Next, I was meticulous when it came to running deconvolution. Since I wanted to bring out dust lane details, I decided that for this project, I would use EZ-Deconvolution. This removes all of the stars from the image and then deconvolves what’s left. After carefully creating and processing the star mask so that all stars had complete coverage, I let EZ-Deconvolution do its thing.
Both efforts worked well, and I was pretty pleased with the detail I could bring out.
Note that at the end of this post, I will include a detailed step-by-step walk-through of the processing done on this image.
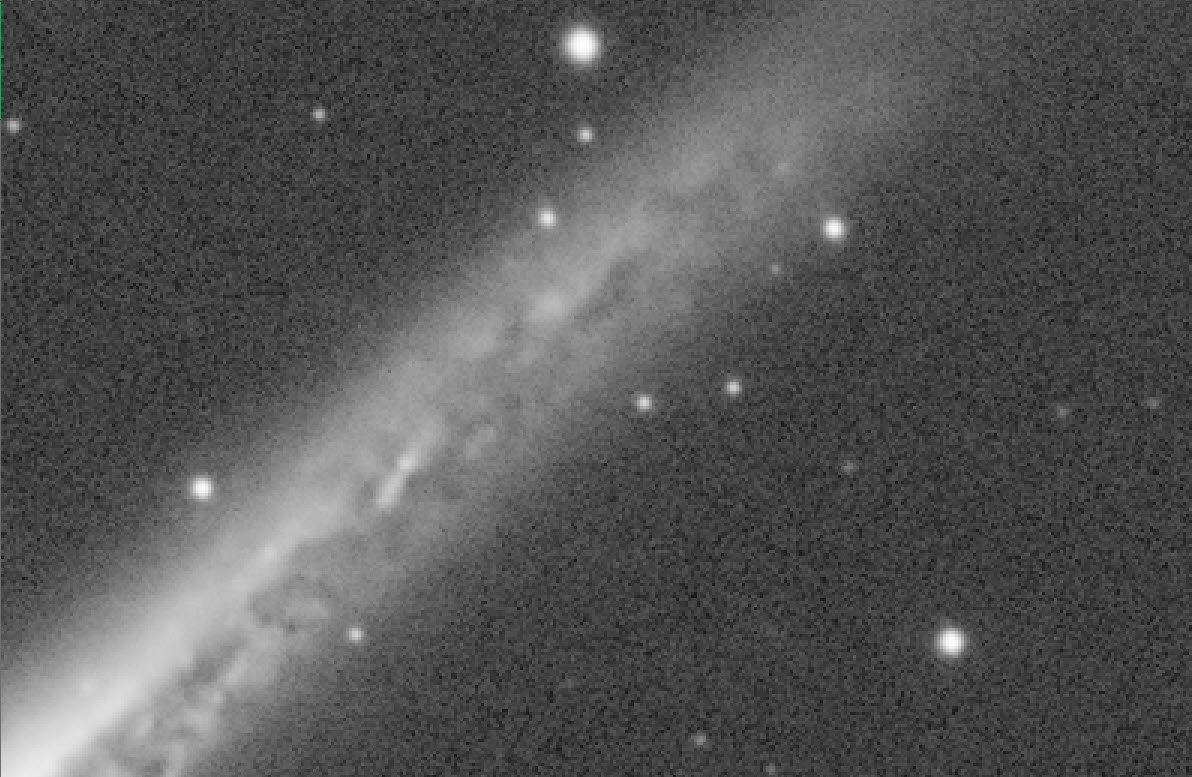
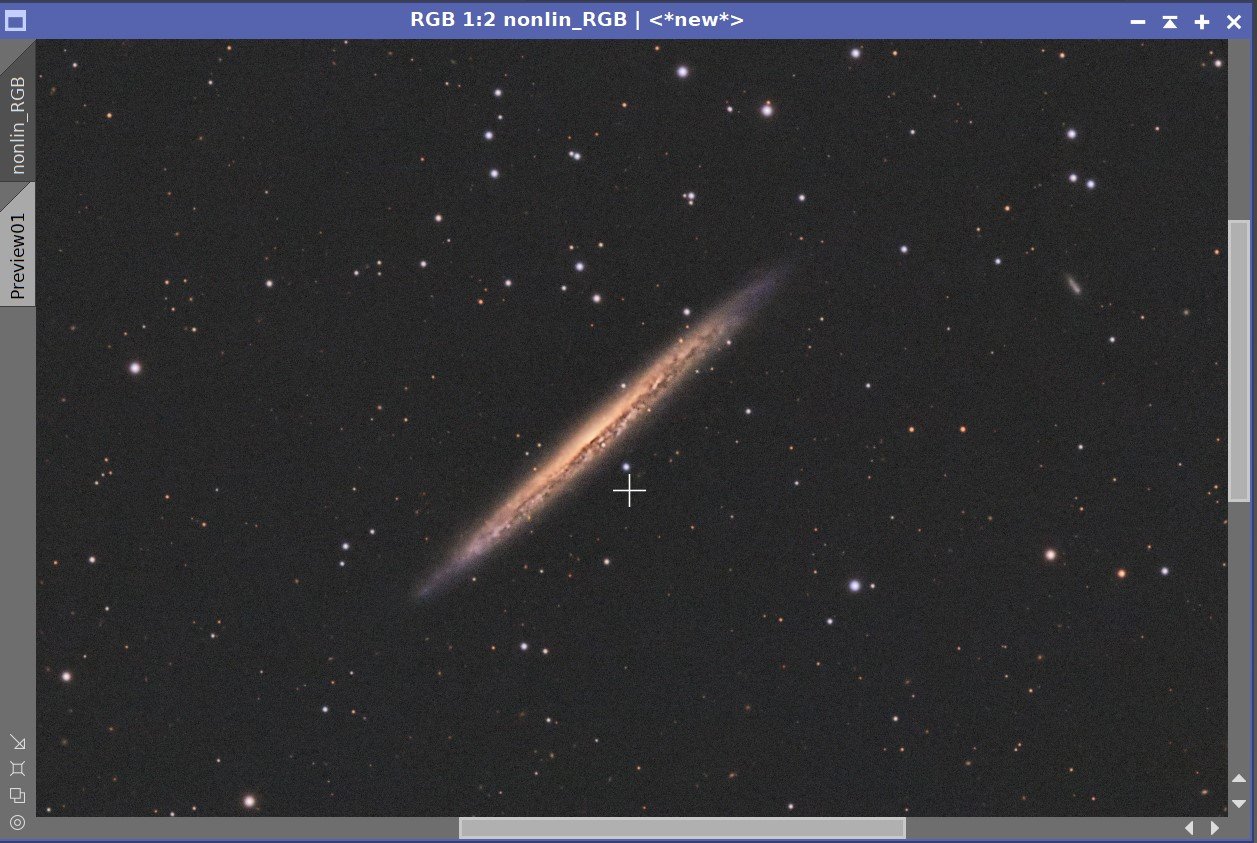
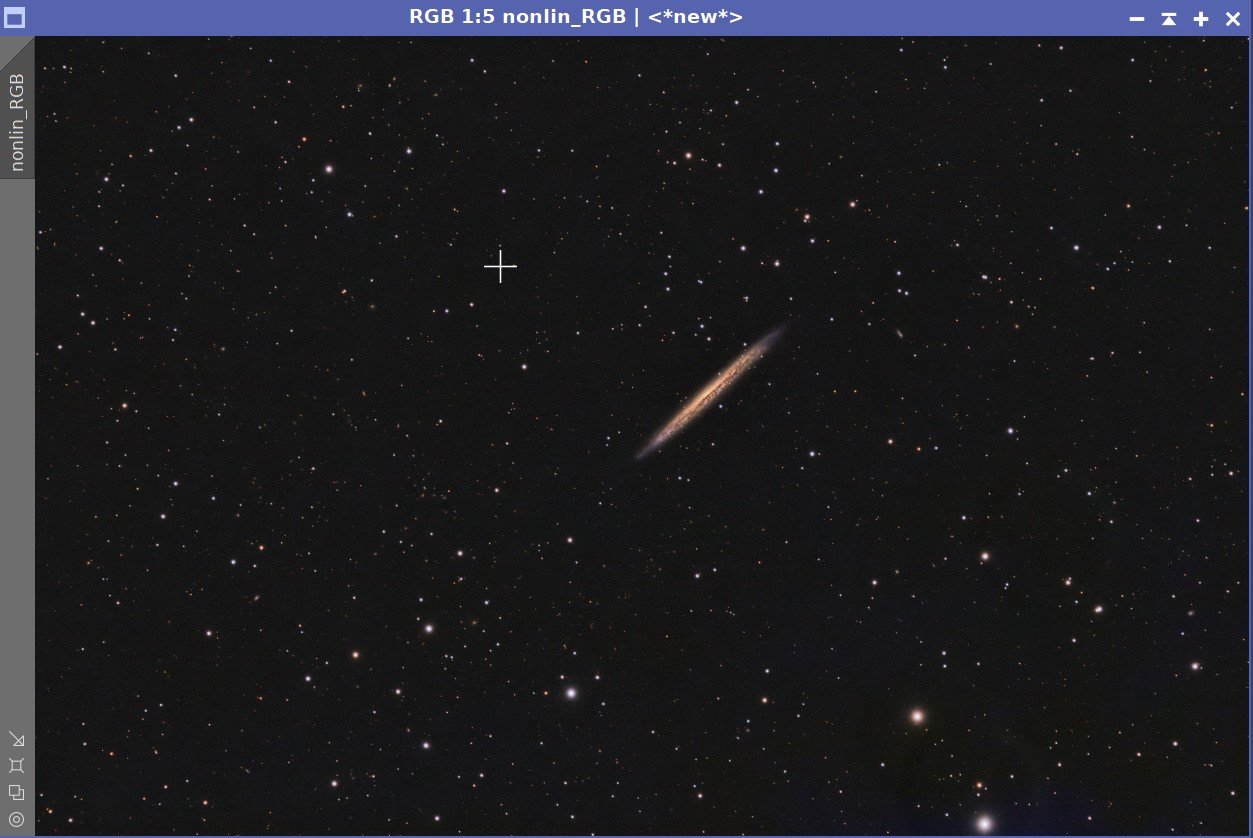
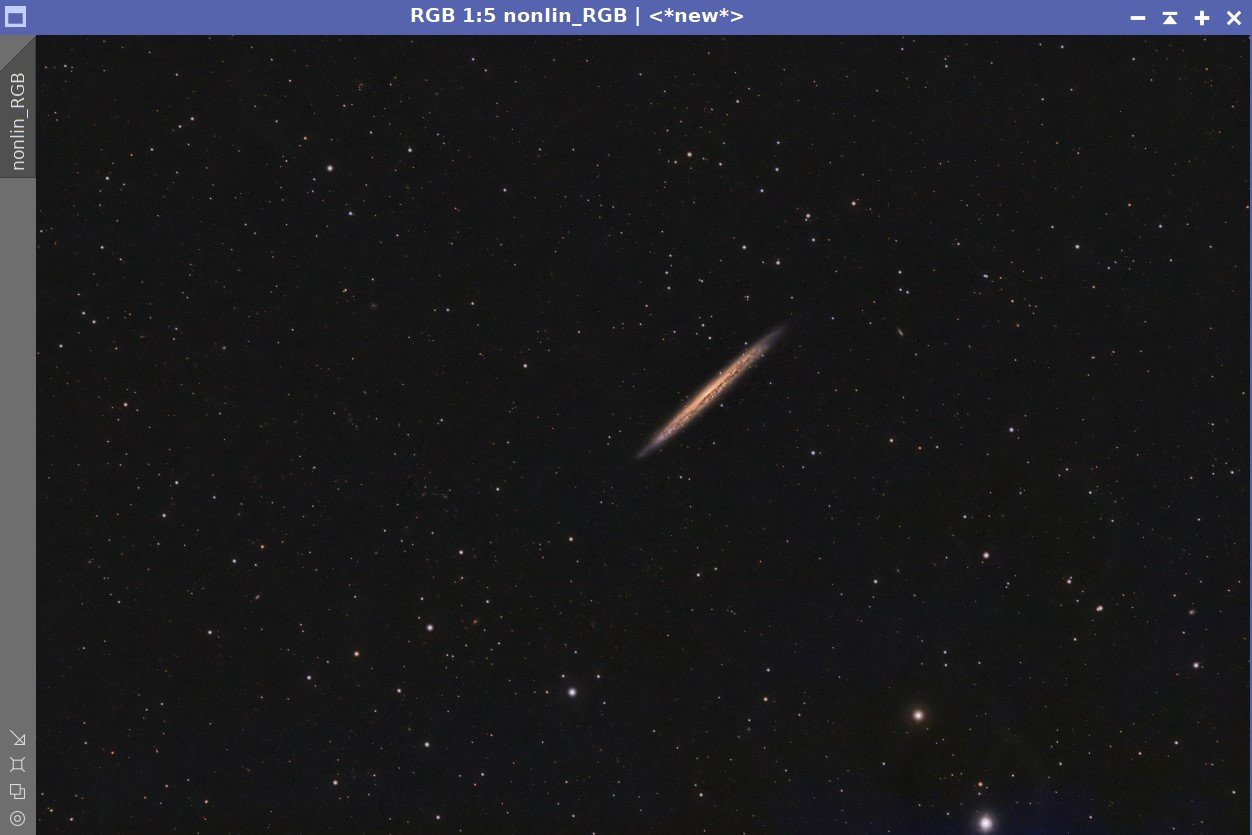
Once I completed the processing with Pixinsight, I moved the image over to Photoshop. One of the things I did here was to experiment with the cropping. As it was initially framed, I thought the galaxy looked too small, and the dust lanes detail were hard to make out. So I tried a few levels of zoom/crop, and I came up with the final image you see at the top of the post. I think this is a better compromise. Frankly, in hindsight, I wish I had Drizzle Processed this, but for that to happen, I need to get a larger SSD working drive to accommodate the extra storage required.
More Information
Wikipedia: NGC 5907
Nasa: NGC 2907
Nasa: Hubble image of NGC 5907
AAPOD2: NGC 5907
Capture Details
Light Frames
Data was collected during the Nights of 5-29-22, 4-30-22, and 5-31-22
114 x 90 seconds, bin 1x1 @ -15C, unity gain, ZWO Gen II L Filter
69 x 90 seconds, bin 1x1 @ -15C, unity gain, ZWO Gen II R Filter
70 x 90 seconds, bin 1x1 @ -15C, unity gain, ZWO Gen II G Filter
71 x 90 seconds, bin 1x1 @ -15C, unity gain, ZWO Gen II B Filter
Total of 8 hours 6 minutes
Cal Frames
30 Dark exposures
30 Flat Darks at appropriate flat exposure times
15 L Flats
15 R Flats
15 G Flats
15 B Flats
Image Processing Detail
(Note this is all primarily based on Pixinsight with some Photoshop polishing at the very end.)
1. Assess all captures with Blink
Light images
Lum
10 subs were removed due to clouds obscuring the galaxy
Lots of satellite trails seen
Gradients from clouds were substantial
Red
2 really bad subs were removed because of bad gradients
More gradients seen
Many trails seen
Green
6 subs were removed for bad gradients
More gradients seen
Some trails - minimal
Blue
Strong gradients seen that did not reach galaxy - left them in
Some trails
Calibration Images
Flats
Saw 2 flats with some strange gradients - removed
Darks
looked good
Flat Darks - looks great!
Darks - taken from earlier cal files
2. WBPP Script 2.45
All images - lights, flats, and flat darks loaded into the tool.
The script panel was set up for:
Cosmetic Correction
Local Normalization
Calibration and registration only
The Script ran for a little over an hour.

The WBPP Calibration screen.

WBPP - Post-Calibration View.
3. SubFrameSelector
Once the images were calibrated, I took all of the subs from each filter and evaluated them for Star size (FWHM) and Eccentricity.
Lum: 11 removed - 3 for eccentricity, the rest for FWHM
Red: 7 removed, one for FWHM, and 6 for eccentricity
Green: 7 removed, 5 for FWHM, and 2 for eccentricity
Blue: 8 removed, one for FWHM, and 7 for eccentricity.
There we more images removed for eccentricity than I like, so I think I am due for a fresh calibration and tweaking for PHD2.
Lum images - FWHM (click to enlarge)

Red images - FWHM (click to enlarge)
Green images - FWHM (click to enlarge)
Blue images - FWHM (click to enlarge)
Lum Image - Eccentricity (click to enlarge)

Red Images - Eccentricity (click to enlarge)
Green Images - Eccentricity (click to enlarge)
Blue Images - Eccentricity (click to enlarge)
4. Image Integration
Each image was integrated by hand after calibration was done. I noticed that a new method was now available for pixel rejection called Robust Chauvenet Rejection (RCR). I decided to try this out with the Lum image. I ran the integration with this new method and the default parameters. Rejection seemed to be done well with this configuration.
L, R, G, B, and H Images were integrated, and the resulting master images were pulled into Pixinsight.
Below is how the ImageIntegration Panel was set up for this.

The Image Integration Panel is set up for Robust Chauvenet Rejection. Other color images were done in the same fashion.
Lum High Rejection Map (click to enlarge)
Green High Rejection Map (click to enlarge)

Red High Rejection Map (click to enlarge)
Blue High Rejection Map (click to enlarge)
5. Dynamic Crop
Master Images were imported into Pixinsight, and a common best crop position was used and implemented with DynamicCrop.
6. Dynamic Background Extraction
There were some images with residual gradients that had to be dealt with, and DBE was used on each.
Lum Sampling (Click to enlarge)
Lum - Before DBE (click to enlarge)
Lum - After DBE (click to enlarge)
Lum - Background removed (click to enlarge)
Red Sampling (Click to enlarge)
Red - Before DBE (click to enlarge)
Red - After DBE (click to enlarge)
Red - Background removed (click to enlarge)
Green Sampling (Click to enlarge)
Blue Sampling (Click to enlarge)
Green - Before DBE (click to enlarge)
Blue - Before DBE (click to enlarge)
Green - After DBE (click to enlarge)
Blue - After DBE (click to enlarge)
Green - Background removed (click to enlarge)
Blue - Background removed (click to enlarge)
Here are the Master images - now ready for further processing.

The linear L, R, G, and B images after crop, DBE.
7. Linear L Processing
Deconvolution
Decided to use EZ-Deconvolution for this image.
Created the star mask, and then processed it to make sure all stars were covered. I used the ellipse tool on the bottom right to cover up one big one.
Created the background mask
Created the PSK Image.

Here is the final LDSI image created.

The Background Protection Mask

The computed PSF image
Before and After EZ-Deconvolution
Do linear Noise Reduction
The goal here is to just “knock the fizz” off of the image
Typically I use MLT or EZ-Denoise at this step, but I recently bought a copy of RC Noise XTerminator, but when I used it before on a linear image, I saw some mid-scale blotchiness and did not use it. I now have the version2 network that is supposed to address this. I tried it out and used a value of 0.4 and was very pleased with the results.

Before and After Noise XTerminator (0.4)
8. Initial Processing of the Color Image
Create a linear color image
Run ChannelCombination and create the first RGB image
Run DBE on the image with subtraction to remove color gradients.
Run PCC on this image.
Used the default settings along with specific values for my scope combination
Denoise the image
Noise XTerminator was run with a value of 0.7 - I go a little heavier on the color image prior ti inserting the Lum image (where most of the sharpness will come from).

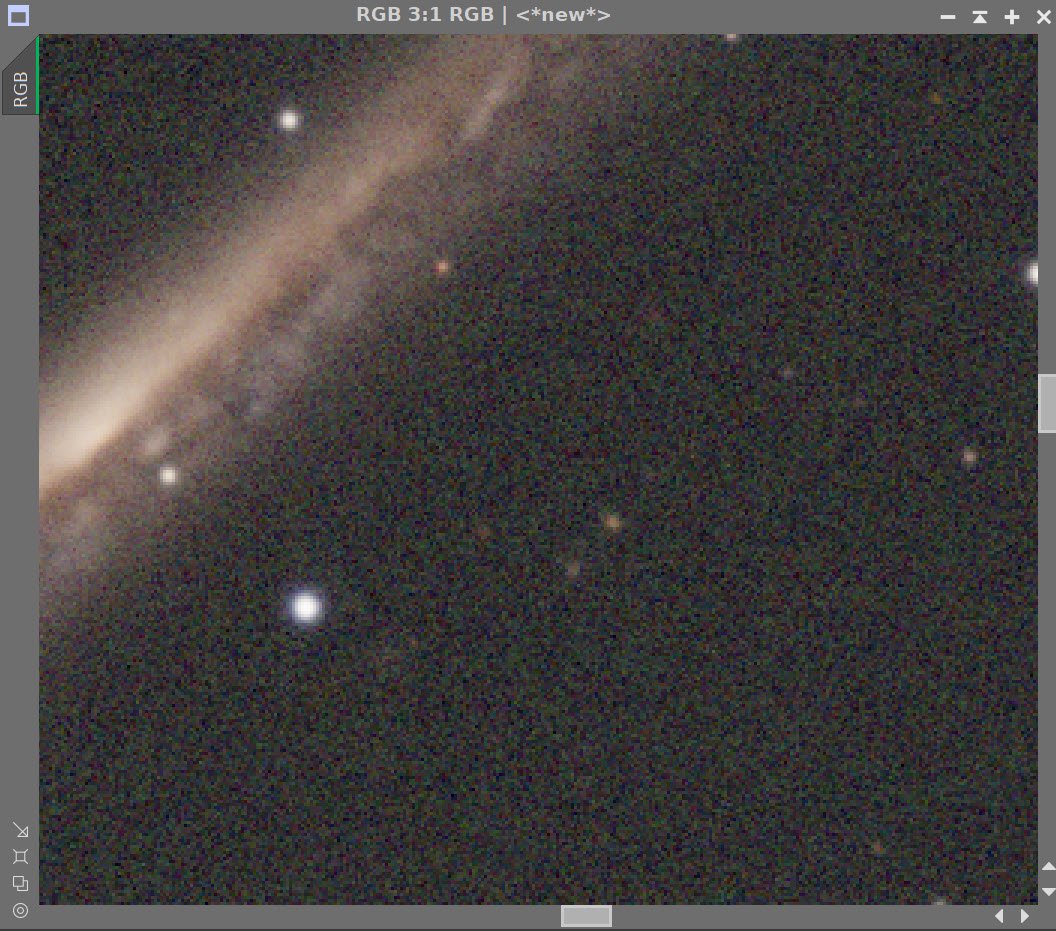
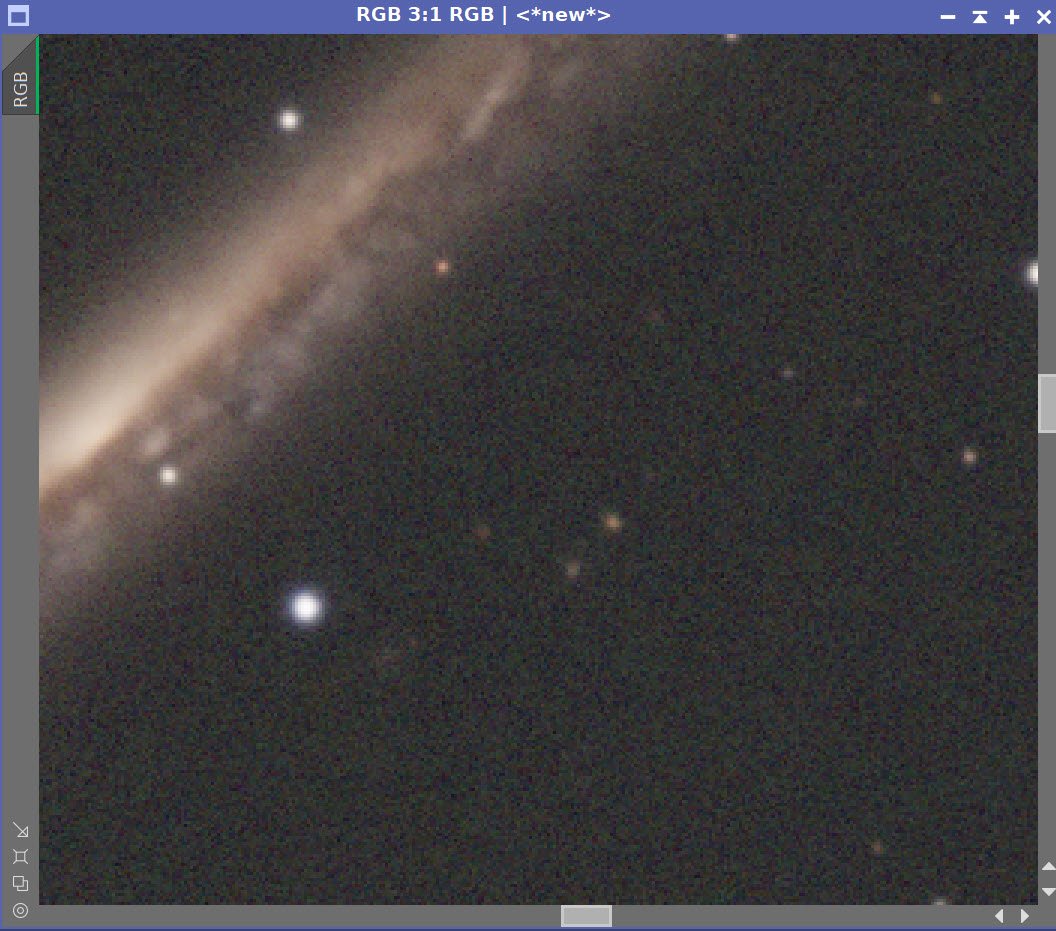
The Initial RGB Color Image.
Then we apply DBE….
Sampling used (click to enlarge)
Before DBE (click to enlarge)
After DBE (click to enlarge)
Background Removed (click to enlarge)
This is the PCC Regression line. (click to enlarge)
RGB linear image after PCC applied. (click to enlarge)
RGB Linear before and After Noise XTerminator with a value of 0.7
9. Take Lum image Nonlinear and Process
Take the image Nonlinear
Create a Preview with an area of the background sky
Run MaskedStretch using this preview
Run CT tweak tone scale
GAME - make galaxy mask
Apply the Galaxy Mask
Enhance the fine detail:
LHE #1: Run LHE with a radius of 20, contrast limit of 2.0, amount of 0.75, and 8-bit histogram.
LHE #2: Run LHE with a radius of 64, contrast limit of 2.0, amount of 0.5, and 8-bit histogram.
Apply Noise XTerminator with a value of 0.6
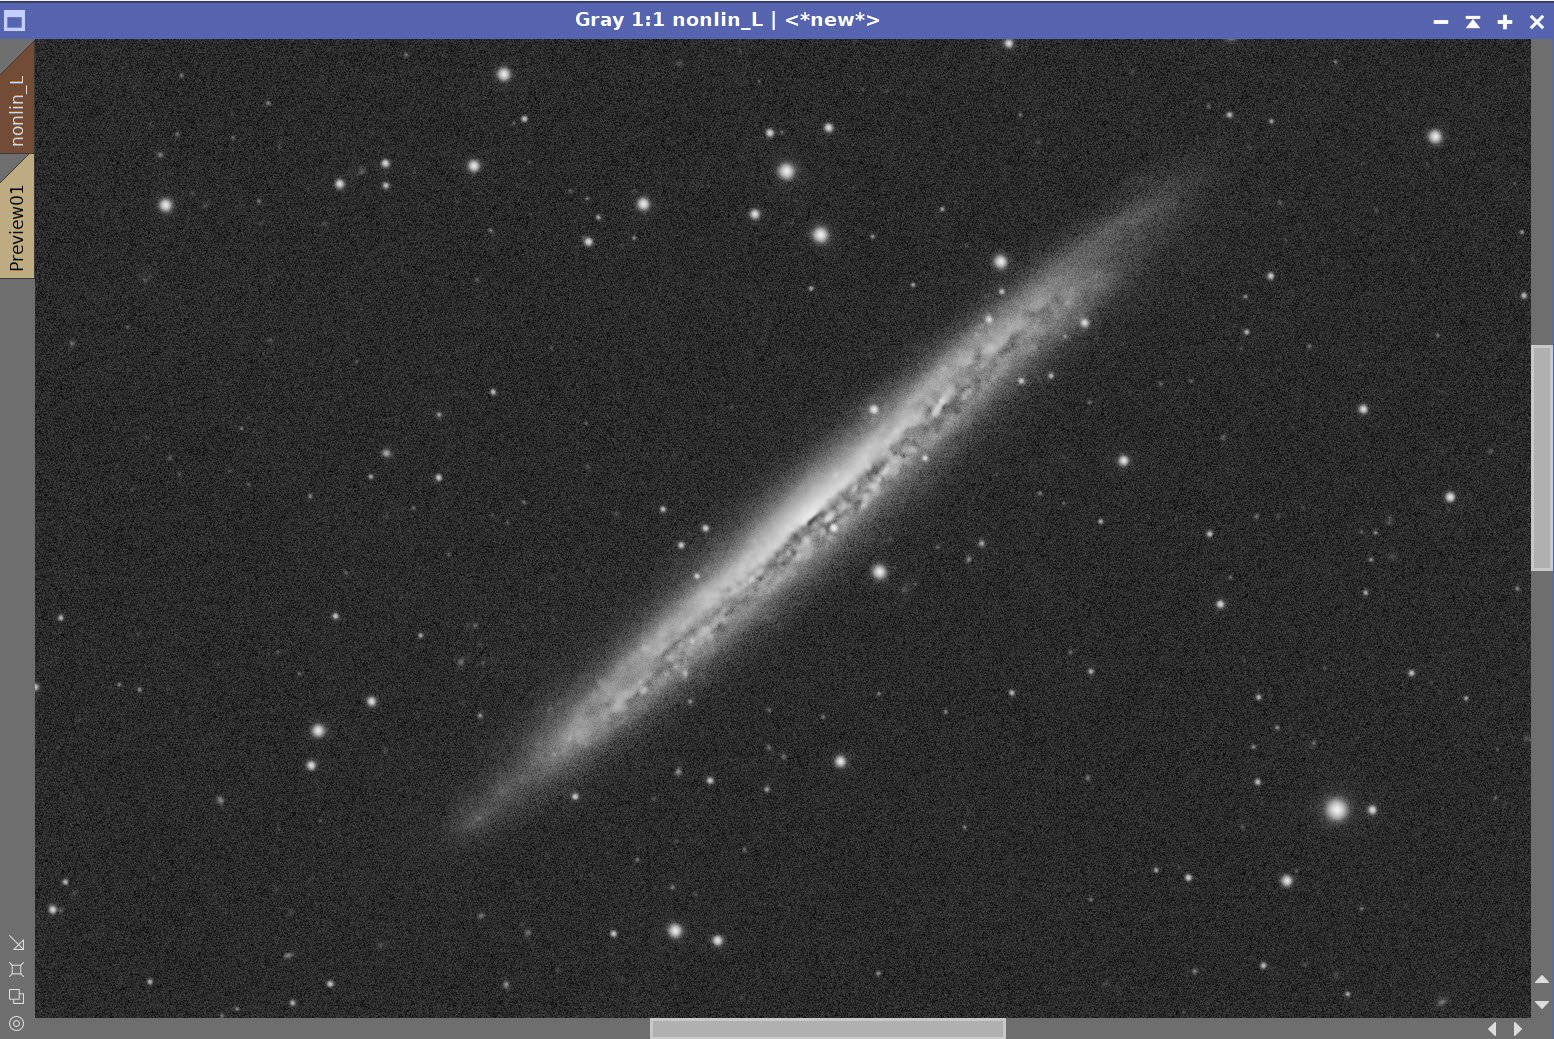
Nonlin L image after MaskedStretch (click to enlarge)
Nonlin L image after tone scale tweak via CT(click to enlarge)

This galaxy Mask was created using the GAME script.


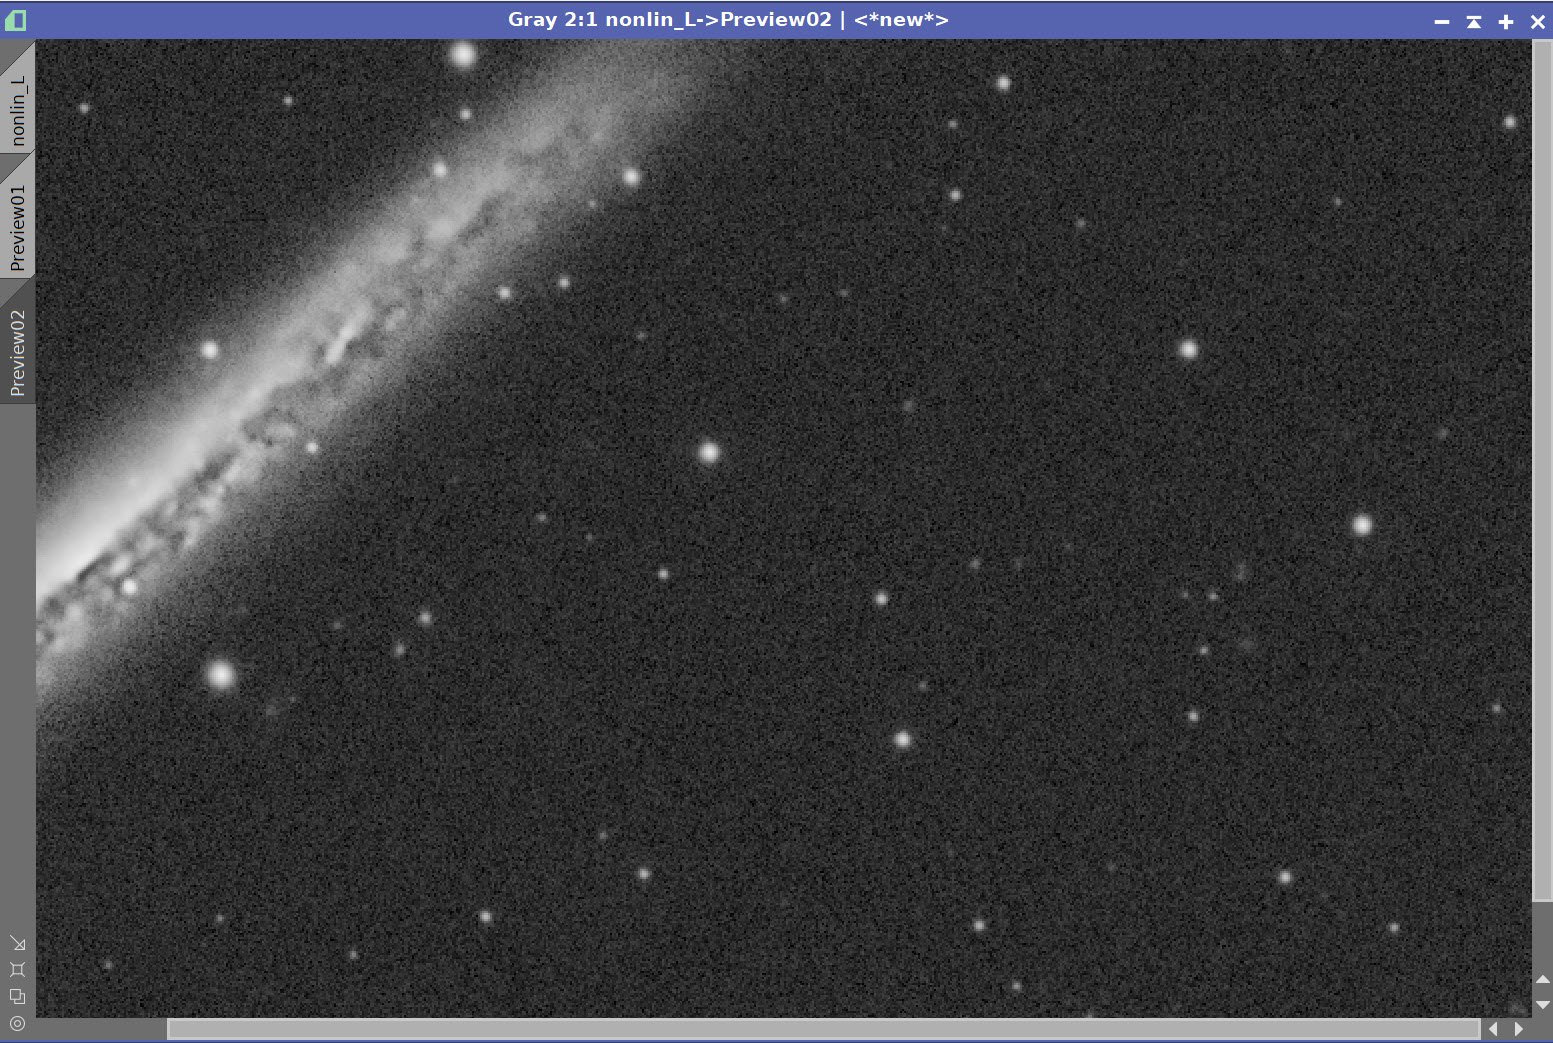
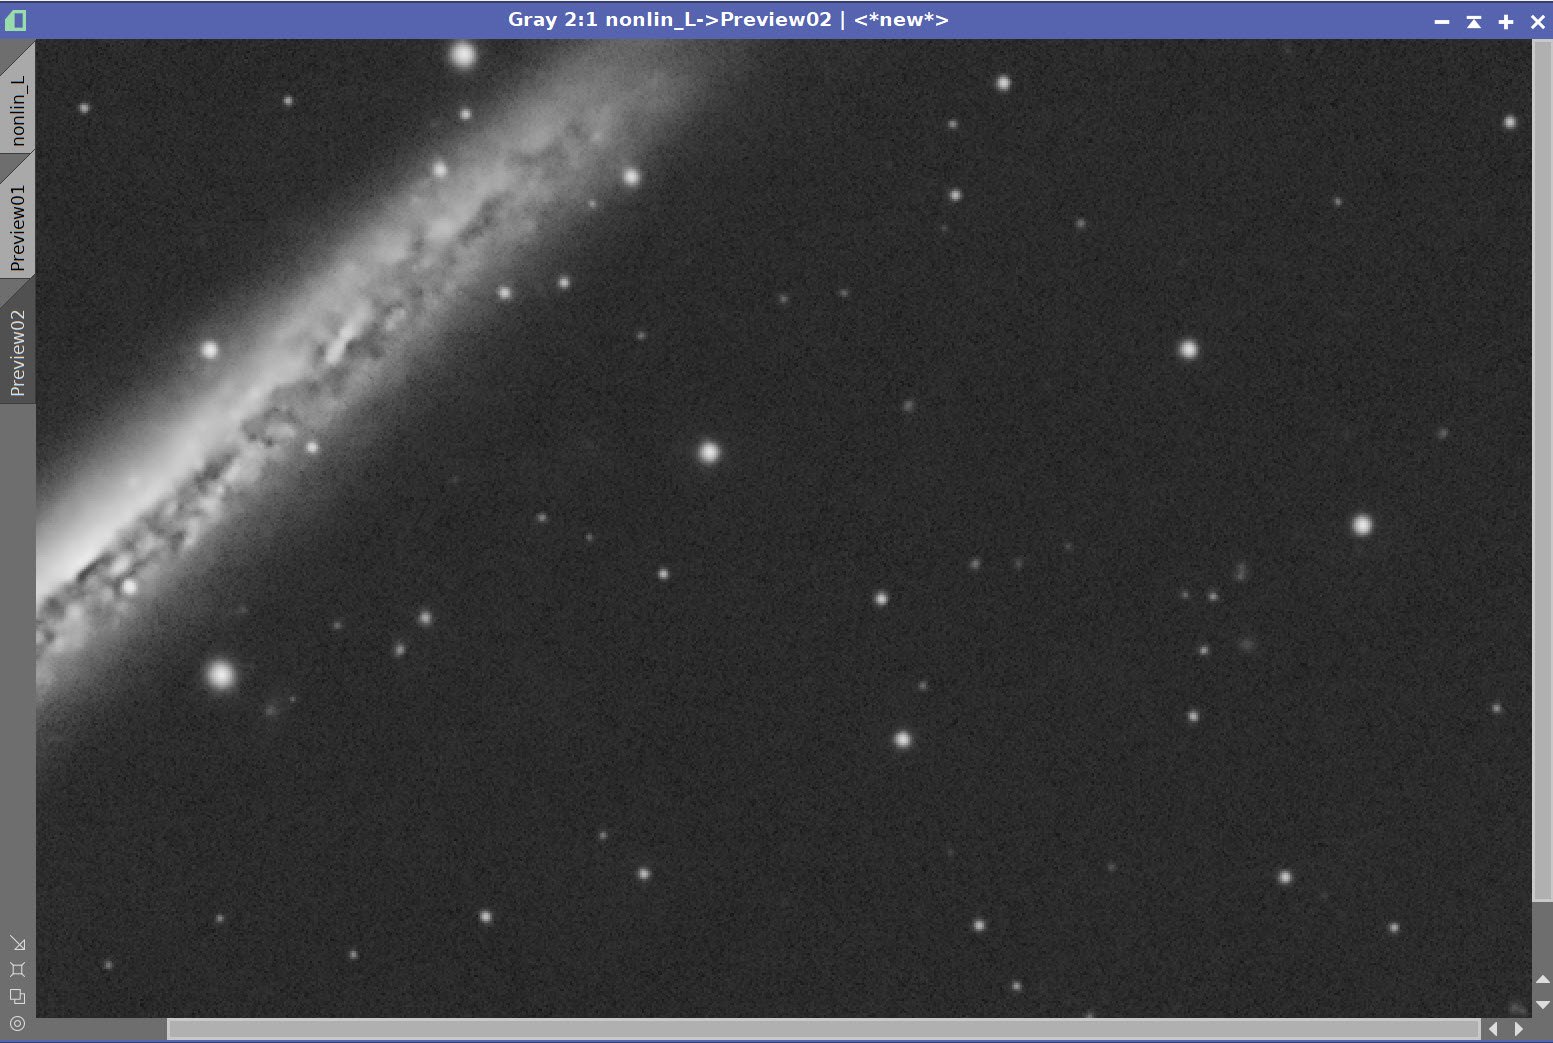
Before and After LHE #1, and After LHE #2
Nonlinear Lum image: Before and After Noise XTerminator 0.6
10. Take Color Image Nonlinear and Process
Select a background sky Preview region
Run MaskedStretch
Run ArcsinhStretch to finalize the stretch and protect the highlights - see panel snap for settings
Run CT and adjust tone scale and saturation
Apply the Galaxy mask
Run ColorSaturation boosting blue and orange colors
Run Noise XTerminator with a value of 0.7

After MaskedStretch

The parameters used i ArcsinhStretch

After ArcsinhStretch

Nonlin RGB after CT adjustment of color sat and tone.
Before and After Noise XTerminator with a value of 0.7
11. Create Nonlinear LRGB image and Finish Processing the Image
Use LRGBCombination to insert the nonlinear Lum image into the Nonlinear RGB image. Do not check color noise options.
Apply Galaxy Mask
Use CT to adjust color Saturation
Use ColorSaturation to Adjust oranges and blues.
Invert Galaxy Mask and Adjust star colors with CT
Run the DarkEnhancement Script at default parameters
Run EZ-Star Reduction and use the Default Adam Block method and parameters.

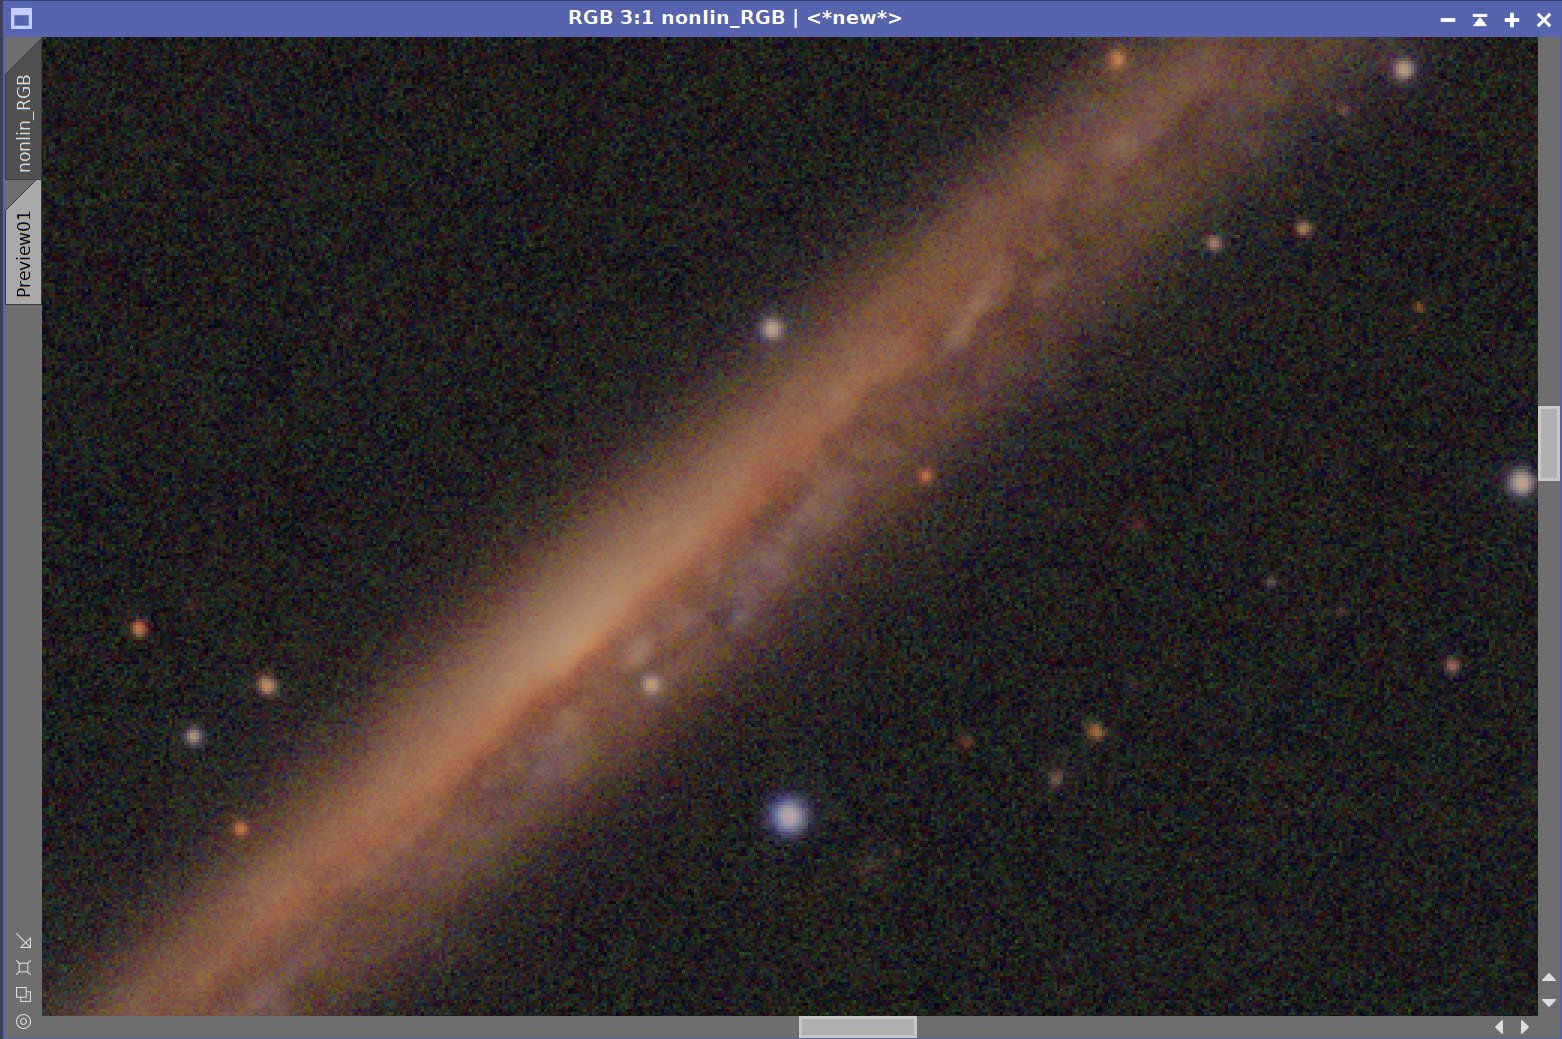
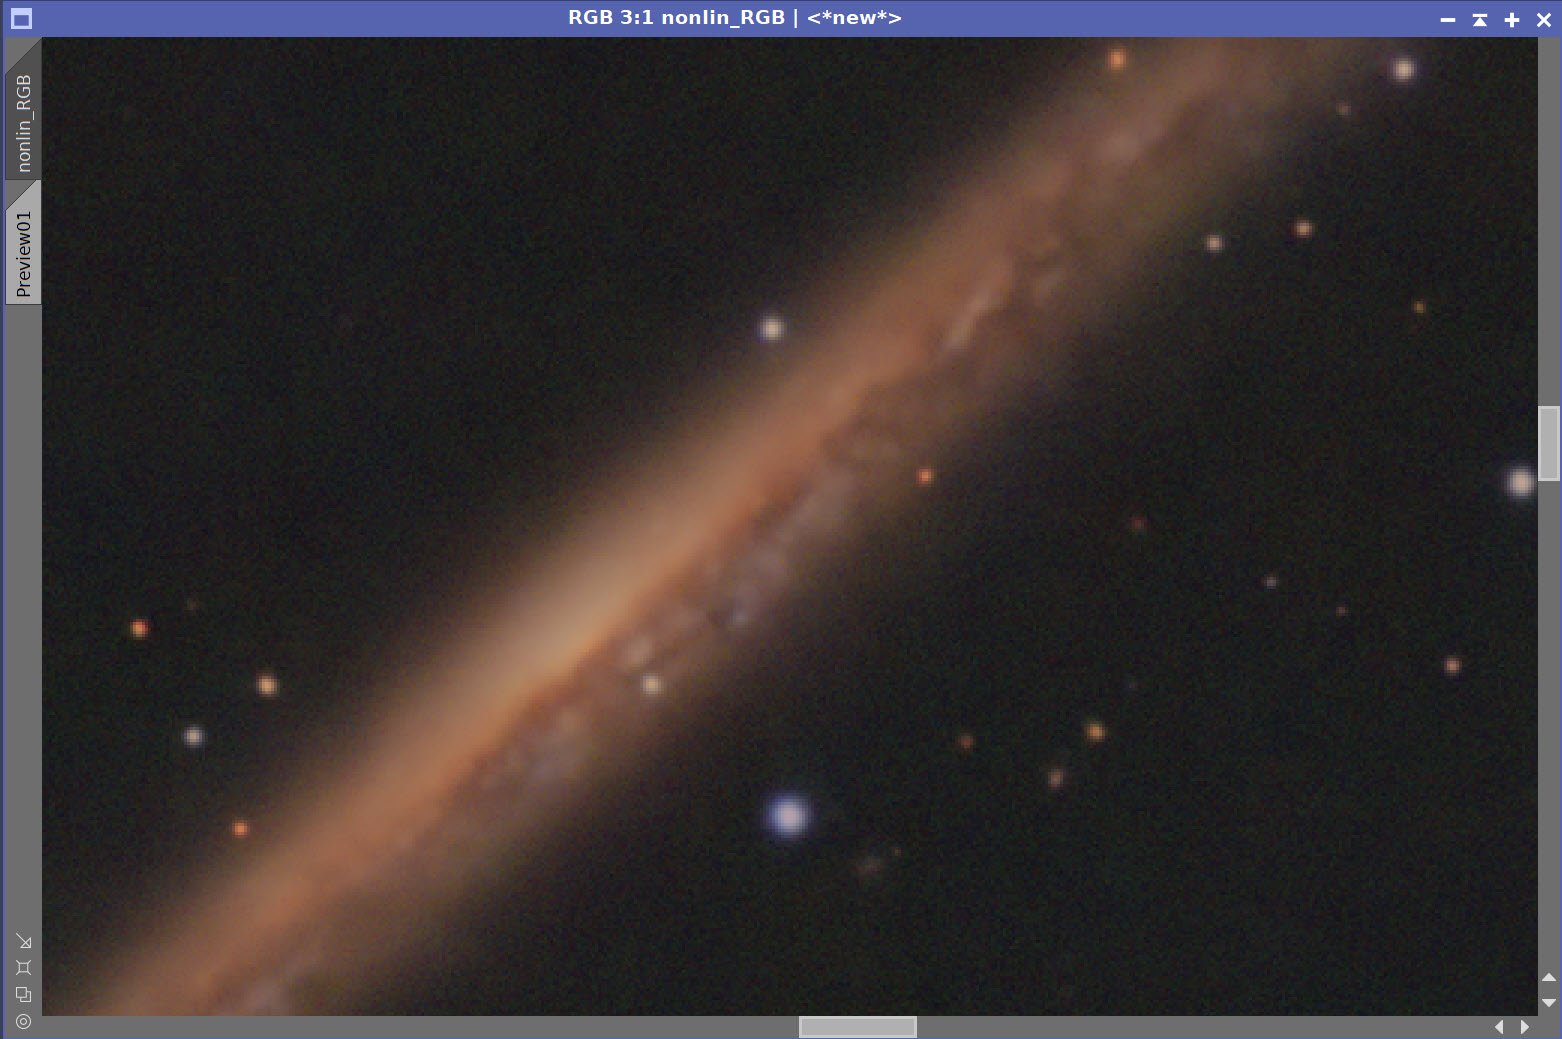
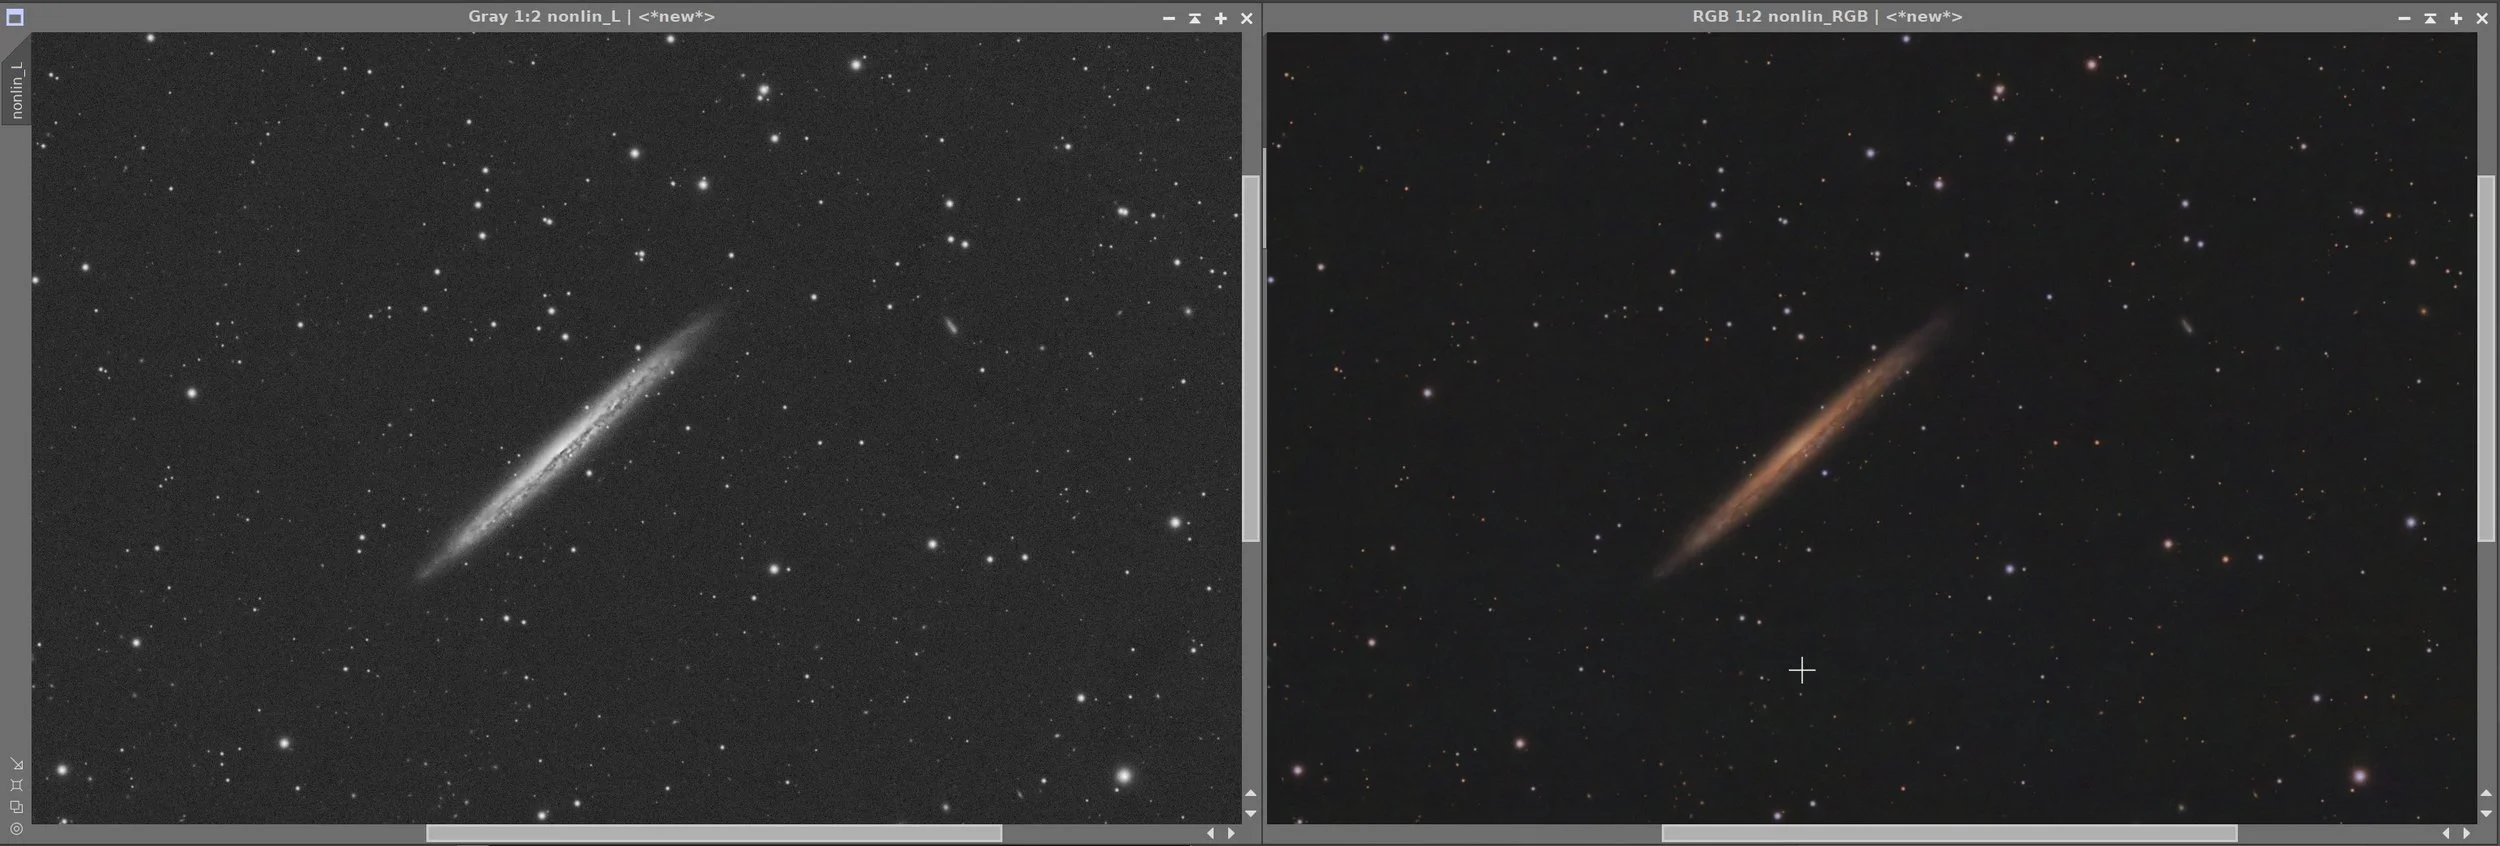
Final Linear Lum and RGB images.
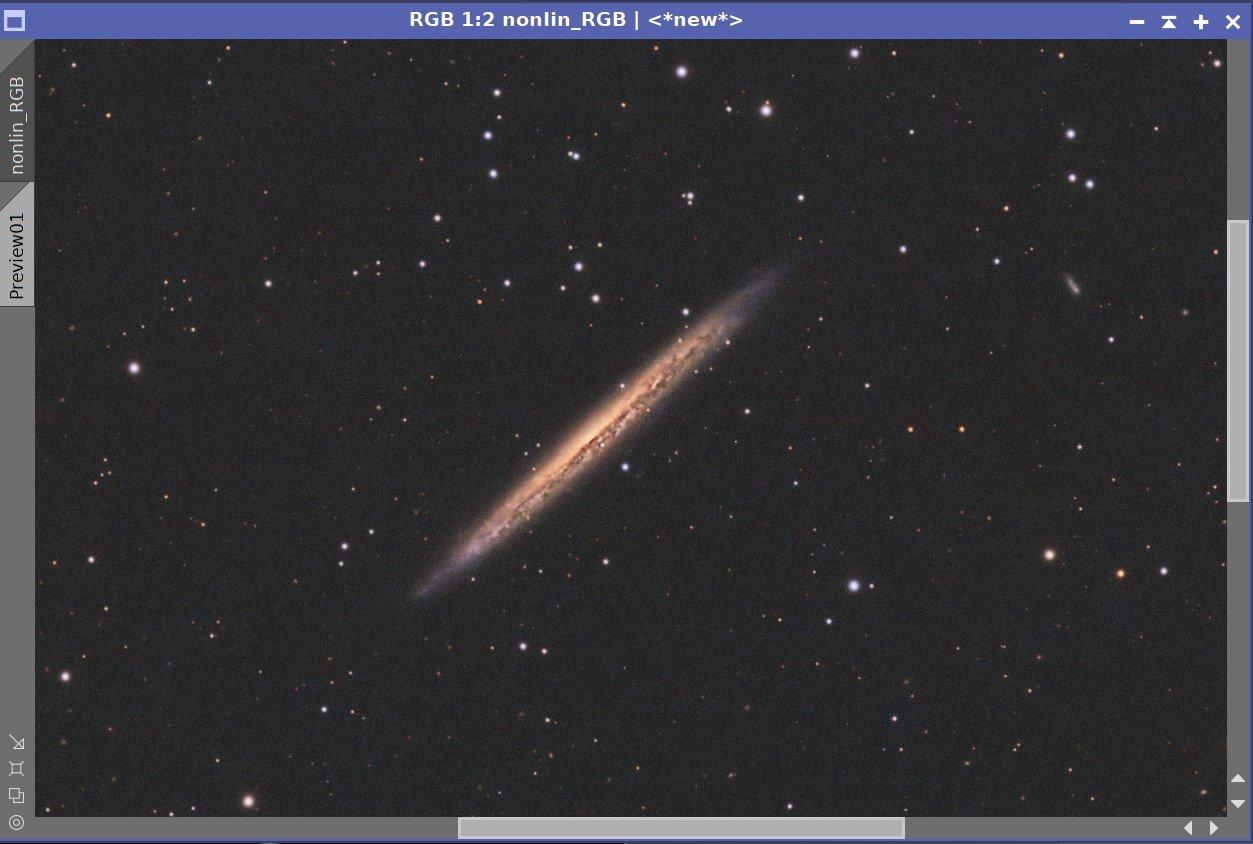
Final Nonlinear L and RGB image. Note that the image is zoomed a bit to better show galaxy detail.

The new LRGB image.

Nonlinear LRGB after CT adjustment of color sat and tone scale.
Before and After DarkStructureEhance
Before and After EZ-Star Reduction
12. Export to PhotoShop
Export as 16-bit tiff
Open in Photoshop
Determine best crop and crop the image.
Use the Filter Starshrink to selectively reduce the bloated,the bright stars
Use Camera Raw filter to tweak color, tone, and Clarity
Carefully use Topaz AI Denoise to reduce color noise
Add in watermarks
Save image files.
The Final Image!
Capture Hardware
Scope: Astrophysics 130mm Starfire F/8.35 APO refractor
Guide Scope: Televue 76mm Doublet
Camera: ZWO ASI1600mm-pro with ZWO Filter wheel with ZWO LRGB filter set,
and Astronomiks 6nm Narrowband filter set
Guide Camera: ZWO ASI290Mini
Focus Motor: Pegasus Astro Focus Cube 2
Camera Rotator: Pegasus Astro Falcon
Mount: Ioptron CEM60
Polar Alignment: IPolar camera
Software
Capture Software: PHD2 Guider, Sequence Generator Pro controller
Image Processing: Pixinsight, Photoshop - assisted by Coffee, extensive processing indecision and second-guessing, editor regret and much swearing….. Given the problems on this image, more than the usual whining
Adding the next generation ZWO ASI2600MM-Pro camera and ZWO EFW 7x36 II EFW to the platform…