NGC 7008- The Fetus Nebula (2026): Image Processing Walkthrough
Aug 19, 2026
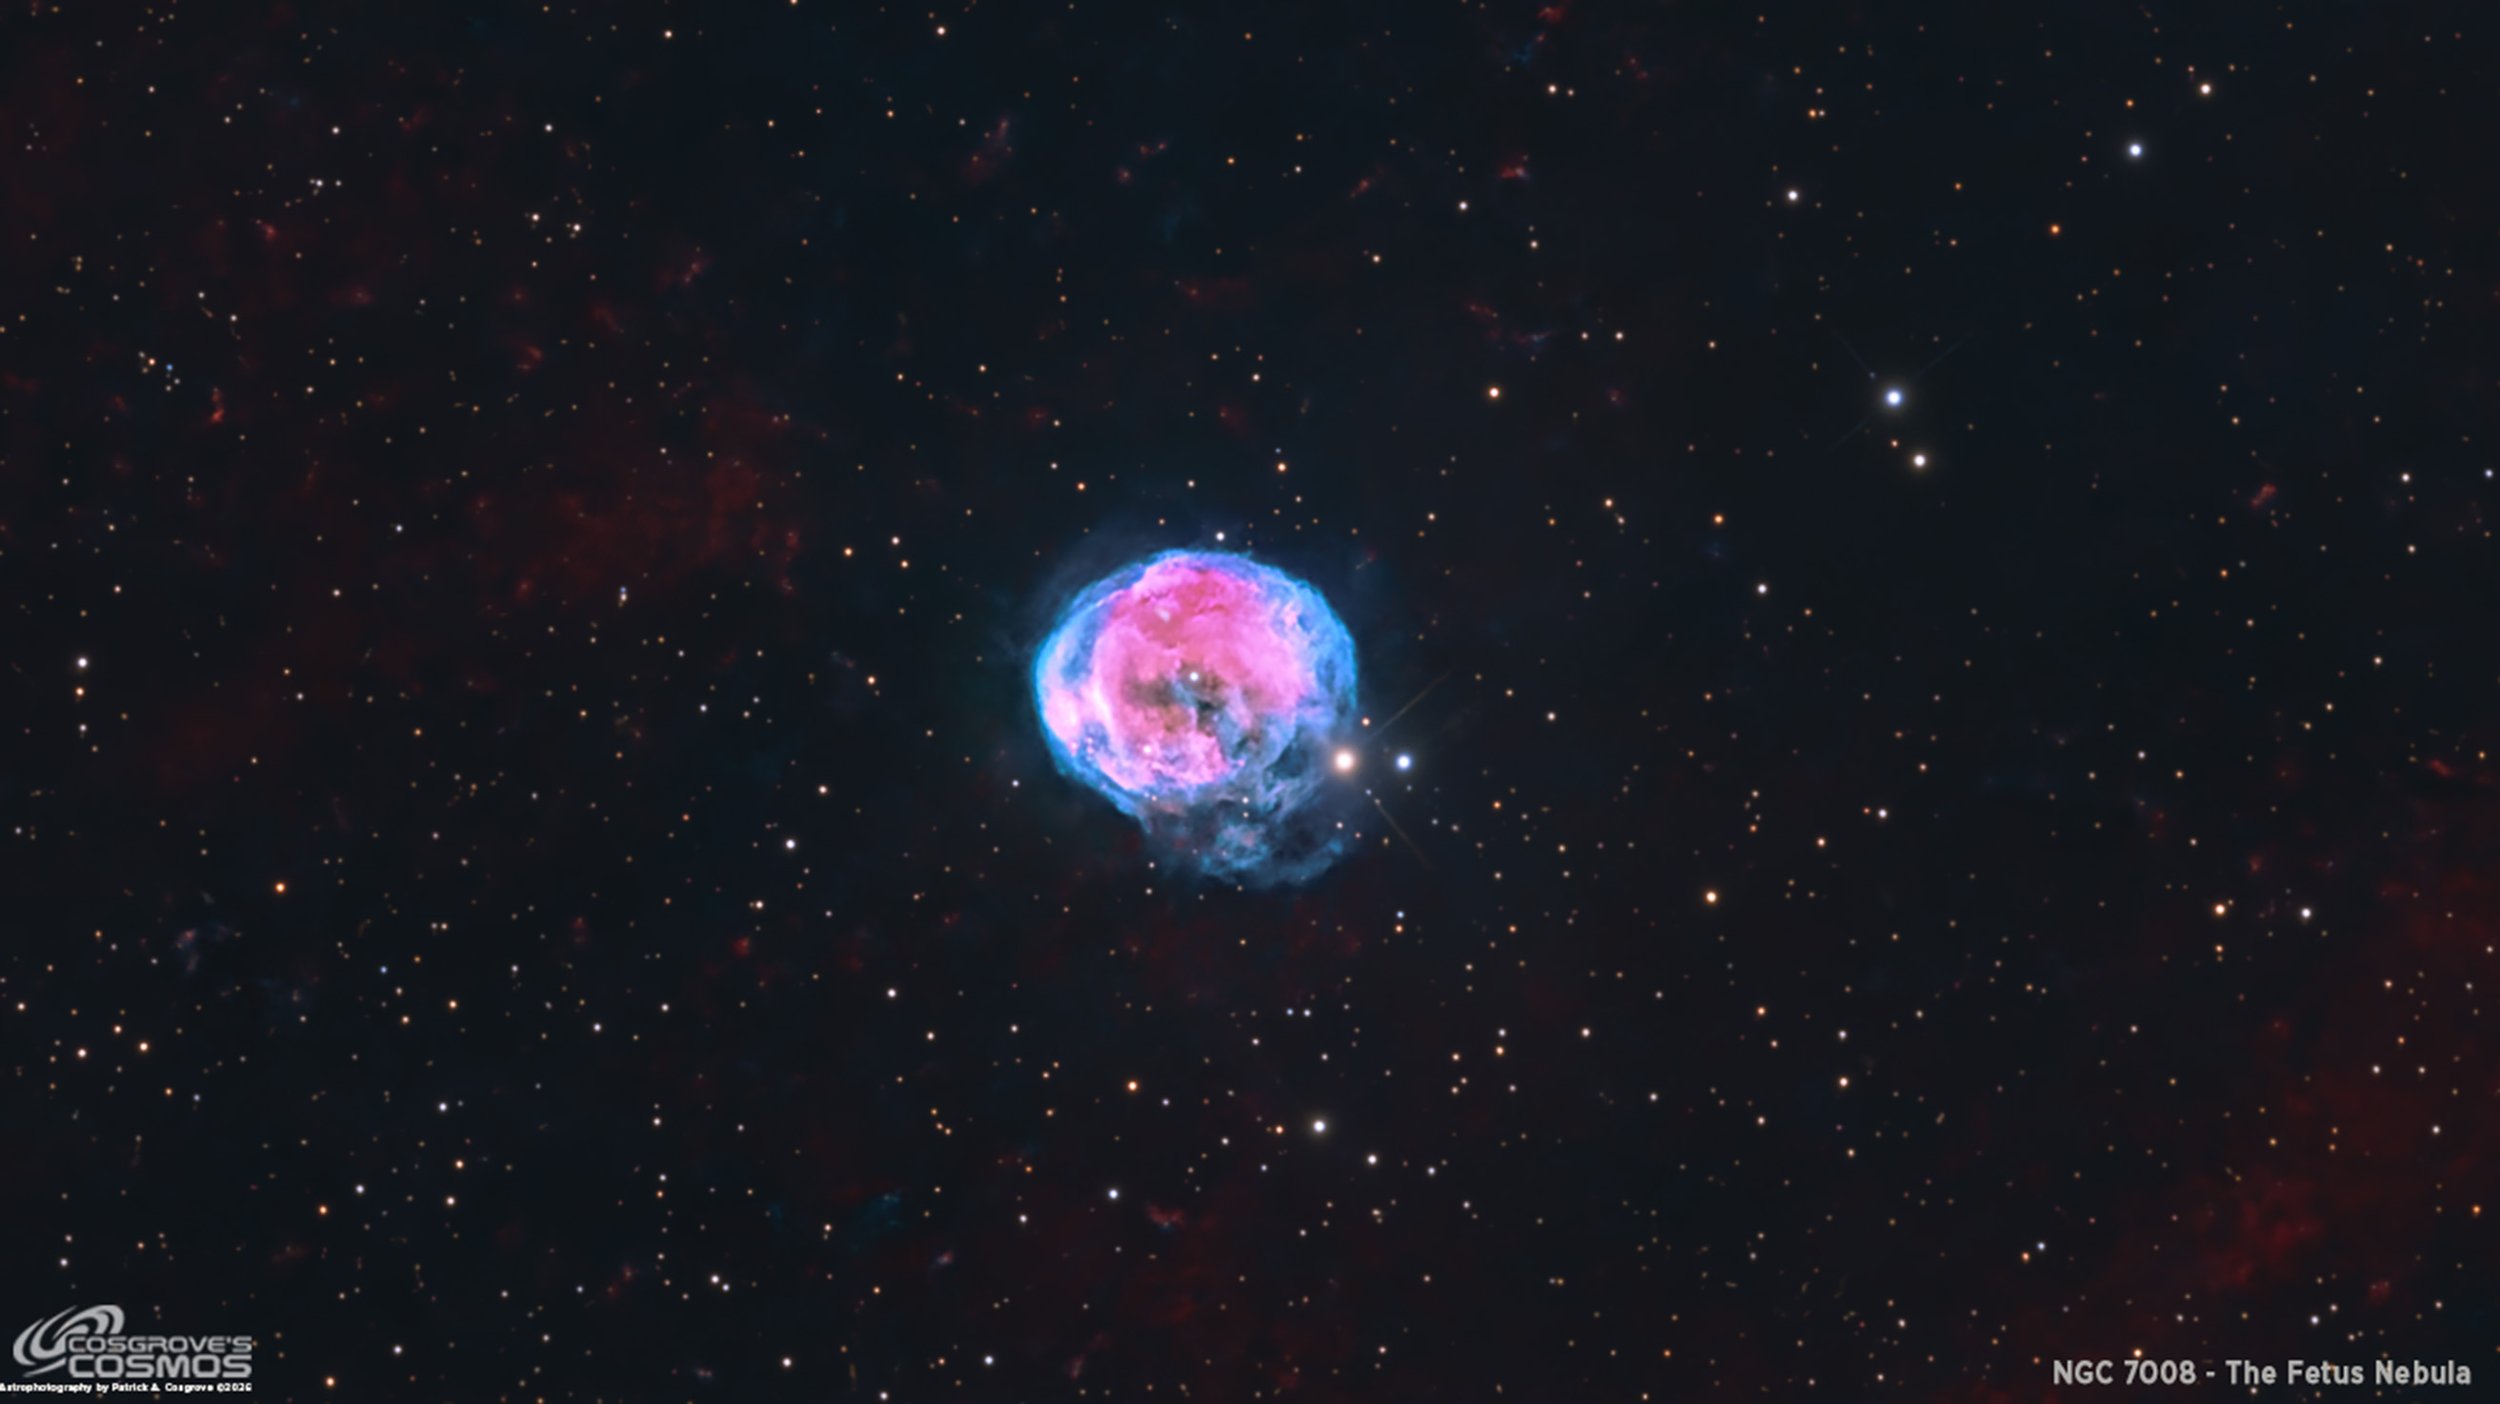
My Image of NGC 7008.
This page is the Image Processing Walkthrought page for the NGC 7008 (2026) Imaging Project.
🔭 Project Summary
Target: NGC 7008 — The Fetus Nebula / PN G093.4+05.4 / PK 93+5.2
Capture Dates: July 11, 12, 22, and 23, 2026
Constellation: Cygnus • Distance: ≈ 2,800 light-years
Type: Planetary nebula — the glowing outer atmosphere of a dying Sun-like star
Angular Size: ≈ 1.4 arcminutes, or about 86 arcseconds across
Imaging Period: July 11–23, 2026 • Total Integration: 10 h 30 m 00 s (HOO narrowband + RGB stars)
Filters: Ha · OIII (Astronomik 36 mm 6 nm) + R · G · B (ZWO 36 mm LRGB Gen II)
Telescope: Sharpstar SCA260 V2 260 mm f/5.0 Special Cassegrain Astrograph
Camera: ZWO ASI2600MM-Pro (−10 °C; Gain 100 narrowband, Gain 0 RGB)
Mount: iOptron CEM70 on custom steel pier with modified iOptron top pier plate
Guiding: ZWO OAG-L with ZWO ASI174MM-Mini guide camera
Processing: PixInsight (HOO narrowband + RGB stars) & Photoshop
Location: Whispering Skies Observatory · Honeoye Falls, NY (USA)
Acquisition Notes: Ha: 52 × 300 s; OIII: 52 × 300 s; R: 36 × 60 s; G: 37 × 60 s; B: 37 × 60 s, all bin 1×1 at −10 °C; total 10 h 30 m 00 s after culling bad or questionable subs.
Calibration Notes: 25 darks at 300 s, bin 1×1, −10 °C, Gain 100; 25 darks at 60 s, bin 1×1, −10 °C, Gain 0; 30 dark flats at each flat exposure time; 15 flats each for Ha, OIII, R, G, and B.
Image Note: This HOO narrowband image with RGB stars frames NGC 7008, a compact and highly structured planetary nebula in Cygnus. The small apparent size of the target makes the field feel wide and star-rich, while the nebula itself shows a broken, knotted shell with the curled structure that gives the Fetus Nebula its informal name.
Table of Contents Show (Click on lines to navigate)
Special Note
Welcome to the new Image Processing Page for this project! If you arrived here from the main Image Project, you can easily return to it using your browser's back button.
Abbreviations Used
NGC 7008 HOO + RGB Stars Processing Flow
Sequential summary of the actual NGC 7008 workflow, following the published NGC 7008 image processing walkthrough: Blink review, WBPP 3.01 integration, HOO/RGB master construction, linear correction, aggressive RGB star preparation, nonlinear HOO work, masked color and contrast refinement, RGB star recombination, crop selection, final PixInsight tweaks, and Photoshop output.
Processing this Image
(Most of the Processing was done in PixInsight, with some final touches done in Photoshop)
Note:
I had originally intended for this project to be an SHOrgb project. So, PI WBPP was done assuming this. However, the SII signal had little to show, so I shifted to a HOOrgb project.
1. Blink
General
Lots of satellite tracks - easy to handle.
Ha
3 frames removed - all for clouds.
OIII
1 frame removed - for clouds.
SII
2 frames removed for clouds.
Red
Zero frames removed.
Green
Zero frames removed.
Blue
Zero frames removed.
Darks
All looked OK
Dark Flats
All looked OK
Flats
All looked OK
2. WBPP 3.01
Reset everything
Load all lights
Load all flats
Load all darks
Select - maximum quality
Reference Image - auto - the default
Select the output directory for the WBPP folder
Enable CC for all light frames
Pedestal value - auto
Darks - set exposure tolerance to 0
Lights - set exposure tolerance to 0
Set for Autocrop
WBPP ran for 1:20. No errors.
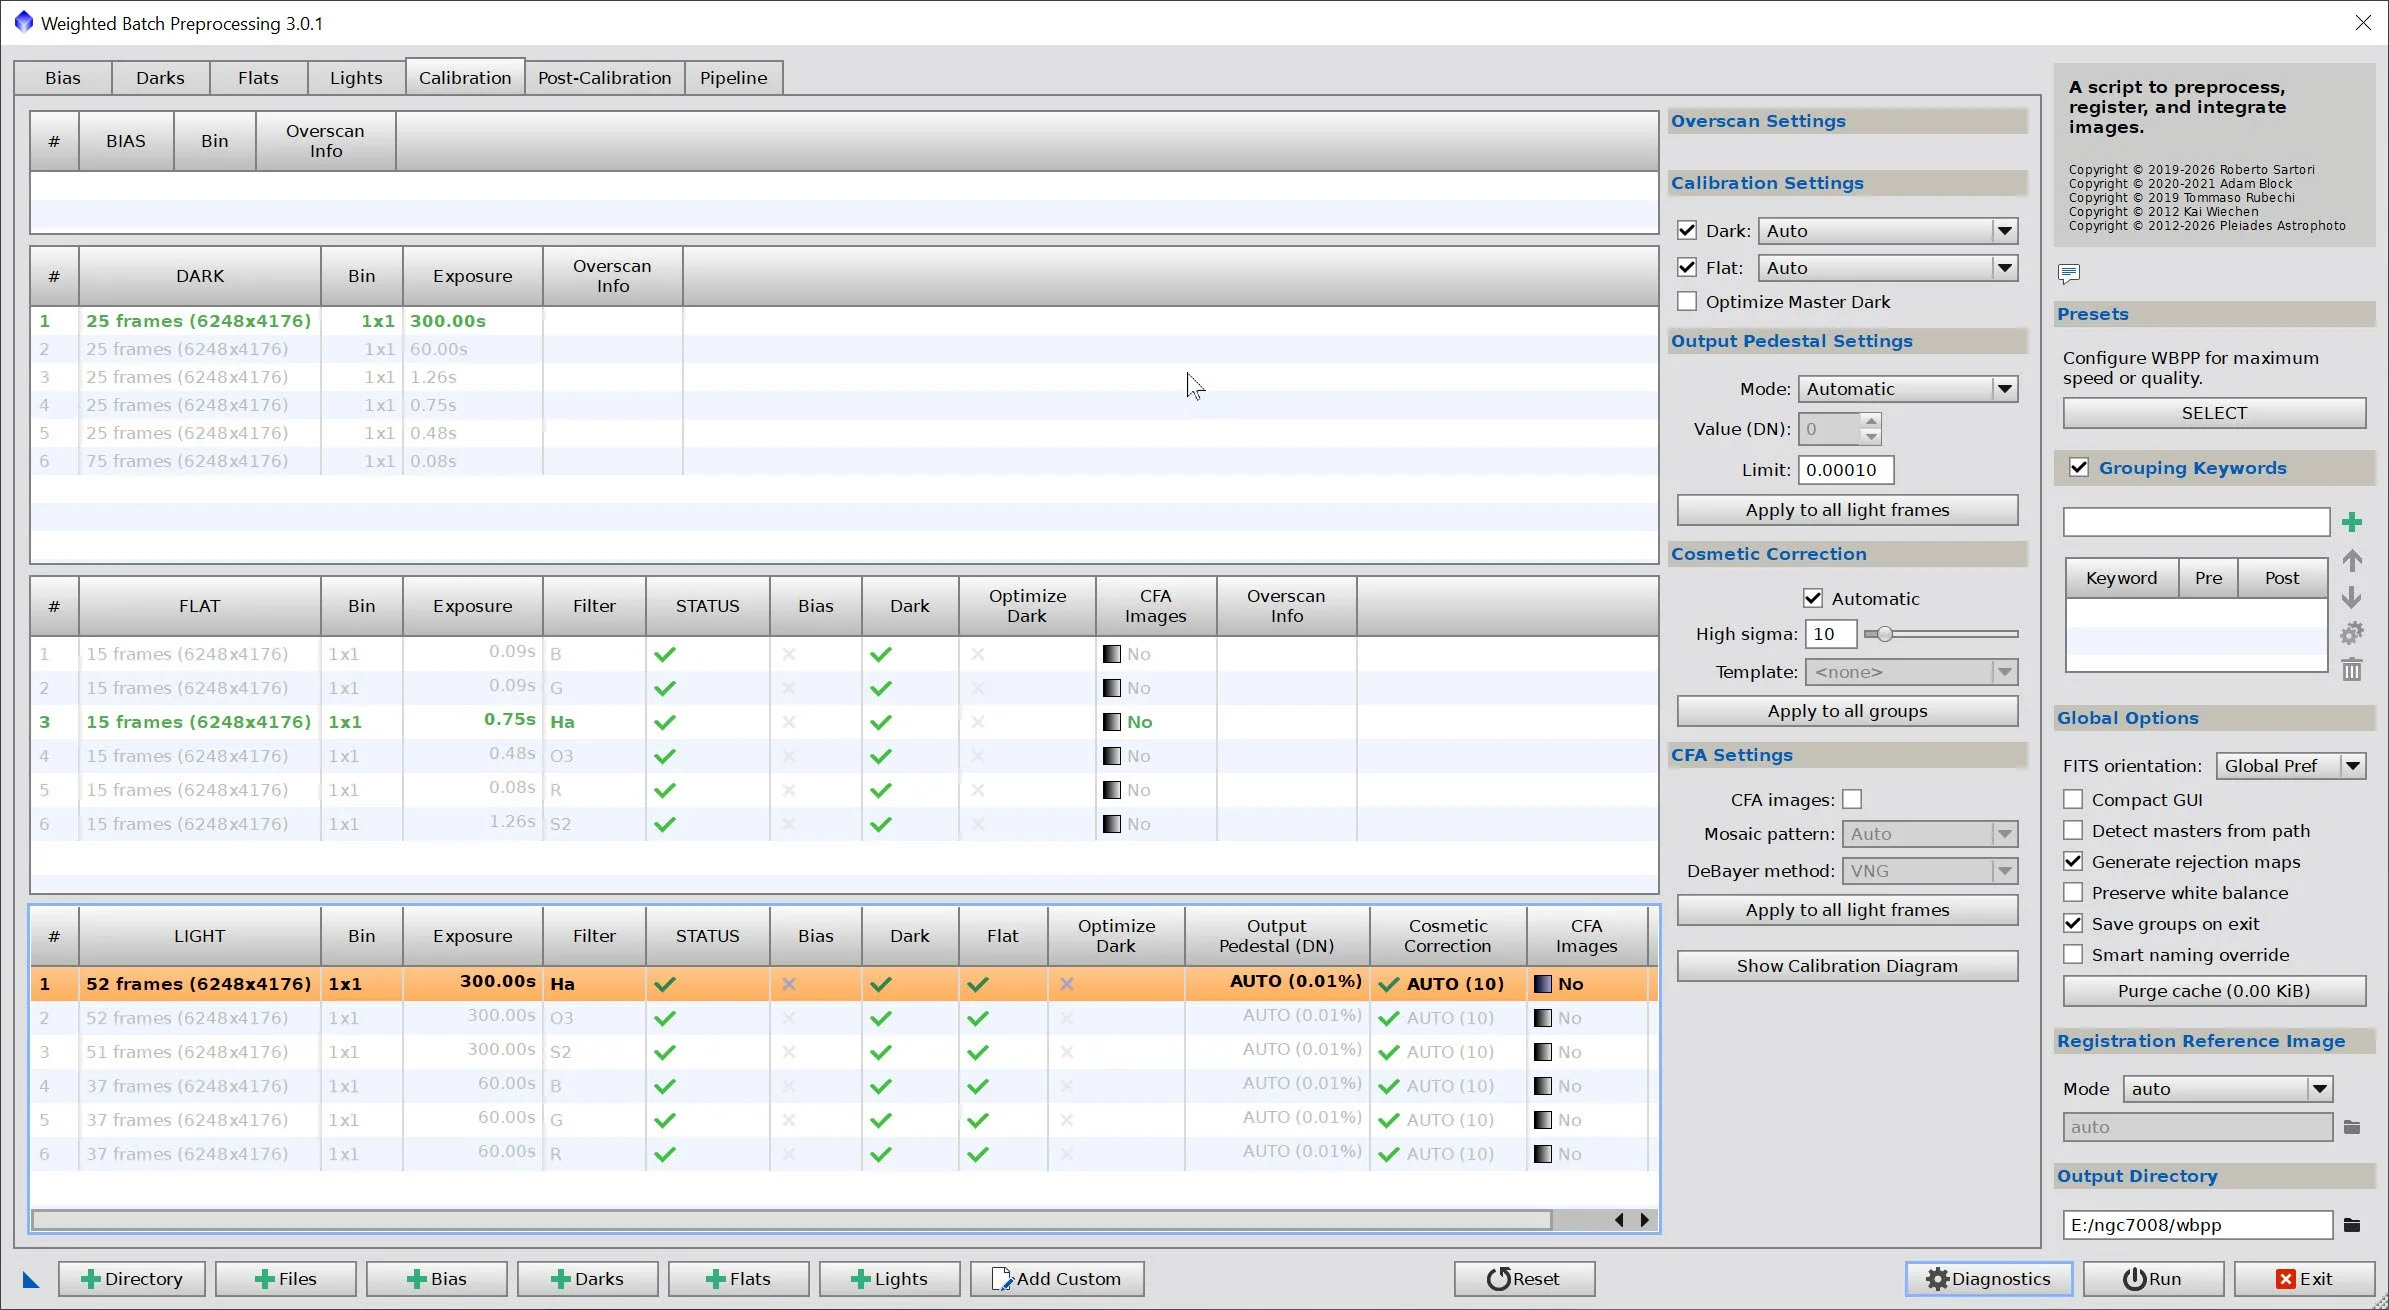
WBPP Calibration View
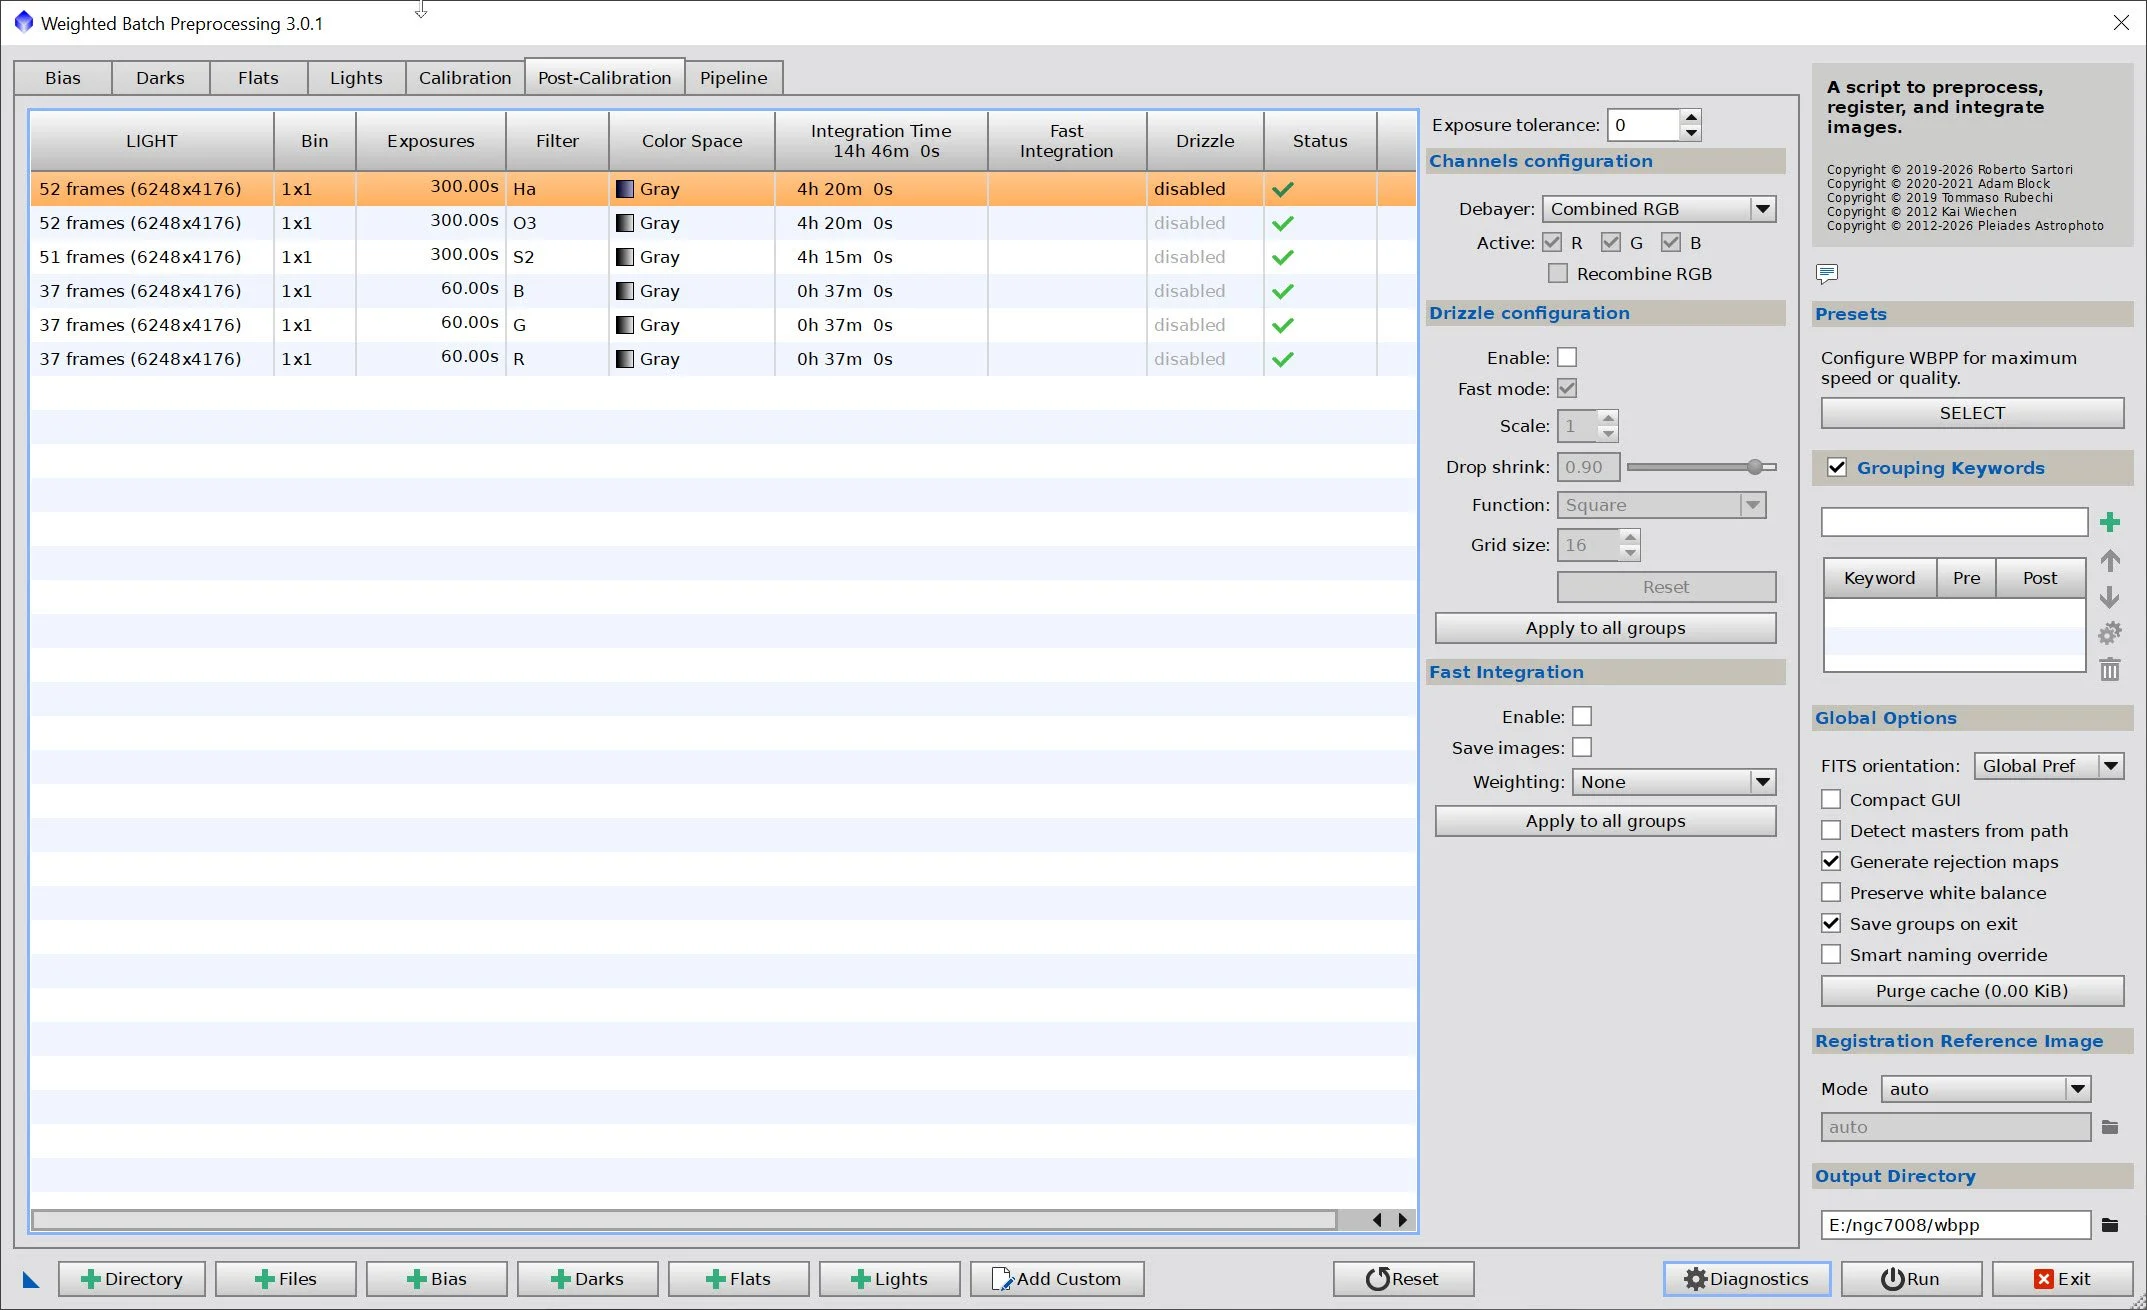
WBPP Post Calibration View
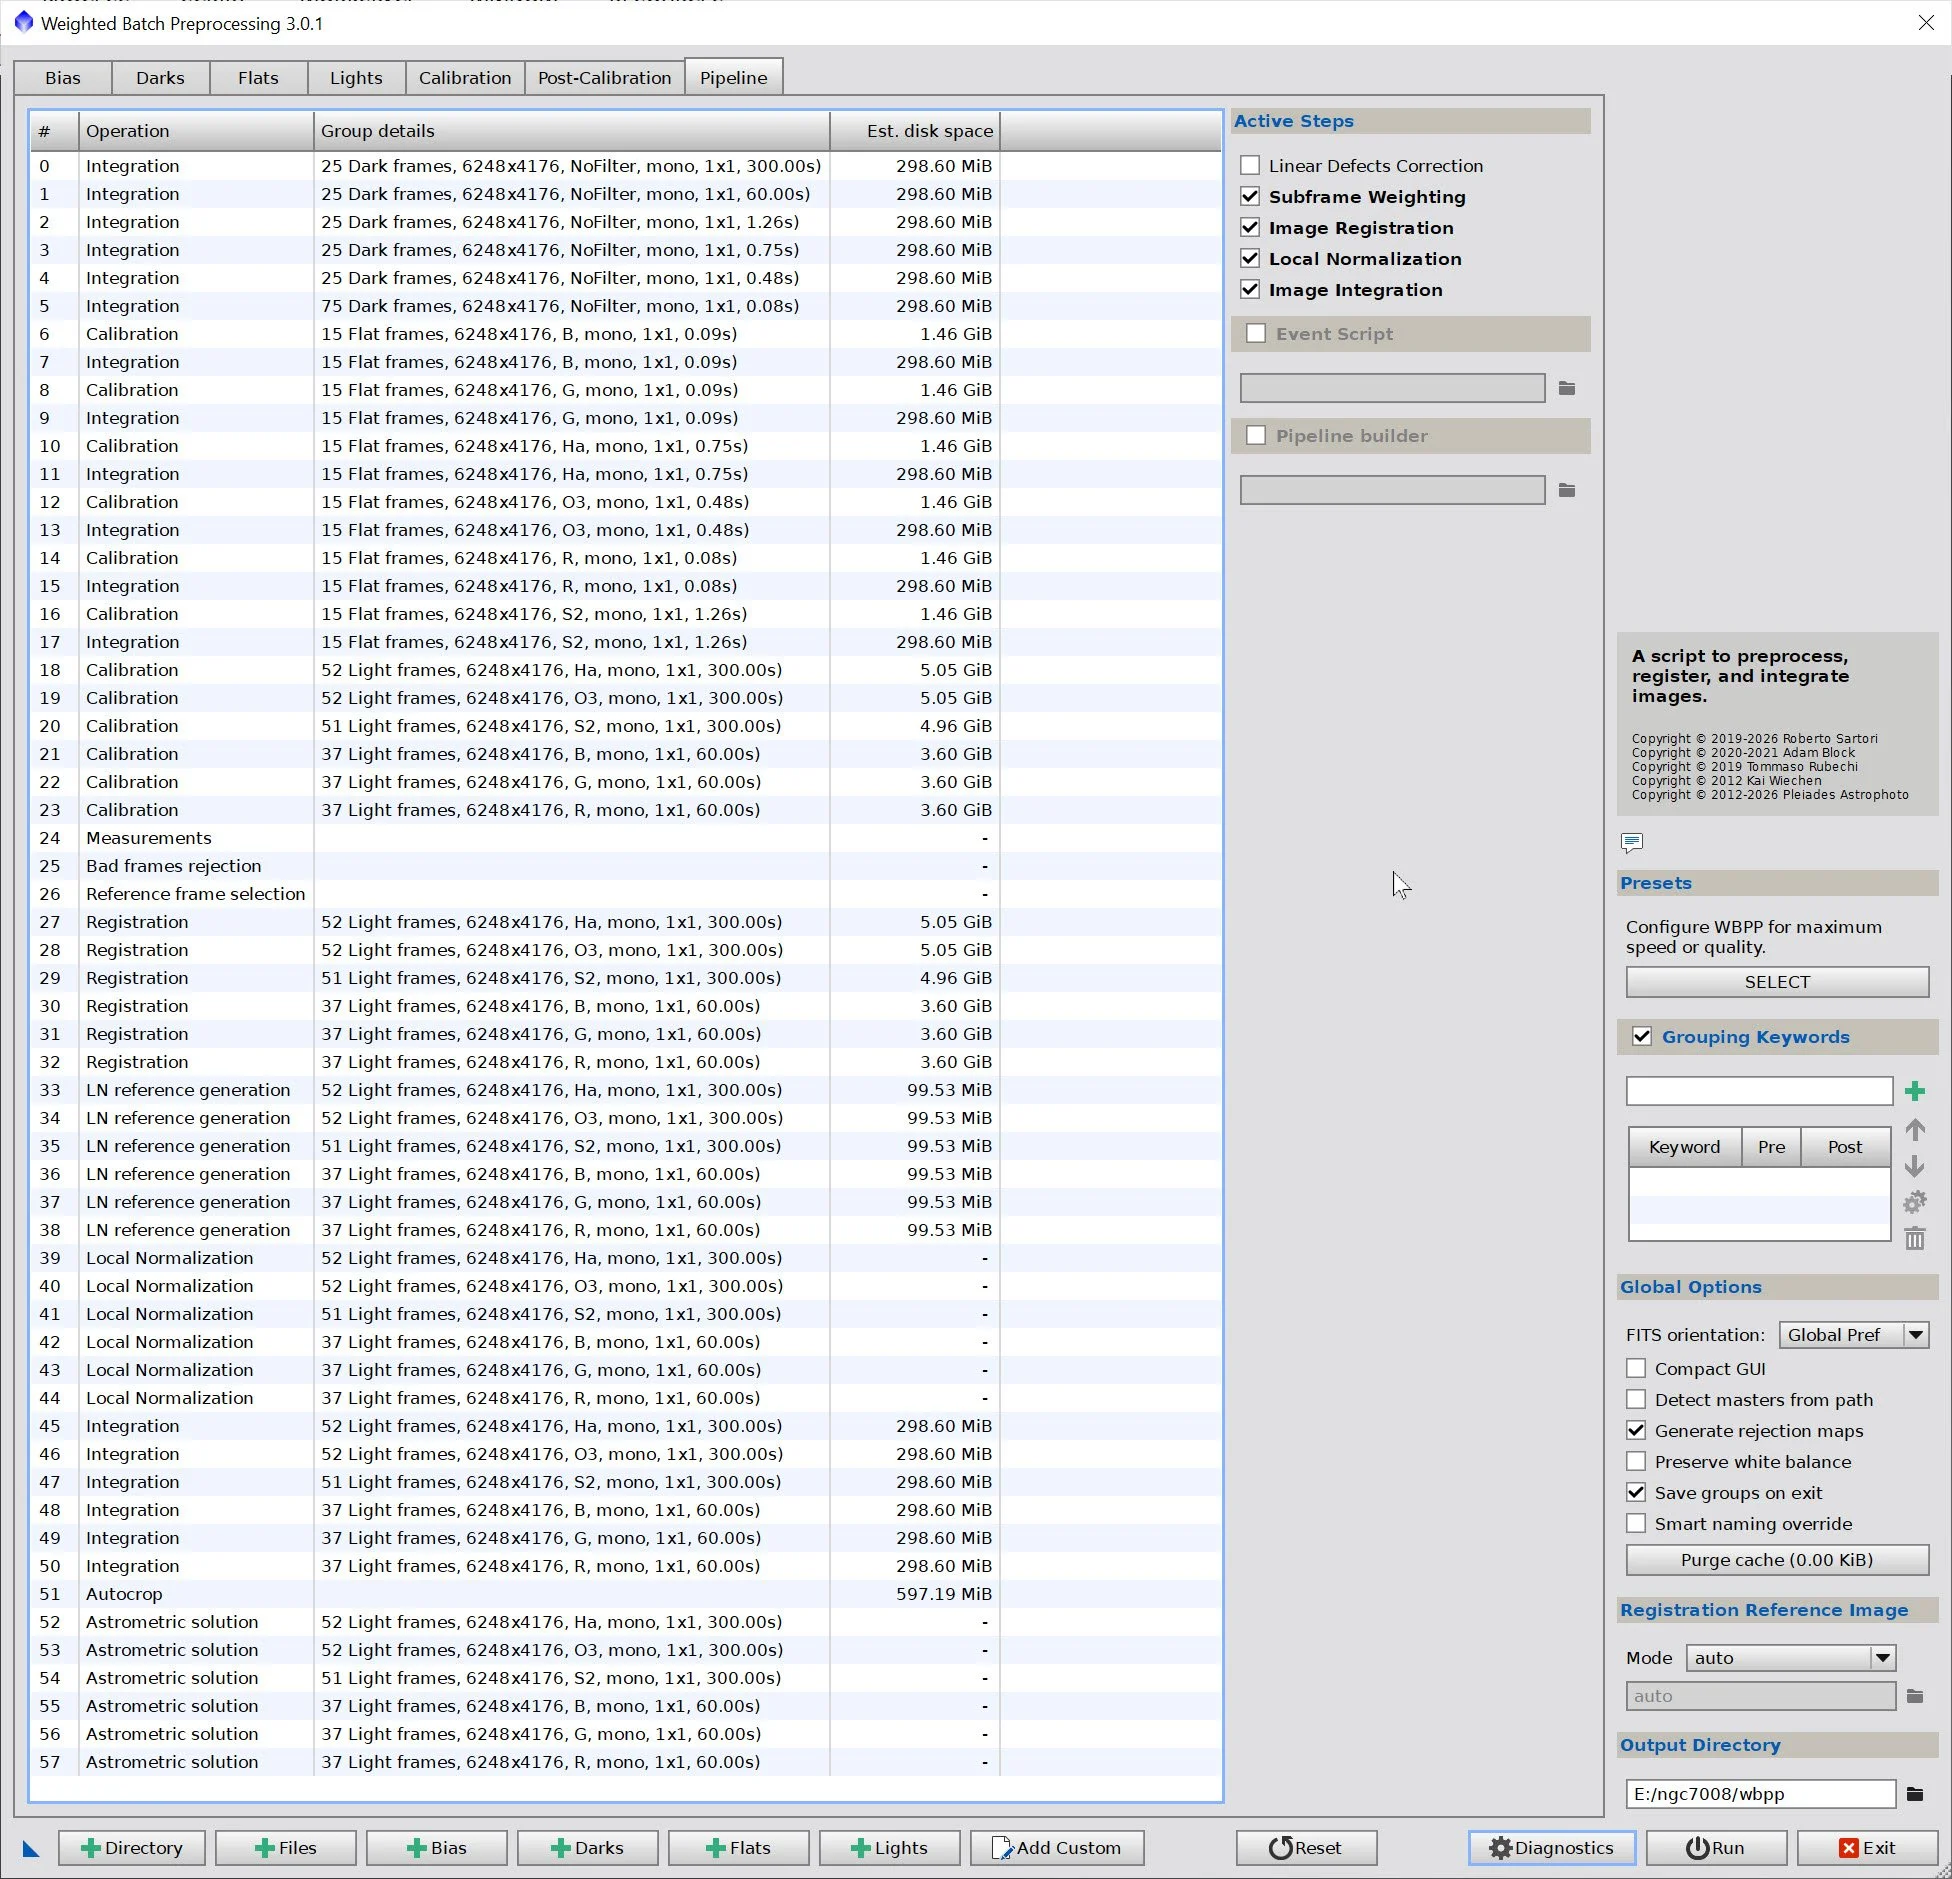
WBPP Pipeline View
3. Load Master Images and Create Color Images
Load all master images and rename them.
SII image showed almost no detail, so I dropped it and went to an HOO image.
Using ChannelCombination, create the Master HOO and RGB color images
For some reason I have not determined, the red channel has a much stronger image for the RGB color image - this was a little odd, to say the least, but I assumed I could calibrate this strong color bias out as part of the normal processing.
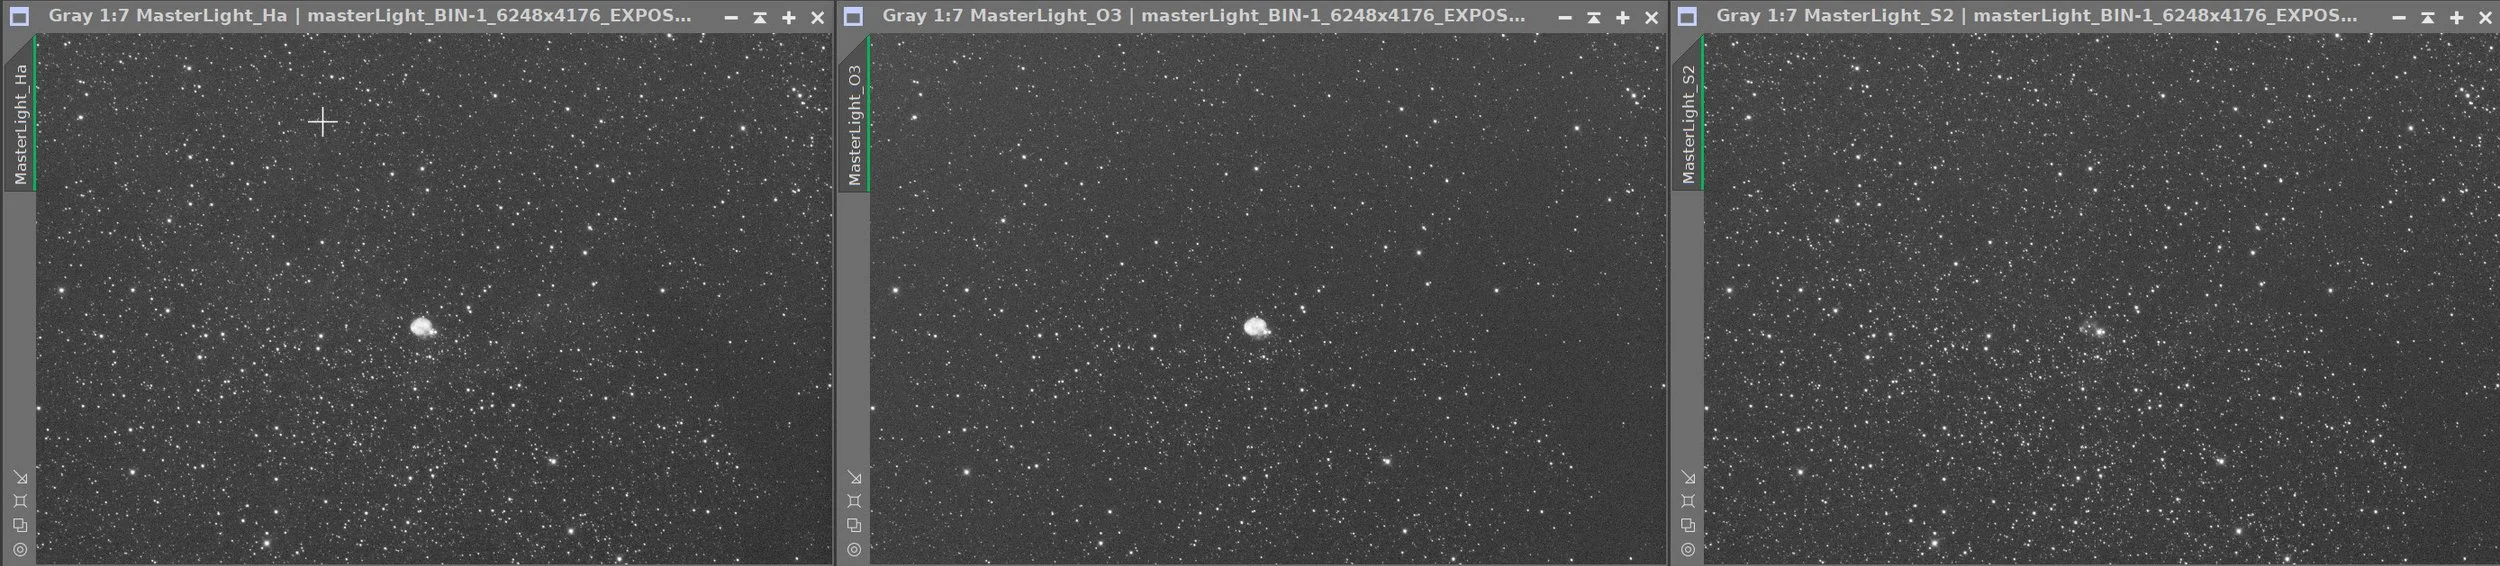
Master Ha, OIII, and SII Images
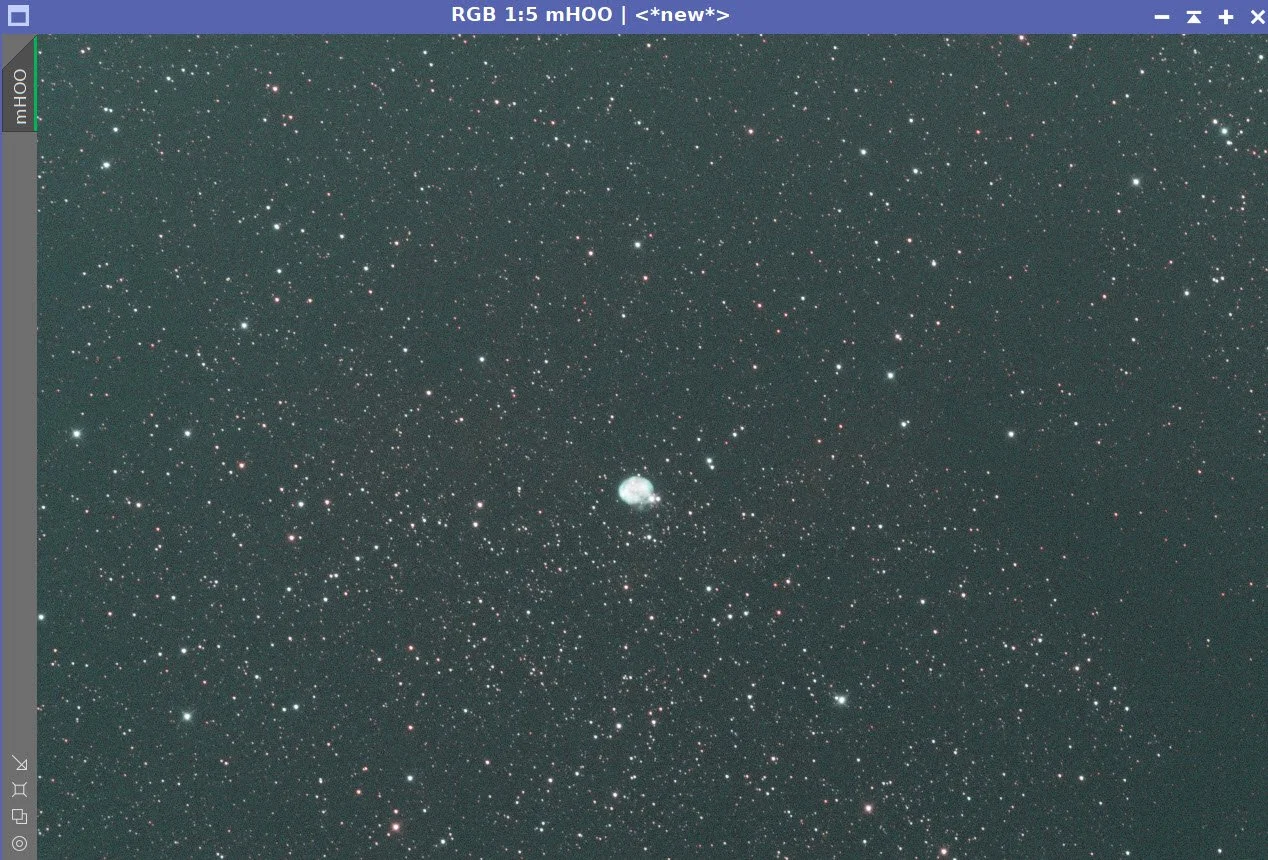
Master HOO image.
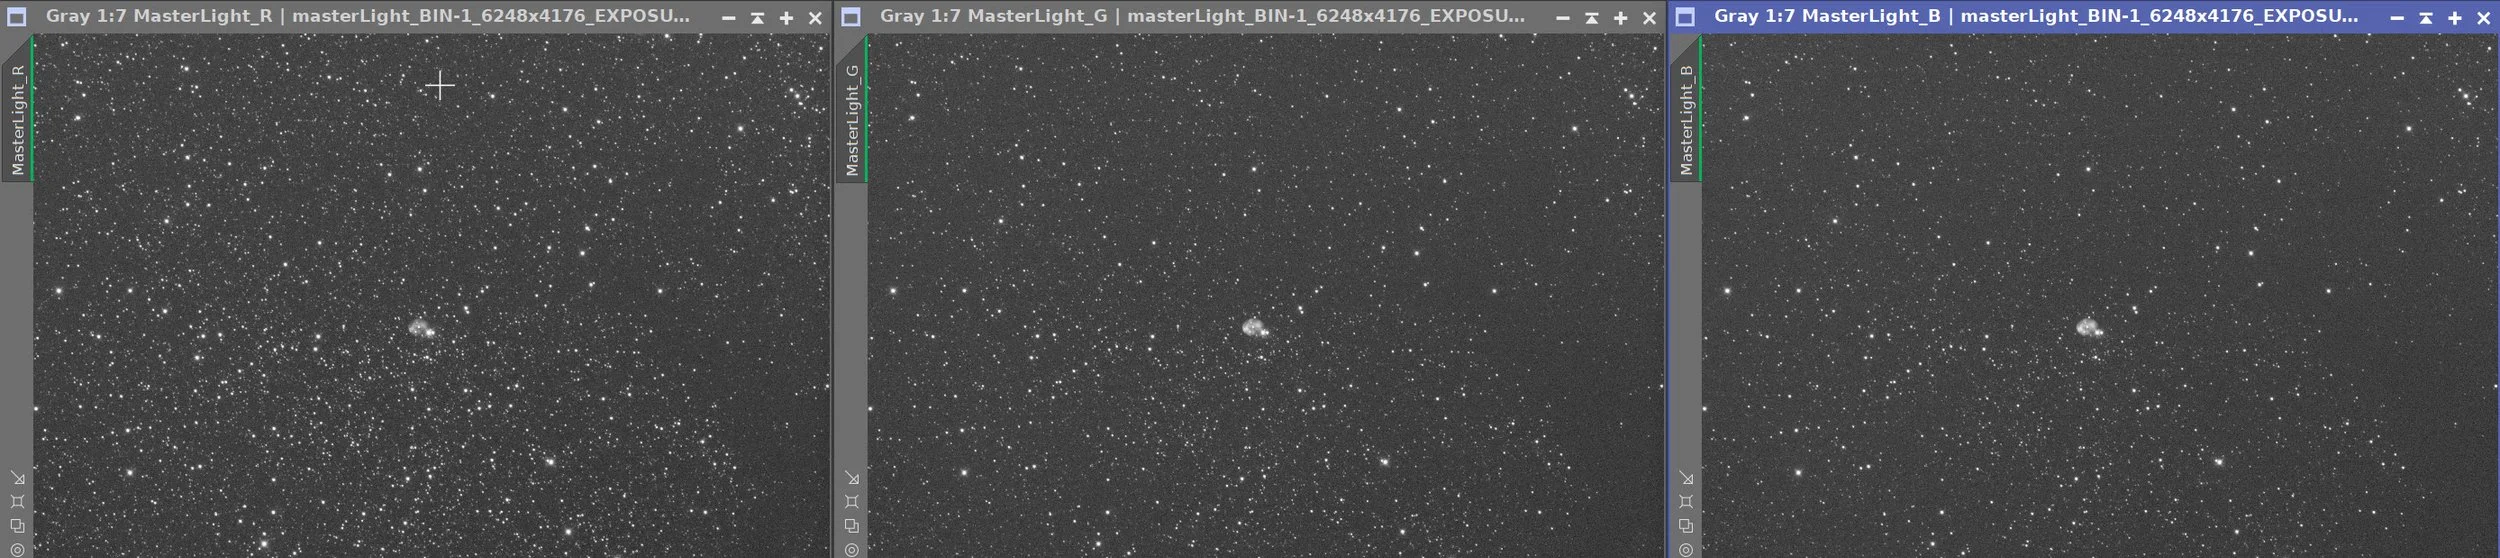
Master R, G, and B images
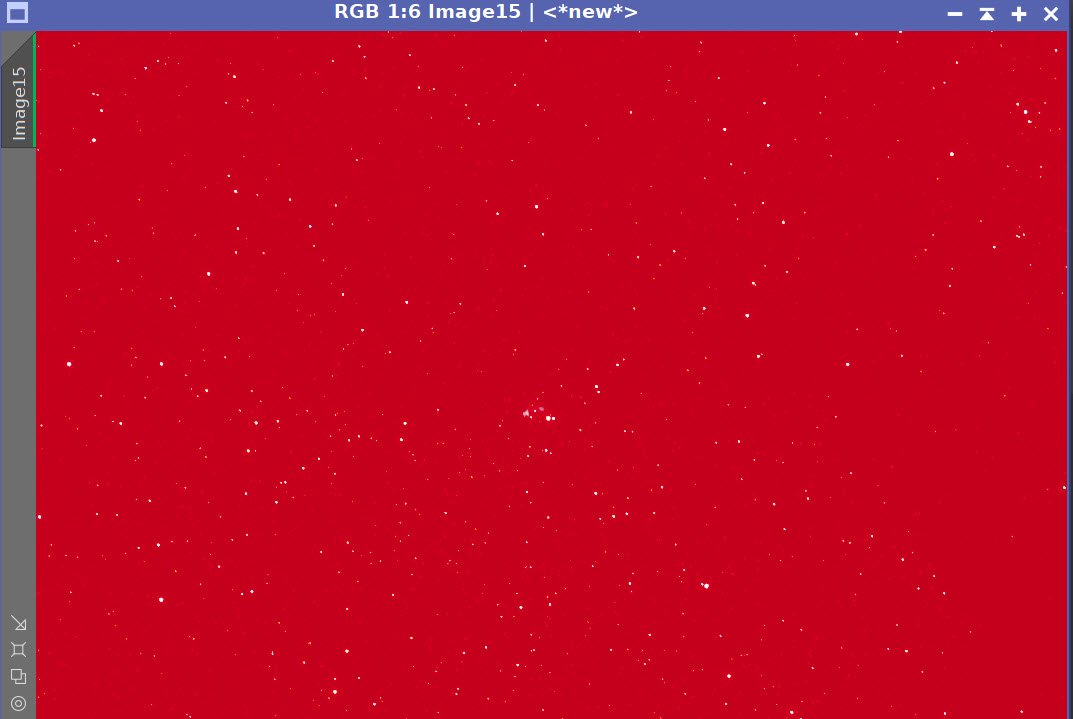
Master RGB color image.
4. Initial Processing of Linear HOO data
DBE was run on the image.
Run BXT - correct only. This cleans up the stars at the corners. Not much to do in this image as the scope is very crisp.
Run PFSImage script to measure star sizes. X = 2.84 Y = 2.76. This will influence the values used in BXT.
Run Full BXT - I am using an enhanced set of values to shrink stars more. These are about double the measured star sizes. See the BXT Panel Snapshot below.
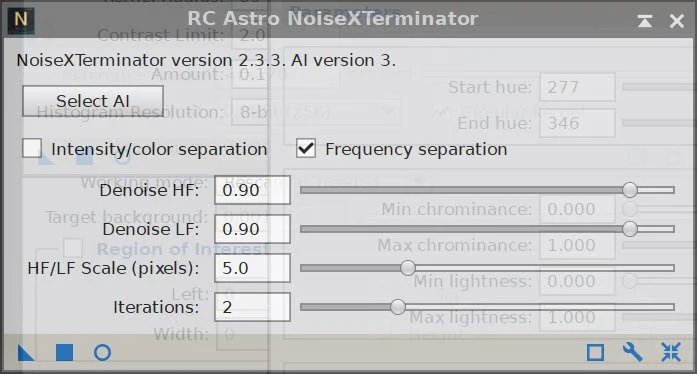
Run NXT V3 - see params from snapshot below.
Run SXT and remove stars - we are not going to use the narrowband stars, so no need to save them.
DBE Sampling Plan for the HOO image (click to enlarge)
DBE HOO Before Image (click to enlarge)
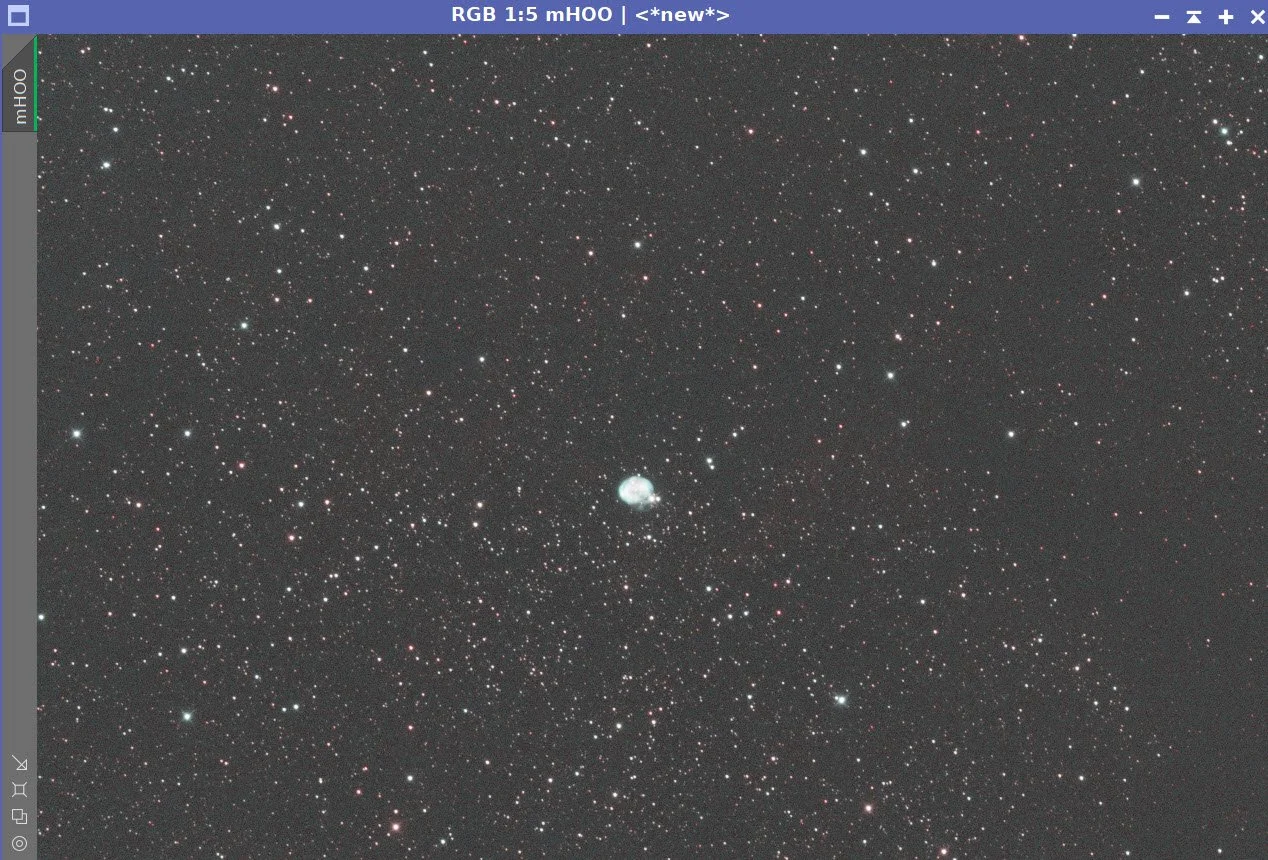
DBE HOO After Image (click to enlarge)
DBE HOO Background Image (click to enlarge)
Measuring Star Sizes with PFSImage Script (click to enlarge)
BXT Settings Used. (click to enlarge)
NXT Panel used. (click to enlarge)
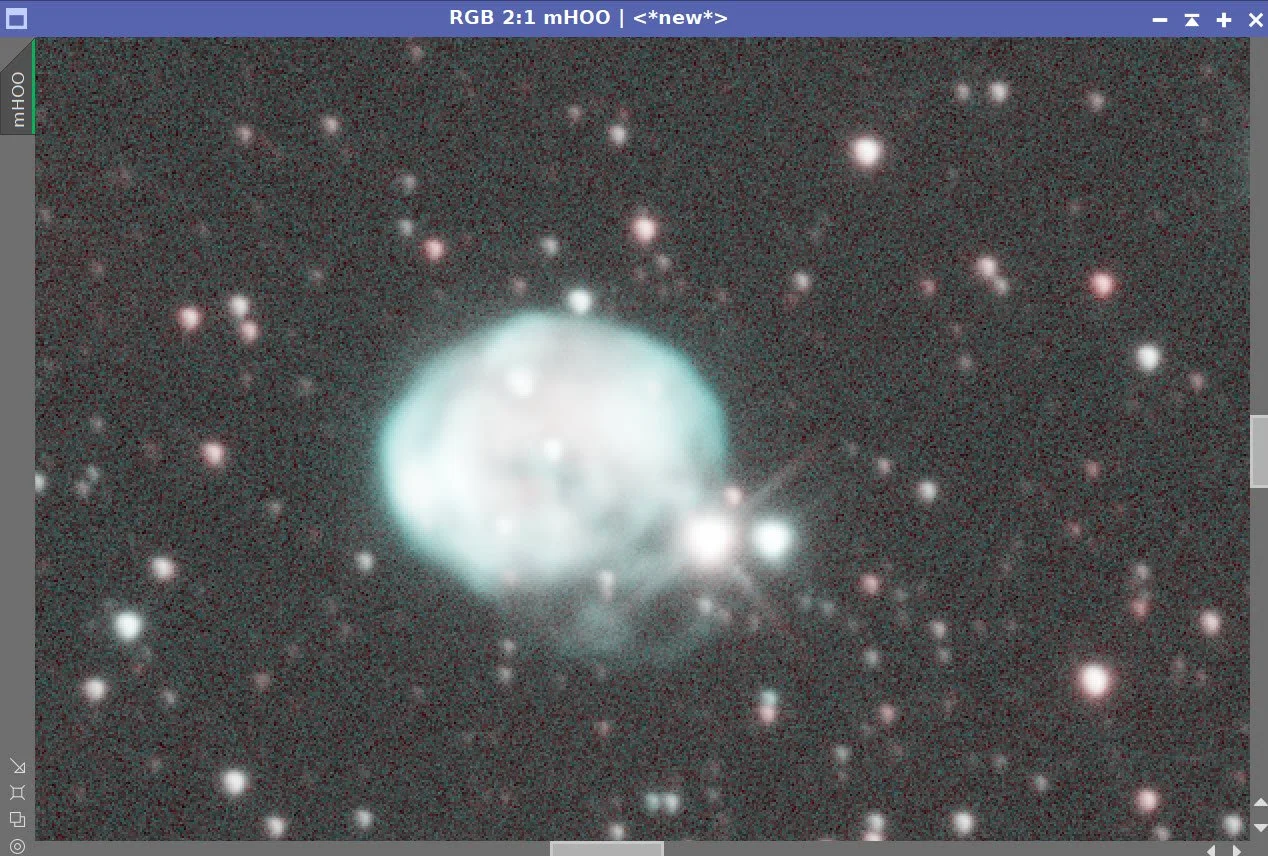
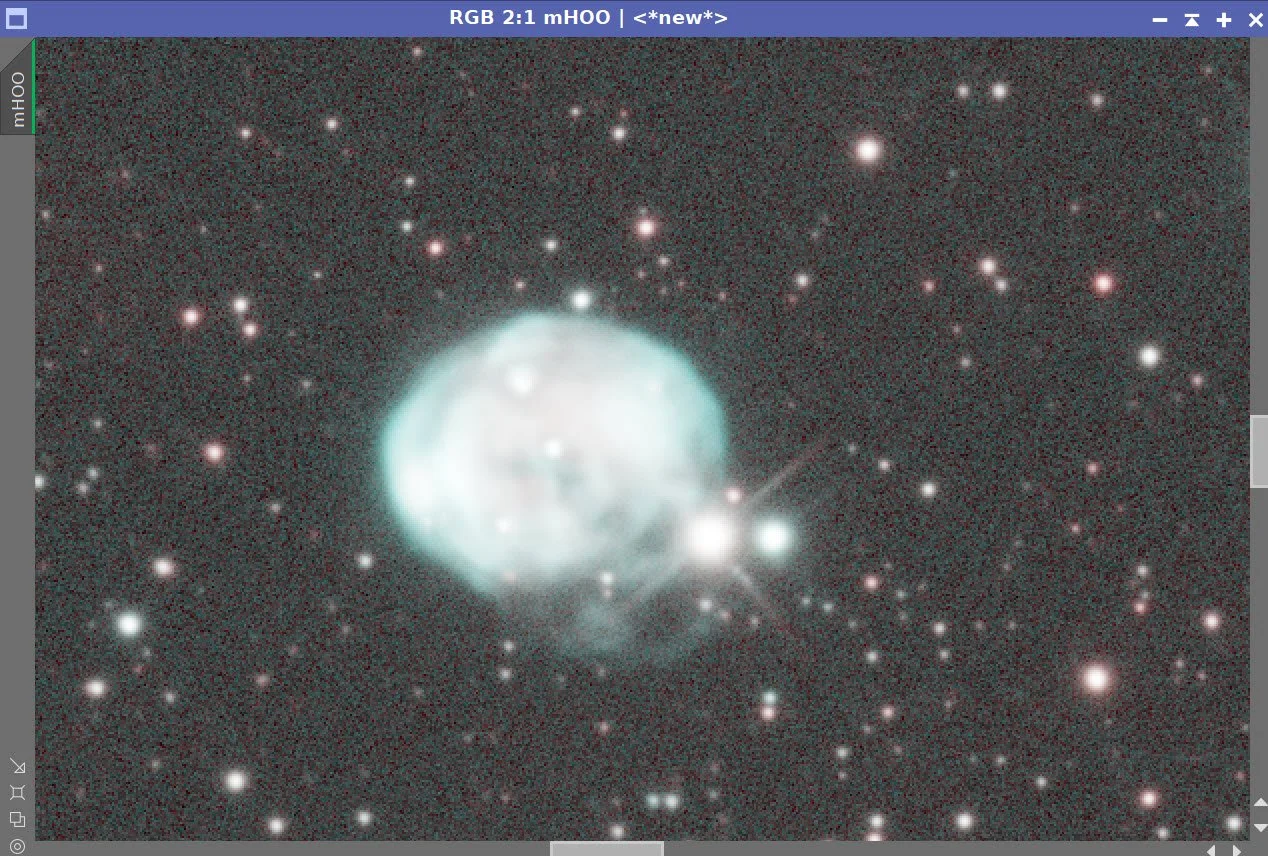
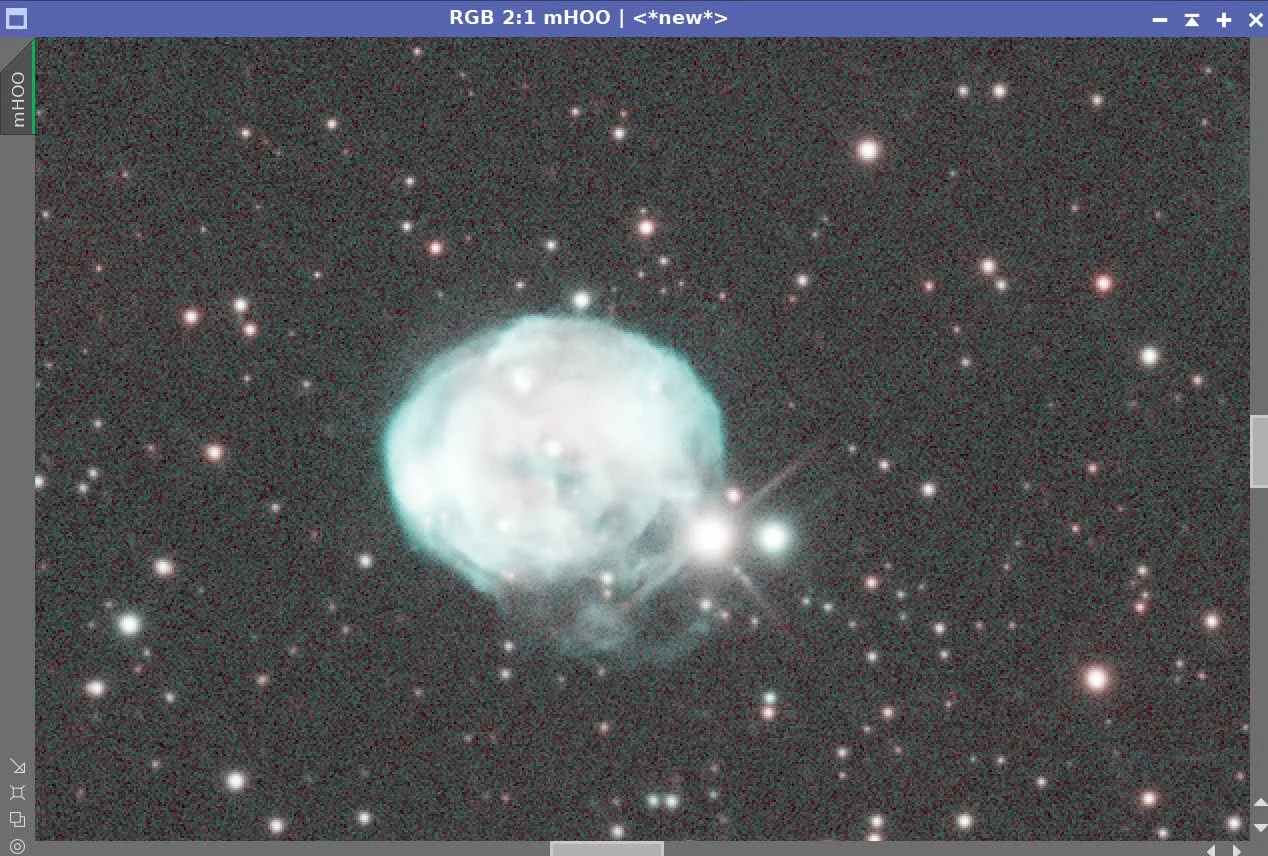
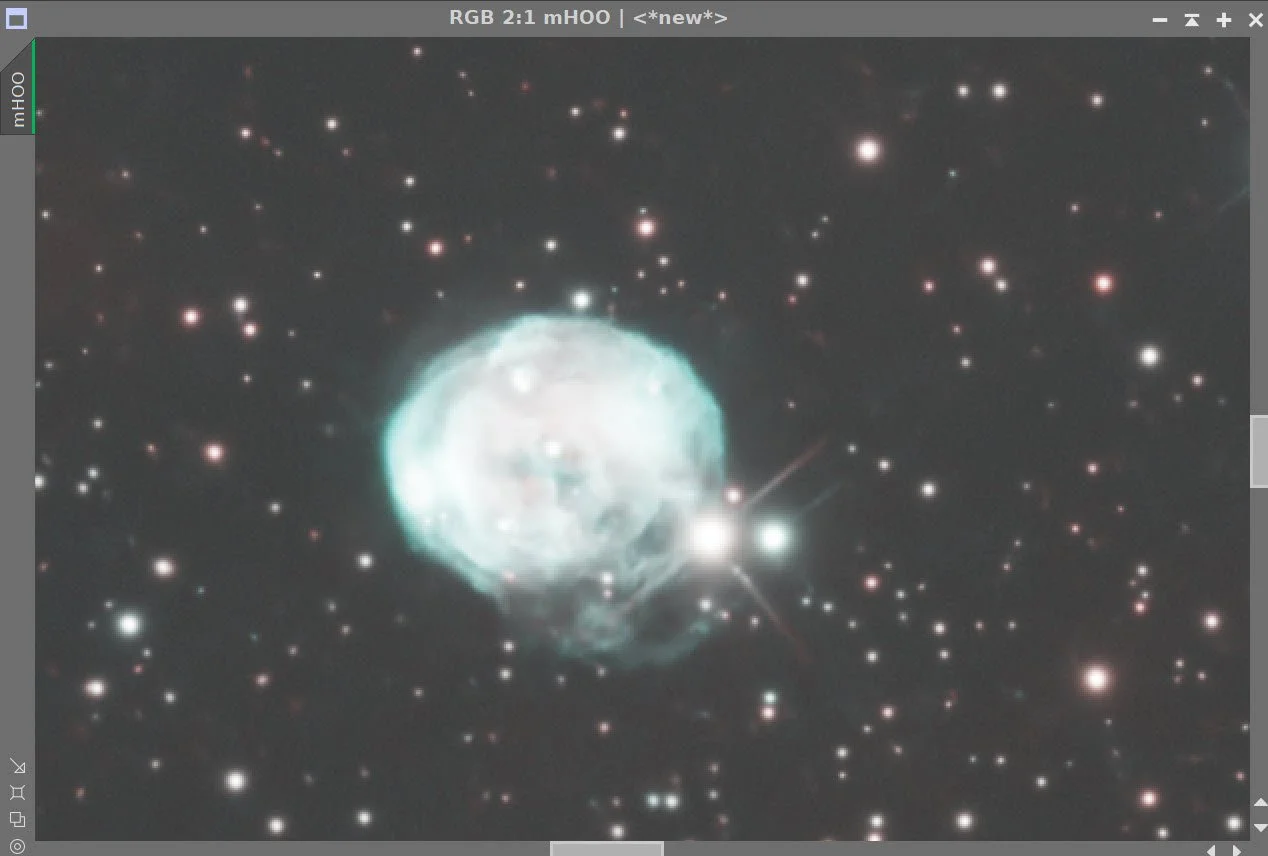
Master HOO Before BXT Correct Only, After BXT Correct Only, After BXT Full, After NXT
Master HOO Image (click to enlarge)
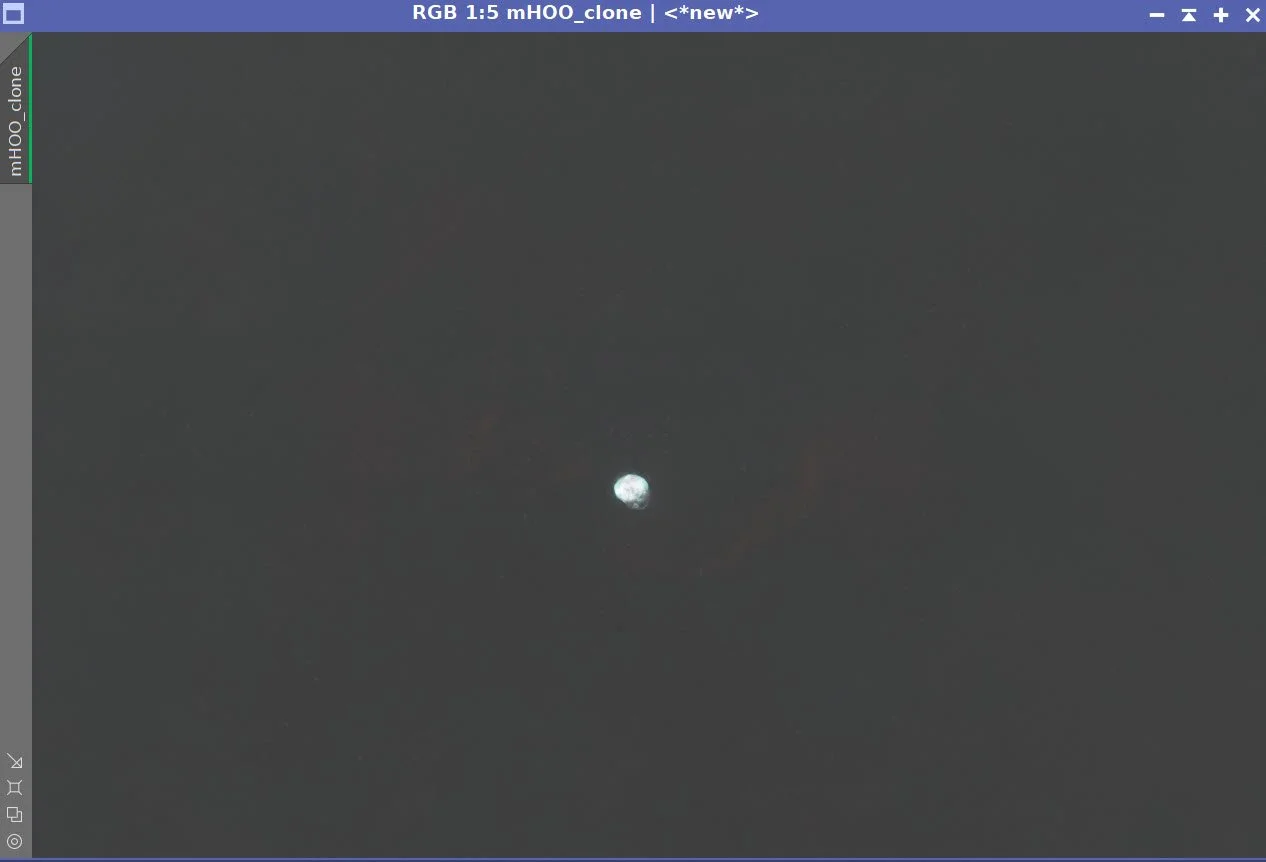
HOO Starless Image.
5. Process the Linear RGB Data
Run DBE for the RGB linear image. Use subtraction for the correction method. Choose a sampling plan that avoids the nebulae (see below)
This took out a major red imbalance, but the stars are still looking red. I assume that SPCC will correct for that.
Select a preview rectangle that samples the background sky, and then set up and run SPCC.
Use the Ideal curve
Use ZWO R, G, & B filter curves
After this, the stars look much better, and the red is gone!
Run the PFSImage script to measure star sizes. X = 1.87, Y = 1.77. This will influence the values used in BXT.
This target is very small, and I need very small stars so that when I do an aggressive zoom-and-crop operation, the stars won’t look huge. To accomplish this, I was very aggressive with BXT.
The resulting BXT pass produced very small stars, which was exactly what this crop needed.
Run SXT and don’t save the RGB starless image - we are not going to use that one.
Master RGB DBE Sampling Plan (click to enlarge)
Before DBE (click to enlarge)
Master RGB after DBE (click to enlarge)
Master RGB Background subtracted (click to enlarge)
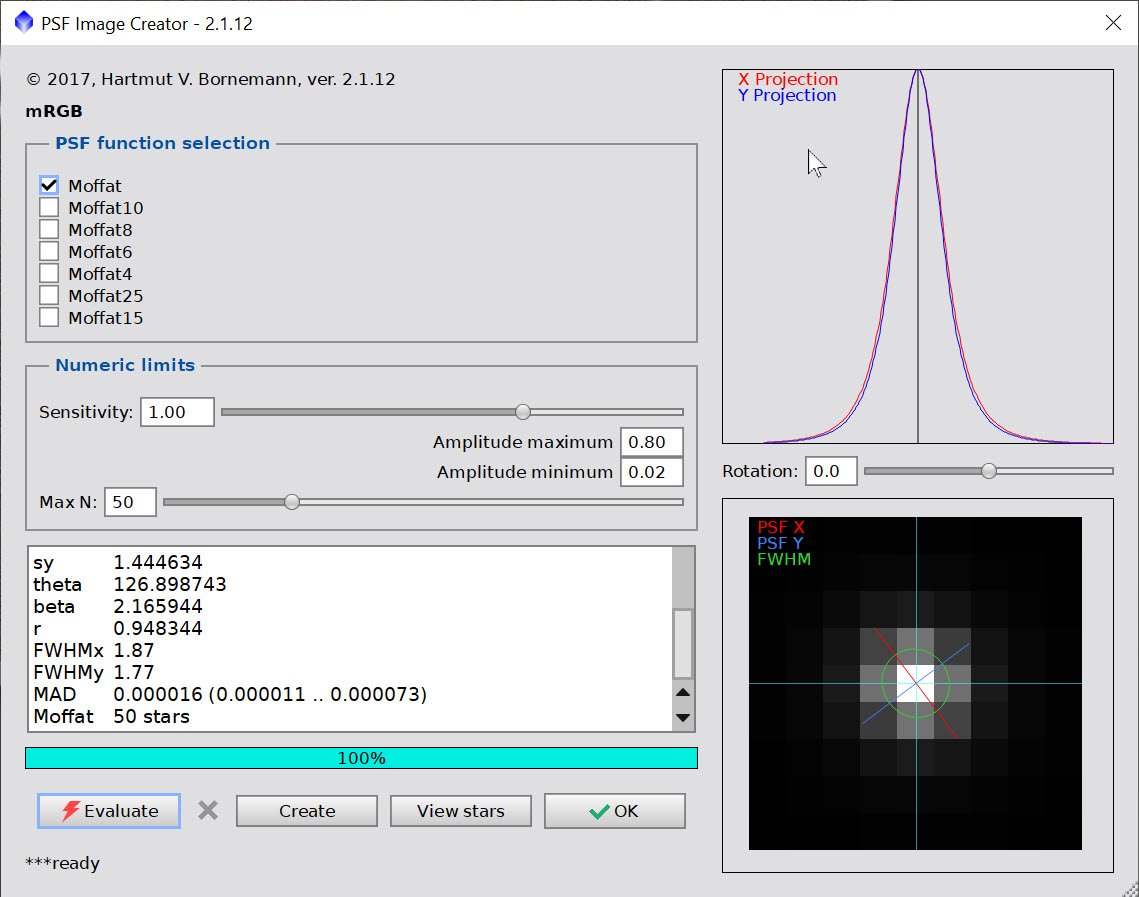
Measuring RGB star sizes.
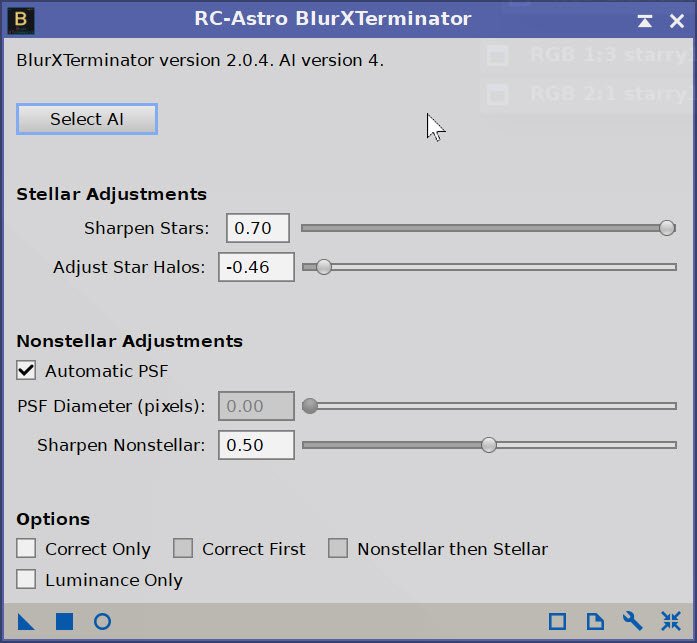
Params used for BXT
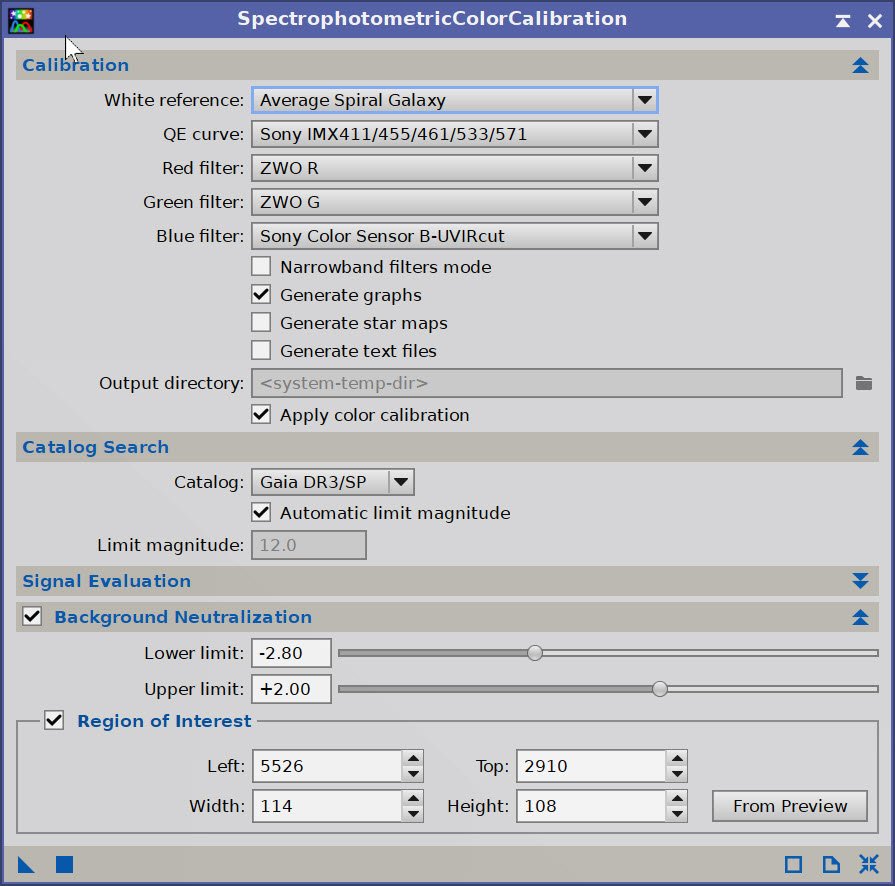
SPCC Panel settings.
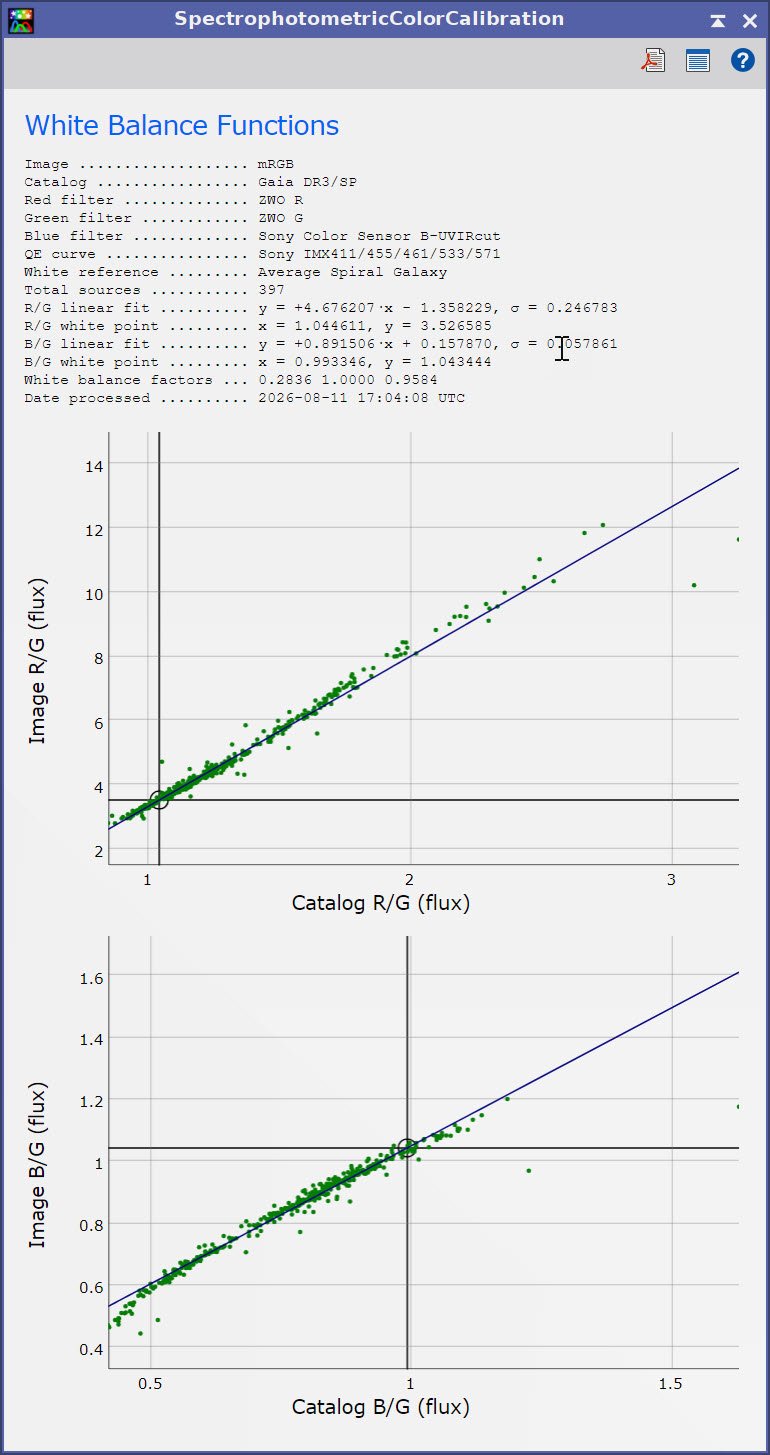
SPCC Regression Results.
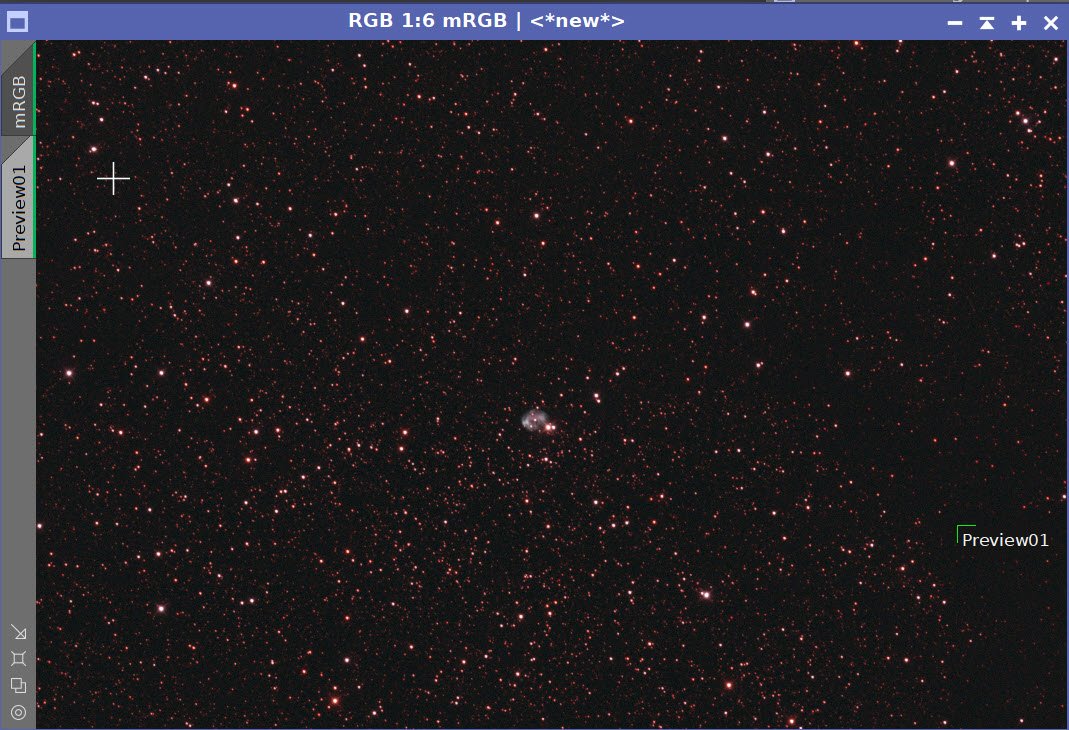
Before SPCC (click to enlarge)
After SPCC (click to enlarge)
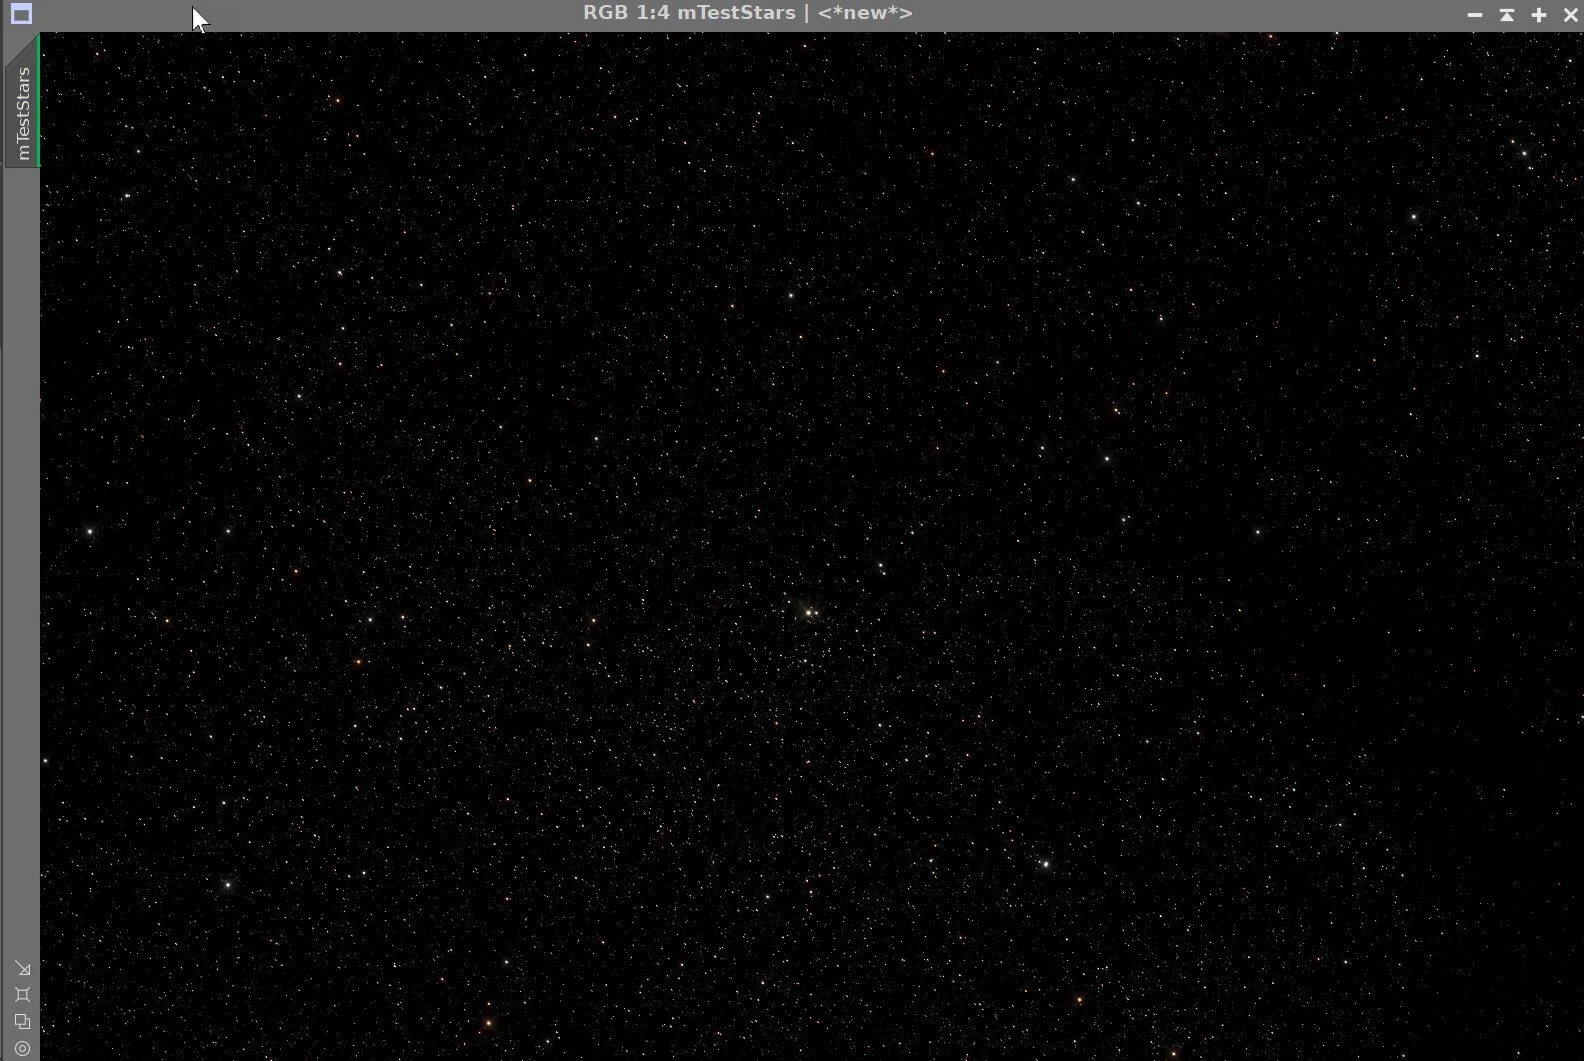
Small stars after aggressive BXT
6. Take RGB Stars Nonlinear
Use Seti Astro Star Stretch Script to stretch Stars
I used the default settings.
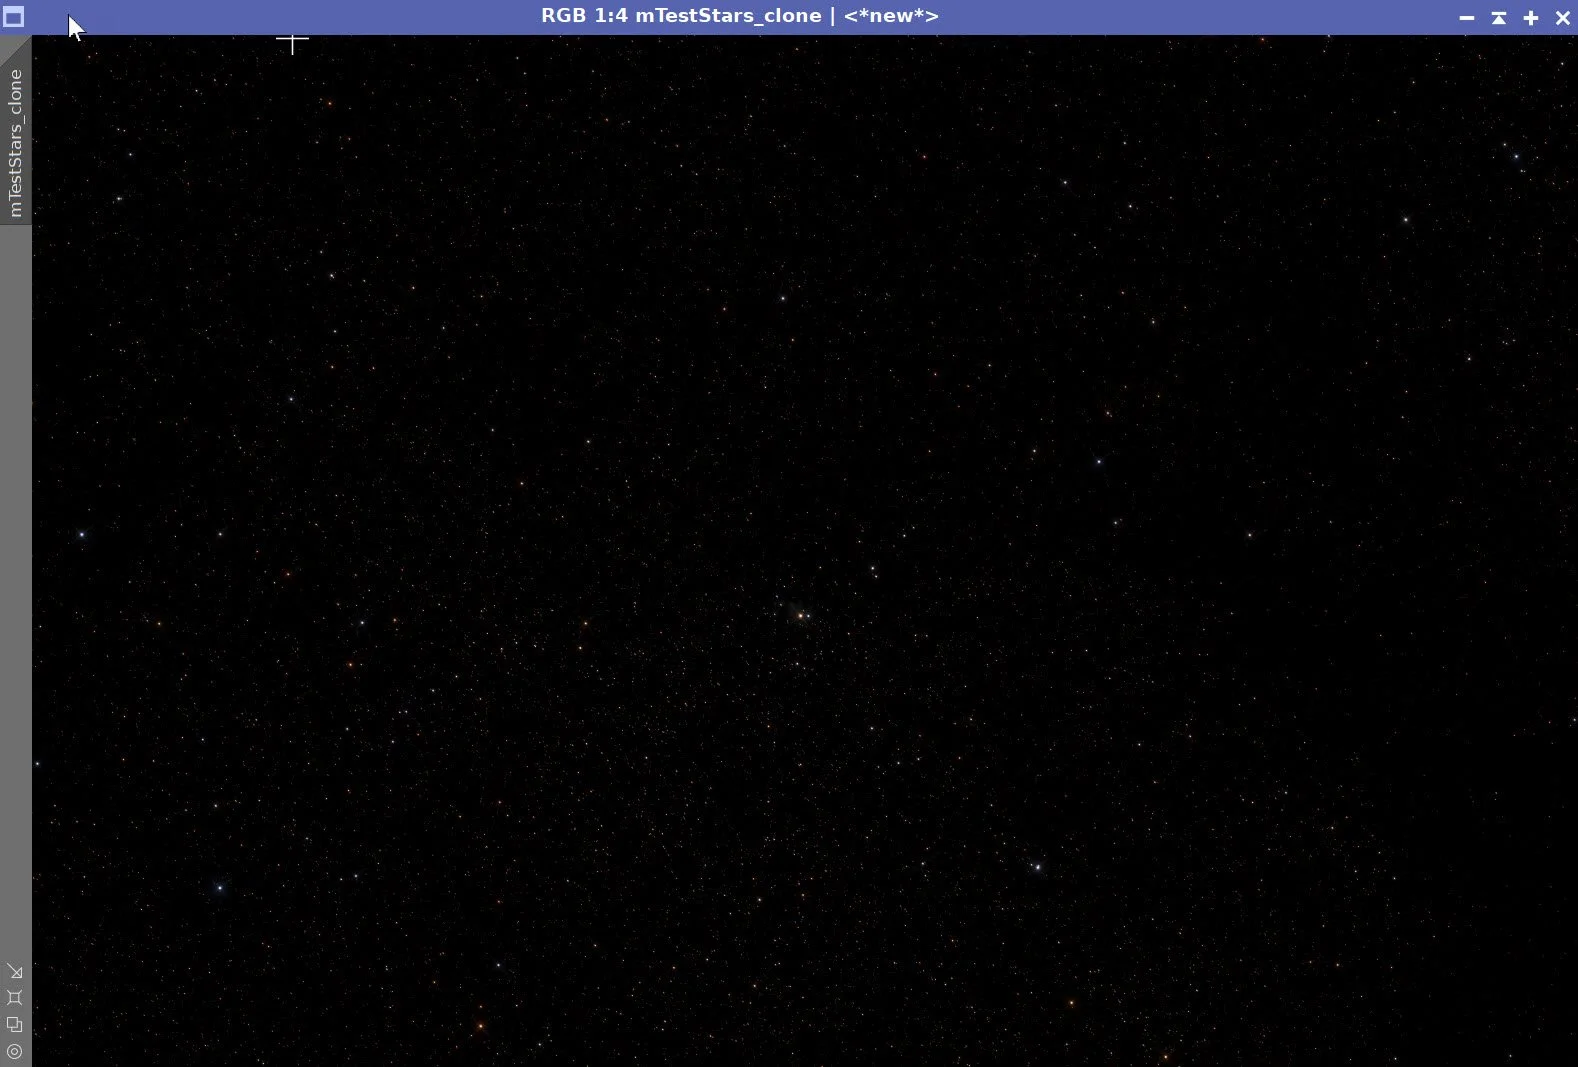
Nonlinear RGB Star Image.
7. Take HOO Starless Image Nonlinear
Use the STF→HT method to take the HOO starless image nonlinear; see the screenshot below for parameters.
Nonlinear HOO image
8. Process the Nonlinear HOO Starless Image
This is the big meaty step of this process. In this section, I will focus on getting Green/Magenta under control, nailing the tone scale and color separation, doing masked warm/cool refinement, and then ACM/ACE polish.
Create the WarmMask
Use the ColourMask Process with StartHue 277 and an end hue of 346, with a blur of 5
Apply CT to boost the mask
Create the Cyan Mask
Use the ColourMask Process with Start Hue 162 and an end hue of 259, with a blur of 5
Apply CT to boost the mask
Use the GAME script to create a CoreMask around the nebula.
Now we can start processing the image.
Apply CT to set the basic tone scale and color saturation
Apply Background Neutralization to remove the green from the background sky.
Apply HDRMT with levels = 6 and “To Lightness” and “Lightness Mask” Checked. This will pull some detail out of the bright areas.
Apply CT to rebalance brights and bring up saturation
To bring out more detail, I am going to use BXT as a sharpener. I experimented with several settings and settled on the one I used here (see screenshot below), as it cleaned up some of the detail.
Another CT.
Apply LHE1 with a factor of 22, a contrast limit of 2.0, an amount of 0.37, and a histogram of 8 bits with the CoreMask in place. (This will bring up some finer detail)
Apply LHE2 with a factor of 86, a contrast limit of 2.0, an amount of 0.17, and a histogram of 8 bits with the CoreMask in place. (This will bring up some medium detail)
Apply NXT with the WarmMask to reduce the noise there.
Apply CT with the CyanMask to enhance color saturation there.
Use Astro Color Mixer to tweak the color position - a bit more saturation, a bit of a red rotation, and a touch-up of the cyan in the shell.
Use Astro Contrast Enhancer to add a light touch of Texture and Clarity.
Use CT with an inverse CoreMask to darken the background and enhance red hair features.
Do a NXT run to smooth things out a bit.
Export to Photoshop to enhance slight red Ha features in the background. Sometimes it is just simpler to use the PS lasso and Color adjust in Photoshop.
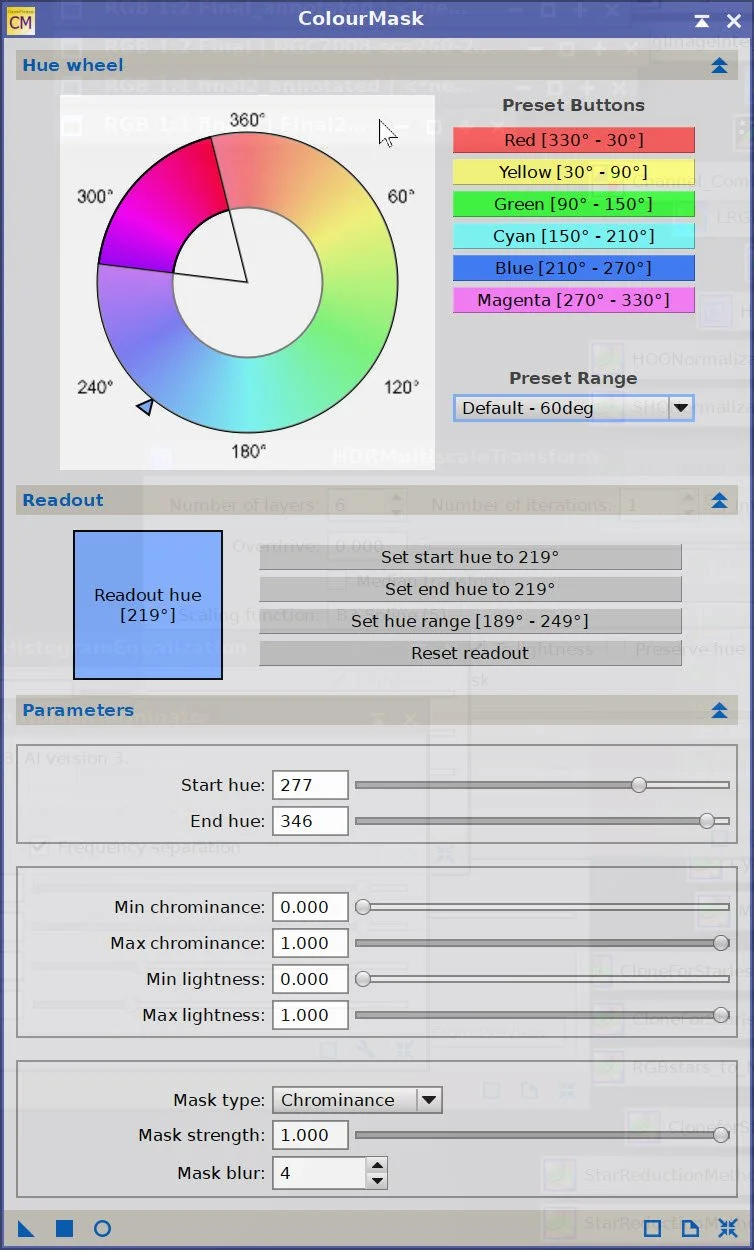
Params used to create the initial WarmMask
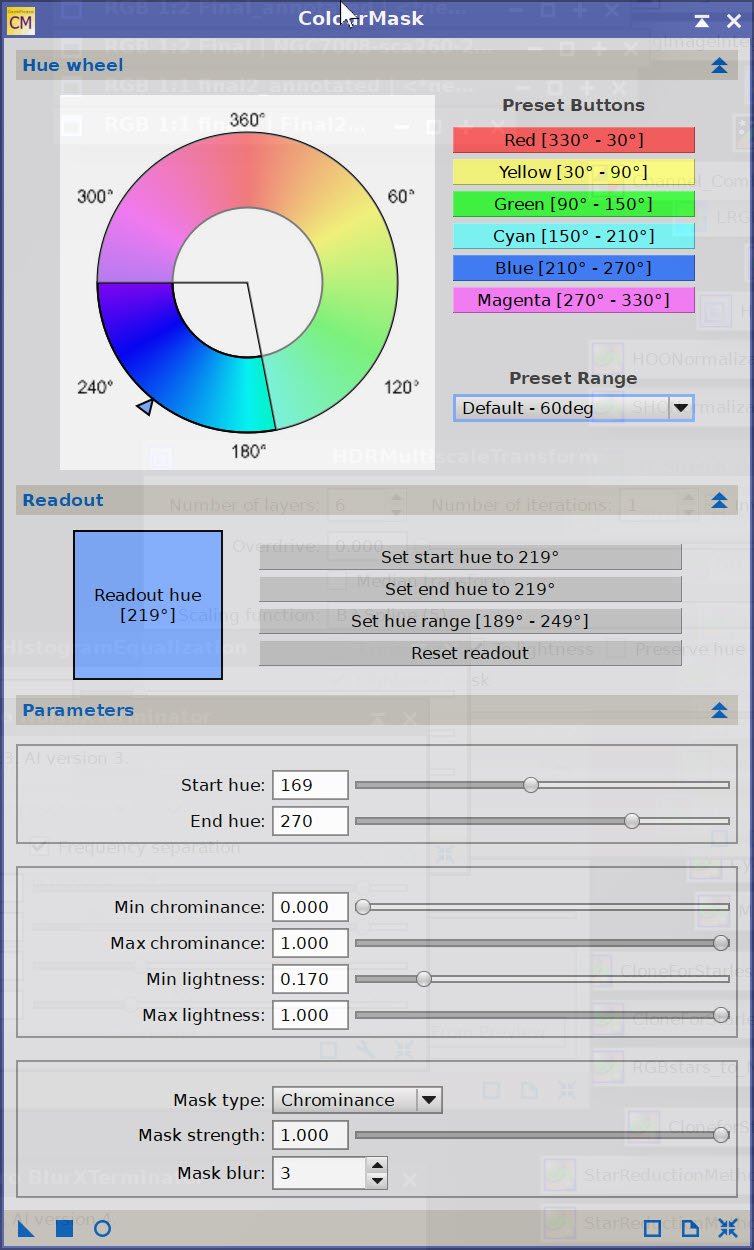
Panel used to create the Cyan Mask
Initial WarmMask (click to enlarge)
WarmMask after CT Boost (click to enlarge)
Initial CyanMask (click to enlarge)
After CT Boost (click to enlarge)
The Core Mask (click to enlarge)
Initial HOO Image (Click to enlarge)
Apply CT(click to enlarge)
Apply Background Neutralization (click to enlarge).
After HDRMT (click to enlarge)
BXT used as a sharpener (click to enlarge)
Another CT adjust (click to enlarge)
Apply LHE2 with the CoreMask (click to enlarge)
After NXT using the WarmMask (click to enlarge)
ACM applied with some light color adjustment (click to enlarge)
CT applied with the inverse CoreMask (click to enlarge)
NXT to smooth out the grain. (click to enlarge)
Now we zoom in to see the nebula detail. (click to enlarge)
CT Adjustment(click to enlarge)
After LHE1 with the WarmMask (click to enlarge)
LHE1 with the Core Mask(click to enlarge)
NXT Params used(click to enlarge)
After CT with the CyanMask (click to enlarge)
After ACE tweak with light Texture and Clarity (click to enlarge)
After PS Lasso work on faint red regions. (click to enlarge)
9. Add the Stars Back In
My goal here was to keep the stars as tight as I could. Using the RGB stars I had prepared, I used the ScreenStar App to add the stars back in.
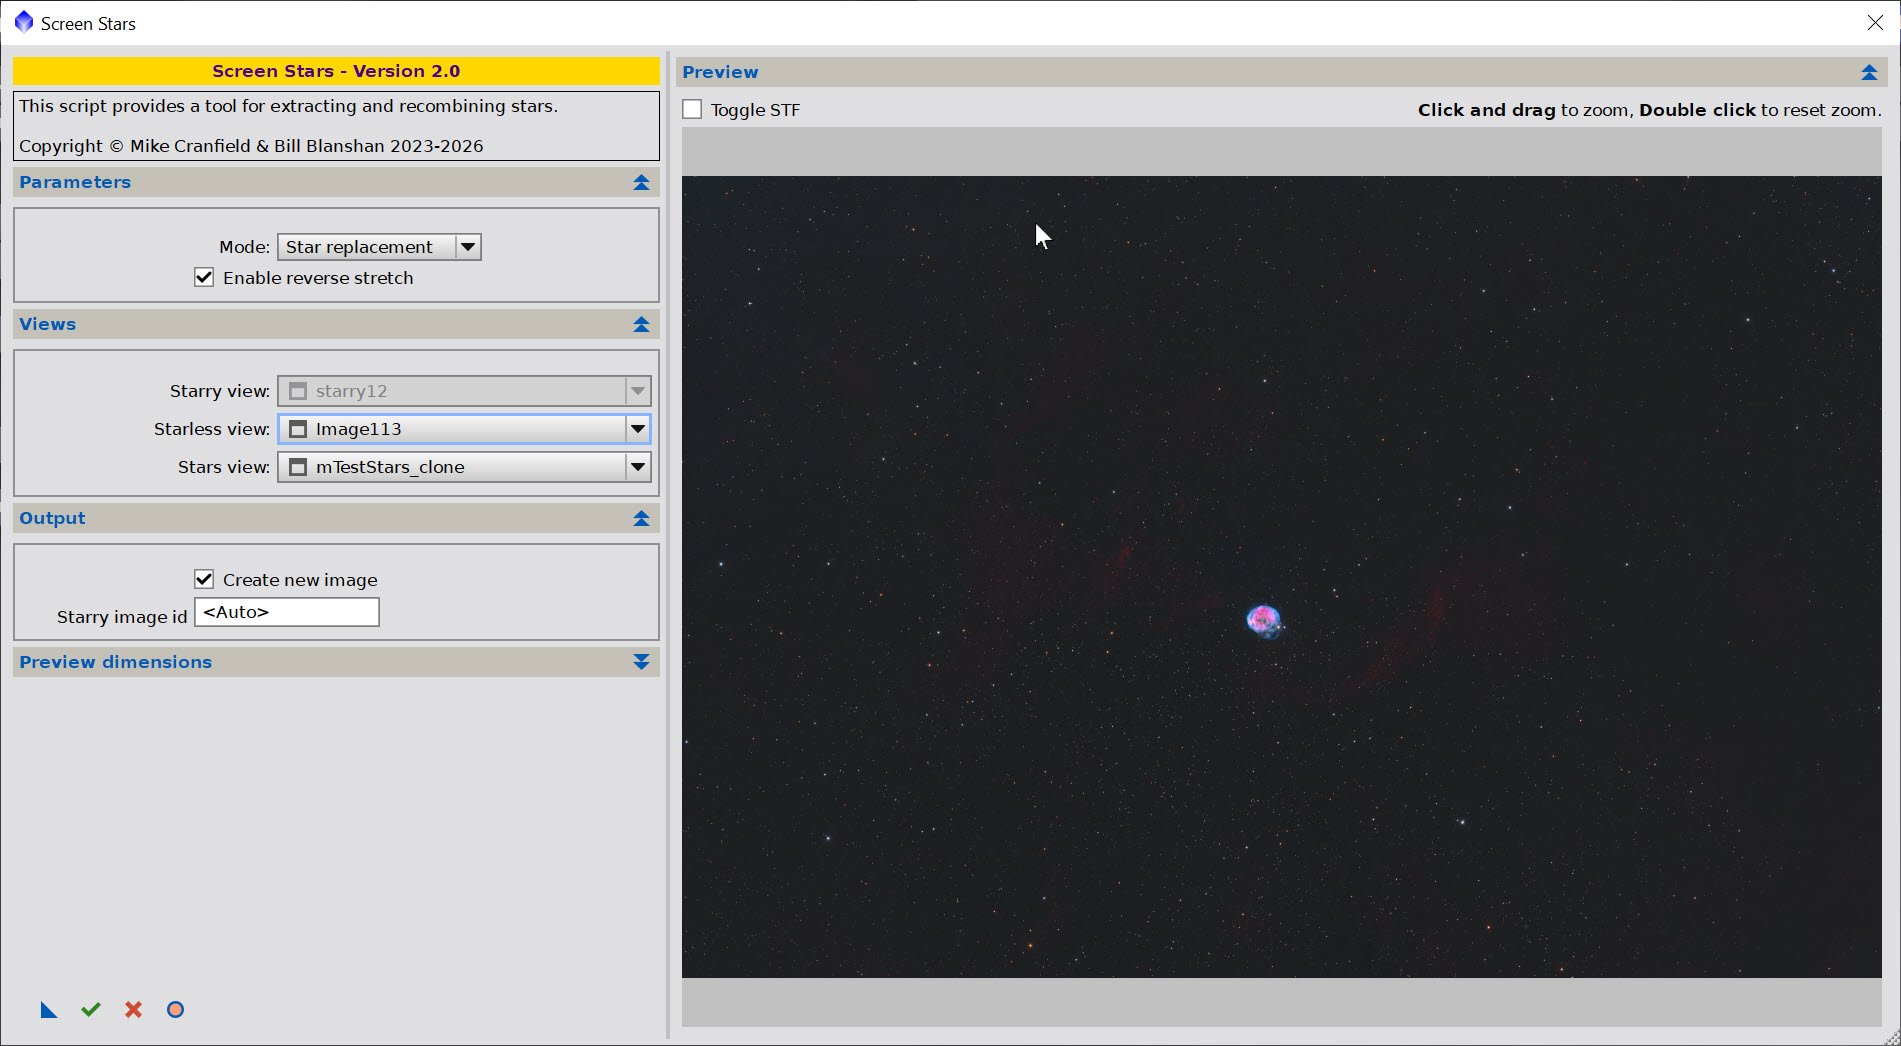
The script used to add the images back in - with smaller stars.
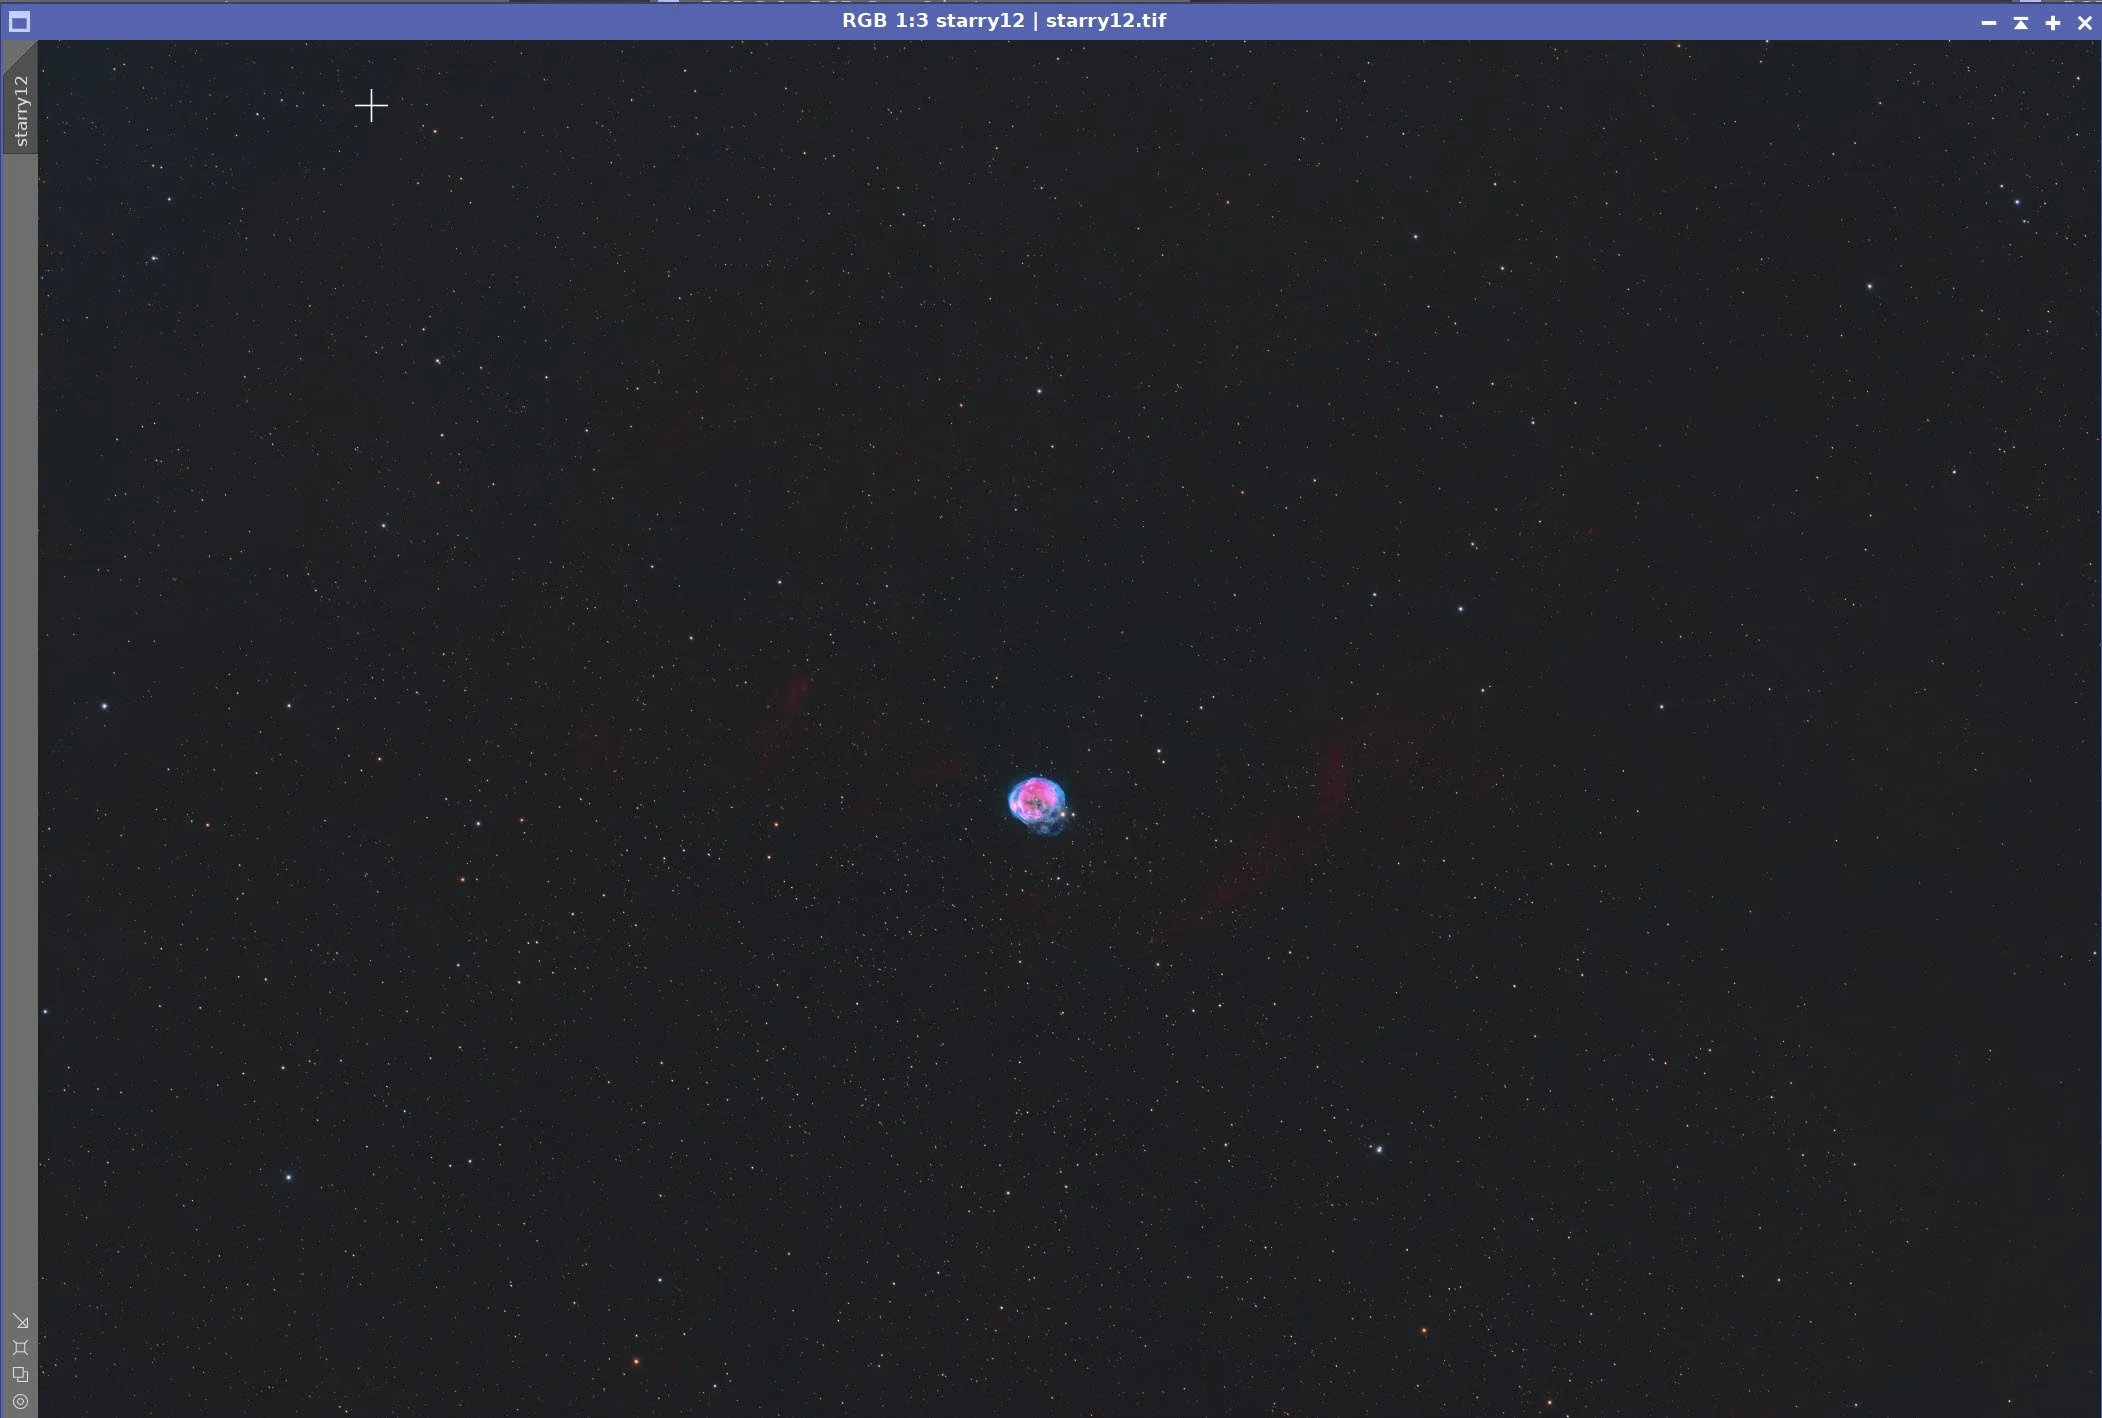
The image - Back with the stars!
10. Export the Image to Photoshop for Polishing
Save the image as a 16-bit unsigned TIFF and move it to Photoshop
My first step was to determine the right crop for this image. I did not want to go too far, and I ended up with the first image
I shared this with some of my local astrophotographers, and based on their feedback, I made the second one with a more aggressive crop
I then exported this to PixInsight for final processing.
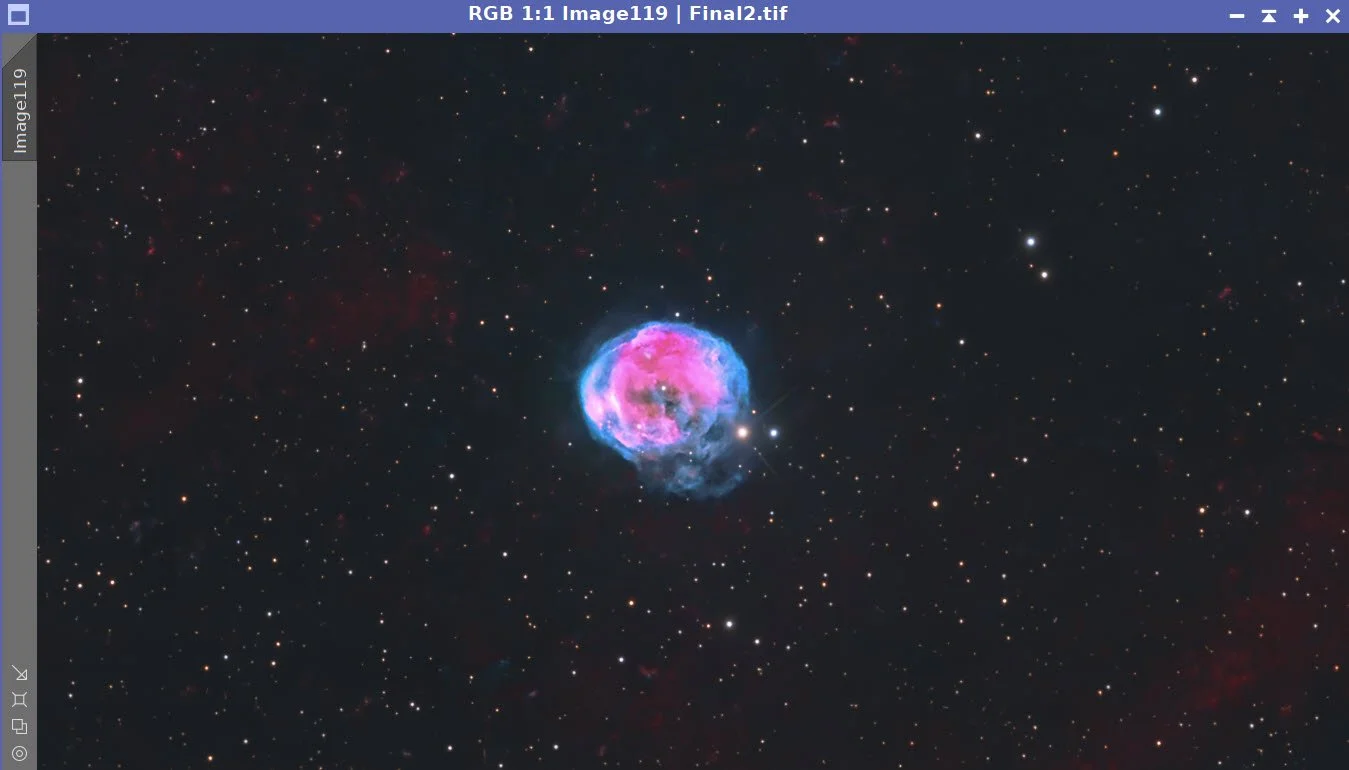
Initial Crop.
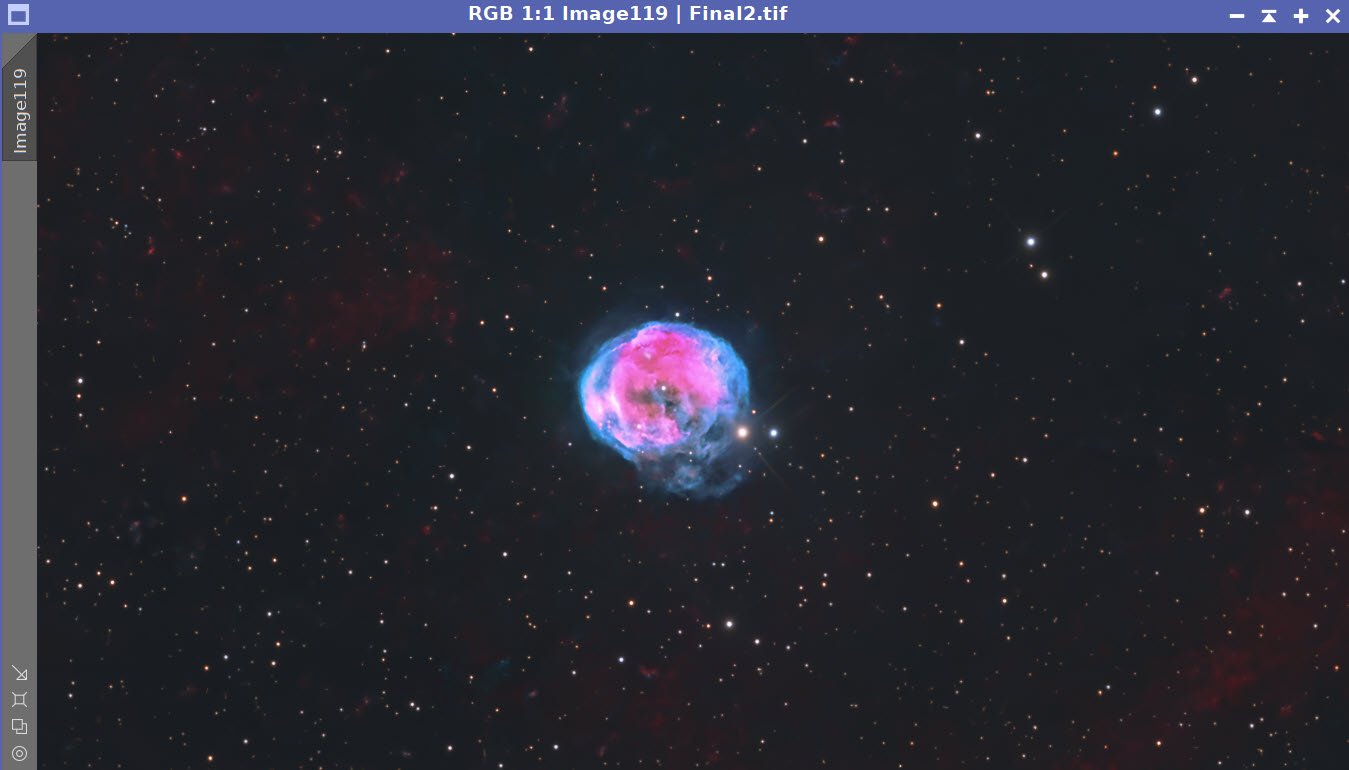
FInal Crop
11. Final PixInsight Tweaks
Slight reduction of red-magenta saturation with ACM
Slight sharpening with ACE
This was the final image!
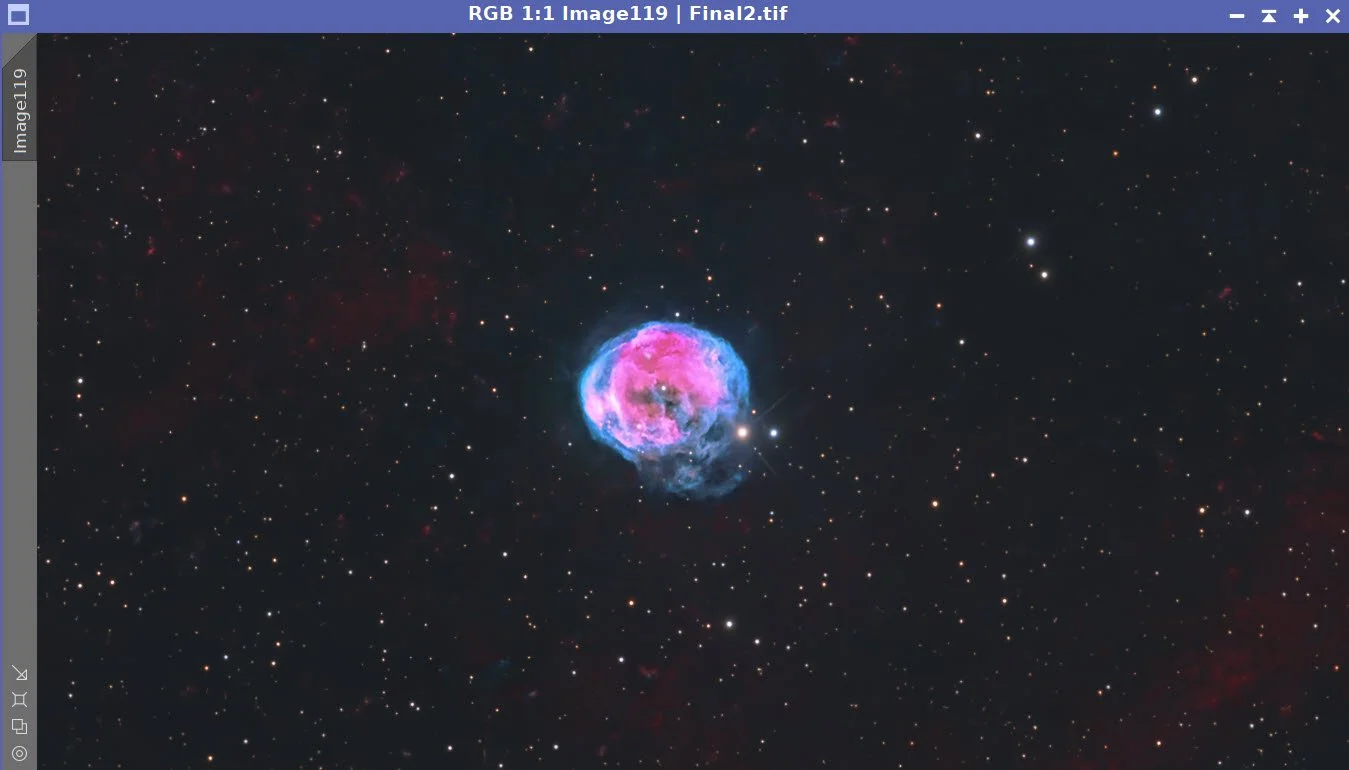
After ACE Tweak.
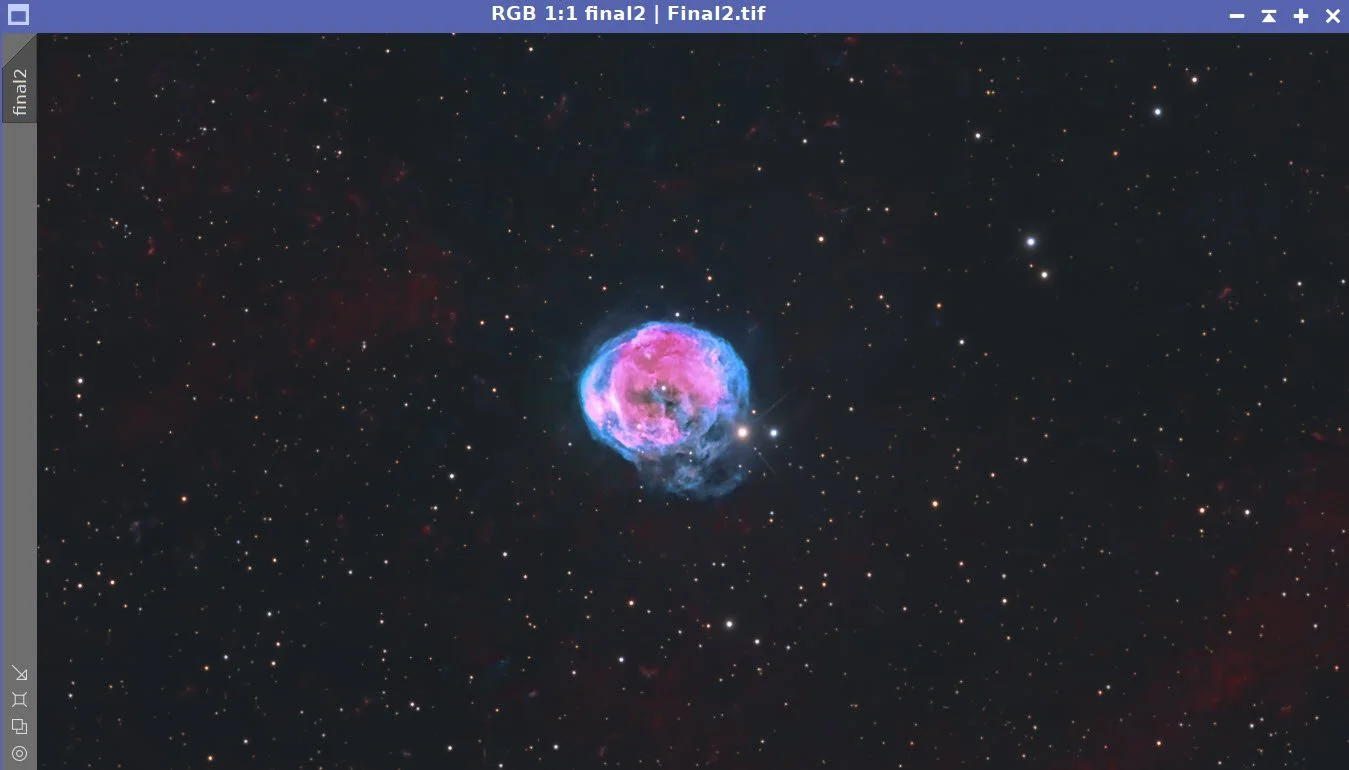
After ACM tweak.
12. Final Photoshop Prep
Added Watermarks
Export Clear, Watermarked, and web-sized JPEGs.
13. The Final Image!
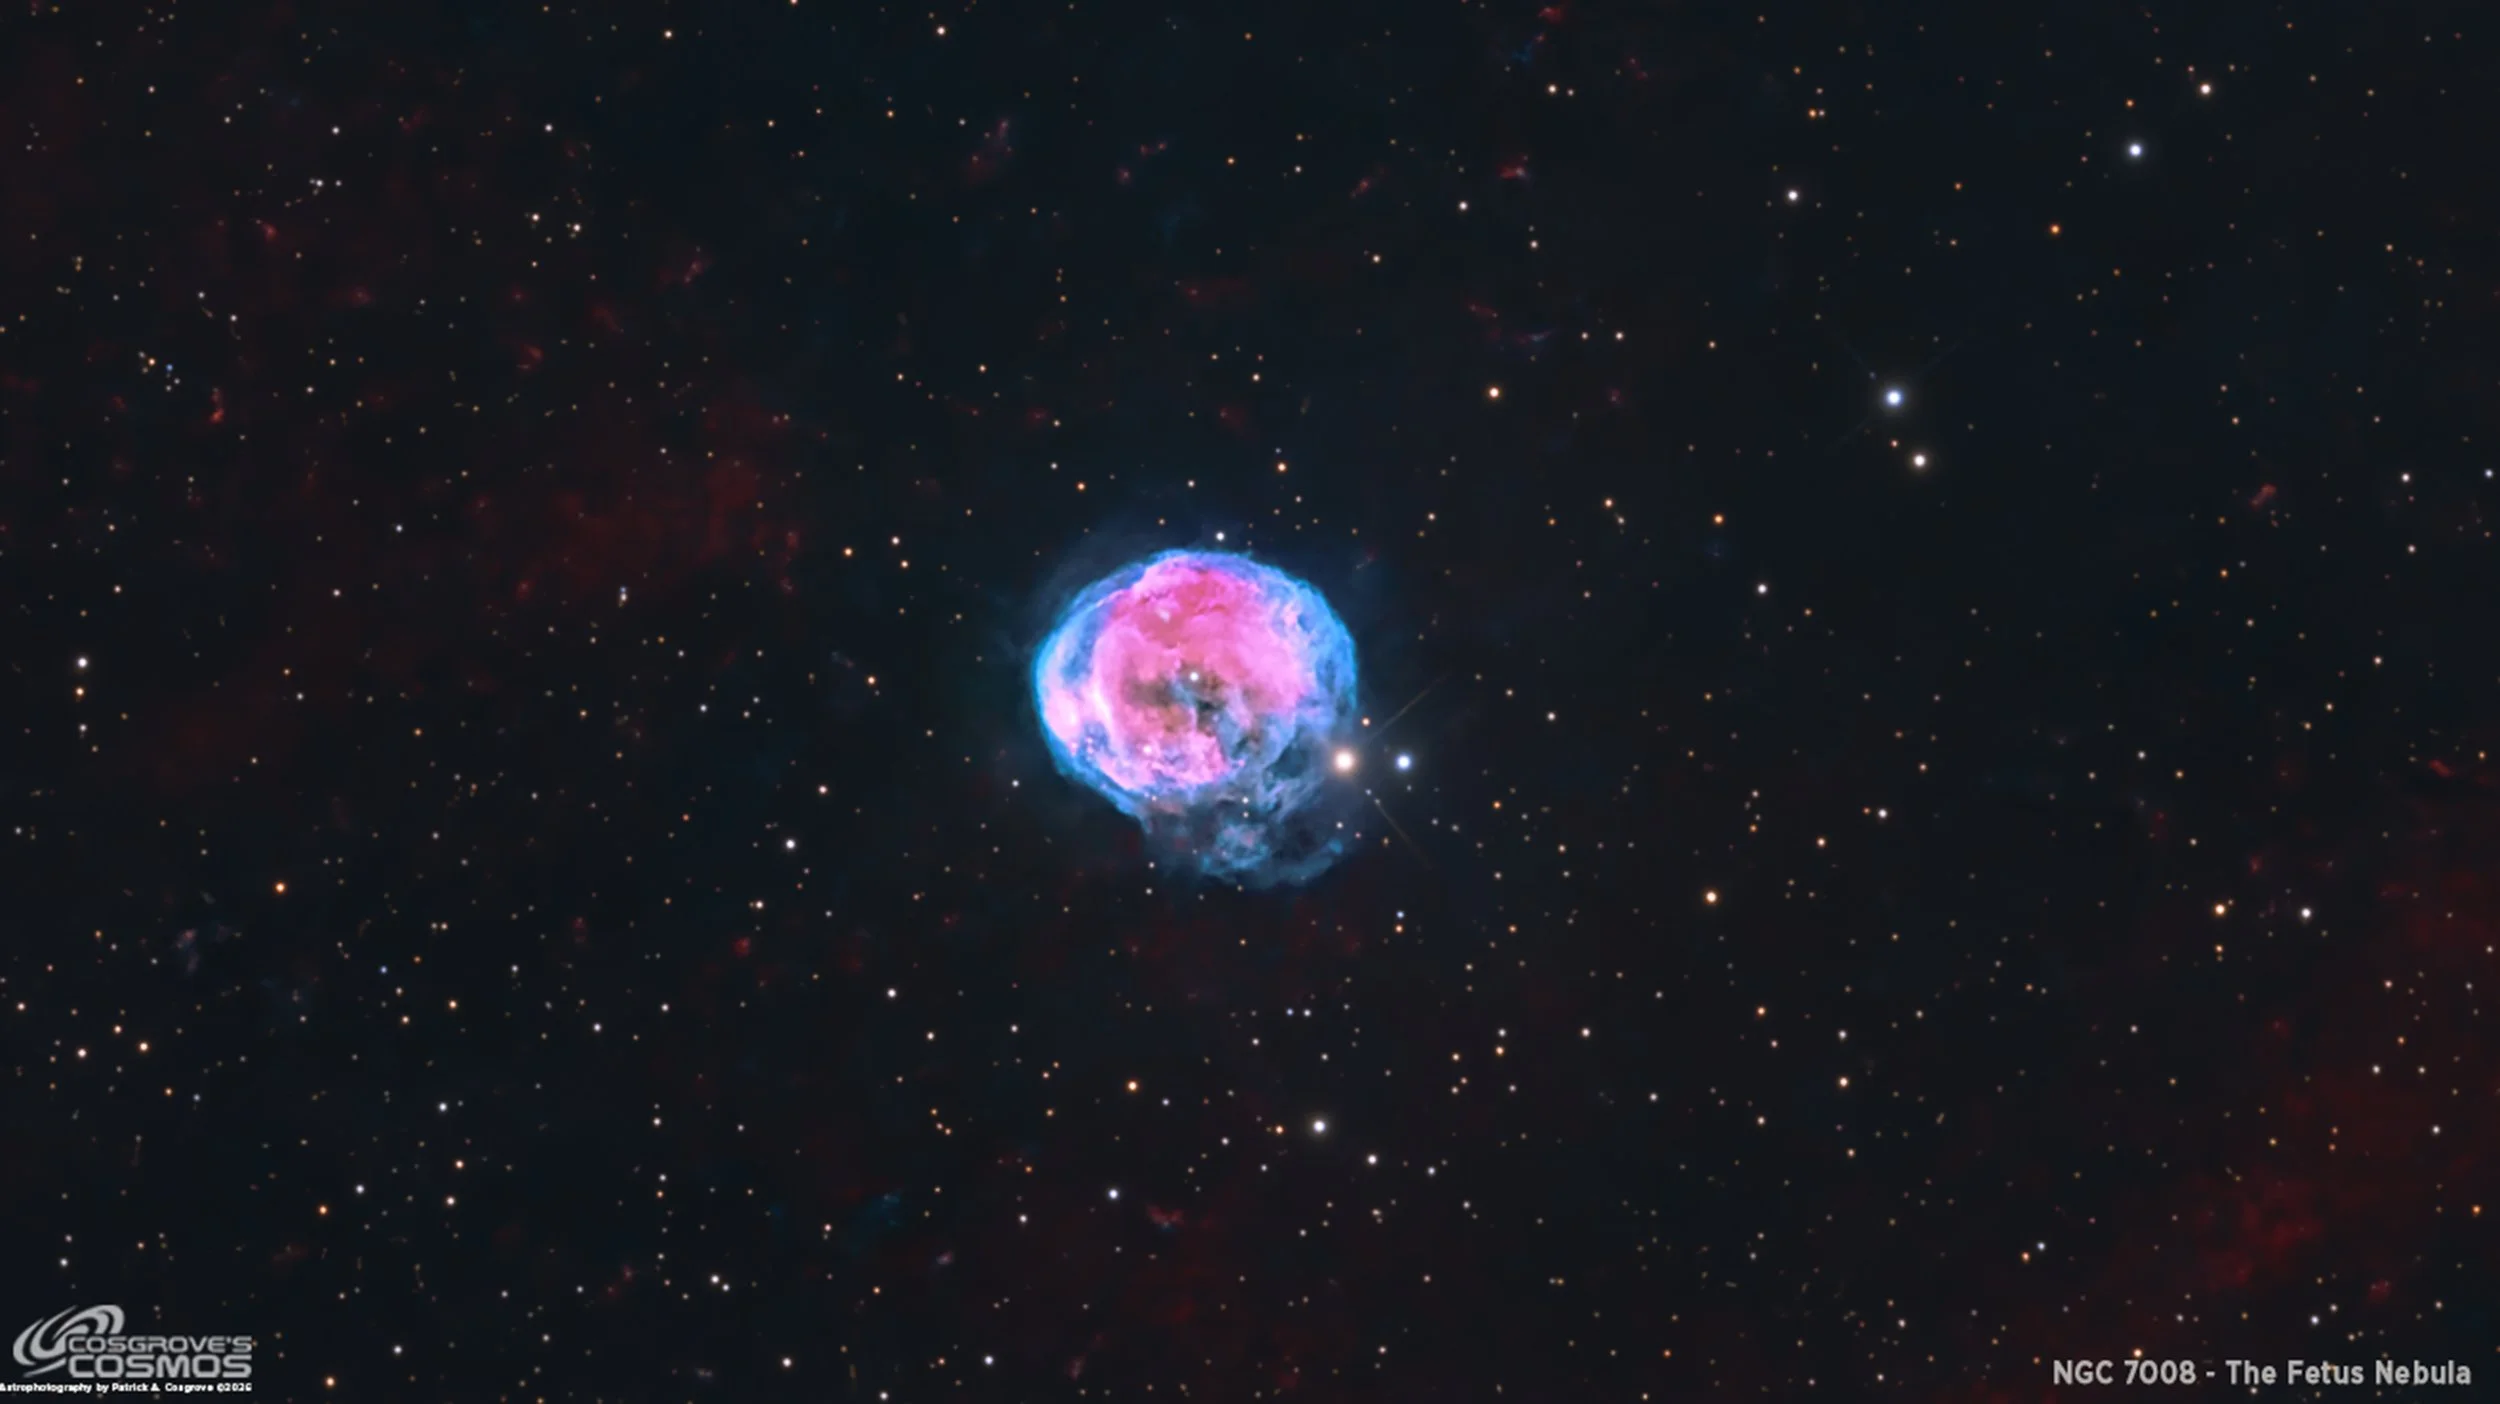
The Final Image
Back to the Main NGC 7008 - 2026 Page
Alternatively, you can use the back arrow to return to the Main NGC 7008 page, or you can use the menu at the top of the page to continue your navigation.
Thanks,
Pat