NGC 7129 - The Cosmic Rosebud - 2026 Image Processing Walkthrough.
August 24, 2026
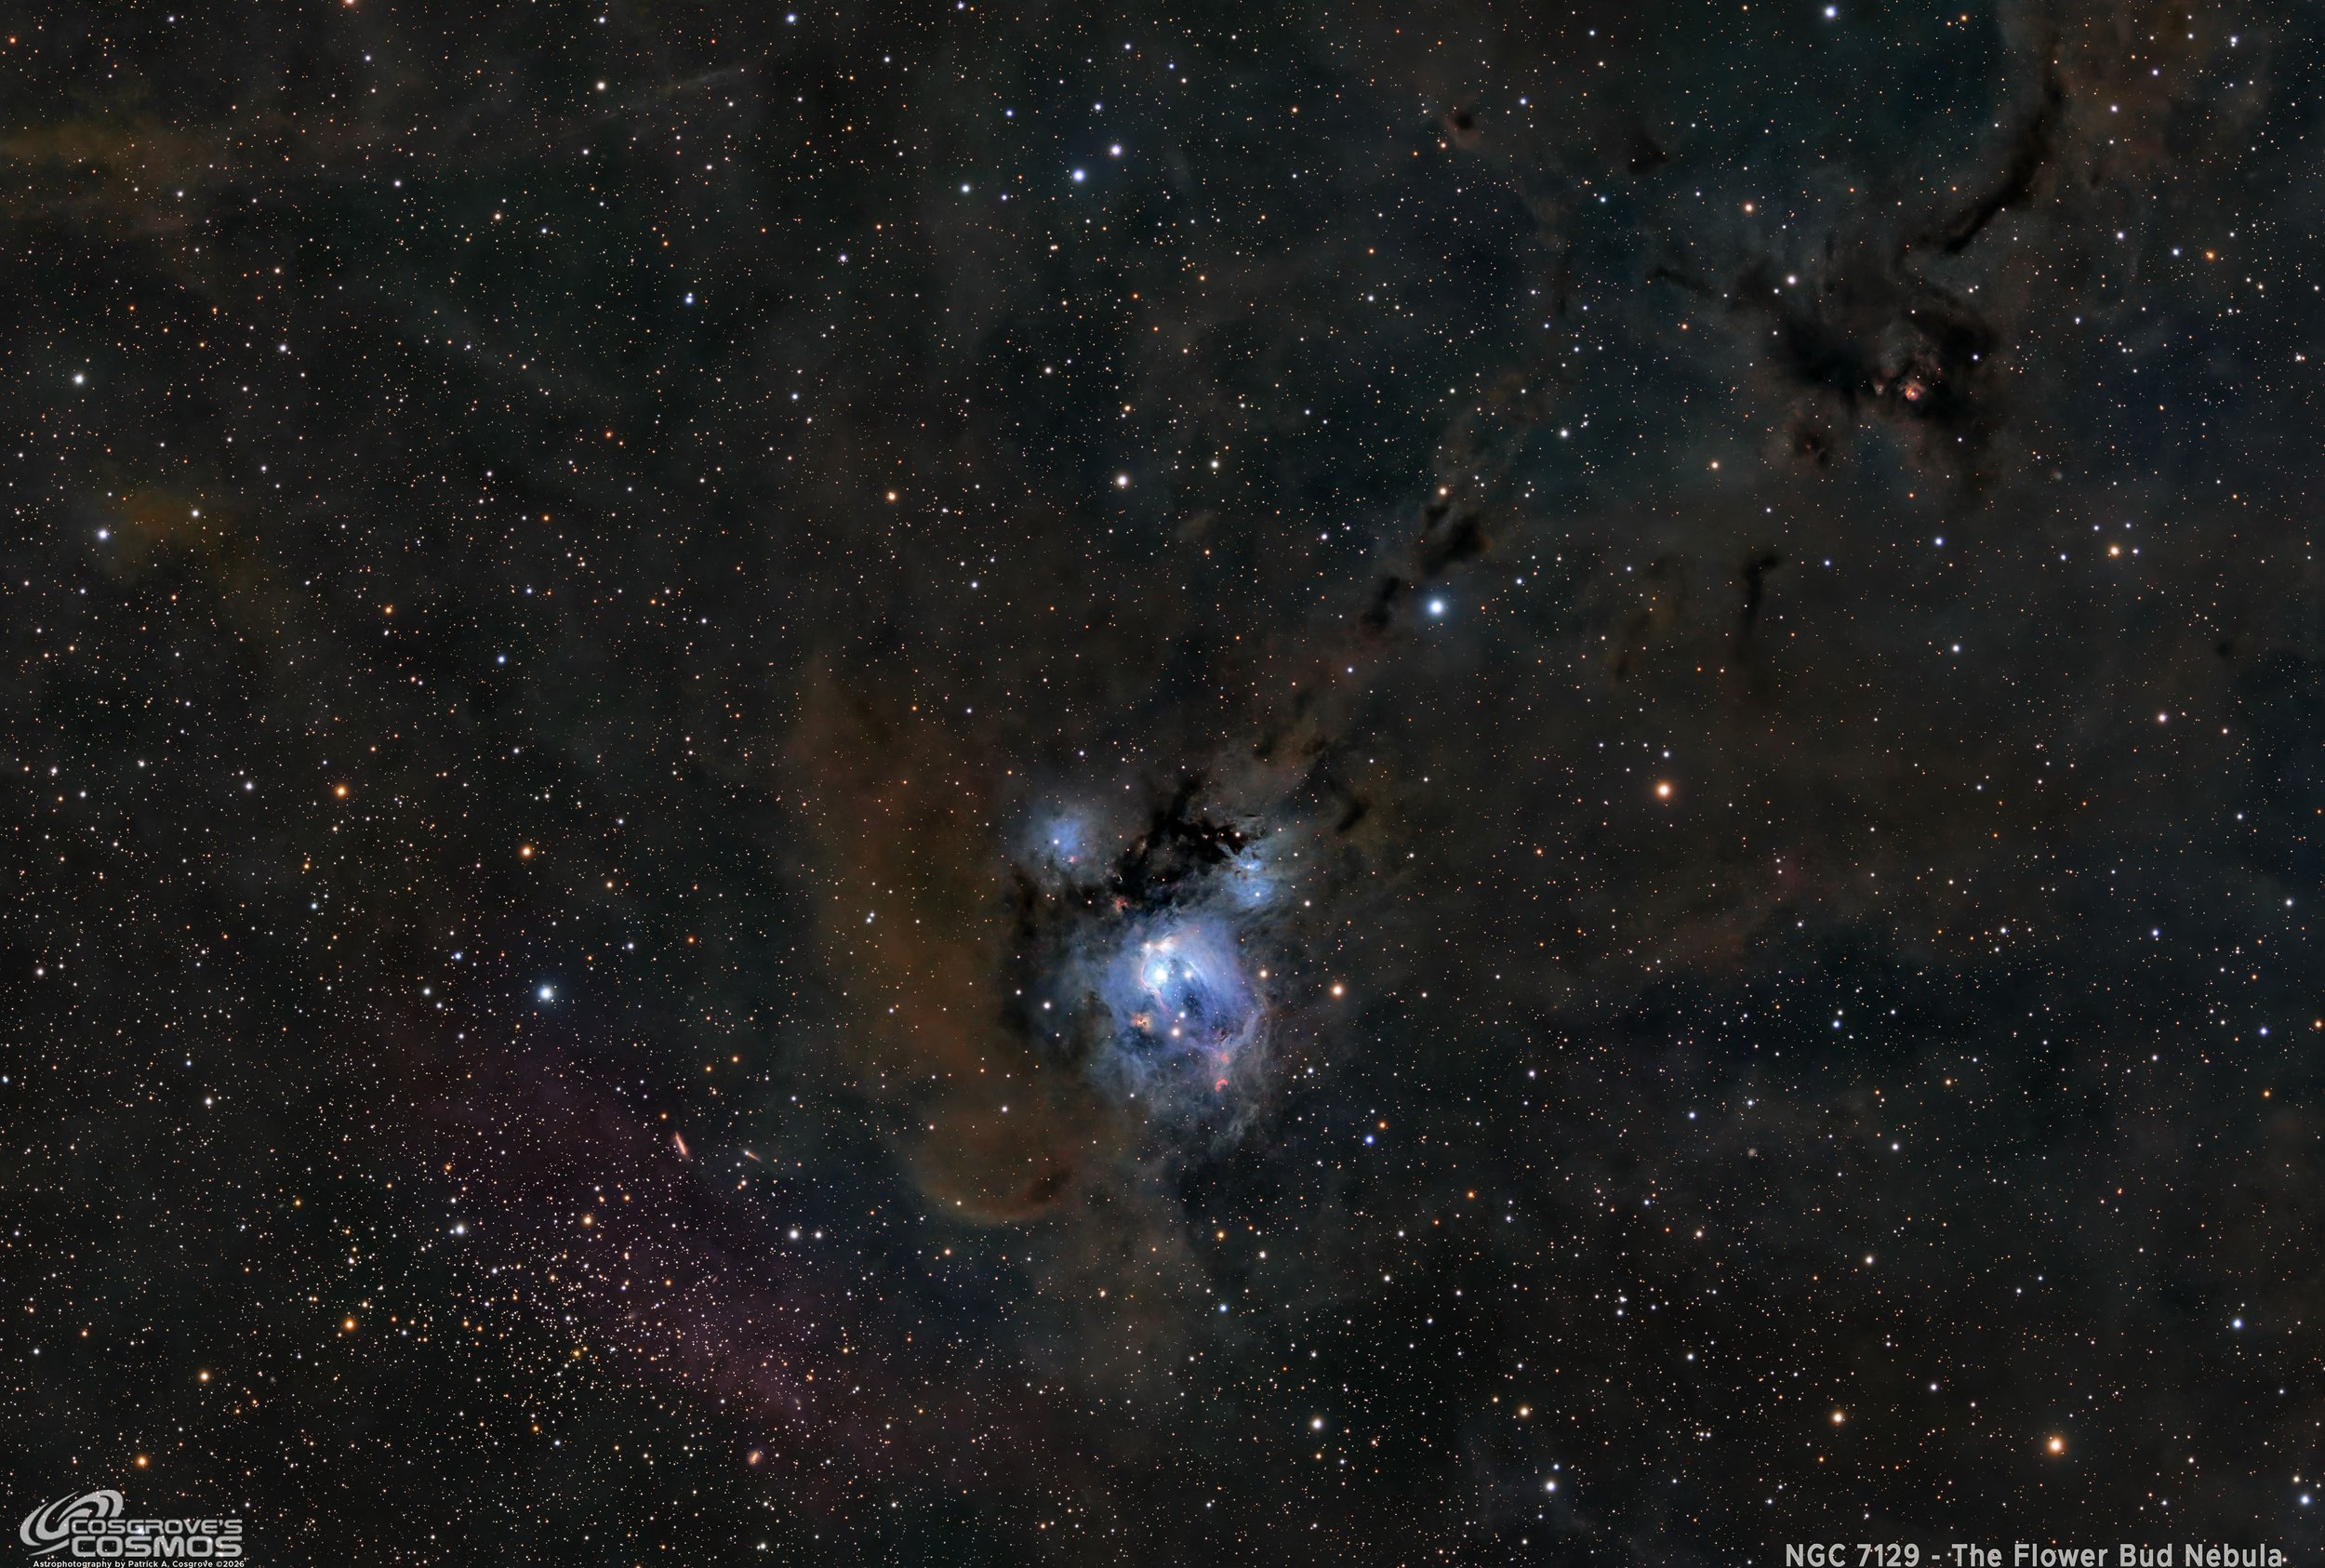
My 2026 image of NGC 7129
🔭 Project Summary
Target: NGC 7129 — The Flower Bud Nebula / Cosmic Rosebud Nebula / Rosebud Nebula
Associated Objects: IC 5134, vdB 146, Ced 196, Collinder 441, LDN 1181, LDN 1183, LBN 497, NGC 7133, and NGC 7142
Capture Dates: July 11, 12, 22, and 23, 2026
Constellation: Cepheus • Distance: ≈ 3,000–3,800 light-years
Type: Reflection nebula / young star-forming region embedded in a larger Cepheus molecular cloud complex
Imaging Period: July 11–23, 2026 • Total Integration: 13 h 54 m 00 s (LRGB)
Filters: L · R · G · B (ZWO 36 mm LRGB Gen II)
Telescope: Astro-Physics 155 mm Starfire EDFS f/5.3
Camera: ZWO ASI2600MM-Pro (−10 °C; Gain 0 LRGB)
Mount: iOptron Tri-Pier with column extension on custom steel pier
Processing: PixInsight (LRGB) & Photoshop
Location: Whispering Skies Observatory · Honeoye Falls, NY (USA)
Acquisition notes: L: 222 × 90 s; R: 111 × 90 s; G: 110 × 90 s; B: 113 × 90 s at −10 °C, Gain 0; total 13 h 54 m 00 s after culling bad or questionable subs.
Image note: This LRGB image captures NGC 7129, the Flower Bud Nebula, as a blue reflection nebula and young stellar nursery set within a wide field of dark Cepheus dust. The surrounding frame includes nearby reflection and dark nebula structures, along with the older open cluster NGC 7142, giving the scene a striking mix of newborn stars, obscuring molecular clouds, and older stellar populations.
Table of Contents Show (Click on lines to navigate)
Special Note
Welcome to the image-processing page for this project. You got here by following a link from the main NGC 7129 2026 project report, and you can return to that page using your browser's back button.
Abbreviations Used
Summary:
NGC 7129 LRGB Processing Flow
Sequential summary of the actual NGC 7129 workflow, following the published NGC 7129 image processing walkthrough: Blink review, WBPP 3.01 integration, RGB construction, linear luminance and RGB correction, starless processing, mask-driven tone and color work, LRGBCombination, RGB star recombination, Photoshop polishing, crop, watermarks, and final web exports.
Processing this Image
(All Processing is done in PixInsight, with some final touches done in Photoshop)
1. Blink
First, I screened the data for thin-cloud frames and obvious defects.
Lum
19 frames removed - 2 for tracking and the rest for clouds.
Red
6 frames removed for clouds.
Green
7 frames removed for clouds
Blue
5 frames removed for clouds.
Darks
All looked OK.
Dark Flats
All looked OK.
Flats
All good.
2. WBPP 3.01
With the bad frames identified, I ran everything through WBPP with a quality-first configuration:
Reset everything
Load all lights
Load all flats
Load all dark flats
Load all darks
Selected maximum quality
Reference Image: auto, the default
Select the output directory for the WBPP folder
Enable CC for all light frames
Pedestal value: auto
Darks - set exposure tolerance to 0
Lights - set exposure tolerance to 0
Lights: all correction options selected except linear defect correction.
Enabled Autocrop
I chose NOT to use Drizzle processing.
WBPP completed in 2:20:35.
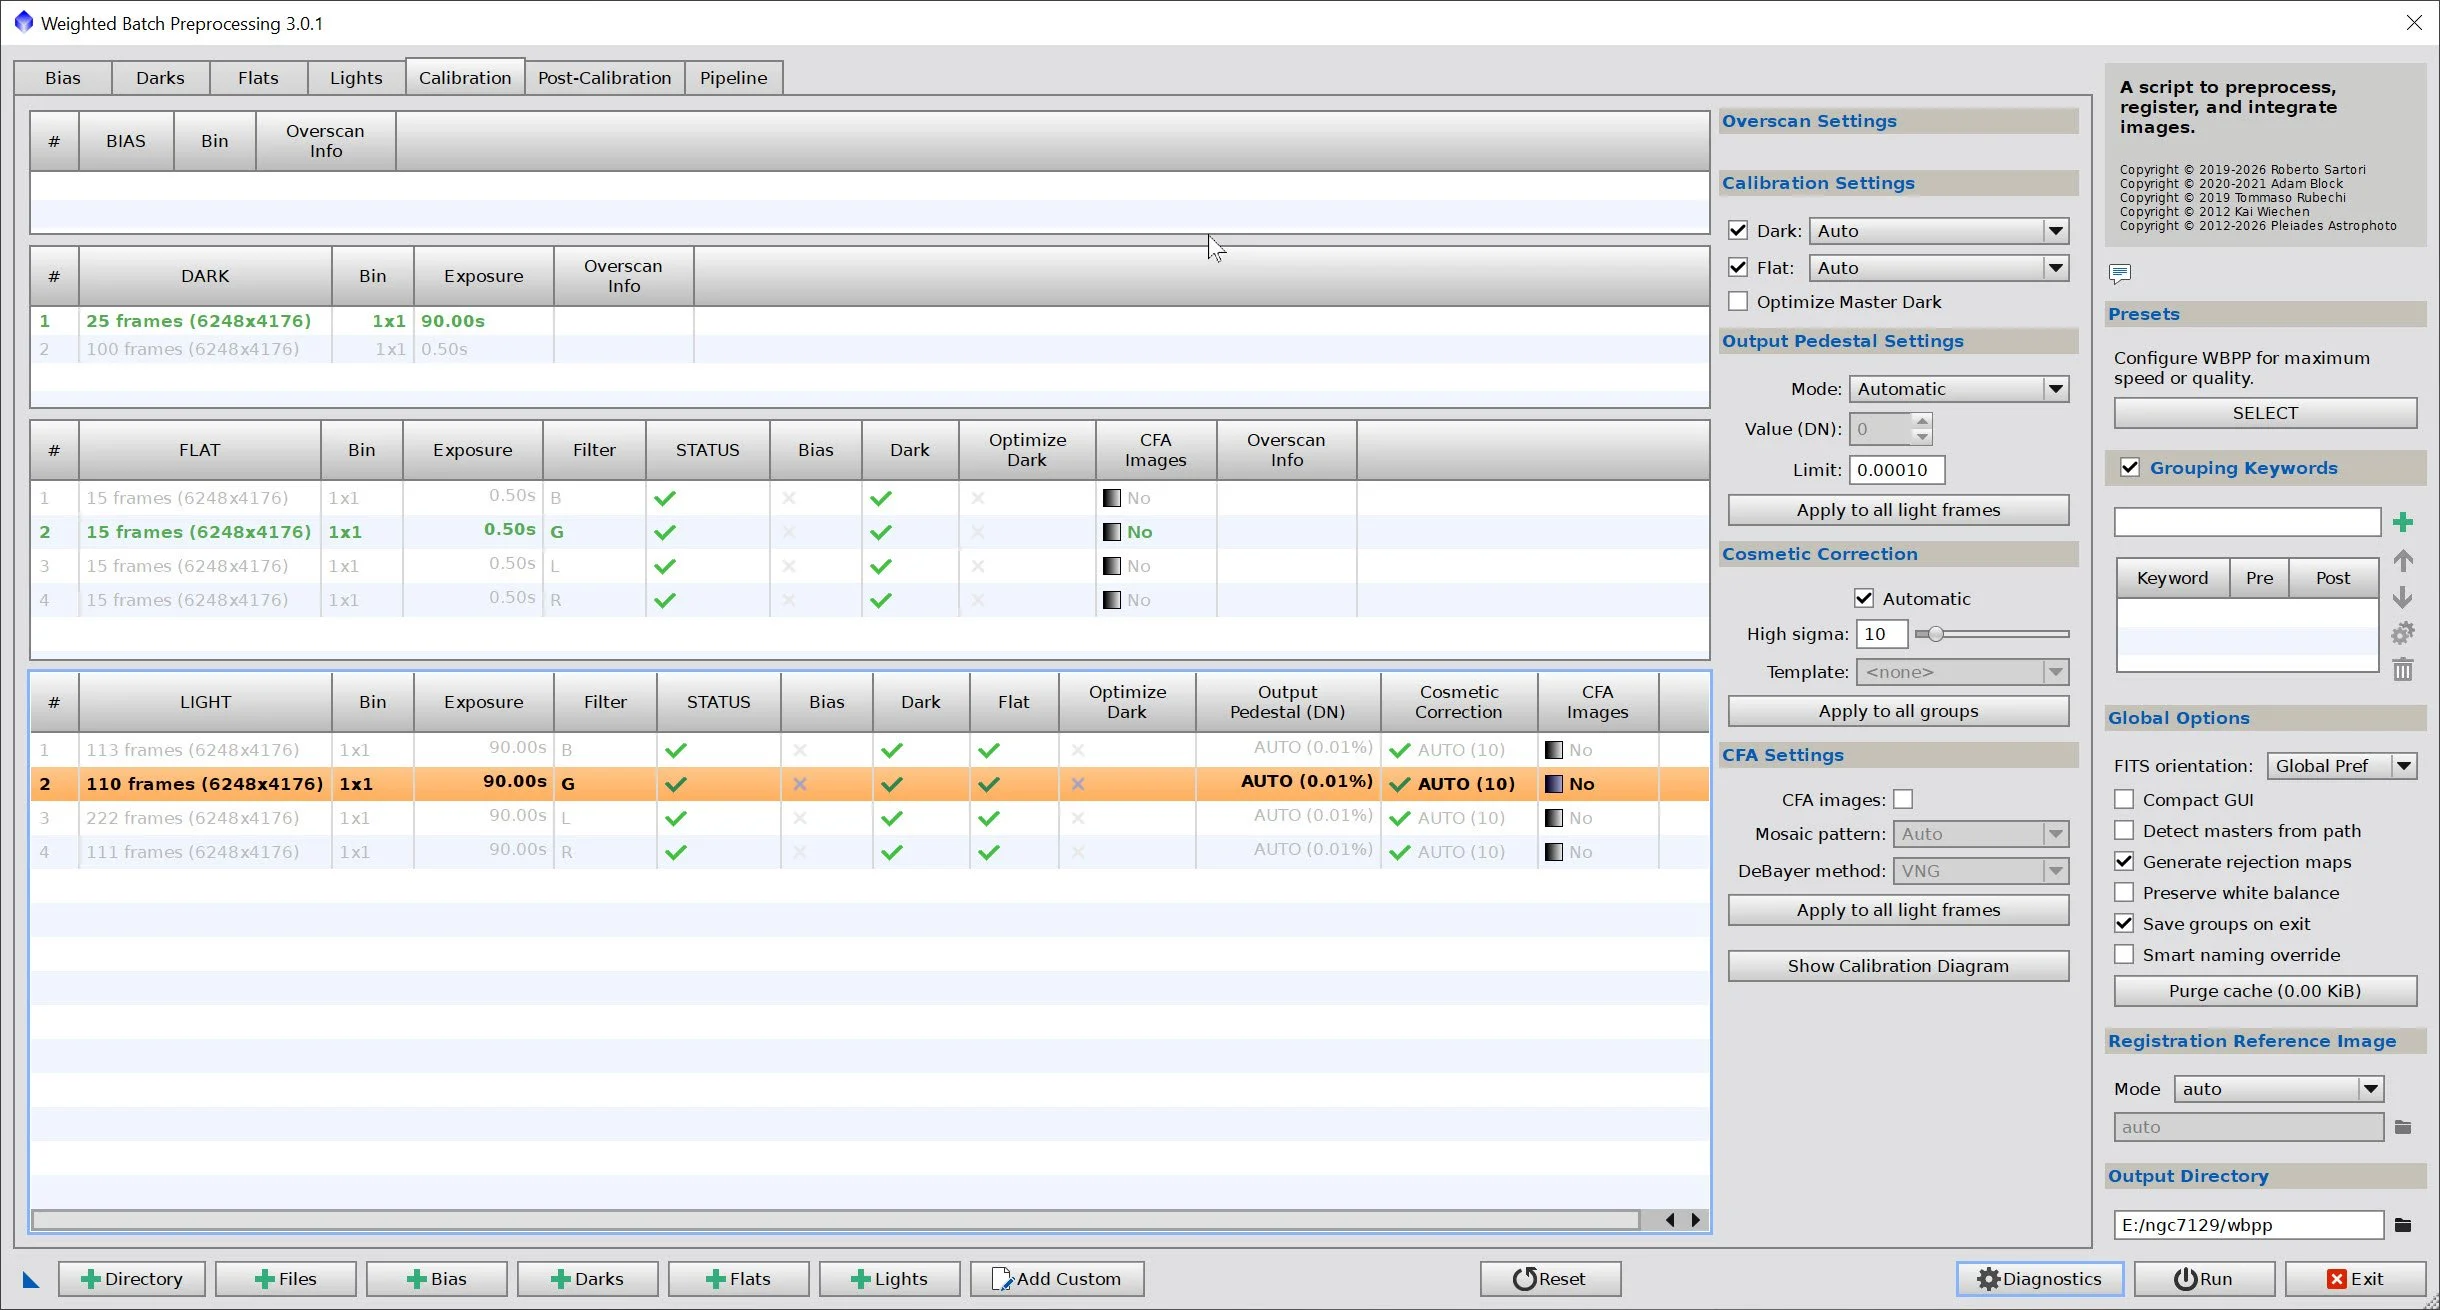
WBPP Calibration View
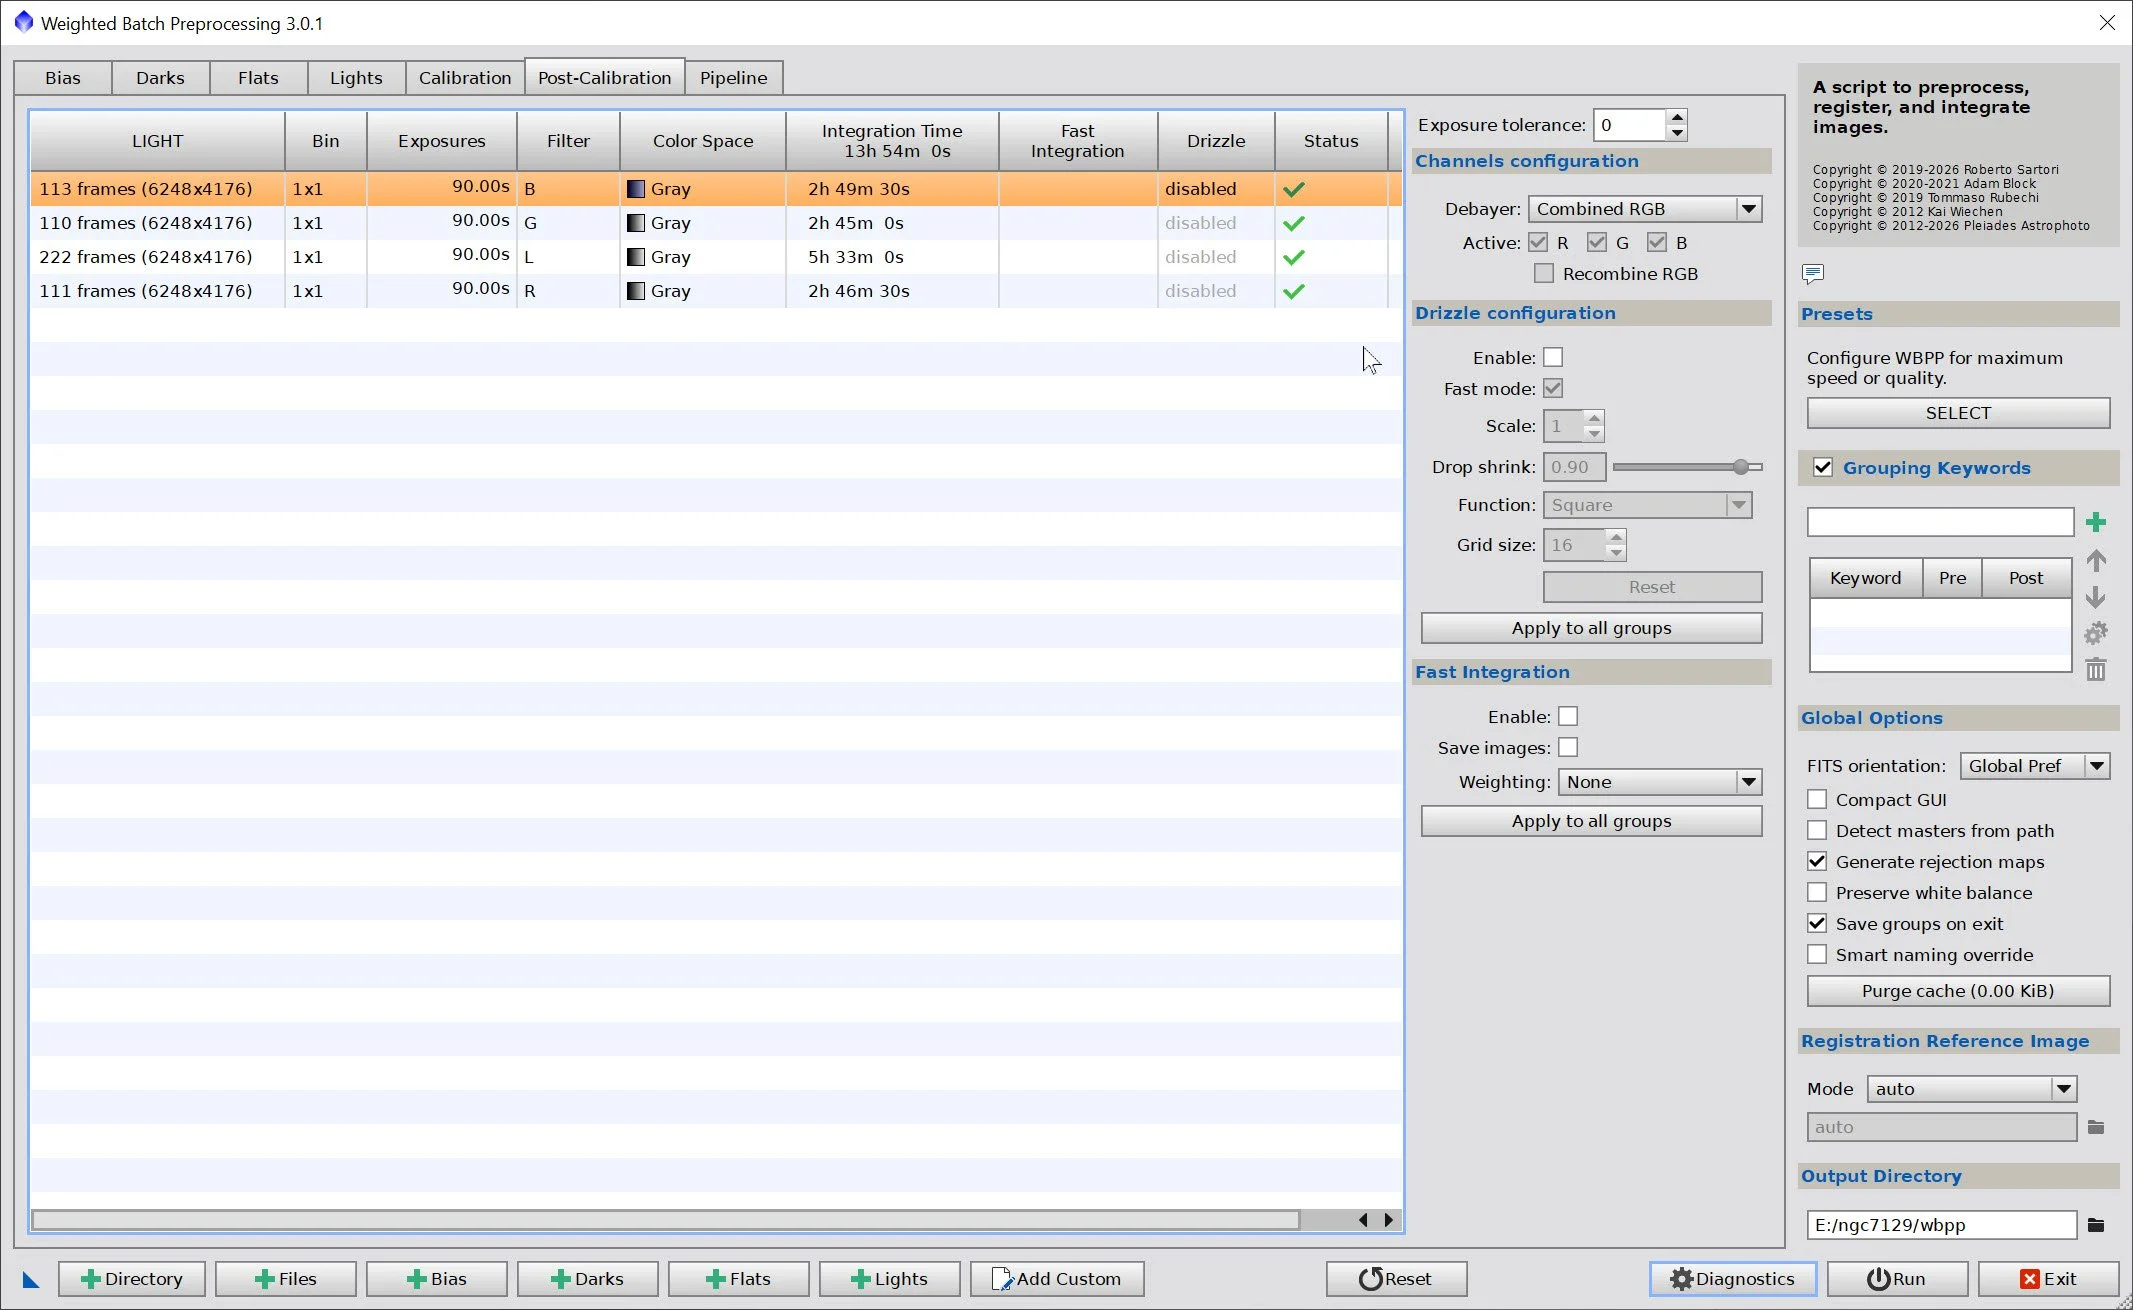
WBPP Post Calibration View
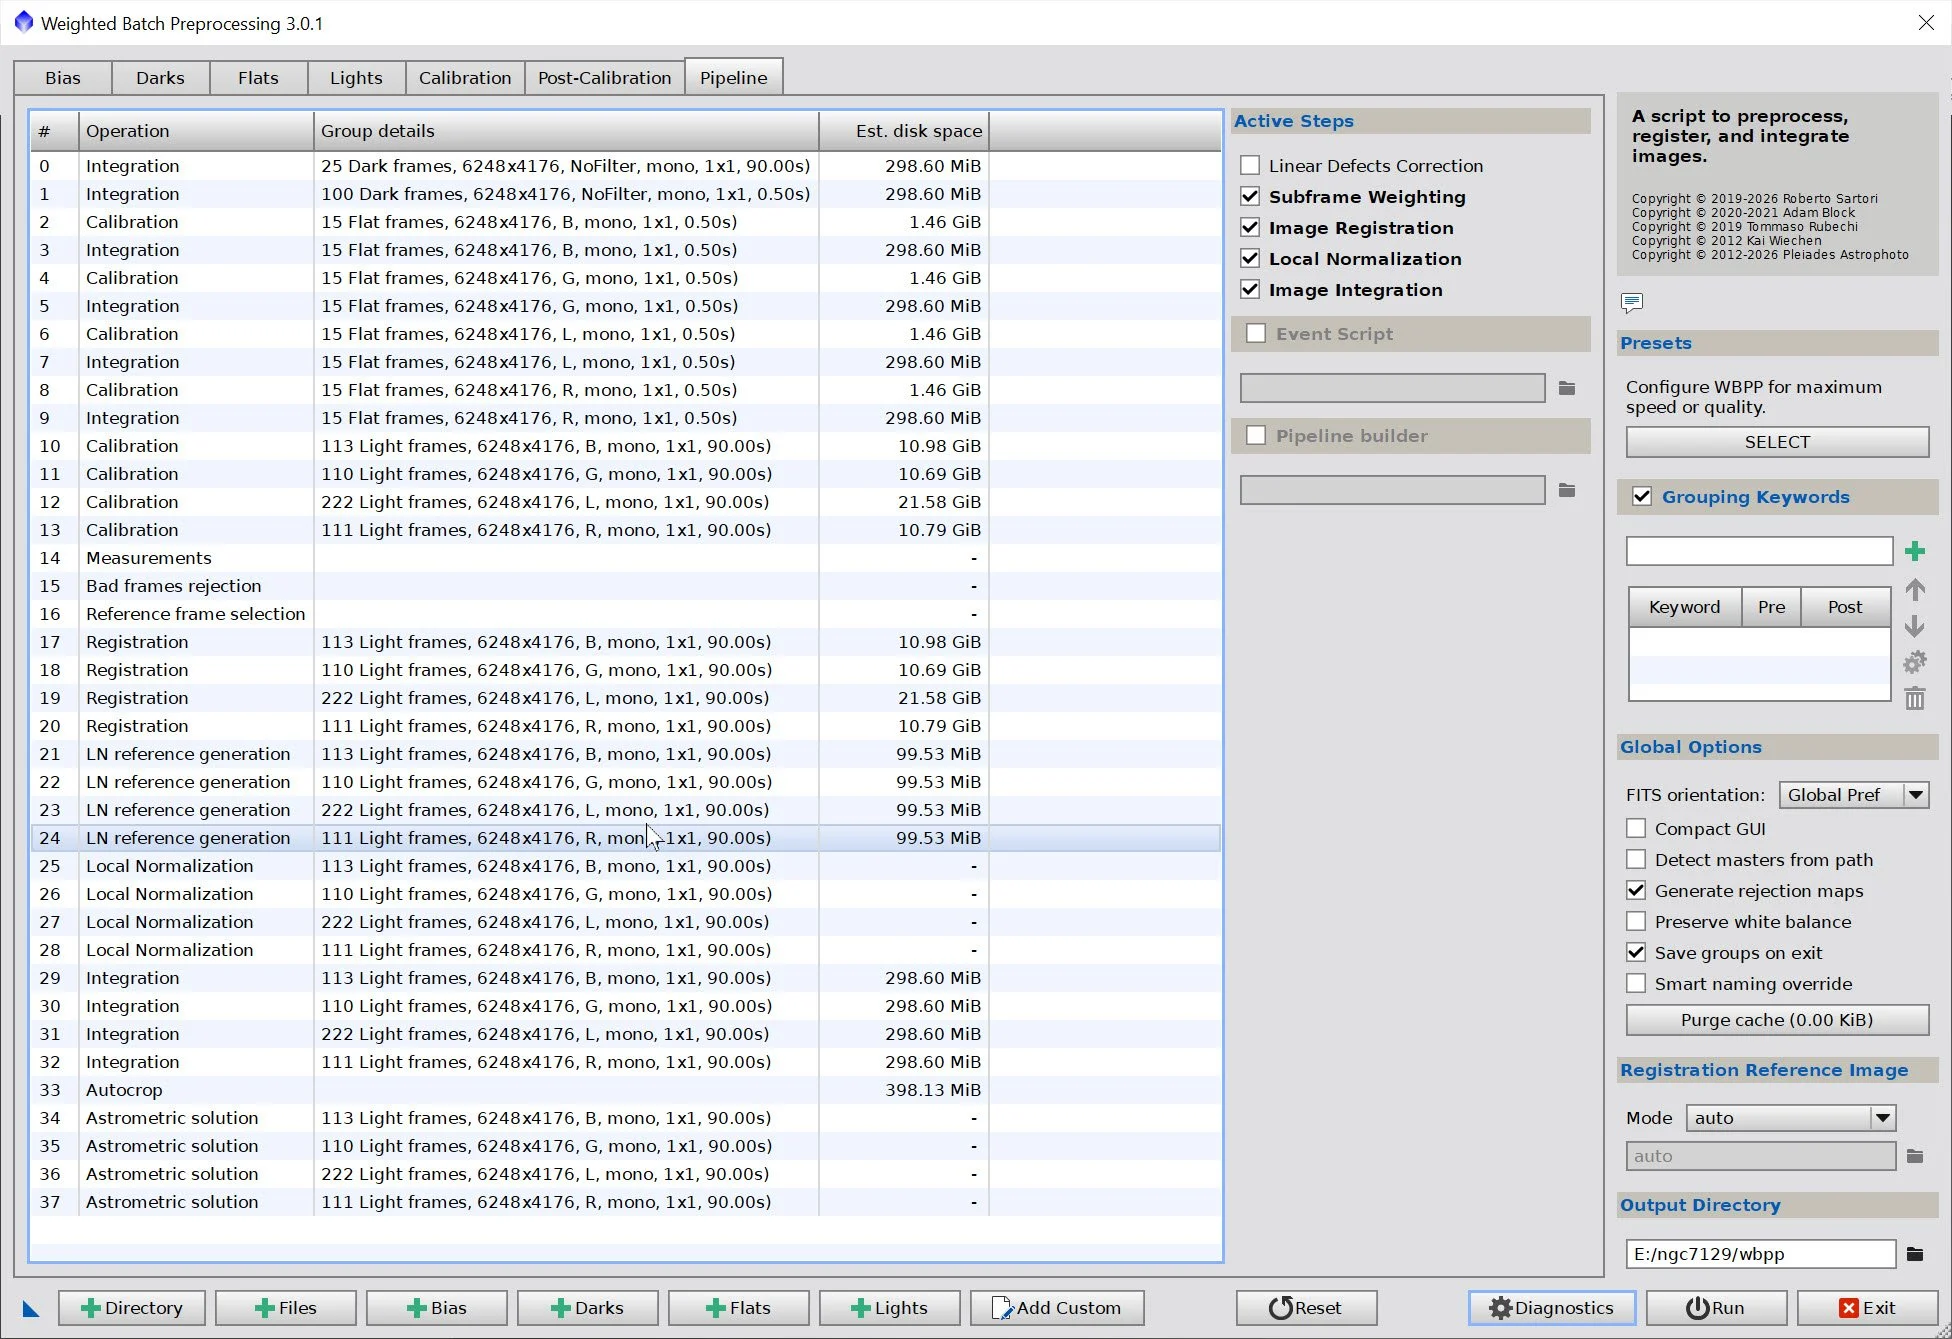
WBPP Pipeline View
3. Load Master Images and Create Color Images
Load all master images.
Using ChannelCombination, create the master RGB color image
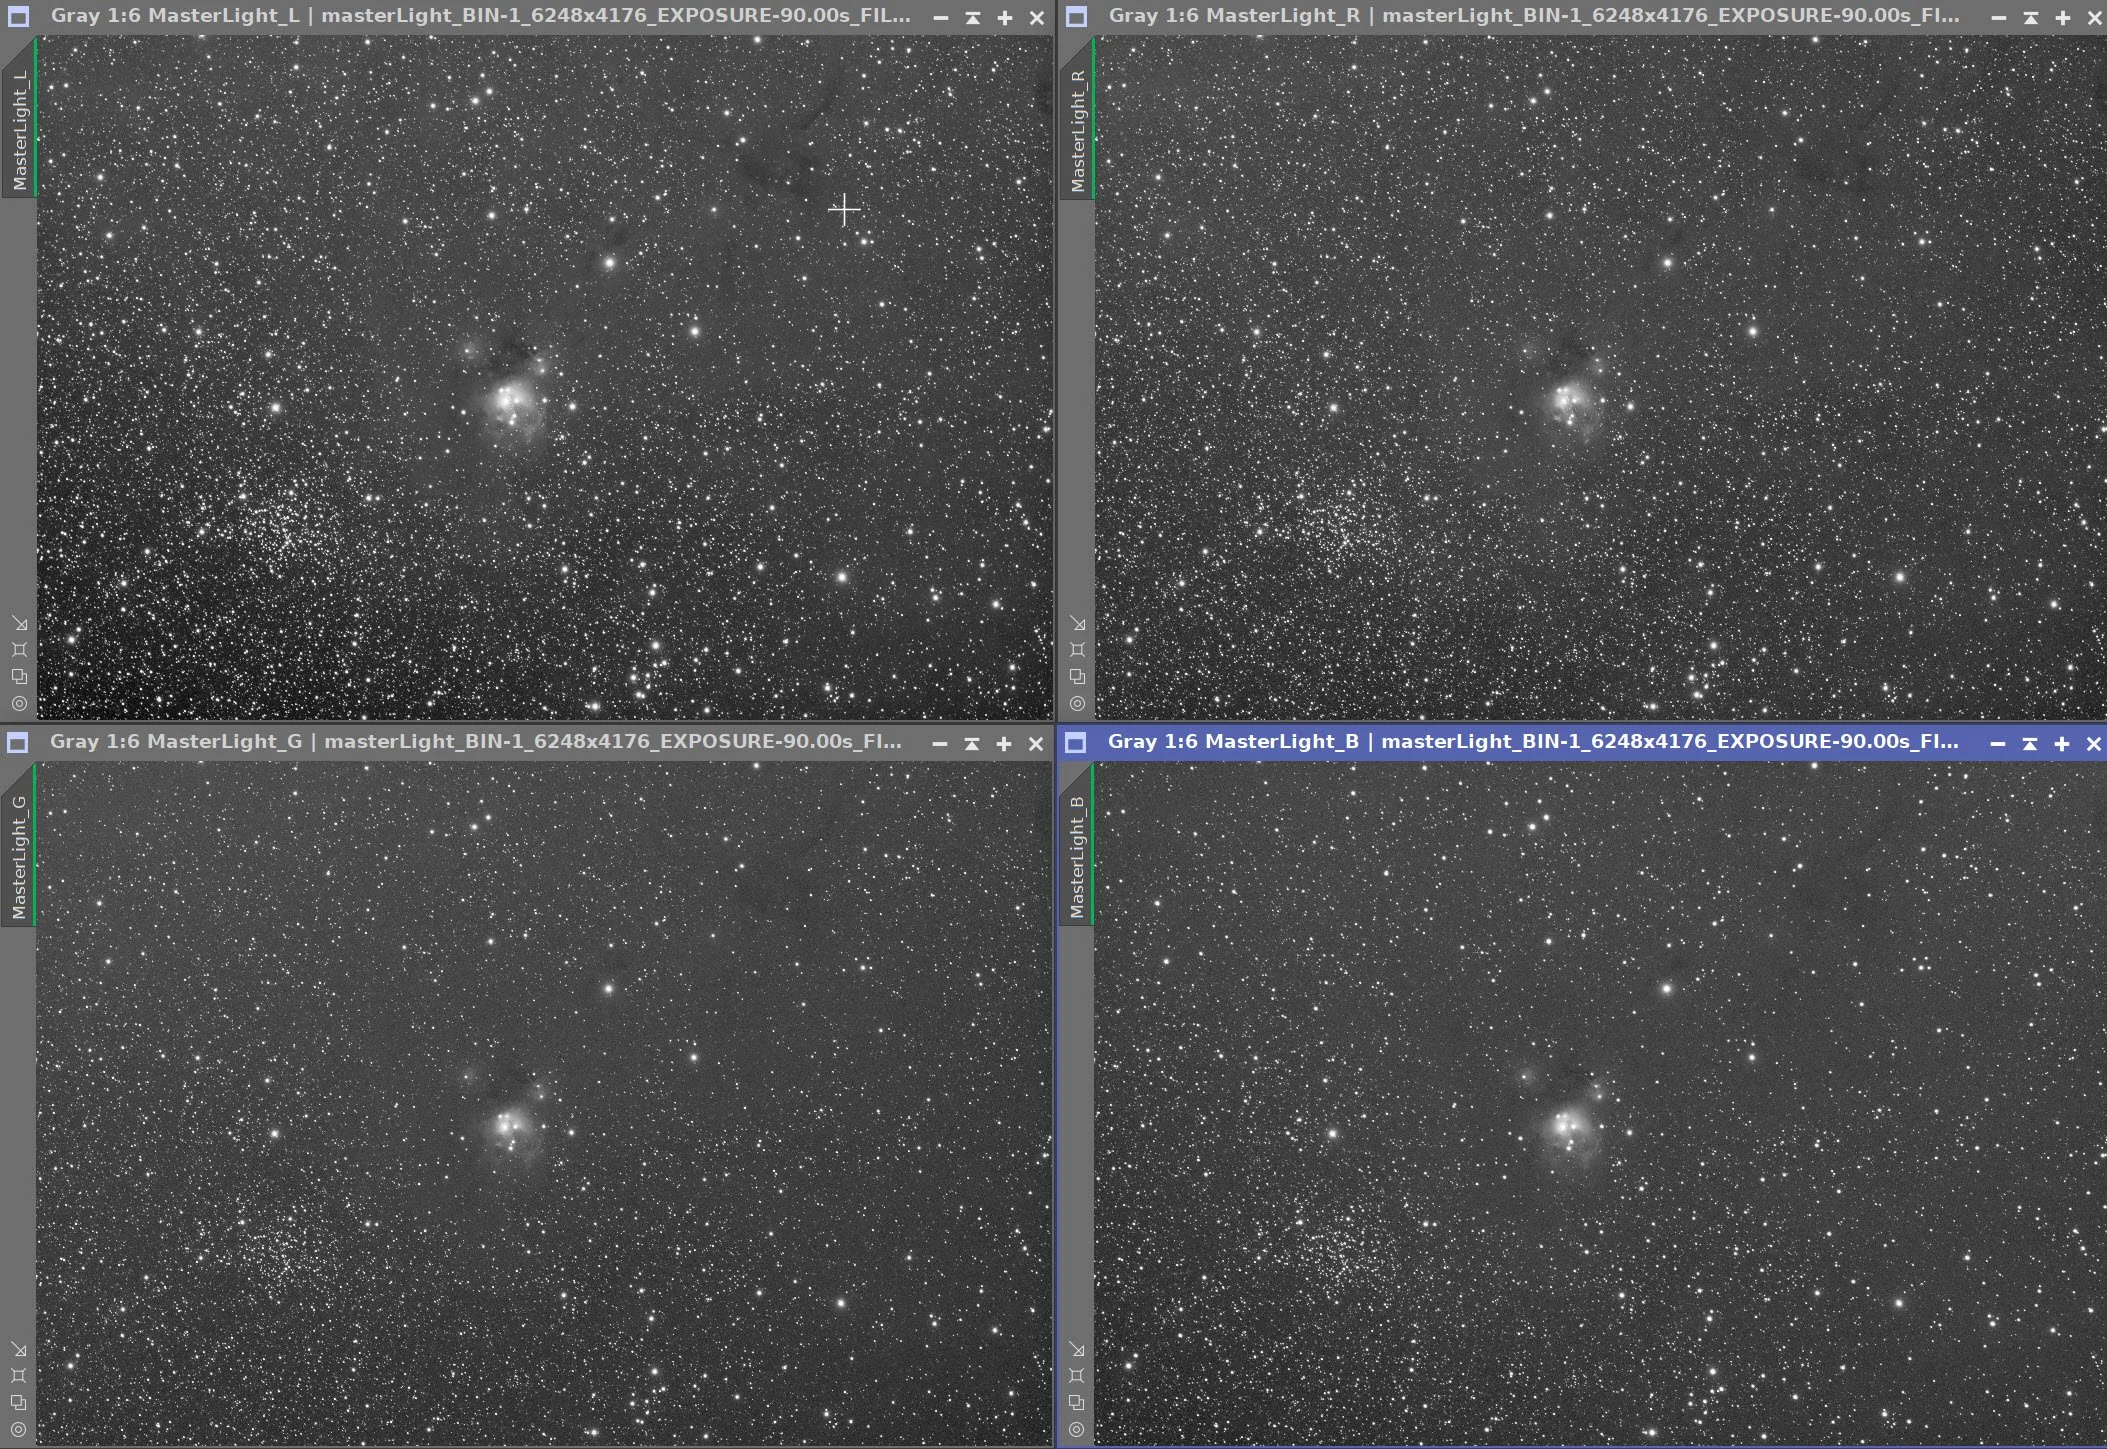
The Individual L, R, G, and B master linear images.
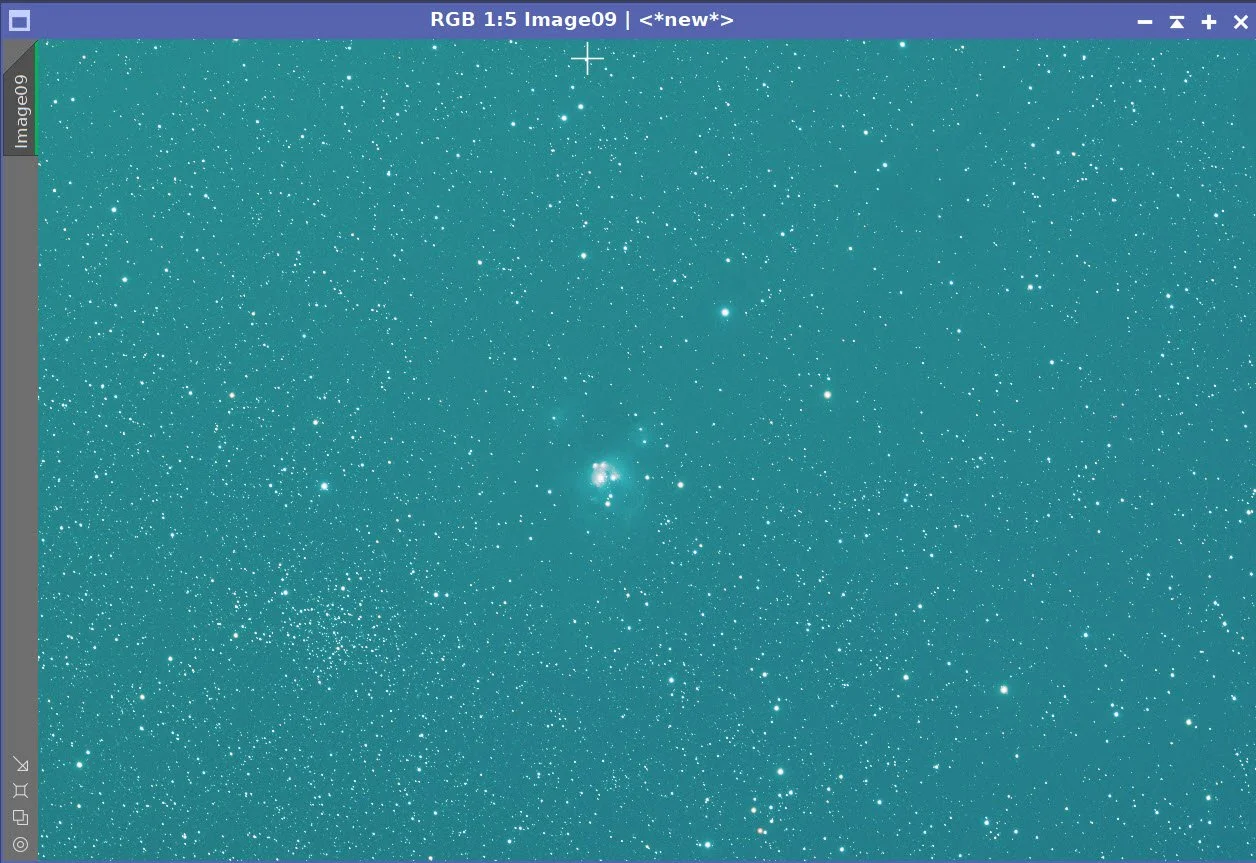
Master RGB image.
4. Initial Processing of Linear Luminance Data
Run DBE for the linear luminance image. Use subtraction as the correction method. Choose a sampling plan that avoids the nebulae and bright stars. (See below). A significant gradient leads to the bottom-left corner. DBE took most of it out.
Run BXT - Correct Only. This image did not need much correction, but I ran it as a light cleanup pass
Run the PFSImage script to measure star sizes. X = 2.12, Y = 1.99. This will influence the values used in BXT.
Run full BXT. I used an enhanced set of values to shrink the stars more aggressively. These are a little over double the measured star sizes. See the BXT Panel Snapshot below.
Run NXT V3; refer to the parameters in the snapshot below.
Run SXT - no need to save the Lum stars, as we will not be using them.
Master L Image DBE Sampling Plan (click to enlarge)
Master L- Before DBE (click to enlarge)
Master L after DBE (click to enlarge)
Background Subtracted by DBE (click to enlarge)
Measuring Star Sizes with PFSImage Script (click to enlarge)
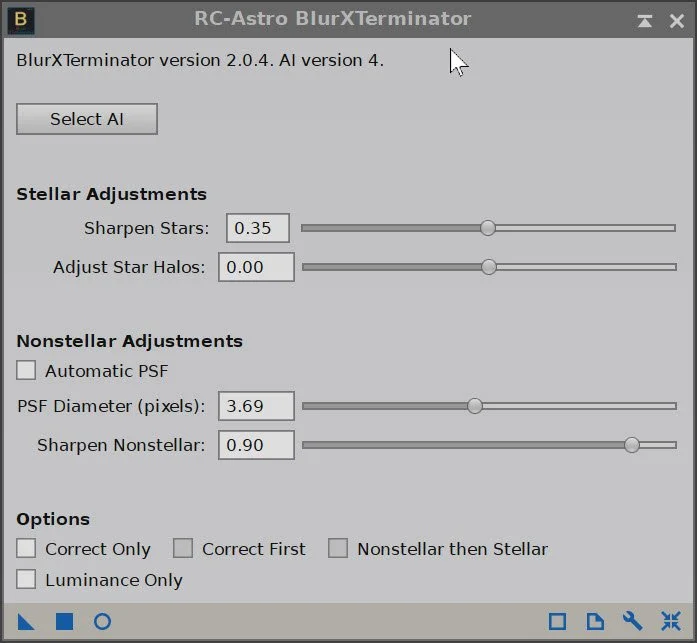
BXT Settings Used. (click to enlarge)
NXT Panel used. (click to enlarge)
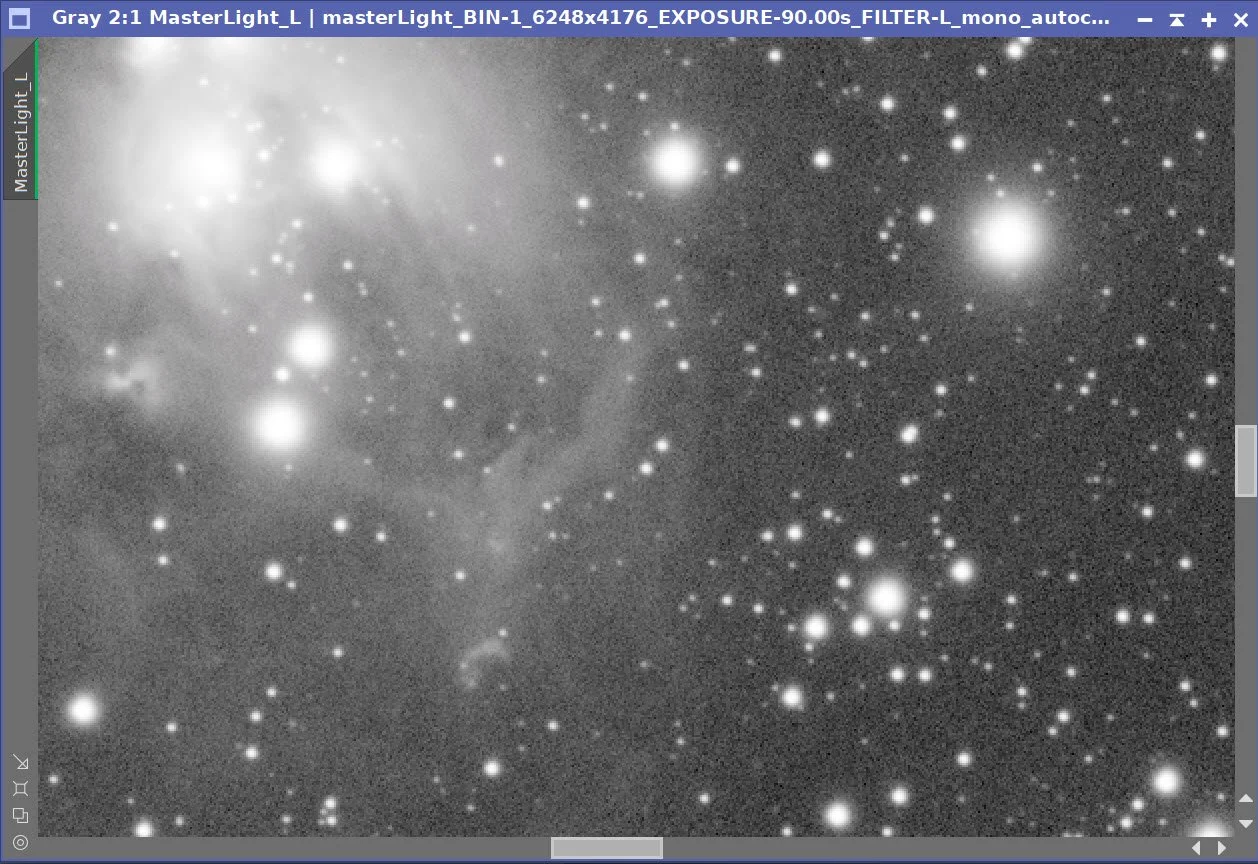
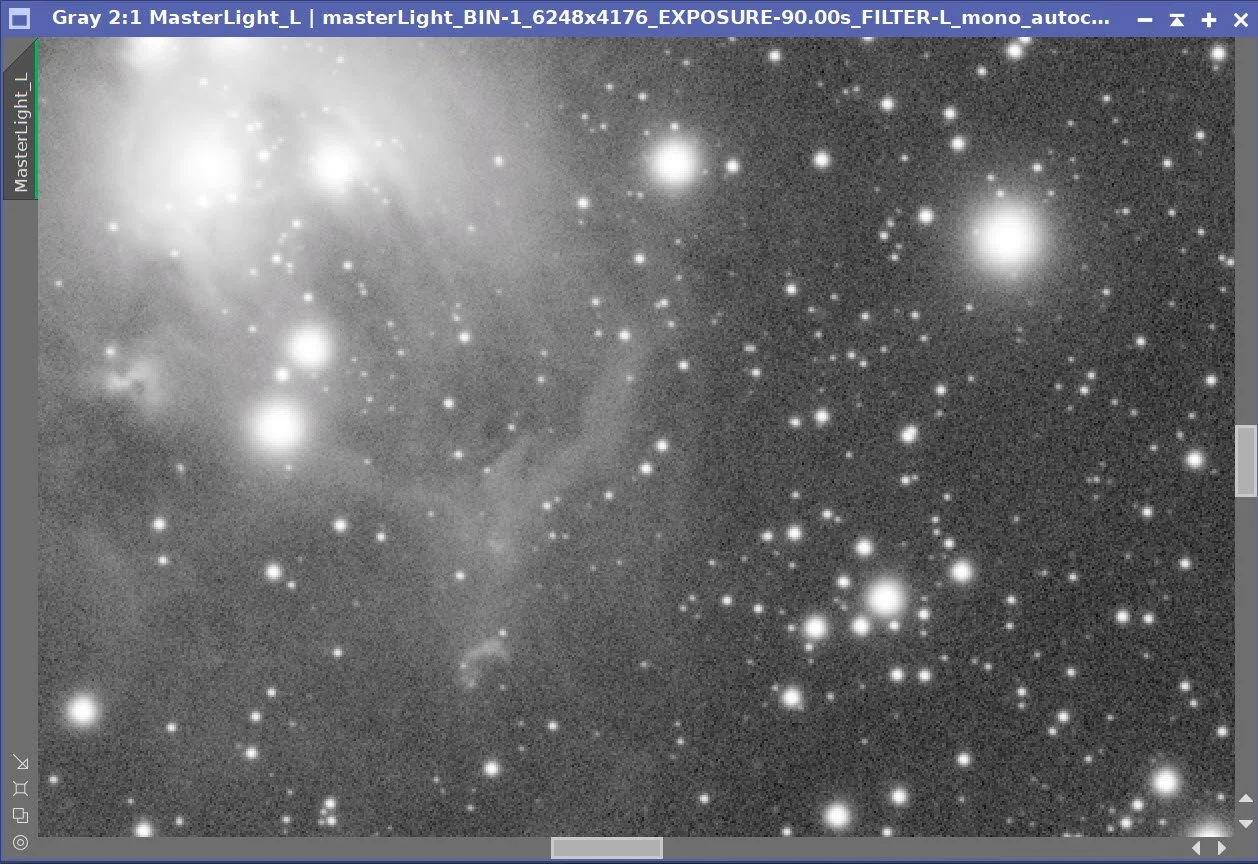
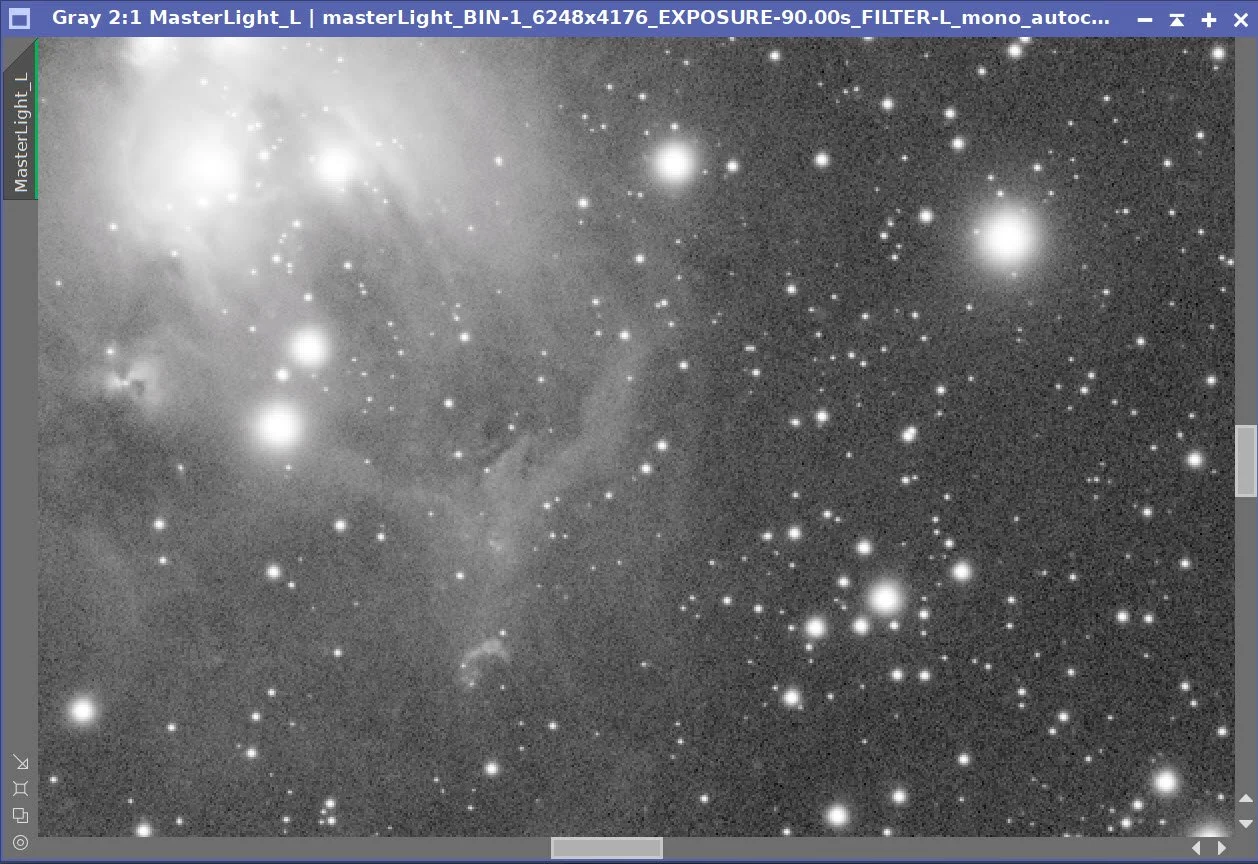
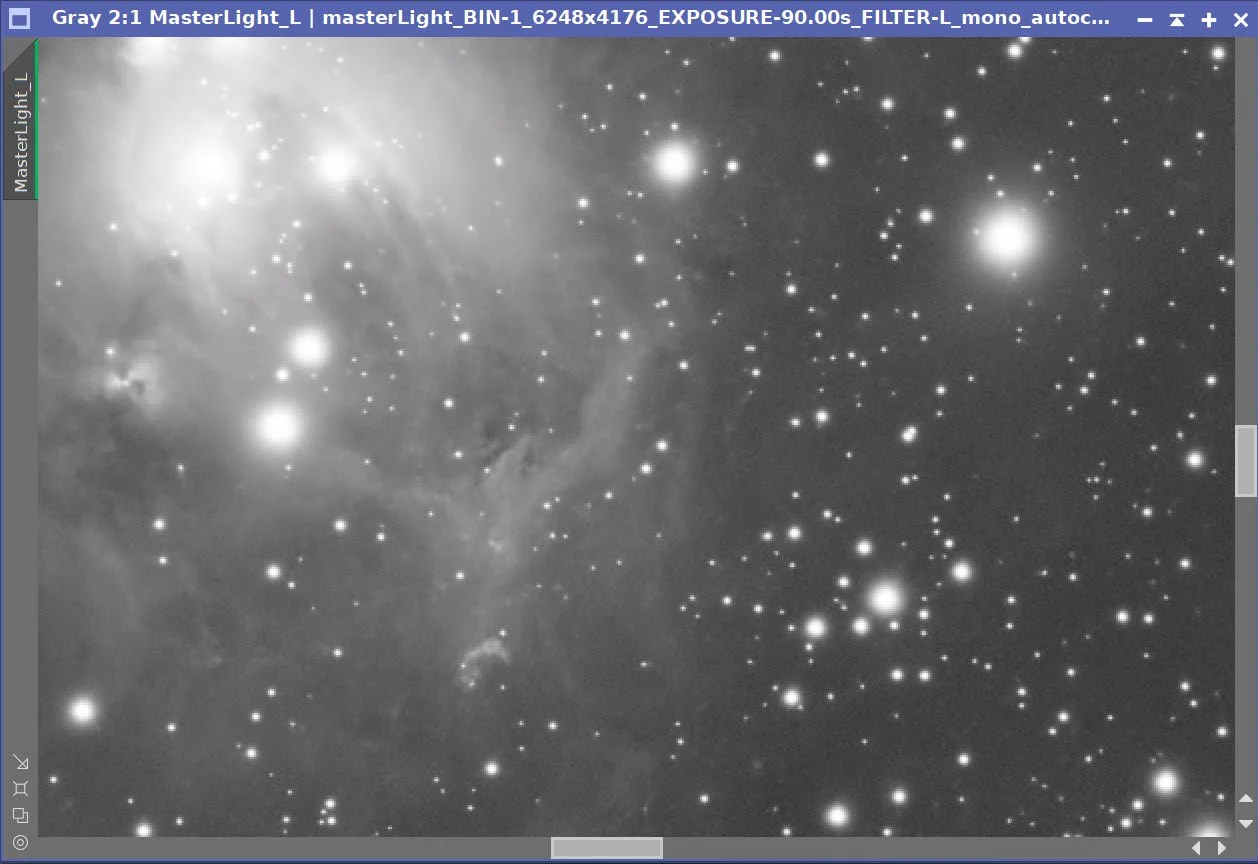
Master Lum Before BXT Correct Only, After BXT Correct Only, After BXT Full, After NXT
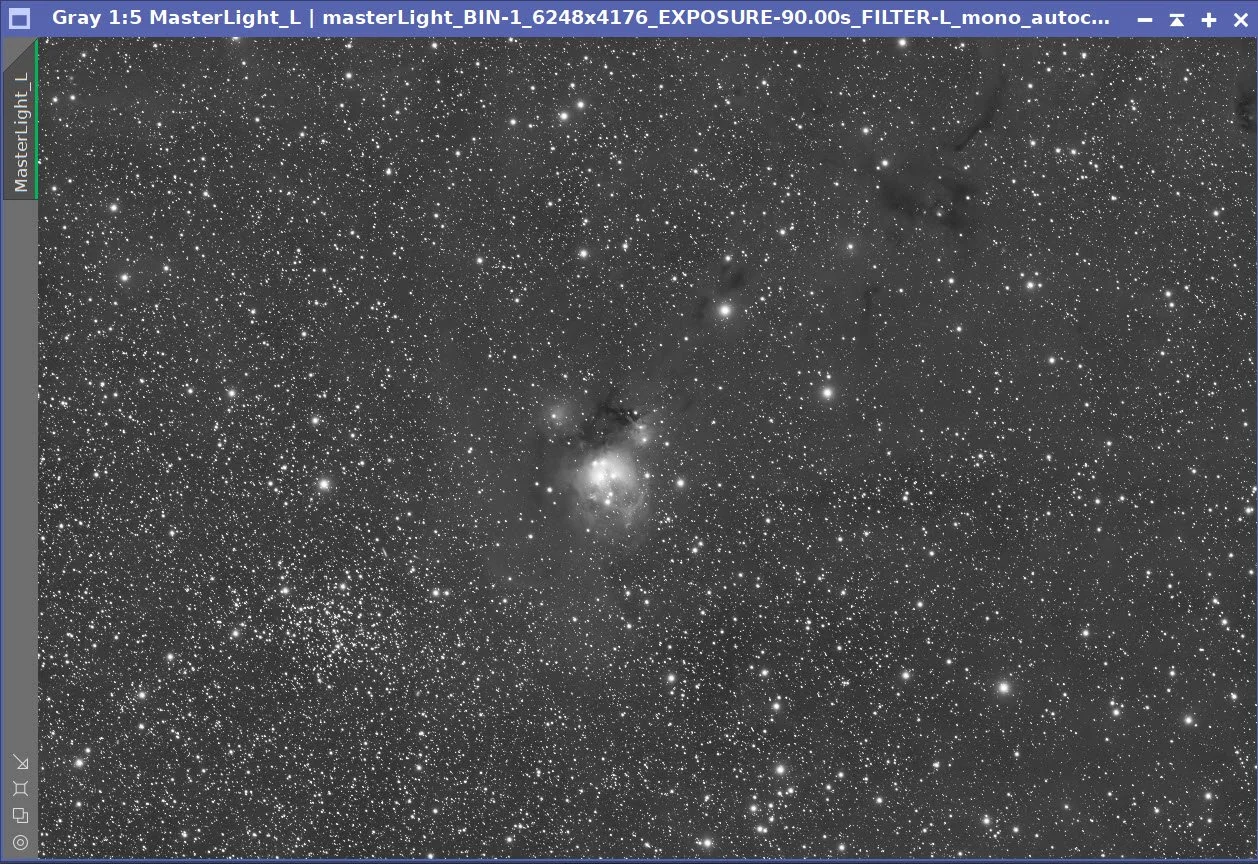
Final Master Lum Image
Master Lum Starless Image (click to enlarge)
5.0 Initial Processing of Linear RGB Data
Run DBE on the linear RGB image. Use subtraction for the correction method. Start with the same sampling plan from the Lum run. Choose a sampling plan that avoids the nebulae and bright stars. (see below)
Select a background preview, then set up and run SPCC. See the SPCC Panel shot below for the parameters used.
Run BXT - Correct only. This cleaned up the stars at the corners. There was not much to correct because the optics were performing well.
Run the PFSImage script to measure star sizes. X=1.85 Y = 1.91. This will influence the values used in BXT.
Run Full BXT - I used an enhanced set of values to shrink stars more. These are about double the measured star sizes. See the BXT Panel Snapshot below.
Run NXT V3; refer to the parameters in the snapshot below.
Run SXT - this time we will save the RGB stars.
Master RGB Sampling Plan (click to enlarge)
Master RGB before DBE (click to enlarge)
Master RGB after DBE (click to enlarge)
Master RGB Background removed (click to enlarge)
Master RGB before SPCC (click to enlarge)
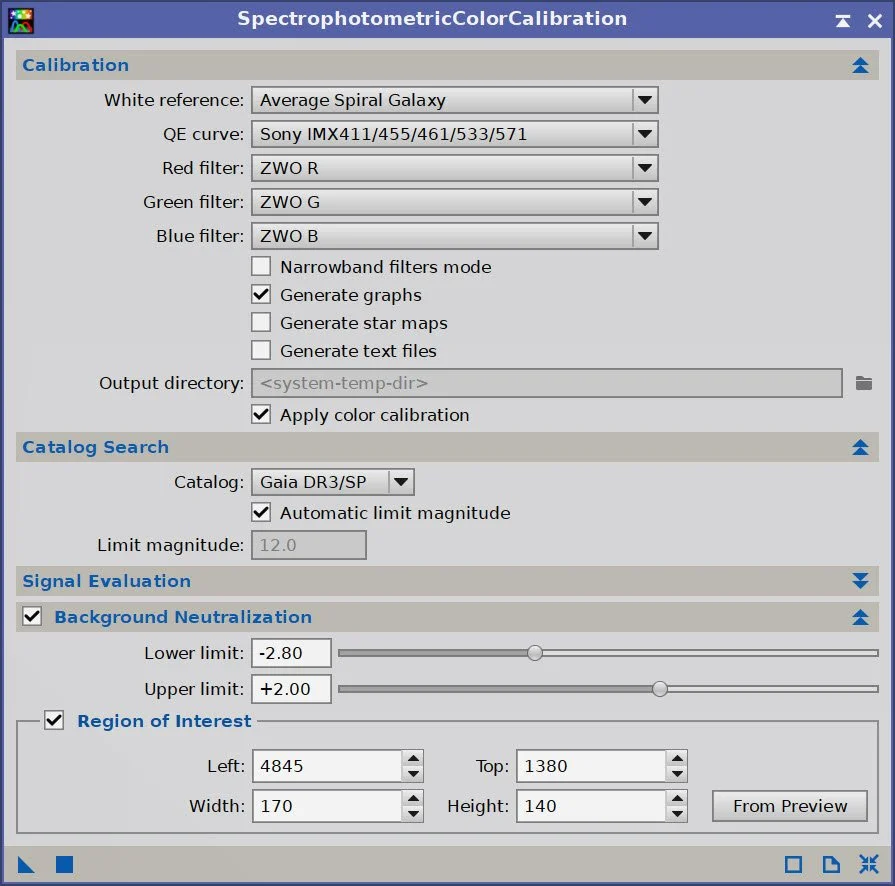
SPCC Panel showing parameters used.
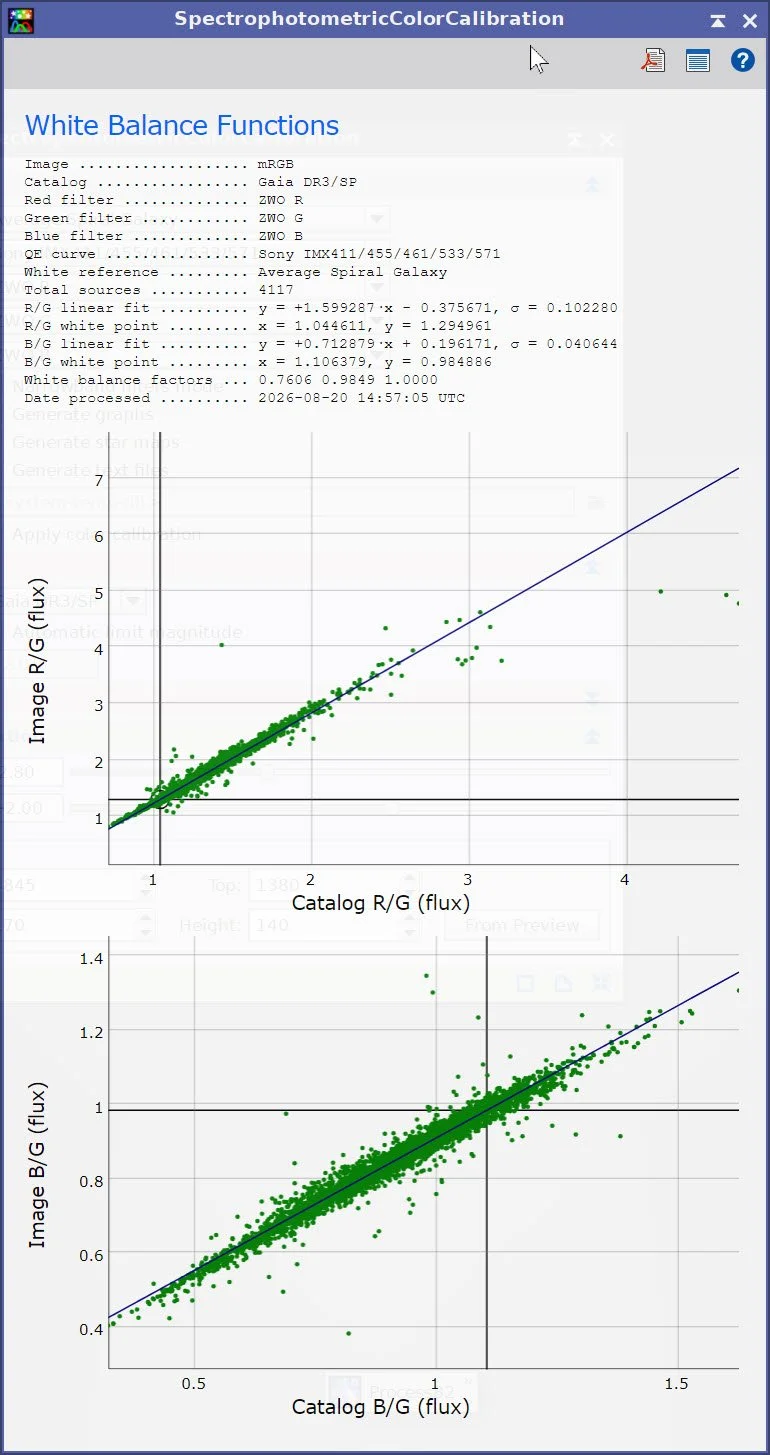
SPCC Regression results.
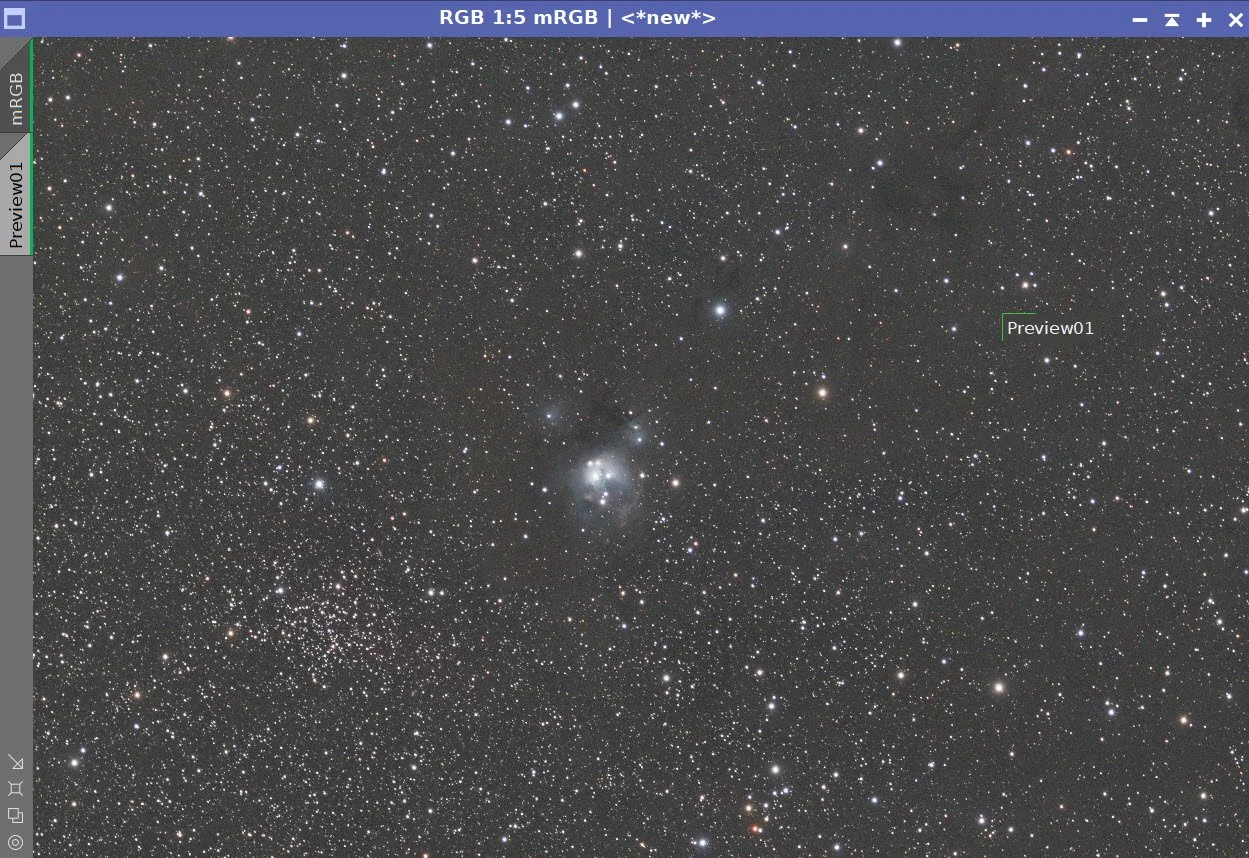
Master RGB after SPCC.
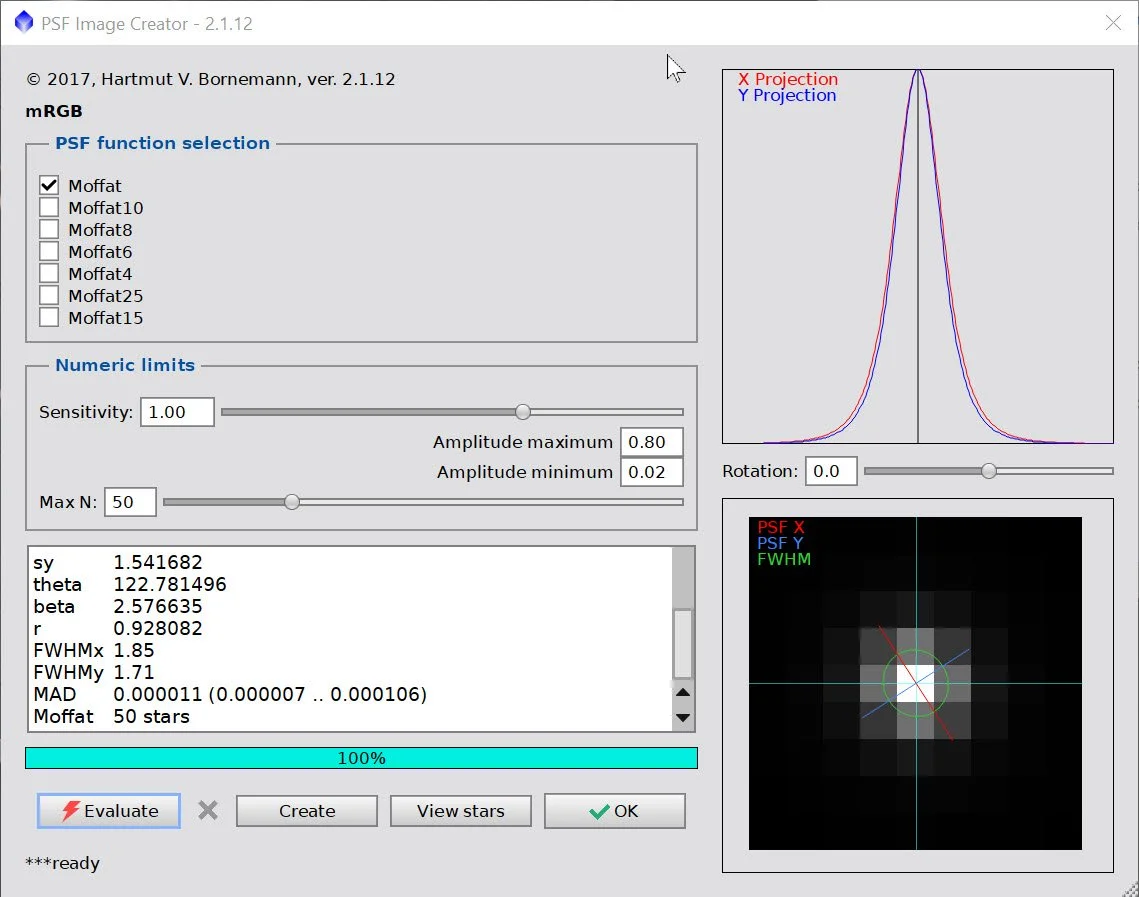
PFSImage panel showing star sizes.
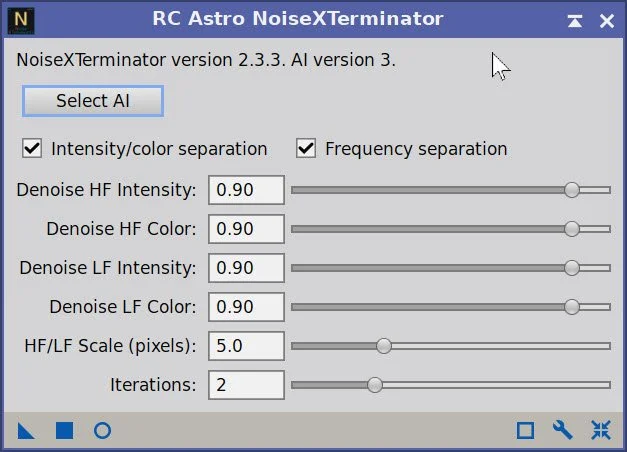
NXT Panel showing parameters used.
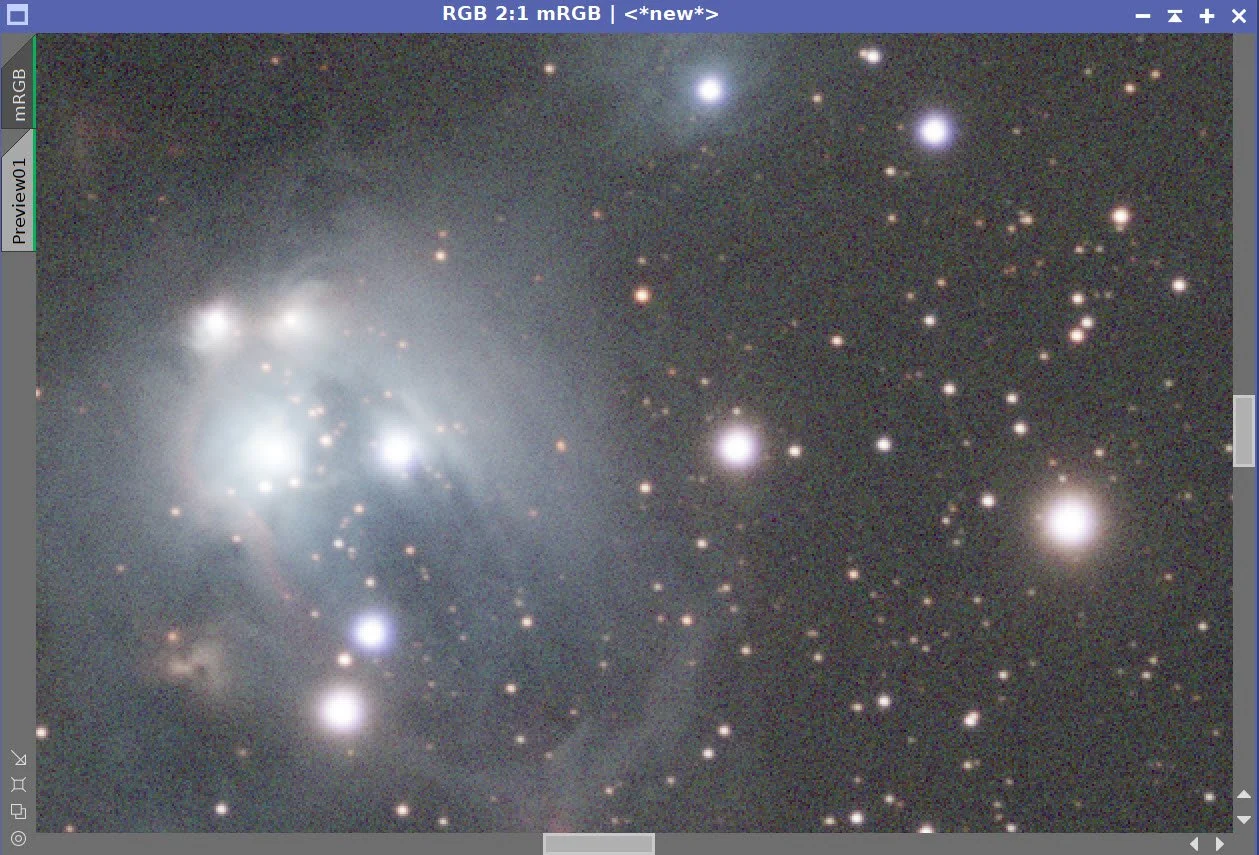
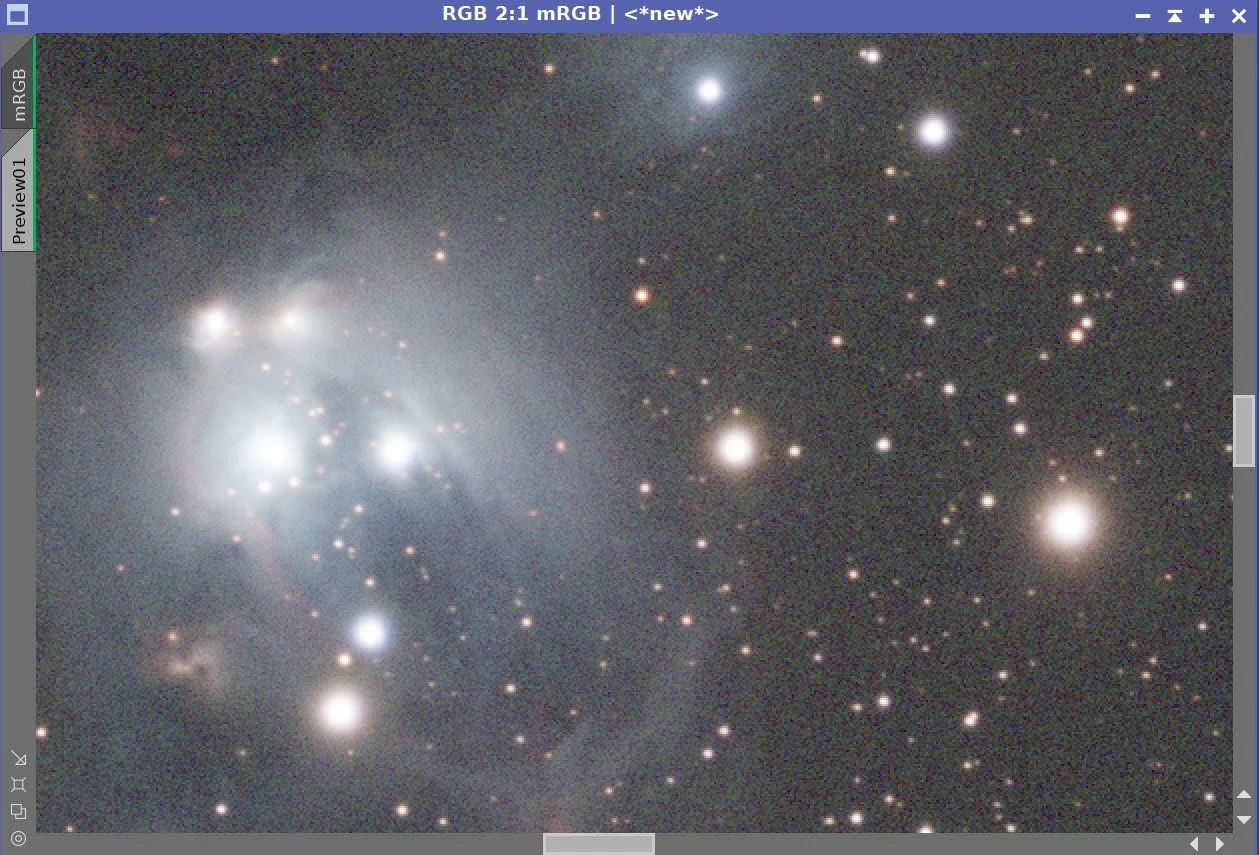
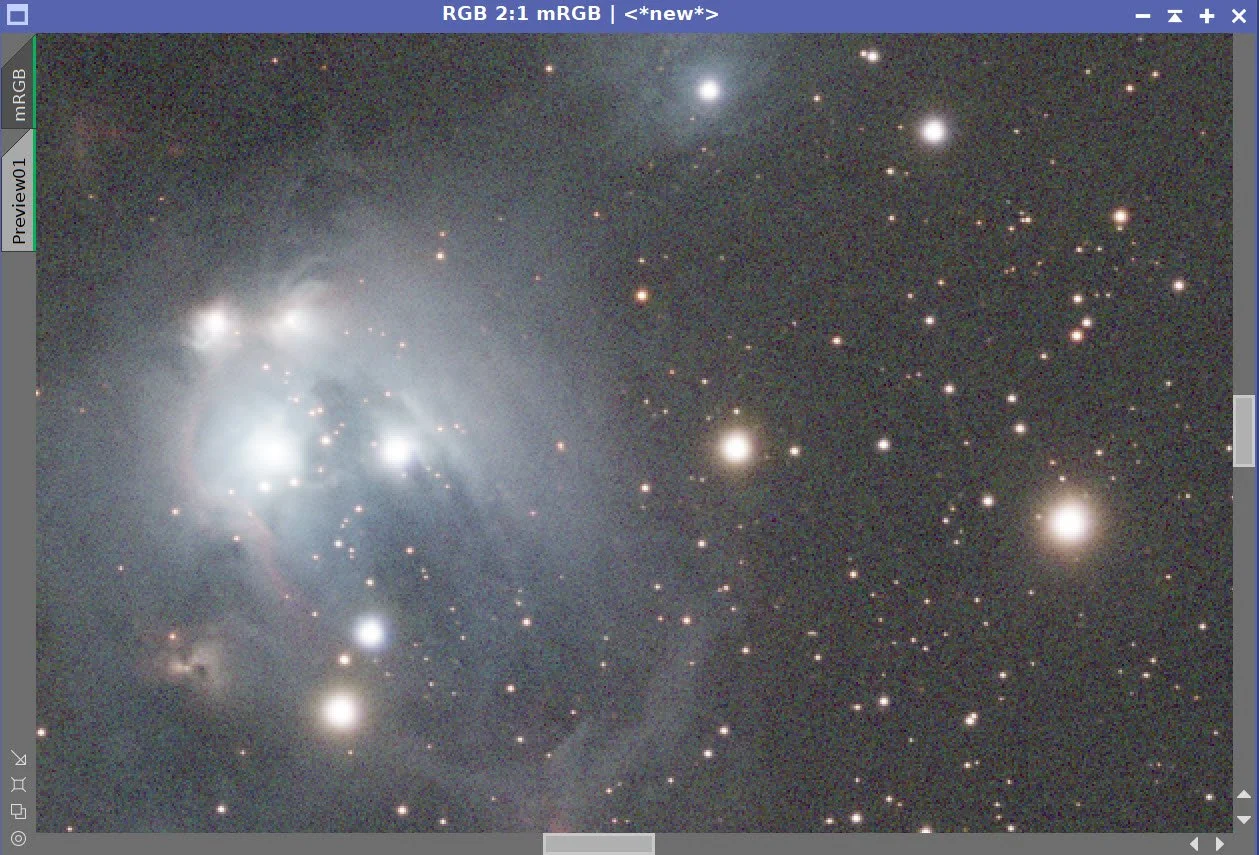
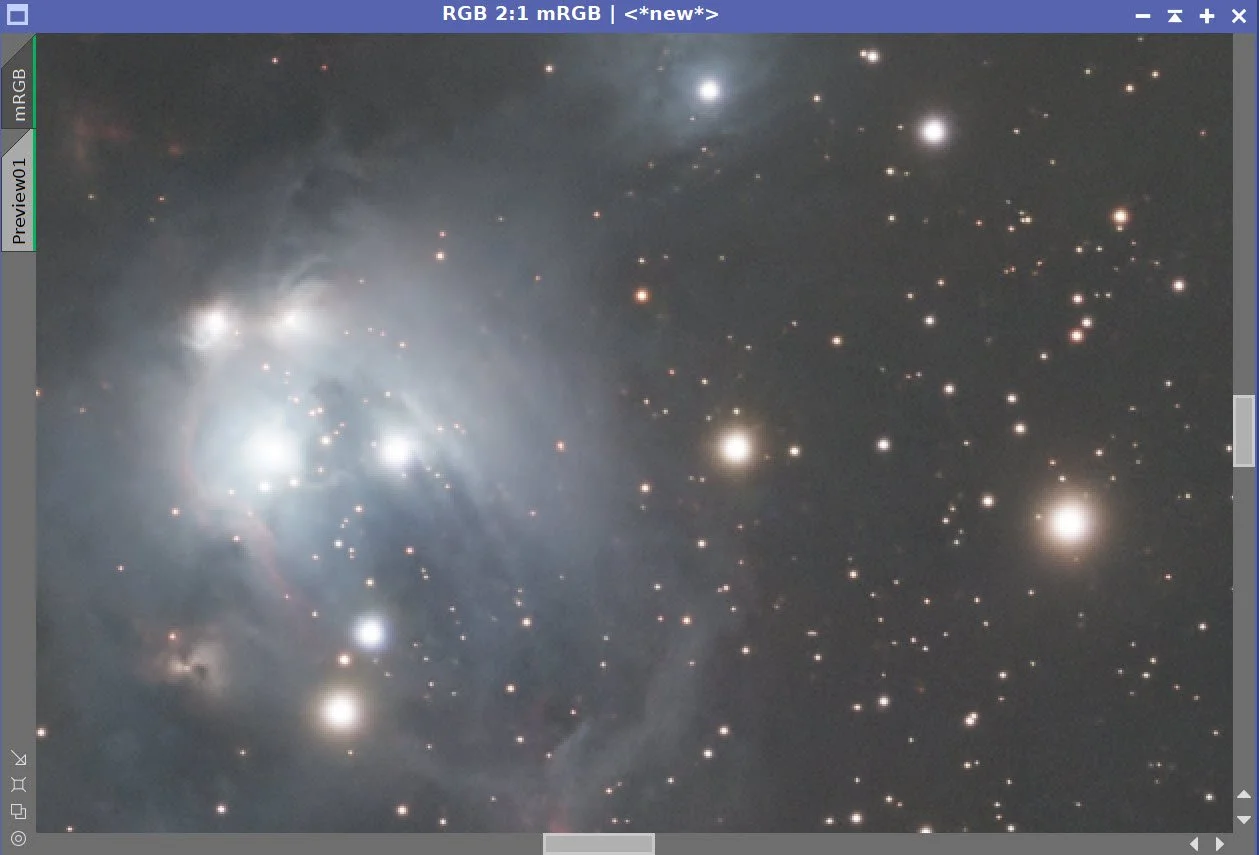
Master RGB Before BXT Correct Only, After BXT Correct Only, After BXT Full, After NXT
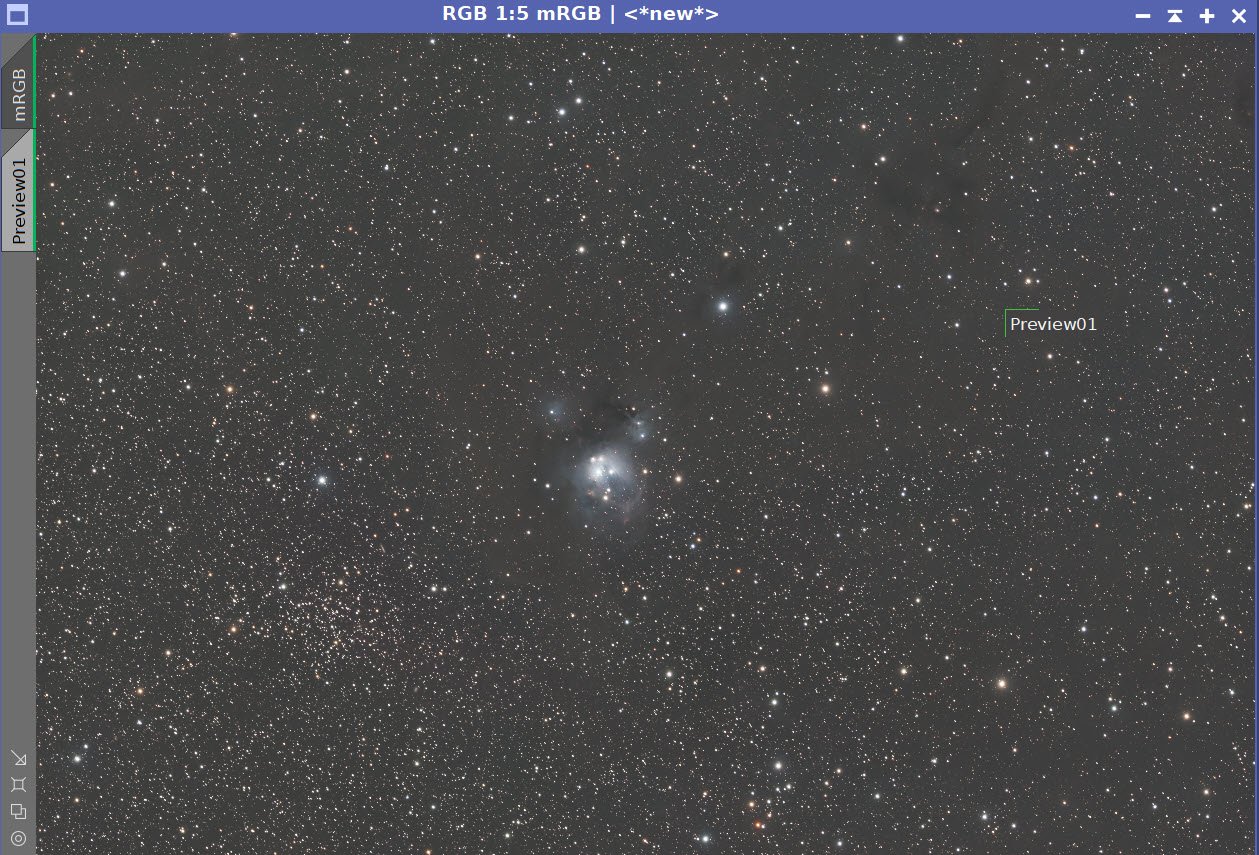
Master RGB Image before SXT.
Master RGB Starless Image. (click to enlarge)
Master RGB Stars image (click to enlarge)
6. Go Nonlinear
Using the STF → HT method, convert the linear Luminance and RGB images to nonlinear.
Using Seti Astro Star Stretch, take the nonlinear RGB star image with two levels of star stretch:
6.0 stretch and 1.7 saturation boost.
7.0 stretch and 1.7 saturation boost.
This is a crowded star field, and I want to preserve that feeling and show off the open cluster, so I skipped the lower-level default position in StarStretch.
Nonlinear Starting Lum Image (zoomed) (click to enlarge)
Nonlinear RGB image (zoomed) (click to enlarge)
Slight Stretch RGB Stars (Click to enlarge)
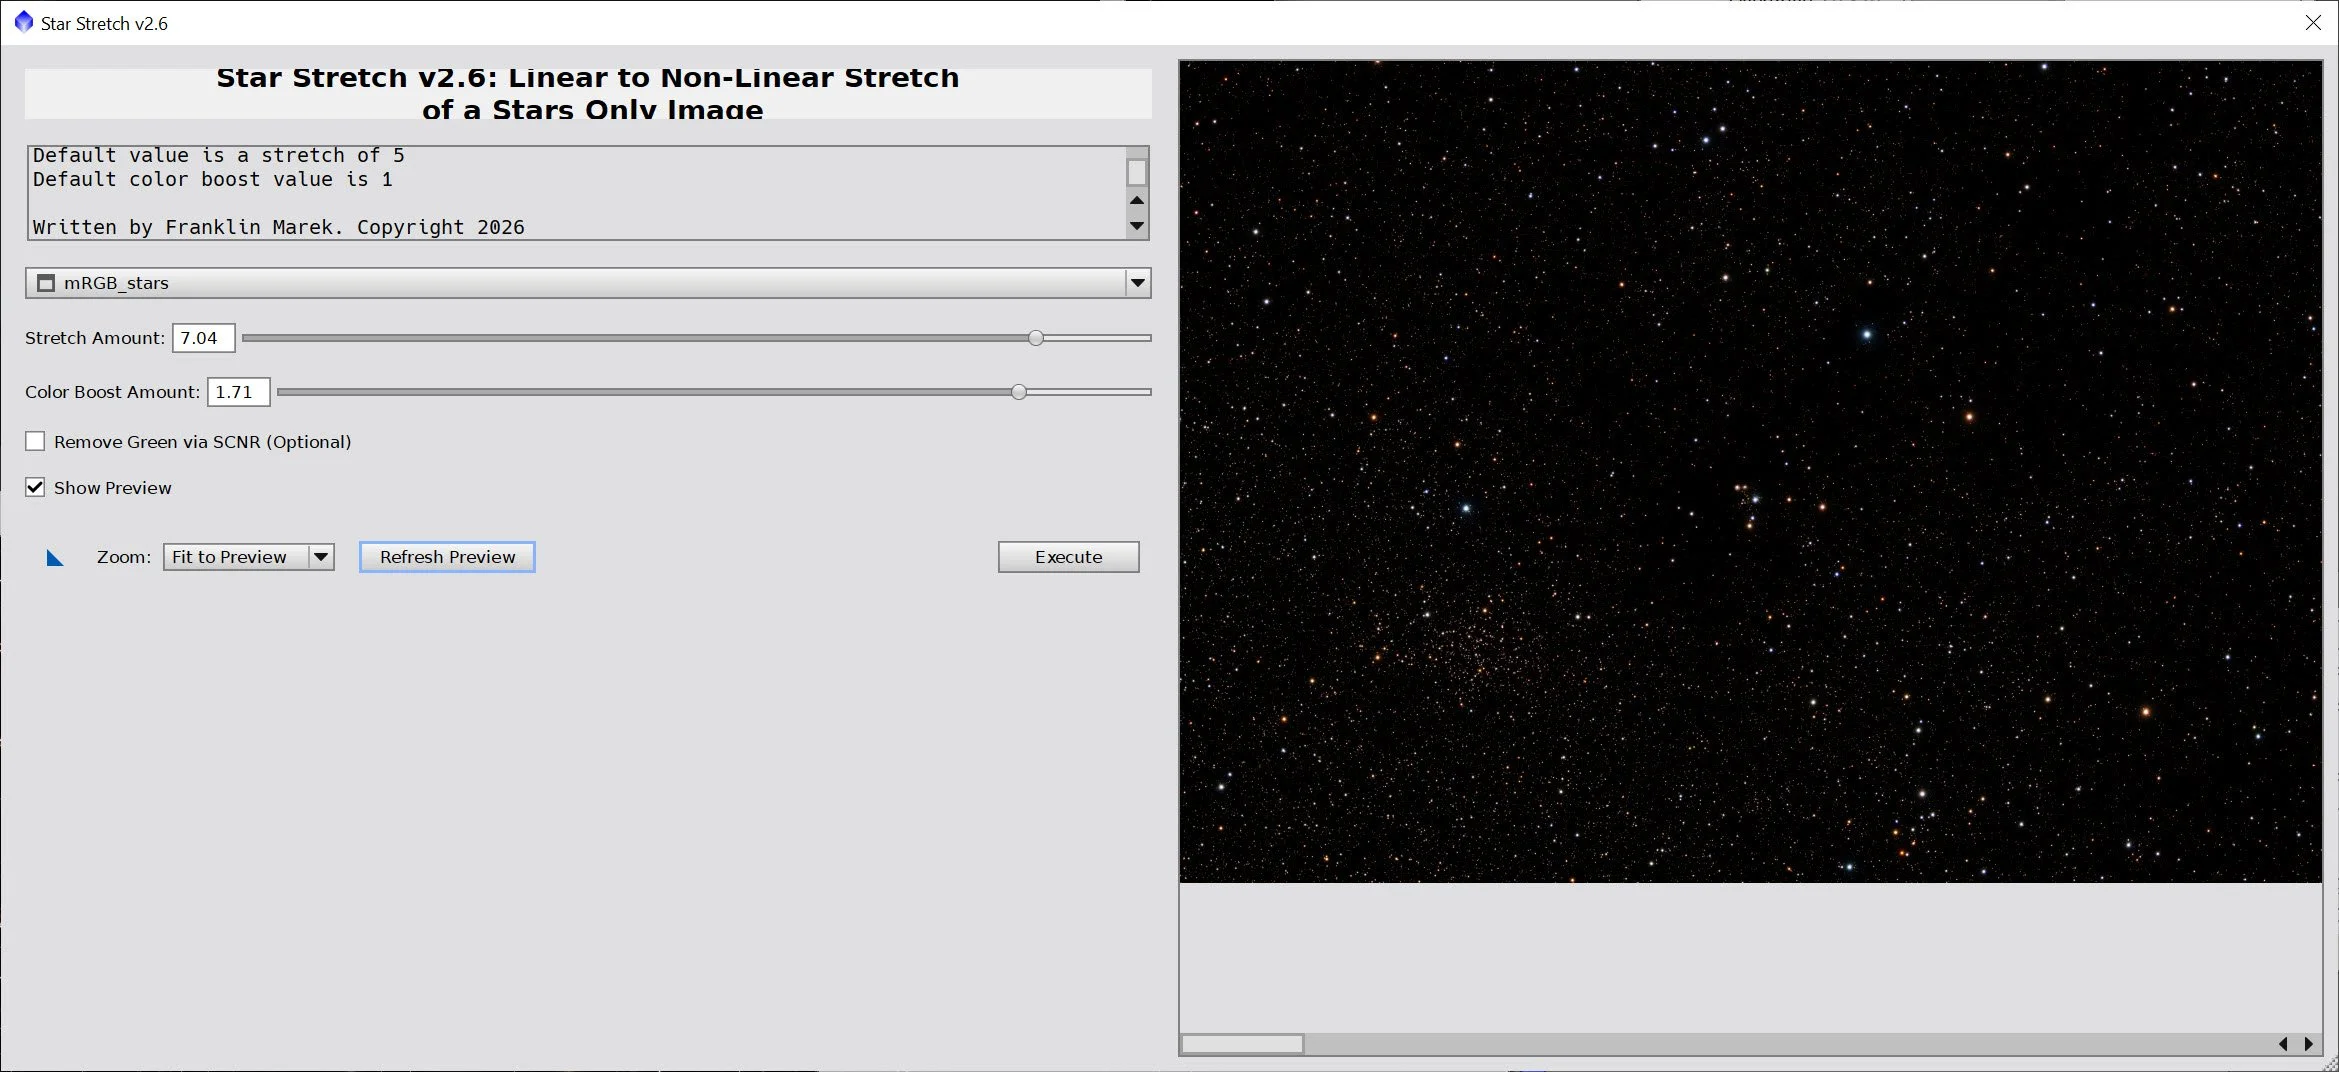
More agressive Stretch RGB Stars
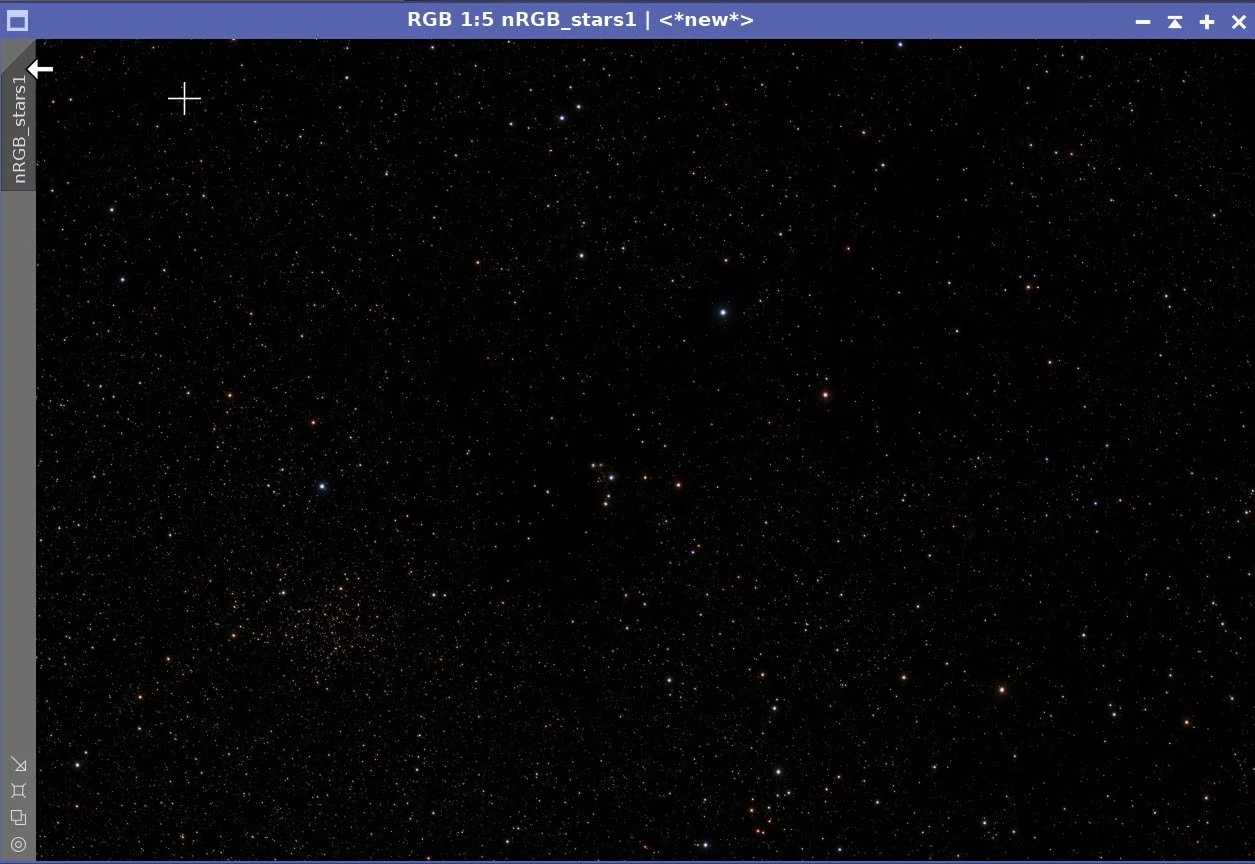
First Star position.
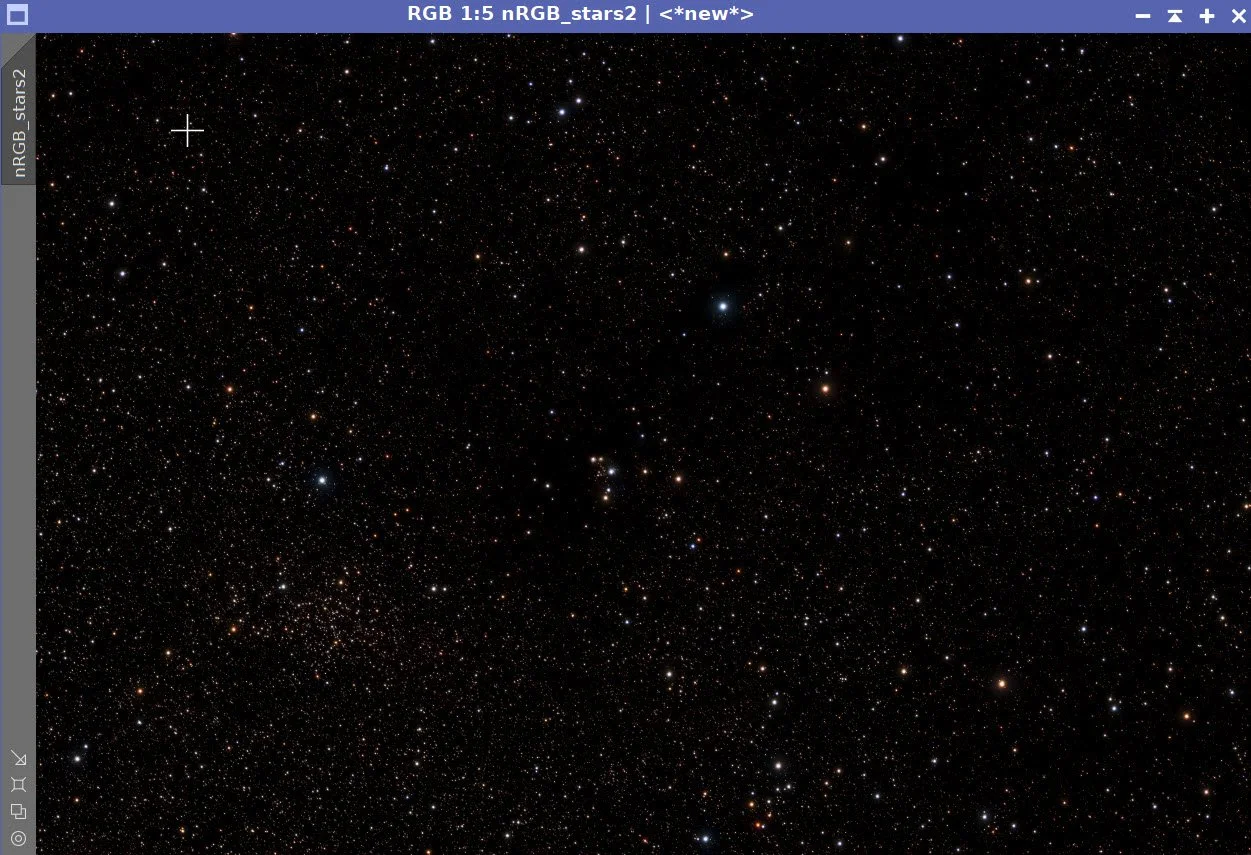
Second Star posiiton.
7. Create Masks
I want to create and use three masks:
The Warm Mask will be used to boost the faint reddish glow of the background sky and the red-magenta portions of the Flower Bud
The Cool Mask will be used to enhance the blue reflection nebula of the flower bud
The Core Mask will allow me to work on the flower vs. the background sky.
Use the ColourMask Process to create the color masks.
WarmMask: Hues 288 to 61, Mask Blur 5
CoolMask: Hues 155 to 245, Mask Blur 5
Use the GAME script to create the CoreMask.
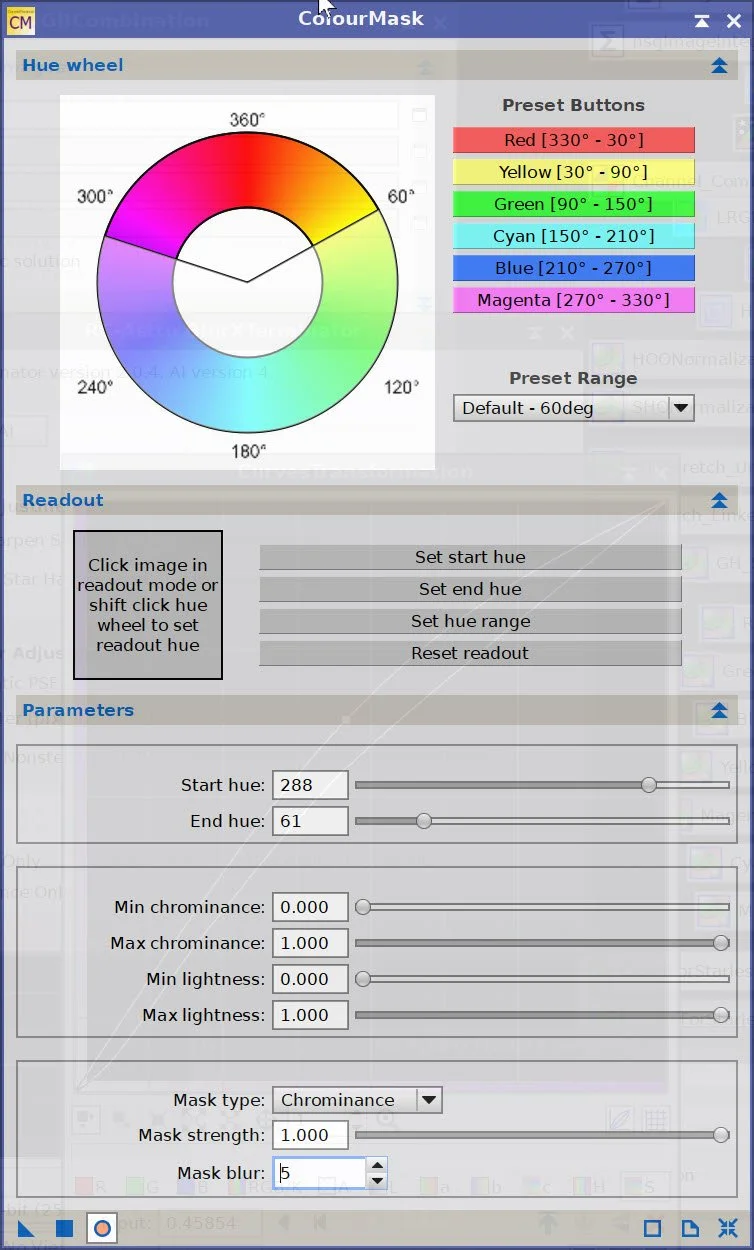
WarmMask Panel settings.
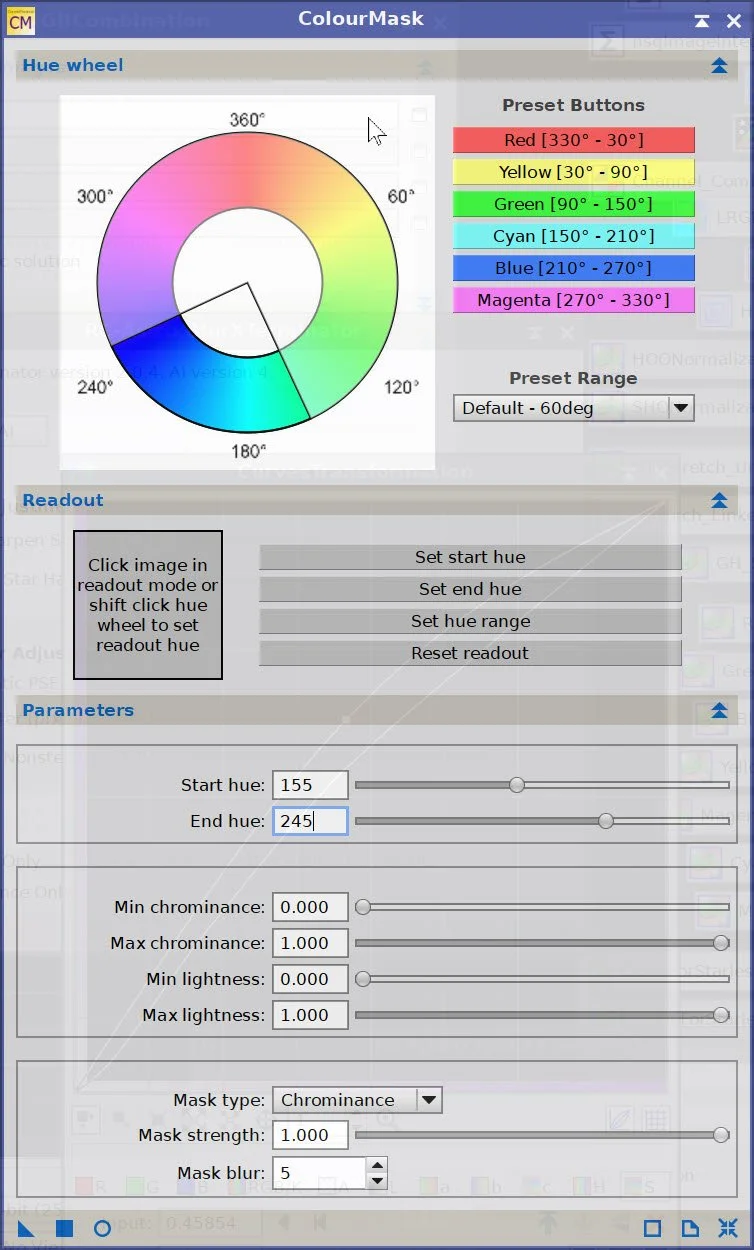
CoolMask Panel Settings.
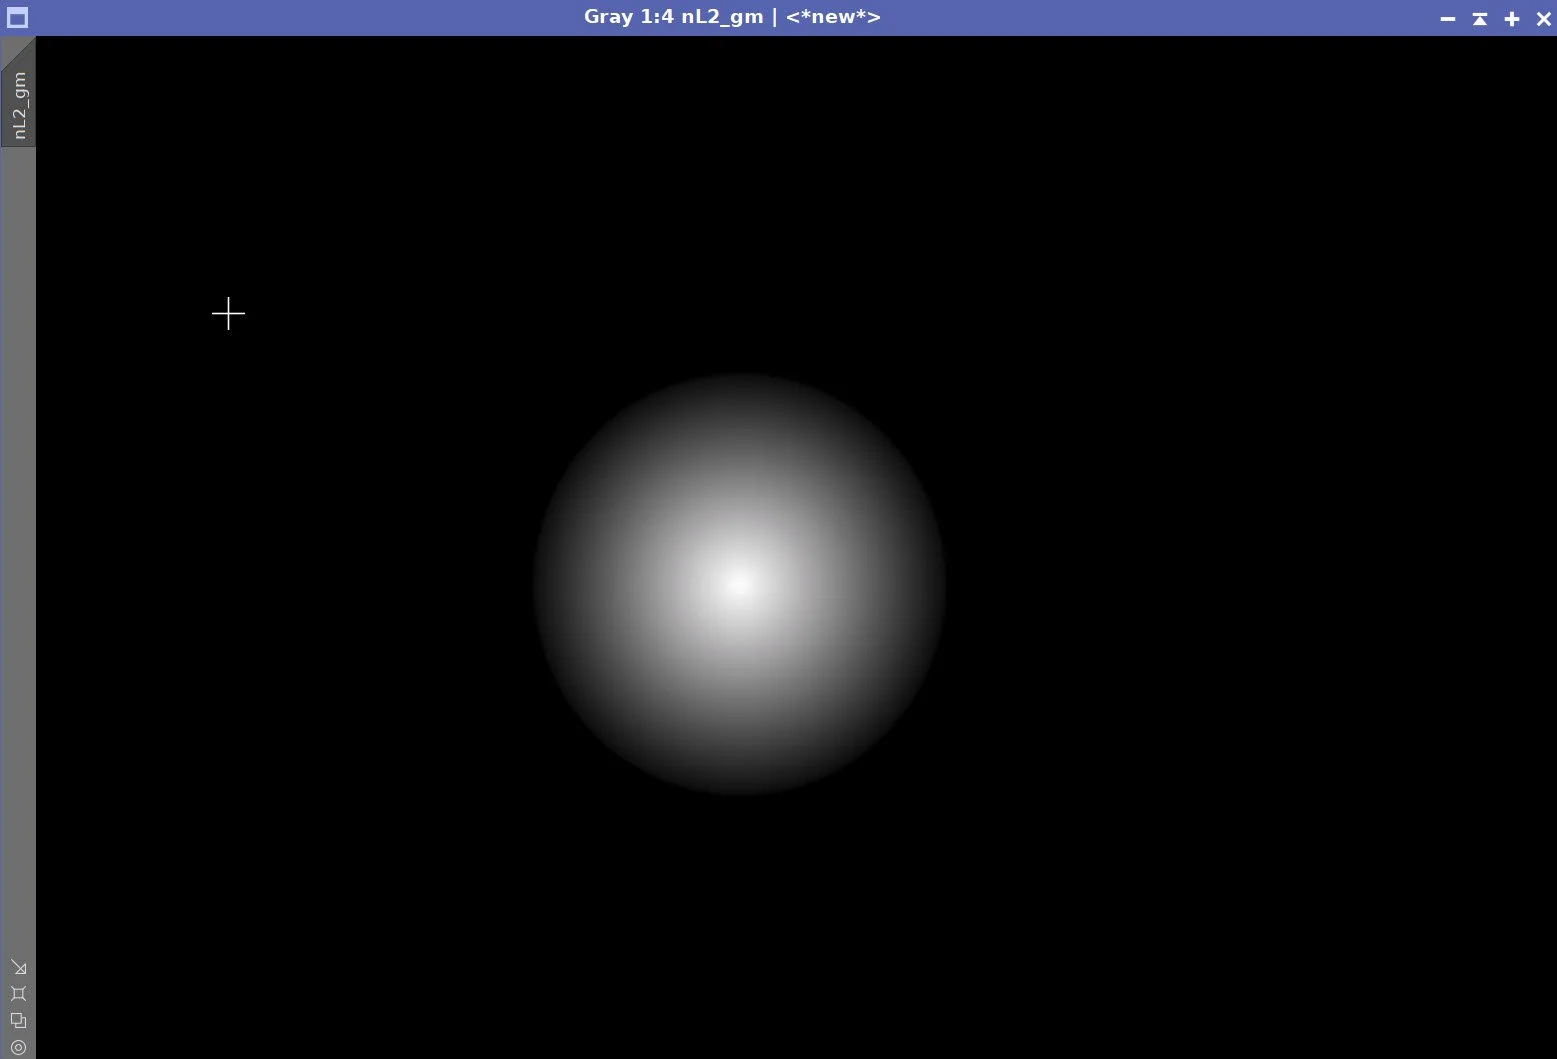
BottomLeftMask
Initial WarmMask. (click to enlarge)
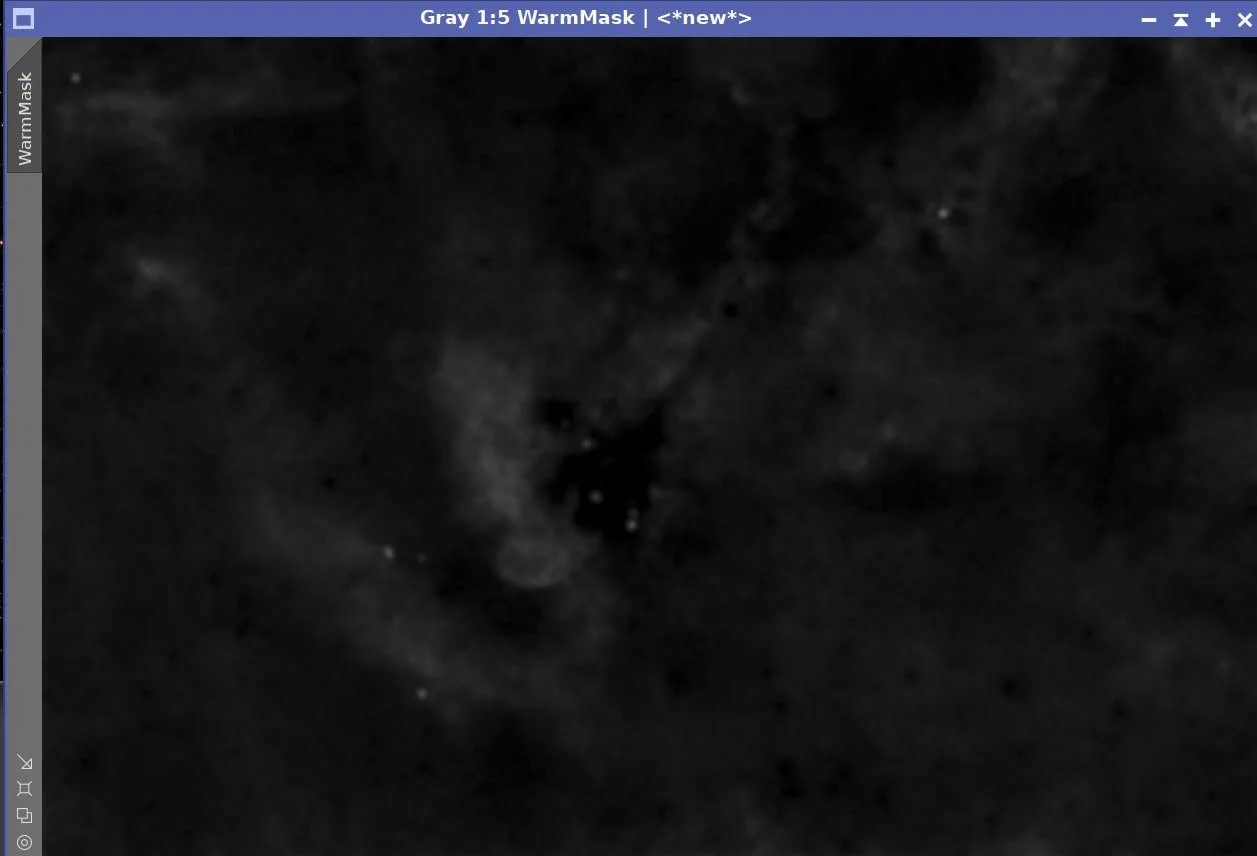
After CT Boost.
Initial CoolMask (click to enlarge)
After CT boost (click to enlarge)
8. Process the Nonlinear Lum Starless Image
Apply CT to darken the background sky
The highlights in the Flower Bud were starting to close up, so I used HDRMT to open them back up. See screen snap below for the HDRMT params used.
Apply CT to rebalance the tone scale after the HDRMT operation.
Now I want to enhance the large-scale structures in the background sky. Apply LHE with a scale of 230, a contrast limit of 2.0, an amount of 0.25, and a 10-bit histogram.
Apply NXT to handle noise - see the NXT panel screenshot below for parameters used
I don’t normally do this, but lately I have been experimenting with using light doses of BXT for sharpening. I did this here. See the BXT panel screenshot for parameters used. This is a very subtle but real improvement.
The initial image (click to enlarge).
HDRMT Parameters used for the next step.
After CT (click to enlarge)
Zoomed in to better show the next few detail-level operations (click to enlarge)
Params used in the last step (click to enlarge)
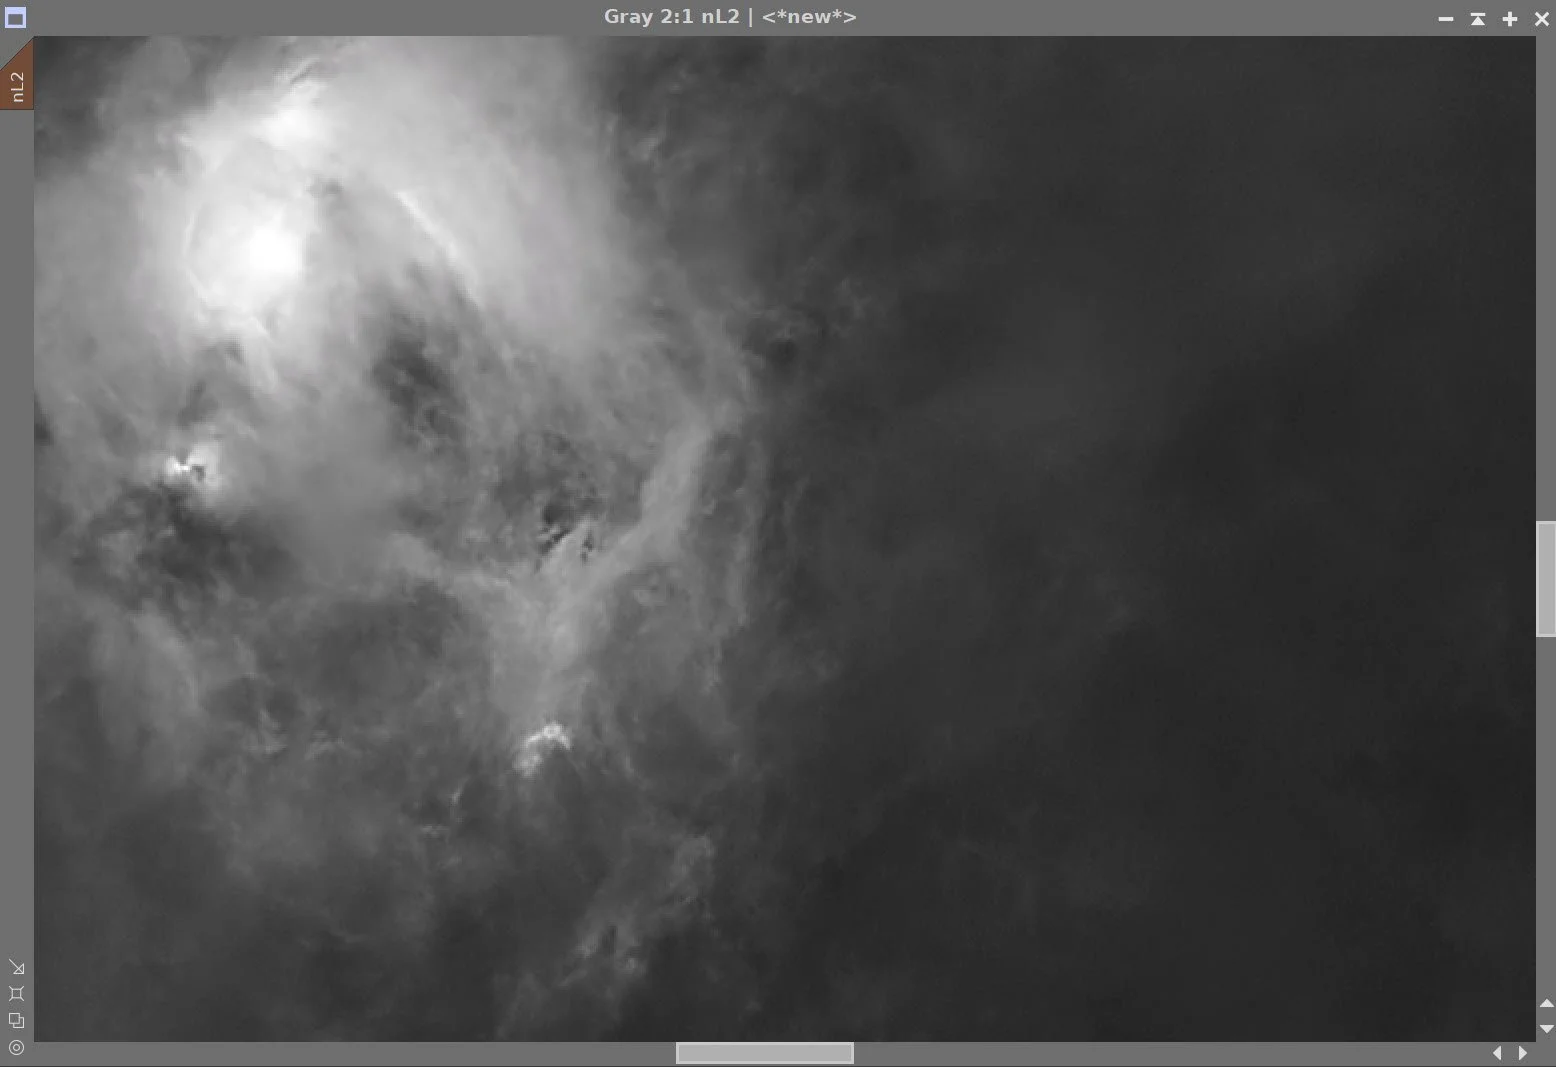
Using BXT to slightly sharpen (Click to Enlarge)
After CT (click to enlarge)
After HDRMT (click to enlarge)
After Large Structure LHE (click to enlarge)
Apply NXT (click to enlarge)
Params used in the next step (click to enlarge)
Final Lum image (click to enlarge)
9. Now Process the RGB Starless Image
Adjust the tone scale with CT and boost background colors
Adjust the tone scale with CT, and use the WarmMask to go further
Apply CT with the CoolMask to get the color and tone right for the reflection nebula.
Apply NXT to handle noise and get ready for folding in the Lum image. See screenshot for params used.
Use the LRGBCombination Process to fold the Lum image into the current RGB image.
Use CT to tweak things after the last operation
Next, I used ACE to put a small amount of Texture and Clarity into the images. This was a very small amount - around 20.
Then I used ACM to fine-tune the color position. These were small tweaks to taste.
Finally, I exported the image to Photoshop. I often use the lasso tool to tweak small areas for curve and color as a final polish. Afterward, I bring the image back into PixInsight.
Initial RGB nonlinear image (click to enlarge)
After CT(click to enlarge)
After CT adjustment with WarmMask to boost color (click to enlarge)
NXT Params used on the next step(click to enlarge)
After Lum image folded in(click to enlarge)
ACE Script showing some of the adjustments made. (click to enlarge)
After ACE - just a little Texture and Clarity (click to enlarge)
CT with CoolMask (click to enlarge)
After NXT (click to enlarge)
After CT (click to enlarge)
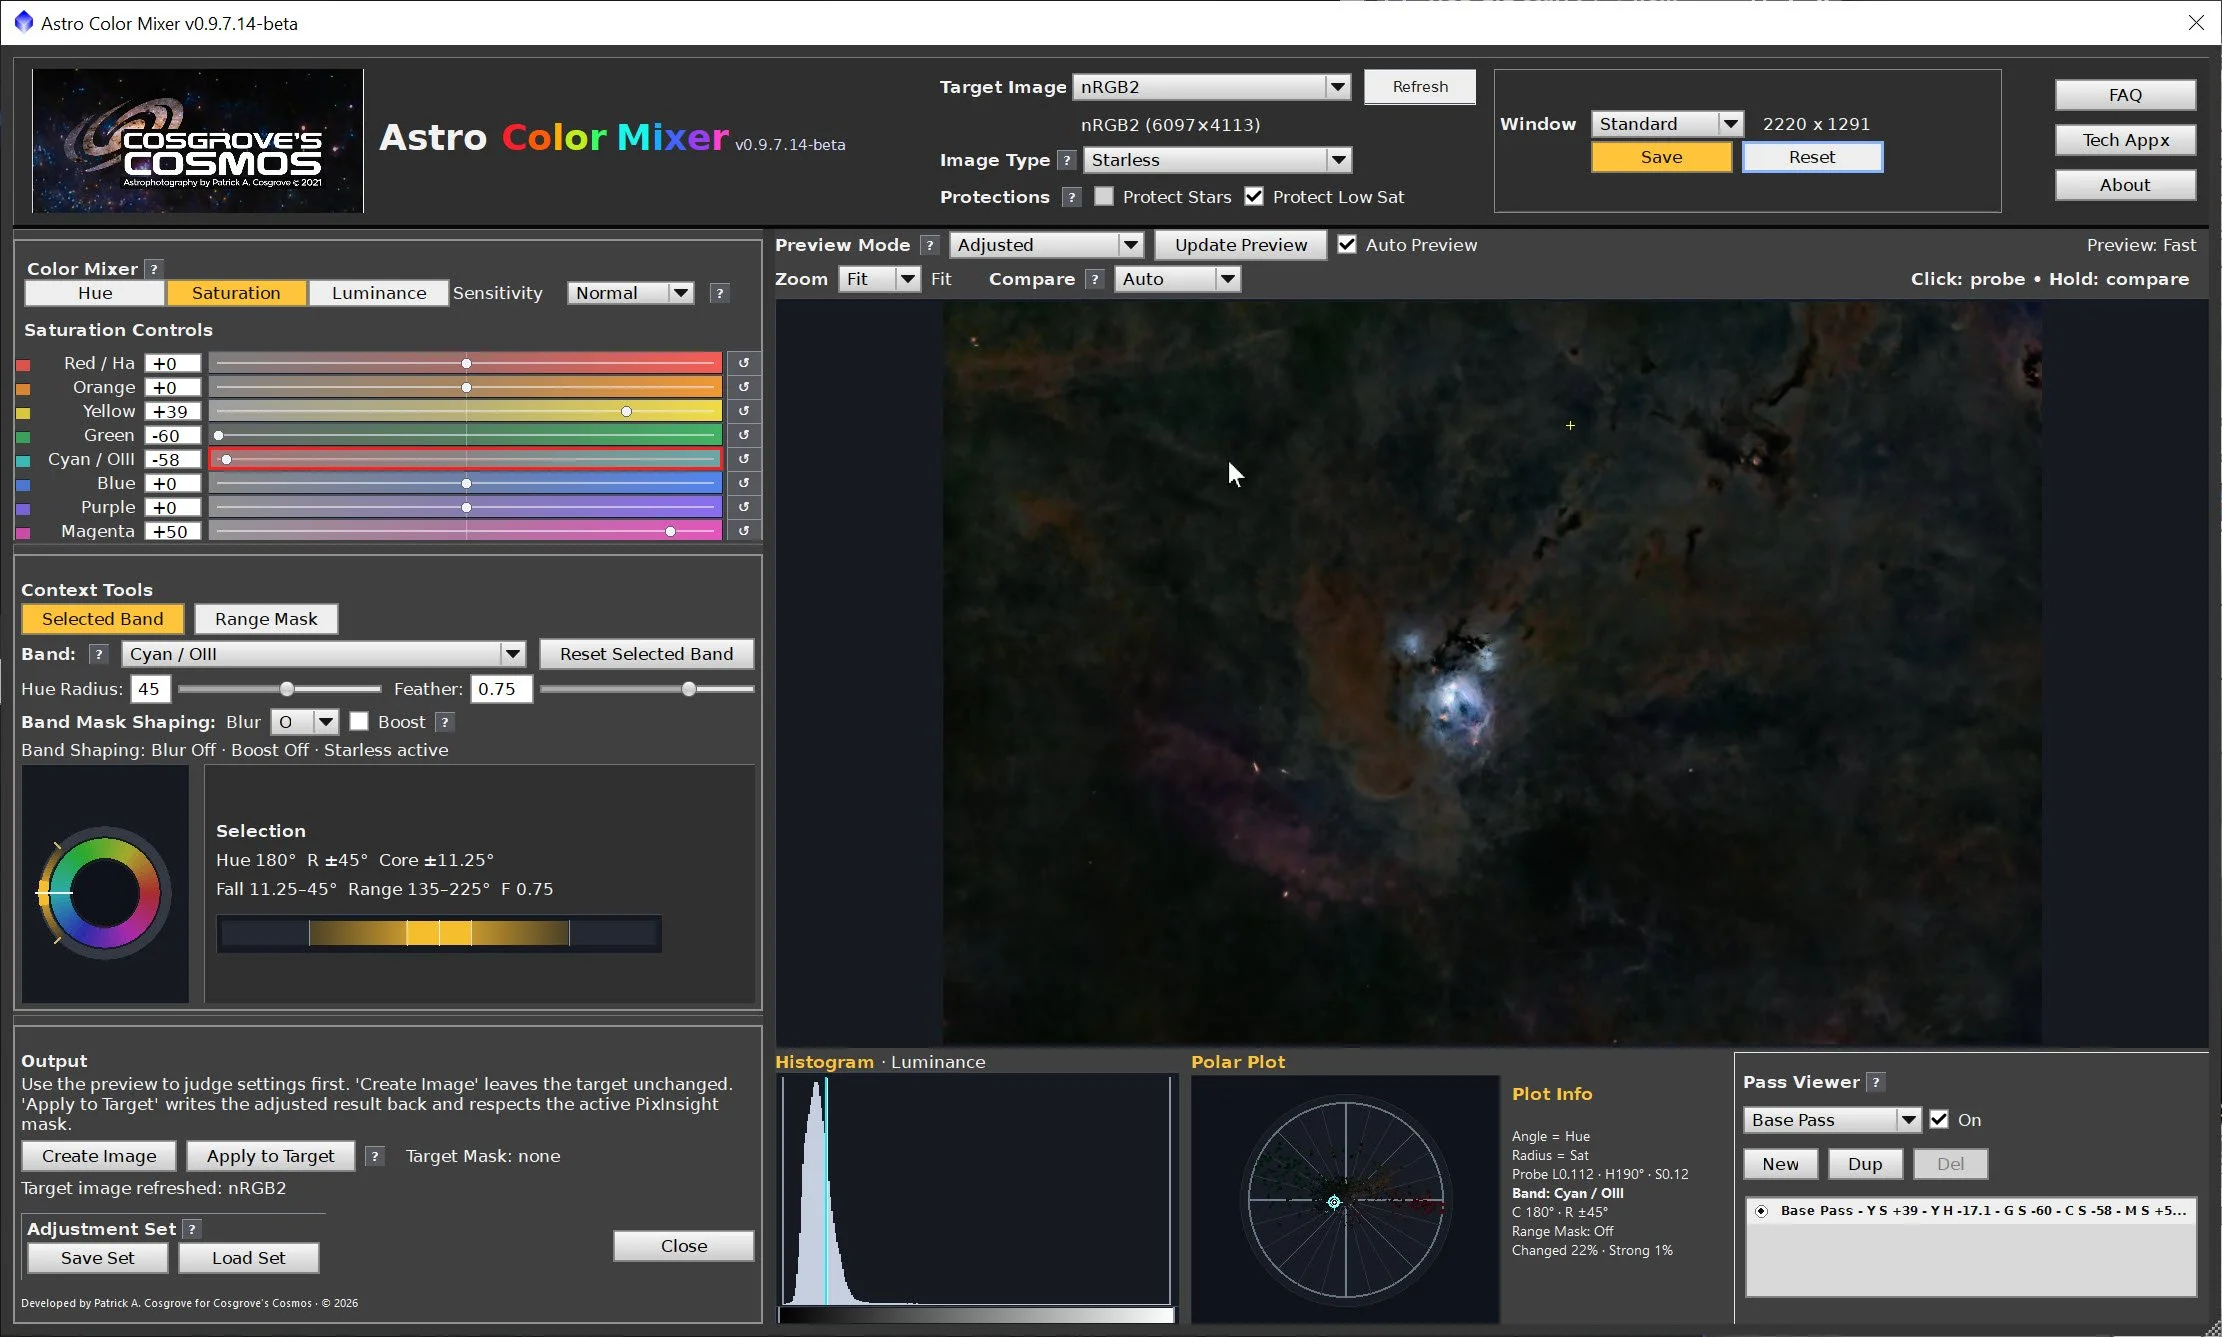
ACM Script - Showing some of the adjustments made. (click to enlarge)
After fine tuning with ACM (click to enlarge)
Final RGB color image after Photoshop Lasso tweaks. (click to enlarge)
10. Add the Stars Back In
Using the ScreenStars script, add the stars back into the starless LRGB image. I tested the medium and large star versions to see which best balanced the star field and chose the large stars.
Screnstars with the final RGB image and the Larger star sizes. (click to enlarge)
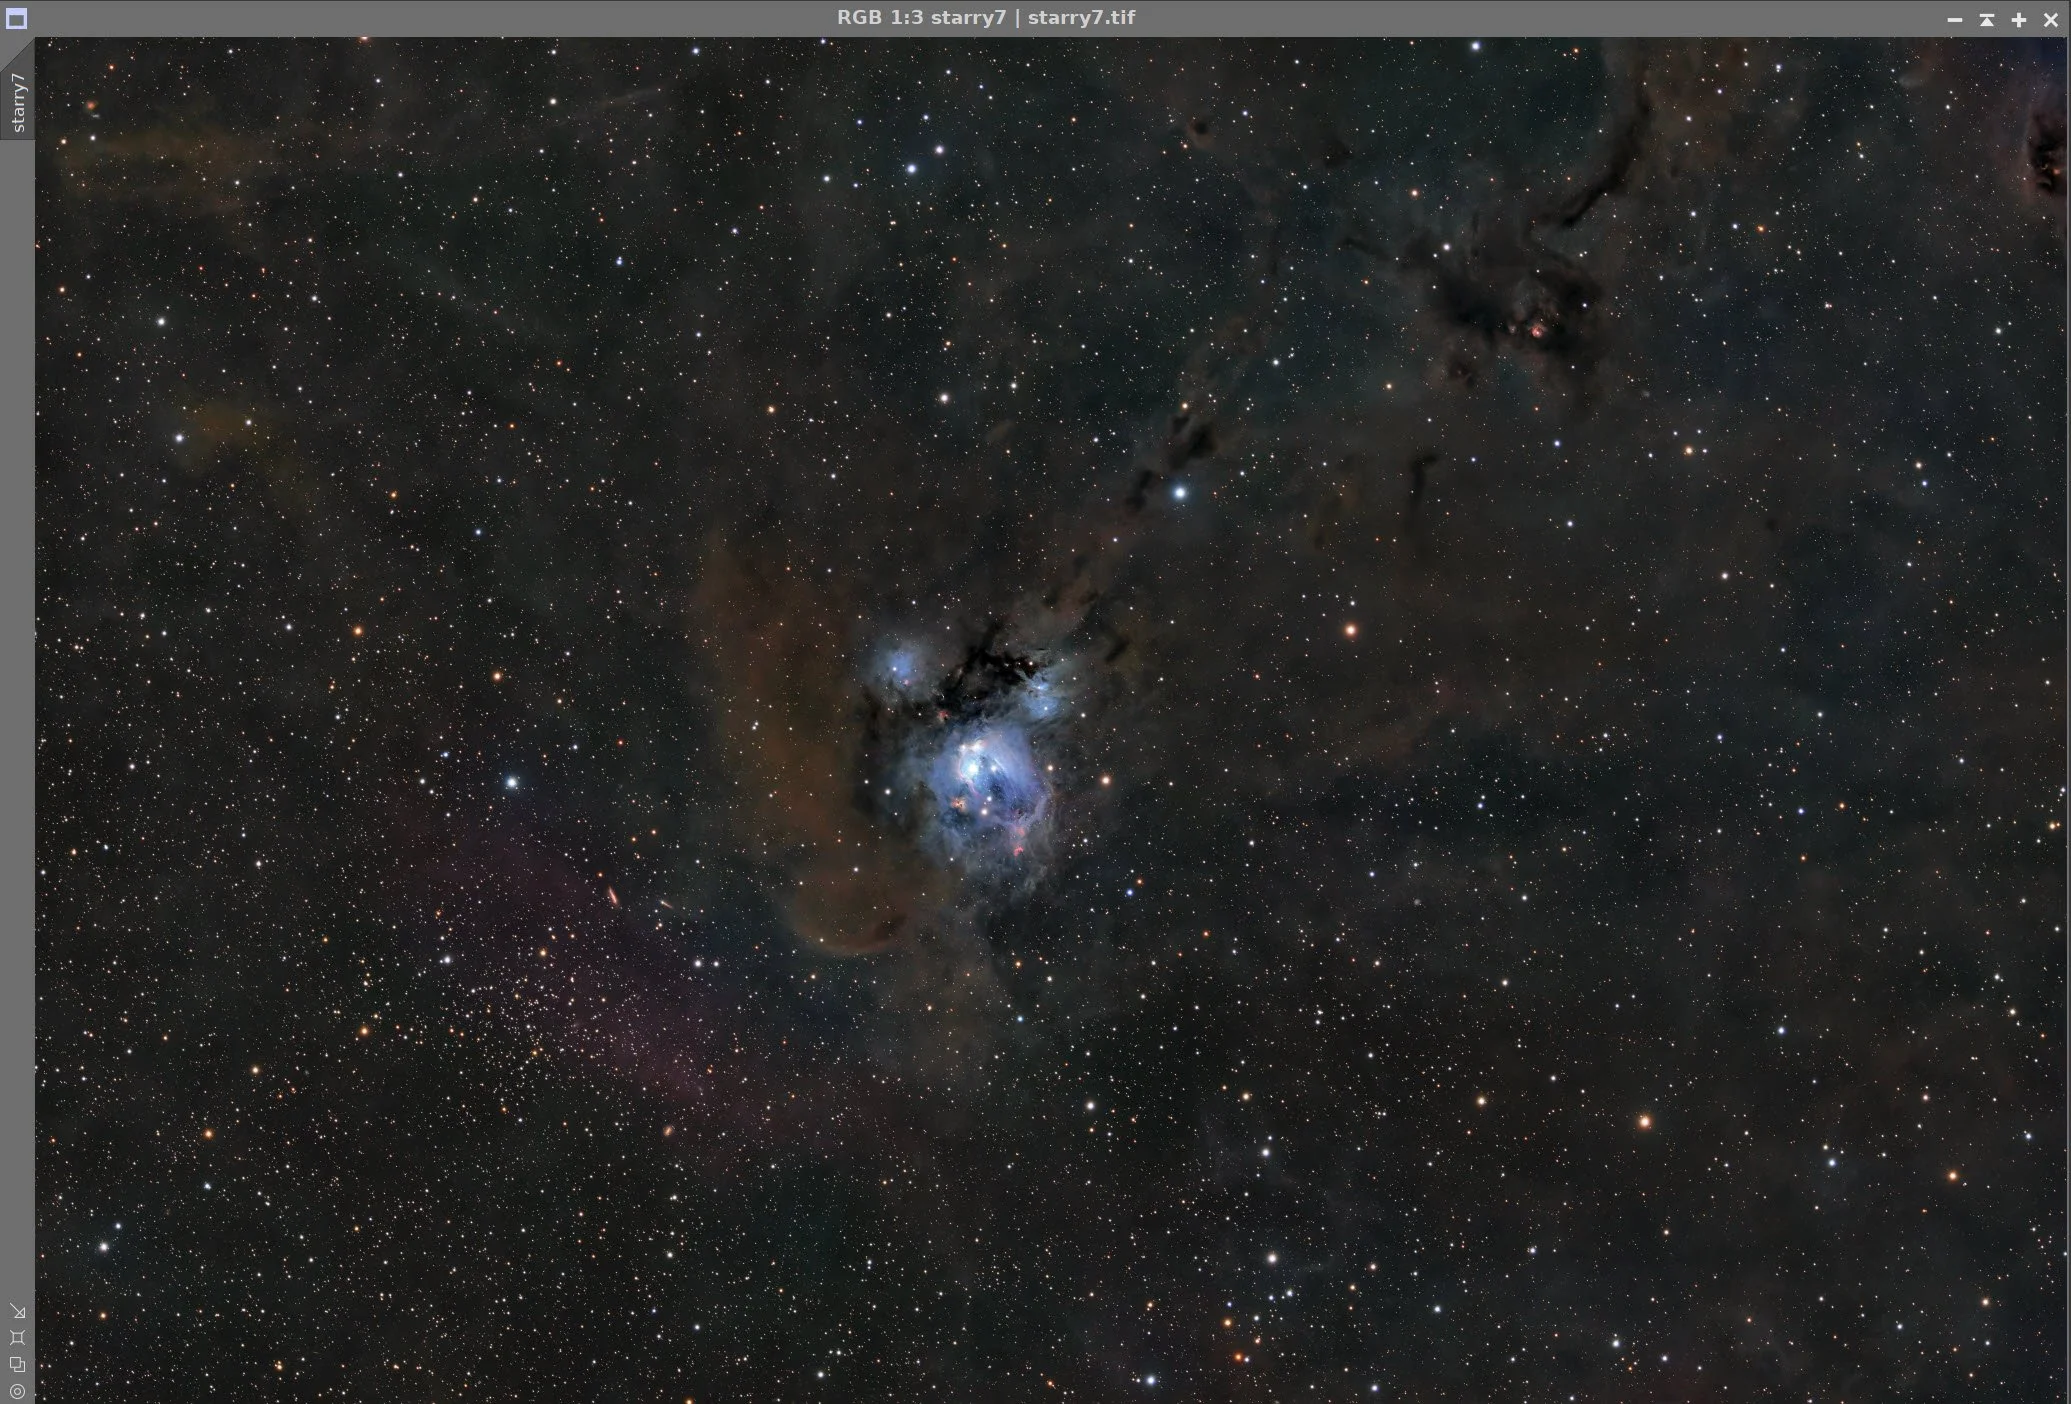
With Larg stars.
11. Export the Image to Photoshop for Polishing
Save the image as a 16-bit unsigned TIFF and move it to Photoshop
At this point, the image was technically complete, but I had to decide whether a crop would improve the composition. I chose a slight crop to let the main features fill the diagonal of the composition more naturally.
Added watermarks
Exported clear, watermarked, and web-sized JPEGs.
The Final Image
Back to the NGC 7129 Project Page
Alternatively, you can use the back arrow to return to the NGC 7129 project page, or you can use the menu at the top of the page to continue your navigation.
Thanks,
Pat