
Going Mobile! The First Use of My Portable Rig in a New Location
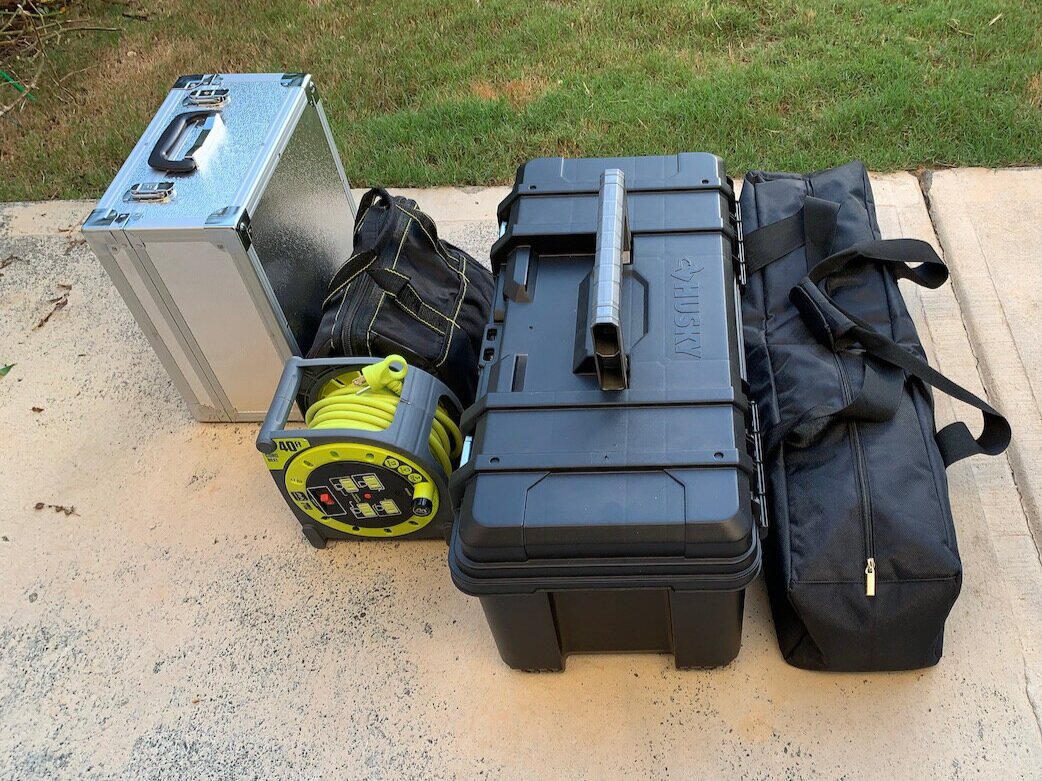
The Askar FRA400 Platform all packed and ready to go!
My first two telescope platforms were pretty large and heavy and did not allow for portable operations. They also had focal lengths in the 900-1000mm range, so they were certainly not widefield systems.
When I decided to build a third telescope platform, I wanted something relatively small and lightweight with a wider field of view. With those goals in mind, I created my Askar FRA400 platform.
Once built, I set it up in my driveway with my other two platforms, and on clear nights I ran three platforms simultaneously.
This worked out well and offered me one scope that could be used for widefield targets, but it certainly was not being used in a portable sense. In my mind, portable means something that I can load into the car, transport to an alternative location, and use.
I recently had the opportunity to do this when we visited my older son and his family in North Carolina. This was a 12-hour drive away, so it counted as a "remote" operation in my book!
It also presented me with another challenge that I had not encountered before - the logical place to set up the telescope would not allow a view of Polaris - the house was in the way! This meant that I would have to do a polar alignment with an alternative method.
This article will cover how I finally decided to prep and transport this rig, how I set it up and used it, and finally, how I did polar alignment when Polaris was not in view.
Packing the Mount
This one was straightforward. You can order your CEM 26 mount with a hard case or get it as an accessory:

This is a nice solid case!

The Ioptron Hard Case for the CEM26 - all packed and ready to go!
It is small and compact (14” x 14” x 8”) and cleverly packages your mount, the counterweight. The counterweight rod, tripod spreader, spreader nut, and handset are all stored in a nicely designed case.
Packing the tripod
Ioptron also sells a nice tripod case for the 1.5" tripod for $40:
https://www.ioptron.com/product-p/3404.htm
However, I ended up getting the following photographic tripod case from Amazon for only $26":
https://www.amazon.com/gp/product/B085HQR6TK/ref=ppx_yo_dt_b_search_asin_title?ie=UTF8&psc=1

This nicely holds the tripod, and I also tend to put in other accessories such as cables and tools as there is plenty of room.
Packing the Main Tube Assembly
This was a tricky one. You could get a hard case like a Pelican case - BUT - these are large, very heavy, and very expensive. If you went this route, you could probably run over the tube assembly with a truck and not hurt it. But I opted for something smaller, lighter, and cheaper. I just wanted a case that could hold it, provide some protection, and keep the dust and moisture out. I ended up going to my local Home Depot and getting a PVC toolbox for $30!
The tube fits with room on all sides. I ended up using some scrap closed-cell foam and lining the inside of the case to protect the tube assembly.
I think this will be fine. I am carefully loading it into the car and carefully moving it to where I will use it. I don't expect to run a truck over it!

Tool Bag
I also wanted to bring some tools and the small flat light source I built from an A5 tracing panel and picked up an inexpensive ($10) tool bag from Home Depot to hold those.
Thus with four packages and a cord reel - I have the rig packed and ready to travel.
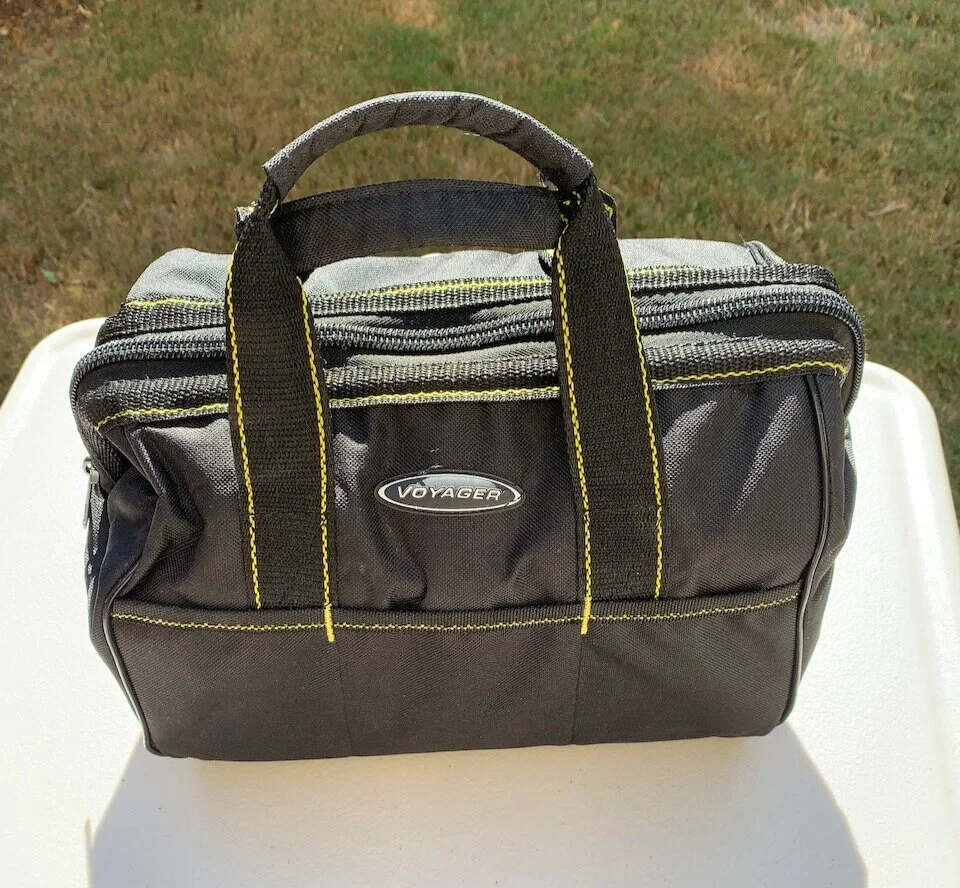
The small tool bag is just large enough to hold some commonly needed tools and even has enough room for the flat light source I use!
Power
At this point, I am assuming that I would run everything with house current. With this as an assumption, all I need is an extension cord that will bring power to the rig. I solved this problem when I brought a 40’ cord reel that had four outlets built on it. This worked very well for my purposes and was very compact for storage and travel.

My 40 foot power cord reel.
Dealing with Polar Alignment when you can't see Polaris
The mount I have has the iPolar Polar Alignment camera built-in, but this is not much help if you can't see any part of the northern sky. So I started to research PHD2's Drift Alignment method as an alternative.
You can read about this here:
https://openphdguiding.org/PHD2_Drift_Alignment.pdf
I experimented with this, and I quickly came to a few conclusions:
This is a LOT harder to do than just using the PA camera!
This takes a much longer time to do - 30-45 minutes of tweaking is not unusual
This is very dependent on having a reasonable setup to start with. Make sure the counterweight rod points north and the latitude is set on the altitude adjuster correctly.
Somewhere (I am not sure where I saw this now), I saw the idea of using the Daytime Alignment Mode of the smartphone app "Polar Scope Alignment Pro." In this mode, the app uses your phone's GPS, compass, and accelerometer to rough align your mount.
First, you need a way to attach the phone to your mount to align with your primary axes of movement. The best way to do that for me was to take a piece of wood that was the same width as a Vixen dovetail mount bar and then add another piece of wood as wide as your phone and connect them together. Just clamp the holder into your mount and tighten it down and then attach the phone to the holder with rubberbands of other means, and then you are ready to dial in your mount.
Daylight Setup

Daytime Setup - first set up the tripod, and then add the mount. Get everything level.

This crude phone holder will mount in the Vixen dovedail clamp.

The top board is for the phone.

Here is one view of the phone older clamped onto the mount.

Here is a better view. You can see that the phone holder is now aligned with the mount.

The app is running and I just attached the phone with some rubber bands.

Now you adjust the mount pointing, and the alt-az mount adjusters until the crosshair is in the middle of the circles. Your mount is now roughly aligned.
I used this method when first setting up the mount in daylight and before mounting the OTA.
This worked great! However, I did have one failure where the app seemed to be having an issue with the compass, and I was WAY off from where I should have been. However, when trying it again, it seemed to correct itself and worked fine.
Once the mount is roughly setup up, you can mount the optical tube assembly, and finish the assembly of the rig. Part of this is balancing the load and adjusting cables so they do not drag.
Drift Adjustment
Once it is dark, you can begin to use the PHD2 Drift Alignment tool. In this mode, pick a starting point where the tool wants you to point, and then you allow your mount to drift for five minutes or so and see what the tracking trend is. The tool will provide cues for adjusting the Azimuth so the drift has either zero slope or is pretty close to it. You go back and forth between drifting and adjusting until you have it looking pretty good. Next, you shift over to adjusting the Atiture adjuster. The app will swing the scope to a different part of the sky, and you go through the process again - only this time adjusting the altitude knob.

This was when I first started. The Red trendline is at a steep angle going straight down and the error circle on the screen is huge. I adjust the azimuth until the tracked star moves to the edge of the circle and then I drift again.

I overshot my first big correction, and now the red trendline is slightly high. Note that the error circle in the image above around the star is now very small - I am very close!
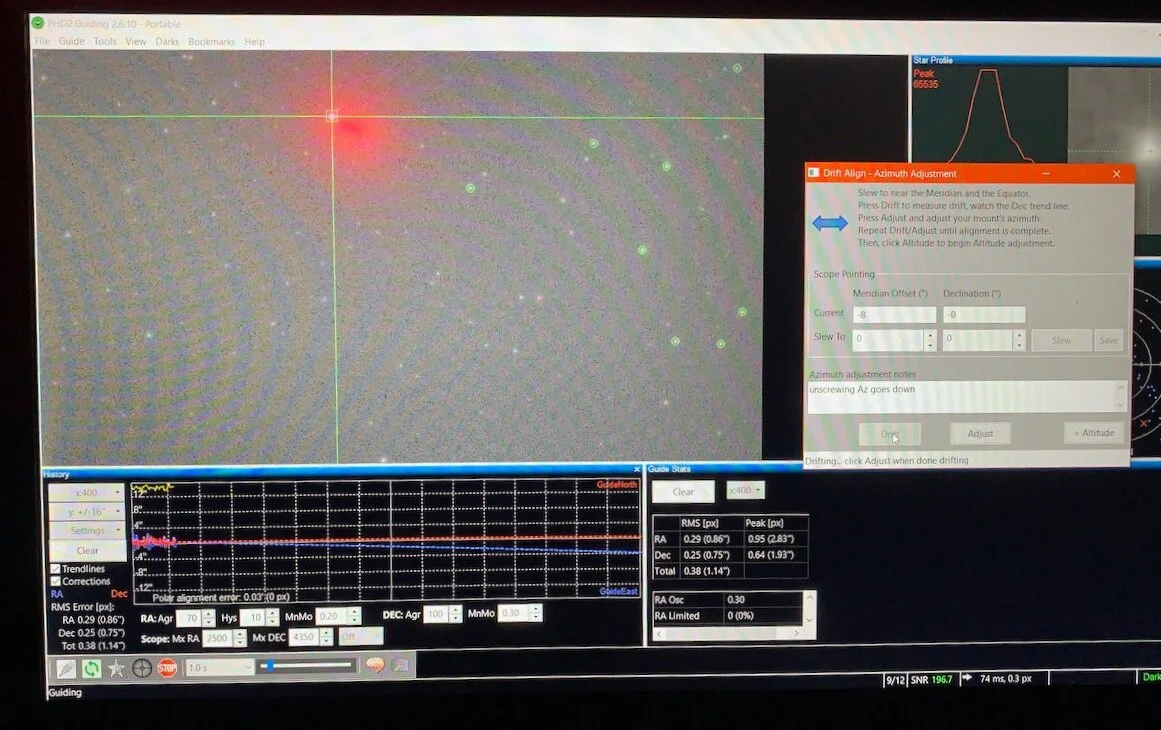
The red trend line is pretty much level now and I ready to move on to the altitude adjustment.
Two things make this tough
First, you have to wait for the drift to occur long enough to establish stable trend lines. This takes time.
Then you need to adjust. I found the somewhat coarse and crude adjusters on an inexpensive mount like the CEM26 can be harder to tweak. It was very easy to overshoot, and then you end up going back and forth.
After 45 minutes of playing around, I ended up with a reasonable but not great PA. I measured PA errors of about five arcminutes with PHD2 Guide assistant. Not great, but good enough at this image scale.
It did work, but I must say that I missed using my PA camera!
Running Subs
As it turns out, I brought all the gear I needed as well as the Clouds from home apparently! I was either clouded out or ran into the full moon most of the nights on my visit! But I did end up having one night where I could shoot and I targeted the region around IC 1396 - The Elephant Trunk Nebula - and collected 3 hours on with the fast f/5.5 rig. This will be the subject of its own write-up and posting.
After I had collected 3 hours of subs, I did the flat calibration using my small flat light source that stored nicely in the tool bag.

Doing flat exposures - the small size of the flat light source made it very handy for travel!
Conclusion
I was pretty happy with my portable rig and the transport arrangements that I made. The drift method of doing PA was not easy or pleasant but showed me that I could set up a reasonable PA for imaging even in those cases where my location prevents a direct view of the Polaris starfield.
A lot of this was just another step in my learning curve and in the journey. With time, I am sure I will become more comfortable and proficient with the running remote and this will become even simpler!