
NGC 4565 - The Needle Galaxy - 11.5 hours in LRGB
Date: May 13, 2022
Cosgrove’s Cosmos Catalog ➤#0099
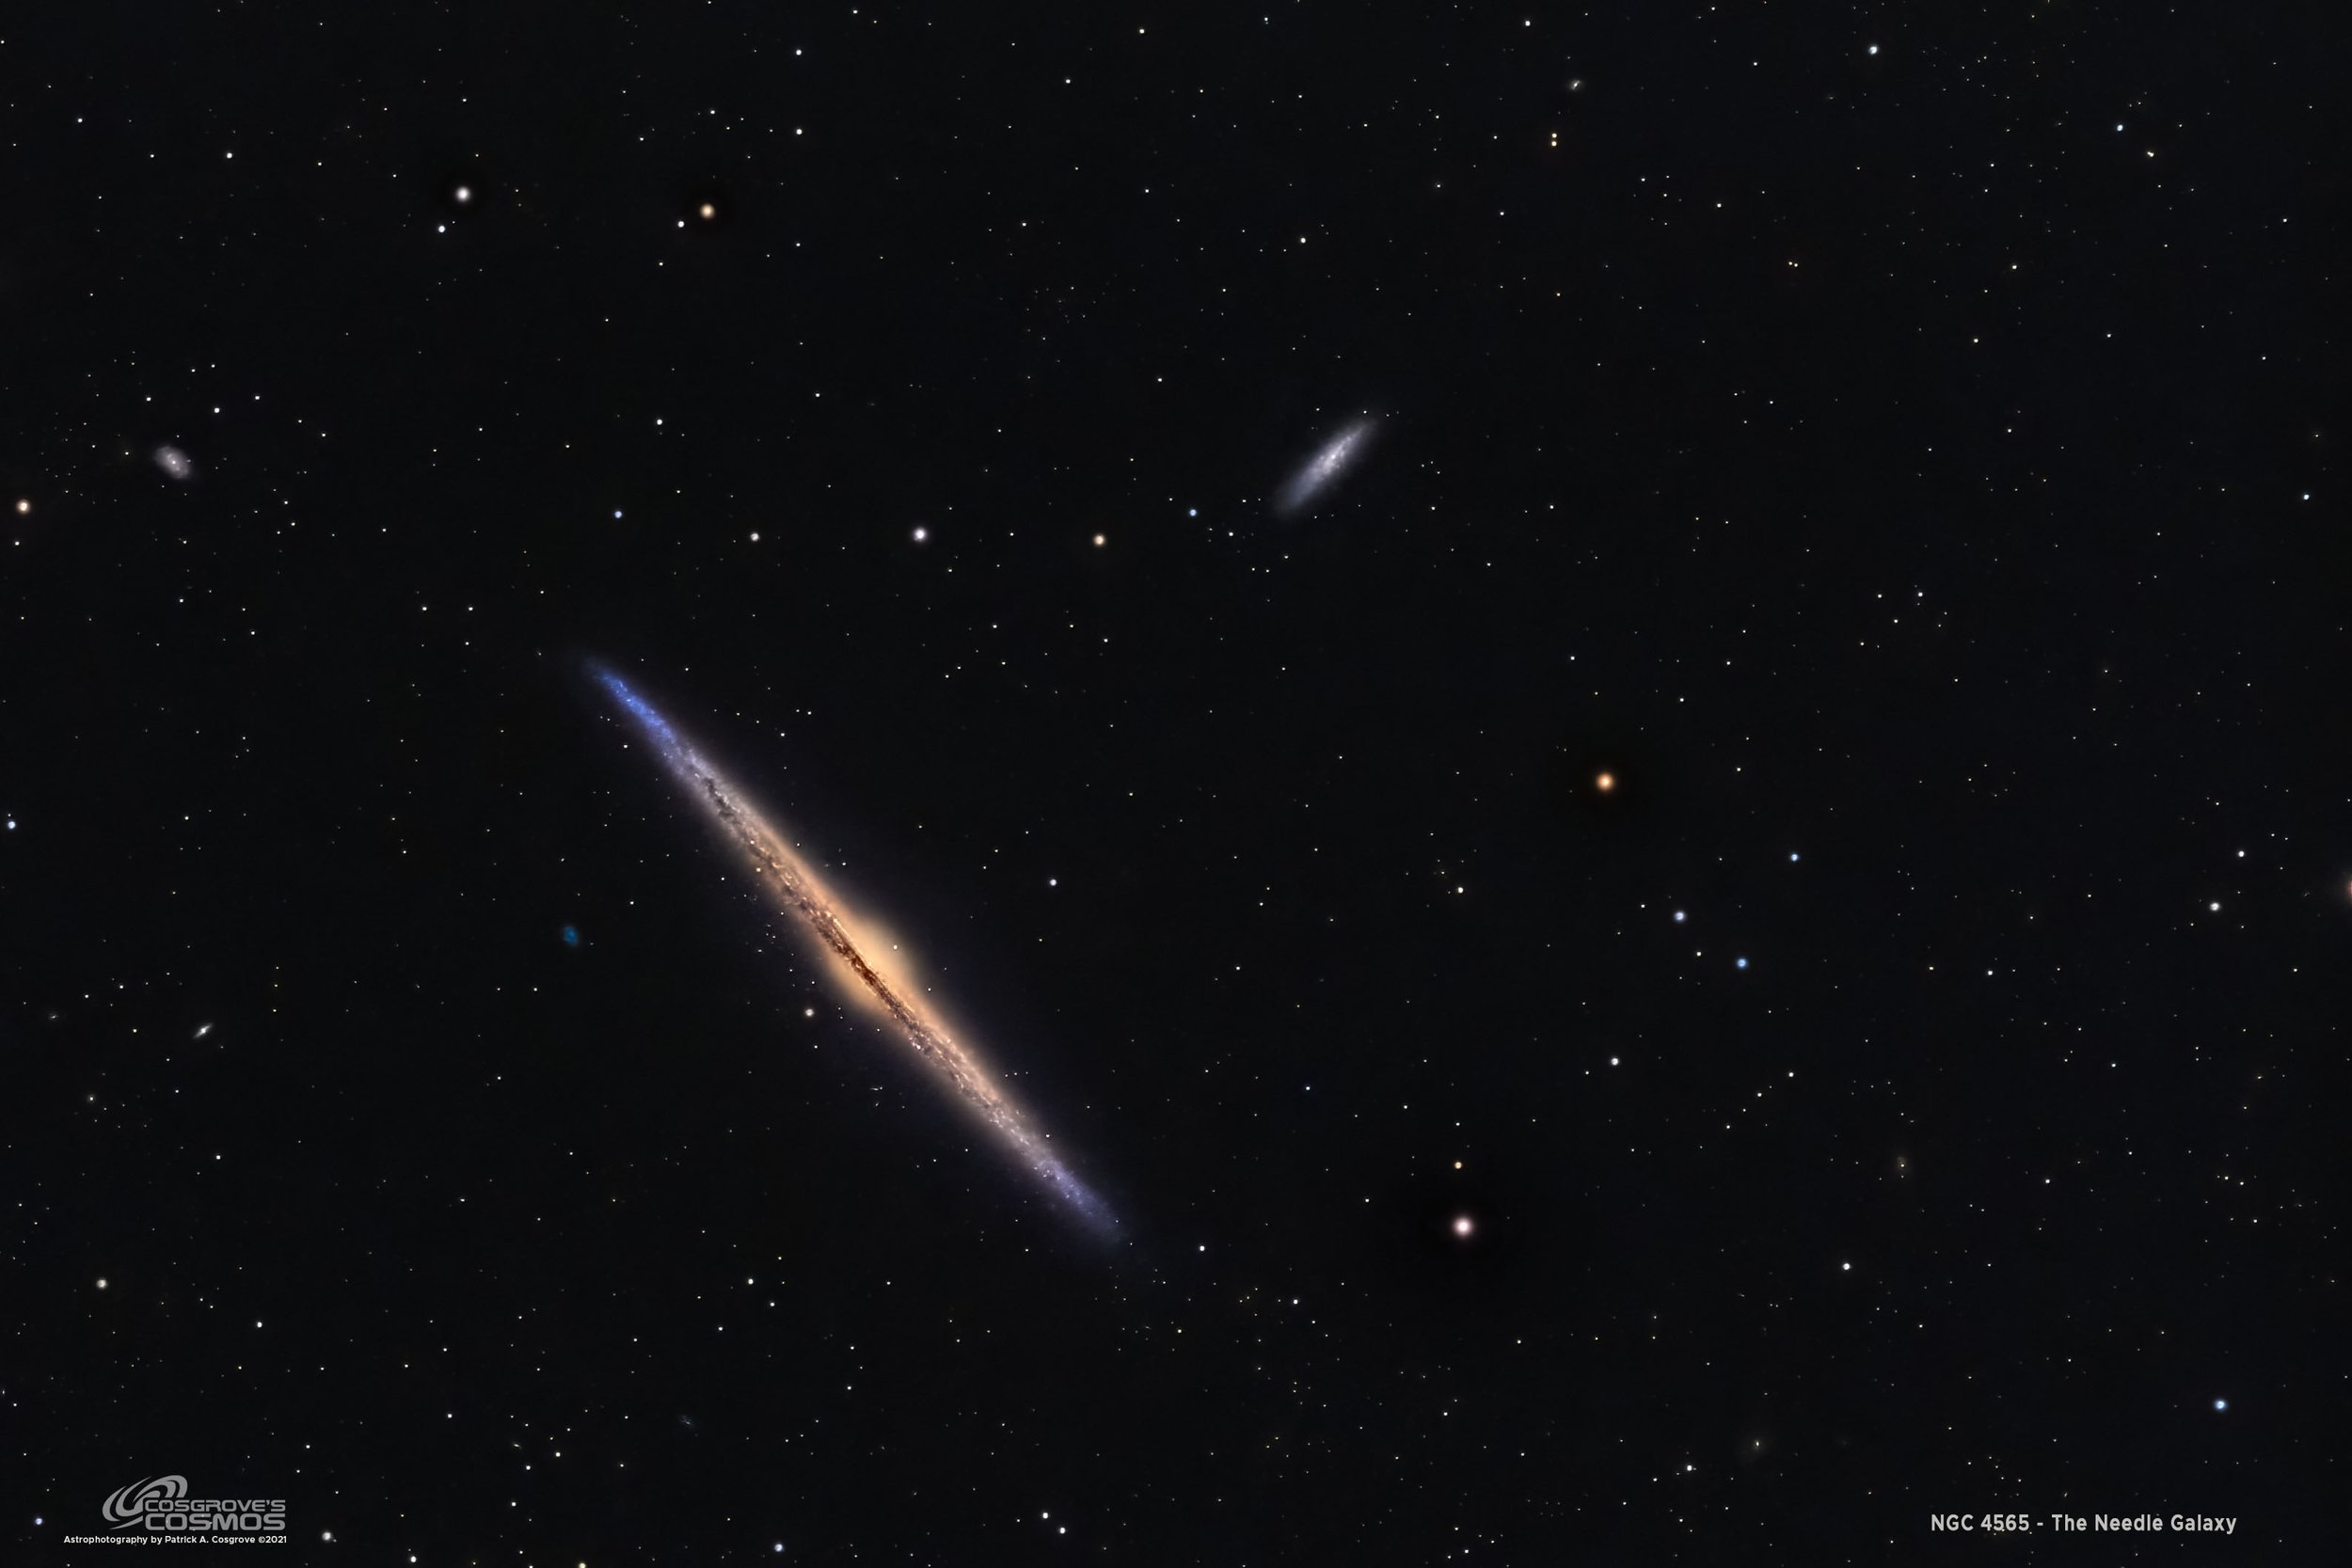
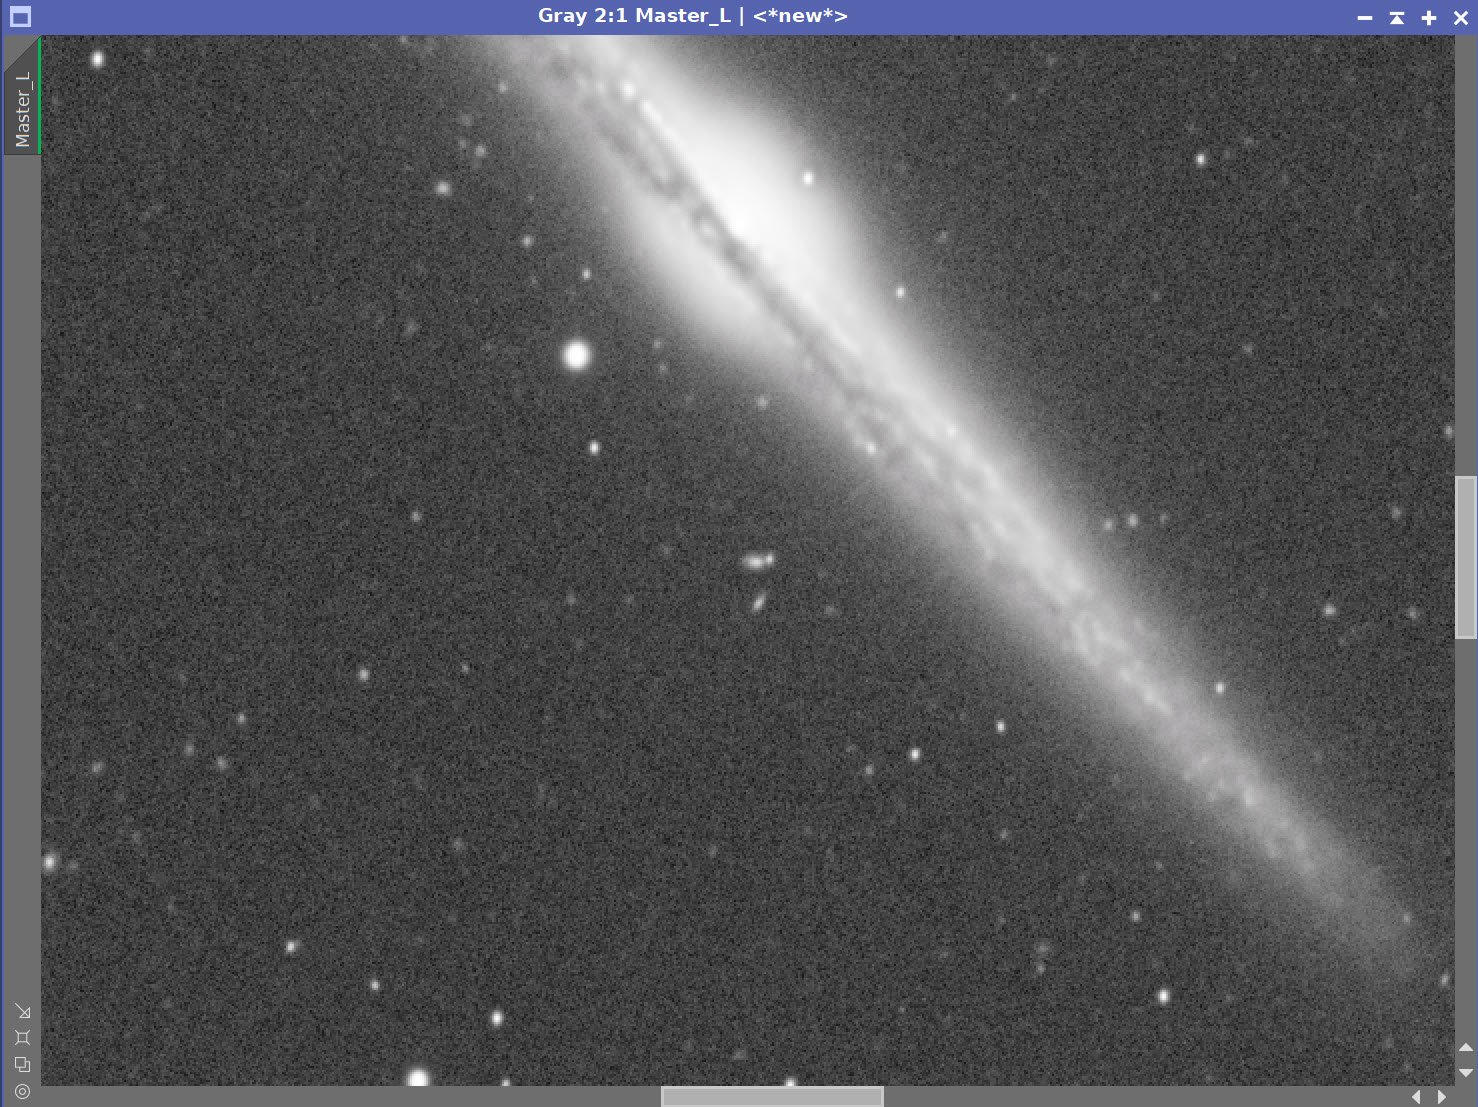
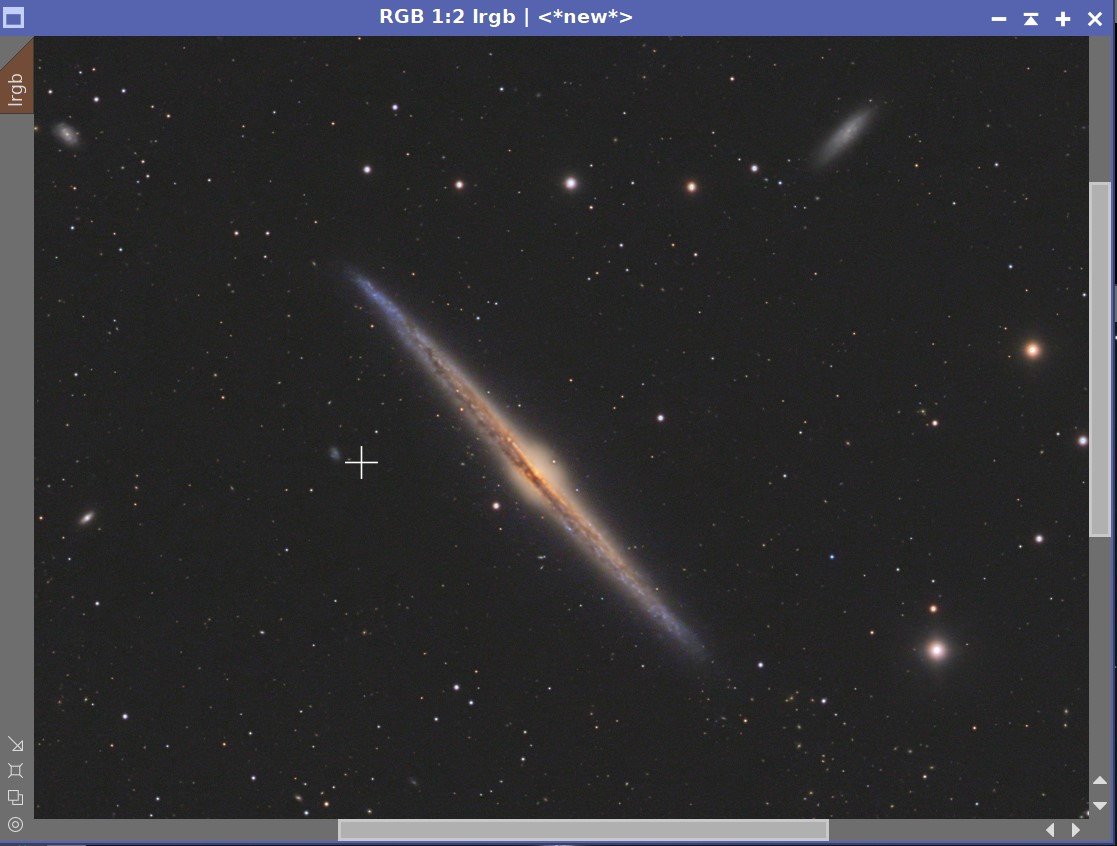
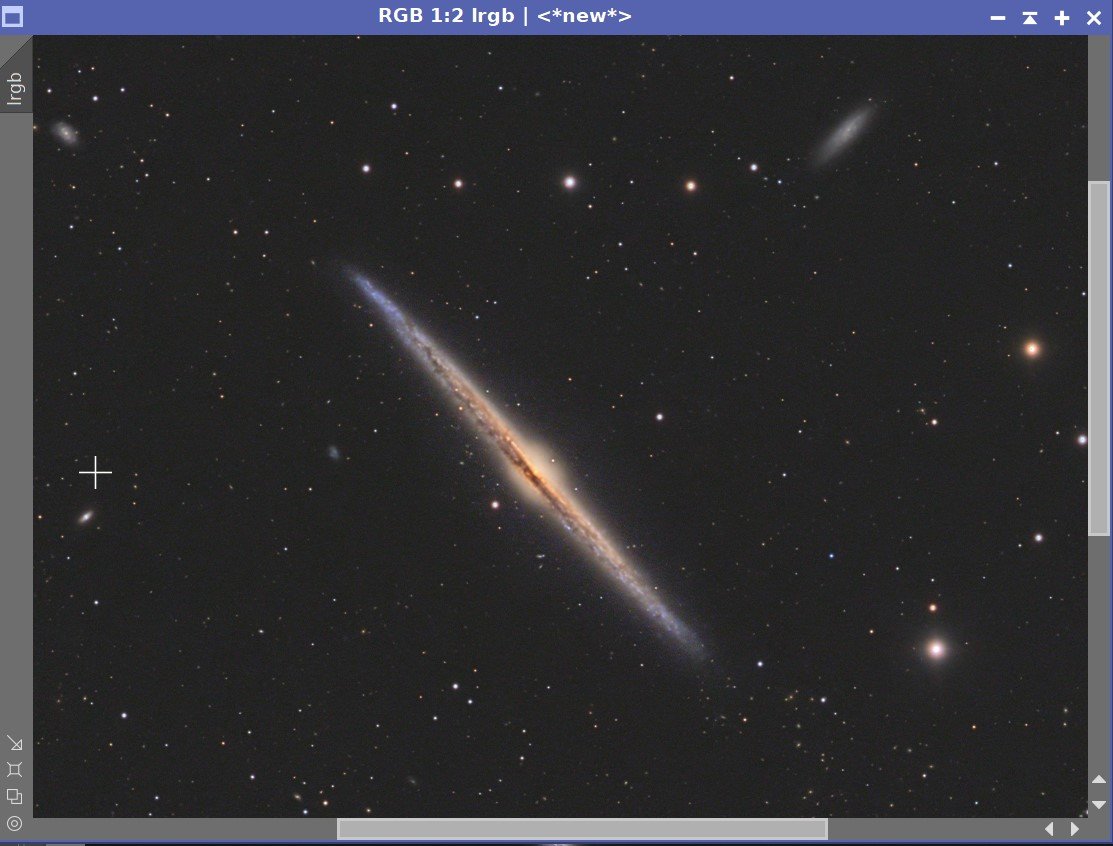
NGC 4565 - The Needle Galaxy. I beautiful target that brought back some fond memories of the first time I ever observed in a large telescope! (click image for a high resolution version via Astrobin.com)
Featured in the November 2022 Issue of Astronomy Magazine!

Issue Cover
Reader Gallery Item #6!
Published in Amateur Astrophotography Magazine!
April 9th, 2023 - In issue #111, p70-75. This image was published as part of a profile article on me!


Table of Contents Show (Click on lines to navigate)
About the Target
NGC 4565, also known as the “Needle Galaxy” and Caldwell 38, is a spiral galaxy seen edge-on, located between 30-50 million light-years away in the constellation of Coma Berenices. It is a bright galaxy, with a visual magnitude of about 10, and was first recorded by William Hershel in 1785.
Wikipedia shares the following details:
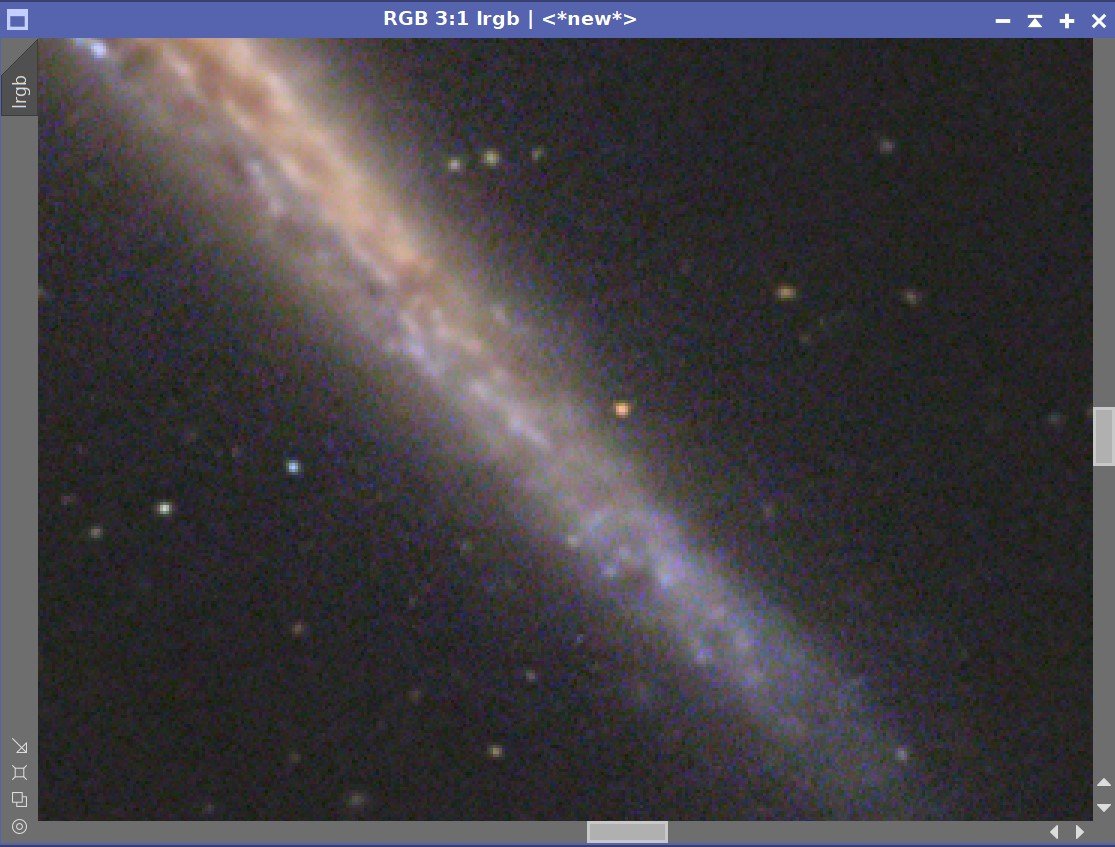
NGC 4565 is a giant spiral galaxy more luminous than the Andromeda Galaxy.[6] Much speculation exists in literature as to the nature of the central bulge. In the absence of clear-cut dynamical data on the motions of stars in the bulge, the photometric data alone cannot adjudge among various options put forth. However, its exponential shape suggested that it is a barred spiral galaxy.[7] Studies with the help of the Spitzer Space Telescope not only confirmed the presence of a central bar but also showed a pseudobulge within it as well as an inner ring.[8]
NGC 4565 has at least two satellite galaxies, one of which is interacting with it.[9] It has a population of roughly 240 globular clusters, more than the Milky Way.[6]
NGC 4565 is one of the brightest[10] member galaxies of the Coma I Group.[11][10]
This edge-on galaxy exhibits a slightly warped and extended disk under deep optical surveys- likely due to ongoing interactions with neighboring satellite galaxies or other galaxies in the Coma I group. The GALEX image shown below highlights the slight warp at the edge of the disc more clearly than other surveys.
The Annotated Image

These Annotations were created in Pixinsight using the ImageSolver and Image Annotation Scripts.
The Location in the Sky

This finder chart was created in Pixinsight using the ImageSolver and Finderchart Processes.
About the Project
I have been waiting a long to shoot this target. NGC 4565 is one of my favorite galaxies!
Why this Target?
35 years ago I was a very active visual observer.
I had the great fortune to be introduced to Rick Albrecht at work. Rick had built his own observatory (a rotating dome) which housed a 16” fork-mounted Newtonian Telescope that he had built himself.
I mean he BUILT it.
He ground the mirror. He welded up the steel forks. He used a large (12”?) worm gear that he cut the teeth on himself! He built his large domed observatory by hand - piece-by-piece.
I used to say that the only thing that Rick needed to build a telescope was some sand and Iron ore - and he could go from there. This thing was solid! At that time I was a pretty big guy - 6’6” tall - weighing in at just under 300 lbs. I could stand on the fork arm and look through the scope without causing much wiggle!

This shot shows Rick Albrecht Standing in his observatory next to his 16” Monster scope. The wrench, as I recall, was for doing PA “fine” adjustments! (Image by Rick Albrecht - used with permission)

Glenn Cummings helping install the heavy fork arms (image by Rick Albrecht - used with Permission)
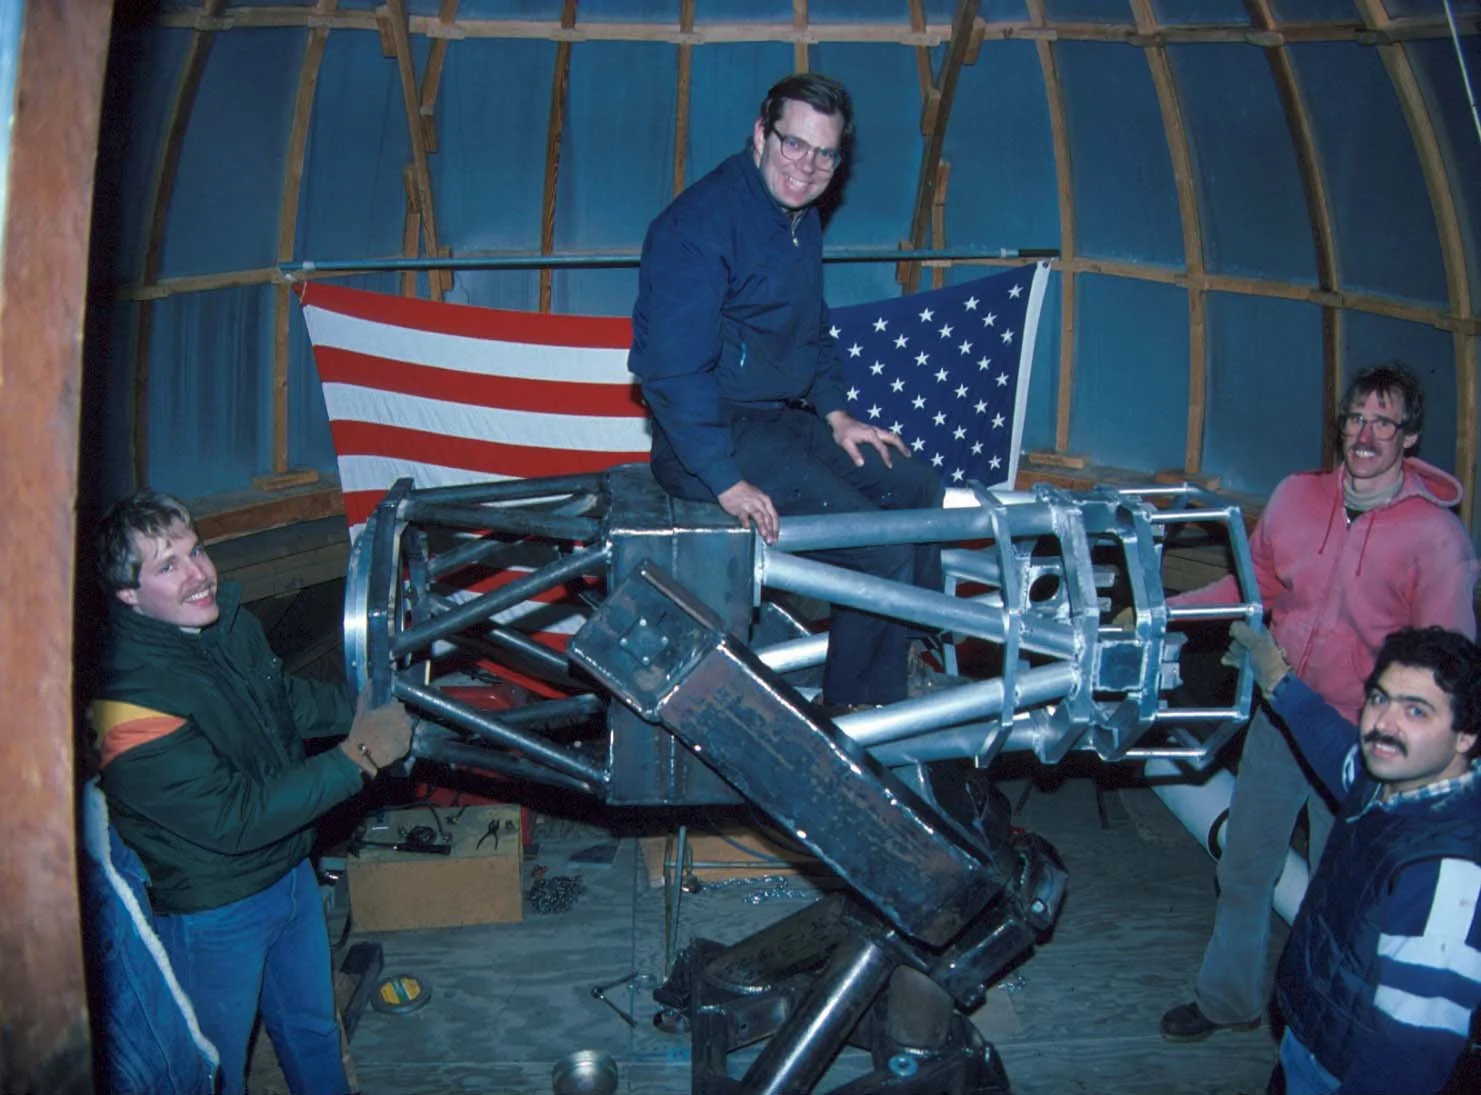
Like I say - this monster could handle a load! (Image by Rick Albrecht - used with permission)
Rick used to invite a group of us over and we would have a blast tracking down and observing deep-sky objects. Of course in those days, there were not many GOTO scopes, so we would take turns star-hoping to find objects to observe.
It was during one of these sessions that I first saw NGC 4565. I can tell you - that galaxy was an impressive sight in that 16” scope!
Here is the entry from my observing logbook for the night of May 2, 1987:
“While Glenn (Cummings) and I were trying to find a way to locate M64 in Coma Berenices, Rick was searching the region for anything interesting. He stumbled upon a bright, extremely elongated galaxy.
We did not know what it was, but I searched my database for galaxies in this region that were very elongated and I came up with NGC4565 as a candidate, as it measured 15.5’ x 2.5’. Glenn and I then looked it up in the Star Atlas and if it was indeed NGC 4565, we should find a galaxy to the West and a star to the South. We found both! To cinch it, we found an entry in Burnham’s Handbook that had a photo of the galaxy - which was identical to what we had found!
In the 16”, it was extremely elongated - the most elongated galaxy I had ever seen. It was bright and appeared as “needle” or I keep thinking of a knife blade. The core was bright and stellar in appearance. There was clearly evidence of a dust lane running along through the middle of the galaxy! Amazing! “
This event clearly had an impact on me. I had never seen an edge-on galaxy like that before and it was visually distinct! I have always remembered this galaxy and that experience and I wanted to have the chance to shoot it for myself.
I think it was in 2020, Gary Opitz shared with me his shot of NGC4565 - which can be seen HERE. I thought it was an amazing shot and I still do! But now I wanted to shoot this galaxy for myself.
Data Collection
After a lousy start to the year - weatherwise - we finally had a prediction of at least three clear nights with no moon starting on April 28th. As I planned my targets for this clear spot, I realized that the NGC 4565 would be well-positioned for me during this time. So I planned on shooting it with my William Optics 132mm FLT scope on the IOptron CEM60 mount, sporting a ZWO ASI1600MM-Pro camera.
Interesting note: I really like Gary’s shot of NGC4565. As it turns out, I ended up buying his ASI1600MM-Pro camera and mounting in on my William Optics platform. So the camera that took the image that I admired would once again be imaging the same object! File this under “small world. :-)
I was able to capture subs on the nights of April 28th and 29th - but the next night was clouded out. I really wanted more data so I let things sit for a week or so and then we had one clear night opening up on May 5th! It had rained all day but cleared just as darkness was falling. The humidity was 100% but I managed to capture subs from the time of darkness to about 2:30 am.
Image Processing
I captured the data for my most recent M101 shot during the same time as NGC 4565, and I processed that data first. Because of poor seeing conditions during the first night, and high humidity the last night, my bright stars were rather bloated on that image. Because of this, I knew that I wanted to do things differently for my NGC 4565 shot.
It’s been my habit to blink all frames - lights, flats, and darks - to ensure I had good data - and to eliminate frames or take corrective processing actions based on what I see happening in the data.
For this project, I decided it was time to learn how to use the SubFrameSelector Process to review my frame data more analytically. So I blinked all my data and removed a few frames, as needed. Then I pulled up SubFrameSelector and loaded my frames. First I looked at the FWHM data. There were several frames with very high values - Ahah! Star bloat! You can open the offending sub and look at it. Indeed some were bloated - so I got rid of those. But some were elongated.
Oh, Noooooo! - tracking problems! This is the point where astrophotgraphers start sweating bullets!
I’m not sure why yet, but some frames had very elongated stars and I removed those. When I looked at the eccentricity plot - those same frames were flagged there as well.
So something was causing tracking errors on some frames. I recently put cable wraps on some of my longer cables - Did I mess up the balance of the rig by doing that? I’m not sure yet. But I was able to spot this problem and remove the worst offending frames. I will also be on the lookout for elongated stars as I process the data.
I really liked using SubFrameSeletor and will be making it a standard part of my workflow from now on.
Once stacking was done - I inspected my masters and sure enough - there were still some egg-shaped stars. But I have run into this before and I knew how to use the Motion Blue mode on deconvolution to deal with it.
Image Analysis
At the end of it all, I was very happy with the resulting image. I was very happy to get as much detail as I did - especially with the seeing conditions as they were, and the humidity of the last evening.
Unlike the last image I published - the processing on this image went as smooth as silk. Everything came together very well and I was very impressed with the job being done by my new noise tool - RC Noise XTerminator!
One thing bothered me at the end - the sky background came out kind of on the dark side.
Astrophotographers can be very sensitive to this, as this is something that rookies do all the time. Space is black right? So let’s just force the background to be black and hide all of that nasty noise and those ugly artifacts!
For myself, I have found that I sometimes like to go darker with a background when I am dealing with a galaxy. It seems to make the Galaxy pop more and the colors of the galaxy show more dramatically.
I tend NOT to do this with nebulae shots. In those cases - I want to show all the subtleties of both bright and dark nebulae and to do that, I don’t ever want the sky to go too dark!
So as I looked at this image, I began to obsess (yes - Astrophotographers obsess all the time!) about whether I had gone too dark on the background. So I made a second version of the image where I lightened the background a bit. I ran these by my support team (Dan Kuchta and Gary Opitz) and asked their opinion.
Gary liked the lighter version. Dan liked the darker. A split decision!
Dan tried looking at it on a variety of monitors and he found some monitors were showing the dark areas as being lighter than you would see on a calibrated monitor - and on those he noted that the lighter version revealed some artifacts that you normally would not see.
So I decided to keep it darker.
Did I mention that I tend to obsess about these things?
Well - I could not leave it alone. So I made a lighter version and then hunted for the artifacts it might reveal, and fixed them in Photoshop. Now I had a lighter version that would hold up better. But should I use it?

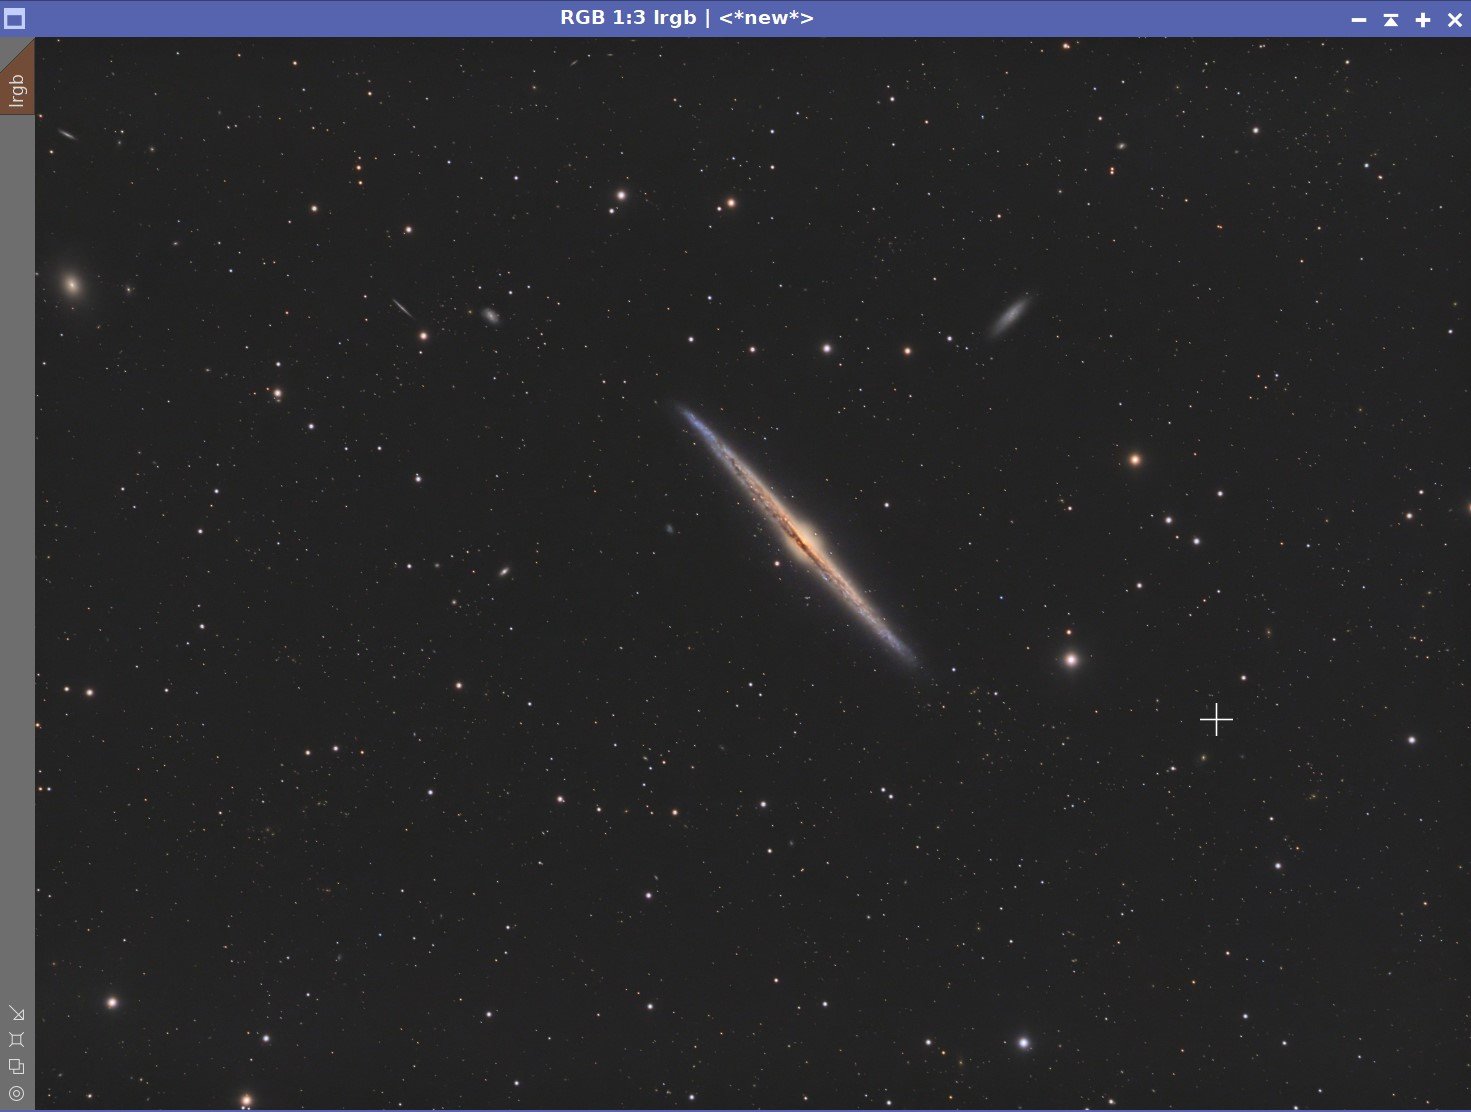
The Darker Version

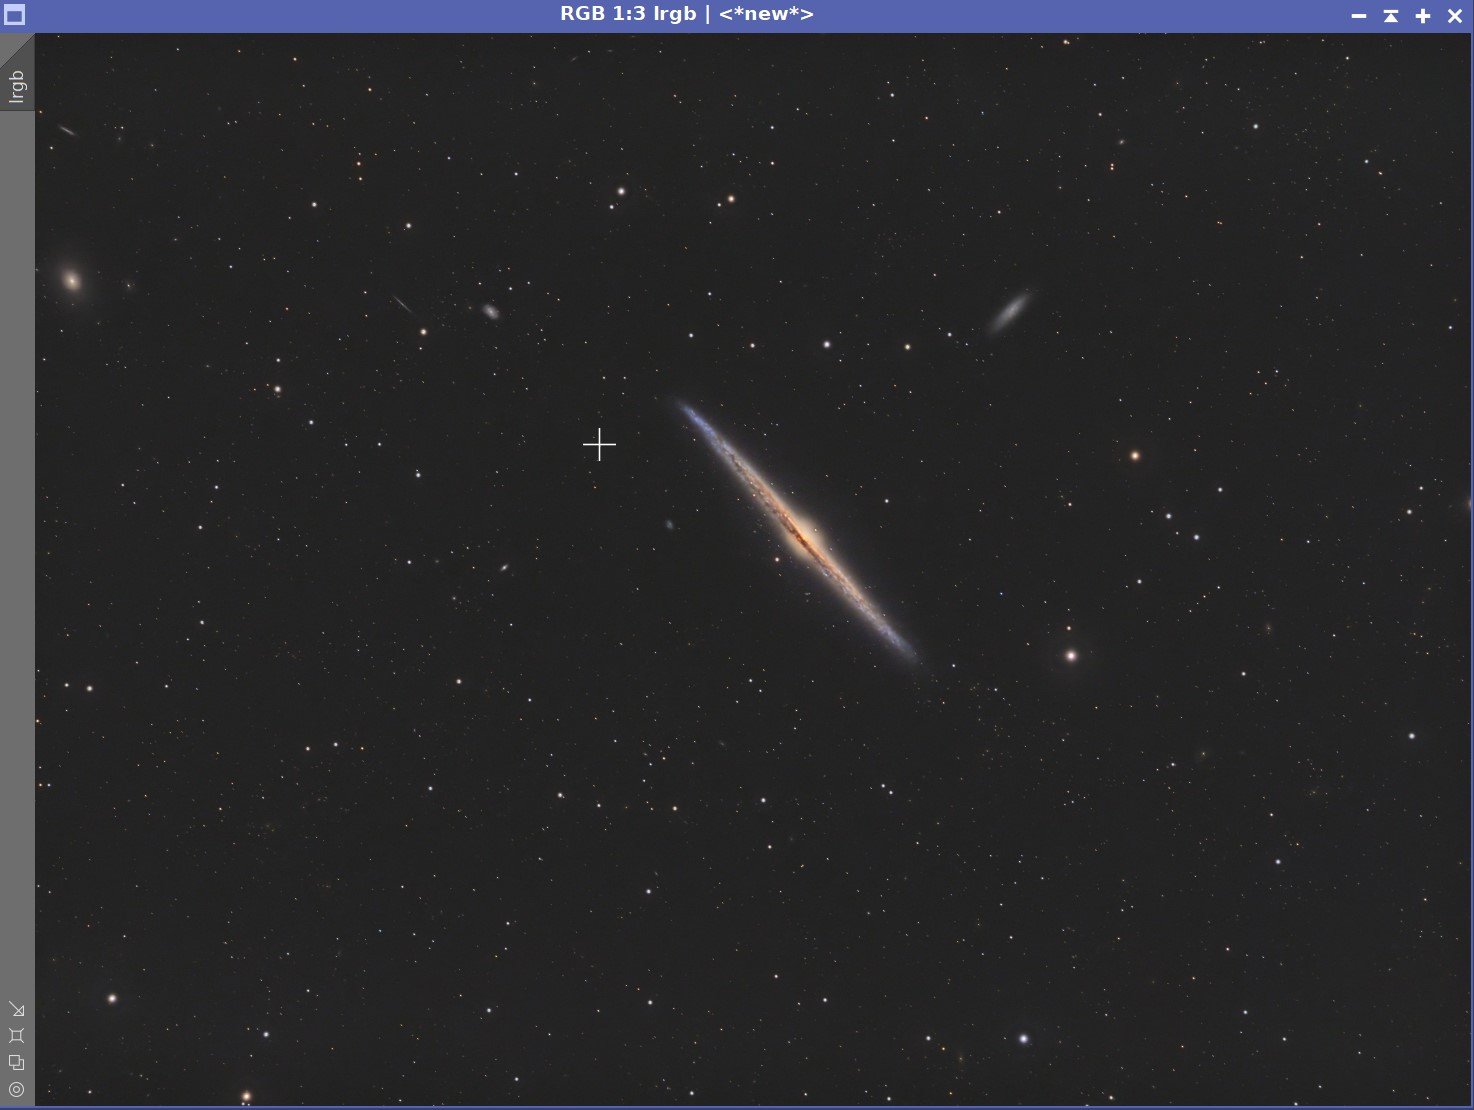
The lighter background version. The differences are subtle but real. Which do oyu like better?
The differences are minor but real. Which do you like better?
When I run into issues like this where I cannot make up my mind, I often pose the question to the Twitter #Astrophotography community. So I did that again.
Here is what I posted:
Finishing off my next Project - NGC 4565 - 11.5 hours.
— 🔭Cosgrove's Cosmos💫 (@CosgrovesCosmos) May 13, 2022
I may be splitting hairs, but I have 2 versions w/ background sky darker or slightly lighter.
OK, #Astrophotography hive mind - which do you like better?
I normally prefer lighter but sometimes on galaxies, I like darker. pic.twitter.com/XQEPDltIGB
This must of struck a chord, as my phone was going nuts all day with responses. But the darker background was preferred about 3-to-1, so I am going to keep it that way.
Here is a sampling of some of the comments I received:
I’d say the first one, but it’s a close race between two spectacular images. Nice job!
— jb (@somejohnbforya) May 13, 2022
Amazing. I love both colourways in isolation, but can see how the darker image has more contrast when they're side by side. Having said this, I feel the slightly lighter one somehow has more depth, and feels a little more natural..? Sometimes blacker isn't better. Amazing work ✨
— Jane (@DrJaneCocks) May 13, 2022
I prefer the first one, being darker gives it a cleaner feel.
— David Lozano (@LozanoDavid17) May 13, 2022
Can’t decide, but the galaxy looks amazing in both! The level of detail is outstanding, well worth the 11.5h to collect
— James Clark (@clarkjames70) May 13, 2022
As a general rule I like darker unless you are sacrificing detail, even slightly. With a dense starfield, dark is certainly a negative. A galaxy can be surrounding by mostly nothing, so makes more sense.
— OccasionalBrainiac (@OccasionalBrai1) May 13, 2022
Your work there is really sharp!
Conclusion
This was a fun project to work on and since it dealt with a target that was kind of like an old friend - it just made the whole experience even more enjoyable for me.
I’m still surprised at the amount o detail I can see in the dust lane along the length of the galaxy - but that’s the challenge and the fun of Astrophotography - you never know what you are going to end up with you are often amazed at the result you can get from images taken in your own driveway!
Thanks for reading! And don’t forget - a complete processing walk-through is included at the end of this post!
More Information
Wikipedia: NGC 4565
NASA: Hubble image of a portion of NGC 4565
TheSkyLiveL : NGC 4565
Capture Details
Lights Frames
Taken on the nights of April 29th, 29th, and May 5th 8th
114 x 120 seconds, bin 1x1 @ -15C, Gain Unity, ZWO Gen II Lum filter
80 x 120 seconds, bin 1x1 @ -15C, Gain Unity, ZWO Gen II Red filter
75 x 120 seconds, bin 1x1 @ -15C, Gain Unity, ZWO Gen II Green filter
76 x 120 seconds, bin 1x1 @ -15C, Gain Unity, ZWO Gen II Blue filter
Total of 11.5 hours
Cal Frames
25 Darks at 120 seconds, bin 1x1, -15C, gain Unity
25 Dark Flats at Flat exposure times, bin 1x1, -15C, gain unity
12 flats Flats at bin 1x1, -15C, gain unity
Software
Capture Software: PHD2 Guider, Sequence Generator Pro controller
Image Processing: Pixinsight, Photoshop - assisted by Coffee, extensive processing indecision and second-guessing, editor regret, and much swearing…..
Capture Hardware
Click below to visit the Telescope Platform Version used for this image.
Scope: William Optics 132mm f/7 FLT
APO Refractor
Focus Motor: Pegasus Astro Focus Cube 2
Cam Rotator: Pegasus Astro Falcon
Guide Scope: Sharpstar 61EDPHII
Guide Focus Motor: ZWO EAF
Mount: Ioptron CEM 60
Tripod: Ioptron Tri-Pier
Camera: ZWO ASI1600MM-Pro
Filter Wheel: ZWO EFW 1.25” 8 slot
Filters: ZWO Gen II 1.25” LRGB,
Astrodon 5nm Ha & O3 filters,
Astronomiks 6nm S2 filer
Guide Camera: ZWO ASI290MM-Mini
Dew Strips: Dew-Not Heater strips for Main and Guide Scopes
Power Dist: Pegasus Astro Pocket Powerbox
USB Dist: Startech 8 slot USB 3.0 Hub
Polar Align Cam: Polemaster
Image Processing Log
(All Processing done in Pixinsight - with some final touches done in Photoshop)
1. Blink Screening Process
Lum Images: some trails are seen - very minor
Red: Everything looks good
Green: One sub is in the tree line and was rejected
Blue: Two subs are in the tree line and obscuring the galaxy - these were rejected. Lots of trails trail are seen but - rejections should handle it.
Flats - all looks good
Darks - all good
2. Use SubFrameSelector to analyze the remaining subs
Subs for each filter were loaded into the tool and metrics were computed. FWHN and Eccentricity were the key metrics I used in this analysis. Screenshots for each filter are attached below.
Lum Images: 7 deleted for having either too high an FWHM or Eccentricity value
Red Images: 7 deleted for having either too high an FWHM or Eccentricity value
Green Images: 12 deleted for having either too high an FWHM or Eccentricity value
Blue Images: 9 deleted for having either too high an FWHM or Eccentricity value
Lum FWHM Plot. Note deleted frames. (click to enlarge)
Red FWHM Plot. Note deleted frames. (click to enlarge)
Green FWHM Plot. Note deleted frames. (click to enlarge)
Blue FWHM Plot. Note deleted frames. (click to enlarge)
Lum Eccentricity Plot. Note deleted frames. (click to enlarge)
Red Eccentricity Plot. Note deleted frames. (click to enlarge)
Green Eccentricity Plot. Note deleted frames. (click to enlarge)
Blue Eccentricity Plot. Note deleted frames. (click to enlarge)
3. WBPP 2.41 Run
All frames loaded
Set up for calibration only - no integration
Cosmetic Correction setup
Pedastal image set up for “Litteral”
Subframe weighting: psf signal
Local Normalization enabled
Run complete with no issues

WBPP Calibration Panel

WBPP Lights Panel
4. Image Integration
ImageIntegration was run for each Master image.
It used the same setup for each run.
Weighting scheme was PSF Signal Weight
Rejection was set to Robust Chauvenet Rejection (RCR)
This new rejection method seems to do a very good job and this is the second image I have been using it on.
A sample panel for ImageIntegration can be seen below
Also shown are a few of the High Rejection Maps showing how well trails are being removed.

Sample ImageIntegration Panel Setup.

This is the high rejection map for the Lum image.

This is the high rejection map for the Blue image.
5. Crop all of the images
a common crop level was selected and DynamicCrop was used to trim all of the master frames.
6. Dynamic Background Extraction
DBE was run for each image using the subtraction method. Below are the Sampling plans, the before image, the after image, and the removed background images.
L Sampling (click to enlarge)
R Sampling (click to enlarge)
G Sampling (click to enlarge)
B Sampling (click to enlarge)
L before DBE (click to enlarge)
R before DBE (click to enlarge)
G before DBE (click to enlarge)
B before DBE (click to enlarge)
Lum after DBE (Click to Enlarge)
R after DBE (Click to Enlarge)
G after DBE (Click to Enlarge)
B after DBE (Click to Enlarge)
L background (Click to enlarge)
R background (Click to enlarge)
G background (Click to enlarge)
B background (Click to enlarge)
7. Create and Process the Linear Color Image
Use ChannelCombination process to create an initial RGB image.
Run DBE on the image to remove any color gradients.
Run PCC to color calibrate the image
Run Noise XTerminator with a value of 0.4 to “knock the fizz off”
Initial RGB Linear Image (click to enlarge)
After Running DBE (Click to enlarge)

After PCC

PCC Panel set up for this run

The PCC regression results.

Before Noise XTerminator

After Noise XTerminator
8. Process the Linear L image.
Create a PSF image by running PFSImage Script
Create the Local Deringng Support Image (LDSI)
Create a mask using the StarMask Process - with layers = 6
Adjust with HT to boost stars a bit.
Establish previews on the L image to test deconvolution values.
Test deconvolution parameters iteratively, first determining Global Dark and Global Bright values, then iterations, and finally the Regularization values.
Apply to the whole image
See the values used and results below.
Run Noise XTerminator with a value of 0.4

The PFSImage Panel after a run

The Computed PSF value used

Starmask Panel with values used to create the initial LDSI mask.

The final LDSI image after a HT boost.

The Final Deconvolution Parameters used.

Before and After Deconvolution

Before and After A Light Application of Noise XTerminator
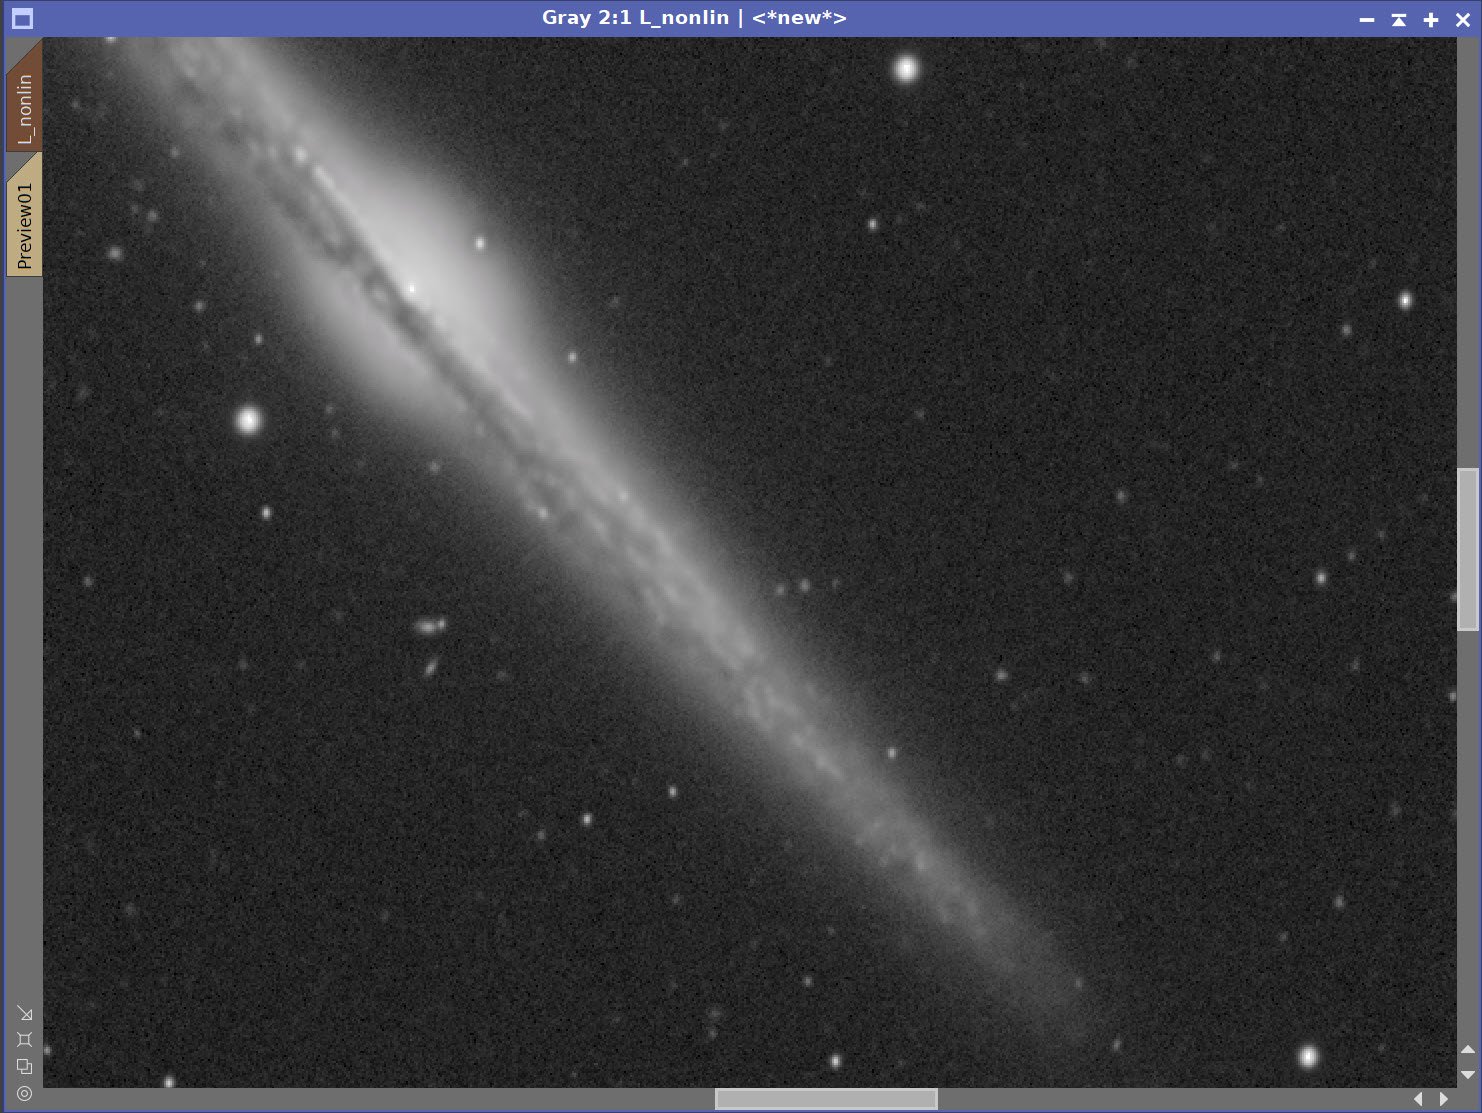
The Final Version of Linear Images:

The final set of linear images. Top: L and R, Bottom: G and B
8. Take Images NonLinear and Do Initial Processing
L Image:
Create a preview of a good background portion of the image
Run MaskedStretch with default parameters but use the preview as a background reference
Tweak the tone scale with CT
Create a Galaxy Map
Use RangeSelection to create a range mask that isolates the galaxy
Use DynamicPaintBrush to remove all stars - leaving just the galaxy
Apply Galaxy Mask and do a Local Histogram Equalization(LHE) run:
Kernal Radius of 22, contrast limit of 2.0, amount of 0.24 using ann 8-bit histogram.
Remove Mask and Run ANoise XTerminator @ 0.5
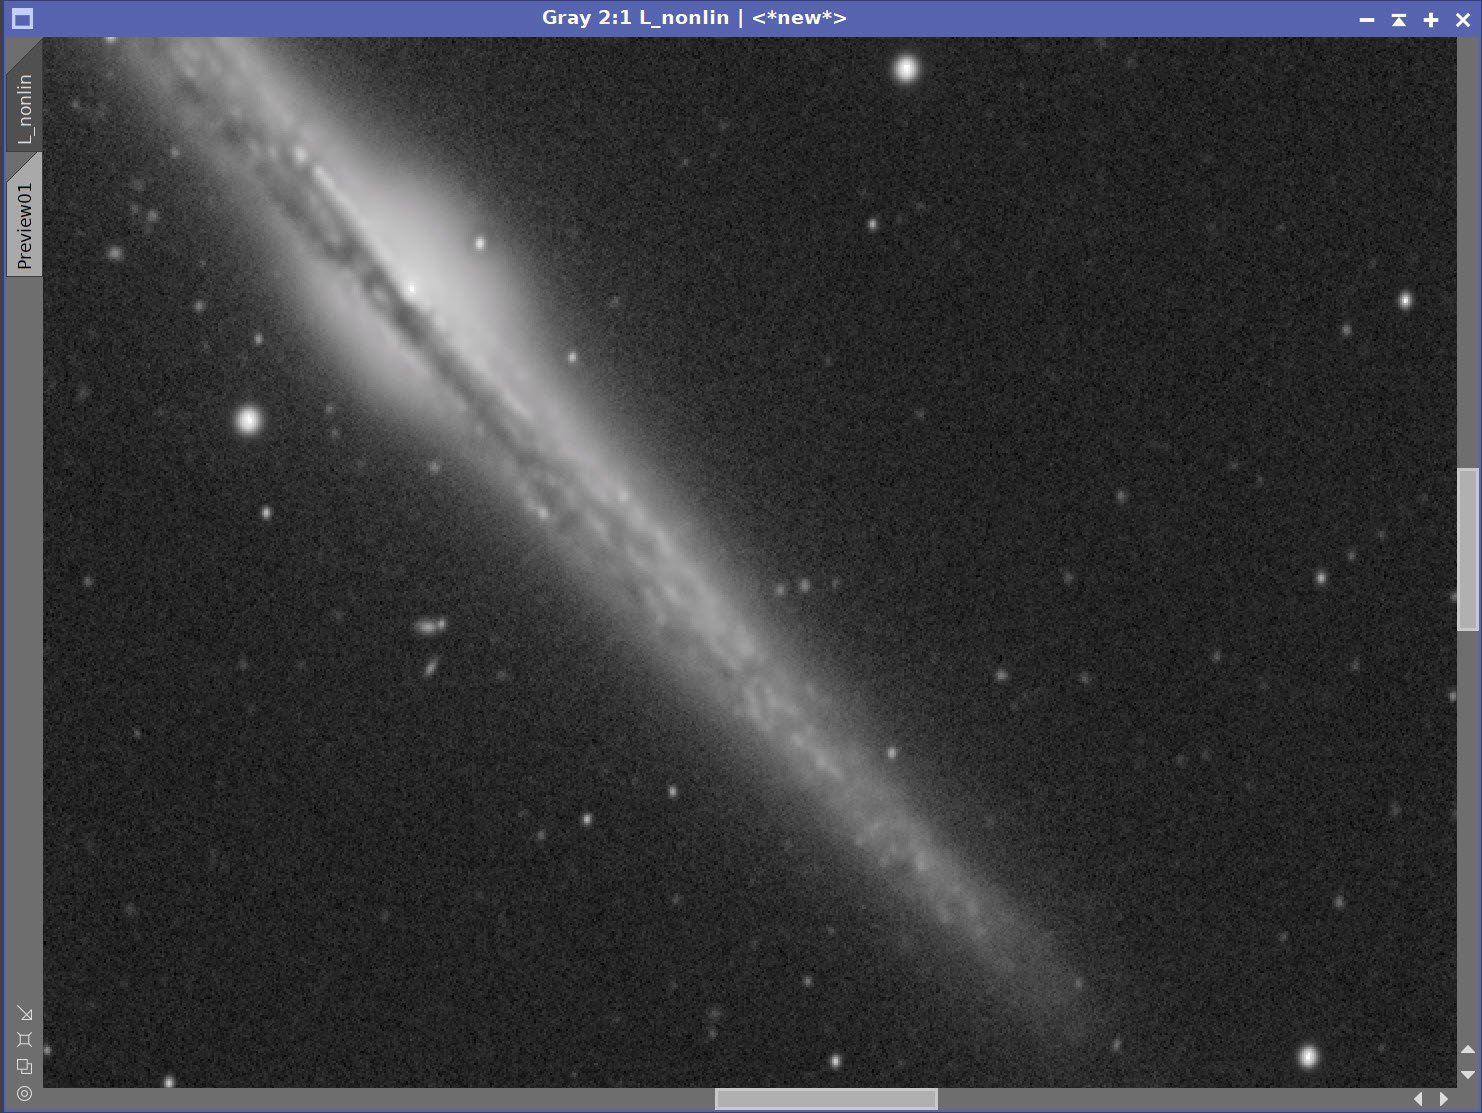
Initial nonlinear L image. (click to enlarge)
L image after a CurvesTool Tweak (click to enlarge)

The Galaxy Mask - created using RangeSelection and then removing stars with the Dynamic Paint Brush.

LHE Panel Settings
L image: Before and After LHE Application
Color Image Processing:
Create a preview of a good background portion of the image
Run MaskedStretch with default parameters but use the preview as a background reference
Tweak the tone scale and color saturation to make a darker, more saturated color position than wanted. Injecting the L image will soon lighten it.
Use LRGBCombination to fold the L image into the color image.
Use CT to tweak overall tone and saturation
Use Deconvolution in the “Motion Blur” mode to fix slightly elongated stars. See panel snapshot for parameters used.
While this tool seems to be very powerful - it can be a bit twitchy when setting the length parameter. In one case it would undercorrect, and then it would suddenly overcorrect. It was hard to dial-in a perfect number. I set this up to undercorrect slightly - I thought that looked better than the overcorrected version.
Apply galaxy mask
Use CT to increase the color saturation of the galaxy
Use ColorSaturation to boost blues at the rim and red yellows in the core
Apply LHE - parameters shown in the screen snap below.
Remove Galaxy Map
Run Noise XTerminator @ 0.6

Initial Nonlinear RGB image - note preview used for the background sky sample

RGB Before L image Insertion - zoomed in a bit.

LRGB - after L insertion - zoomed a bit

Deconvolution Parameters used for fixing the elongated stars.
Before elongation fix (click to enlarge)
After elongation fix. (click to enlarge)
LRGB - After Galaxy Masked CT and ColorSaturation changes (click to enlarge)

Local Histogram Equalization Panel with parameters used for the last application of this tool.
LRGB Image: Before and After LHE Application

LRGB Image: Before and After Noise XTerminator
LRGB Image: Before and After EZ_Star Reduction
9. Save images as Tiff and move to Photoshop
Use Camera Raw Filter to adjust Global Clarity, Texture, and Color Mix
ColorMix is much easier to use to adjust hues in an image compared to the tool provided by Pixinsight and I tend to do this final operation in PhotoShop
Use StarShrink to reduce the largest stars further.
Use Topaz AI Denoise to reduce noise and sharpen things further - see screenshot panels - careful with this - is way too easy to take this too far!
Clean up some stars by doing a small area selection and the burn tool and the blur tool.
Add watermarks
Export Clear, Watermarked, and Web-sized Jpegs.
I was very excited to get the ZWO ASI2600MM-Pro camera a while back. I ordered it when it was announced and then prepared to wait a long time to get it. When I did get it - I decided to put it onto the AP130 platform. That meant that I could move the ZWO ASI1600MM-Pro, along with its filter wheel over to my William Optics Platform. This now means that all of the platforms have been moved over to a mono camera and my ZWOASI924MC-Pro is now not in use.