The Sadr Region of Cygnus 2026: Image Processing Walkthrough
Aug 7, 2026
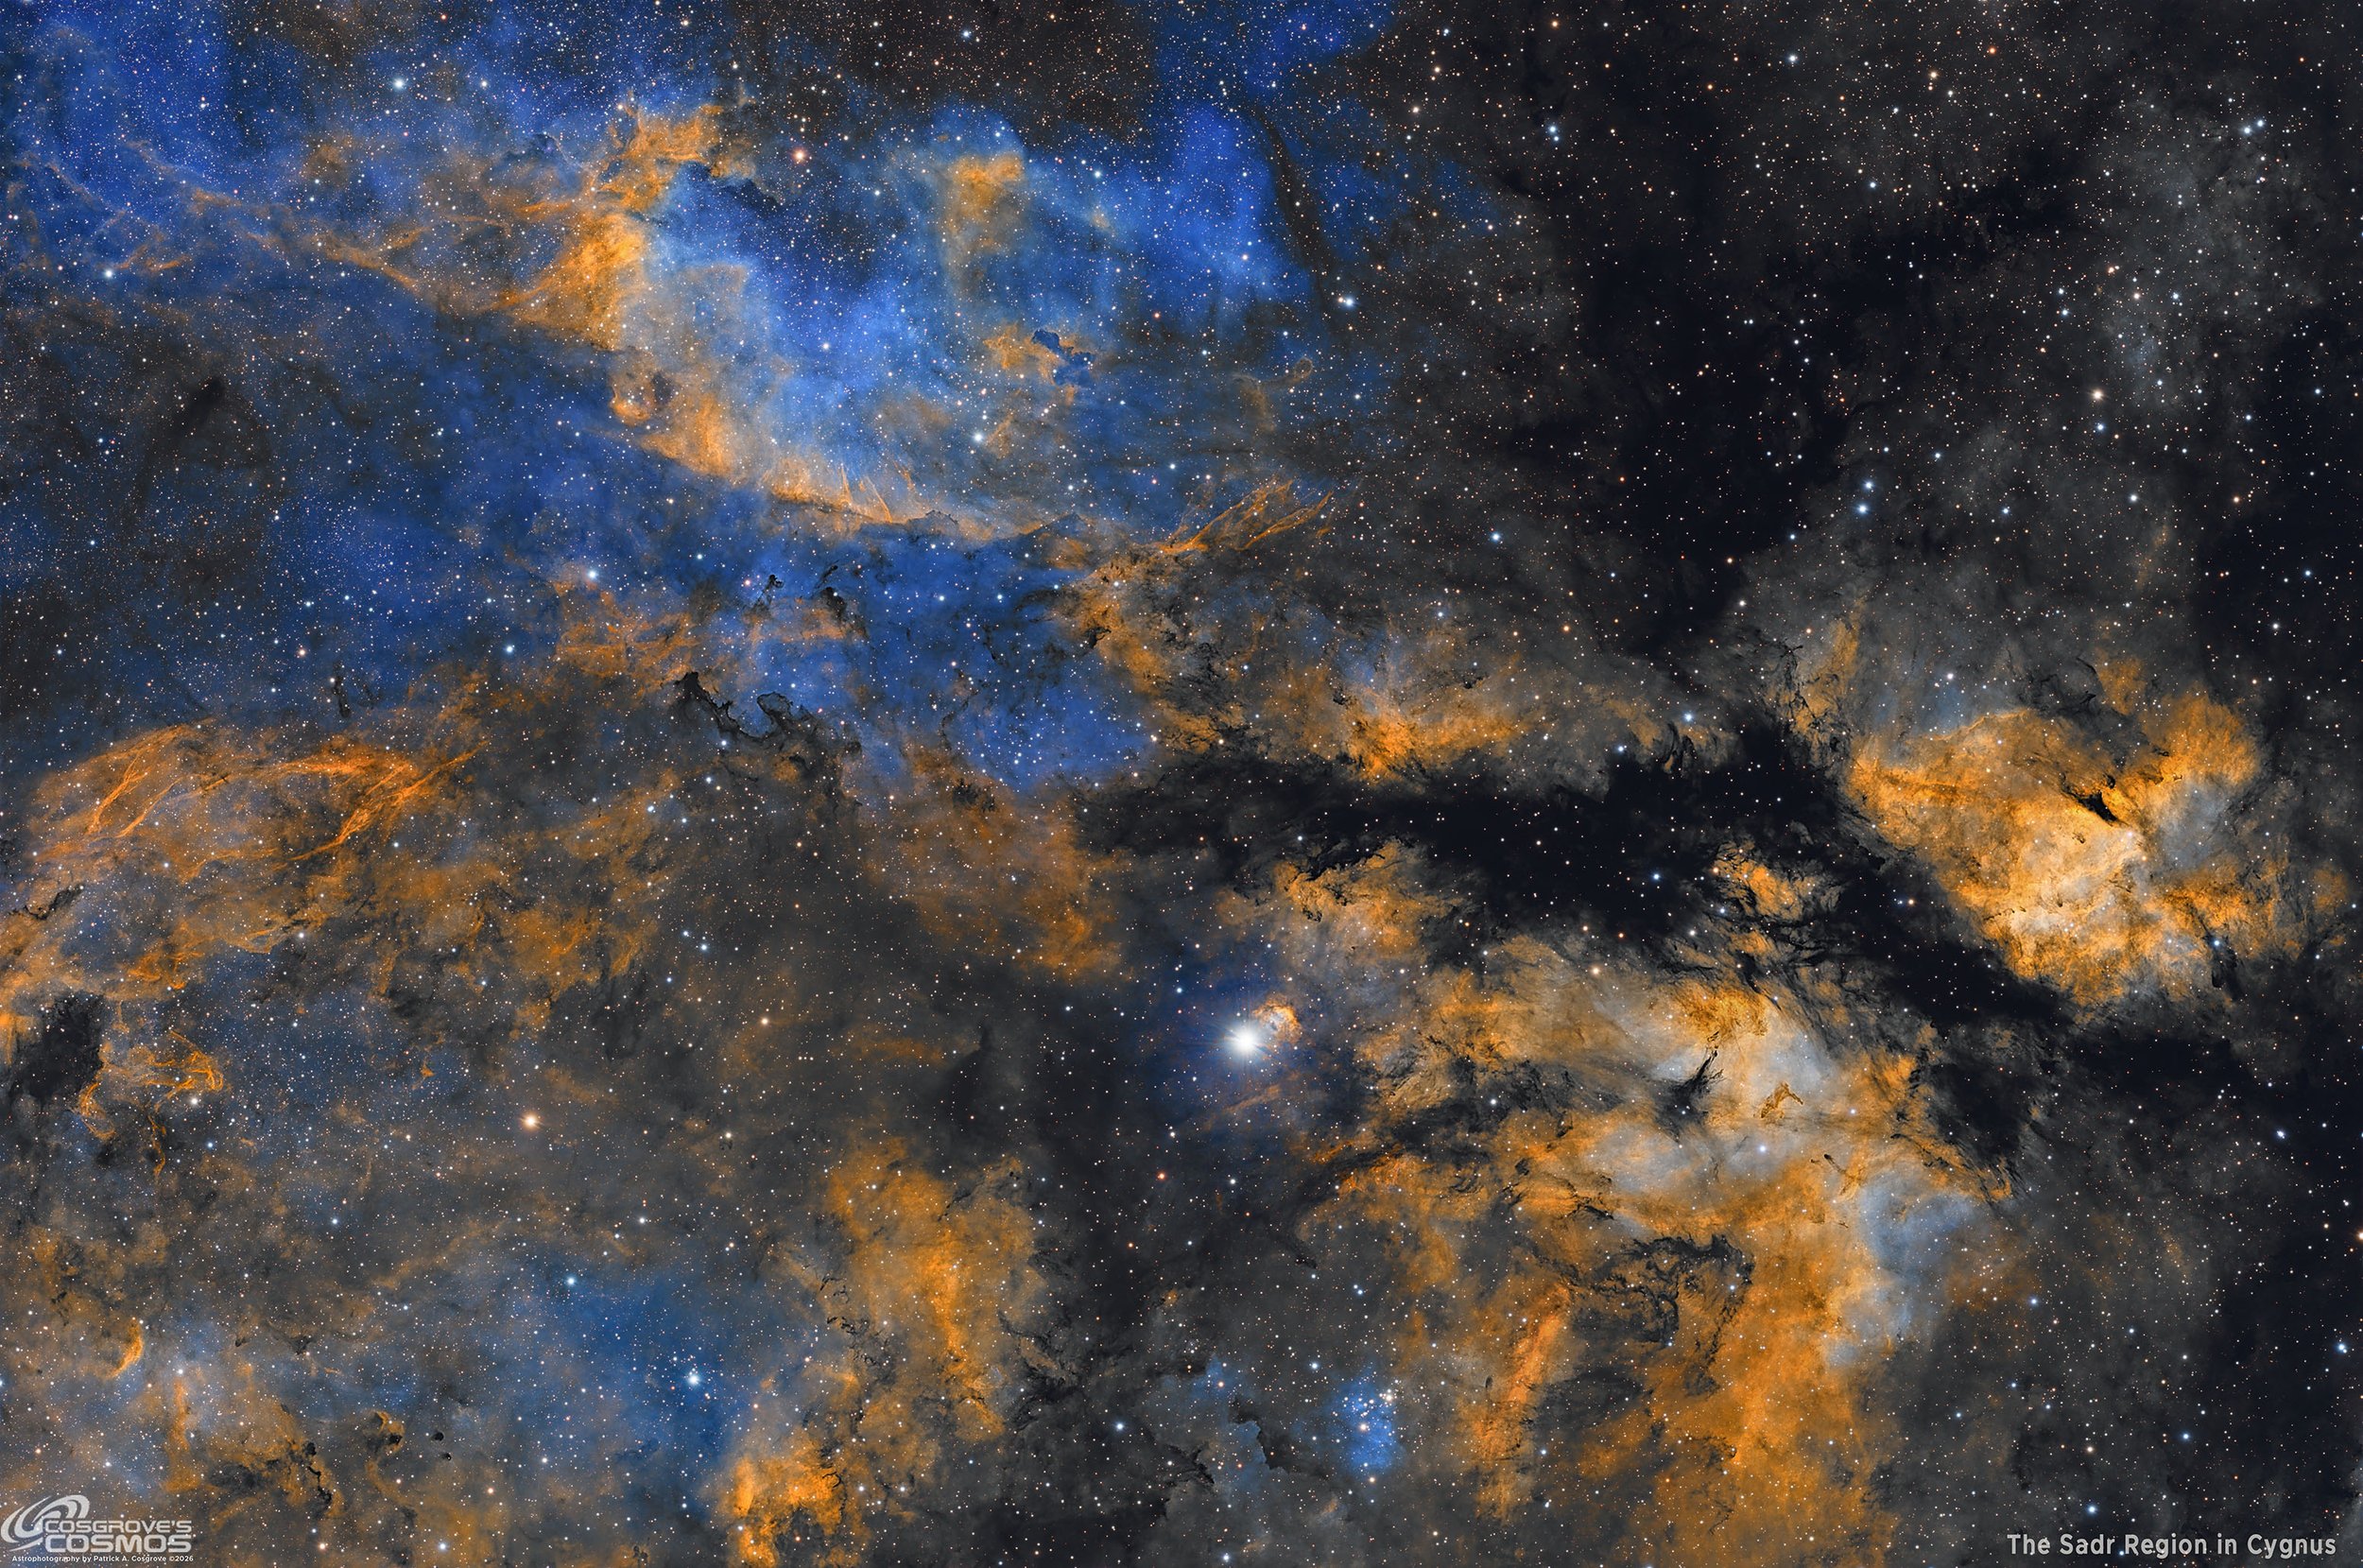
My Image of the Sadr region in the center of Cygnus
🔭 Project Summary
Target: The Sadr Region — IC 1318 / Sh2-108 / Gamma Cygni Nebula complex
Capture Dates: July 11, 12, 22, and 23, 2026
Constellation: Cygnus • Distance: ≈ 4,500–5,000 light-years for the nebular complex; Sadr ≈ 1,800 light-years
Type: Wide-field emission nebula complex with dark molecular clouds, bright nebulae, young stars, and open cluster NGC 6910
Imaging Period: July 11–23, 2026 • Total Integration: 12 h 46 m 00 s (SHO narrowband + RGB stars)
Filters: Ha · OIII · SII (Astronomik 36 mm 6 nm) + R · G · B (ZWO 36 mm LRGB Gen II)
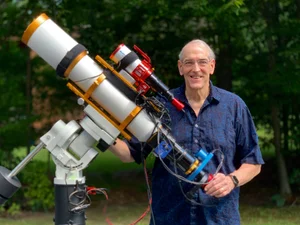
Telescope: Askar FRA400 72 mm f/5.6 Quintuplet Air-Spaced Astrograph
Camera: ZWO ASI2600MM-Pro (−10 °C; Gain 100 narrowband, Gain 0 RGB)
Mount: ZWO AM5 on custom steel pier
Processing: PixInsight (SHO narrowband + RGB stars) & Photoshop
Location: Whispering Skies Observatory · Honeoye Falls, NY (USA)
Acquisition Notes: Ha: 44 × 300 s; OIII: 41 × 300 s; SII: 46 × 300 s; R: 37 × 60 s; G: 37 × 60 s; B: 37 × 60 s, all bin 1×1 at −10 °C; total 12 h 46 m 00 s after culling bad or questionable subs.
Image Note: This wide-field SHO narrowband image frames the Sadr / Gamma Cygni region, including IC 1318, Sh2-108, NGC 6910, Lynds bright and dark nebulae, and Barnard dark nebulae across the dense Cygnus Milky Way.
Table of Contents Show (Click on lines to navigate)
Special Note
Welcome to the New Image Processing Page for this project! You got here by following a link in the main Image Project Report, and you can easily return to that by using the back button on your browser.
Abbreviations Used
ACM Astro Color Mixer Script
ACE Astro Contrast Enhancer Script
BXT BlurXTerminator by RC-Astro
CC Cosmetic Correction
CT Curves Transformation Process
DBE Dynamic Background Extraction Process
ET Exponential Transformation
HT Histogram Transformation
NXT NoiseXTerminator by RC-Astro
MLT Multiscale Linear Transform
PI PixInsight
PS Photoshop
SCNR Subtractive Chromatic Noise Reduction Process
SFS SubFrameSelector
SPCC SpectroPhotometric Color Calibration
STF Screen Transfer Function
STF->HT method – Drag the STF triangle to the base of HistogramTransformation, then apply it to the image to take it nonlinear.
SXT StarXTerminator by RC-Astro
WBPP Weighted Batch Preprocessing Script
Sadr Region SHO + RGB Stars Processing Flow
Sequential summary of the actual Sadr Region workflow, following the published processing walkthrough from Blink review and WBPP 3.01 integration through SHO/RGB master construction, linear correction, star separation, GHS stretching, masked SHO color and contrast work, RGB star recombination, and final Photoshop output.
Processing this Image
(All Processing is done in PixInsight, with some final touches done in Photoshop)
1. Blink
General
Lots of satellite tracks - easy to handle
Ha
10 frames removed - 6 for focus, 2 for tracking, 2 for clouds
OIII
12 frames removed, 6 for focus, 2 for tracking, 4 for clouds
SII
3 frames removed, 1 for tracking, 2 for clouds
Red
No frames removed!
Green
No frames removed!
Blue
No frames removed!
Darks
All looks OK
Dark Flats
All looks OK
Flats
All good
2. WBPP 3.01
Reset everything
Load all lights
Load all flats
Load all darks
Select - maximum quality
Reference Image - auto - the default
Select the output directory for the WBPP folder
Enable CC for all light frames
Pedestal value - auto
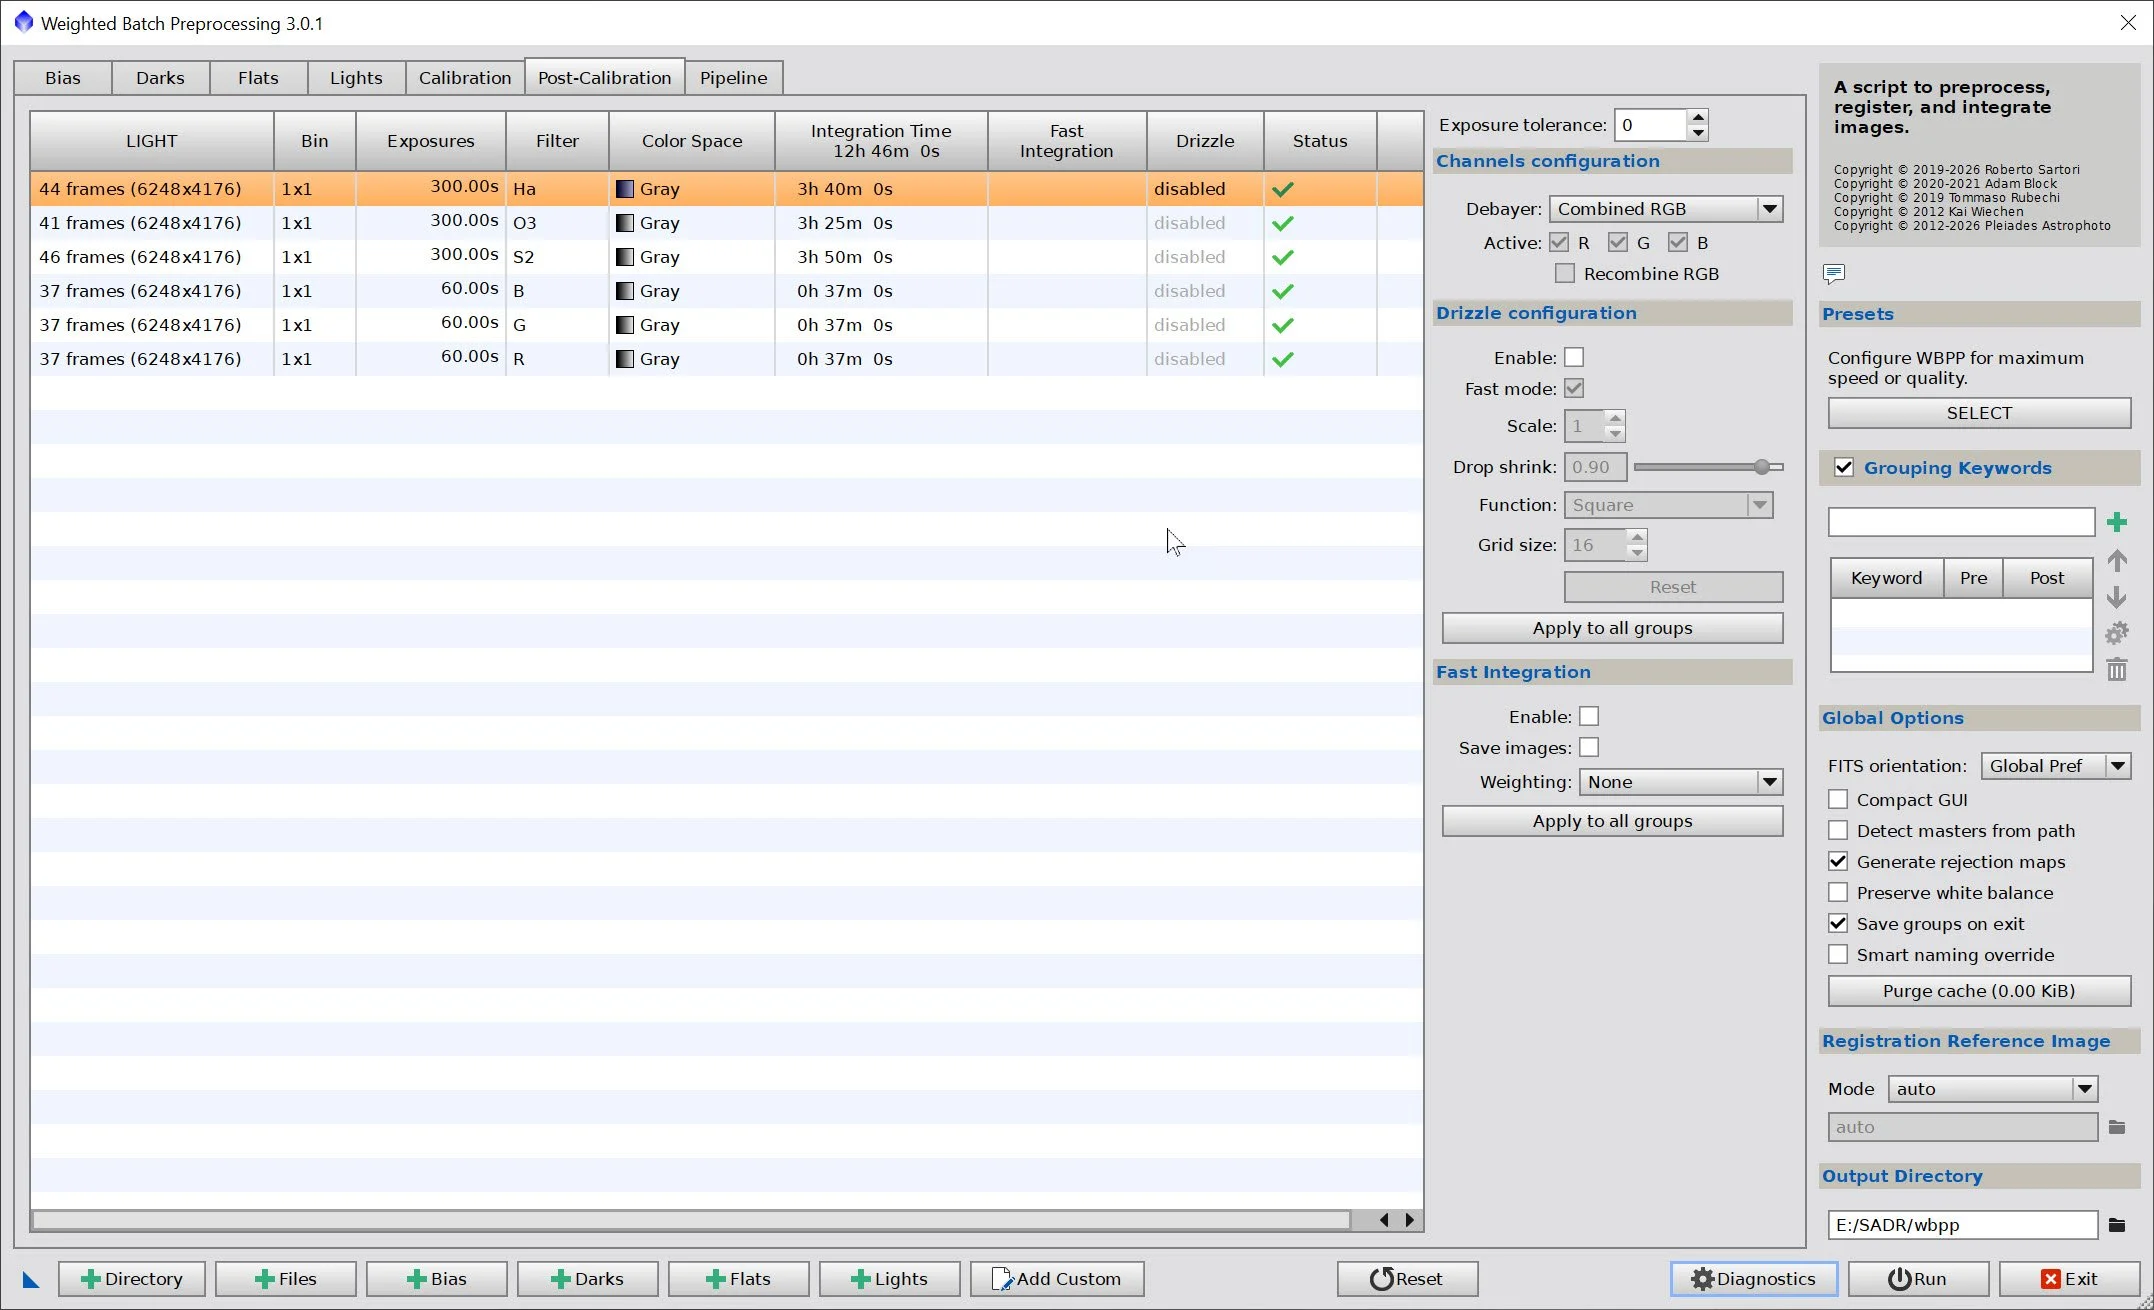
Darks - set exposure tolerance to 0
Lights - set exposure tolerance to 0
Lights - all set except for a linear defect
set for Autocrop
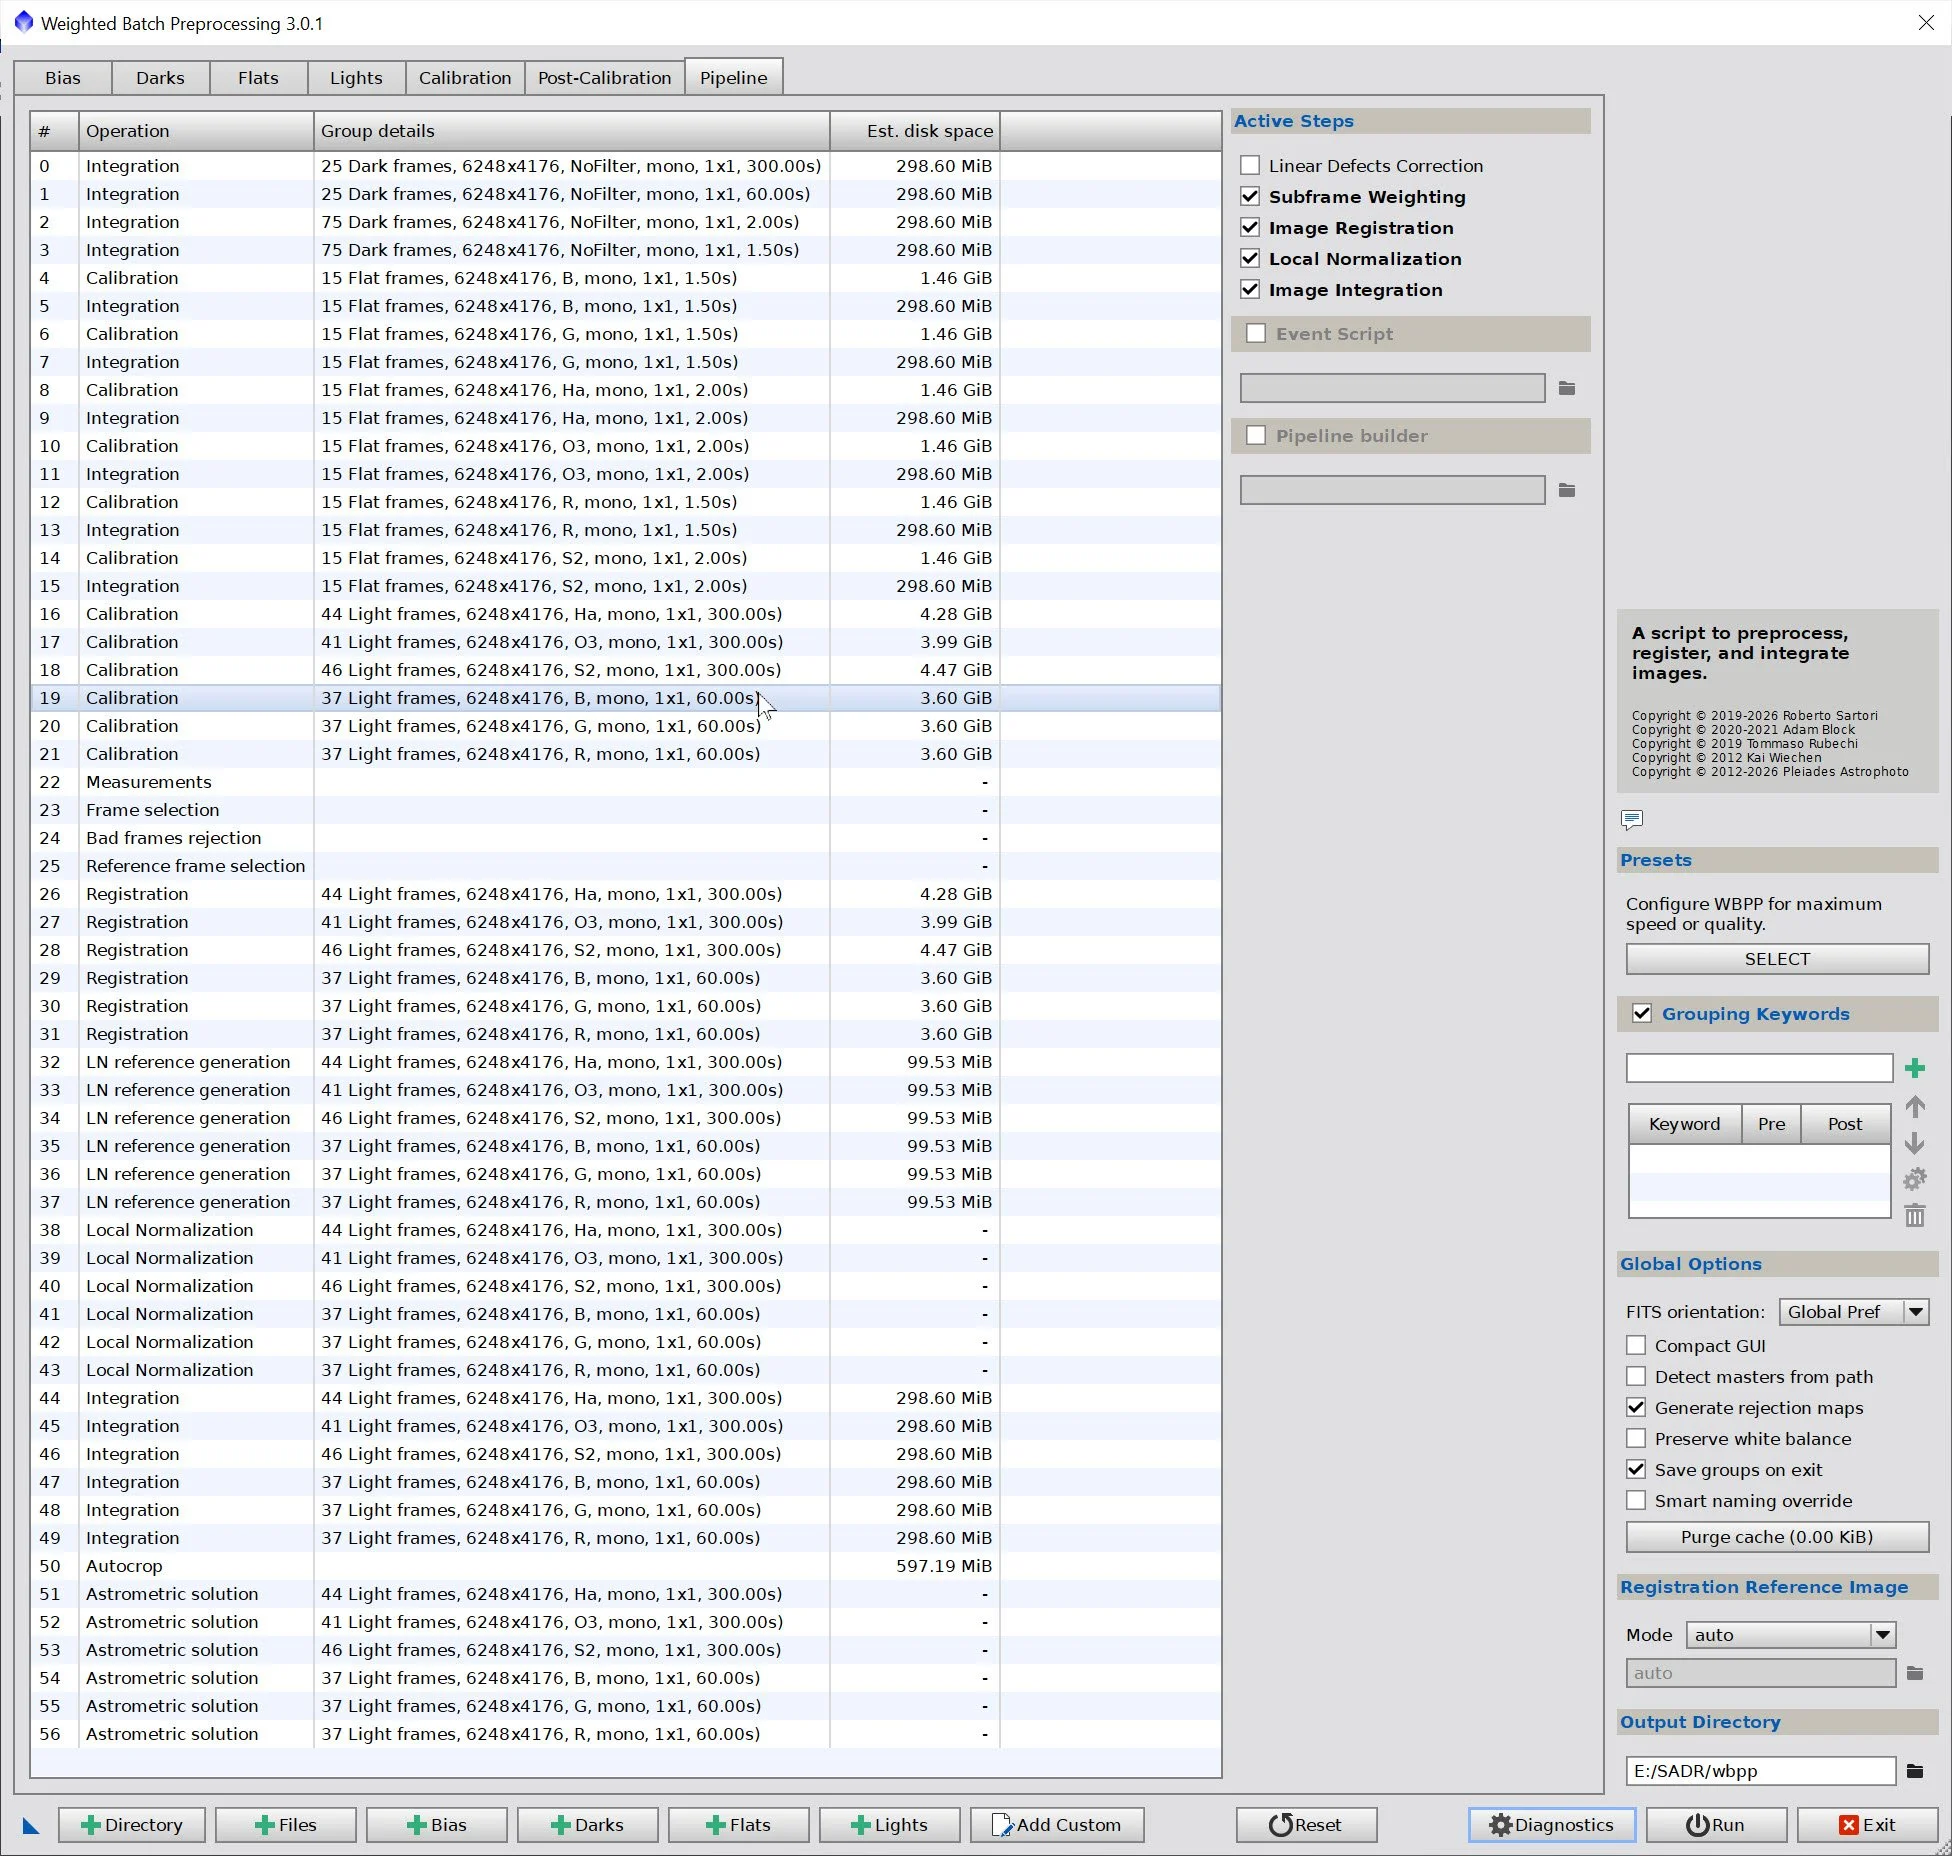
WBPP ran for 1:52. The summary screen was empty and displayed errors, but they did not appear to affect the output; the masters looked great.
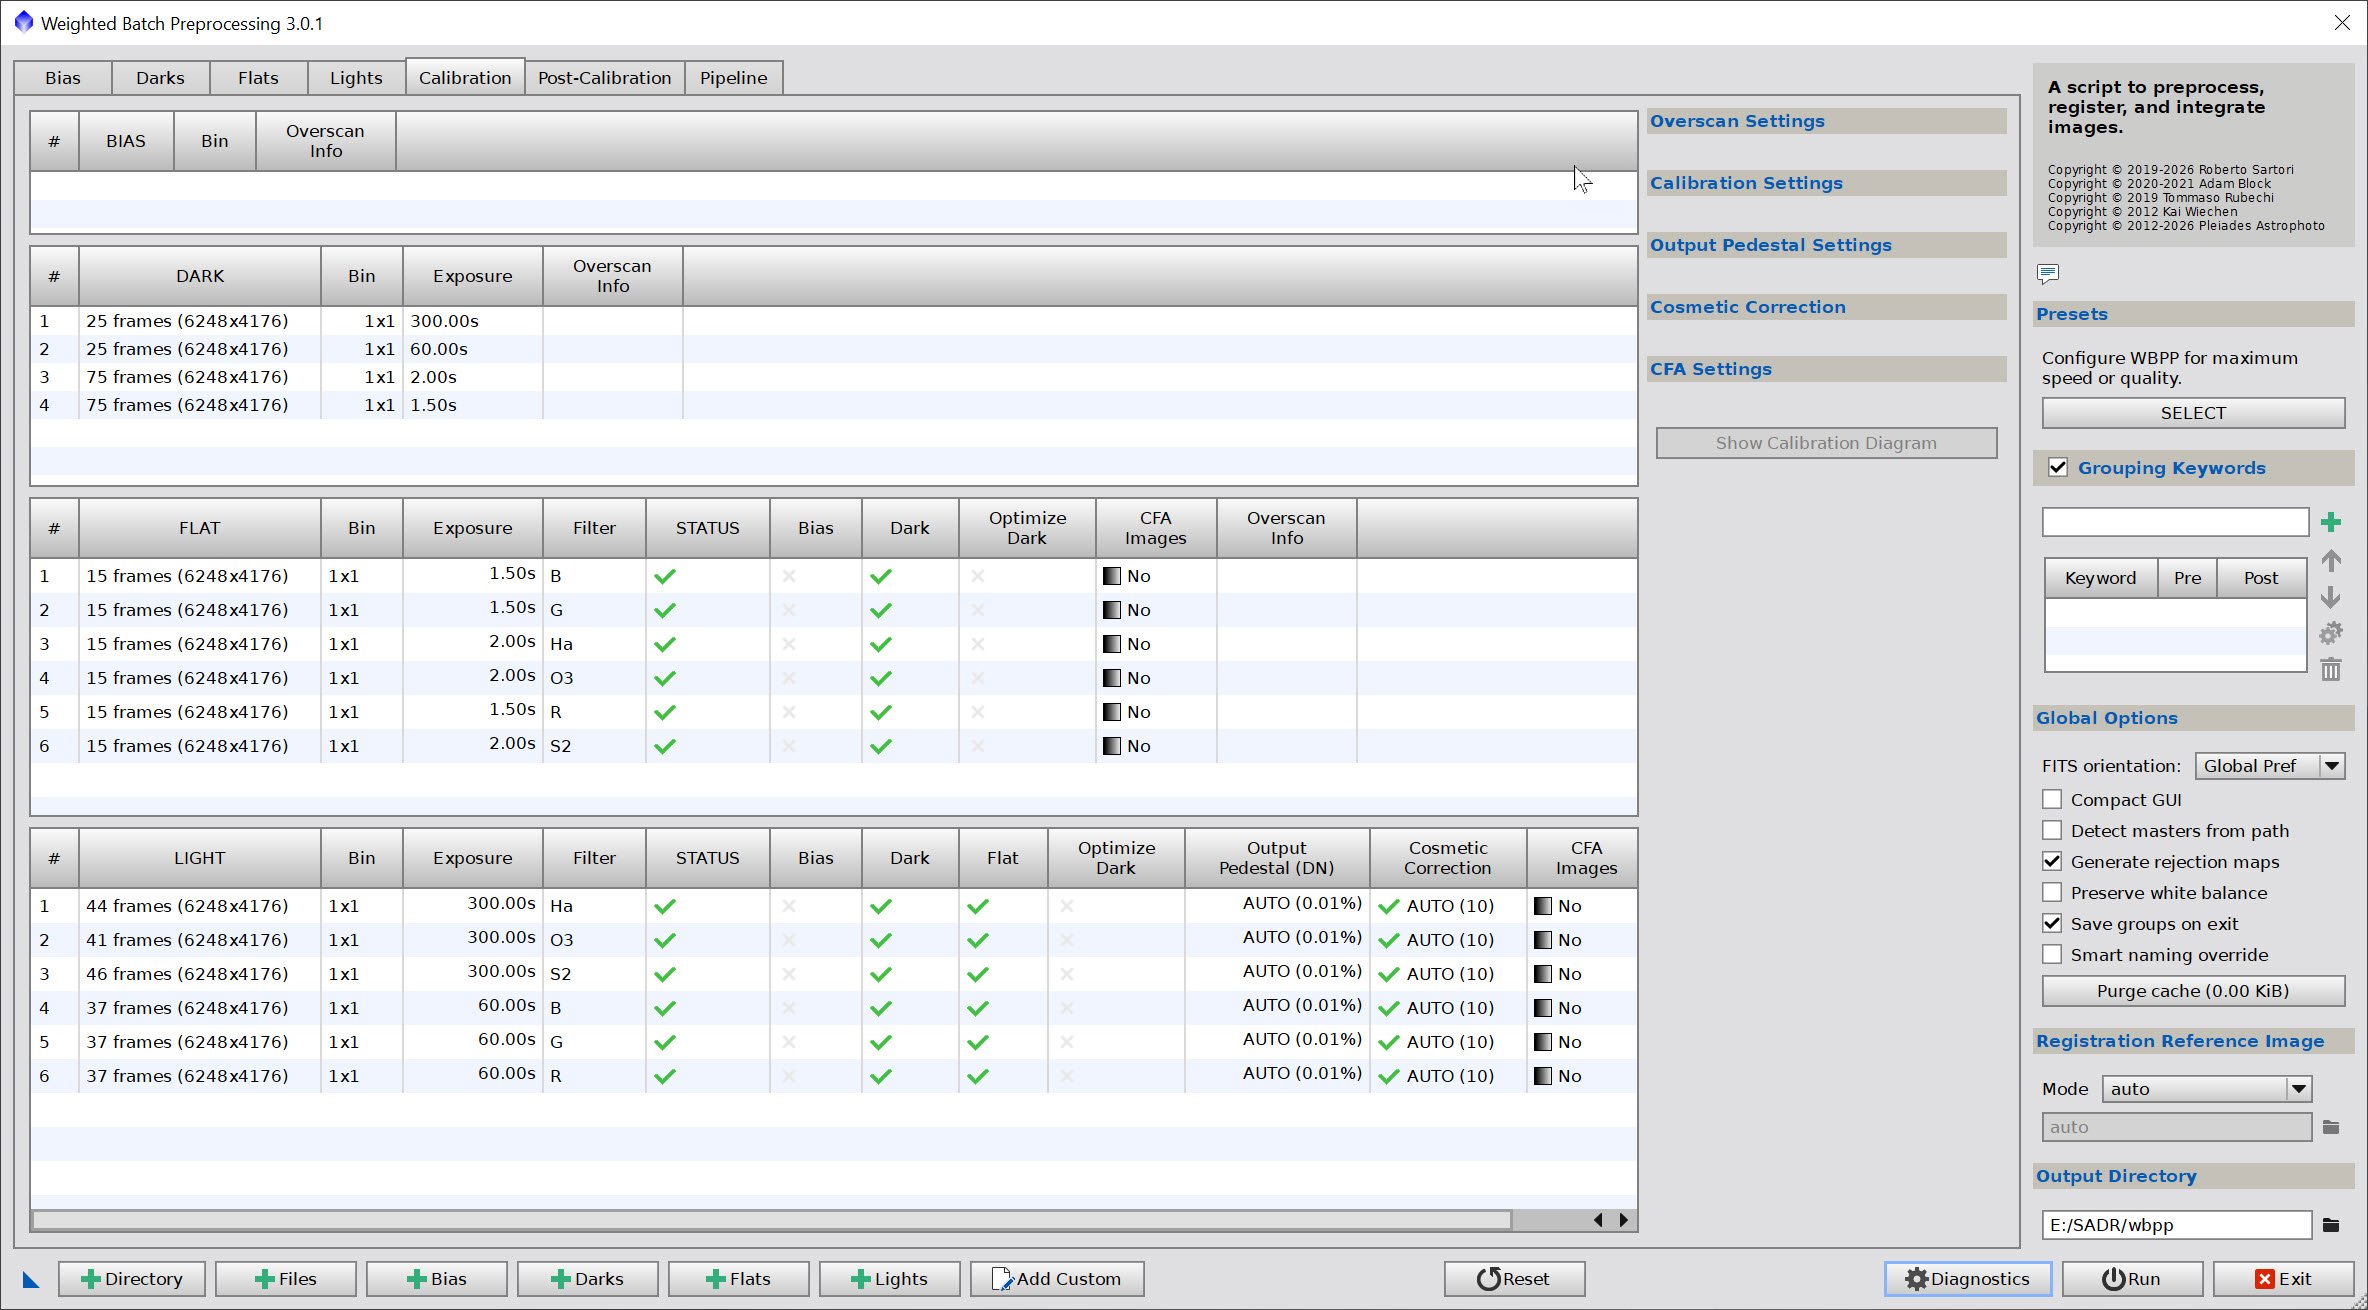
WBPP Calibration View
WBPP Post Calibration View
WBPP Pipeline View
3. Load Master Images and Create Color Images
Load all master images and rename them.
Using ChannelCombination, create the Master SHO and RGB color images
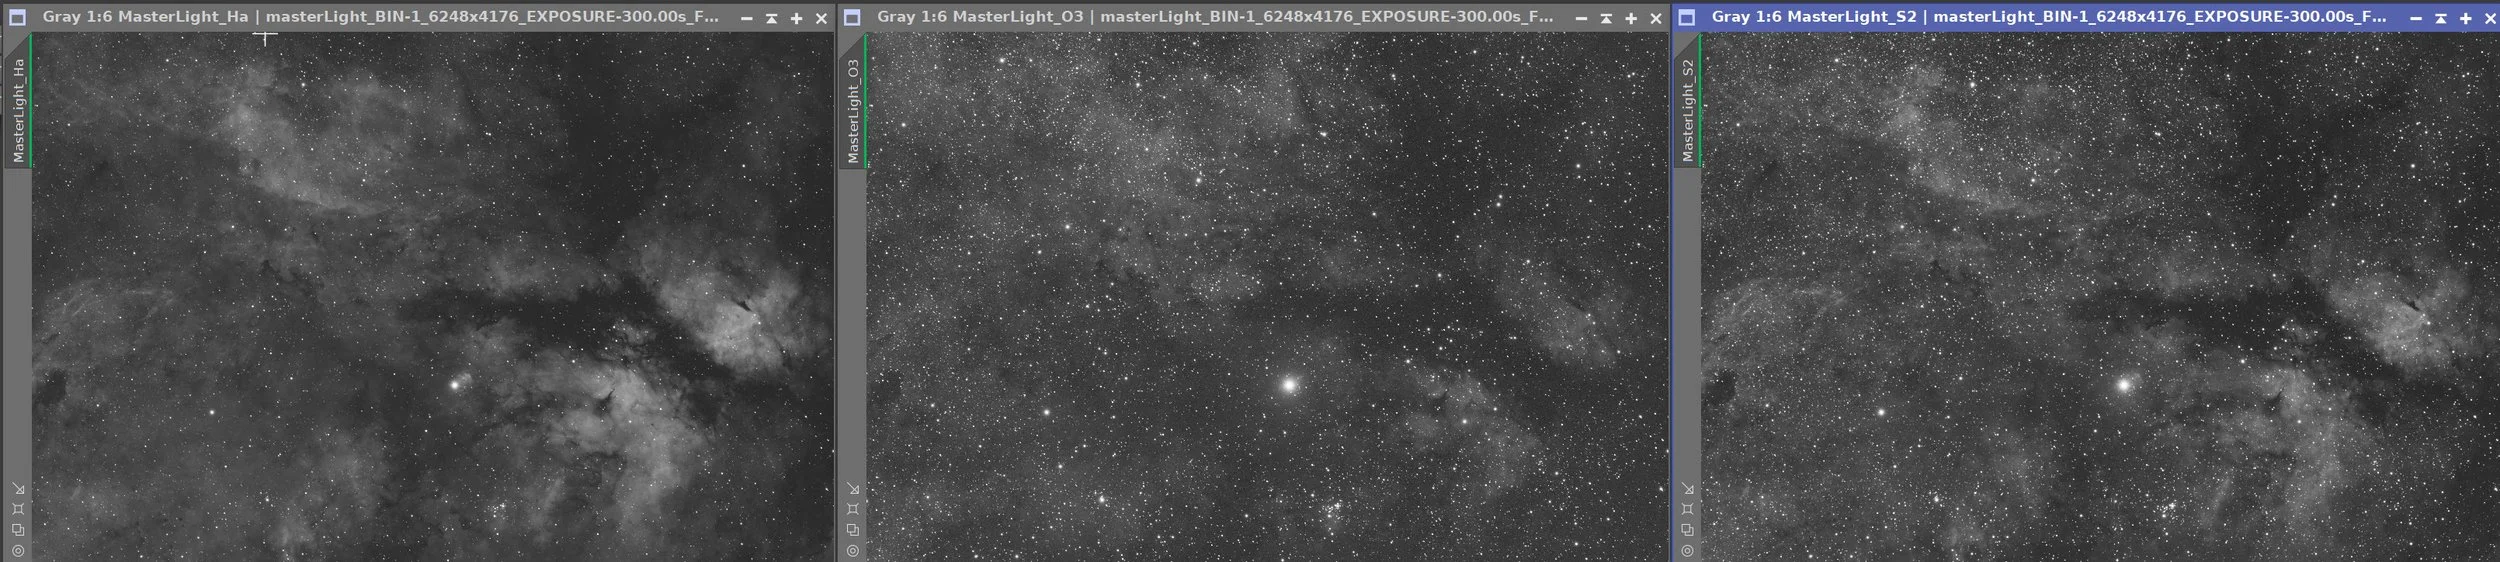
Master Ha, OIII, and SII Images
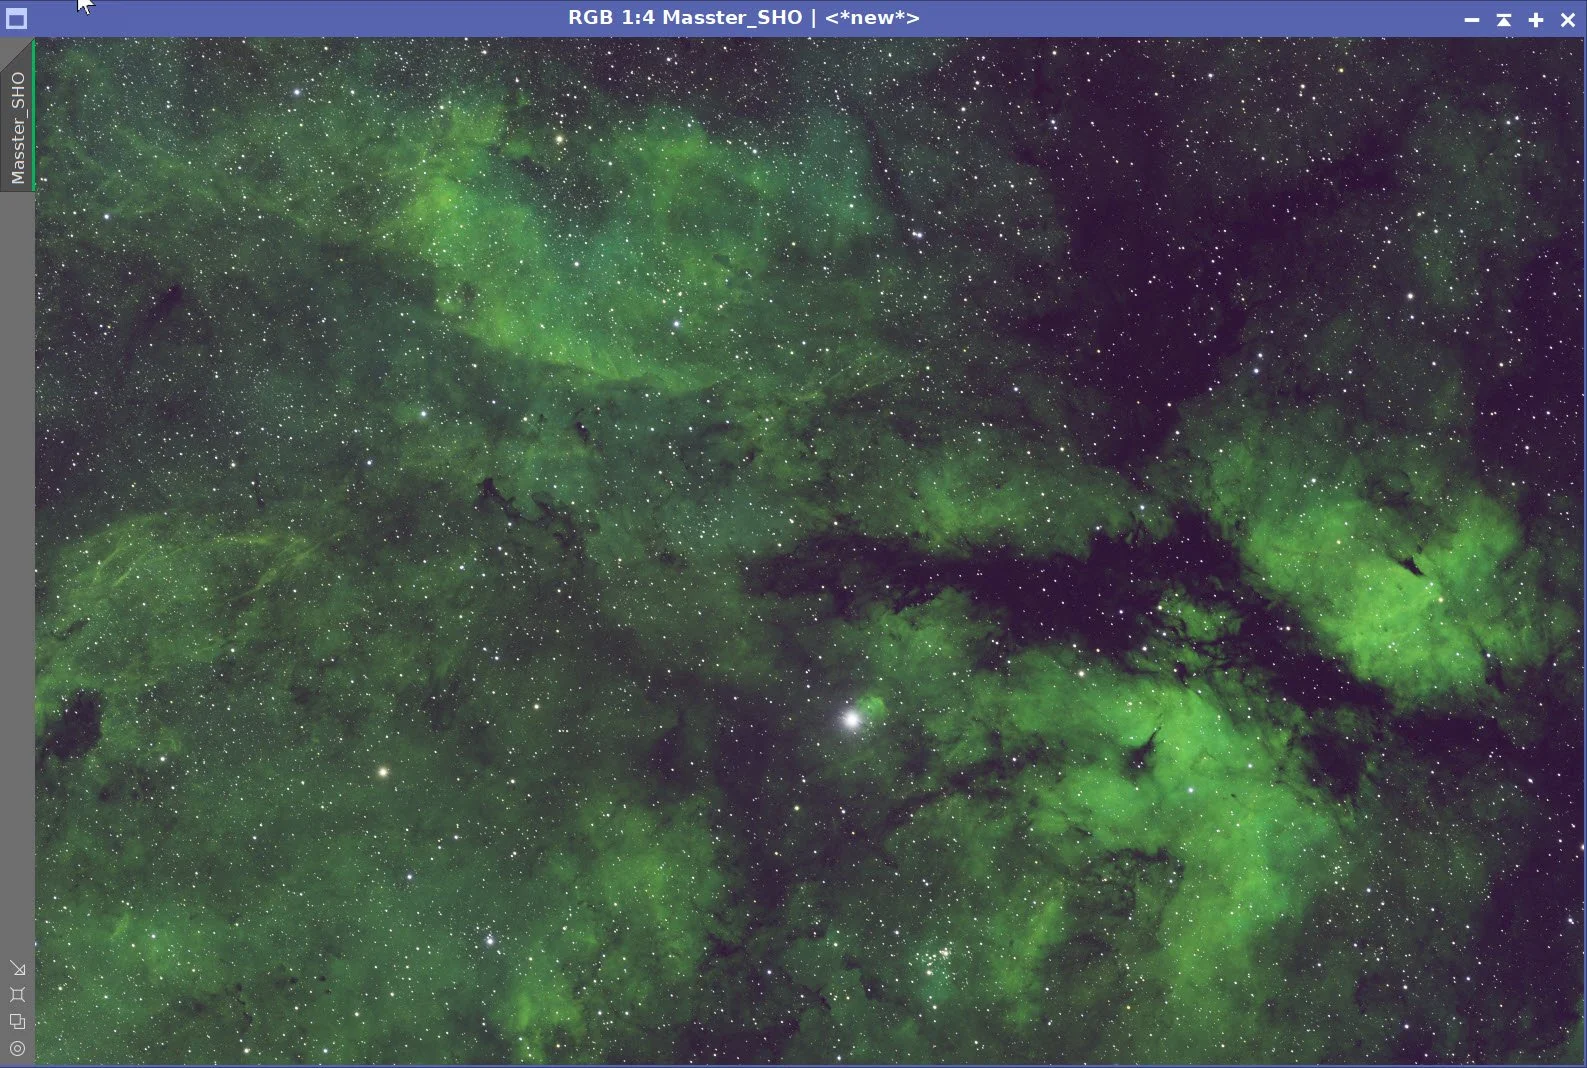
Master SHO image.
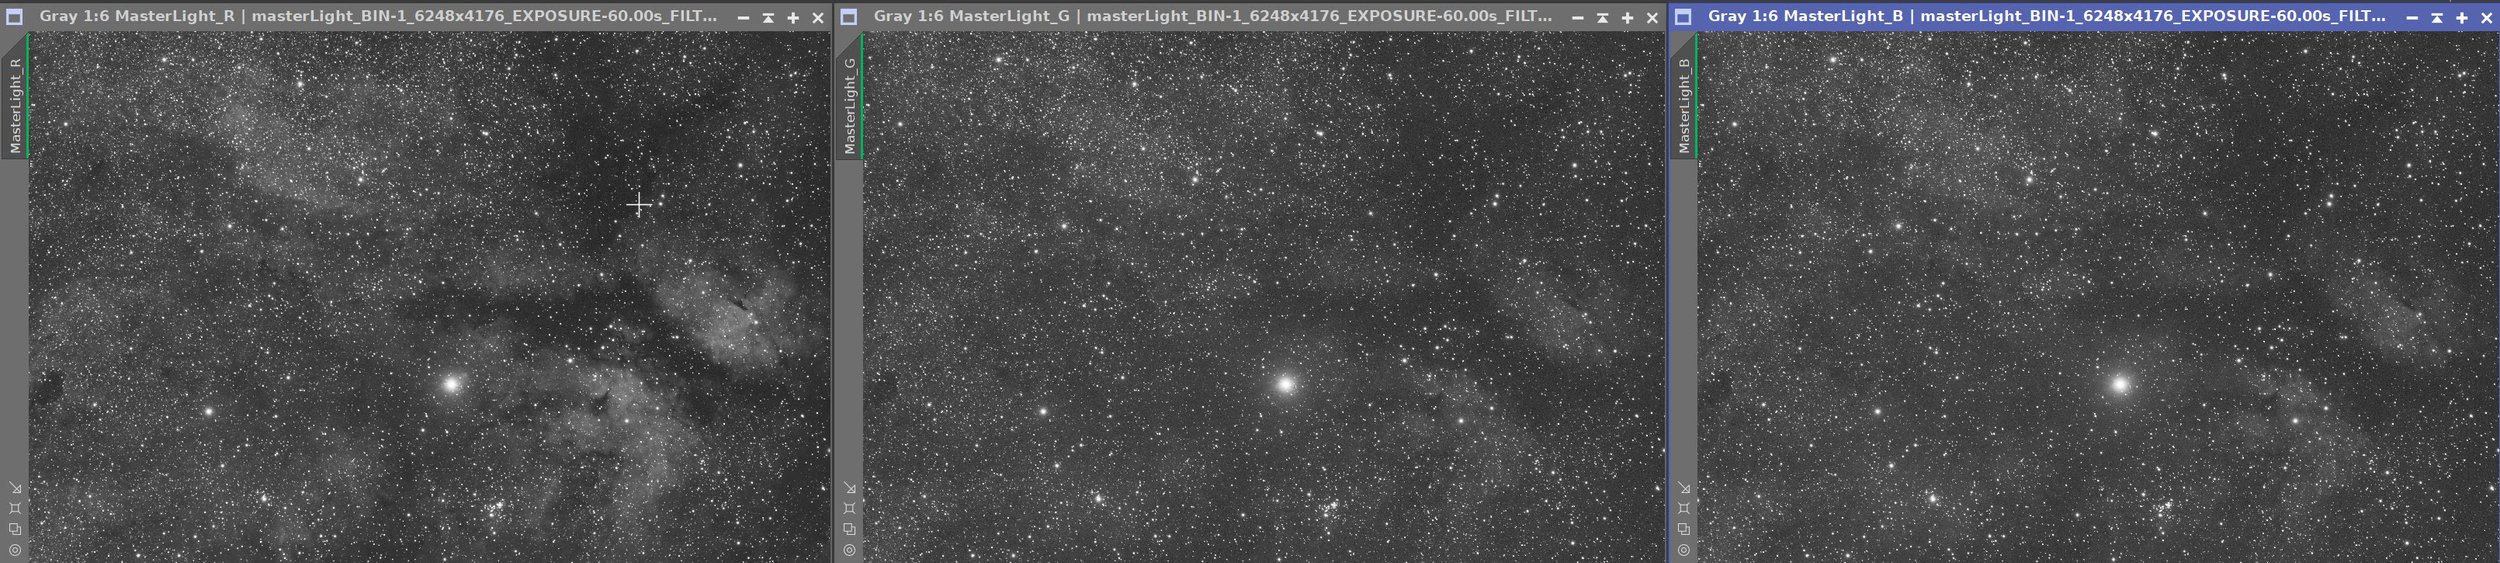
Master R, G, and B images
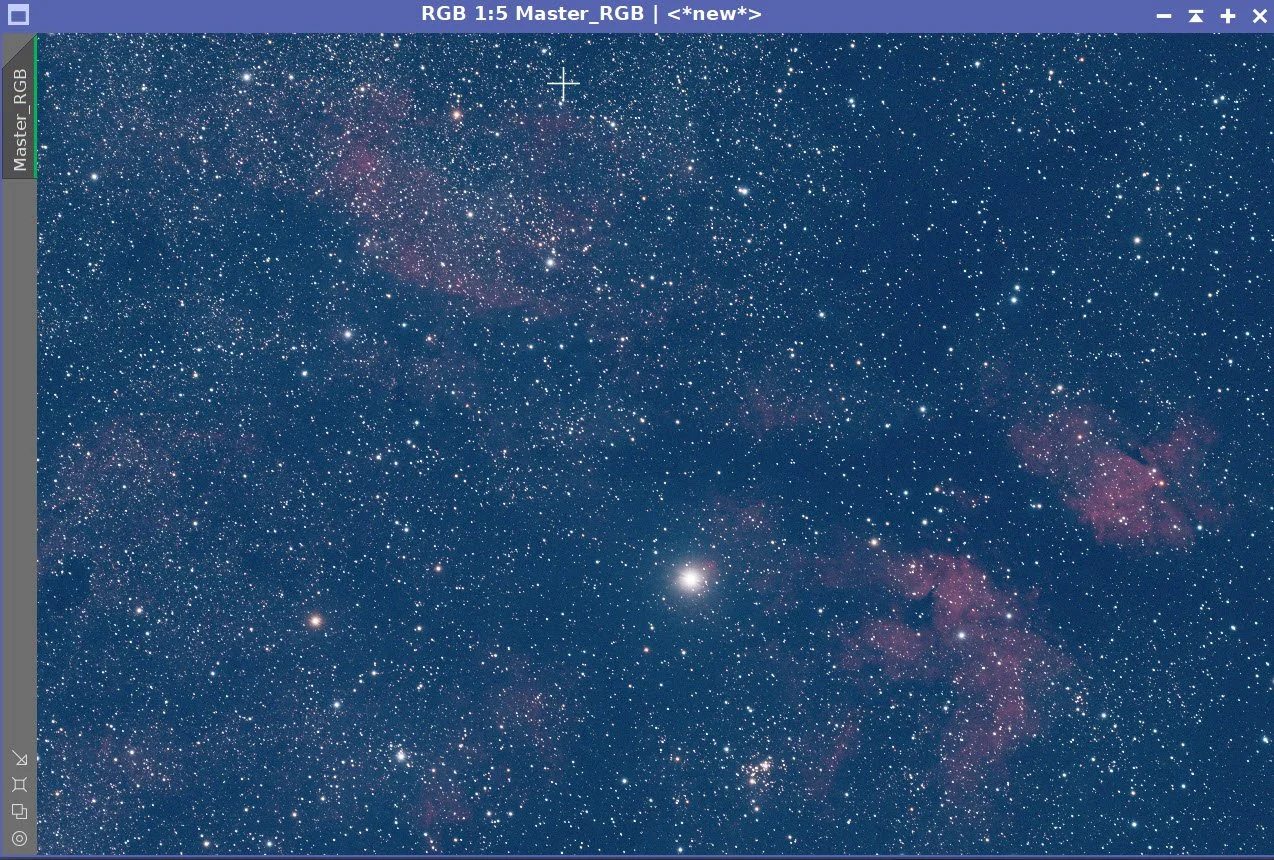
Master RGB color image.
4. Initial Process of Linear SHO data
There were no obvious gradients in the Master SHO image, so I did not run DBE.
Run BXT - correct only. This cleans up the stars at the corners. Not much to do in this image as the scope is very crisp.
Run PFSImage script to measure star sizes. X = 2.49 Y = 2.32. This will influence the values used in BXT.
Run Full BXT - I am using an enhanced set of values to shrink stars more. These are about double the measured star sizes. See the BXT Panel Snapshot below.
Run NXT V3 - see params from snapshot below.
Run SXT and don’t save the SHO stars. I will be using RGB stars so there is no need to keep them.
Run NarrowbandNormalization (see screenshot below for parameters used)
Measuring Star Sizes with PFSImage Script (click to enlarge)
BXT Settings Used. (click to enlarge)
NXT Panel used. (click to enlarge)
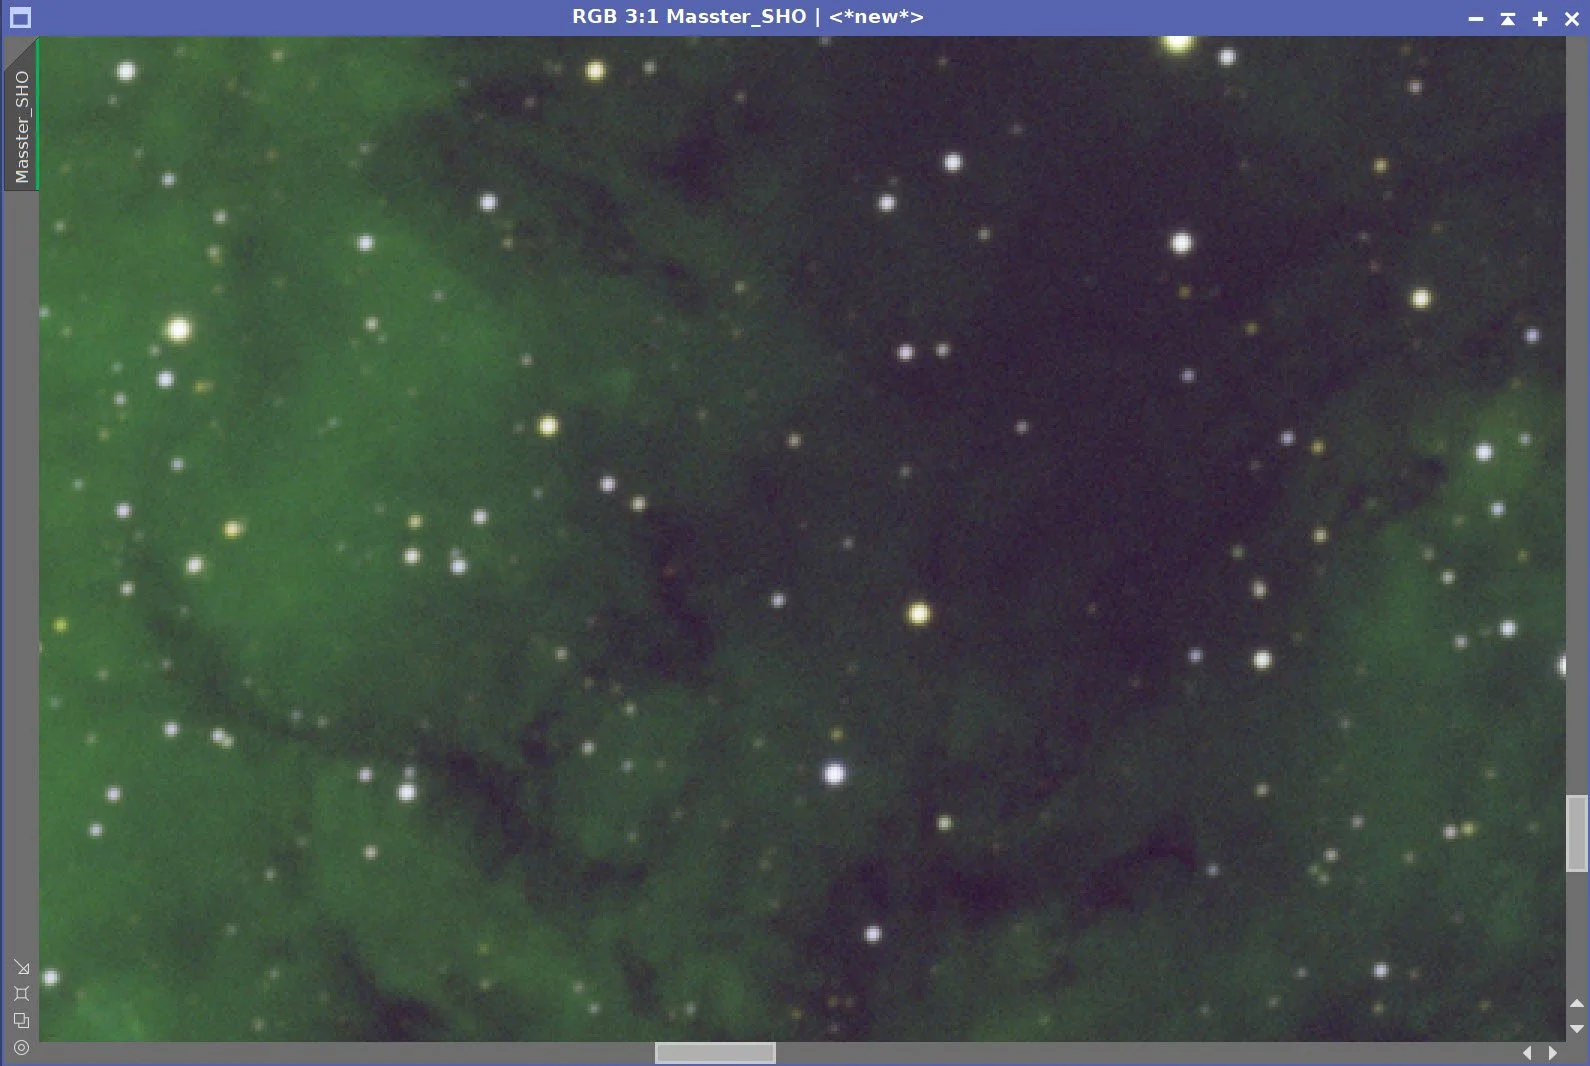
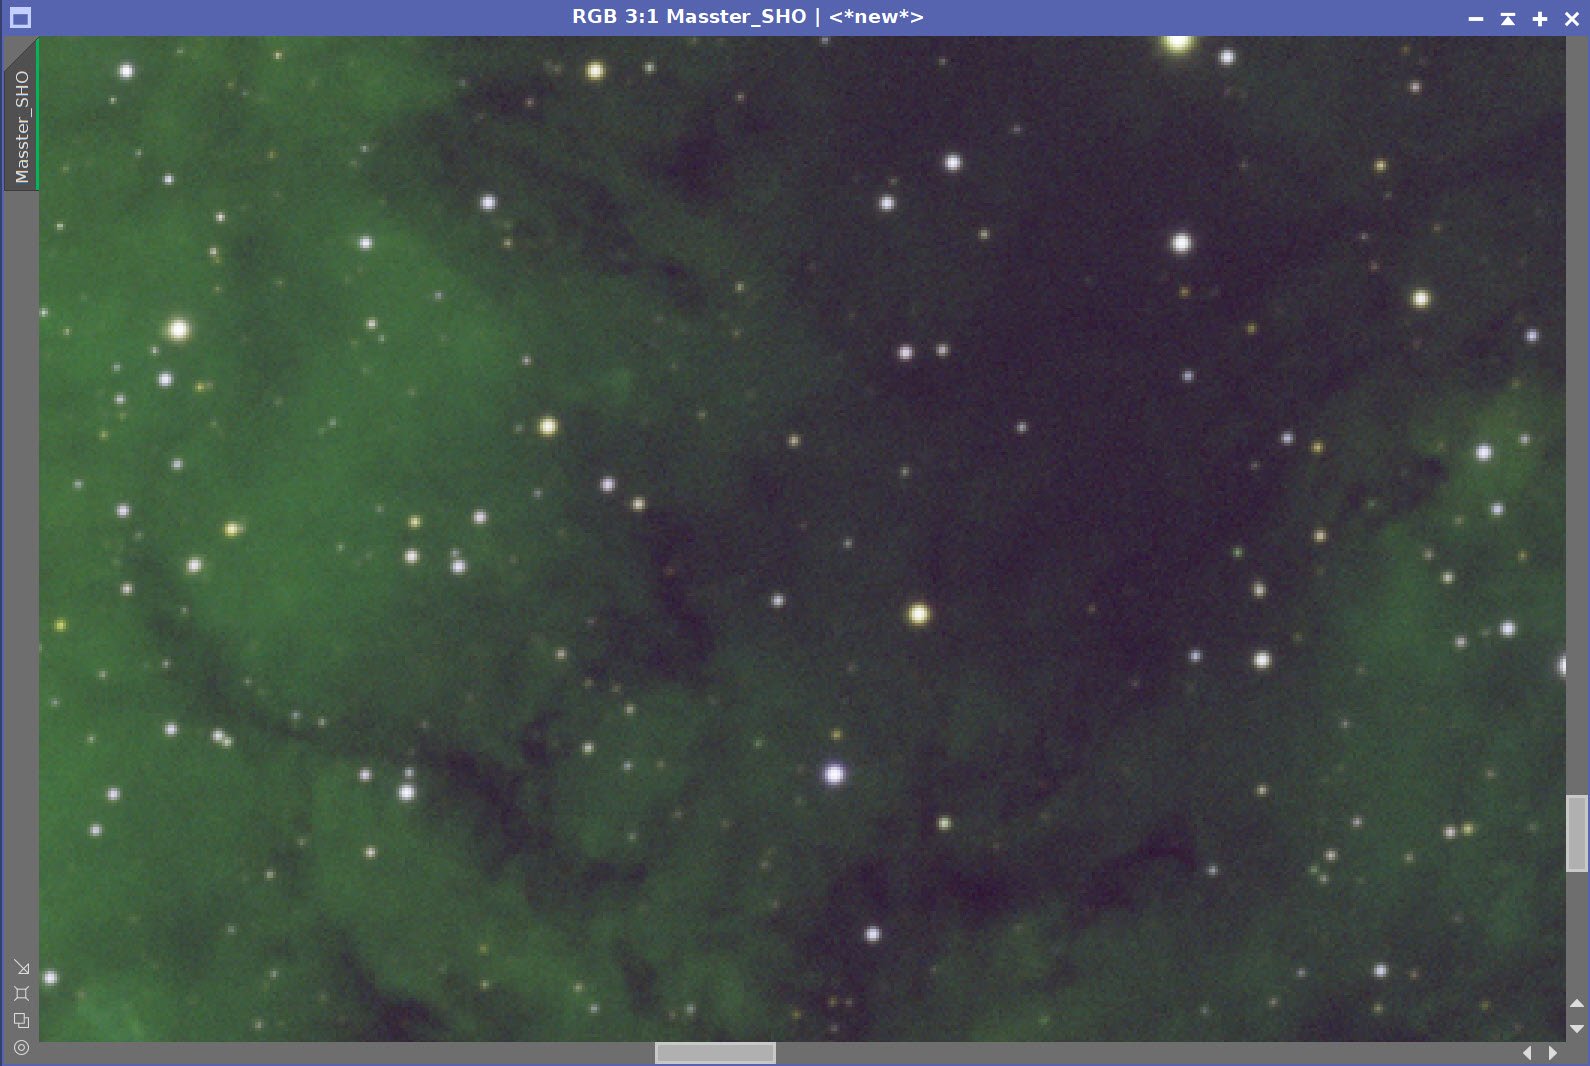
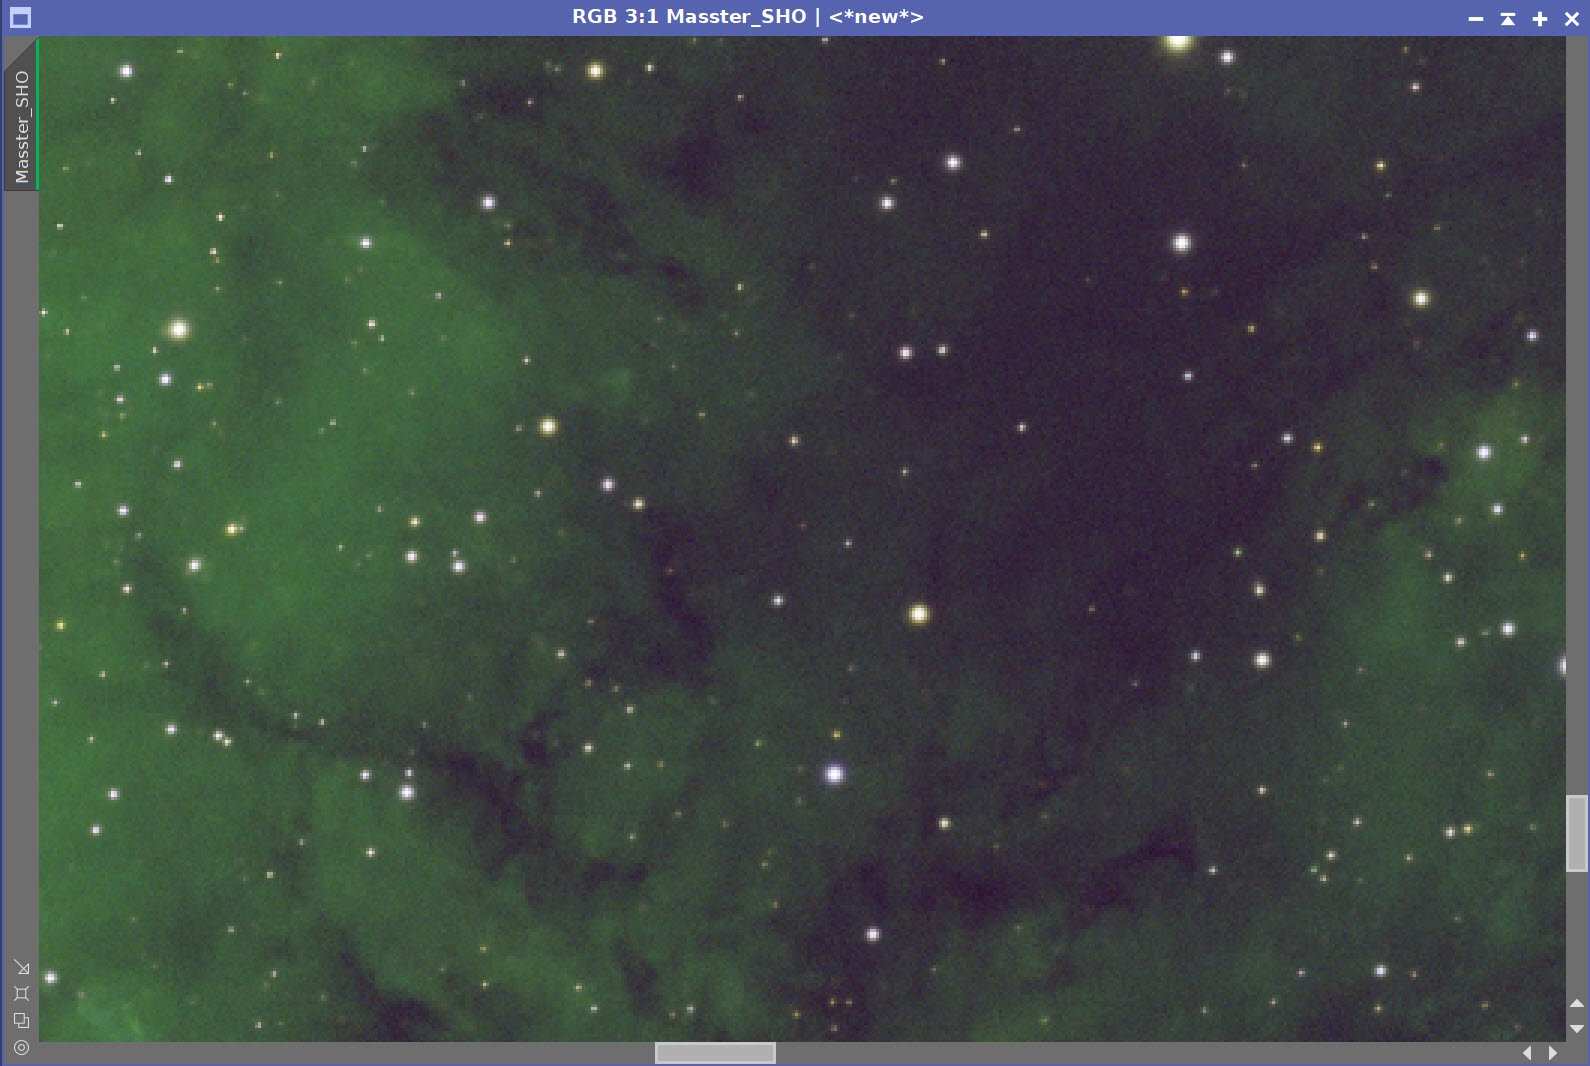
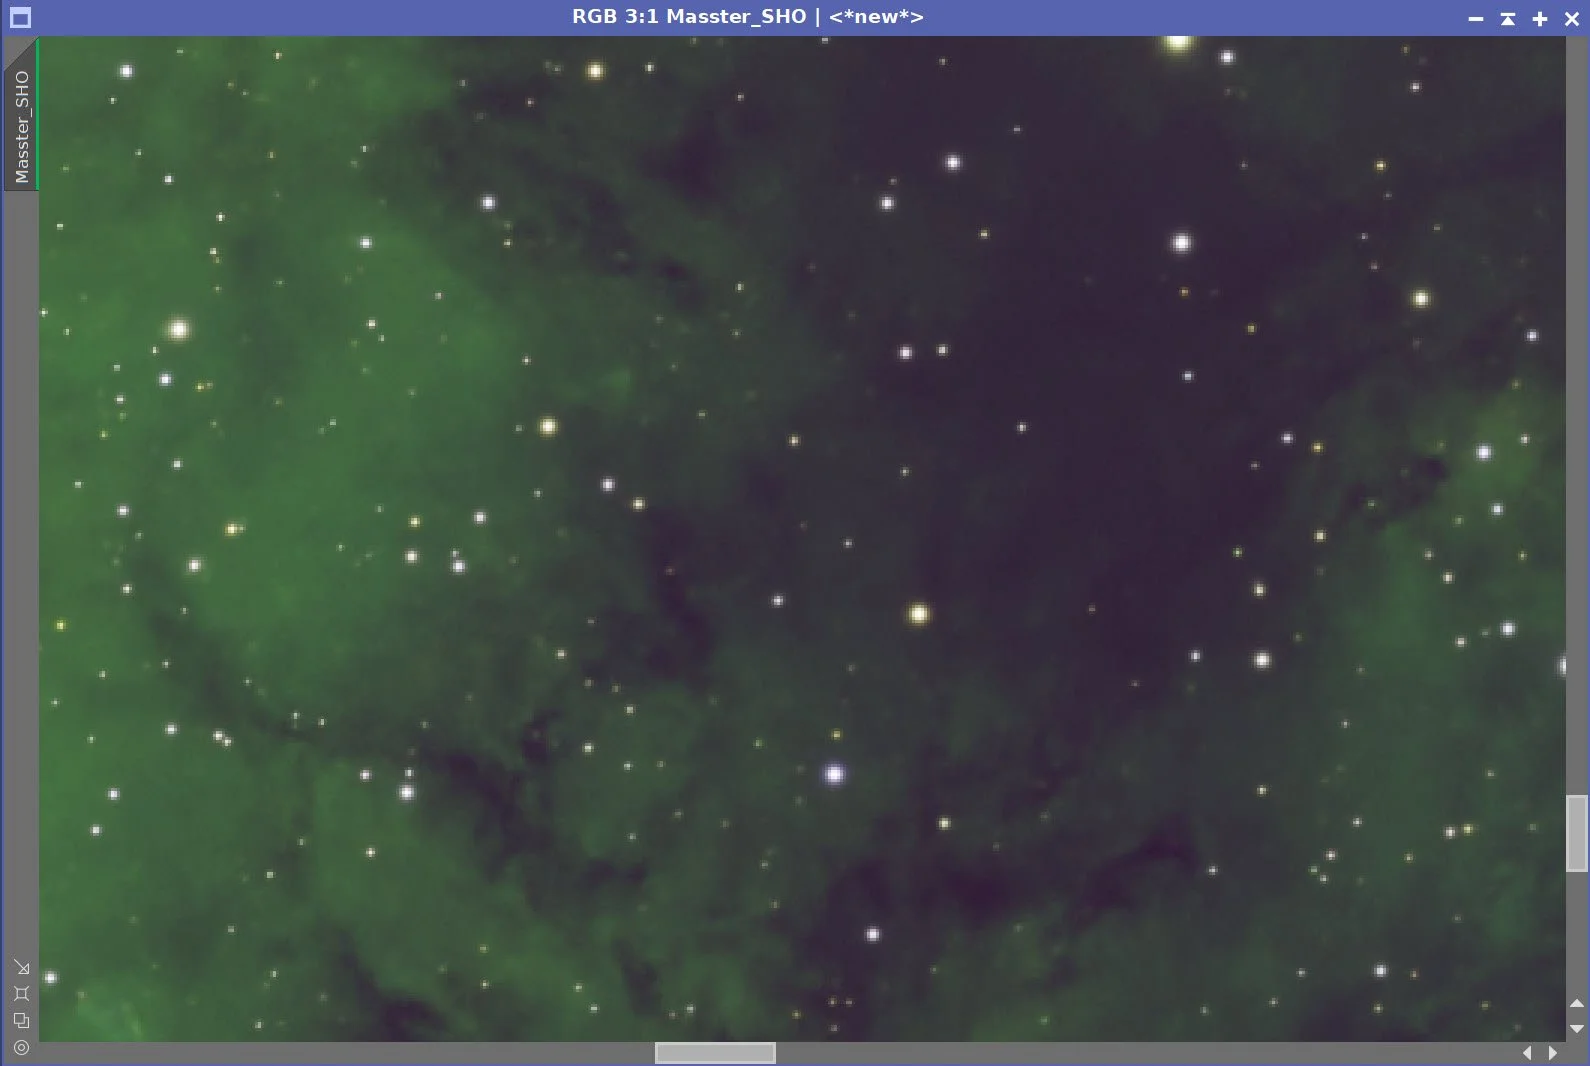
Master SHO Before BXT Correct Only, After BXT Correct Only, After BXT Full, After NXT
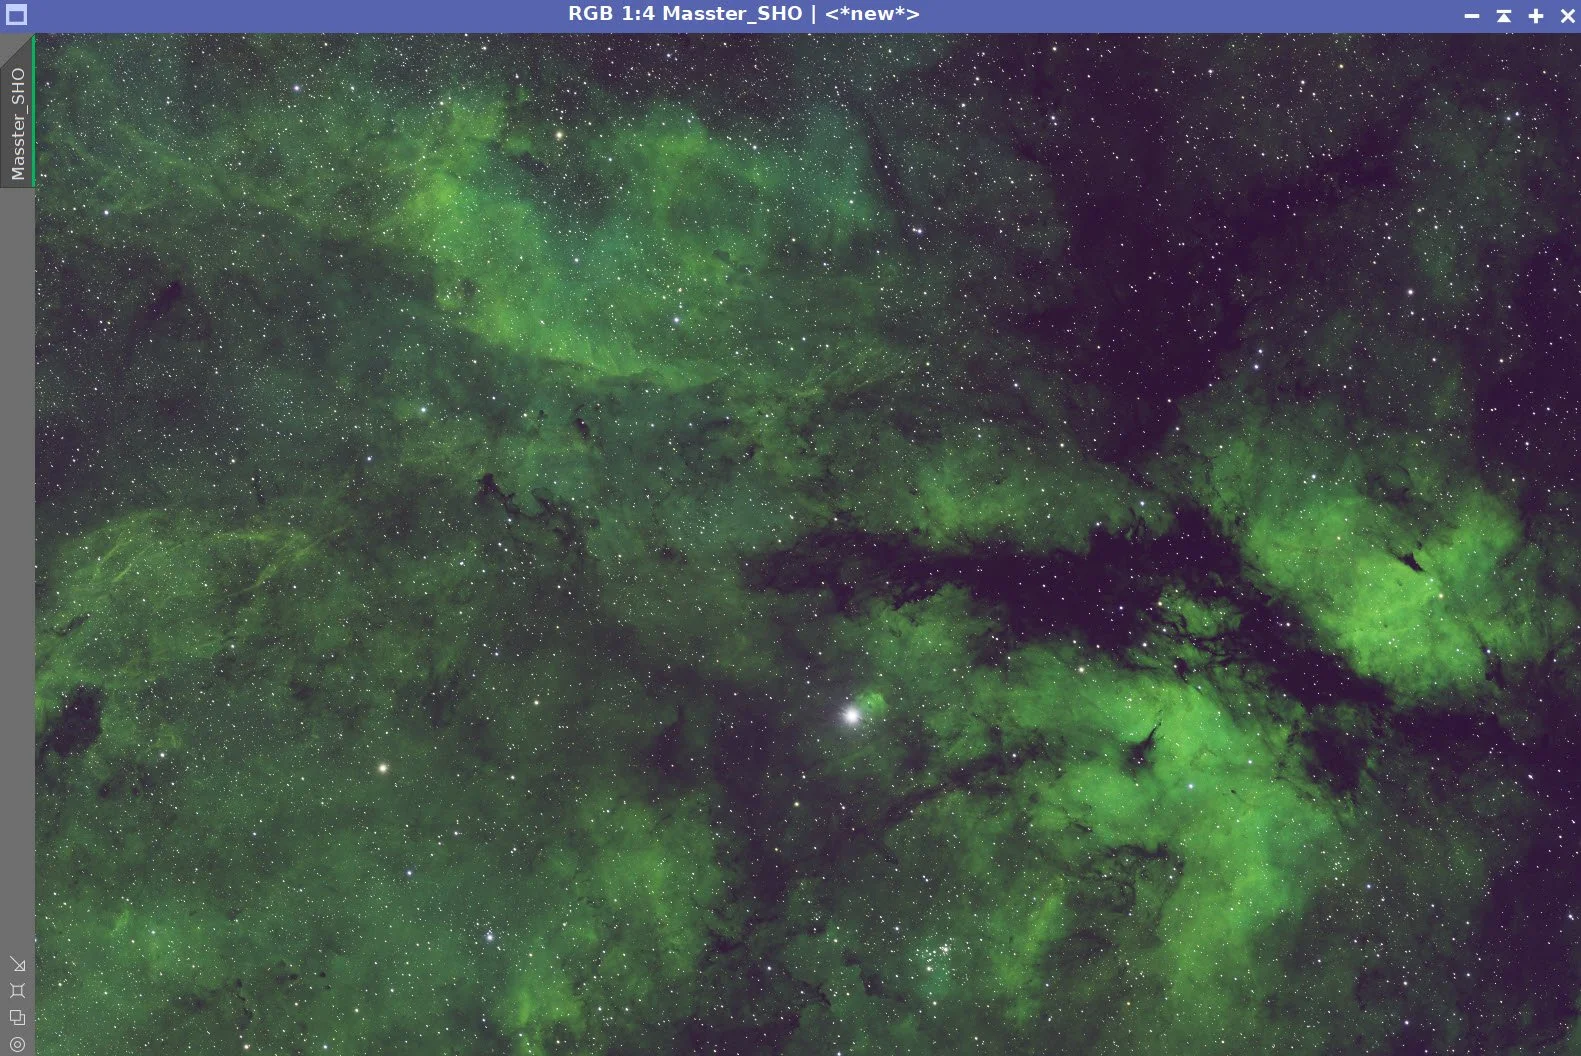
Final Master SHO Image
Master SHO Starless Image (click to enlarge)
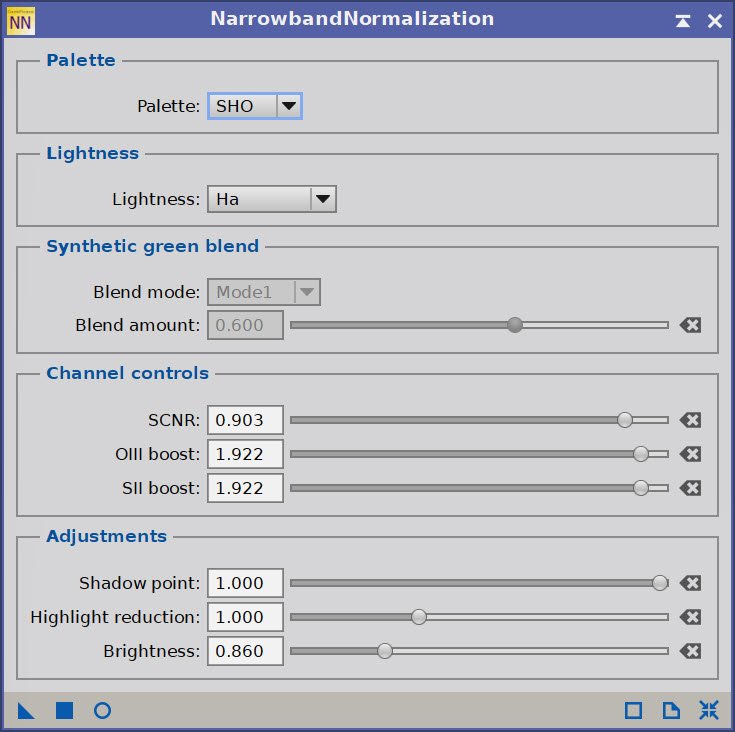
NarrowbandNormalization Parameters used.
After NBNormalization (click to enlarge)
5. Process the Linear RGB Data
Run DBE for the RGB linear image. Use subtraction for the correction method. Choose a sampling plan that avoids the nebulae (see below)
Run BXT - correct only. This cleans up the stars at the corners. Not much to do in this image as the scope is very crisp.
Select a preview rectangle that samples the background sky, and then set up and run SPCC.
Use the Ideal curve
Use ZWO R, G, & B filter curves,
Run the PFSImage script to measure star sizes. X = 2.34, Y = 2.19. This will influence the values used in BXT.
Run Full BXT - I am using an enhanced set of values to shrink stars more. These are about double the measured star sizes. See the BXT Panel Snapshot below.
Run NXT V3 - see params from snapshot below.
Run SXT and don’t save the RGB starless image.
Master RGB DBE Sampling Plan (click to enlarge)
Before DBE (click to enlarge)
Master RGB after DBE (click to enlarge)
Master RGB Background subtracted (click to enlarge)
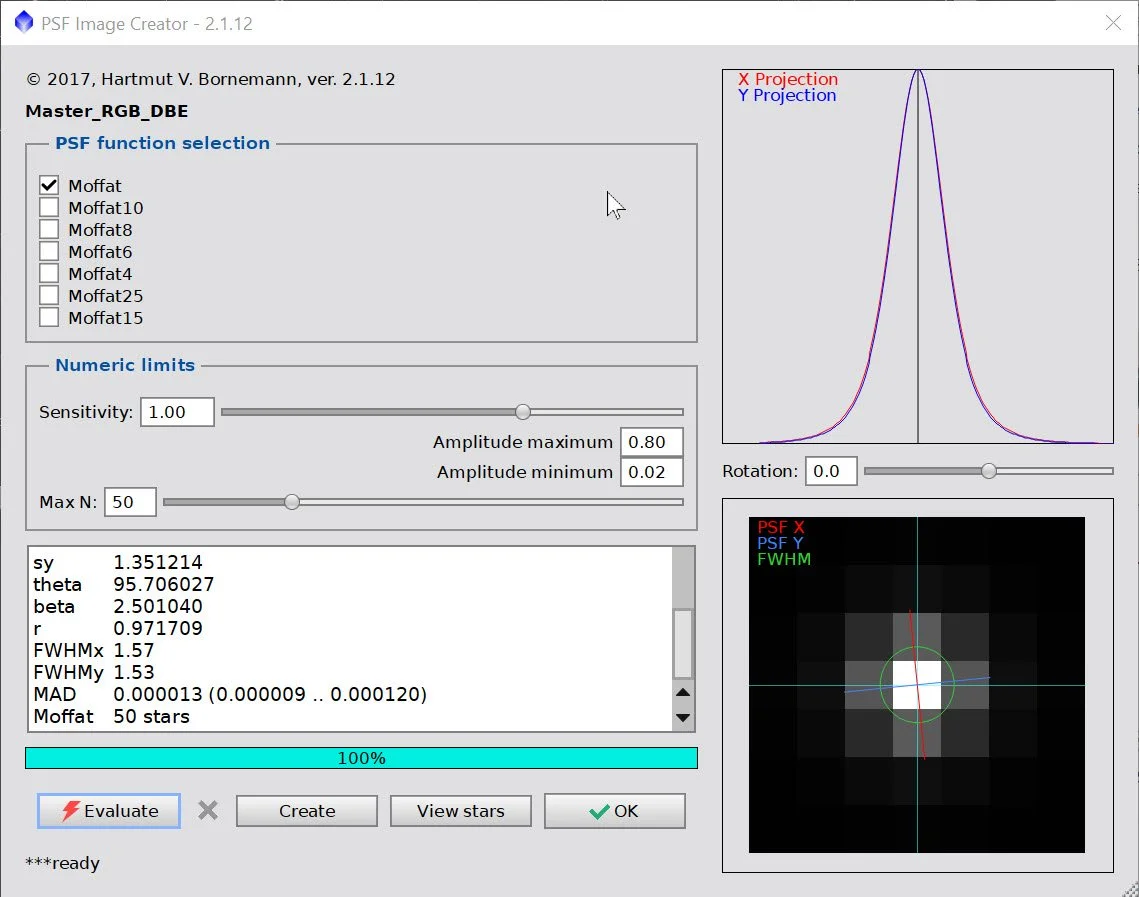
Measuring RGB star sizes.

Params used for BXT
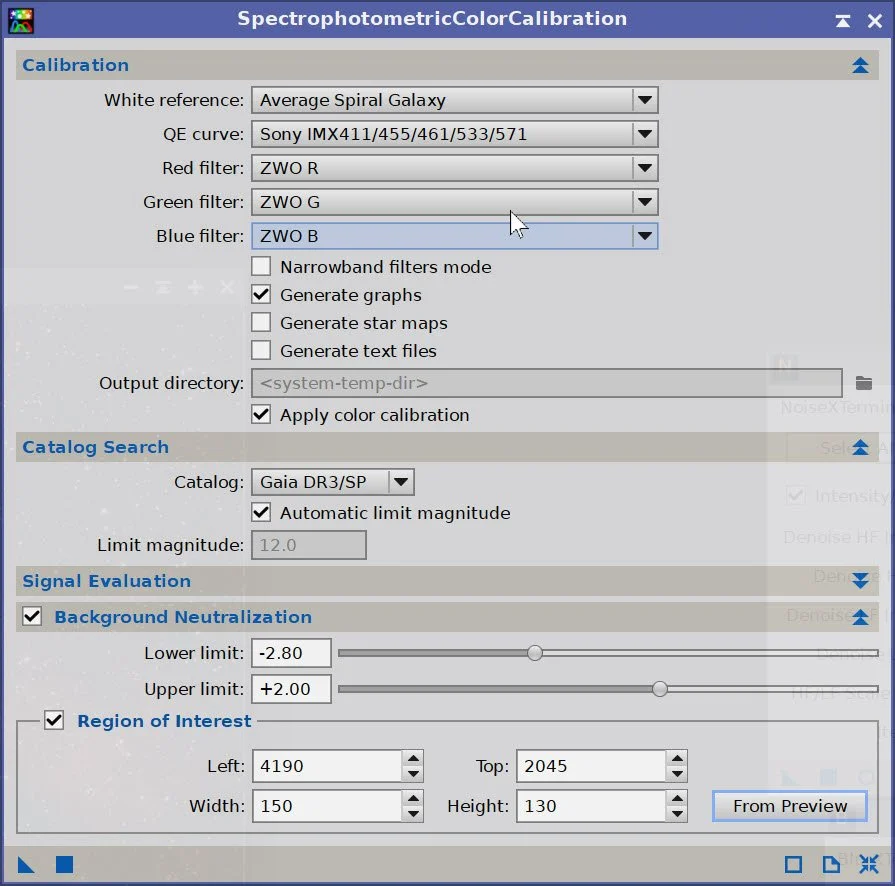
SPCC Panel settings.
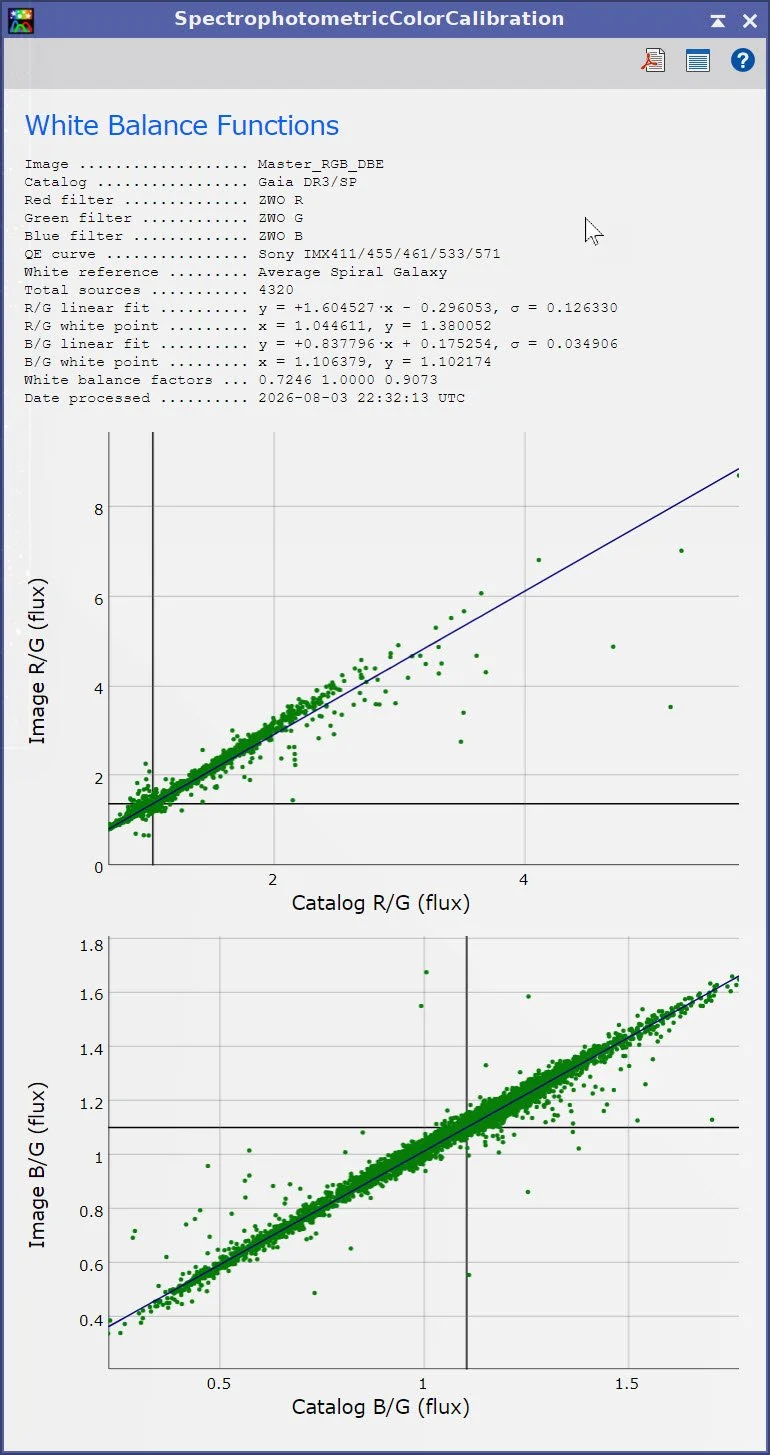
SPCC Regression Results.
Master-RGB Before SPCC (click to enlarge)
After SPCC (click to enlarge)
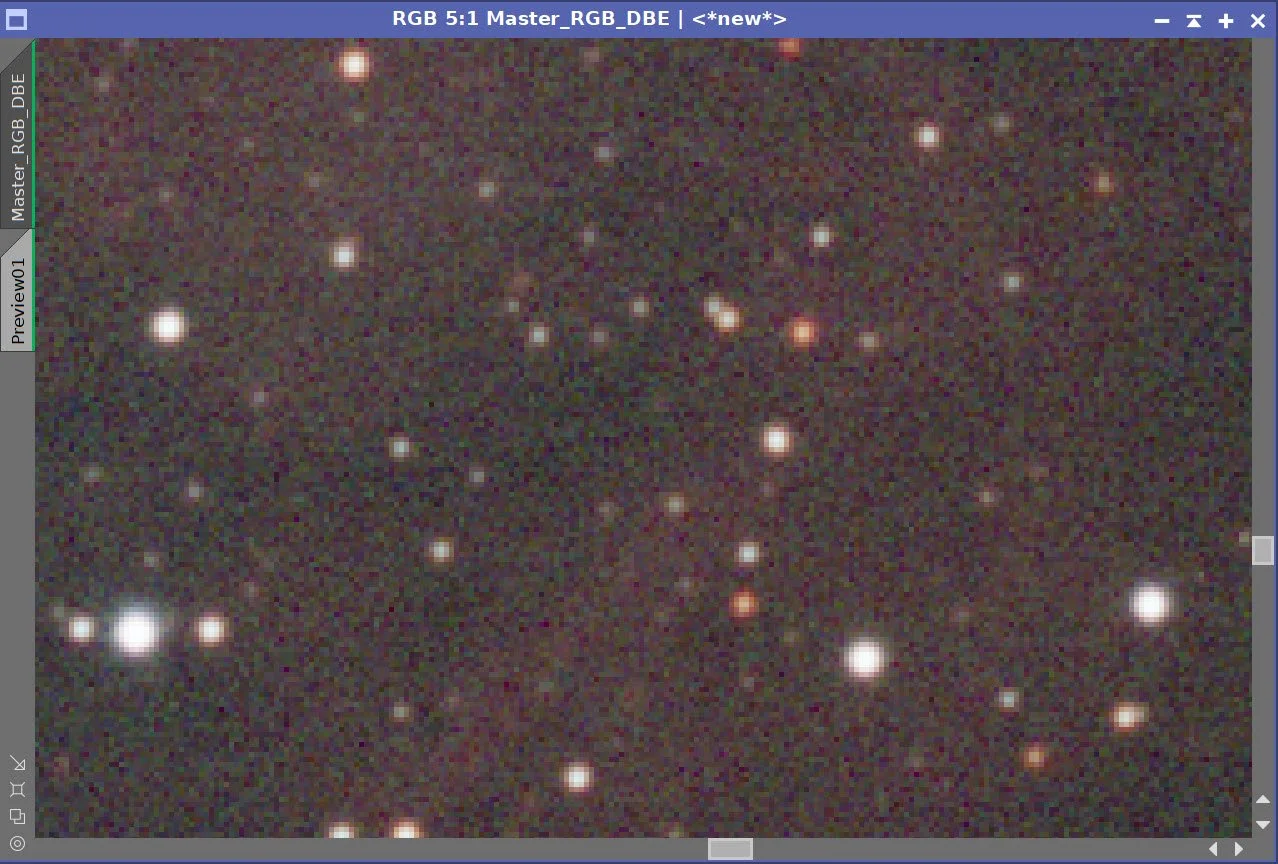
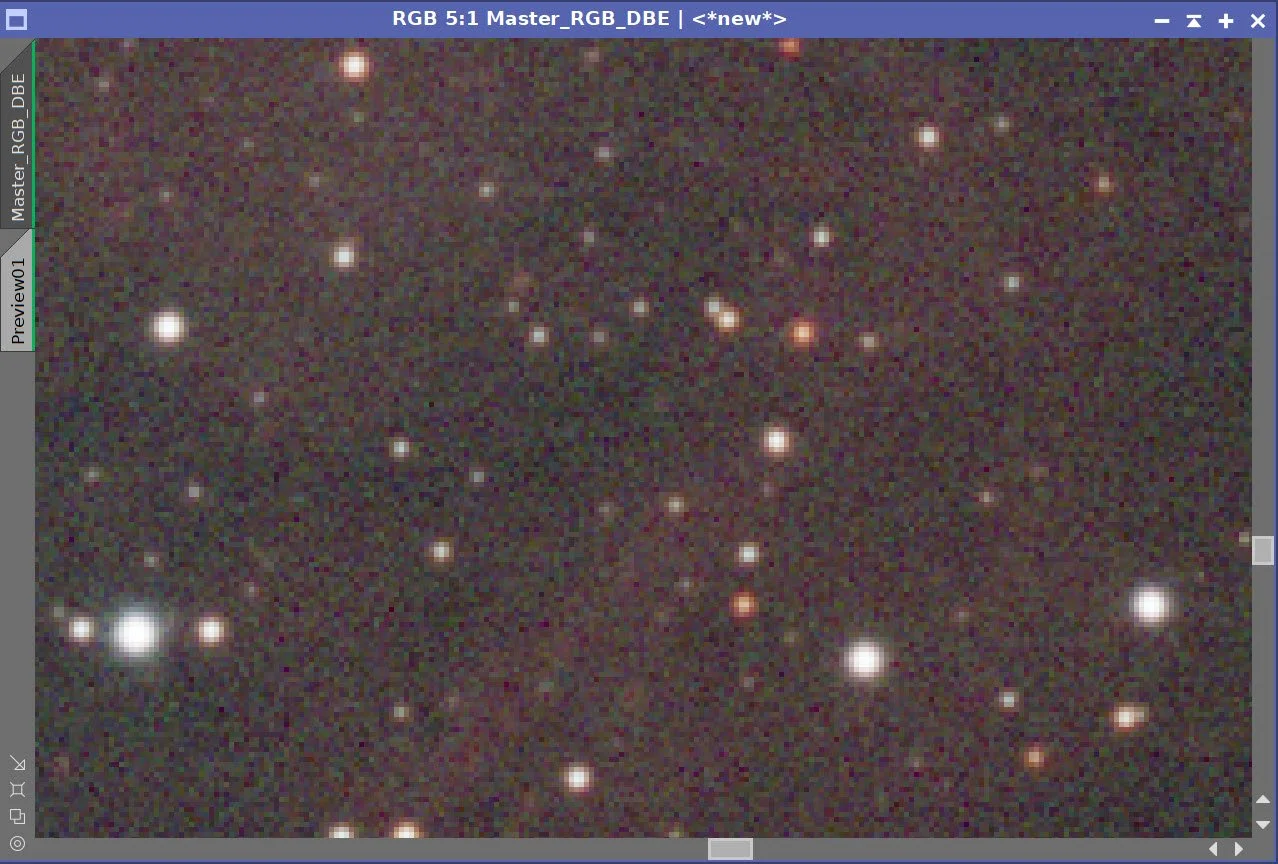
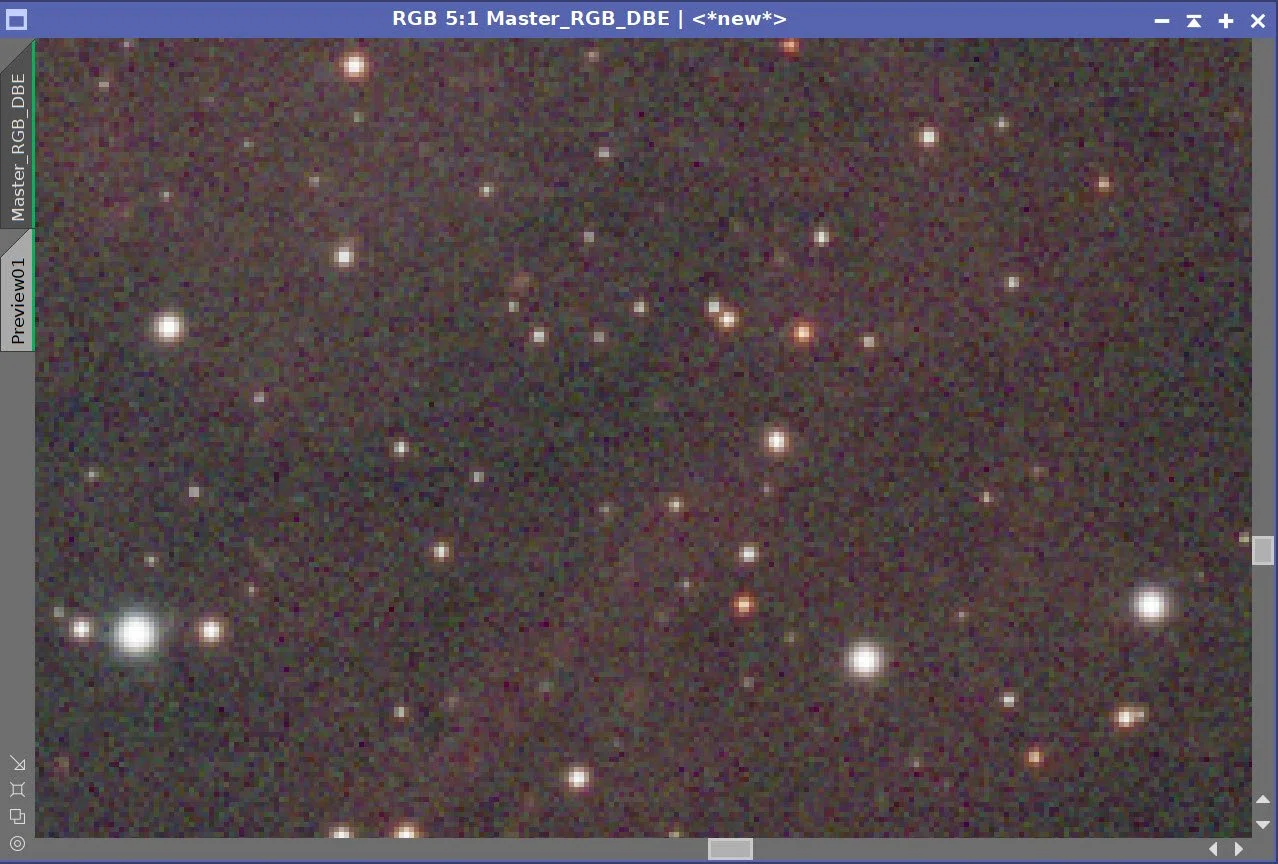
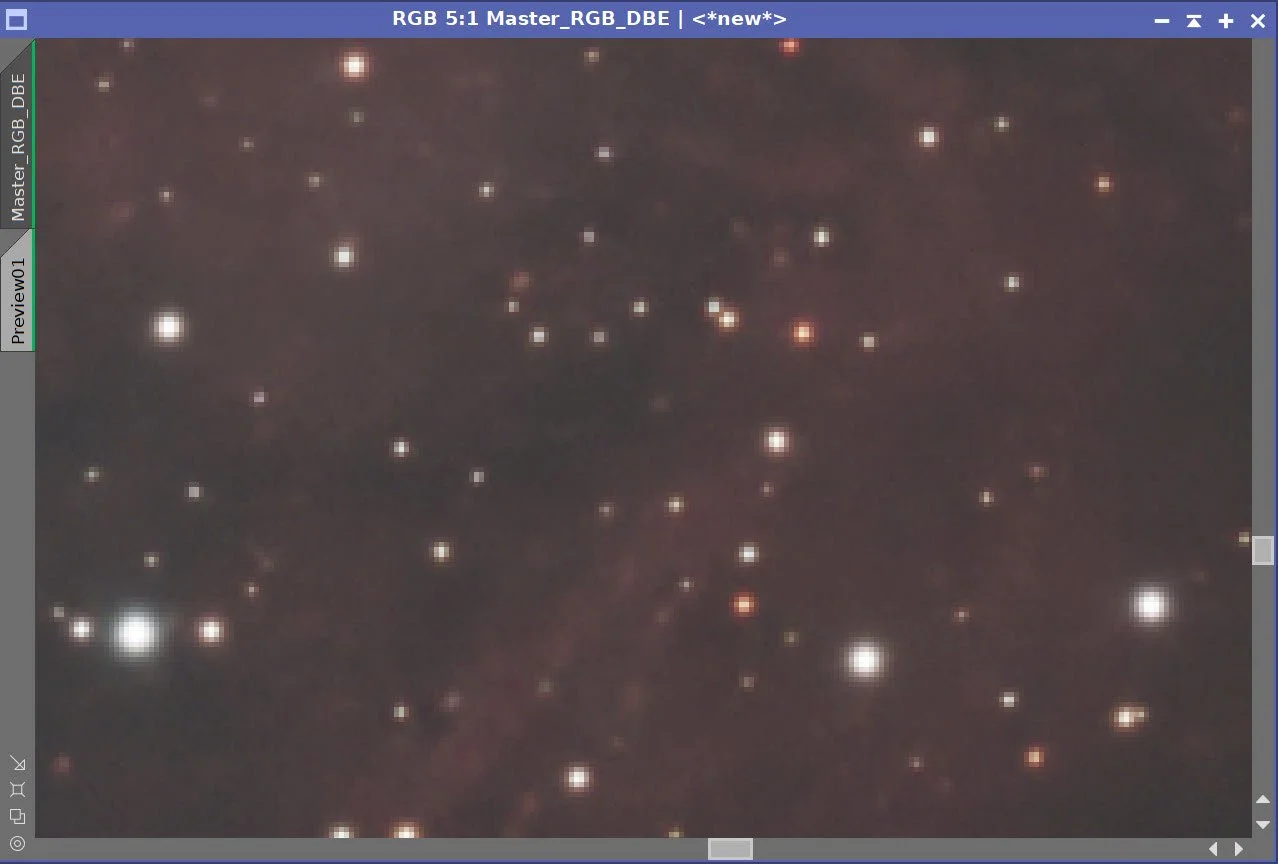
Master RGB before BXT Correct Only, After BXT Correct Only, After BXT Full, After NXT V3
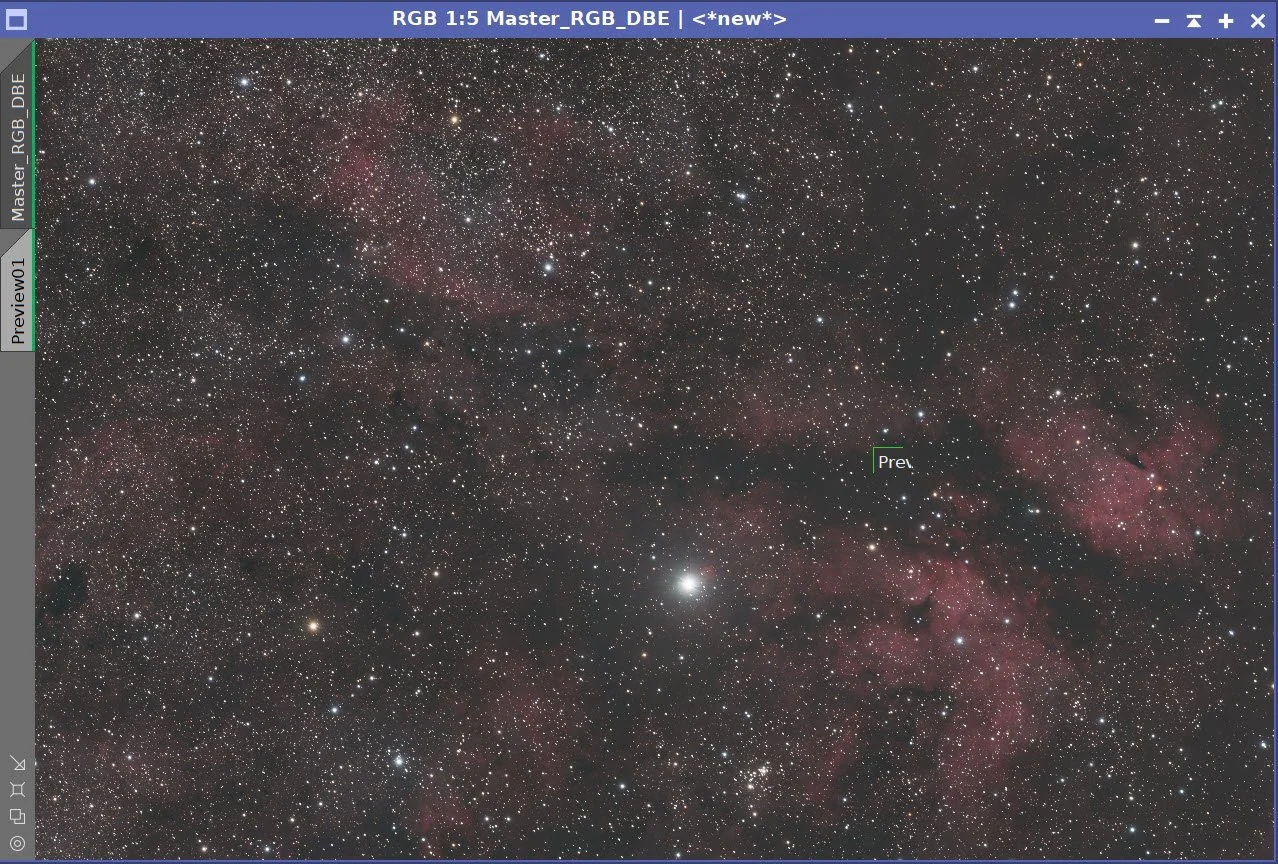
Final Master RGB image - Before Star Removal.
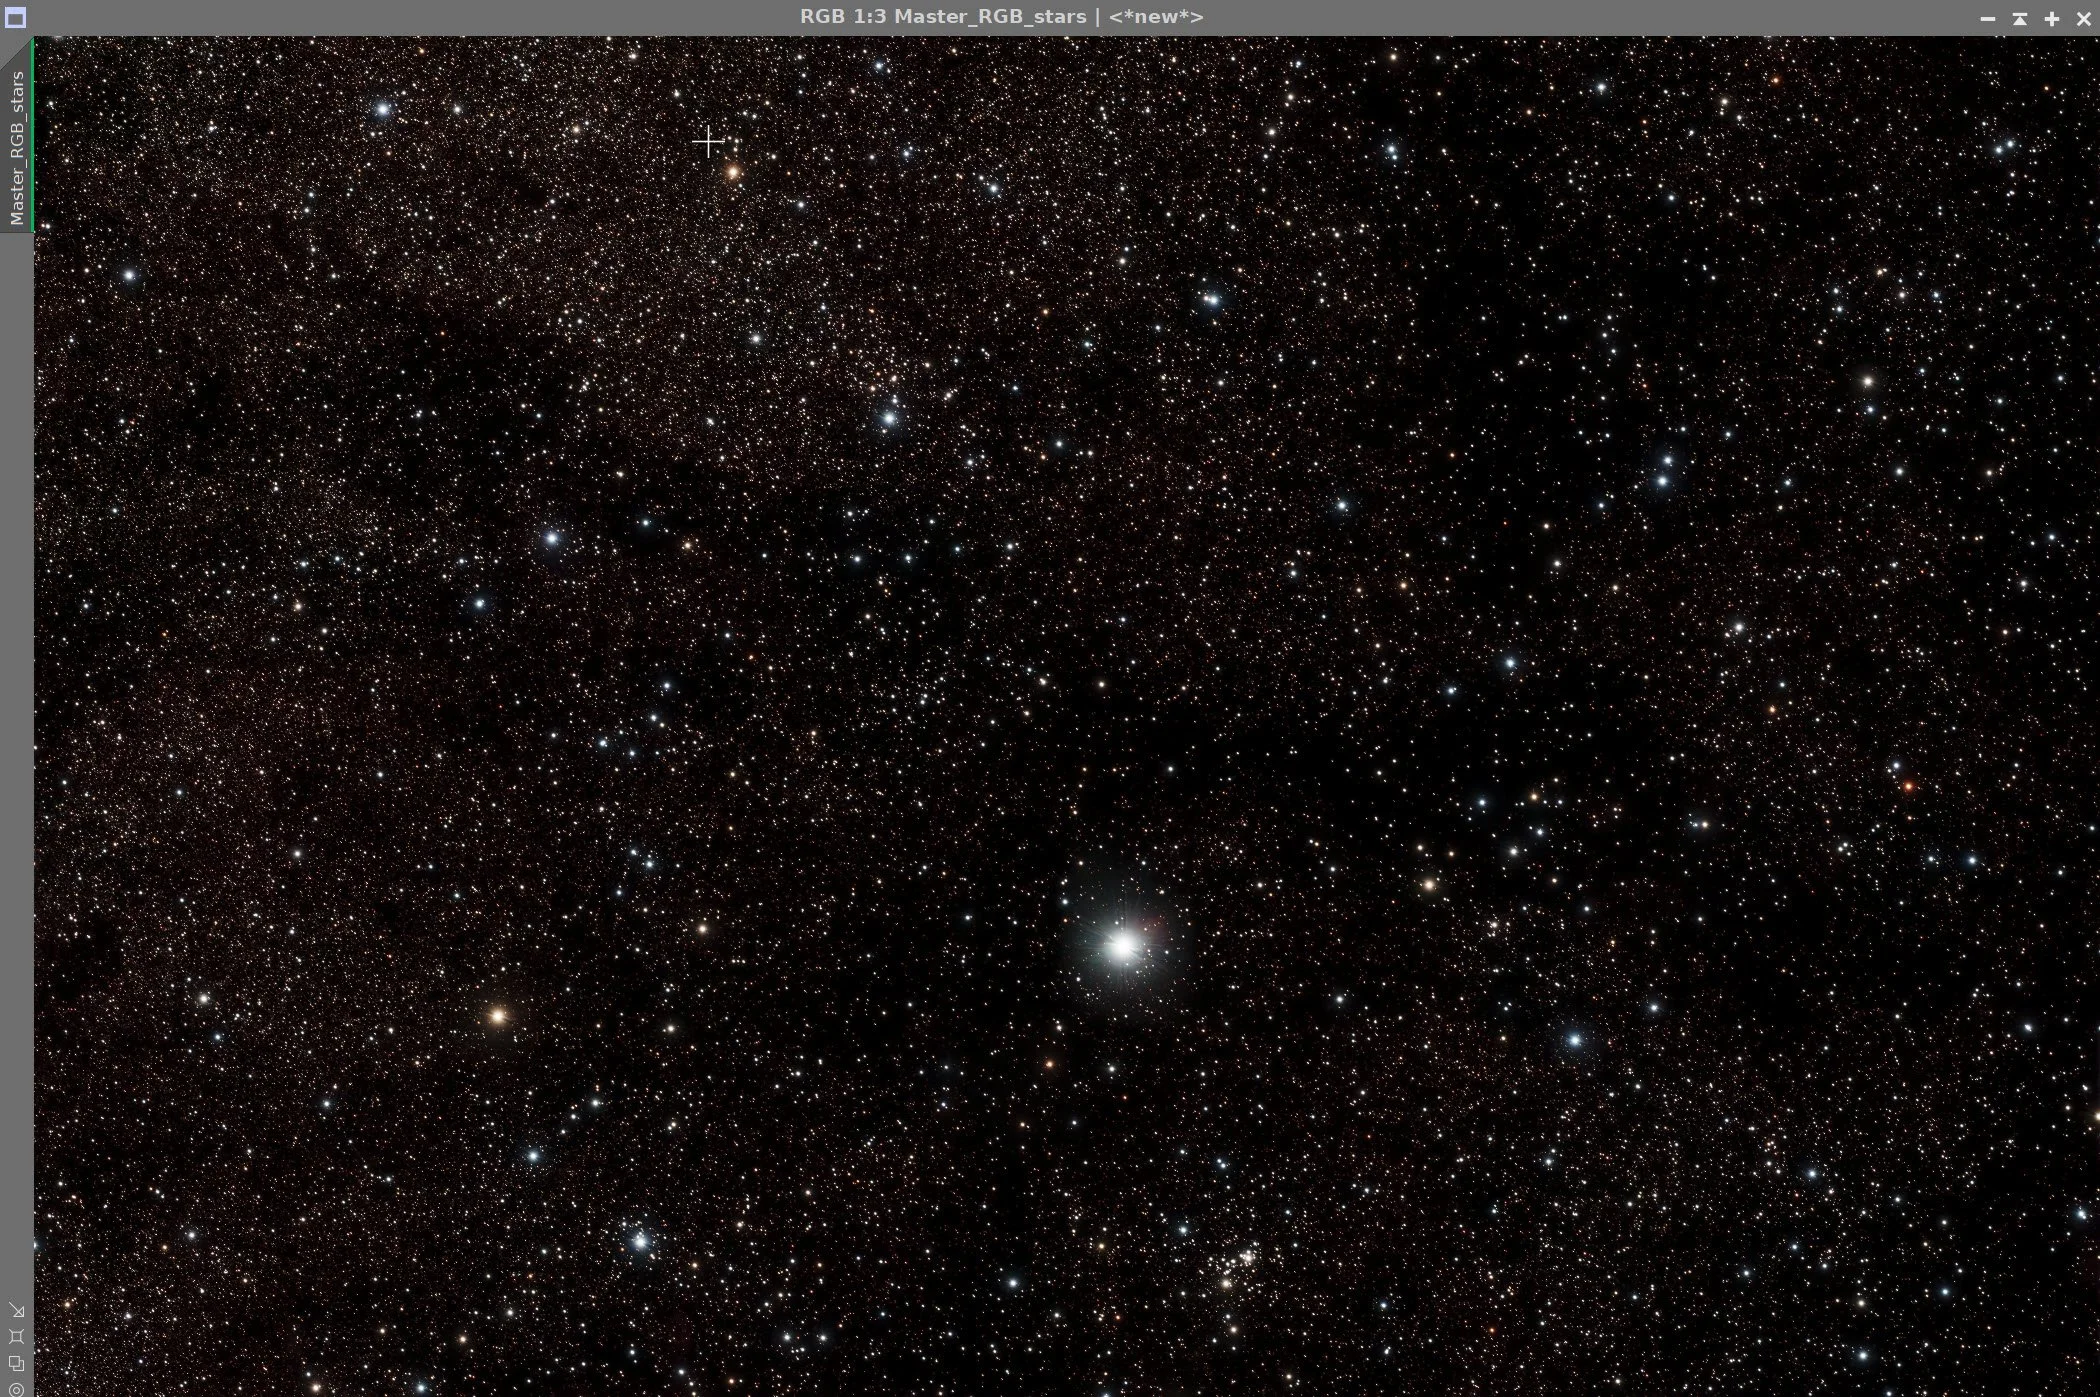
Master RGB Star image after SXT.
6. Take RGB Stars Nonlinear
Use Seti Astro Star Stretch Script to stretch Stars
I decided to create two versions of the nonlinear star image. I created two nonlinear star versions: one using the default stretch and one using a stronger stretch:
Stars #1 used a stretch of 5.0 (the default) and a color boost of 1.6
Stars # 2 used a stretch of 7.0 and a color boost of 1.79
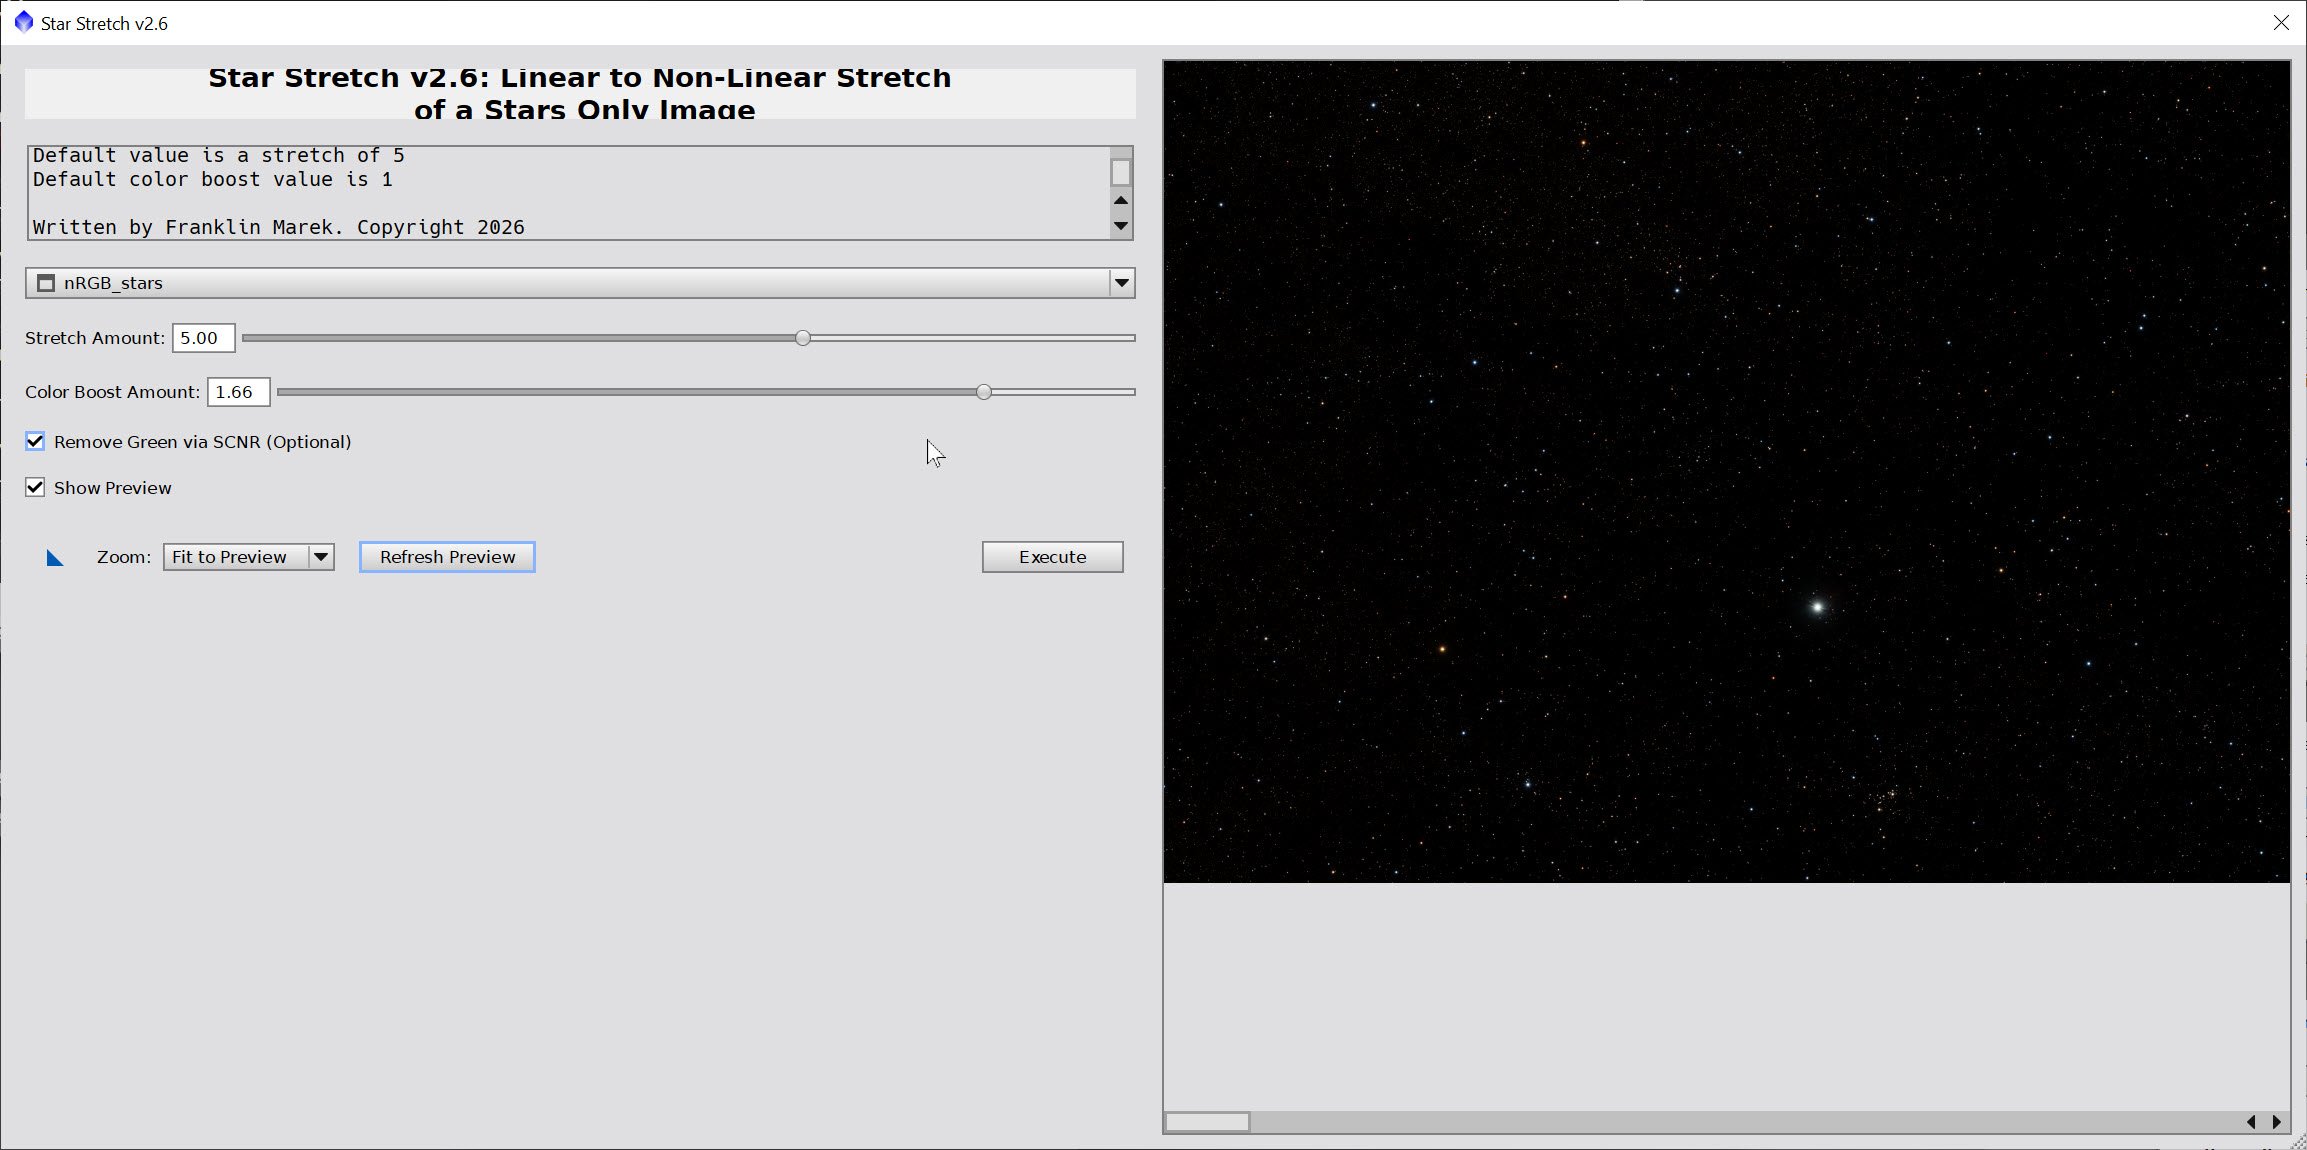
Star Stretch Script panel and params used for stars #1
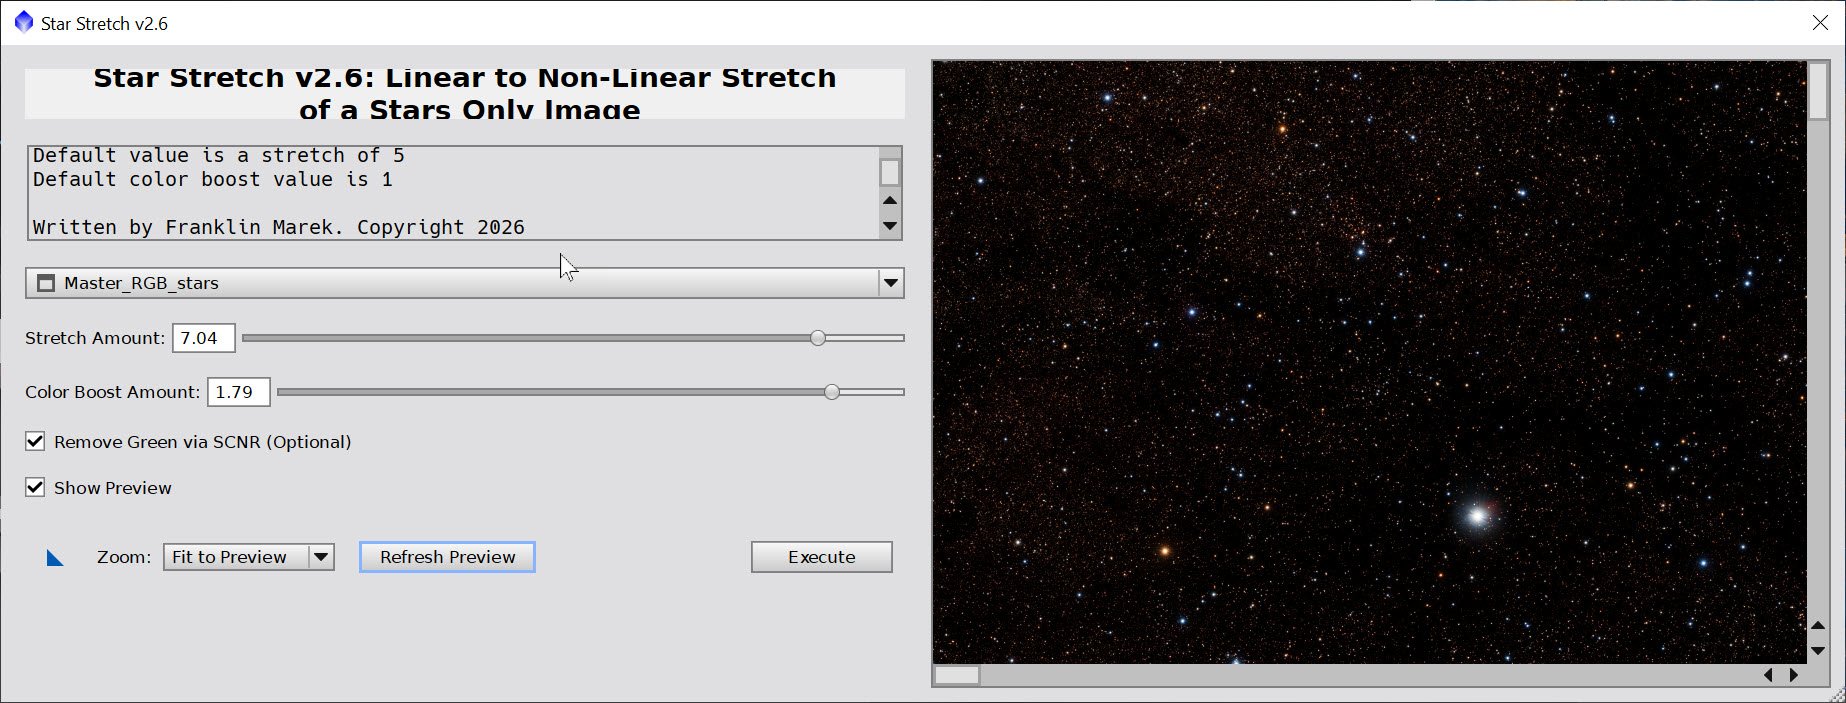
StarStretch Params for stars #2
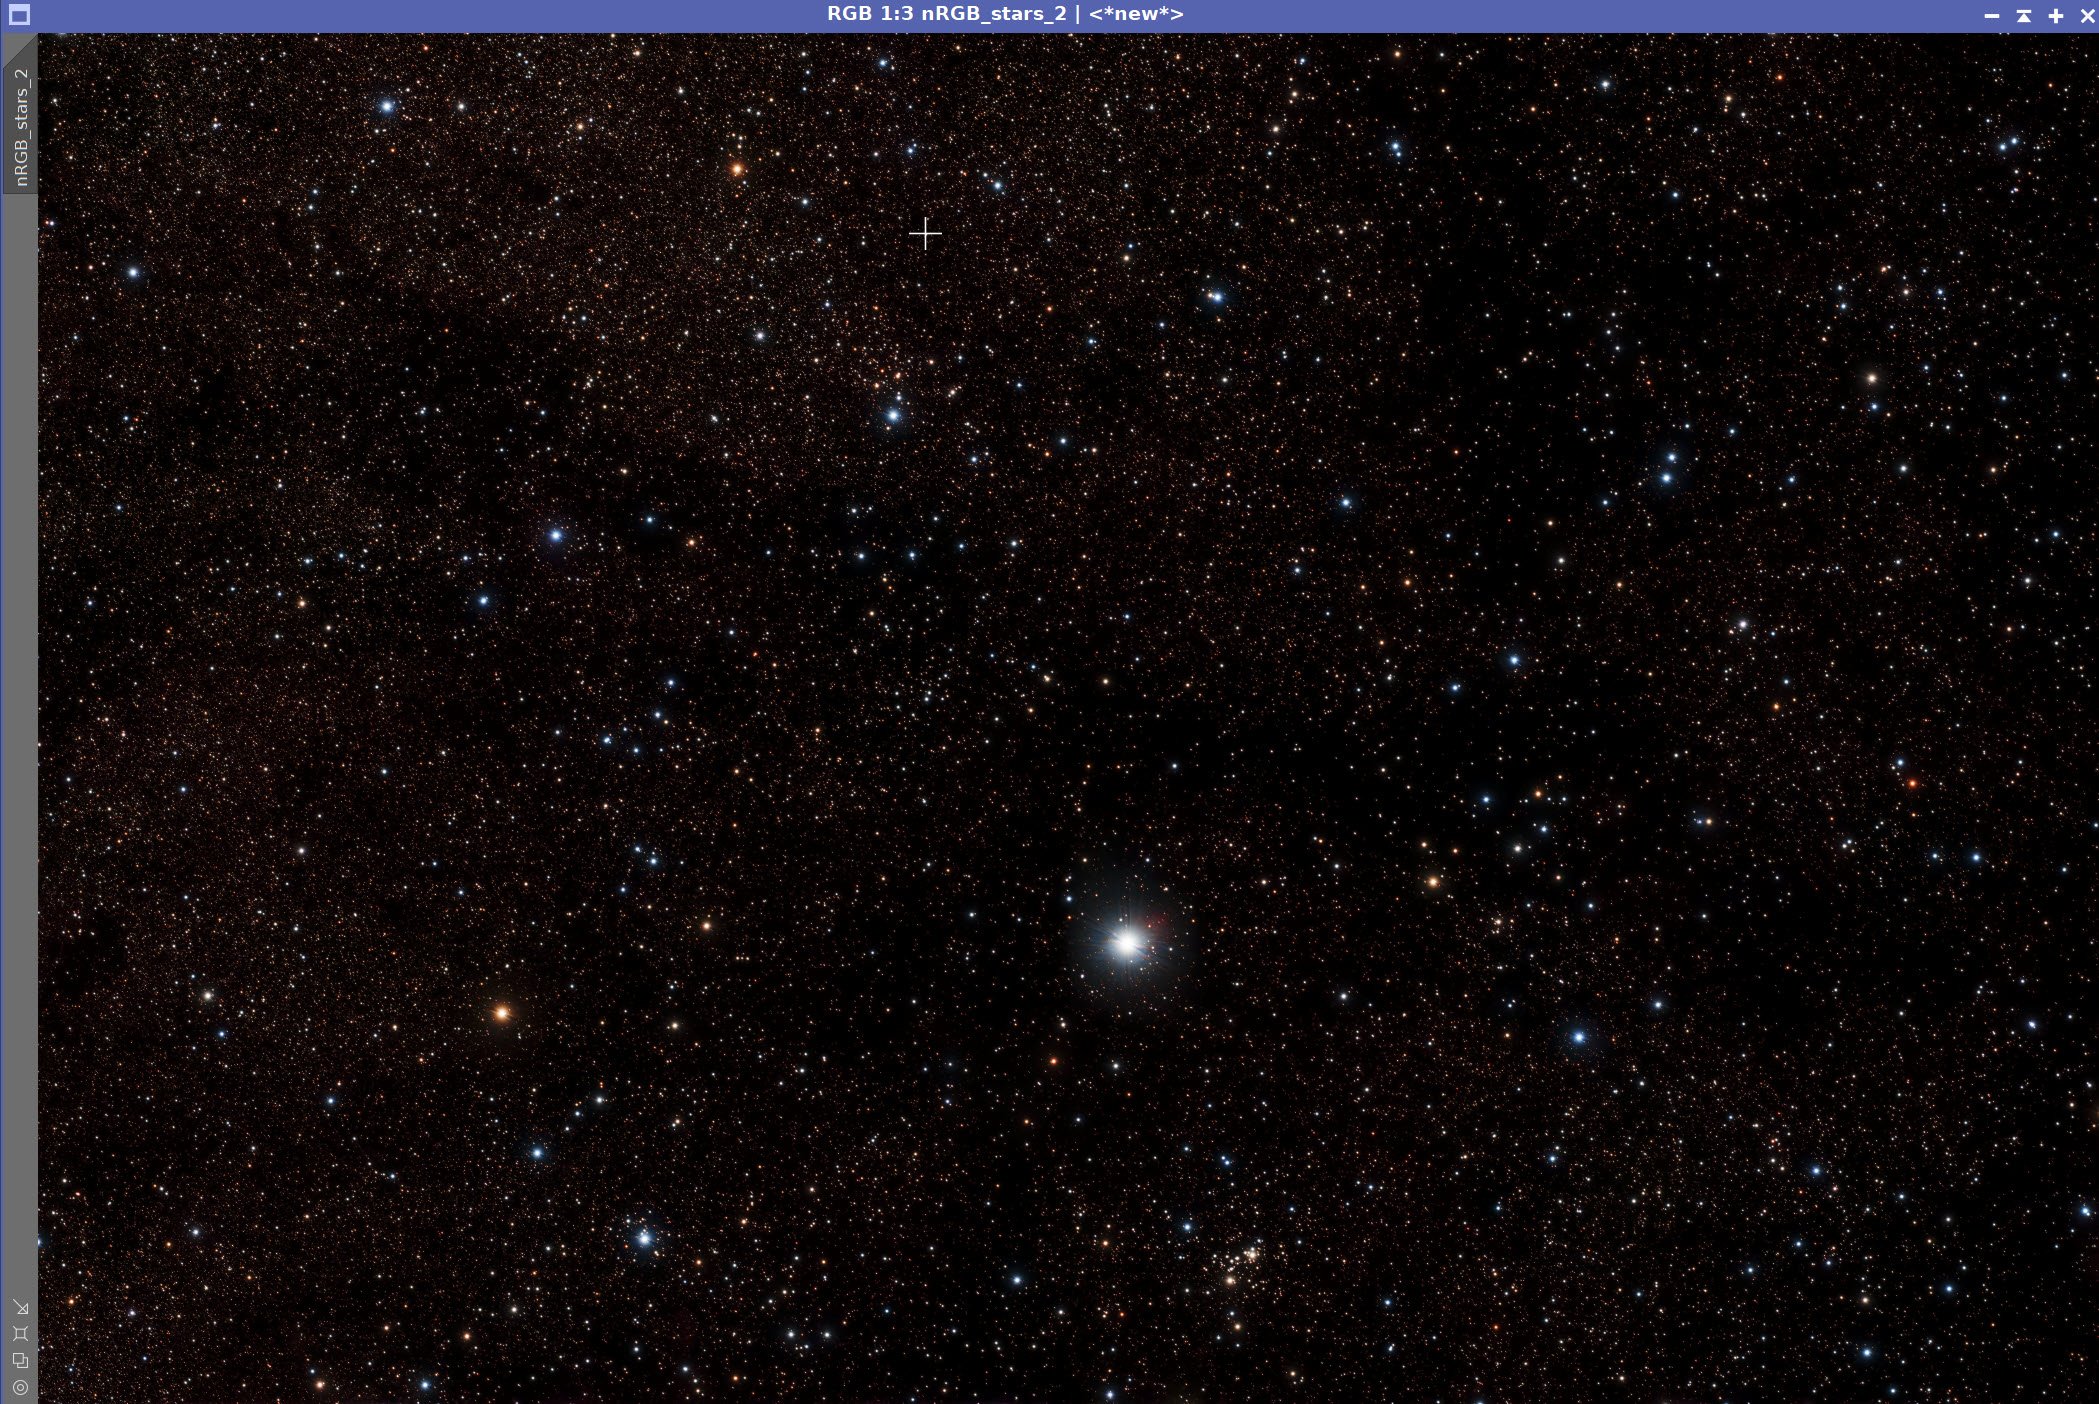
Nonlinear RGB Stars image #1
7. Take the Starless SHO Image Nonlinear
Use GHS to take the SHO starless image nonlinear - see screenshot below for params.
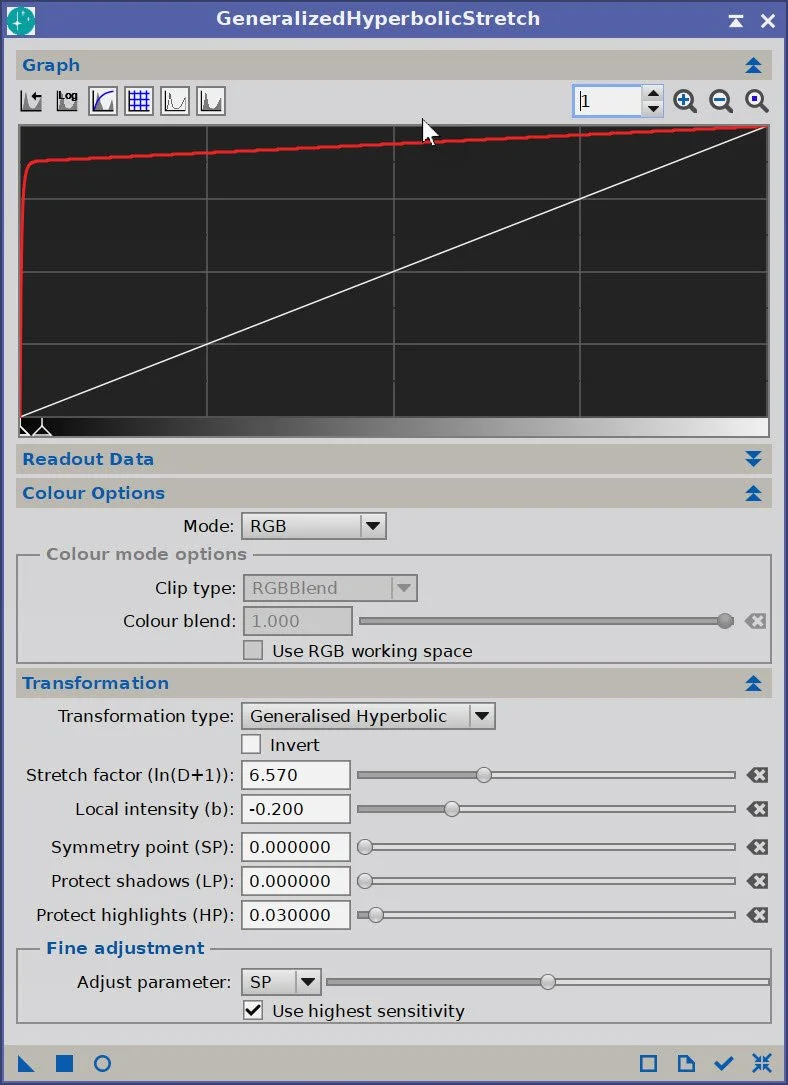
GHS Parameters used.
Nonlinear SHO image
8. Process the Nonlinear SHO Starless Image
This is the big meaty step of this process. In this section, I will focus on getting Green/Magena under control, nailing the tone scale and color separation, doing masked warm/cool refinement, and then ACM/ACE polish.
Create the WarmMask
Use the ColourMask Process with Star Hue 328 and an end hue of 68, with a blur of 5
Apply CT to boost the mask
Create the CoolMask
Use the ColourMask Process with Star Hue 162 and an end hue 259, with a blur of 5
Apply CT to boost the mask
Apply CT to set the basic tone scale and color saturation
Apply SCNR Green with a value 0.9 to reduce the amount of green in the image.
Invert the image (make magenta regions look green)
Apply SCNR Green with a value 0.9 to reduce the amount of green in the image.
Invert the Image
Apply CT for Tone and Color.
Apply the Warm Mask
Apply CT to adjust color and saturation
Apply LHE with a factor of 64, contrast limit of 2.0, an amount of 0.4, and a histogram of 8 bits (This will bring up some finer detail)
LHE with a factor of 216, contrast limit of 2.0, and an amount of 0.3, and a histogram of 8 bits (This will bring up some coarser detail)
Apply the CoolMask
Apply CT and adjust cool-color saturations
At this point, colors are pretty close to what I want, but I am going to finalize them further using my Astro Color Mixer Tool. These were small tweaks to saturation, per-color luminance, and a few slight color rotations.
Now do a CT for tone scale and color tweaks.
Now I want to optimize contrast. I used my new Astro Contrast Enhancer tool for this.
I pegged the texture at 100 - it seemed like this image could handle this much of an adjustment
I added clarity at 49/10
I did not think that Dehaze added much here and left that at zero.
I assessed the final image, and my sense was that the image looked very sharp - but perhaps TOO sharp. I was starting to see some artifacts. So I undid that and went back in and redid the adjustments by taking Texture down to 75 and leaving clarity alone. I think this really helped make the image look more natural.
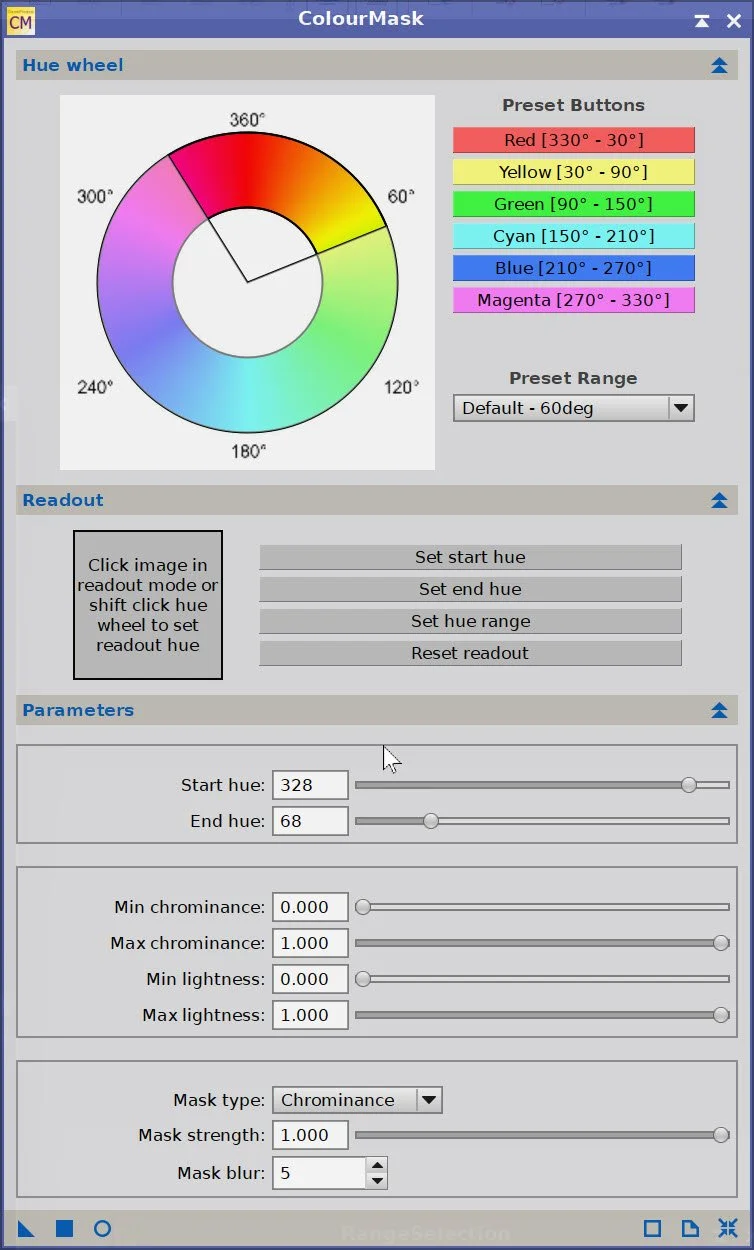
Params used to create the initial WarmMask
Initial WarmMask (click to enlarge)
WarmMask after CT Boost (click to enlarge)
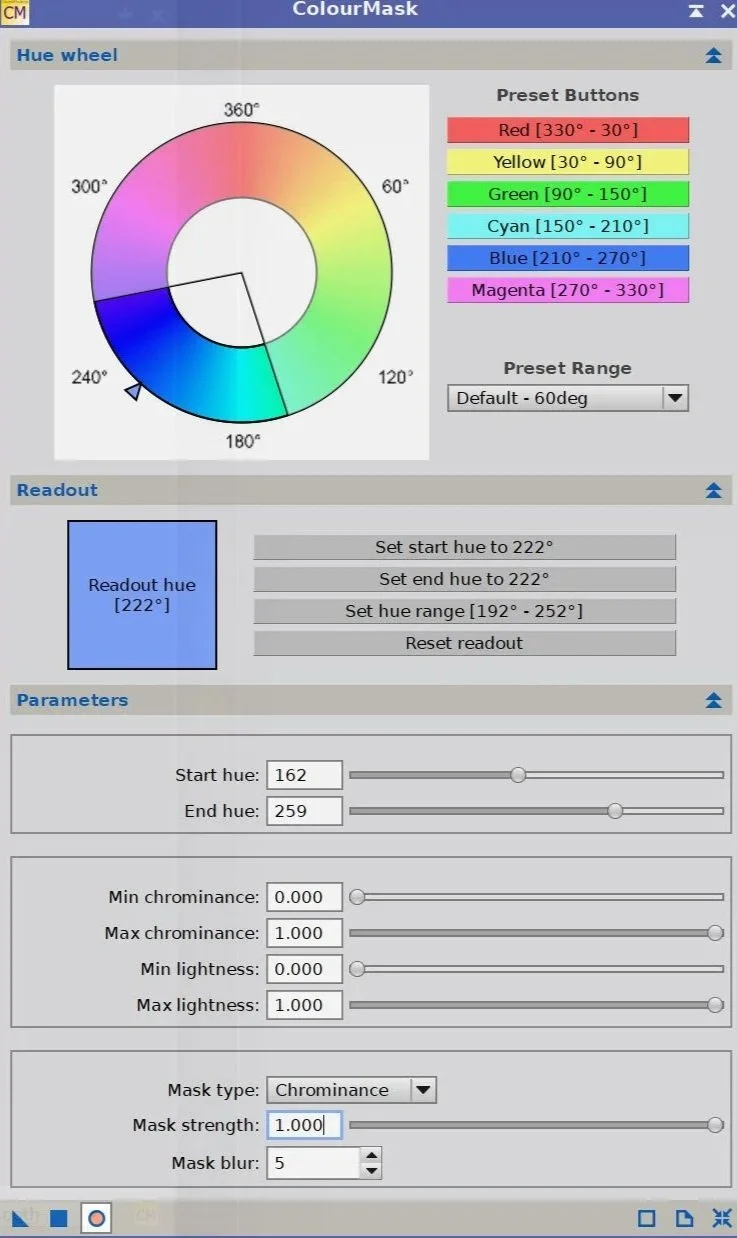
The Params used to create the initial CoolMask
Initial SHO image(click to enlarge)
Initial CoolMask (click to enlarge)
CoolMask after CT boost (click to enlarge)
Apply CT (Click to enlarge)
Apply SCNR Green (click to enlarge).
After SCNR Green at 0.90 (click to enlarge)
Global CT Adjust. (click to enlarge)
After LHE 1 with the WarmMask (click to enlarge)
Apply CT with CoolMask (click to enlarge)
ACM adjustment (click to enlarge)
Initial ACE settings (click to enlarge)
Zoom view - texture is too harsh. (click to enlarge)
Invert the image (click to enlarge)
Final Invert (click to enlarge)
After CT with the WarmMask (click to enlarge)
Apply LHE 2 with WarmMask (click to enlarge)
The Astro Color Mixer Script used to dial in the color. (click to enlarge)
Global CT Adjustment(click to enlarge)
After ACM Adjustment (click to enlarge)
Texture looks much better after backing off by 25% (click to enlarge)
Backing off ACE texture by 25% (click to enlarge)
9. Add the Stars Back In
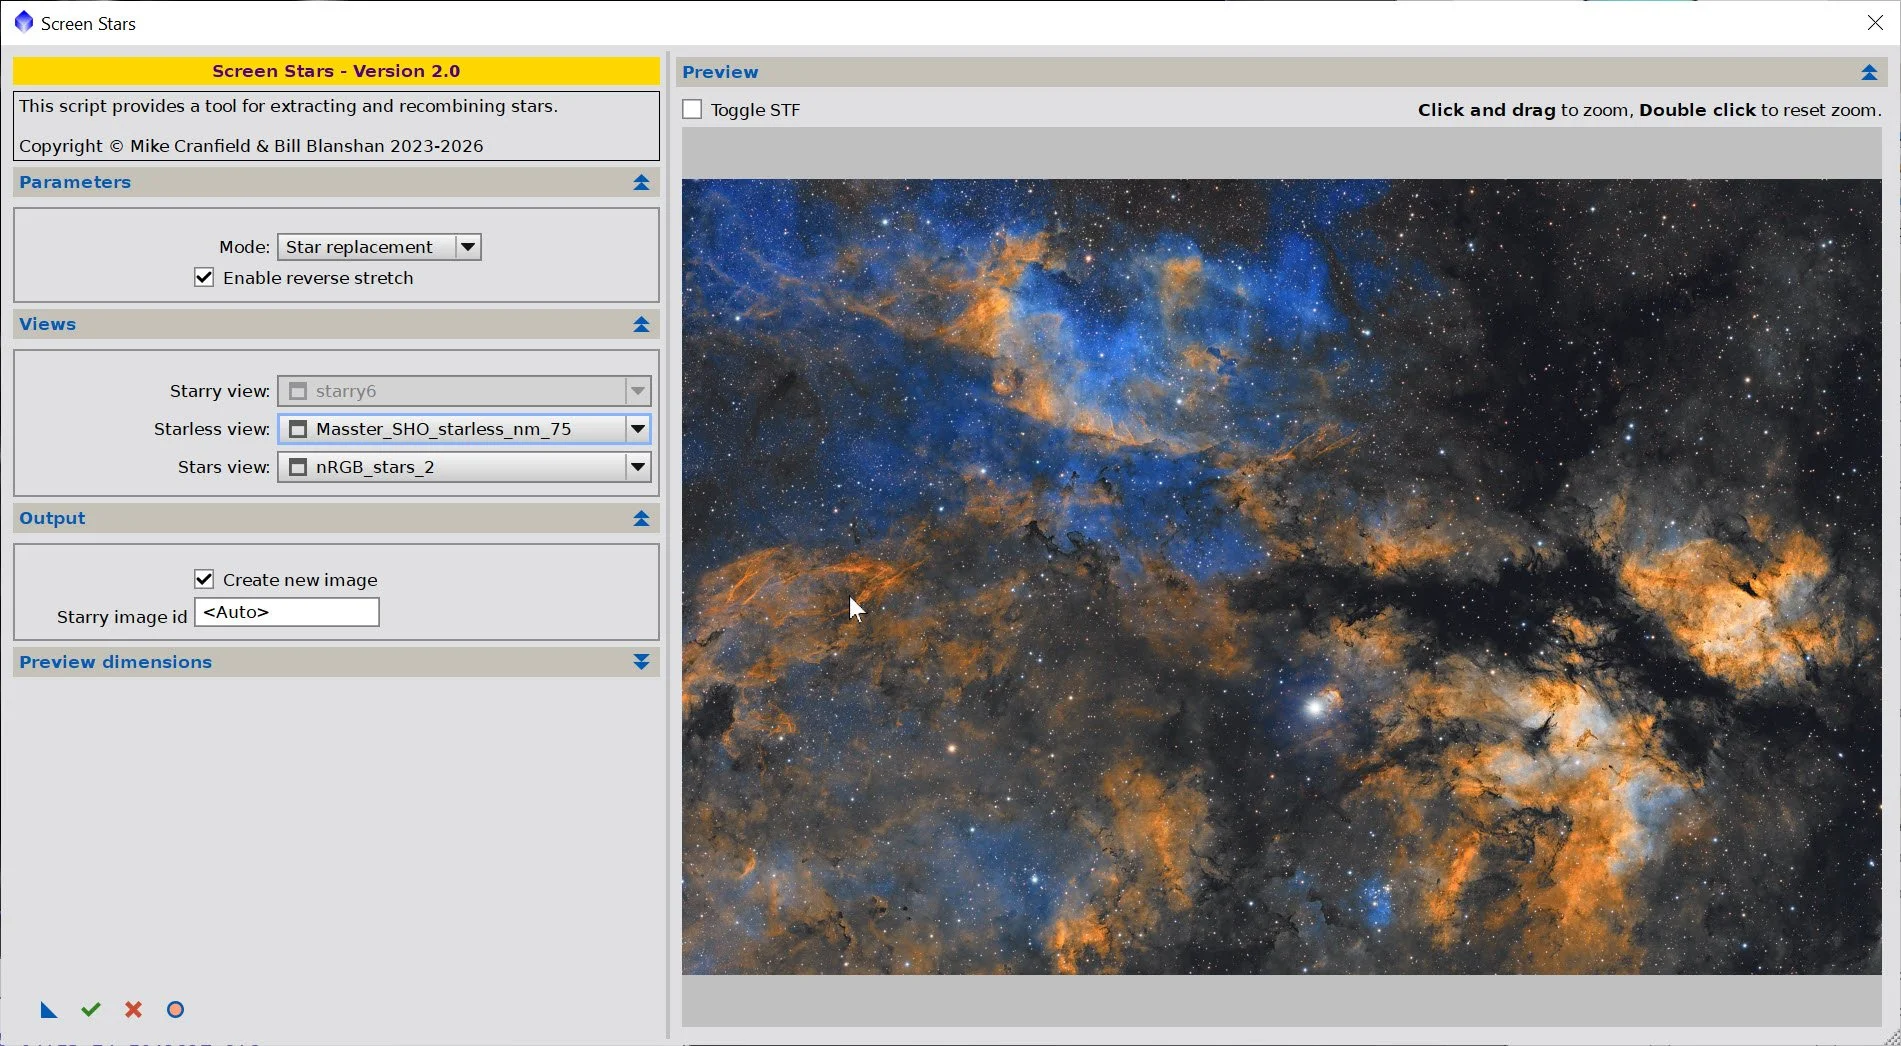
Using the ScreenStars Script, add stars back into our SHO starless image. Do this two times with the two star images created
Pick the best one. I went with star image #2 because I think you need the heavier stars to standout in the rich nebulosity in the image.
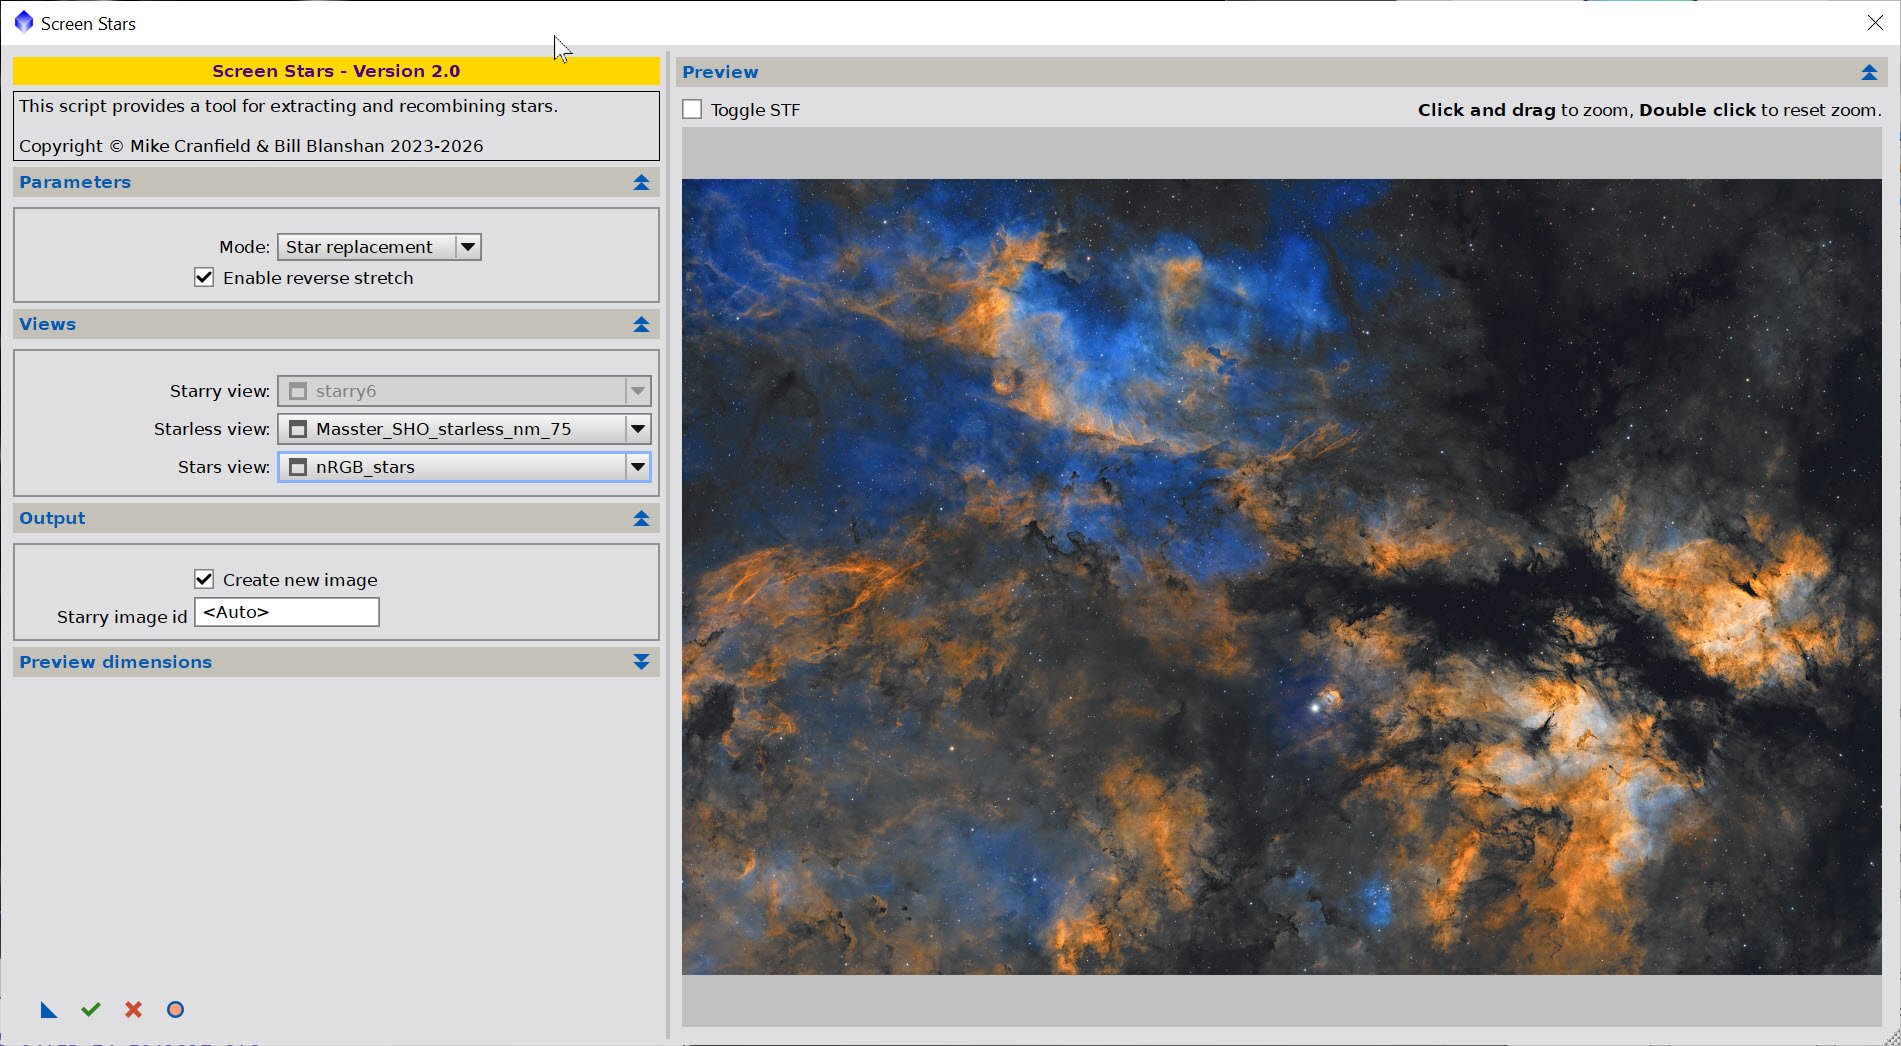
The script used to add the images back in - with smaller stars.
With larger stars.
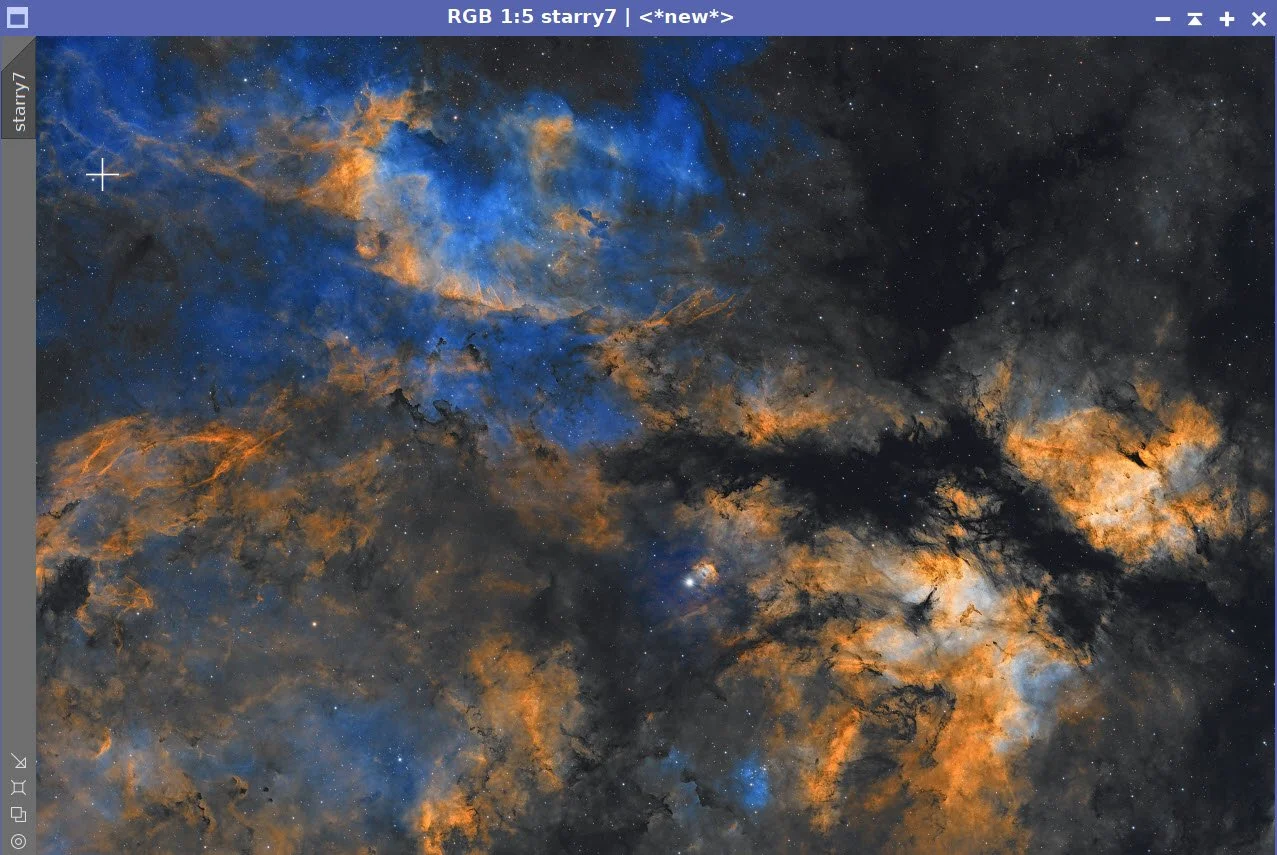
The smaller stars just don’t work here - they are lost in the complexity of the region,.
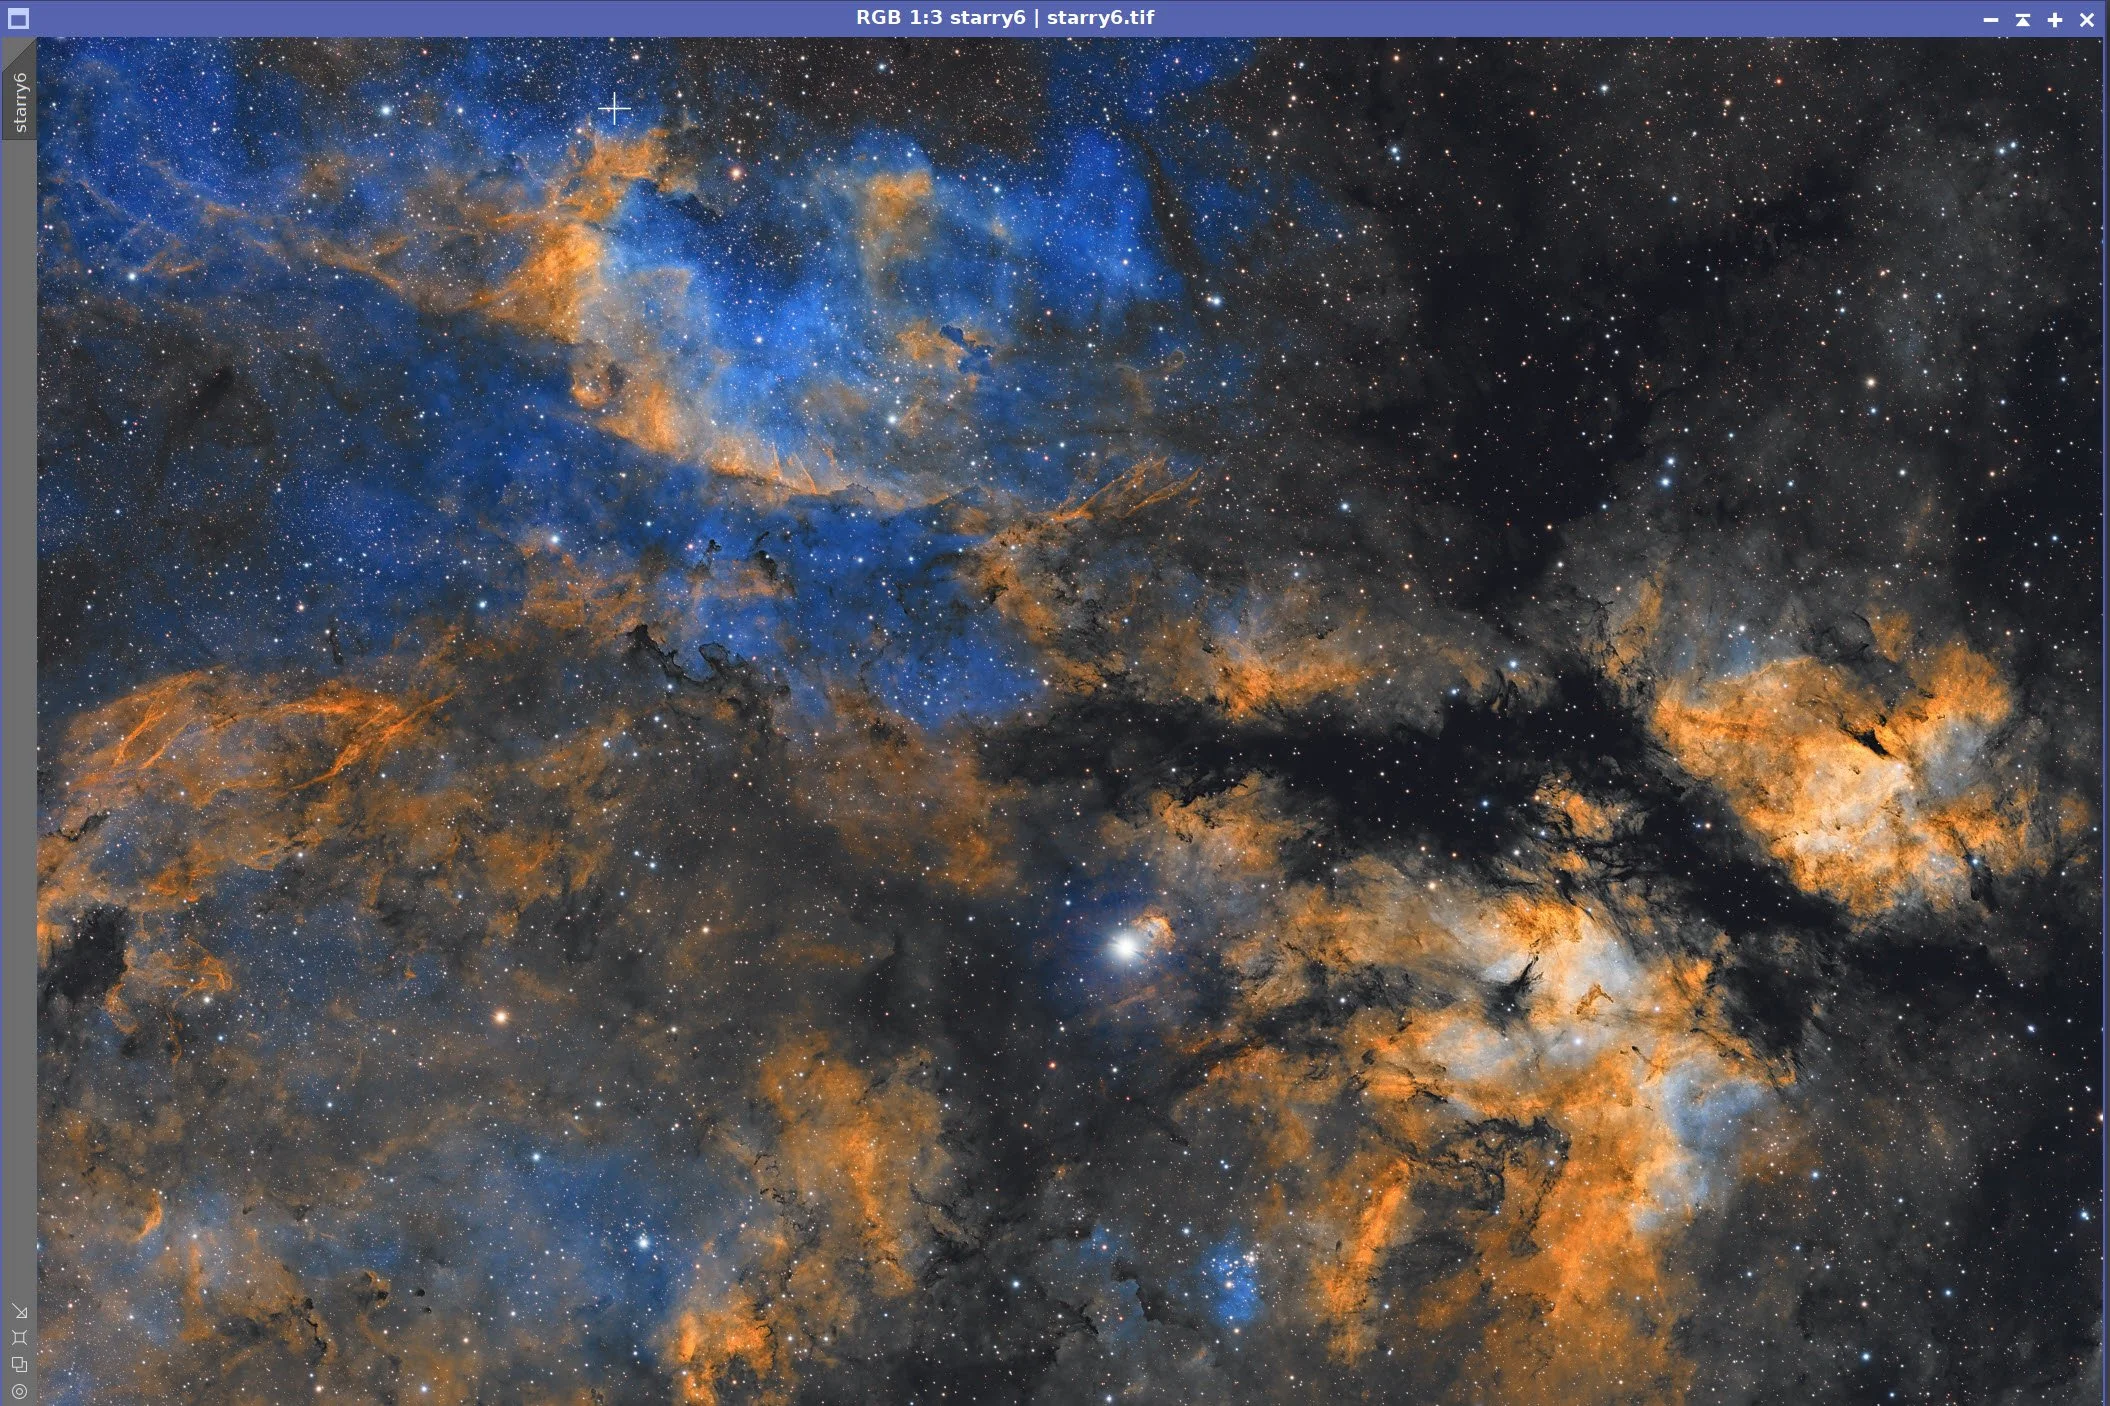
The larger stars work much better - Final Image ready for rendering.
10. Export the Image to Photoshop for Polishing
Save the image as a 16-bit unsigned TIFF and move it to Photoshop
Added Watermarks
Export Clear, Watermarked, and web-sized JPEGs.
11. The Final Image!
The Final Image
11. Final Comments
I was happy with this process. ACM and ACE eliminated several manual steps, and both tools seemed to do their job well. This is the kind of image that it really pays off to zoom into and pan around - a lot of stuff going on in this region, and the image has very crisp details - especially of the dark dust!
Back to the Main Sadr Region 2026 Page
Alternatively, you can use the back arrow to return to the Main Sadr Region page, or you can use the menu at the top of the page to continue your navigation.
Thanks,
Pat