
Hickson 61 - The Box - 2026 Image Processing Walkthrough.
June 4, 2026
My 2026 image of Hickson 61.
🔭 Project Summary
Target: Hickson 61 — “The Box” / HCG 61 / NGC 4169 Group
Main Galaxies: NGC 4169, NGC 4173, NGC 4174, and NGC 4175
Capture Dates: April 20 and 21, 2026
Constellation: Coma Berenices • Distance: ≈ 170–200 million light-years for the main background members; NGC 4173 is likely foreground
Type: Compact galaxy group / apparent galaxy alignment featuring small, faint, distant galaxies arranged in a box-like pattern
Imaging Period: April 20–21, 2026 • Total Integration: 7 h 48 m 00 s (LRGB)
Filters: L · R · G · B (ZWO 36 mm LRGB Gen II)
Telescope: Astro-Physics 155 mm Starfire EDFS f/5.3
Camera: ZWO ASI2600MM-Pro (−15 °C; Gain 0 LRGB)
Mount: iOptron Tri-Pier with column extension on custom steel pier
Processing: PixInsight (LRGB) & Photoshop
Location: Whispering Skies Observatory · Honeoye Falls, NY (USA)
Acquisition notes: L: 128 × 90 s; R: 62 × 90 s; G: 60 × 90 s; B: 62 × 90 s at −15 °C, Gain 0; total 7 h 48 m 00 s after culling bad or questionable subs.
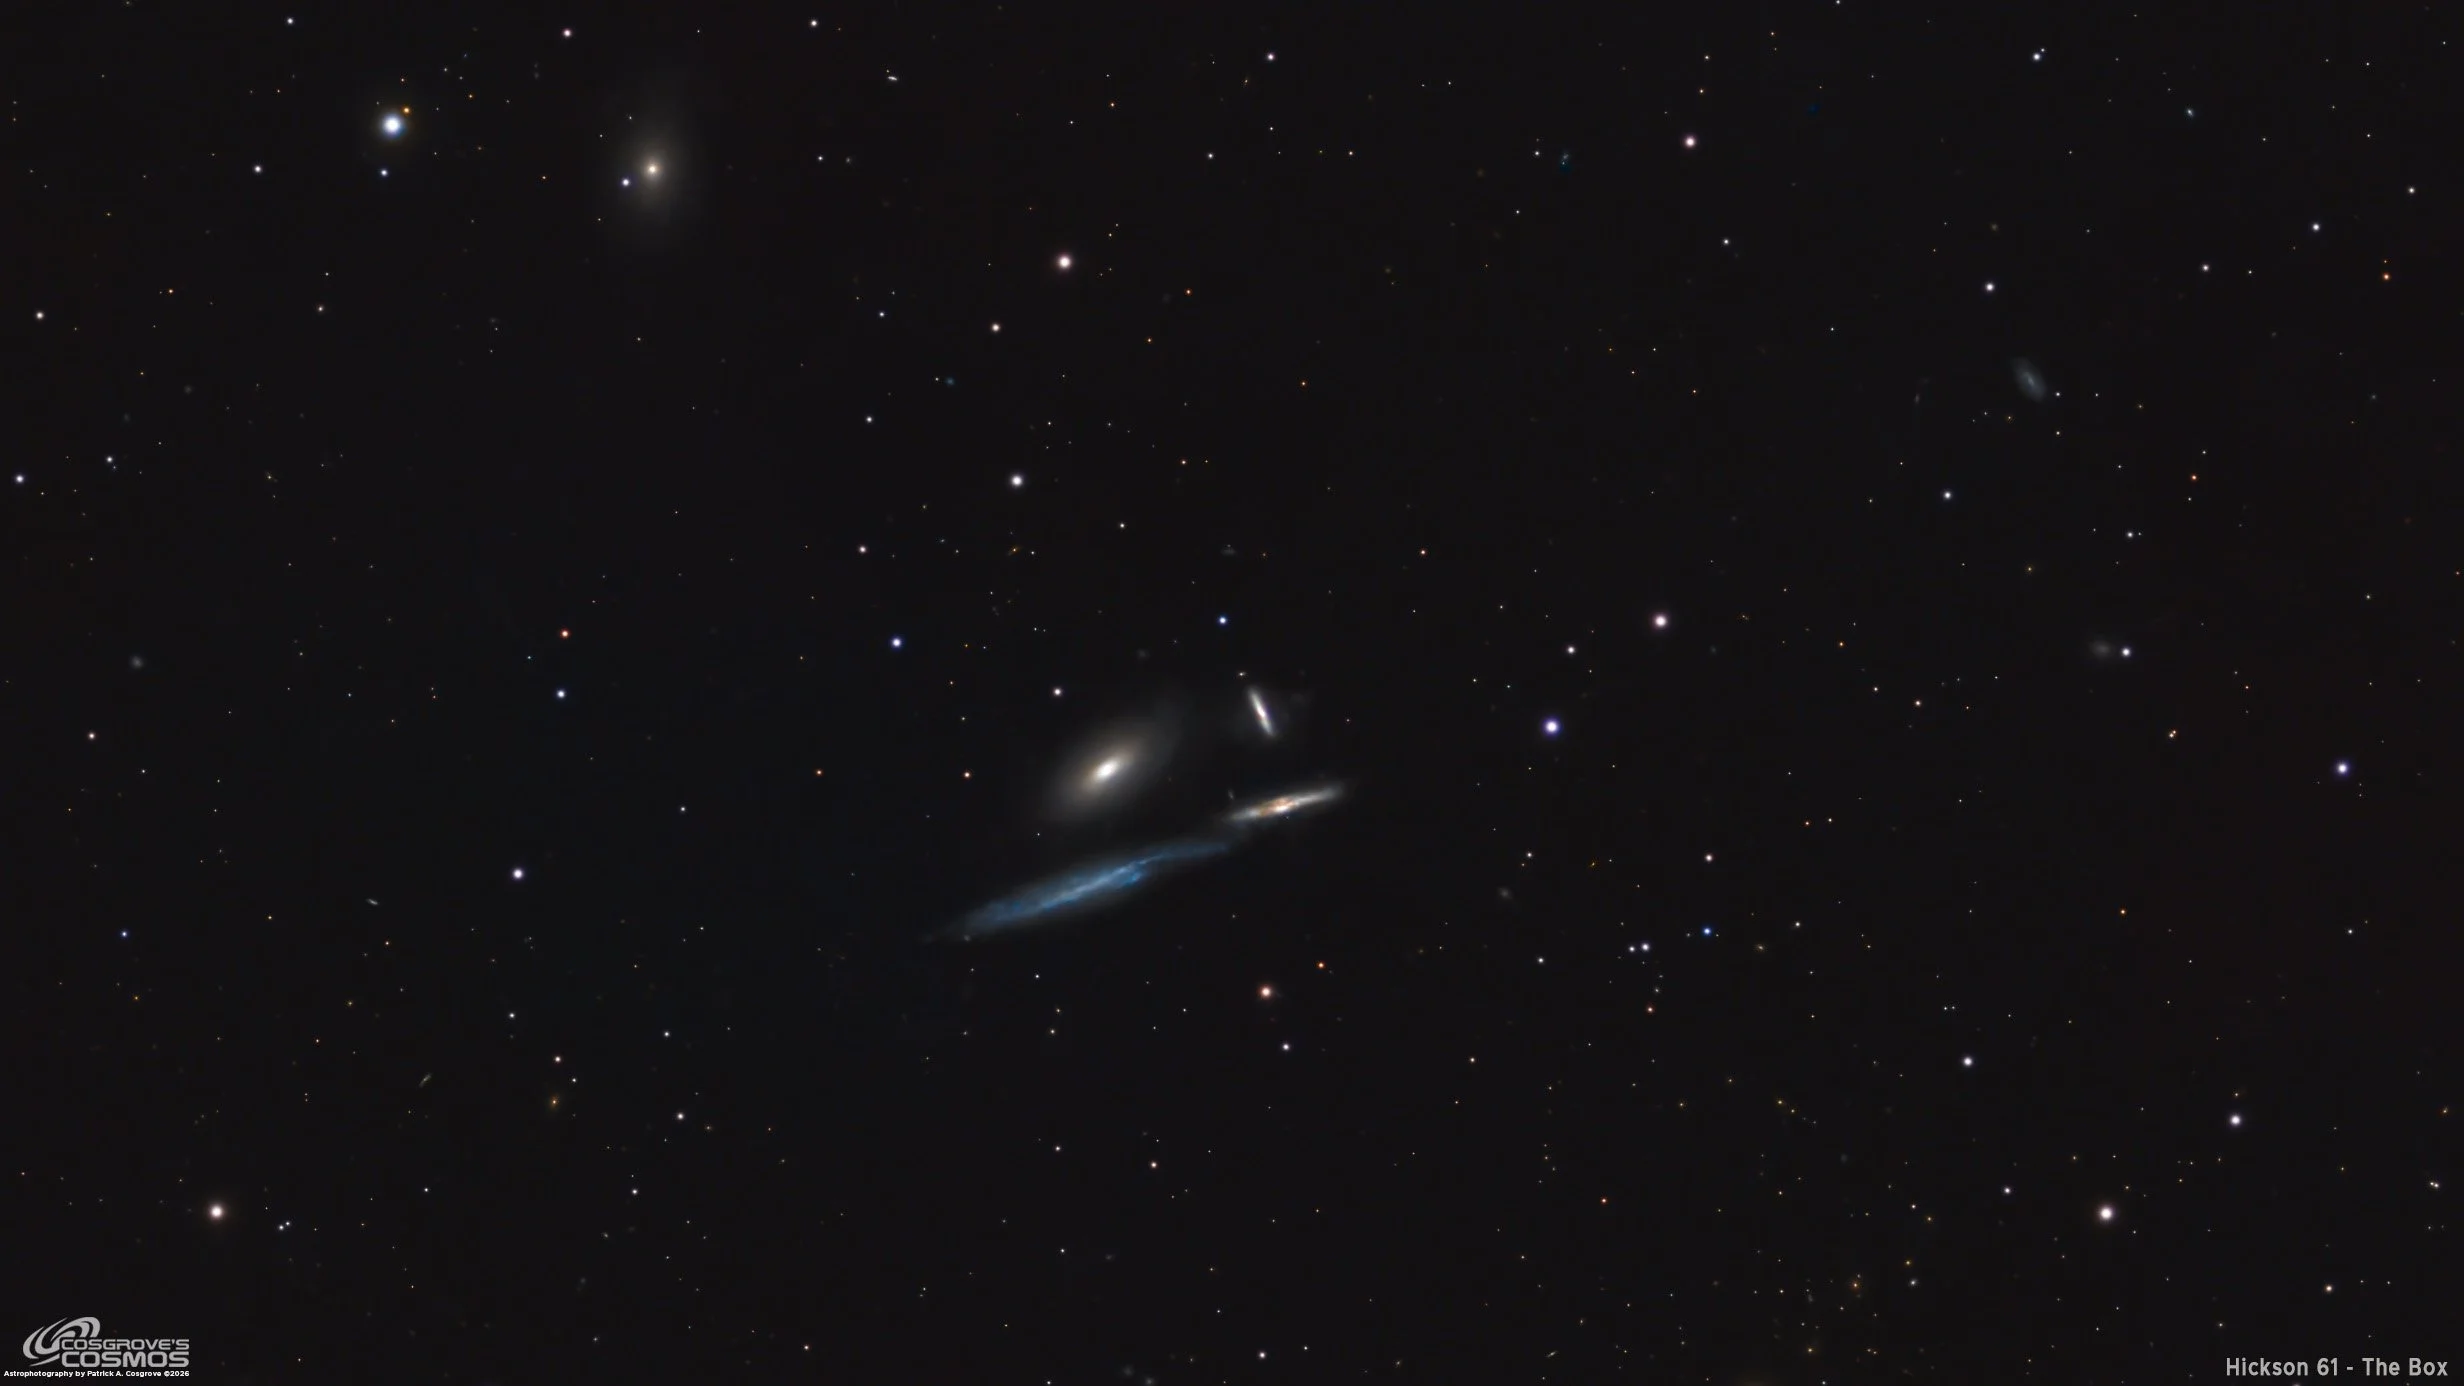
Image note: This LRGB image captures the compact apparent galaxy group Hickson 61, known as “The Box,” a tiny and faint arrangement of galaxies in Coma Berenices. The small angular size, faint surface brightness, and great distance of the background members make this a challenging but rewarding deep-sky target.
Table of Contents Show (Click on lines to navigate)
Special Note
Welcome to the image-processing page for this project. You got here by following a link from the main Hickson 61 2026 project report, and you can return to that page using your browser's back button.
Abbreviations Used
BXT BlurXTerminator by RC-Astro
CC Cosmetic Correction
CT Curves Transformation Process
DBE Dynamic Background Extraction Process
ET Exponential Transformation
HT Histogram Transformation
NXT NoiseXTerminator by RC-Astro
MLT Multiscale Linear Transform
PI PixInsight
PS Photoshop
SCNR Subtractive Chromatic Noise Reduction Process
SFS SubFrameSelector
SPCC SpectroPhotometric Color Calibration
STF Screen Transfer Function
STF->HT method – Drag the STF triangle to the base of HistogramTransformation, then apply it to the image to take it nonlinear.
SXT StarXTerminator by RC-Astro
WBPP Weighted Batch Preprocessing Script
Summary:
Hickson 61 LRGB Processing Flow
Sequential summary of the Hickson 61 workflow, organized around the actual dependency chain from frame review and LRGB integration through linear preparation, targeted masking, nonlinear luminance and color refinement, star recombination, and final Photoshop polish. The processing emphasis was on recovering a small, faint galaxy group from imperfect data while controlling the background and correcting elongated stars.
Processing this Image
(All Processing is done in PixInsight, with some final touches done in Photoshop)
The main processing challenge for this image was rescuing a small, faint galaxy group from imperfect data. The AP155 optics performed well, but tracking problems left the stars noticeably elongated, and the field also contained a stubborn bottom-left gradient or local light-pollution artifact. The workflow focused on careful frame rejection, separate luminance and RGB preparation, aggressive but controlled star correction with BlurXTerminator, targeted masking for the Hickson 61 region and surrounding small galaxies, conservative local-contrast work, star recombination, and final Photoshop polishing.
1. Blink
First, I screened the data for thin-cloud frames and obvious defects.
Lum
5 frames removed for tracking.
Red
2 frames removed for tracking.
Green
5 frames removed for tracking
Blue
2 frames removed for tracking.
Darks
All looked OK.
Dark Flats
All looked OK.
Flats
All good.
After culling, the final retained frame counts were L 128, R 62, G 60, and B 62.
2. WBPP 2.8.9
With the bad frames identified, I ran everything through WBPP with a quality-first configuration:
Reset everything
Load all lights
Load all flats
Load all darks
Selected maximum quality
Reference Image: auto, the default
Select the output directory for the WBPP folder
Enable CC for all light frames
Pedestal value: auto
Darks - set exposure tolerance to 0
Lights - set exposure tolerance to 0
Lights: all correction options selected except linear defect correction.
Enabled Autocrop
I chose NOT to use Drizzle processing.
WBPP completed in 58 minutes
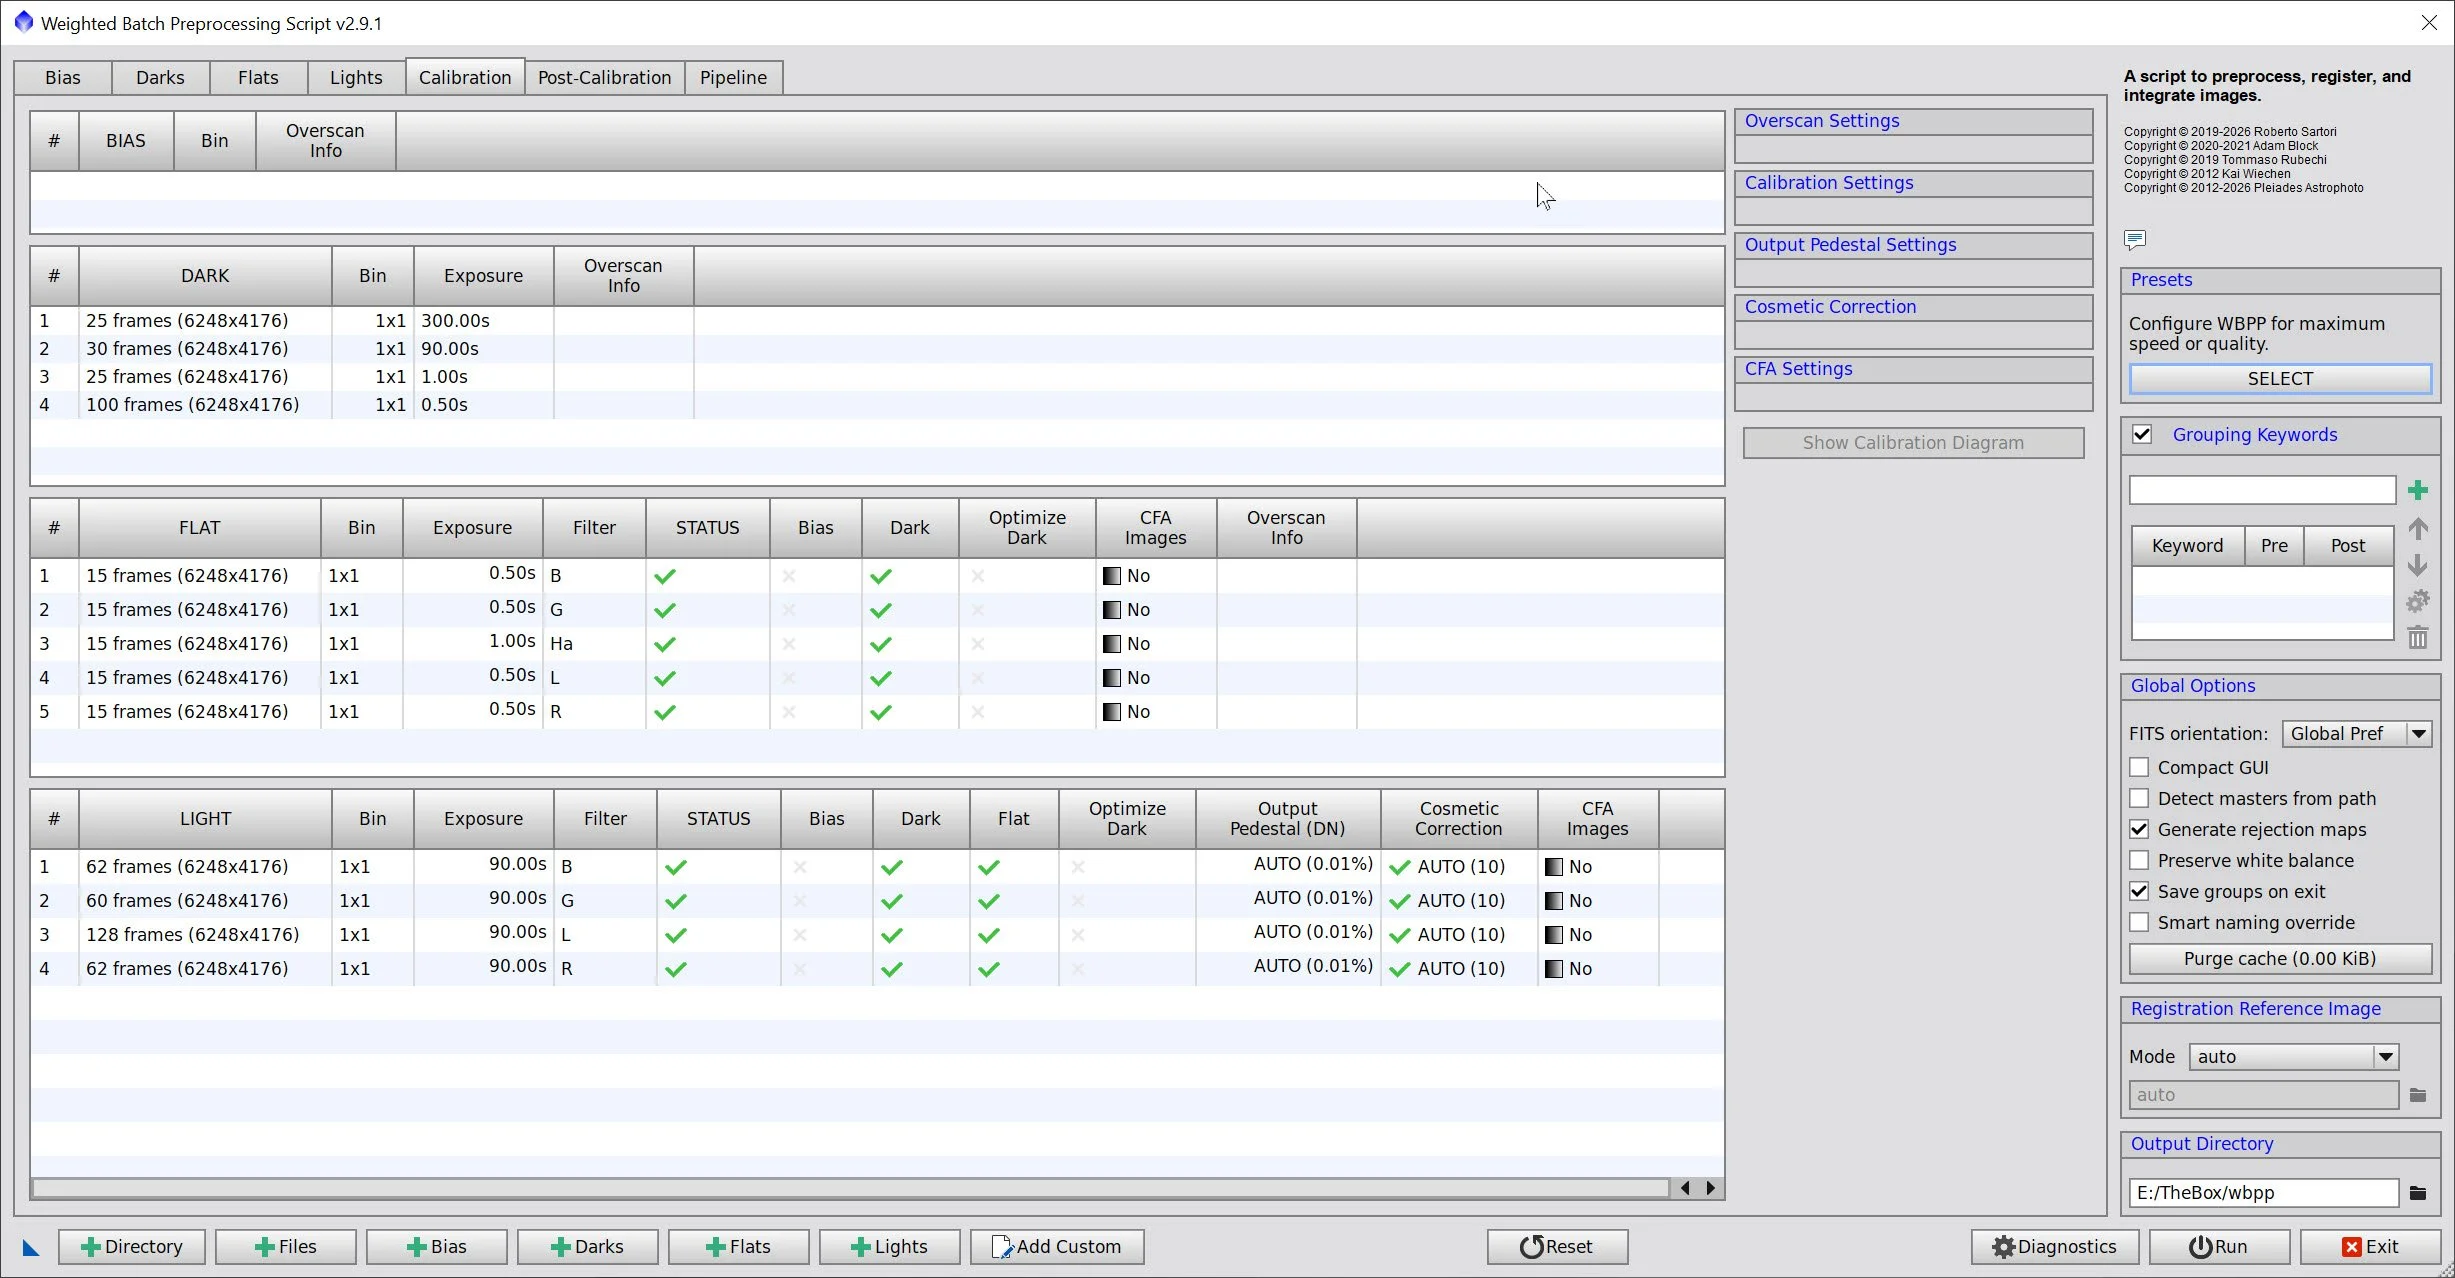
WBPP Calibration View
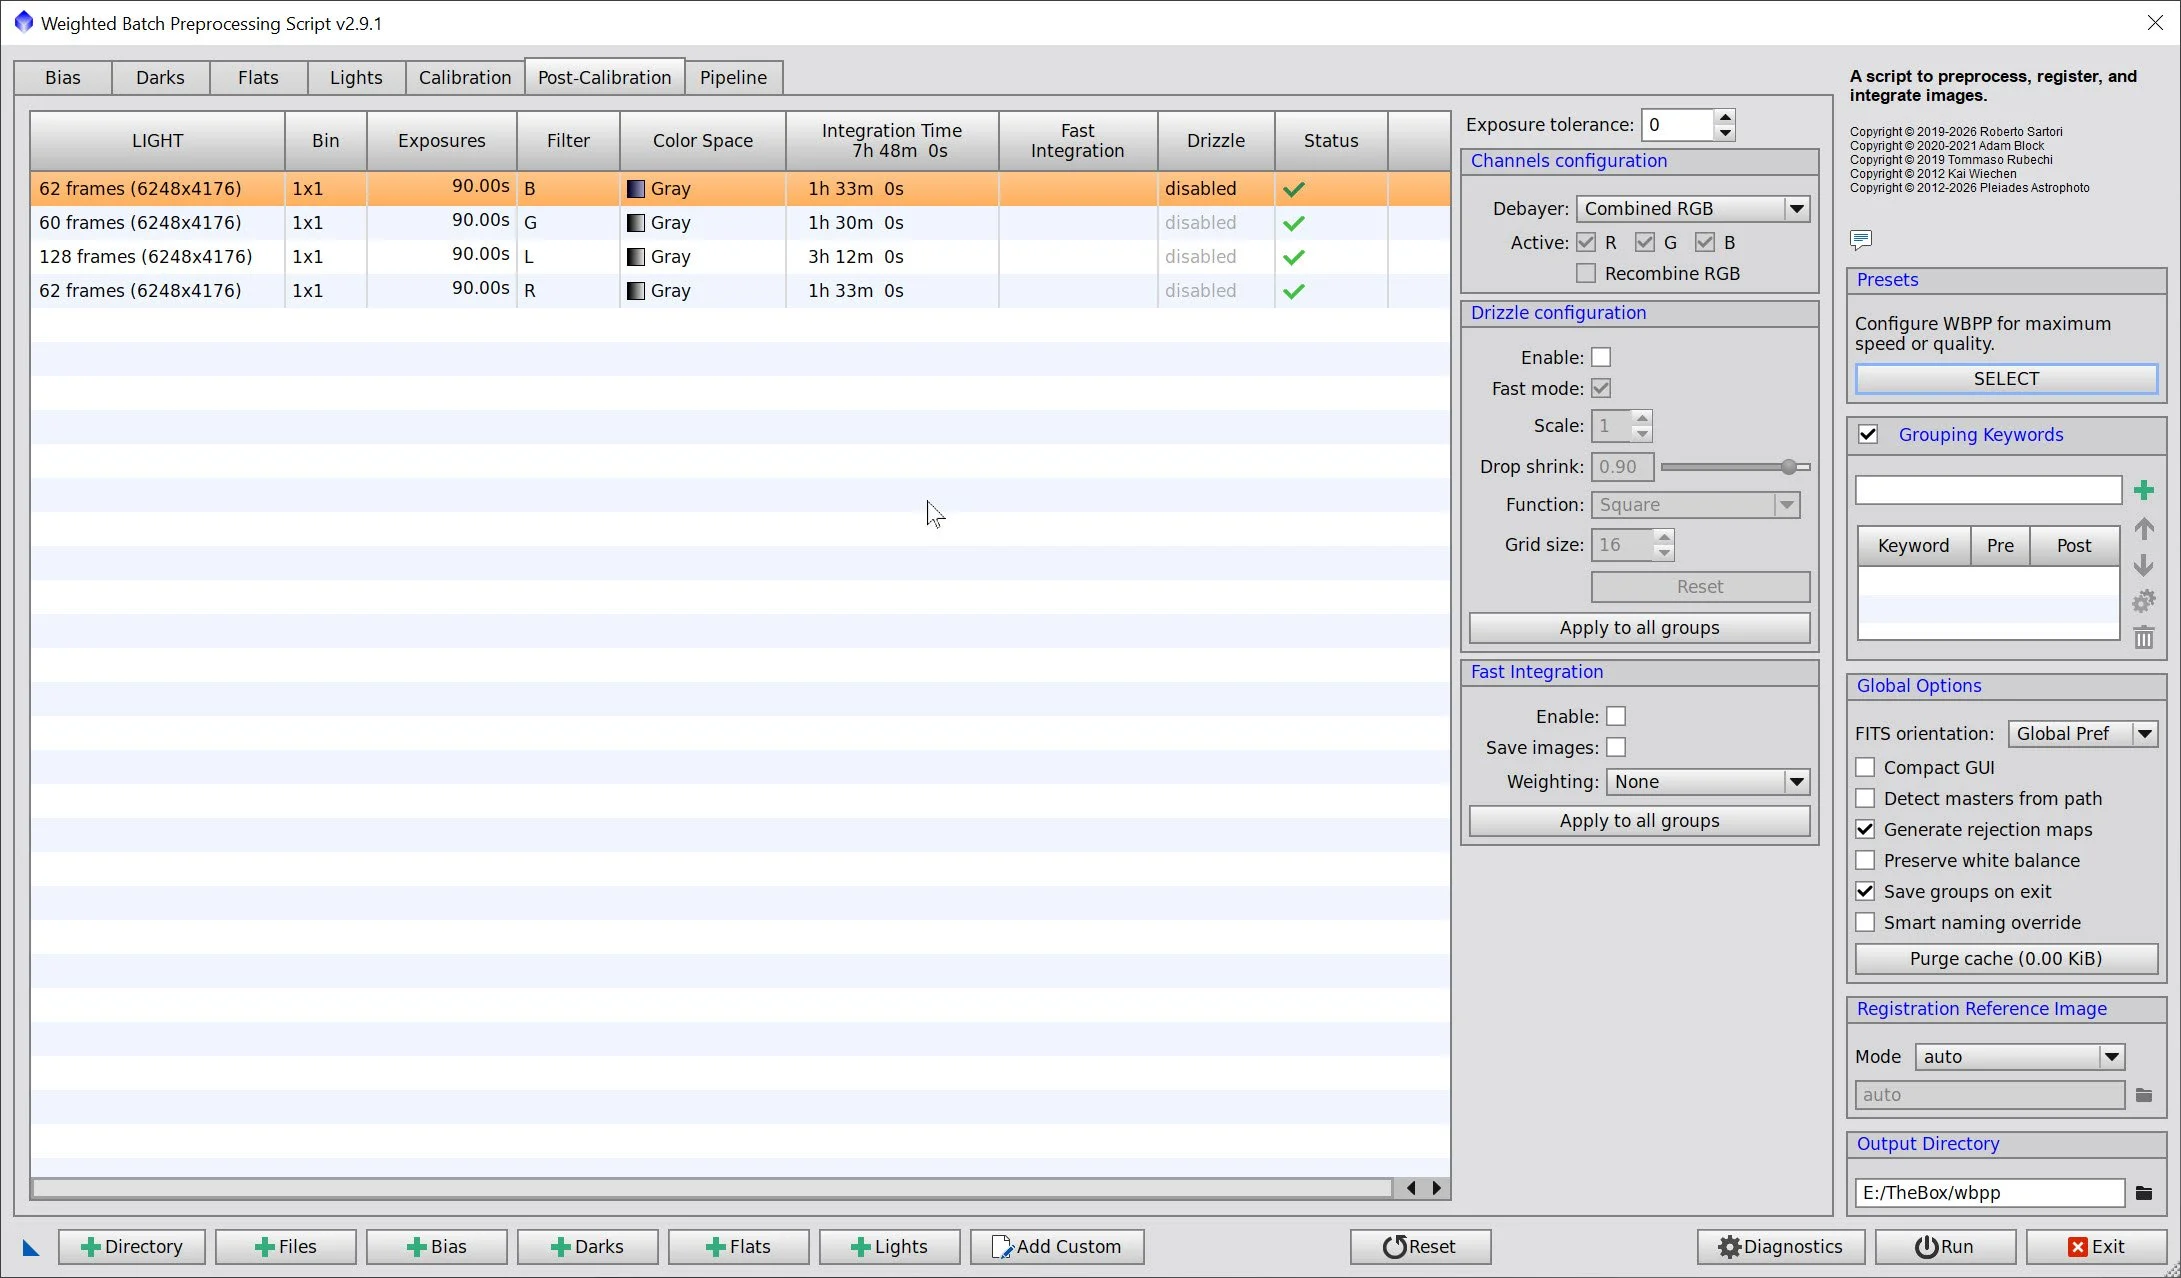
WBPP Post Calibration View
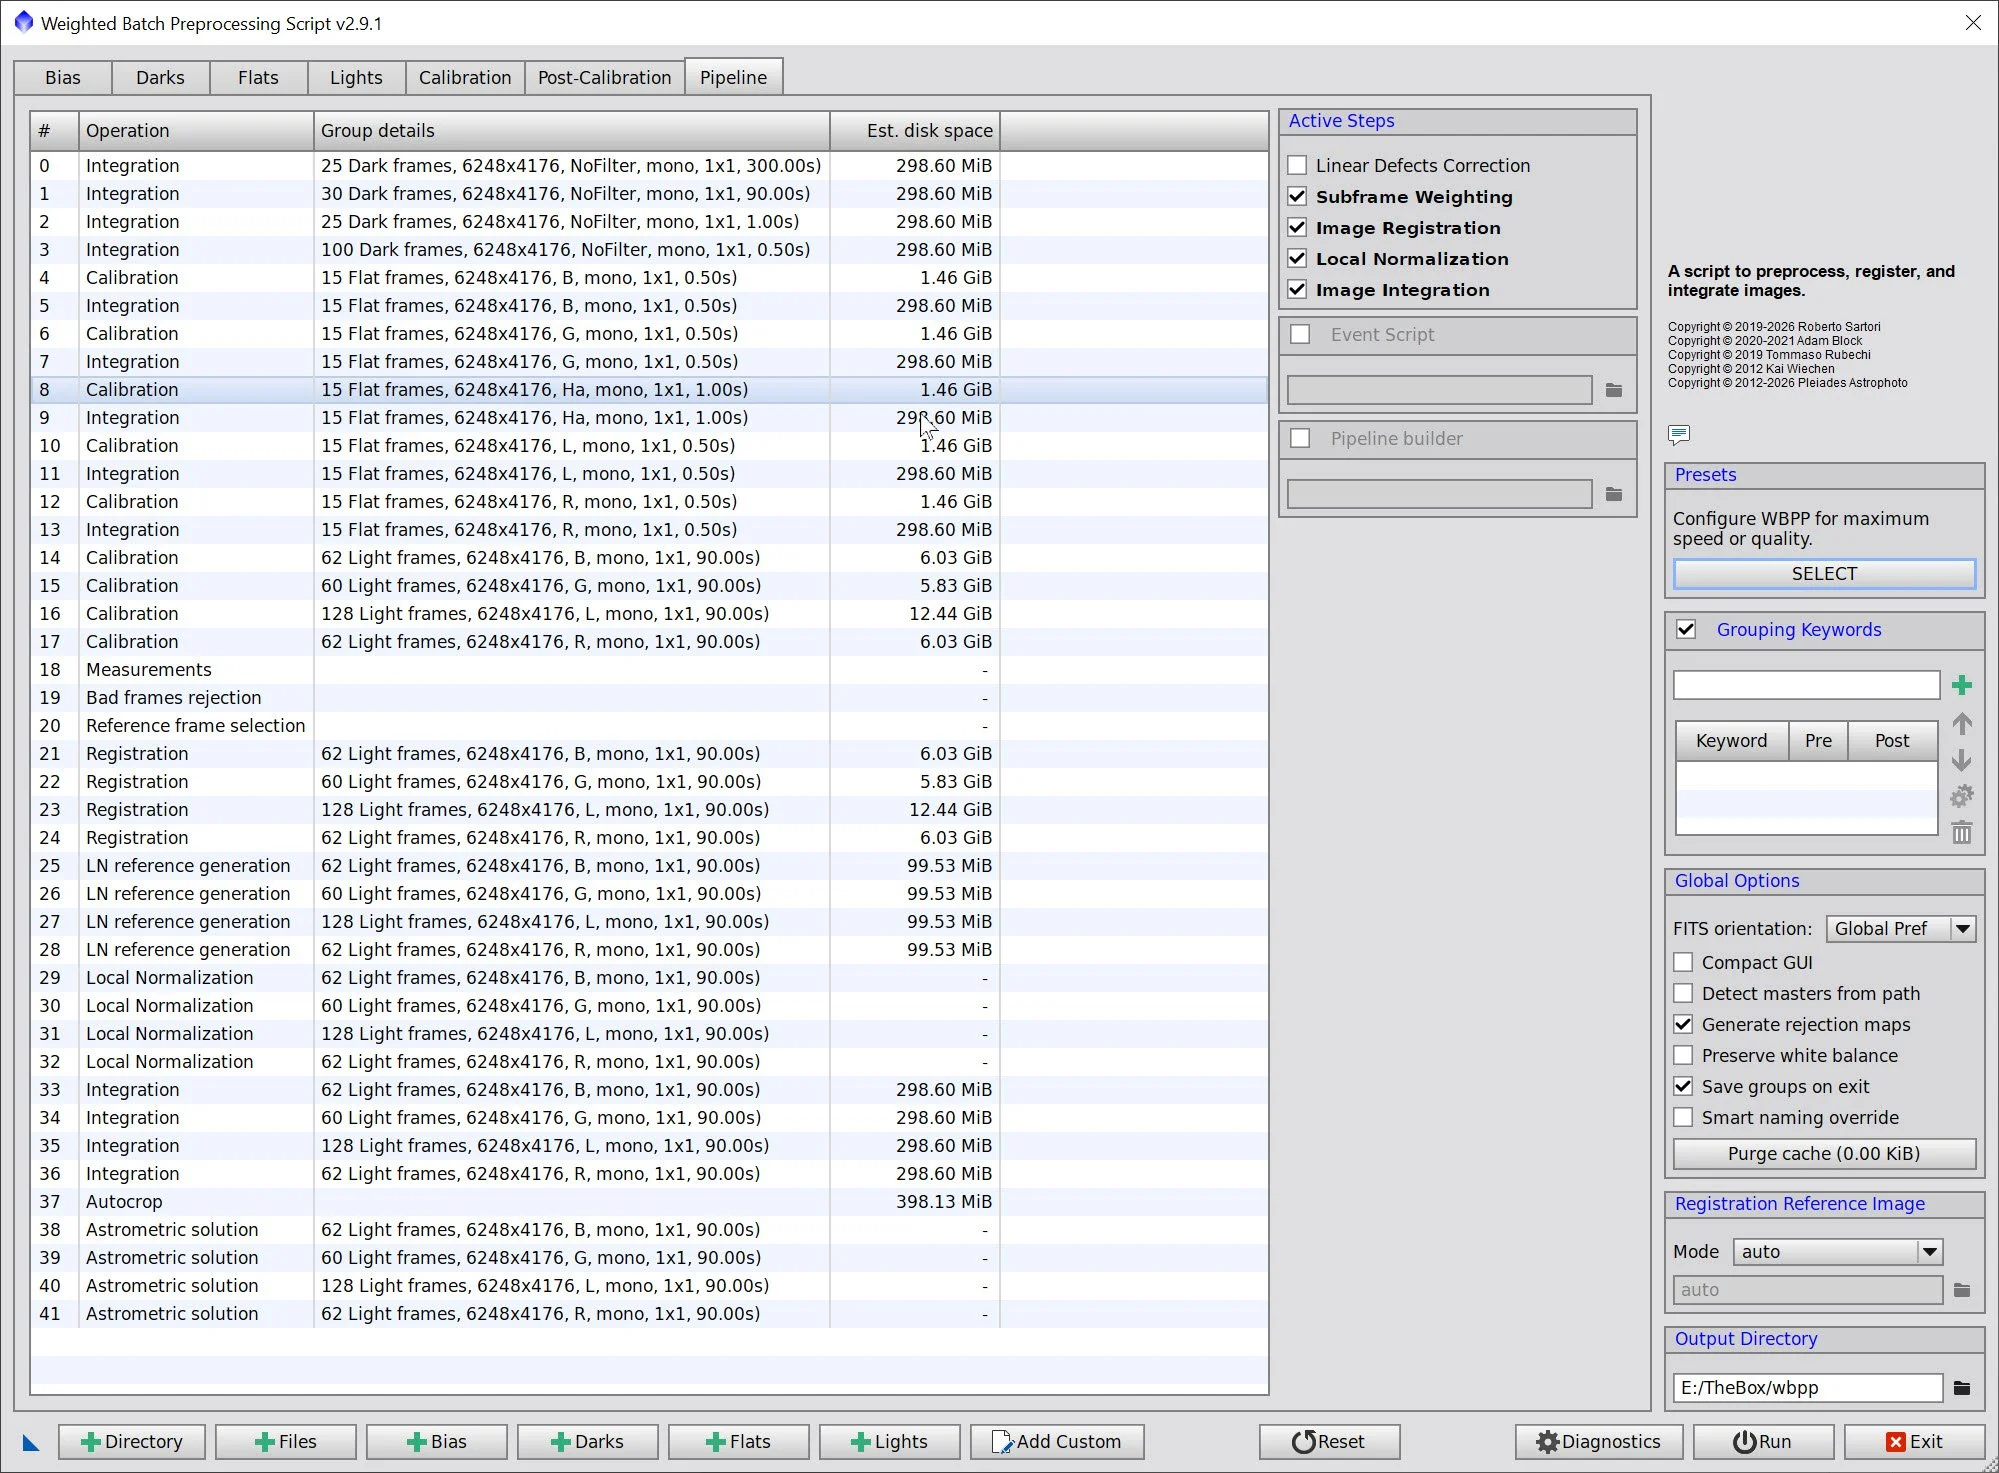
WBPP Pipeline View
3. Load Master Images and Create Color Images
Load all master images and rename them.
Using ChannelCombination, create the master RGB color image
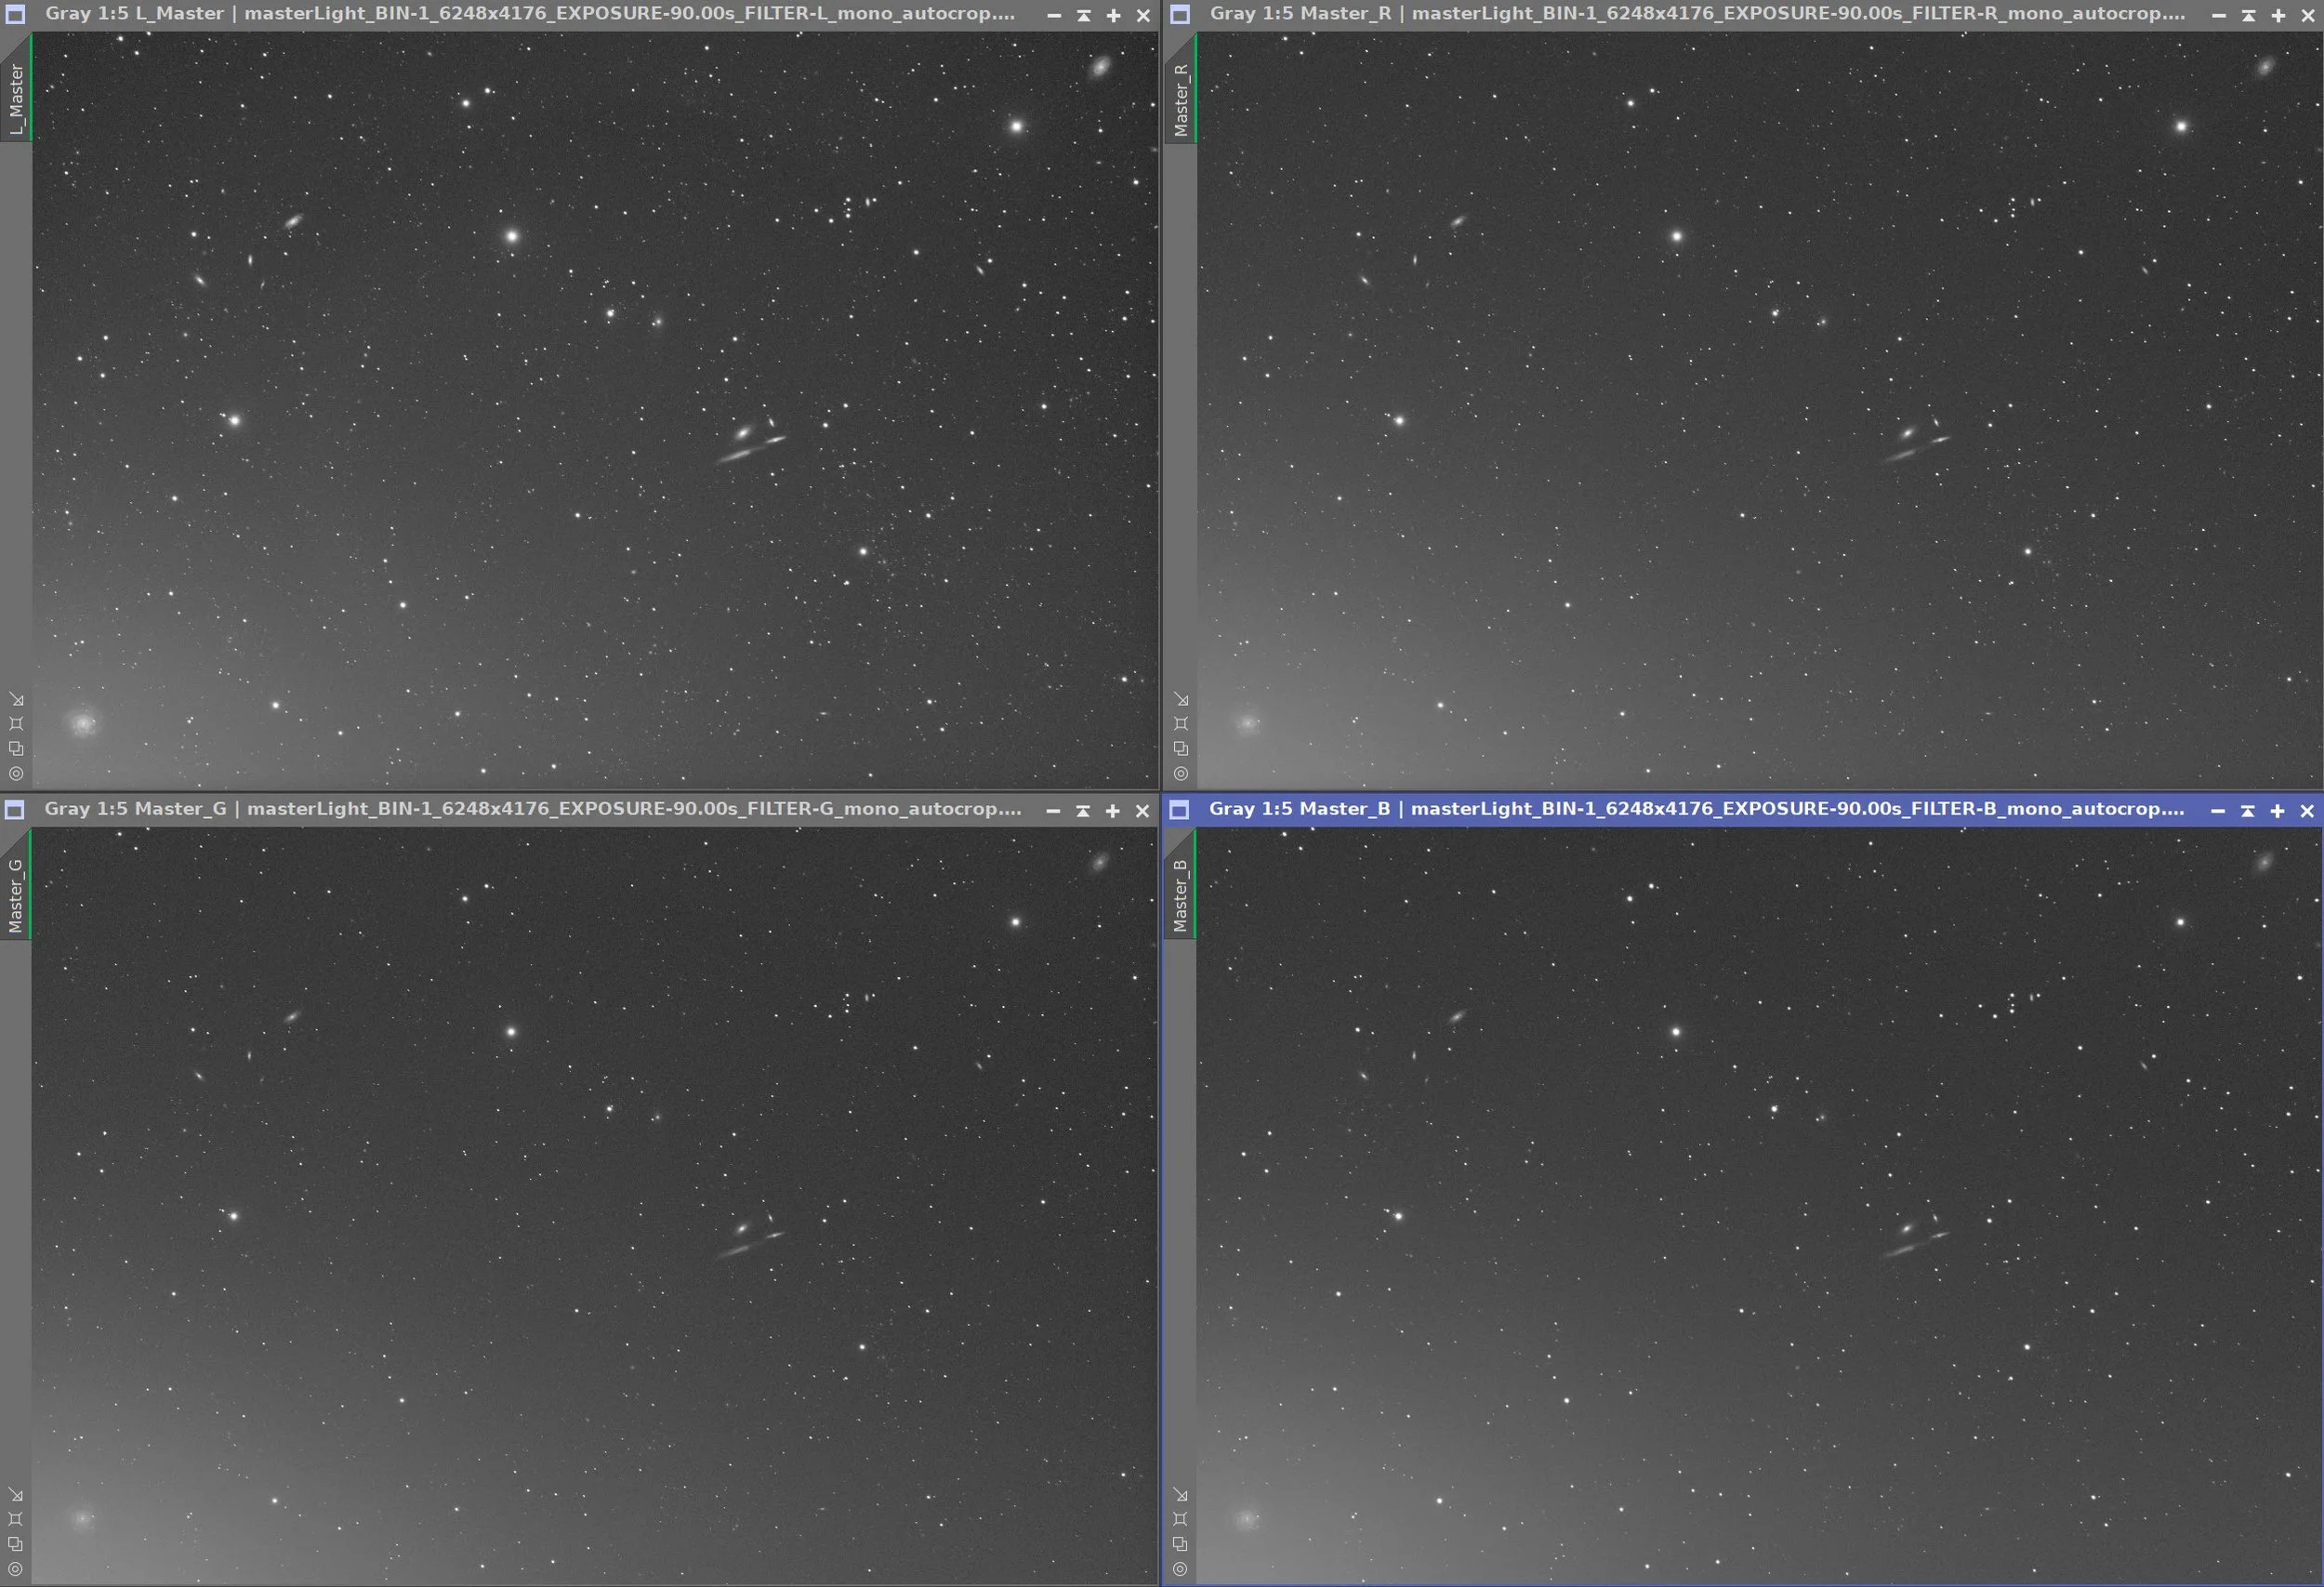
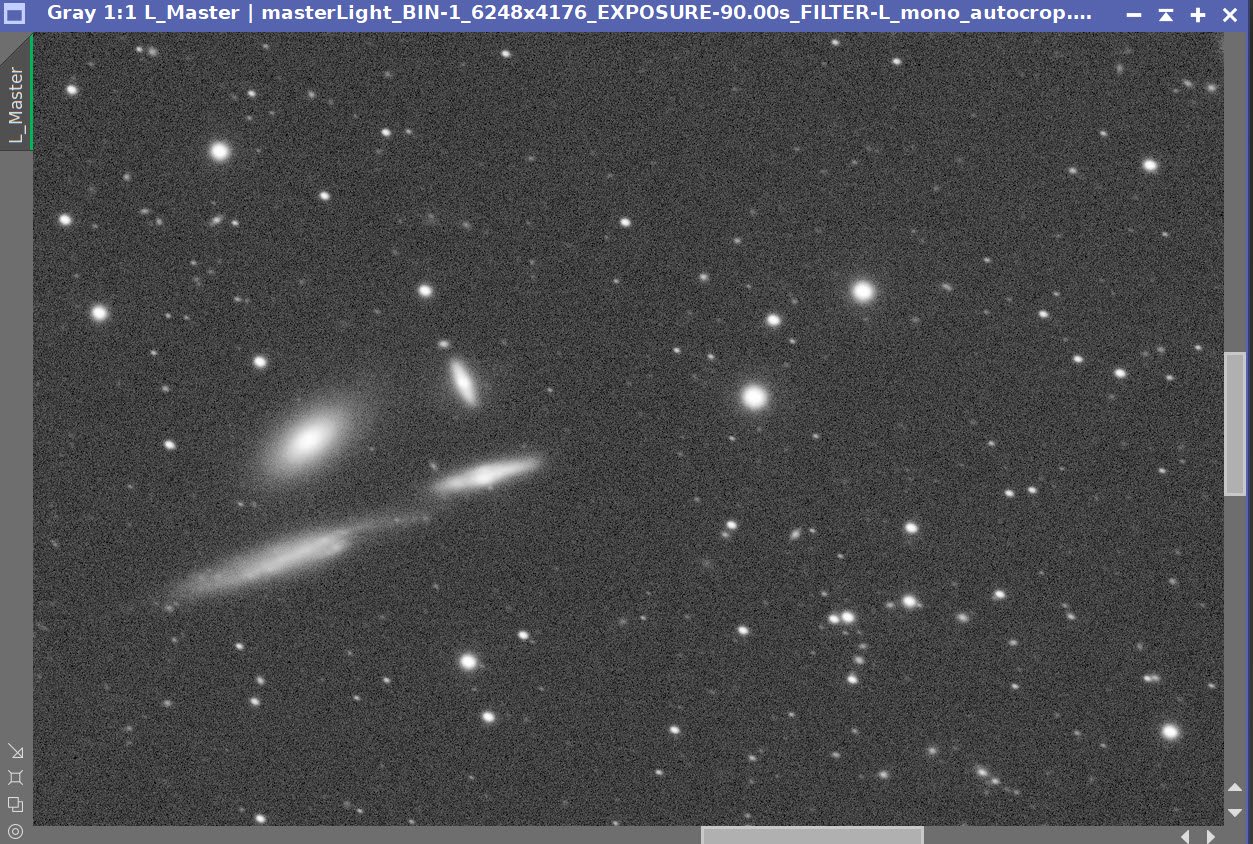
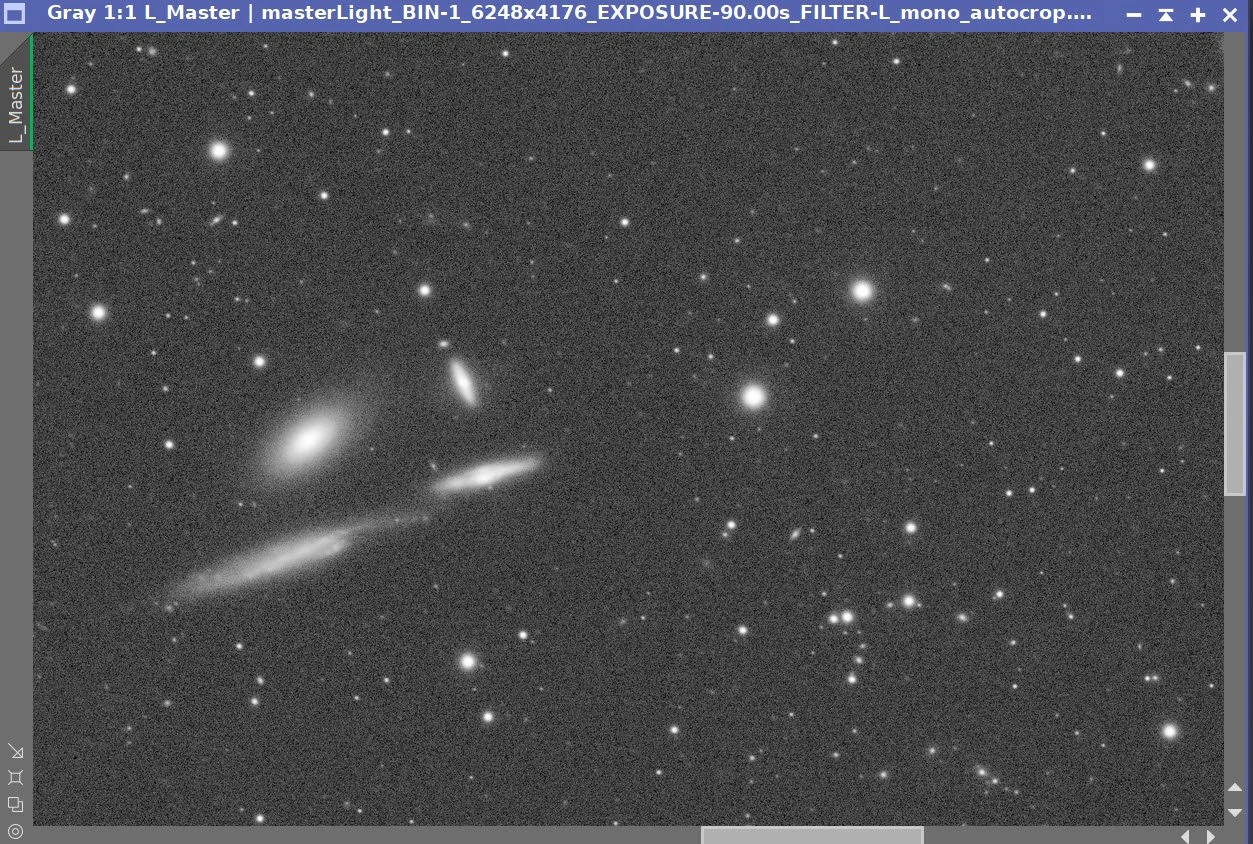
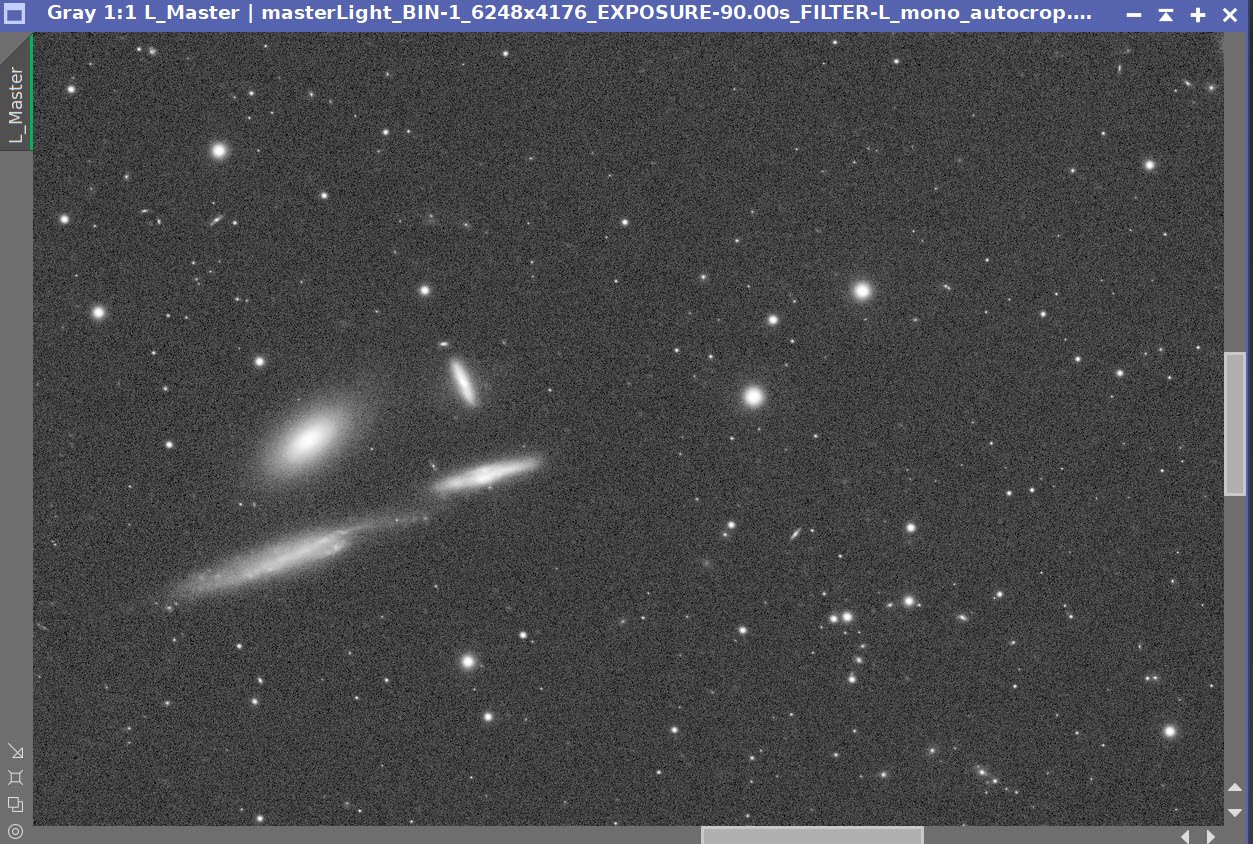
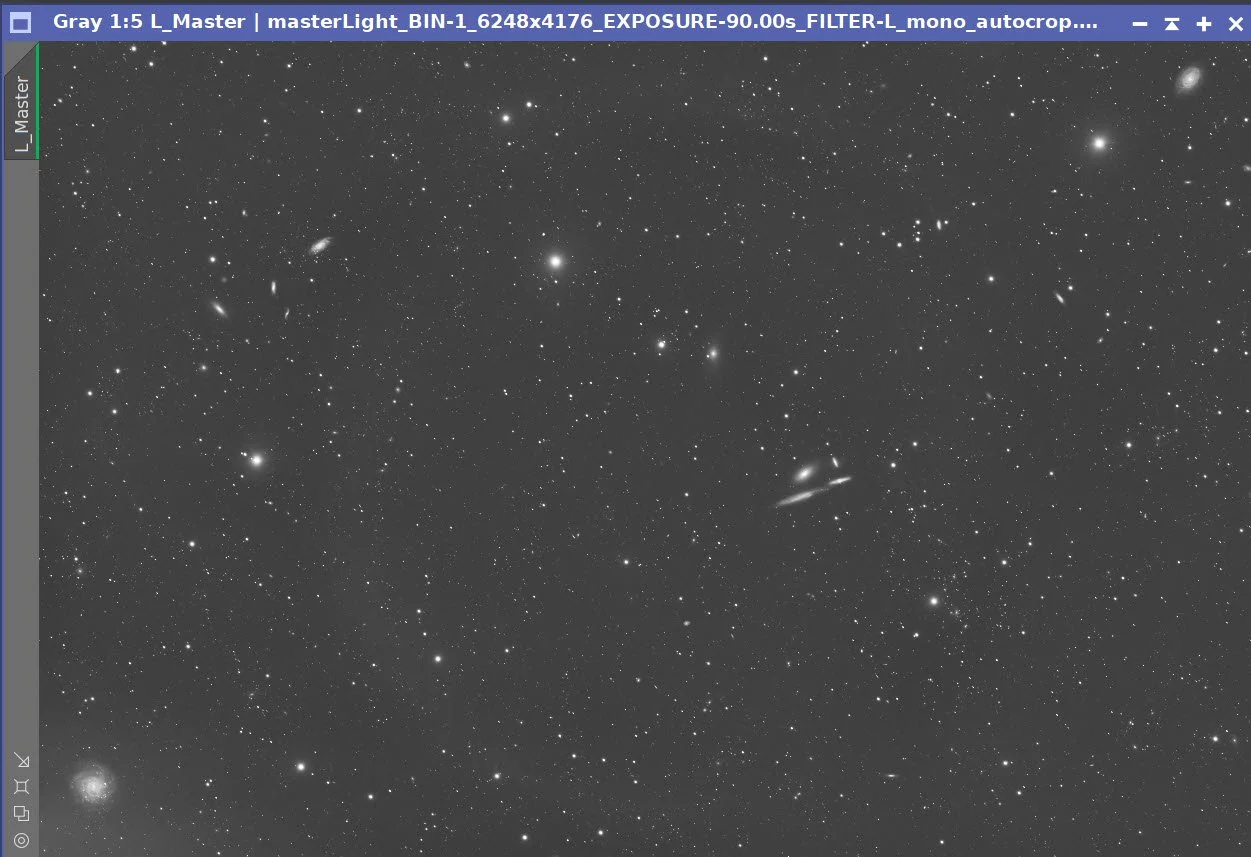
The Individual L, R, G, and B master linear images.
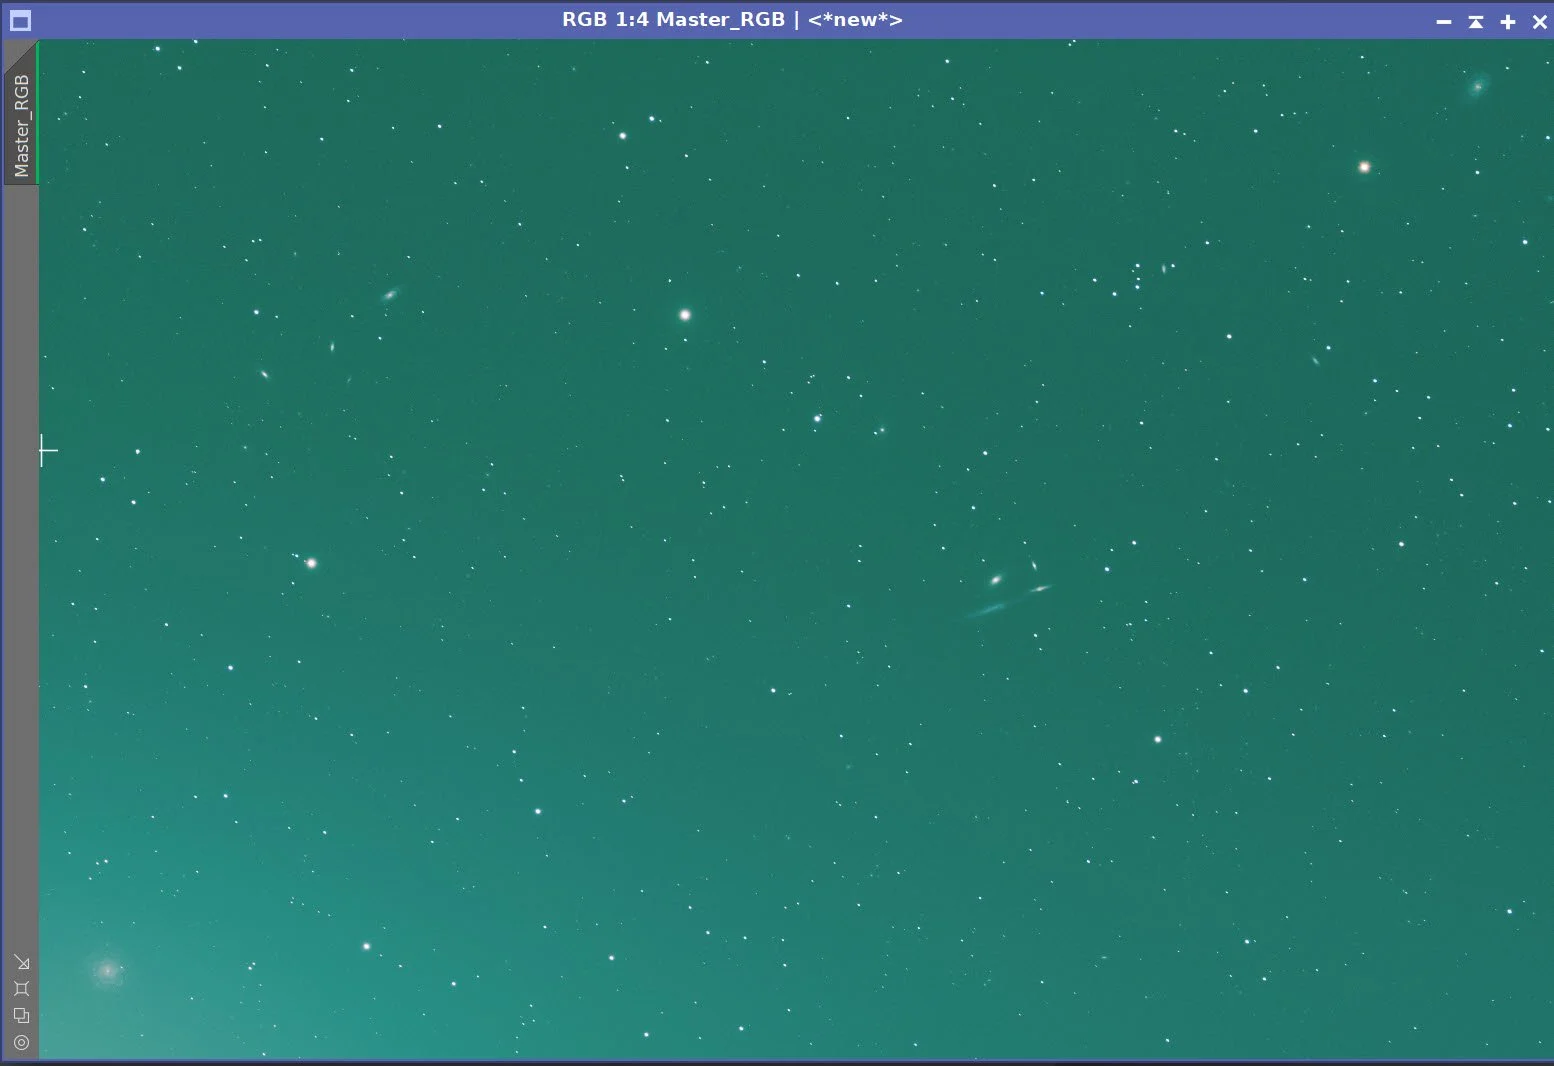
Master RGB image.
4. Initial Processing of Linear Luminance Data
Run DBE for the linear luminance image. Use subtraction for the correction method. Choose a sampling plan that avoids the galaxies and bright stars. (see below). There is a significant gradient leading to the bottom left corner. DBE took most but not all of it out.
Run BXT - Correct Only. This was the turning point in the project. The tracking errors were severe enough that the image might not have been worth continuing, but the Correct Only pass in BlurXTerminator recovered the star shapes far better than I expected.
Run the PFSImage script to measure star sizes. X = 1.86, Y = 1.71. This will influence the values used in BXT.
Run full BXT. I used an enhanced set of values to shrink the stars more aggressively. These are a little over double the measured star sizes. See the BXT Panel Snapshot below.
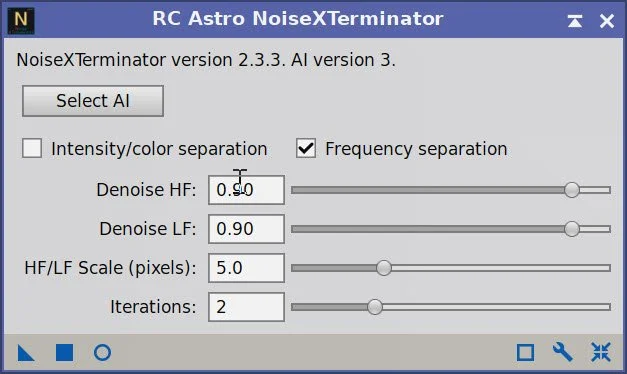
Run NXT V3; refer to the parameters in the snapshot below.
Run SXT - no need to save the Lum stars, as we will not be using them.
Master L Image DBE Sampling Plan (click to enlarge)
Master L- Before DBE (click to enlarge)
Master L after DBE (click to enlarge)
Background Subtracted by DBE (click to enlarge)
Measuring Star Sizes with PFSImage Script (click to enlarge)
BXT Settings Used. (click to enlarge)
NXT Panel used. (click to enlarge)

Master Lum Before BXT Correct Only, After BXT Correct Only, After BXT Full, After NXT
Final Master Lum Image
Master Lum Starless Image (click to enlarge)
5.0 Initial Processing of Linear RGB Data
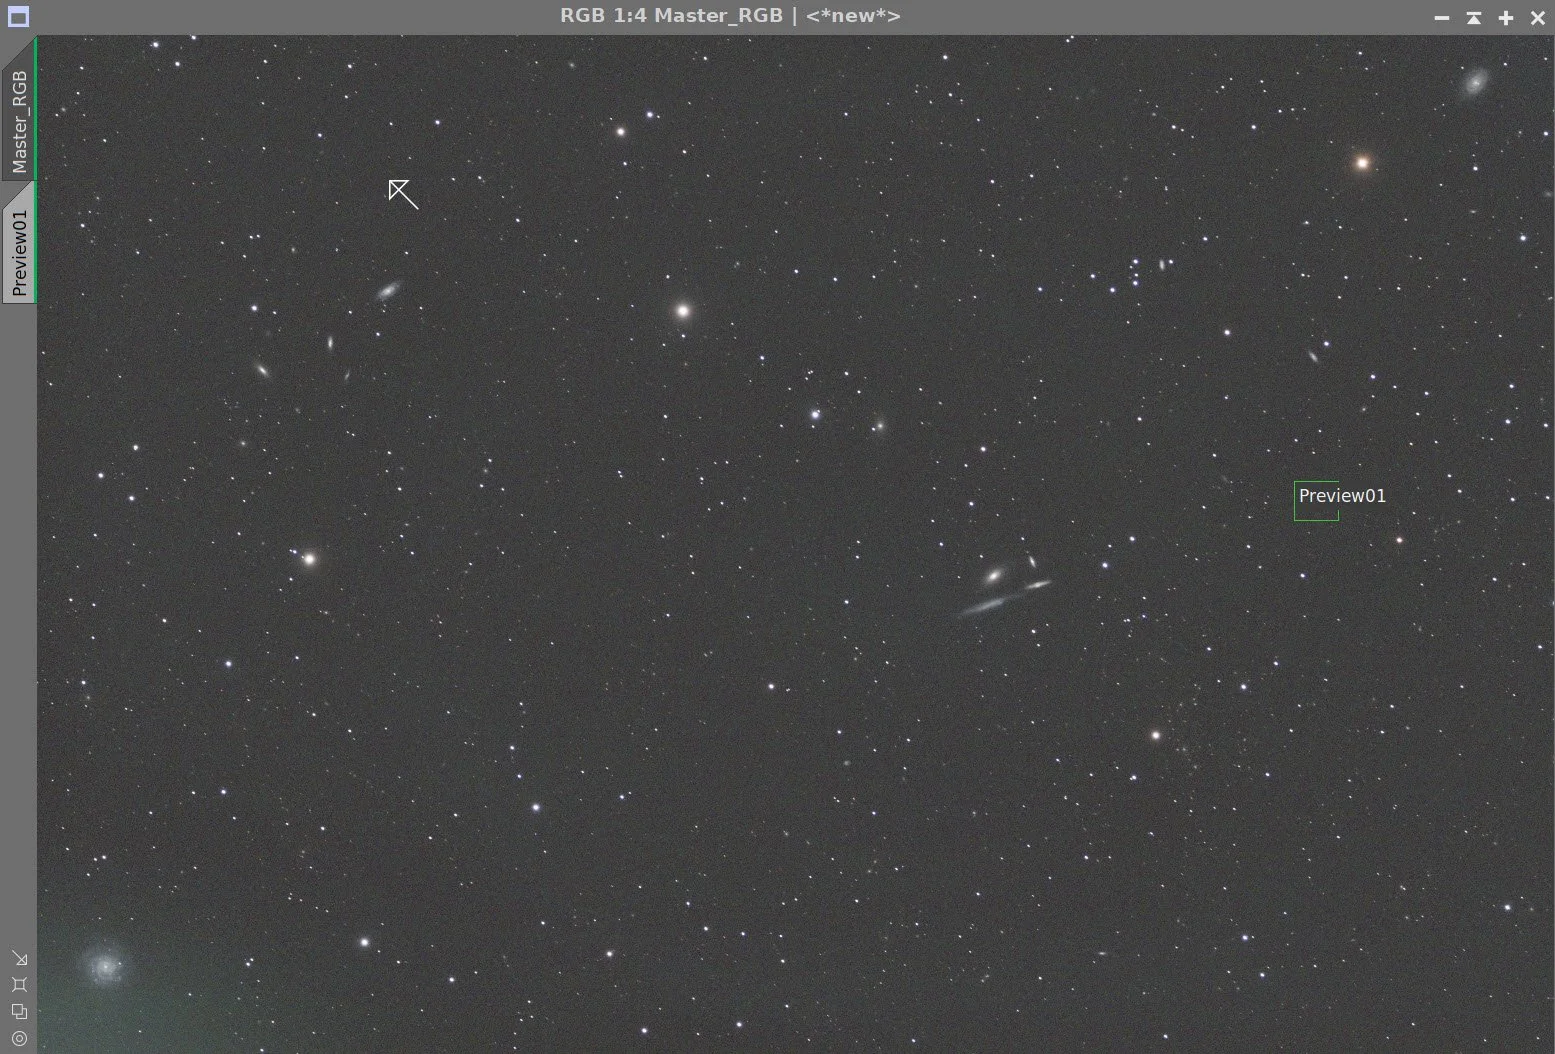
Run DBE for the RGB linear image. Use subtraction for the correction method. Start with the same sampling plan from the Lum run. Choose a sampling plan that avoids the galaxies and bright stars. (see below)
Select a background preview, then set up and run SPCC. See the SPCC Panel shot below for the parameters used.
Run BXT - Correct only. This cleaned up the stars at the corners. There was not much to correct because the optics were performing well.
Run the PFSImage script to measure star sizes. X=1.53 Y = 1.44. This will influence the values used in BXT.
Run Full BXT - I used an enhanced set of values to shrink stars more. These are about double the measured star sizes. See the BXT Panel Snapshot below.
Run NXT V3; refer to the parameters in the snapshot below.
Run SXT - this time we will save the RGB stars.
Master RGB Sampling Plan (click to enlarge)
Master RGB before DBE (click to enlarge)
Master RGB after DBE (click to enlarge)
Master RGB Background removed (click to enlarge)
Master RGB before SPCC (click to enlarge)
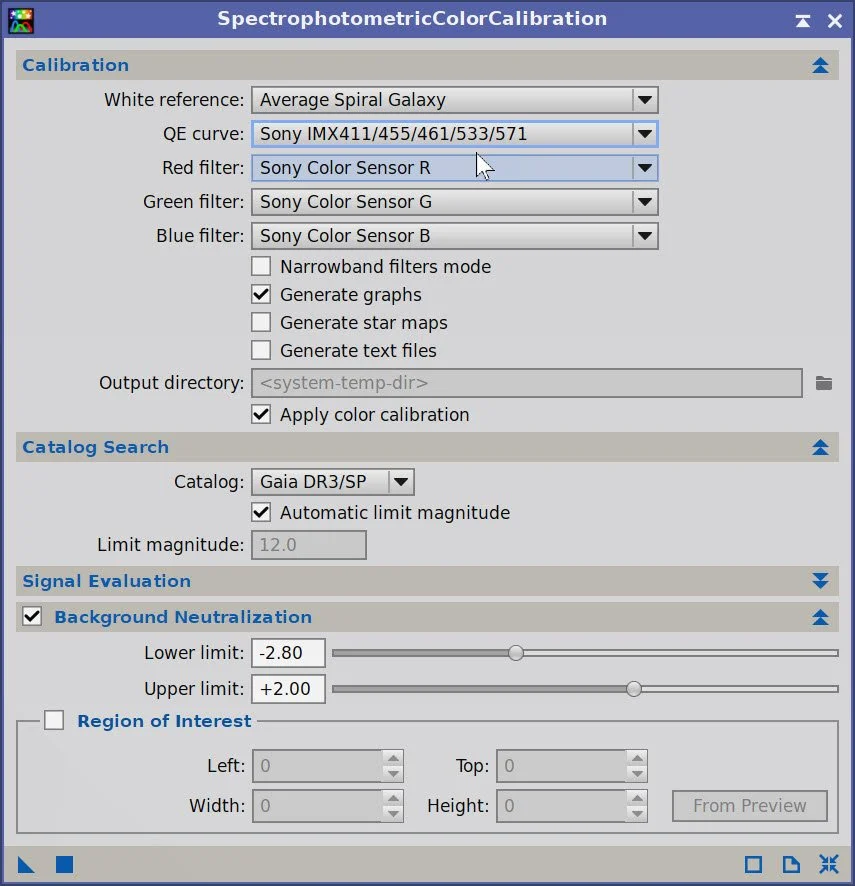
SPCC Panel showing parameters used.
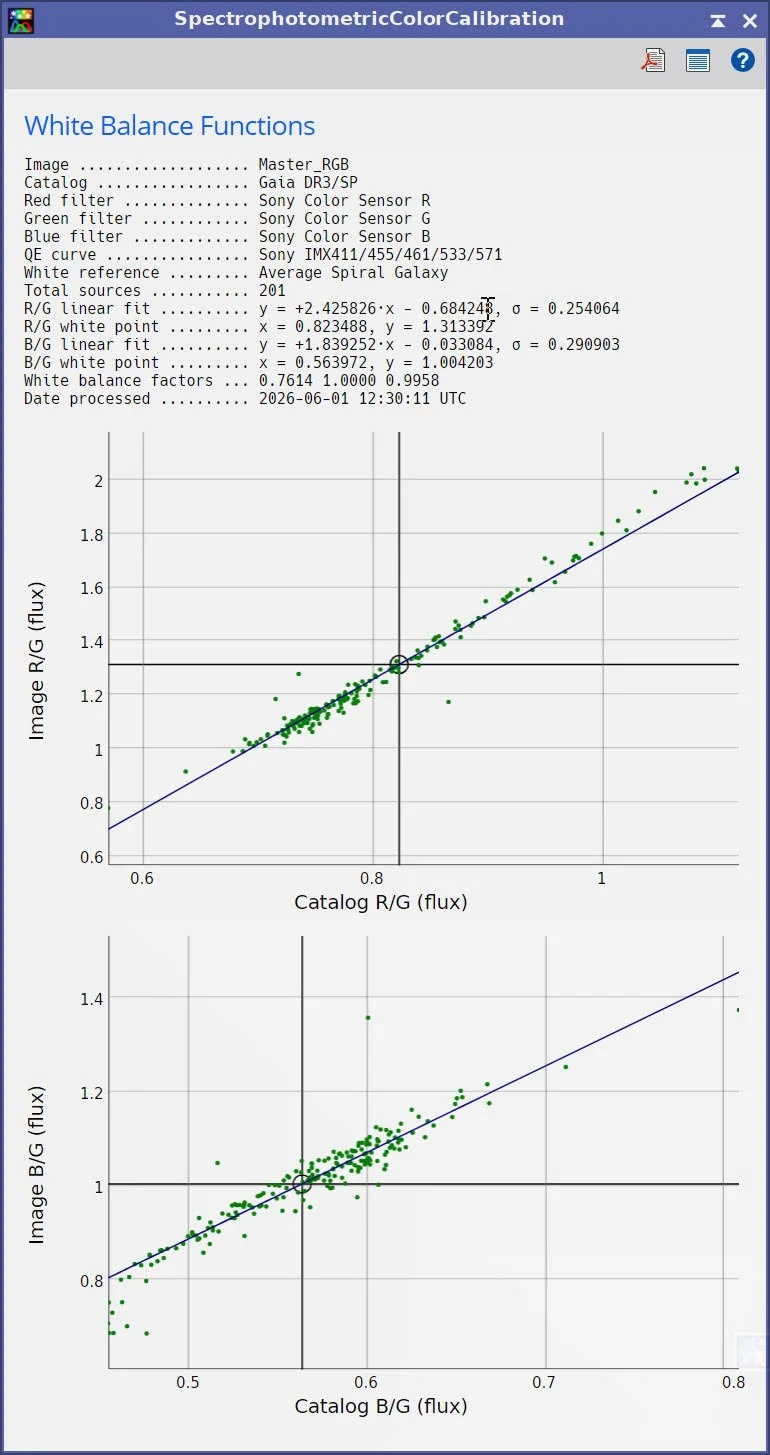
SPCC Regression results.
Master RGB after SPCC.
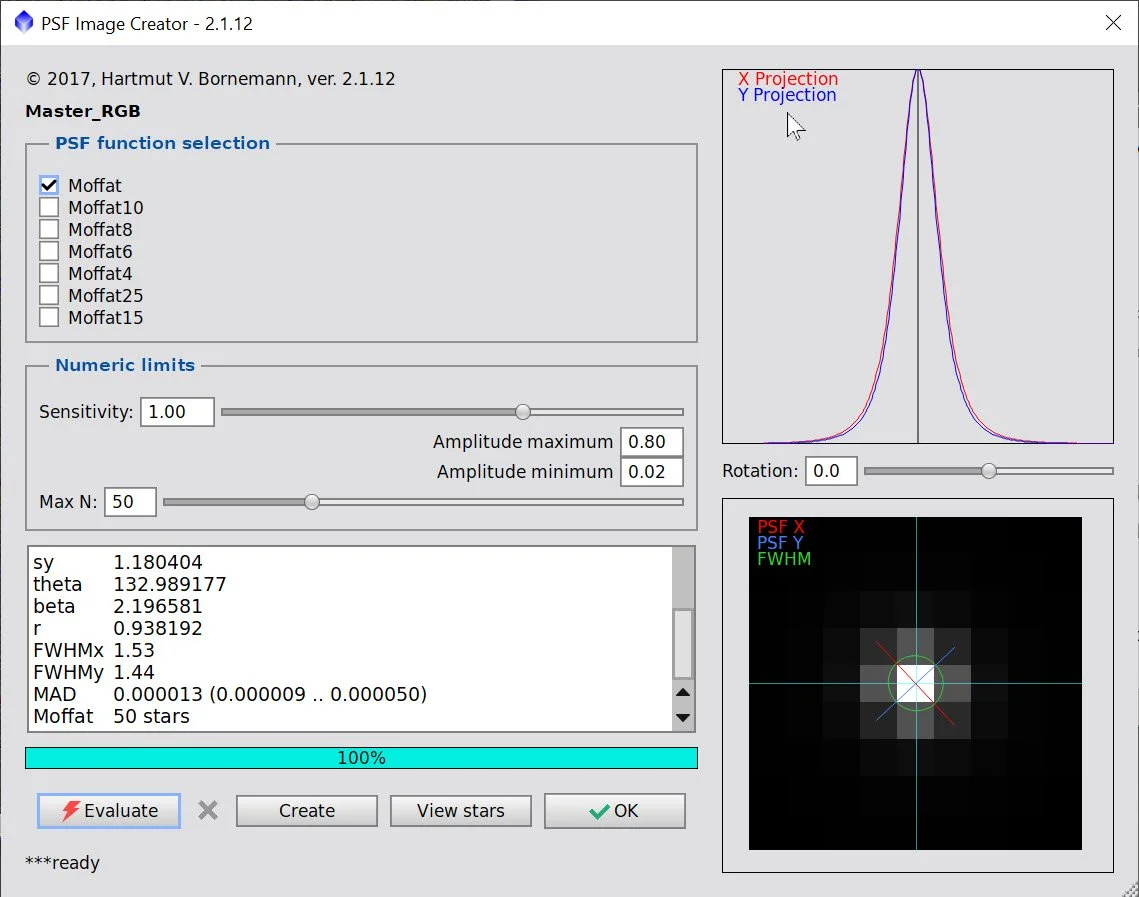
PFSImage panel showing star sizes.
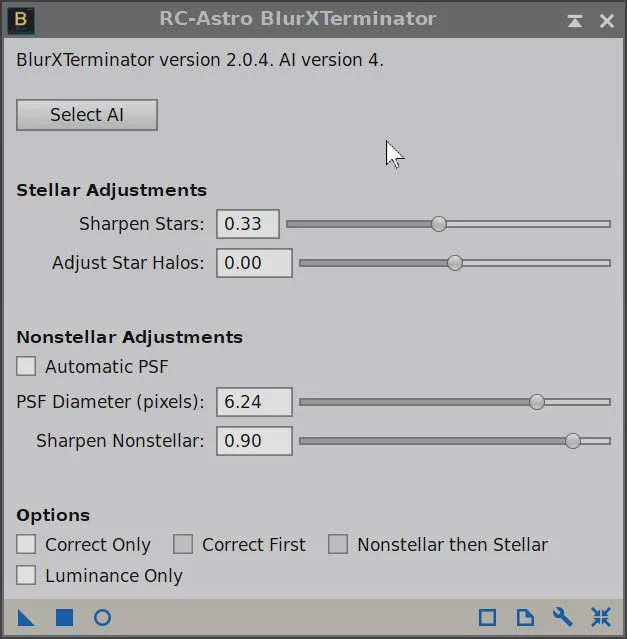
BXT Panel showing parameters used.
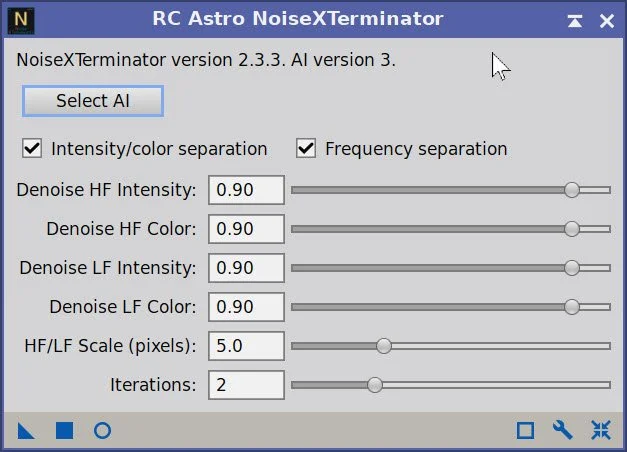
NXT Panel showing parameters used.

Master RGB Before BXT Correct Only, After BXT Correct Only, After BXT Full, After NXT

Master RGB Image before SXT.
Master RGB Starless Image. (click to enlarge)
Master RGB Stars image (click to enlarge)
6. Go Nonlinear
Using the STF → HT method, take the linear Luminance and RGB images nonlinear.
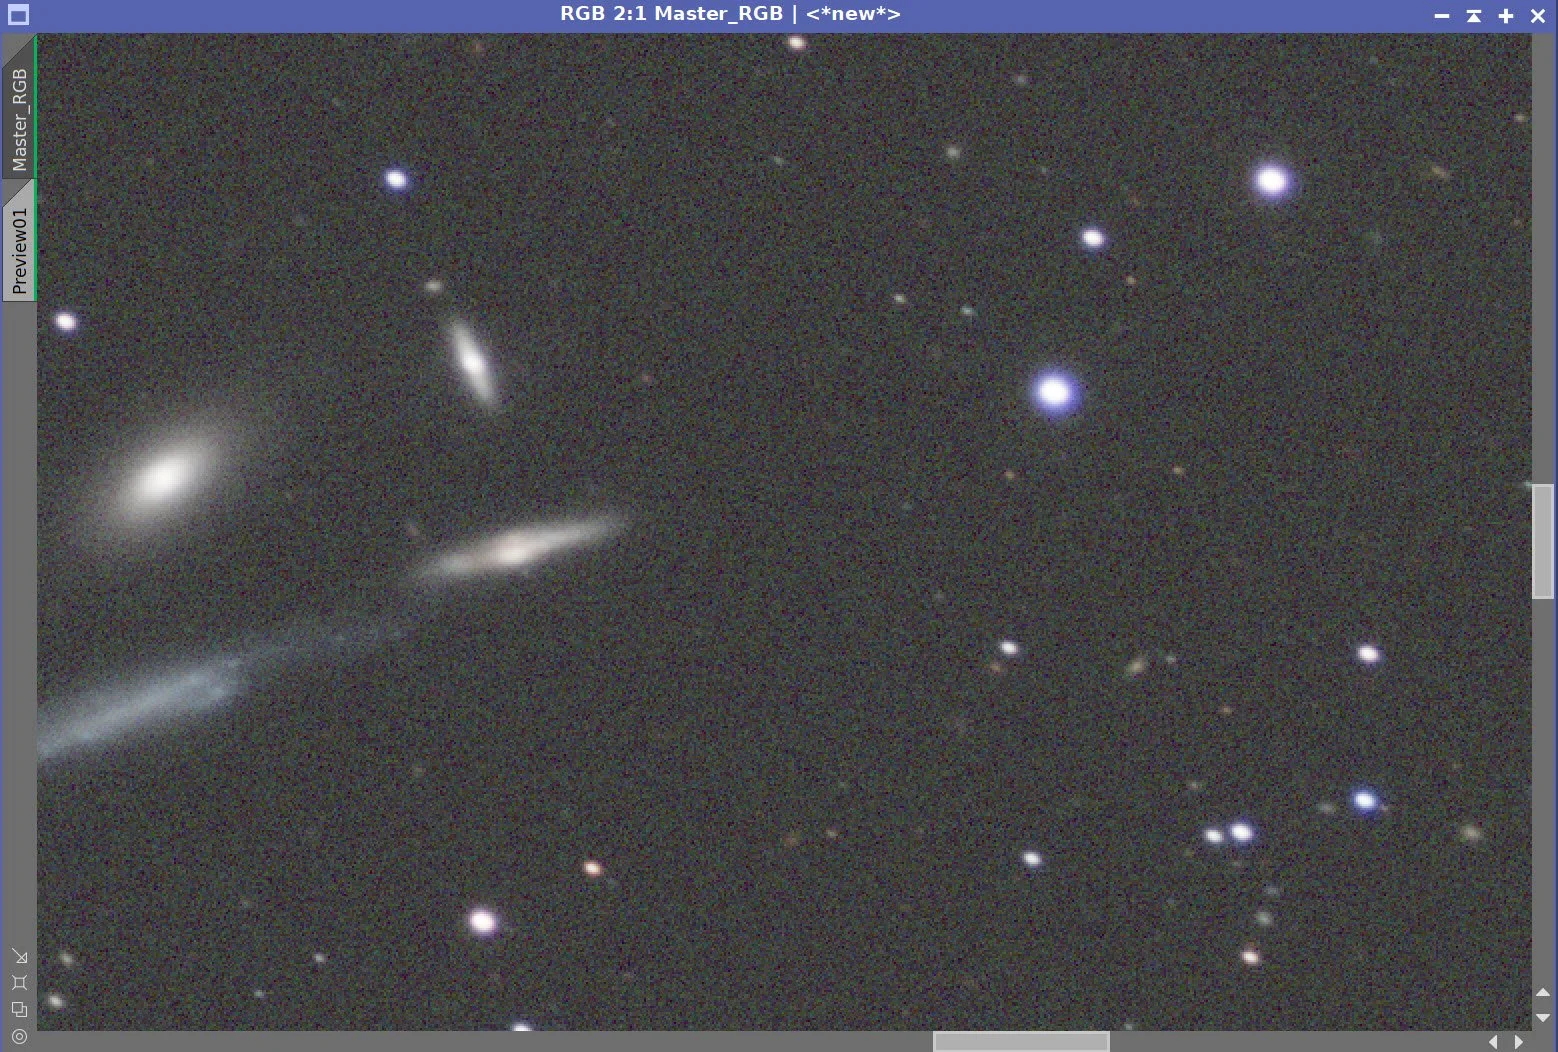
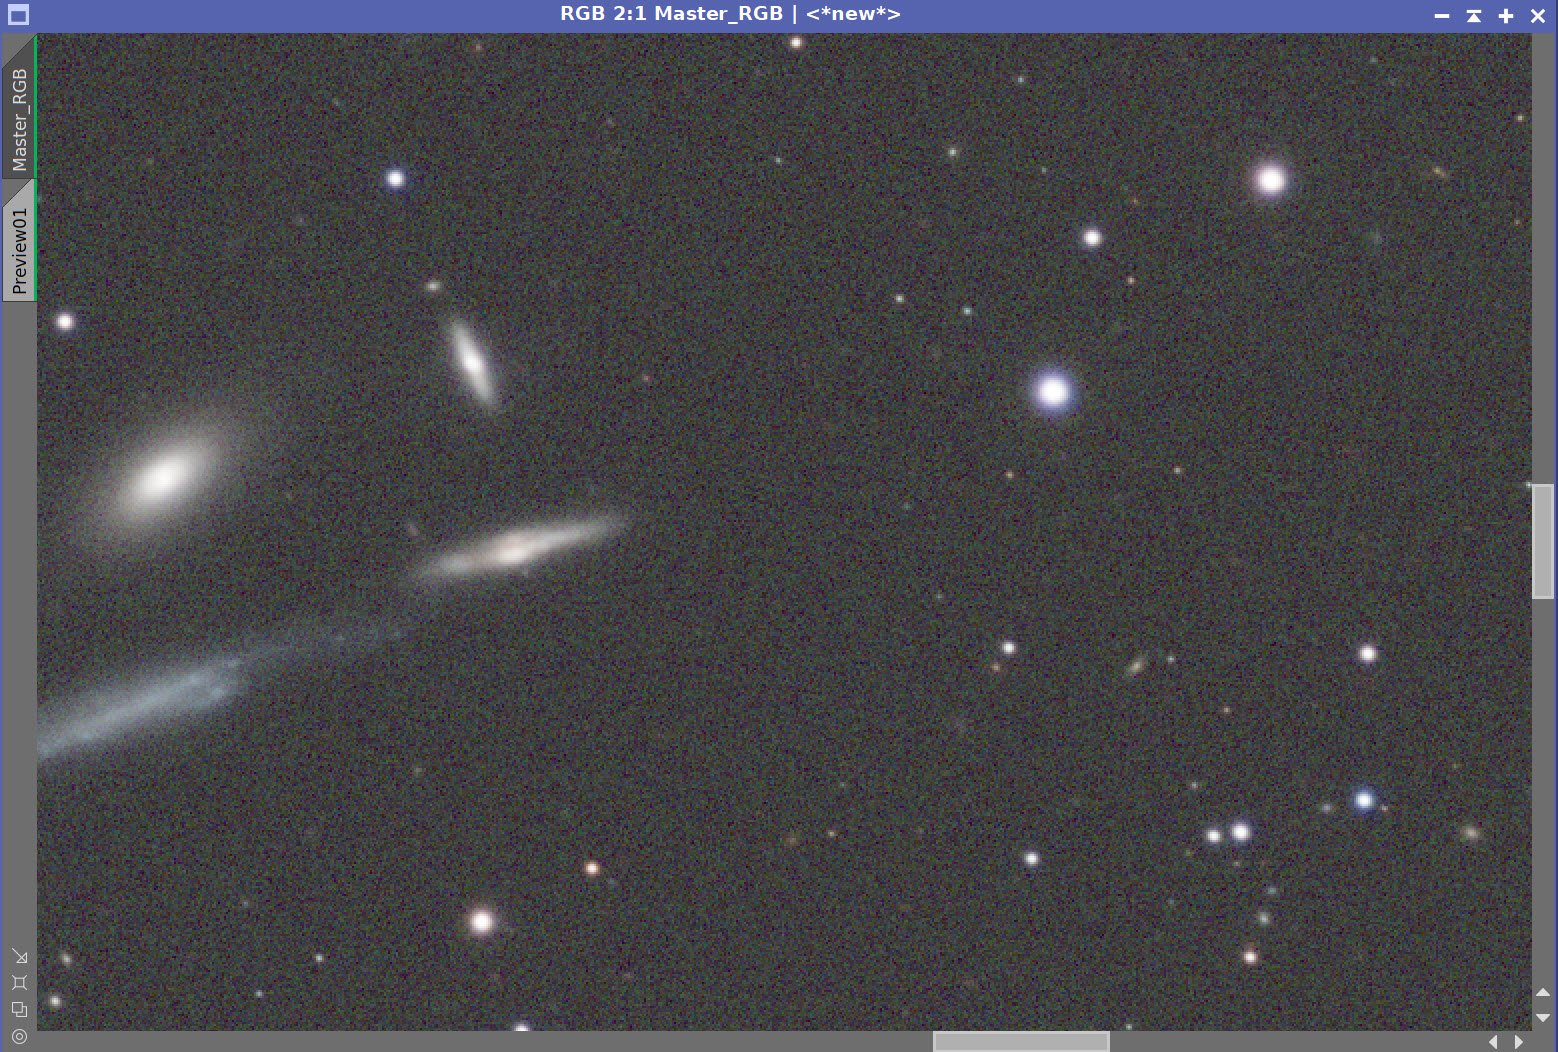
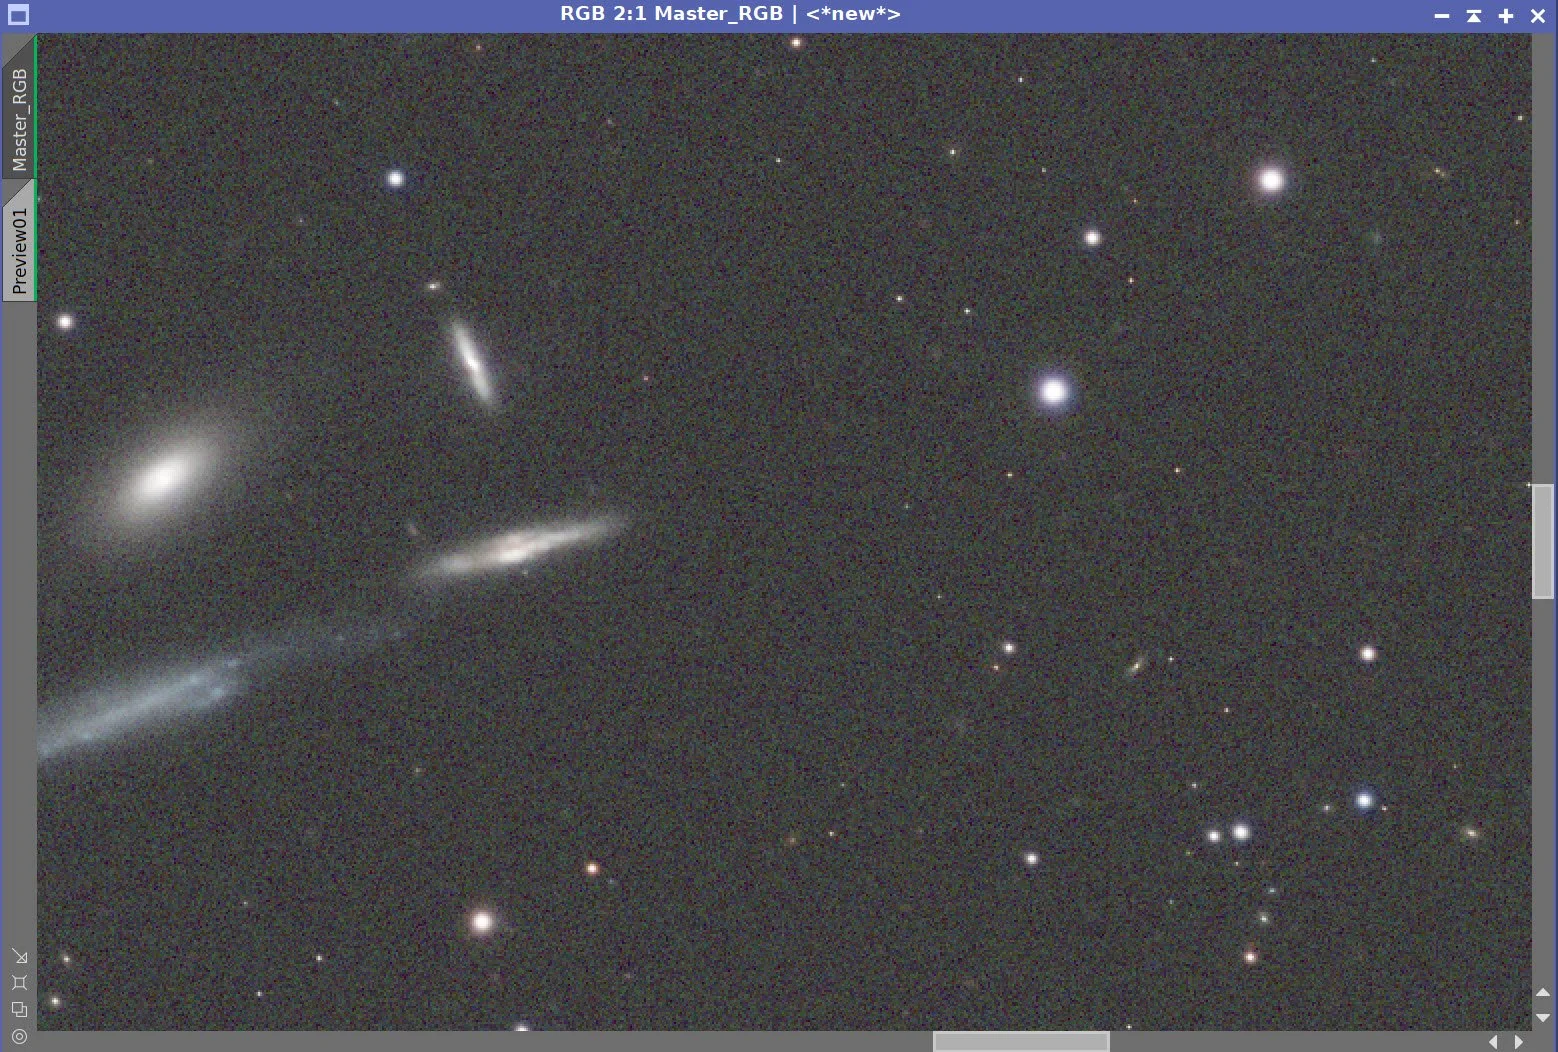
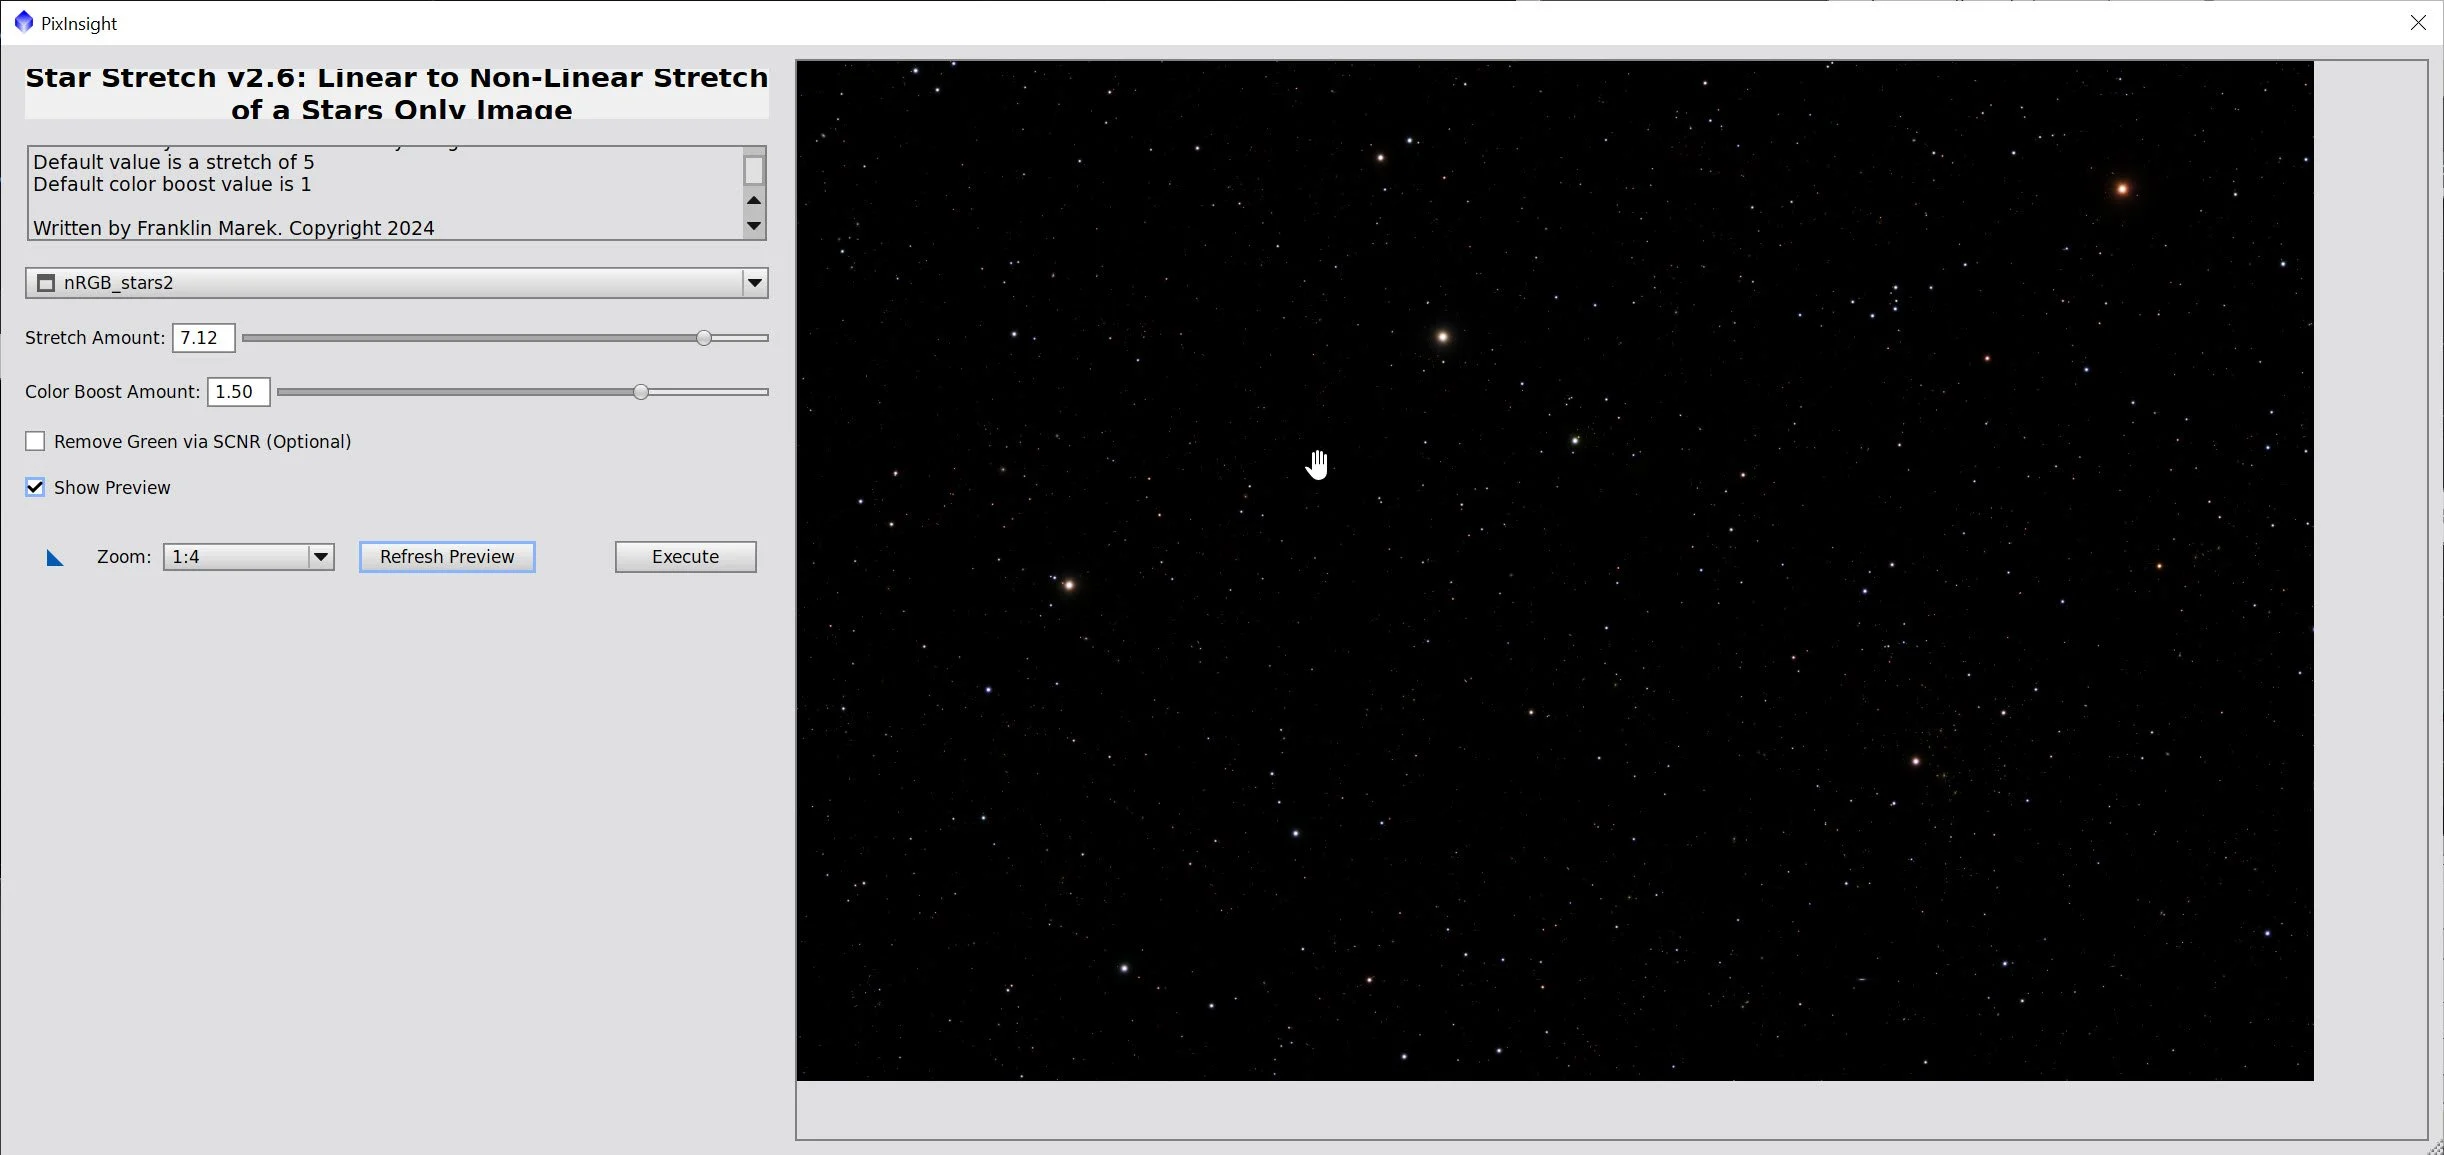
Using Seti Astro Star Stretch, take the RGB star image nonlinear with three levels of star stretch:
1.6 stretch, and 1.5 saturation boost.
Nonlinear Starting Lum Image (zoomed) (click to enlarge)
Nonlinear RGB image (zoomed) (click to enlarge)
Min Stretch RGB Stars (Click to enlarge)
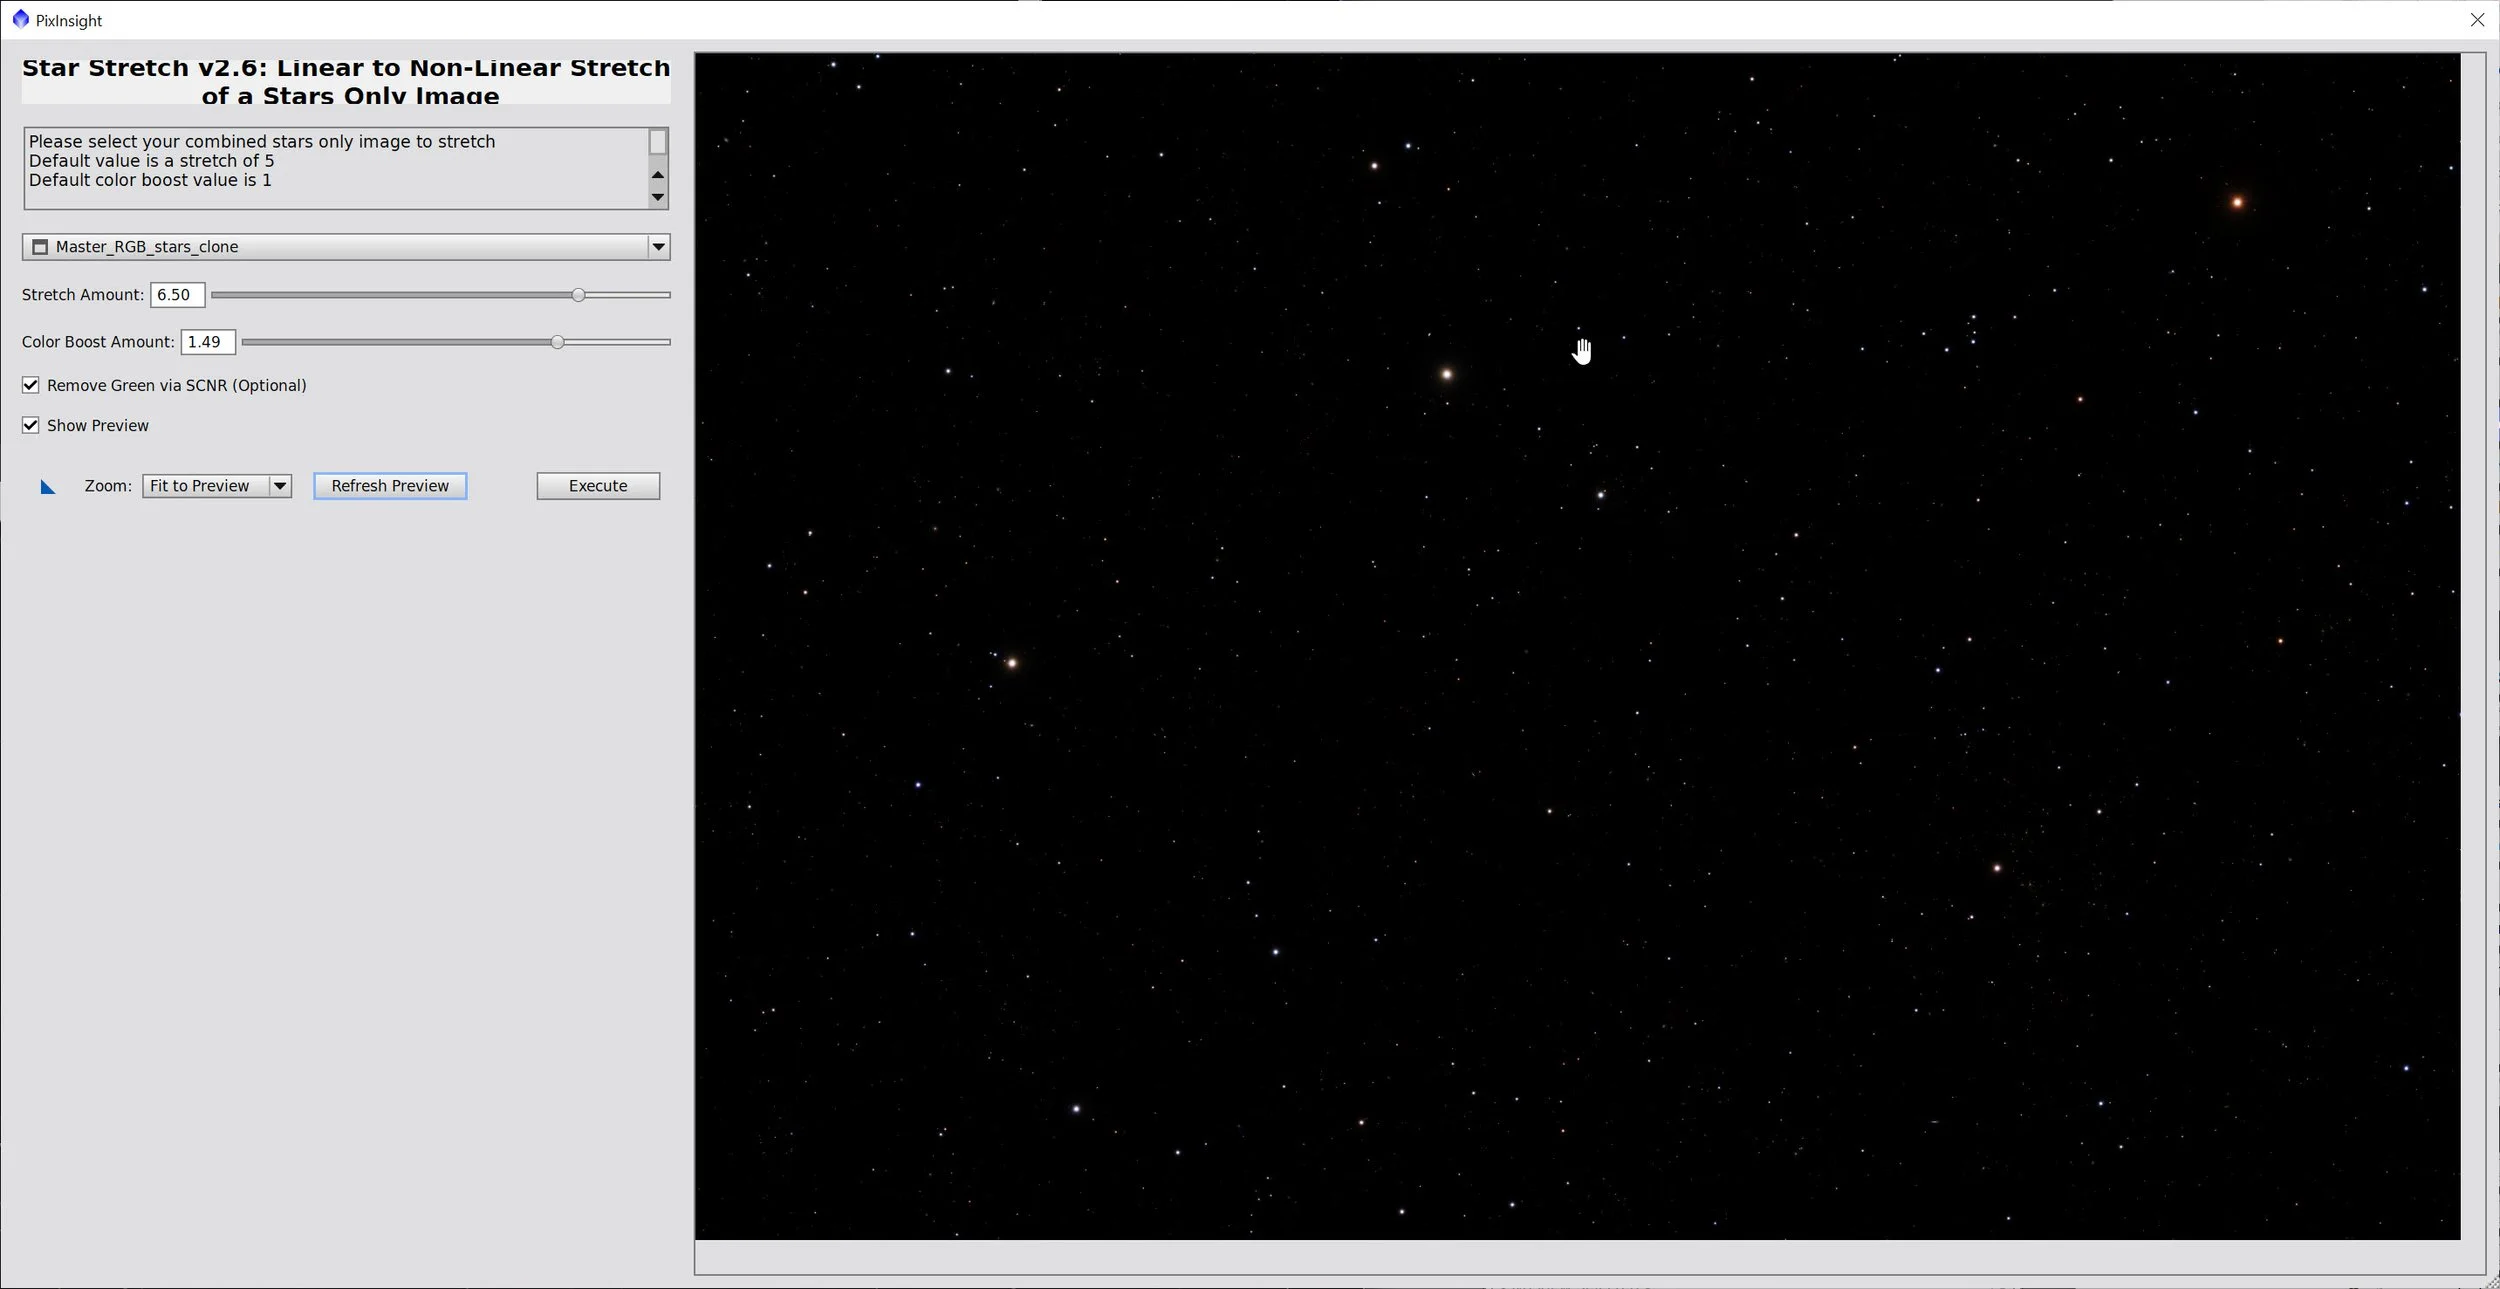
Mid Stretch RGB Stars
High Stretch RGB Stars
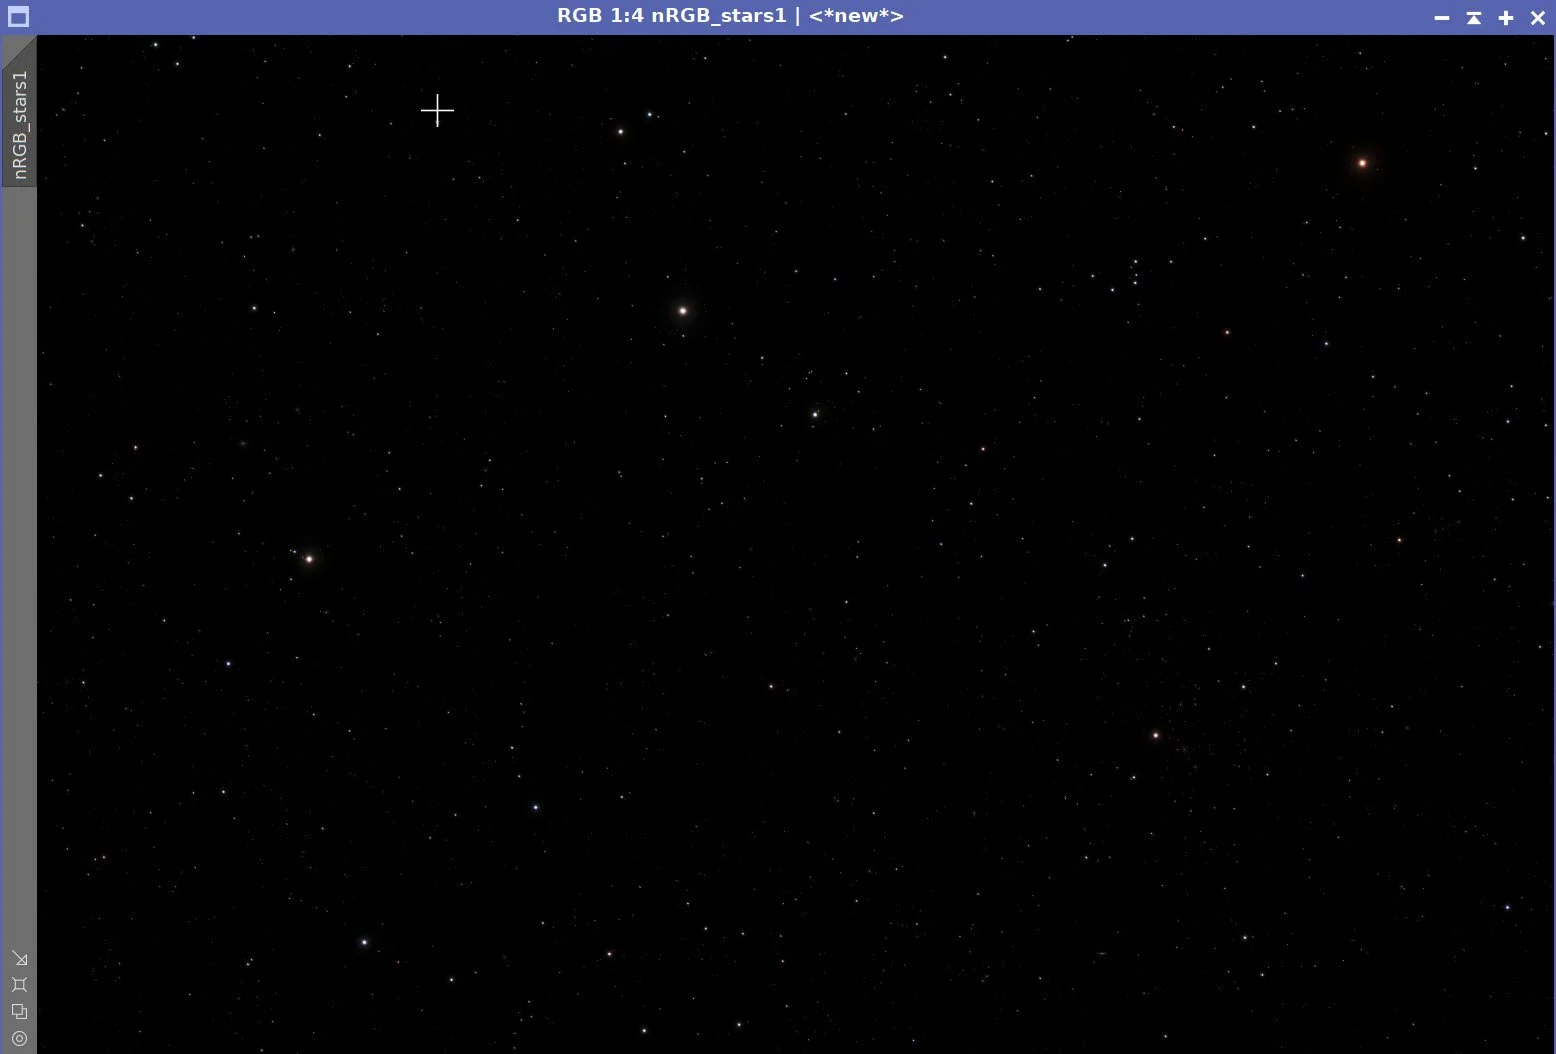
Small stars.
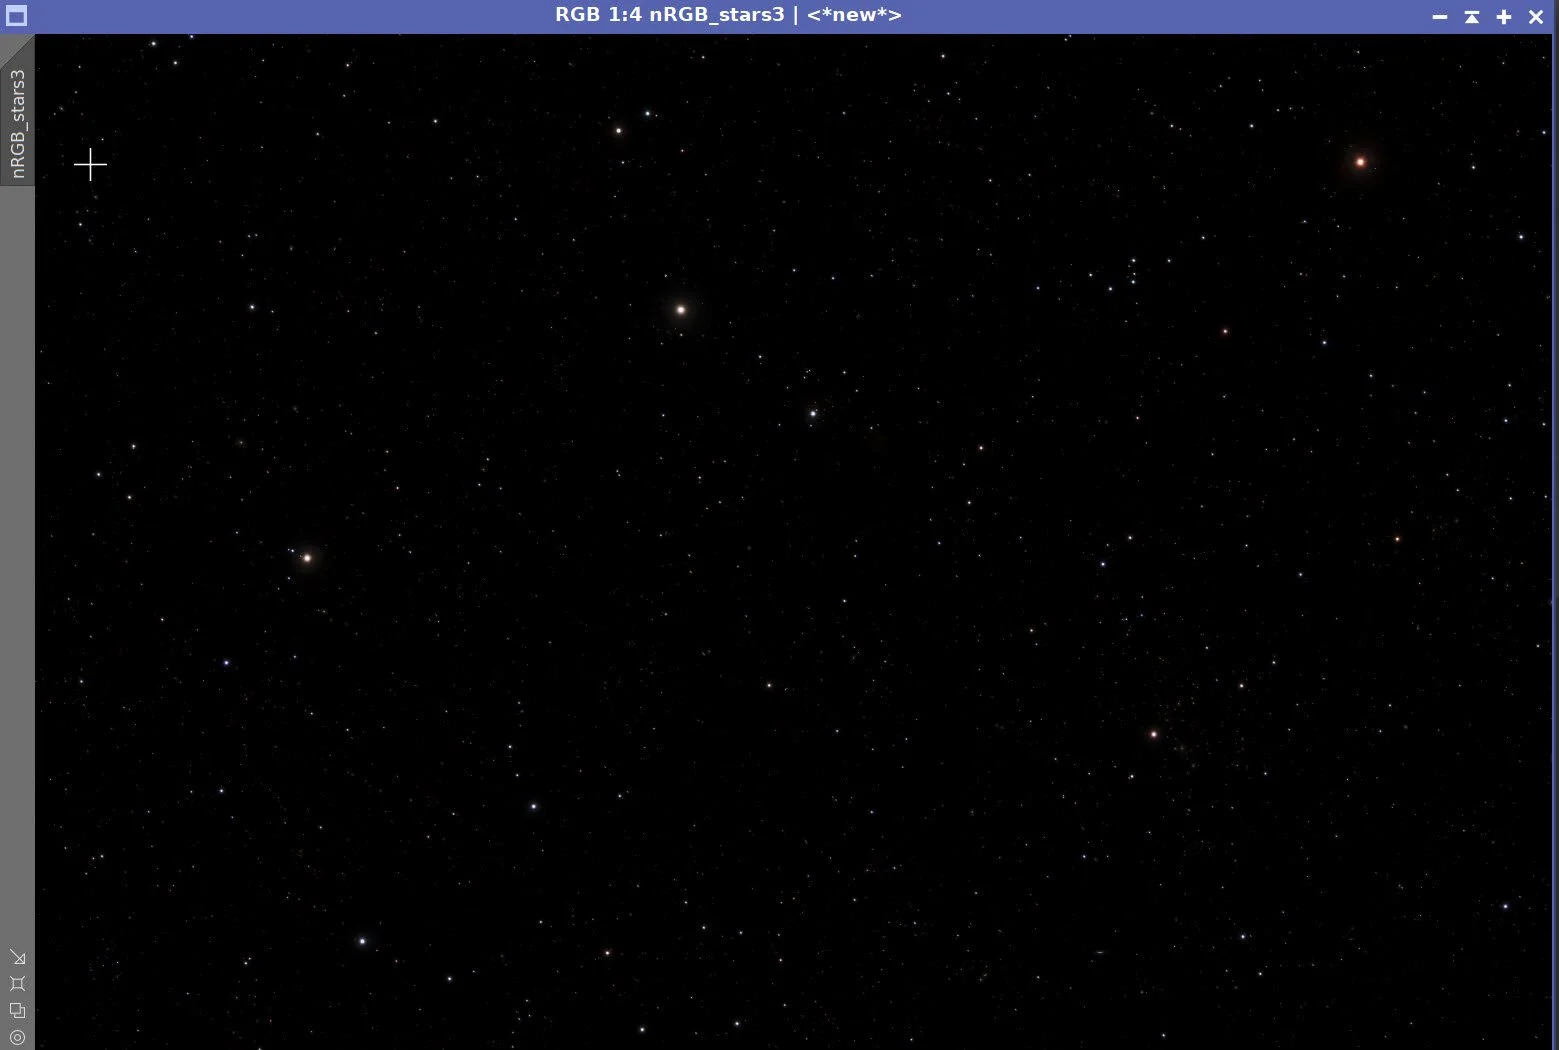
Med Stars.
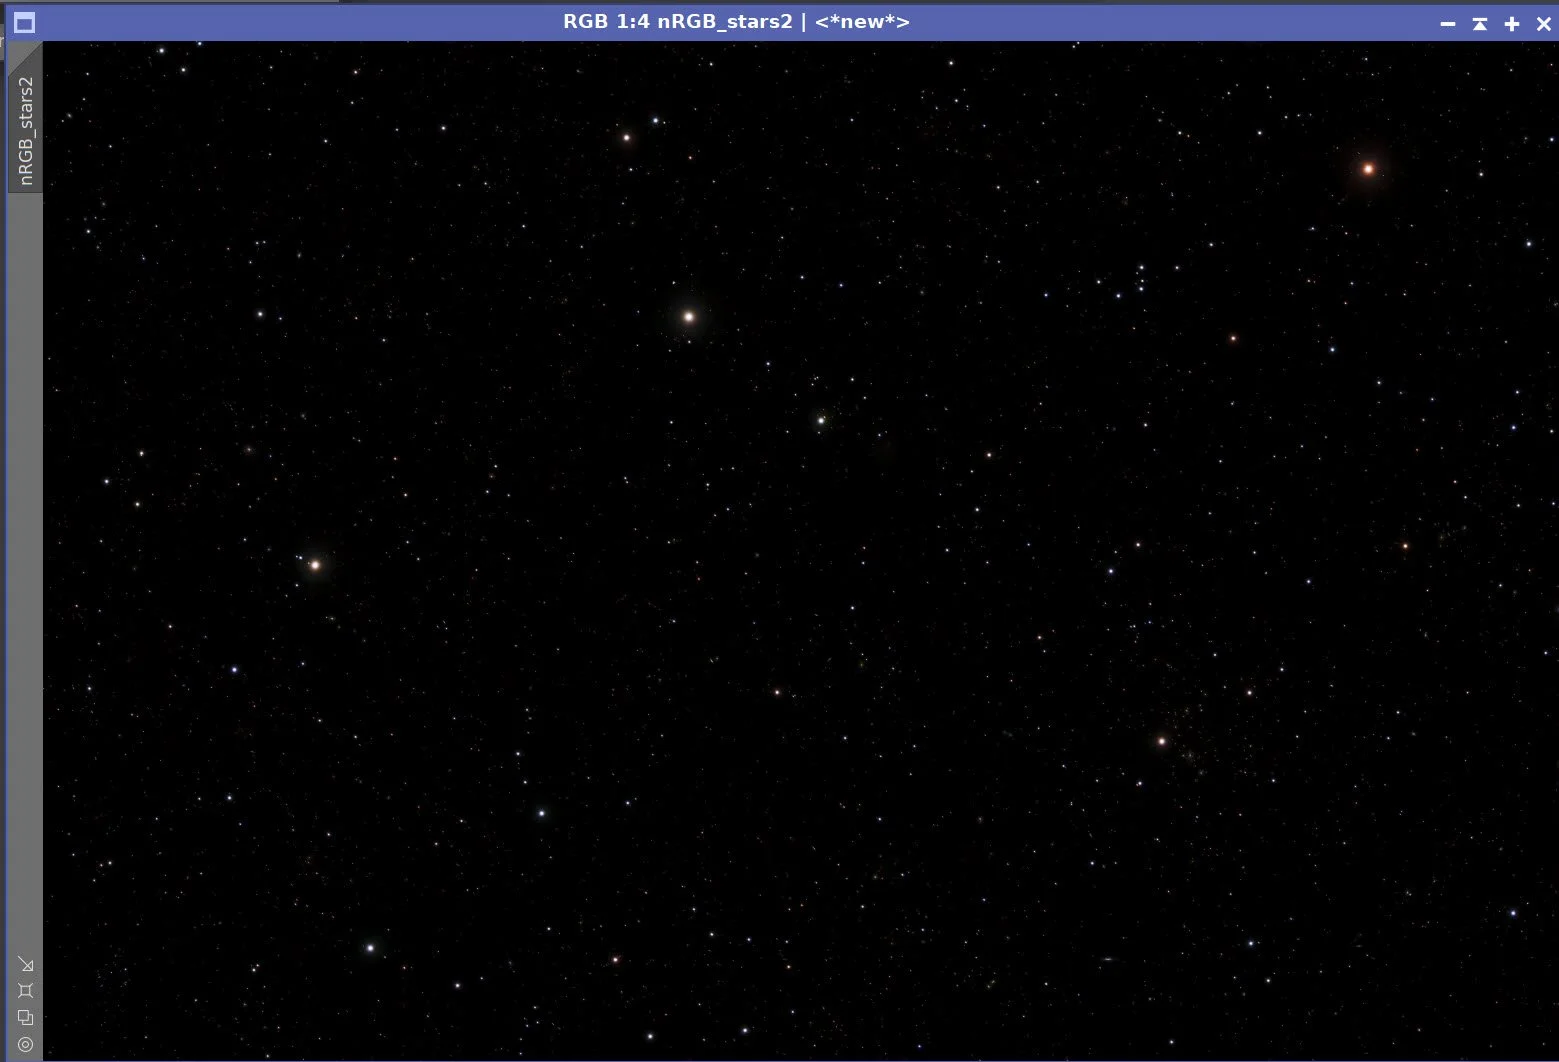
Large Stars.
7. Create Masks
Because the target was so small and the field contained uneven background structure, broad global adjustments were not enough. The rest of the processing depended on targeted masks.
Use RangeSelection to create a mask of the hot bottom-left corner of the field. See RangeSelection Parameters used below.
Use Game to create a mask covering the Box Region, the Left Region, and the Galaxies at the bottom-left and the top-right.
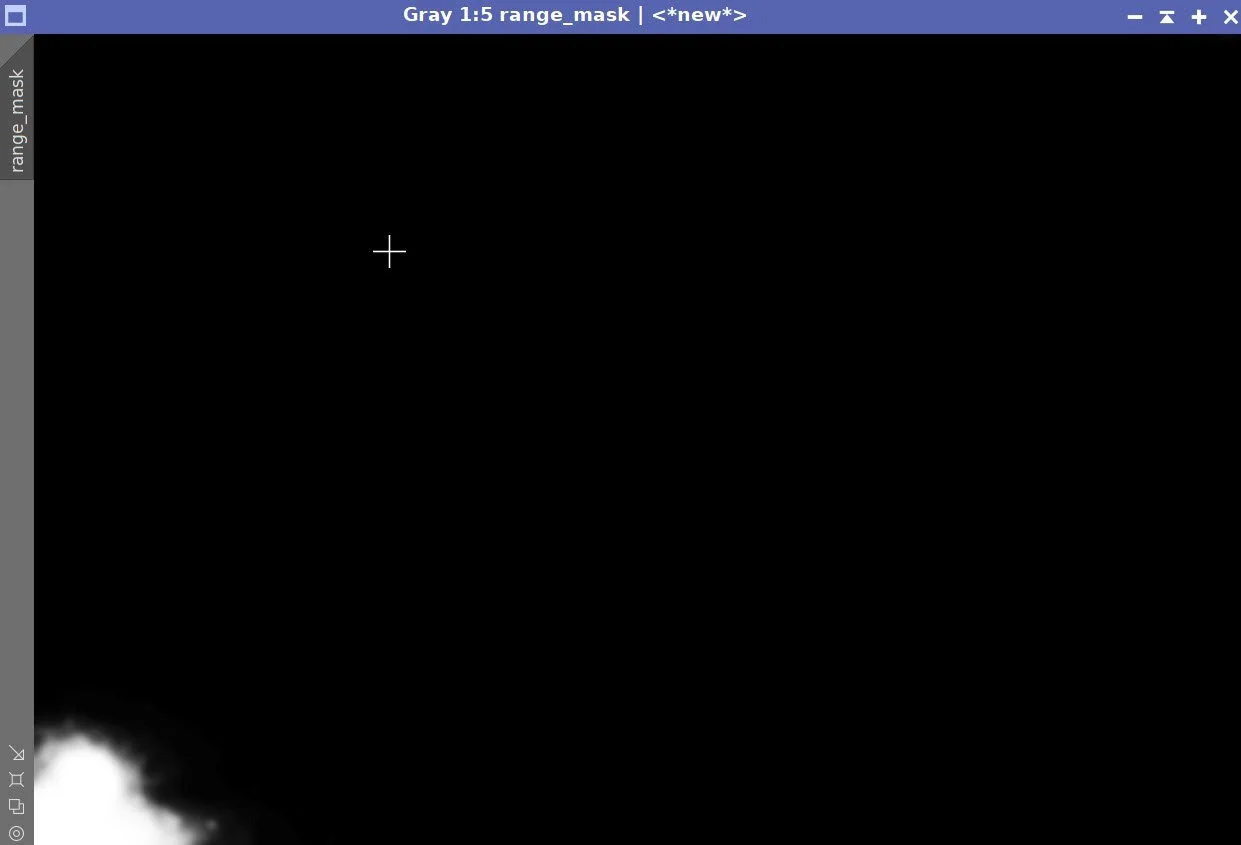
RangeMask
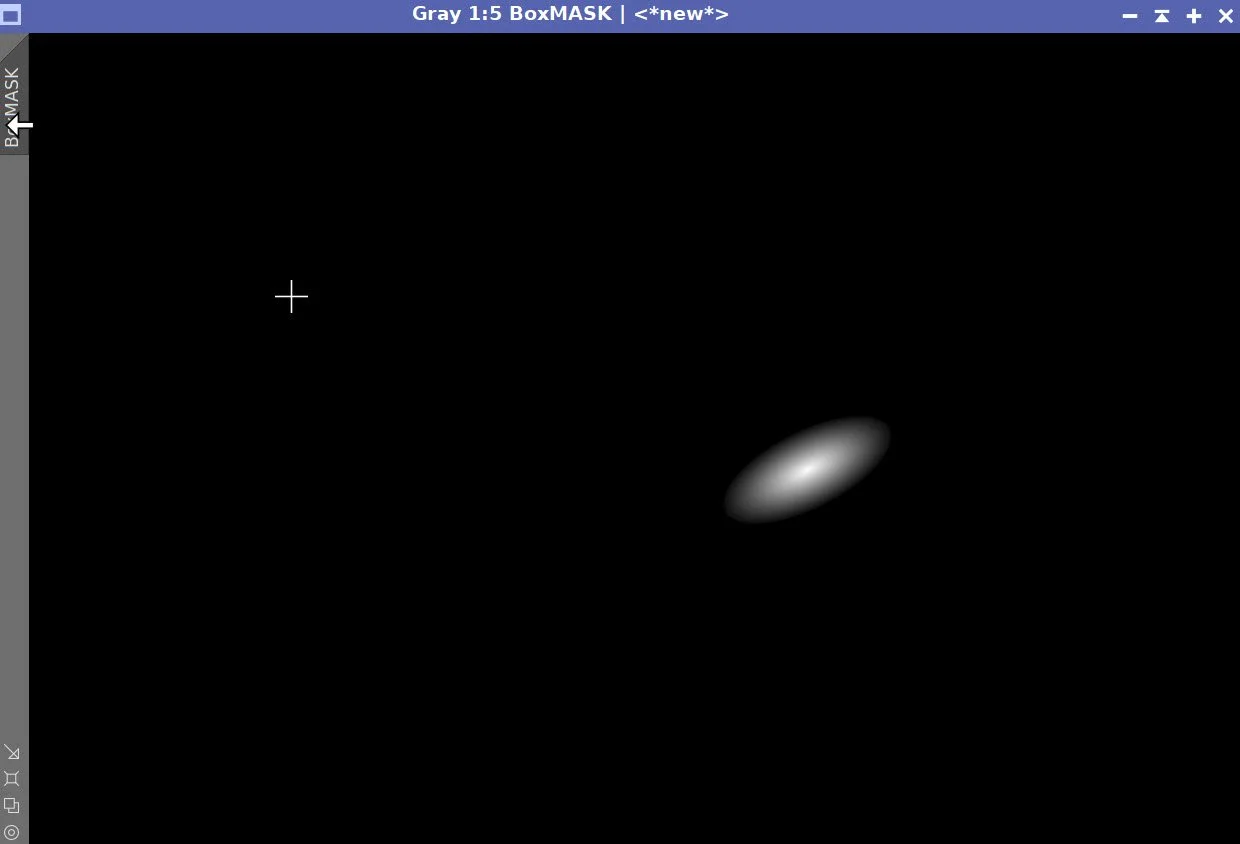
BoxMask
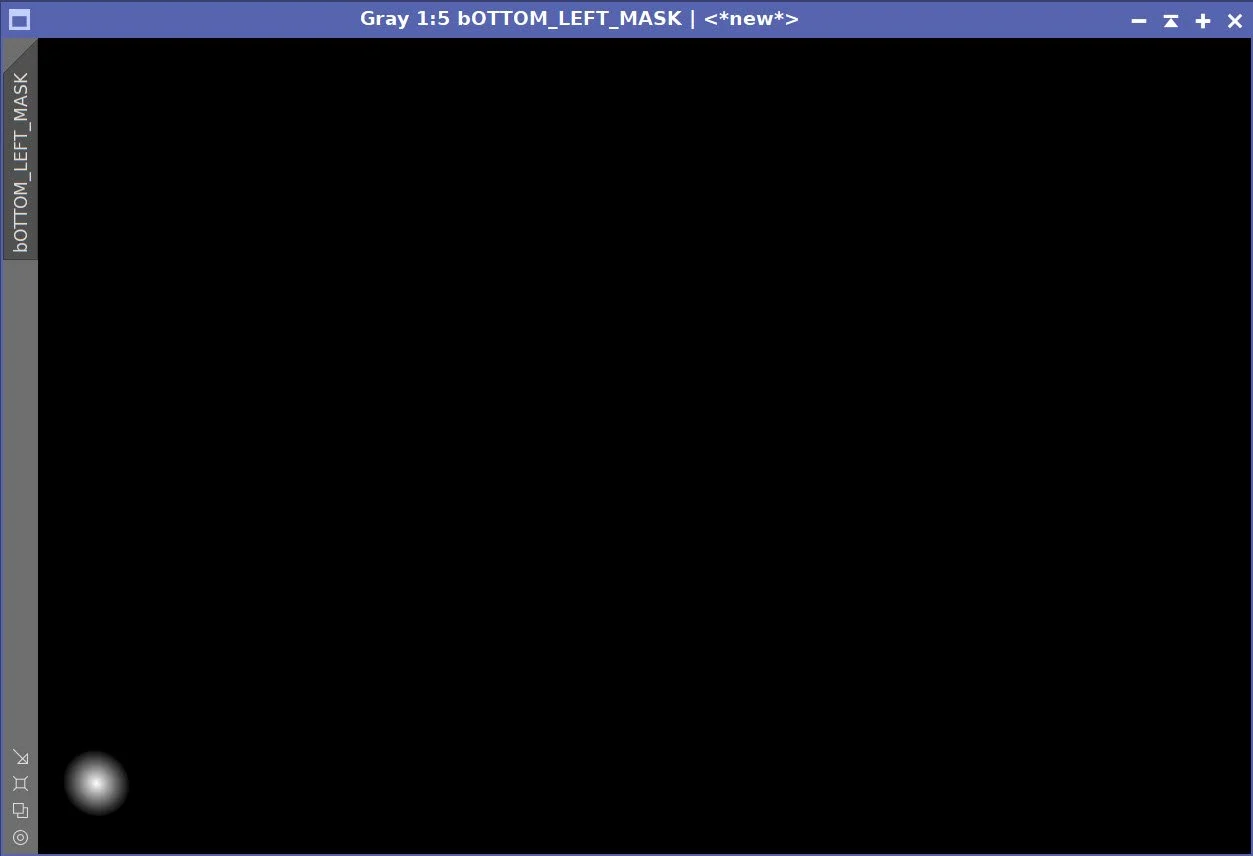
BottomLeftMask
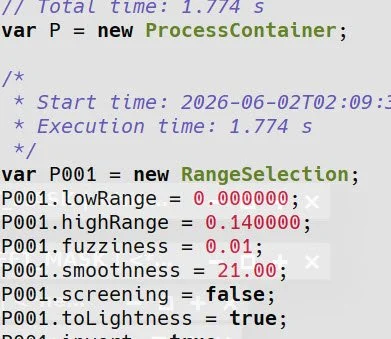
RangeSelection Parameters used.
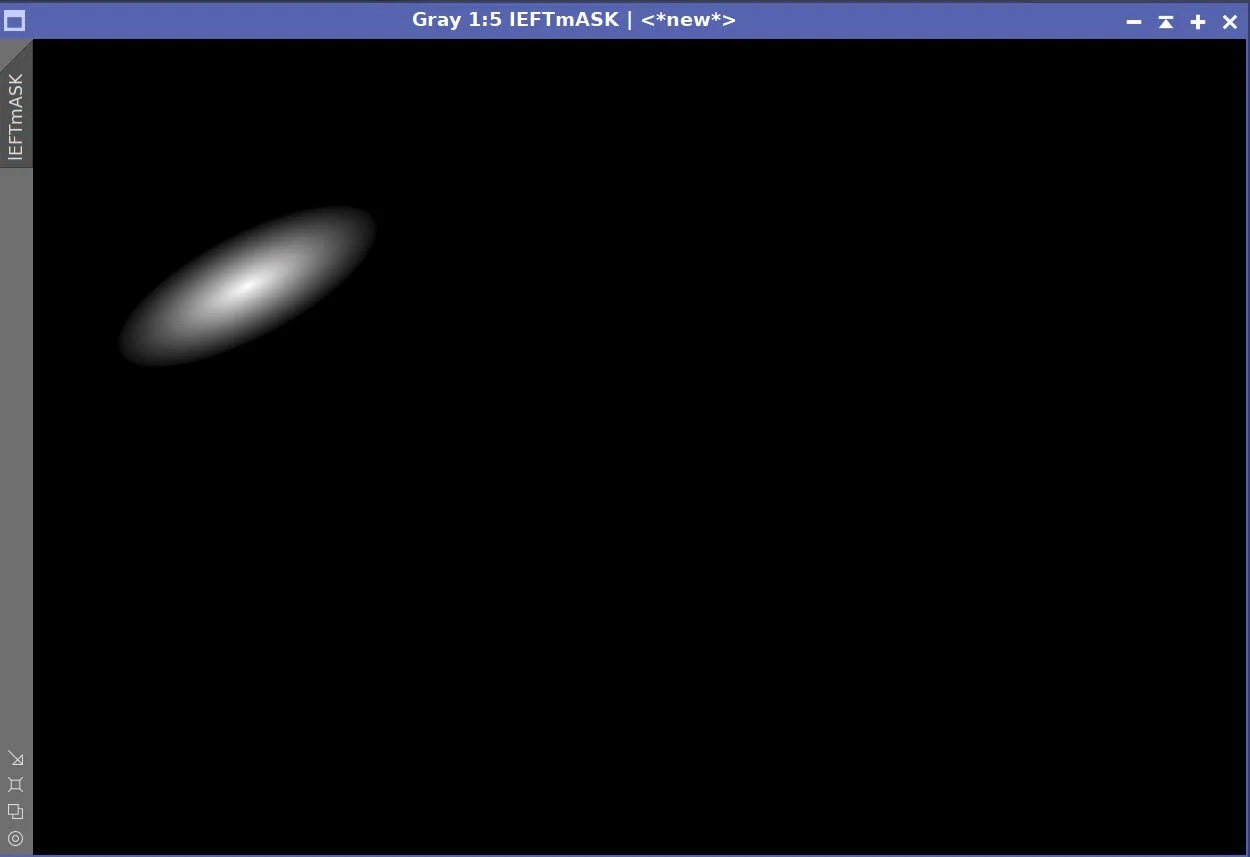
LeftMask
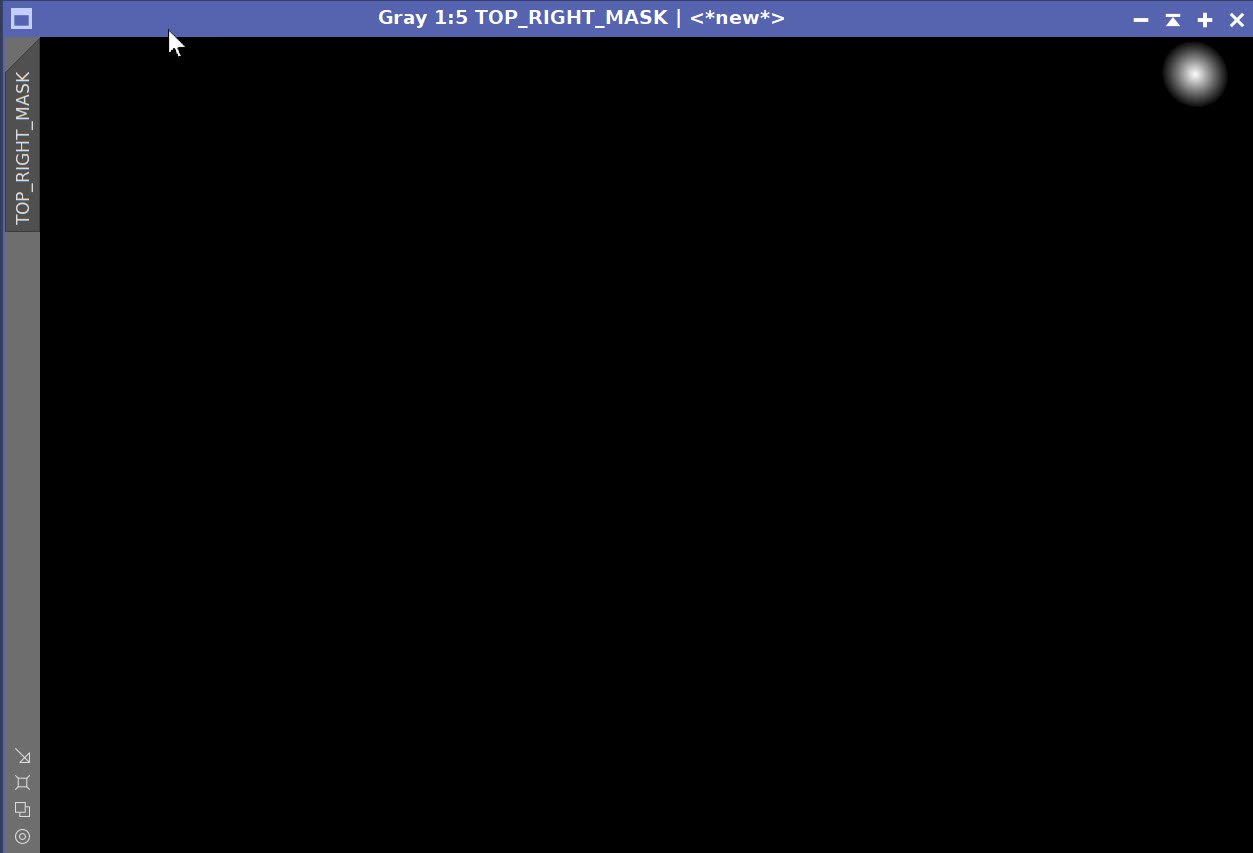
TopRightMask
8. Process the Nonlinear Lum Starless Image
Apply CT to darken the background sky
There seems to be a circular artifact in the image. This is going to be a problem, and neither a DBE nor a Range Mask is handling it. I decided to export it to Photoshop and use the healing brush to carefully remove it.
Apply the RangeMask, then use CT to darken the bottom-left light corner.
CT for the whole frame - no mask.
Apply LHE with a scale of 22, contrast limit of 2.0, amount of 0.2, and an 8-bit histogram and the BoxMask.
Apply LHE with a scale of 22, contrast limit of 2.0, amount of 0.32, and an 8-bit histogram, and the LeftMask
CT with the BottomLeftMask
Apply LHE with a scale of 22, contrast limit of 2.0, amount of 0.32, and an 8-bit histogram and the BottomLeftMask.
Apply CT to TopRightMask
Apply LHE with a scale of 22, contrast limit of 2.0, amount of 0.52, and an 8-bit histogram and the TopRightMask.
Apply NXT V3 now (see parameters in the screenshot below).
The initial image (click to enlarge).
After Photoshop Healing Brush (click to enlarge)
After CT with no mask. (click to enlarge)
Center on the Box Group (click to enlarge)
Center on the Left Group (click to enlarge)
Center on Bottom-Left Galaxy. (Click to Enlarge)
Apply LHE with the BottomLeftMask (click to enlarge)
CT with TopRightMask (click to enlarge)
After CT (click to enlarge)
After CT with RangeMask (click to enlarge)
Small Structure LHE with the BoxMask. (click to enlarge)
Apply CT with the LeftMask (click to enlarge)
CT with the BottomLeftMask (click to enlarge)
LHE with TopRightMask (click to enlarge)
After NXT (click to enlarge)
9. Now Process the RGB Starless Image
Apply SCNR with the Green Channel to clean up the bottom-left corner
Adjust tone scale with CT
Adjust tone scale with CT with the LeftMask
Apply LHE with a scale of 22, contrast limit of 2.0, amount of 0.52, and an 8-bit histogram with the LeftMask
Apply LHE with a scale of 22, contrast limit of 2.0, amount of 0.3, and an 8-bit histogram with the BoxMask
Apply CT with the TopRightMask
Combine with the L image using the LRGBCombination tool with parameters used shown in the screen snap below.
Do an MLT Sharpening with the parameters show in the screen snap below.
Initial RGB nonlinear image (click to enlarge)
After SCNR-Green (click to enlarge)
After CT adjustment to boost color (click to enlarge)
Center on LeftMask Area (click to enlarge)
After LHE with the LeftMask (click to enlarge)
Recenter on BoxMask area (click to enlarge)
Recenter on the TopRightMask (click to enlarge)
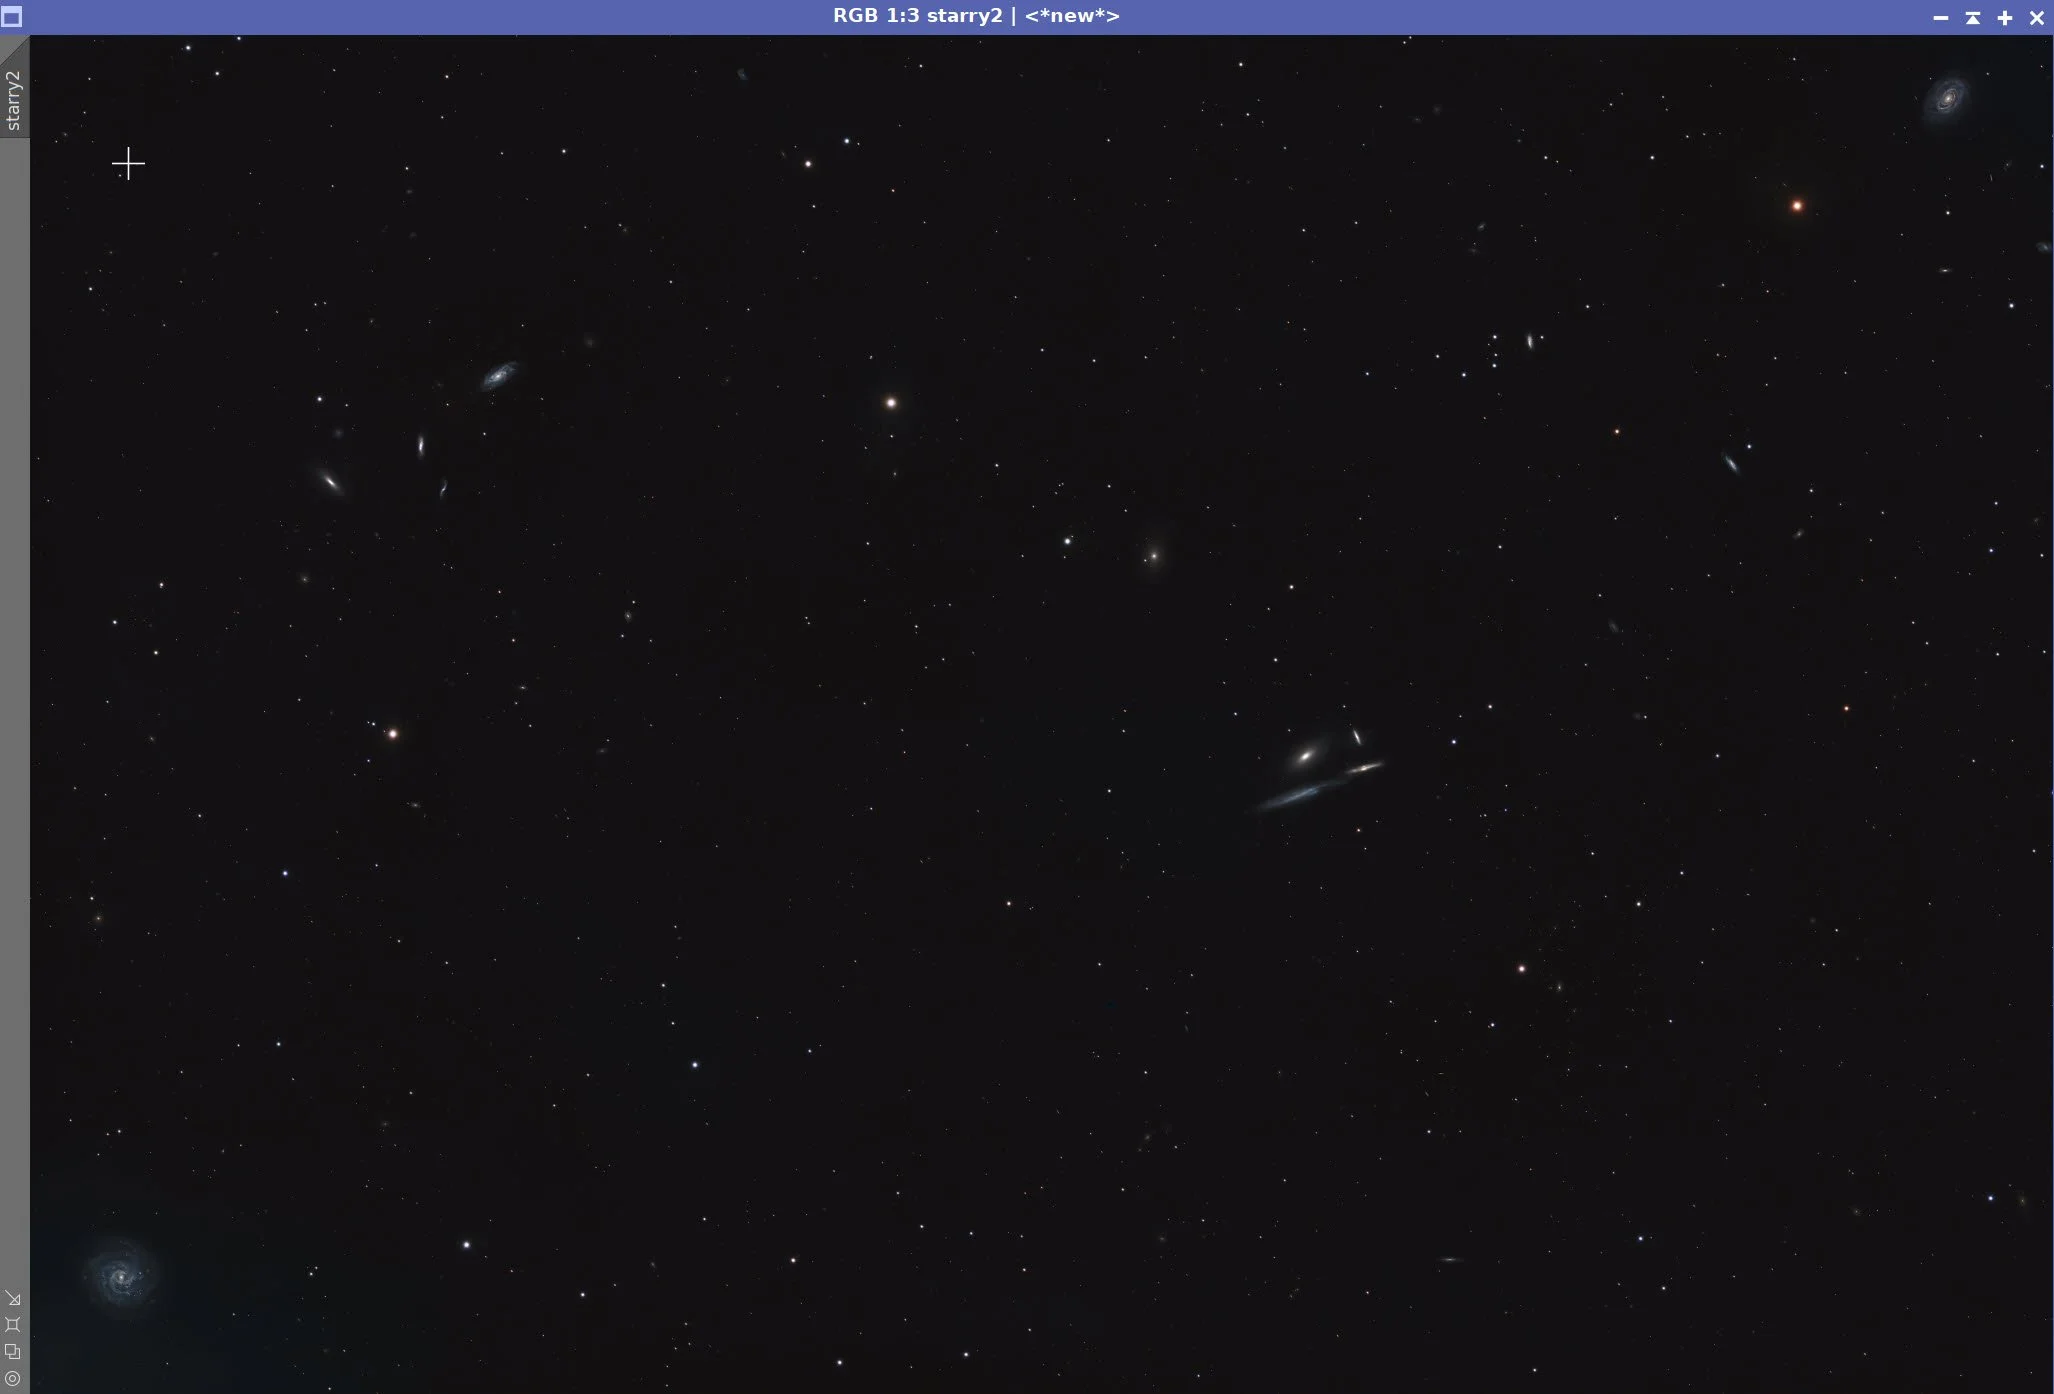
L image inserted with LRGBCombination (click to enlarge)
MLT Params used (click to enlarge)
CT with LeftMask (click to enlarge)
After LHE with the BoxMask (click to enlarge)
CT with the TopRightMask (click to enlarge)
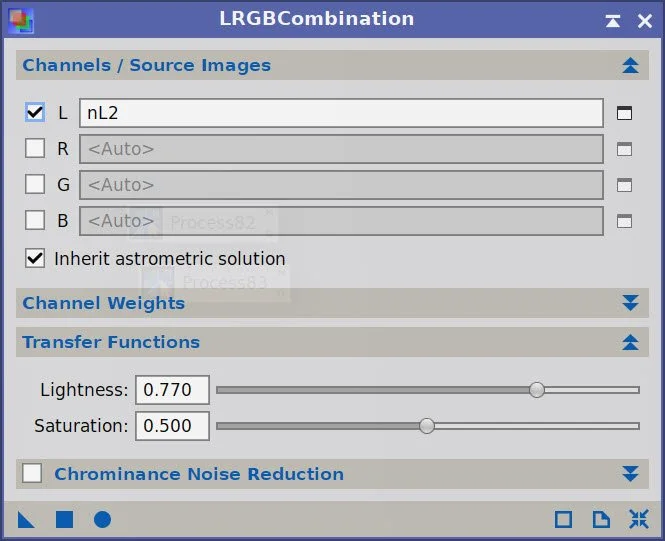
LRGBCombination panel showing parameters used.
MLT Sharpening (click to enlarge)
Astro Color Mixer Panel with Adjustments Made (click to enlarge)
10. Add the Stars Back In
Using the ScreenStars script, add the stars back into the starless LRGB image. I tested the small, medium, and large star versions to see which best balanced the star field against the very small Hickson 61 galaxies.
I chose the medium-star version.
With Large Stars (click to enlarge)

With Med Stars
With Small stars
11. Export the Image to Photoshop for Polishing
Save the image as a TIFF 16-bit unsigned and move to Photoshop
At this point, the image was technically complete, but the final presentation depended heavily on crop choice because Hickson 61 occupies such a small part of the full frame.
I decided to zoom in a lot to center the composition on the Box group itself. I feel there is another image in there that I might be able to extract as its own image, but we will see about that later
I then did a little polishing using the Camera Raw filter.
Added watermarks
Exported clear, watermarked, and web-sized JPEGs.

The Final Image
Back to the Hickson 61 Project Page
Alternatively, you can use the back arrow to return to the Hickson 61 project page, or you can use the menu at the top of the page to continue your navigation.
Thanks,
Pat