
Messier 104 - The Sombrero Galaxy 2026 - Image Processing Walkthrough
April 28 2026
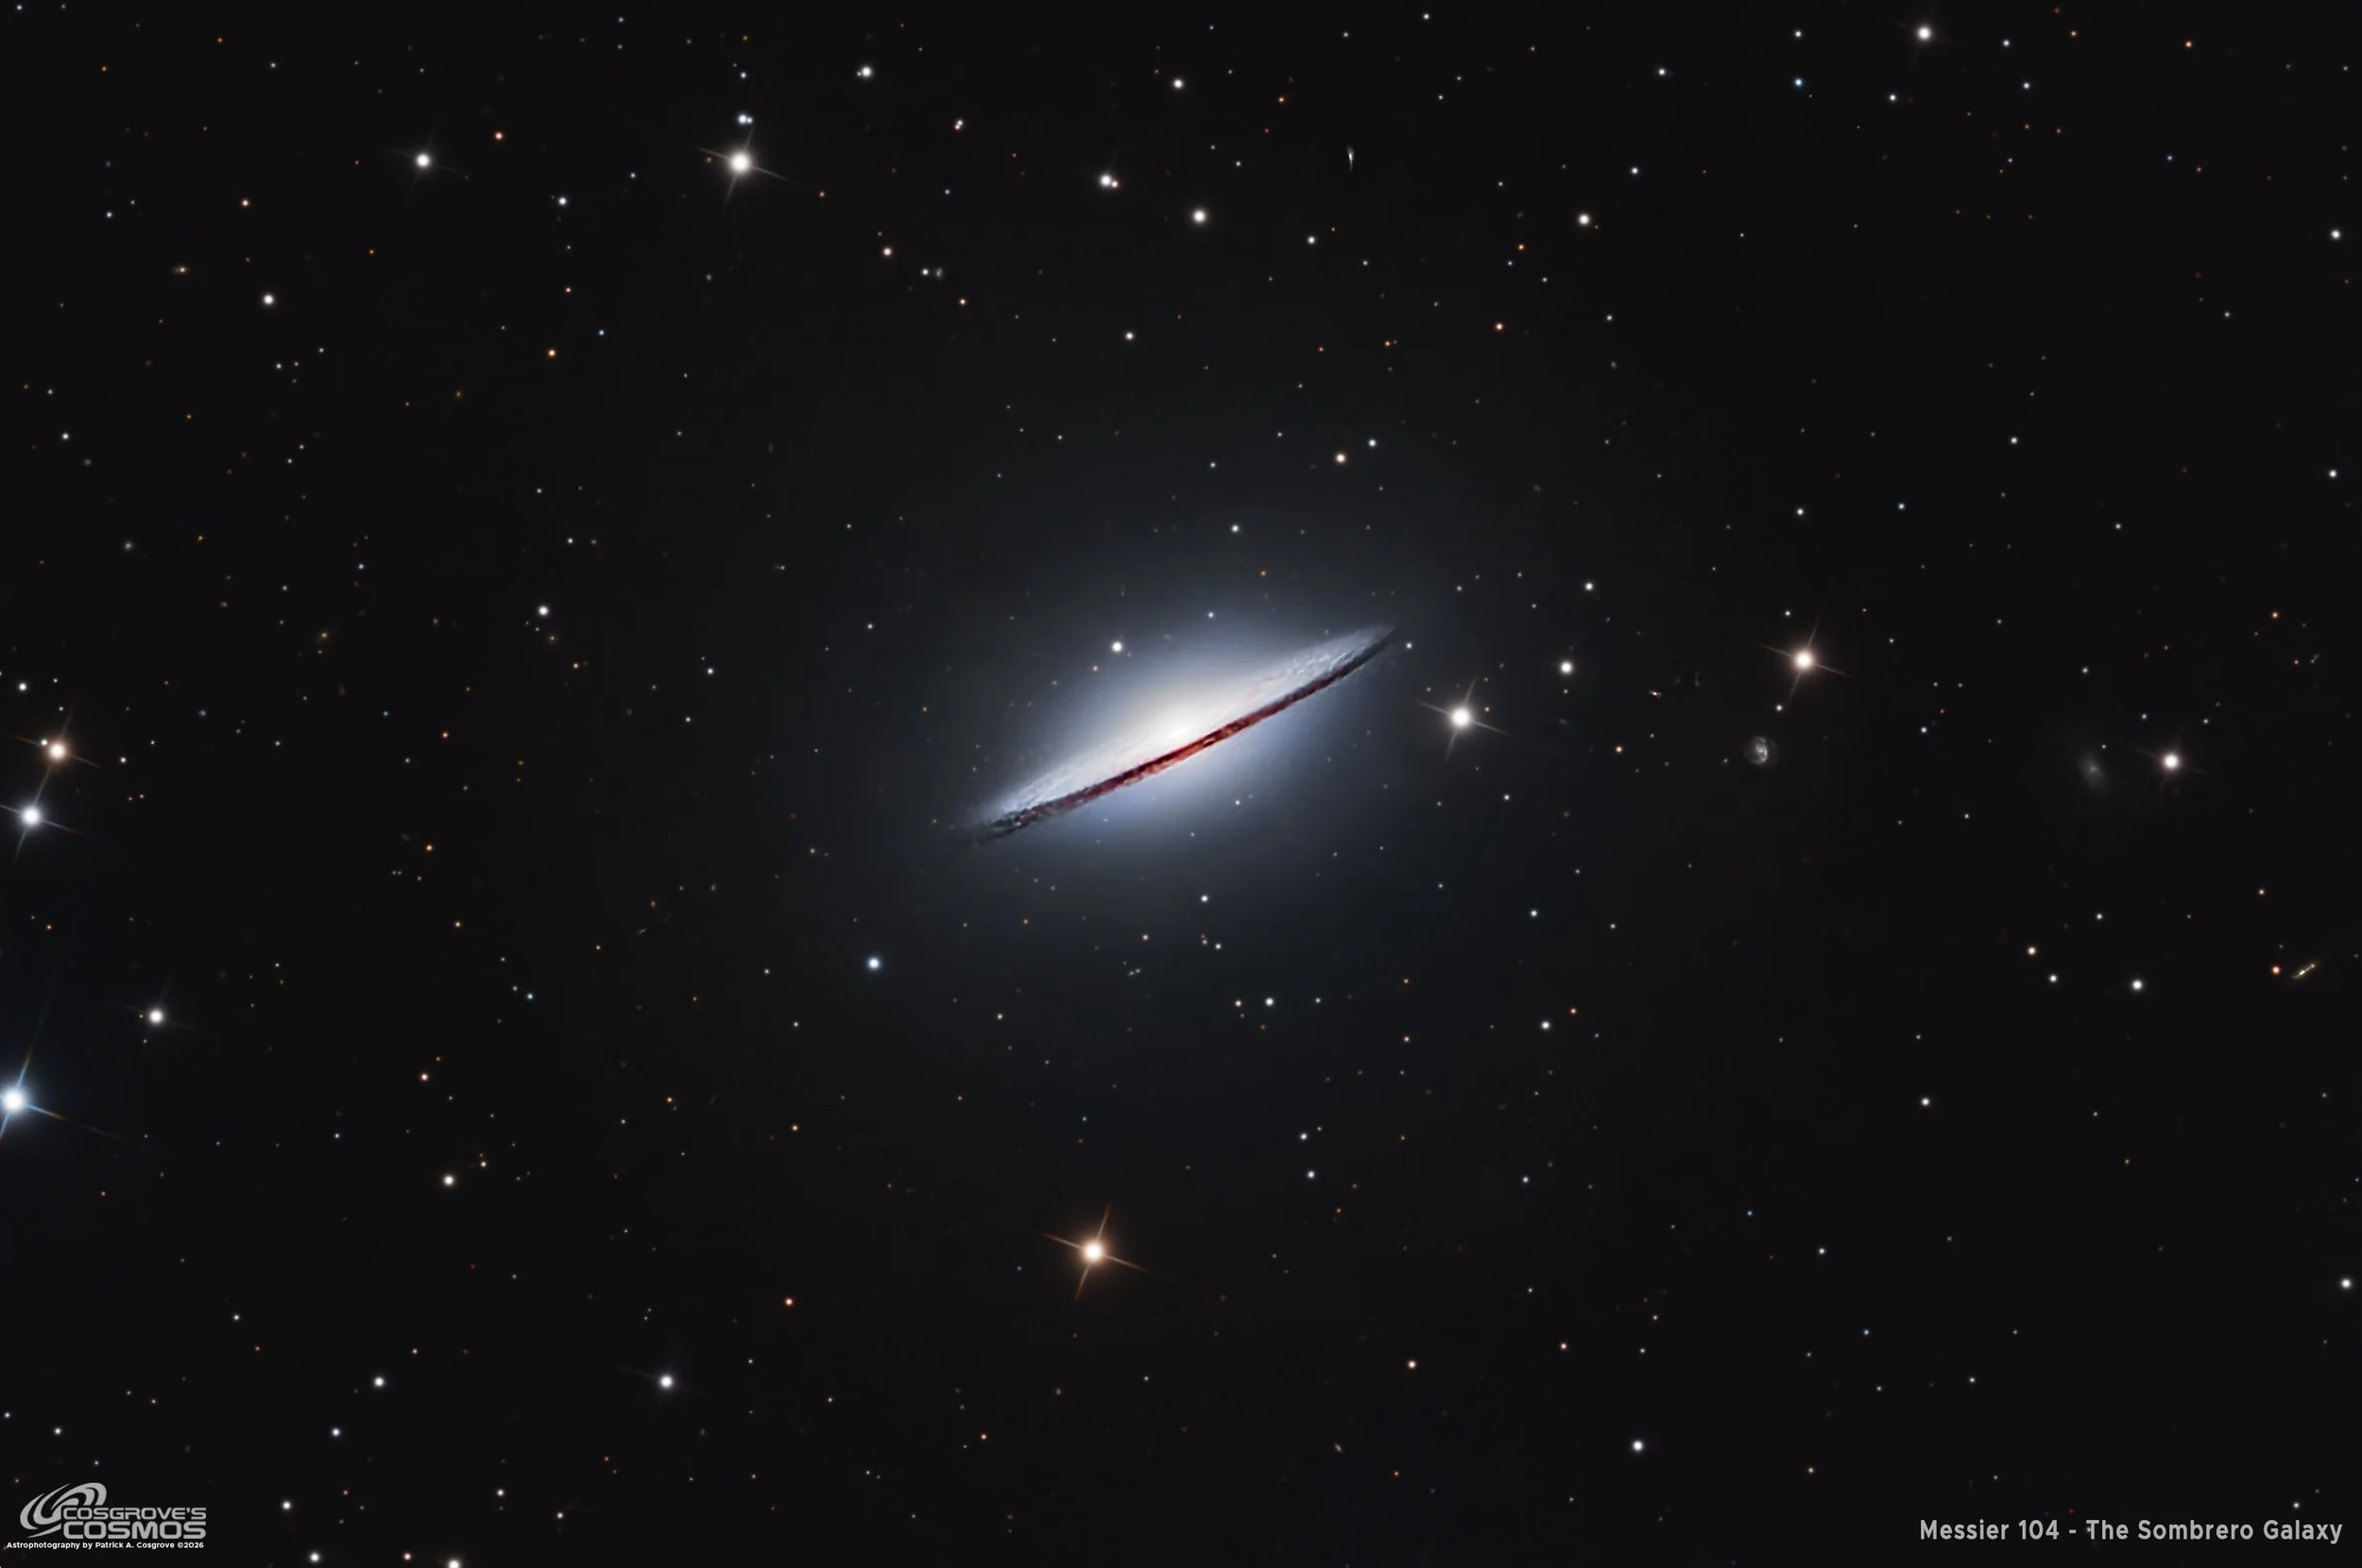
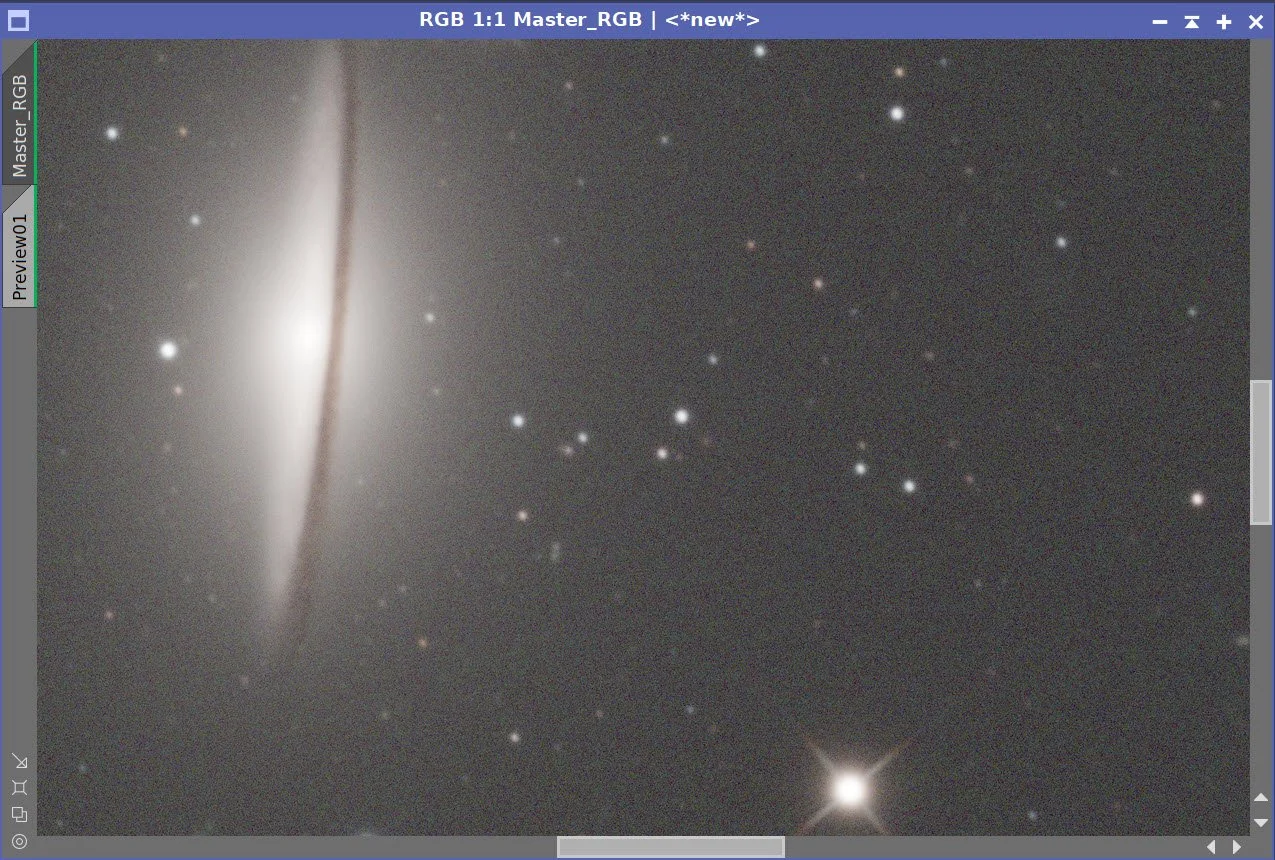
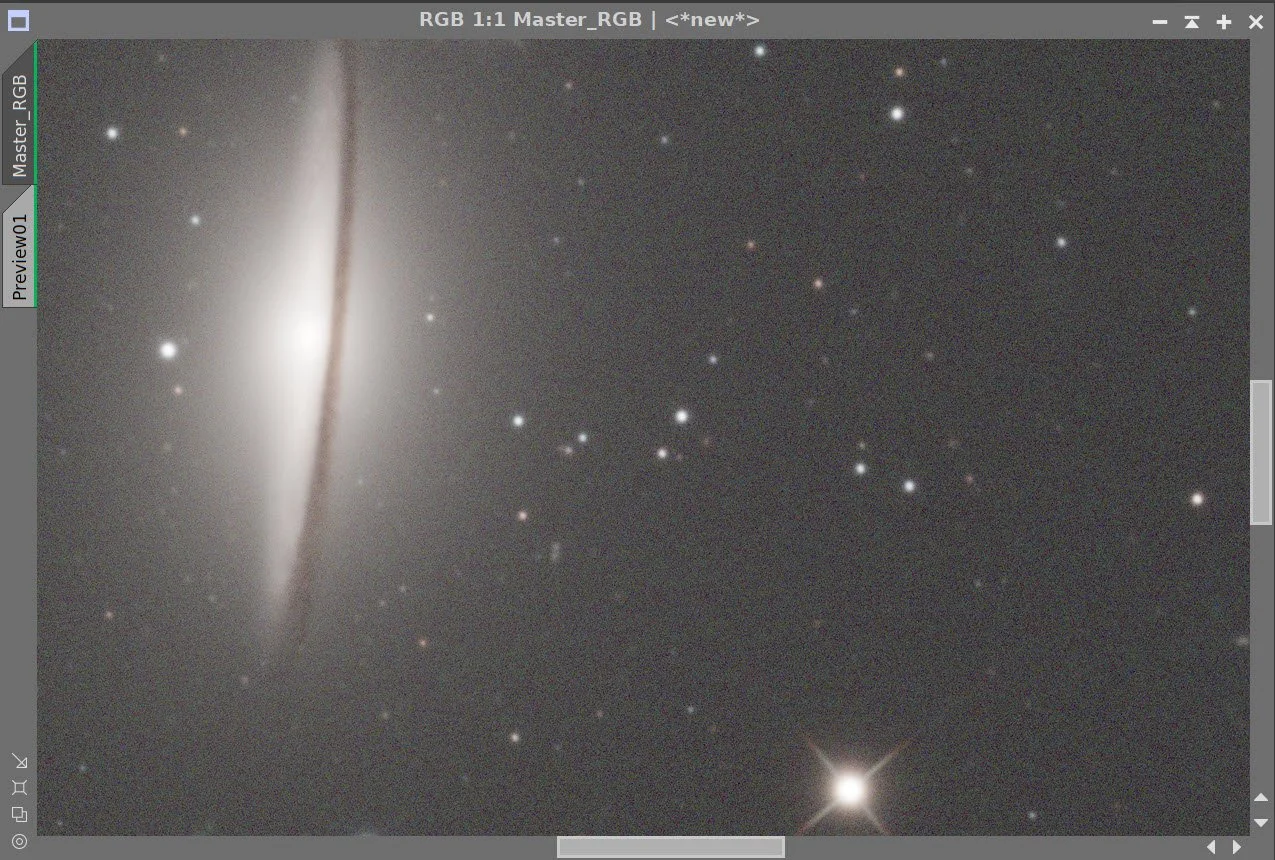
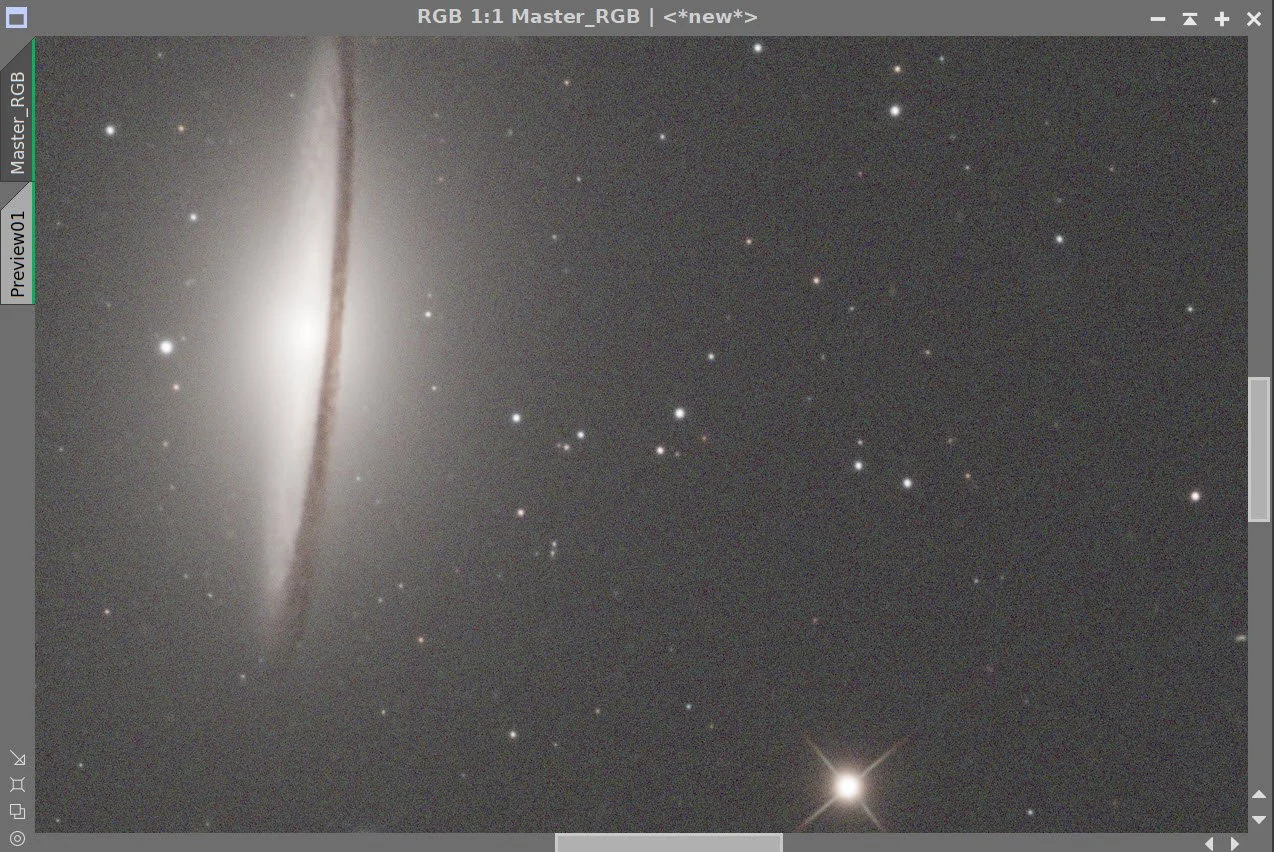
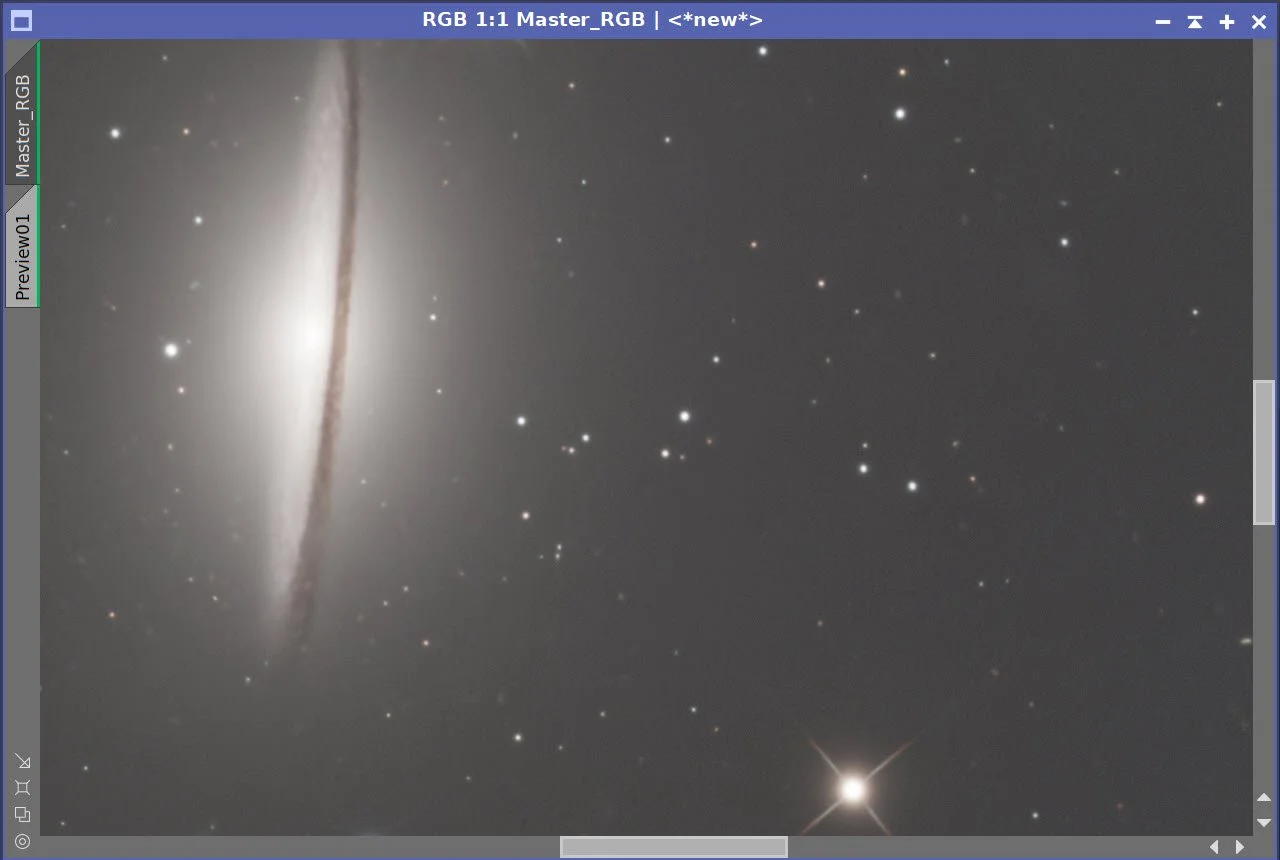
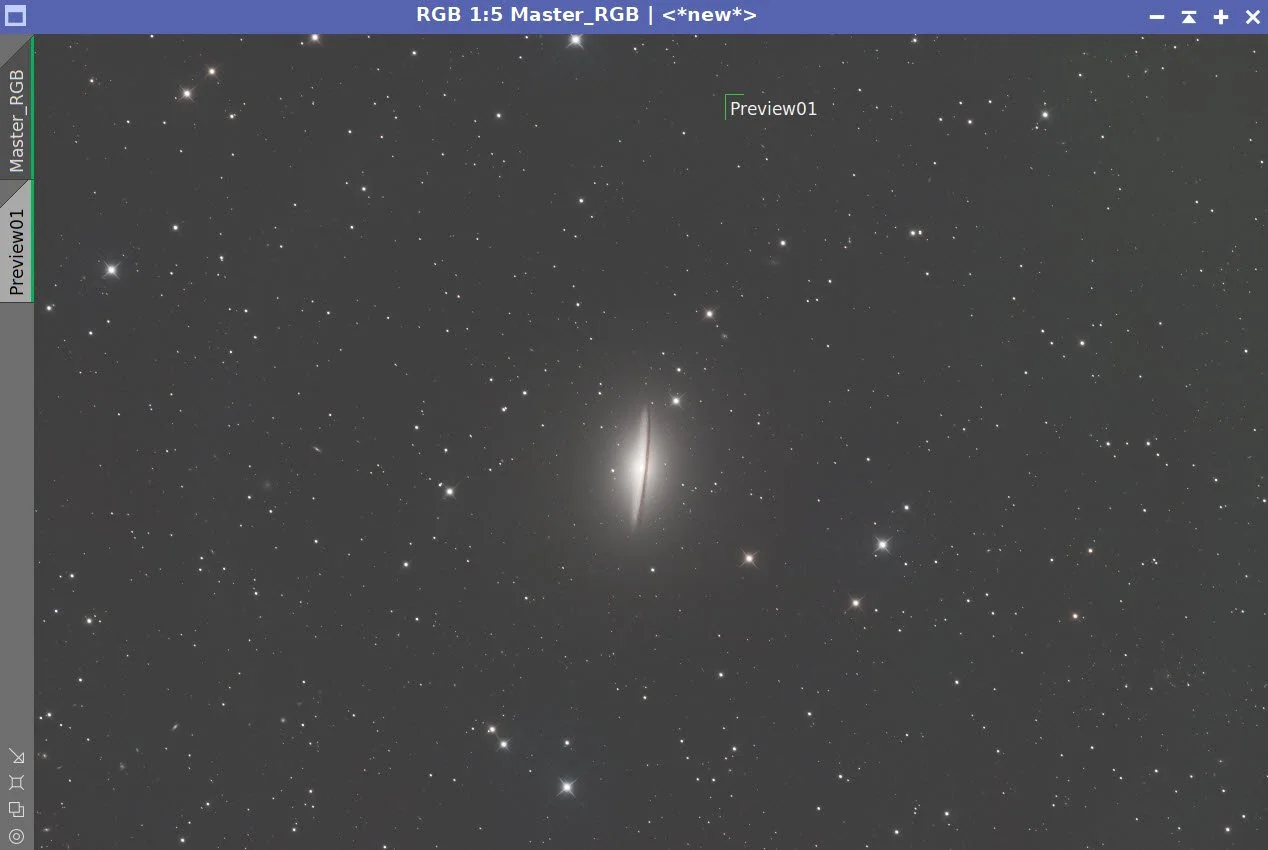
My 2026 image of Messier 104
🔭 Project Summary
Target: Messier 104 – The Sombrero Galaxy / NGC 4594
Capture Dates: April 11, 20, and 21, 2026
Constellation: Virgo • Distance: ≈ 28–30 million light-years
Type: Nearly edge-on spiral galaxy with prominent dust lane and bright central bulge
Imaging Period: April 11–21, 2026 • Total Integration: 11 h 00 m (LRGB)
Filters: L · R · G · B (ZWO 36 mm LRGB Gen II)
Telescope: Sharpstar SCA260 V2 260 mm f/5.0 Special Cassegrain Astrograph (≈1300 mm)
Camera: ZWO ASI2600MM-Pro (−15 °C; Gain 0 LRGB)
Mount: iOptron CEM70 on custom steel pier
Processing: PixInsight (LRGB) & Photoshop
Location: Whispering Skies Observatory · Honeoye Falls, NY (USA)
Acquisition notes: L: 193 × 90 s; R: 89 × 90 s; G: 80 × 90 s; B: 78 × 90 s at −15 °C, Gain 0; total 11 h 00 m after culling bad or questionable subs.
Table of Contents Show (Click on lines to navigate)
Special Note
Welcome to the New Image Processing Page for this project! You got here by following a link in the main Image Project Report, and you can easily return to that by using the back button on your browser.
Abbreviations Used
BXT BlurXTerminator by RC-Astro
CC Cosmetic Correction
CT Curves Transformation Process
DBE Dynamic Background Extraction Process
ET Exponential Transformation
HT Histogram Transformation
NXT NoiseXTerminator by RC-Astro
MLT Multiscale Linear Transform
PI PixInsight
PS Photoshop
SCNR Subtractive Chromatic Noise Reduction Process
SFS SubFrameSelector
SPCC SpectroPhotometric Color Calibration
STF Screen Transfer Function
STF->HT method – Drag the STF triangle to the base of HistogramTransformation, then apply it to the image to take it nonlinear.
SXT StarXTerminator by RC-Astro
WBPP Weighted Batch Preprocessing Script
Summary:
M104 Sombrero Galaxy LRGB Processing Flow
Sequential summary of the M104 workflow, organized around the actual dependency chain from frame rejection through final Photoshop polish.
Processing this Image
(All Processing is done in PixInsight, with some final touches done in Photoshop)
The main processing challenge for this image was balancing the very bright core and sharp dust lane against the much fainter outer halo of M104. I used a fairly conservative LRGB workflow: careful frame rejection, separate luminance and RGB preparation, star removal for nonlinear work, luminance-driven detail enhancement, and final star recombination before a light Photoshop polish.
1. Blink
First, I screened the data for thin-cloud frames and obvious defects.
Lum
8 frames removed for thin clouds.
Red
2 frames removed for thin clouds.
Green
3 frames removed for thin clouds.
Blue
4 frames removed for thin clouds
Darks
All looks OK.
Dark Flats
All looks OK.
Flats
all good.
A total of 17 frames were removed during Blink.
2. SubFrameSelector
Getting critical details was crucial for this image, so I wanted to remove the subs that showed statistically significant detail degradation. To determine which frames, I used SubFrameSelector to examine the FWHM size of stars and removed those outside the confidence bands.
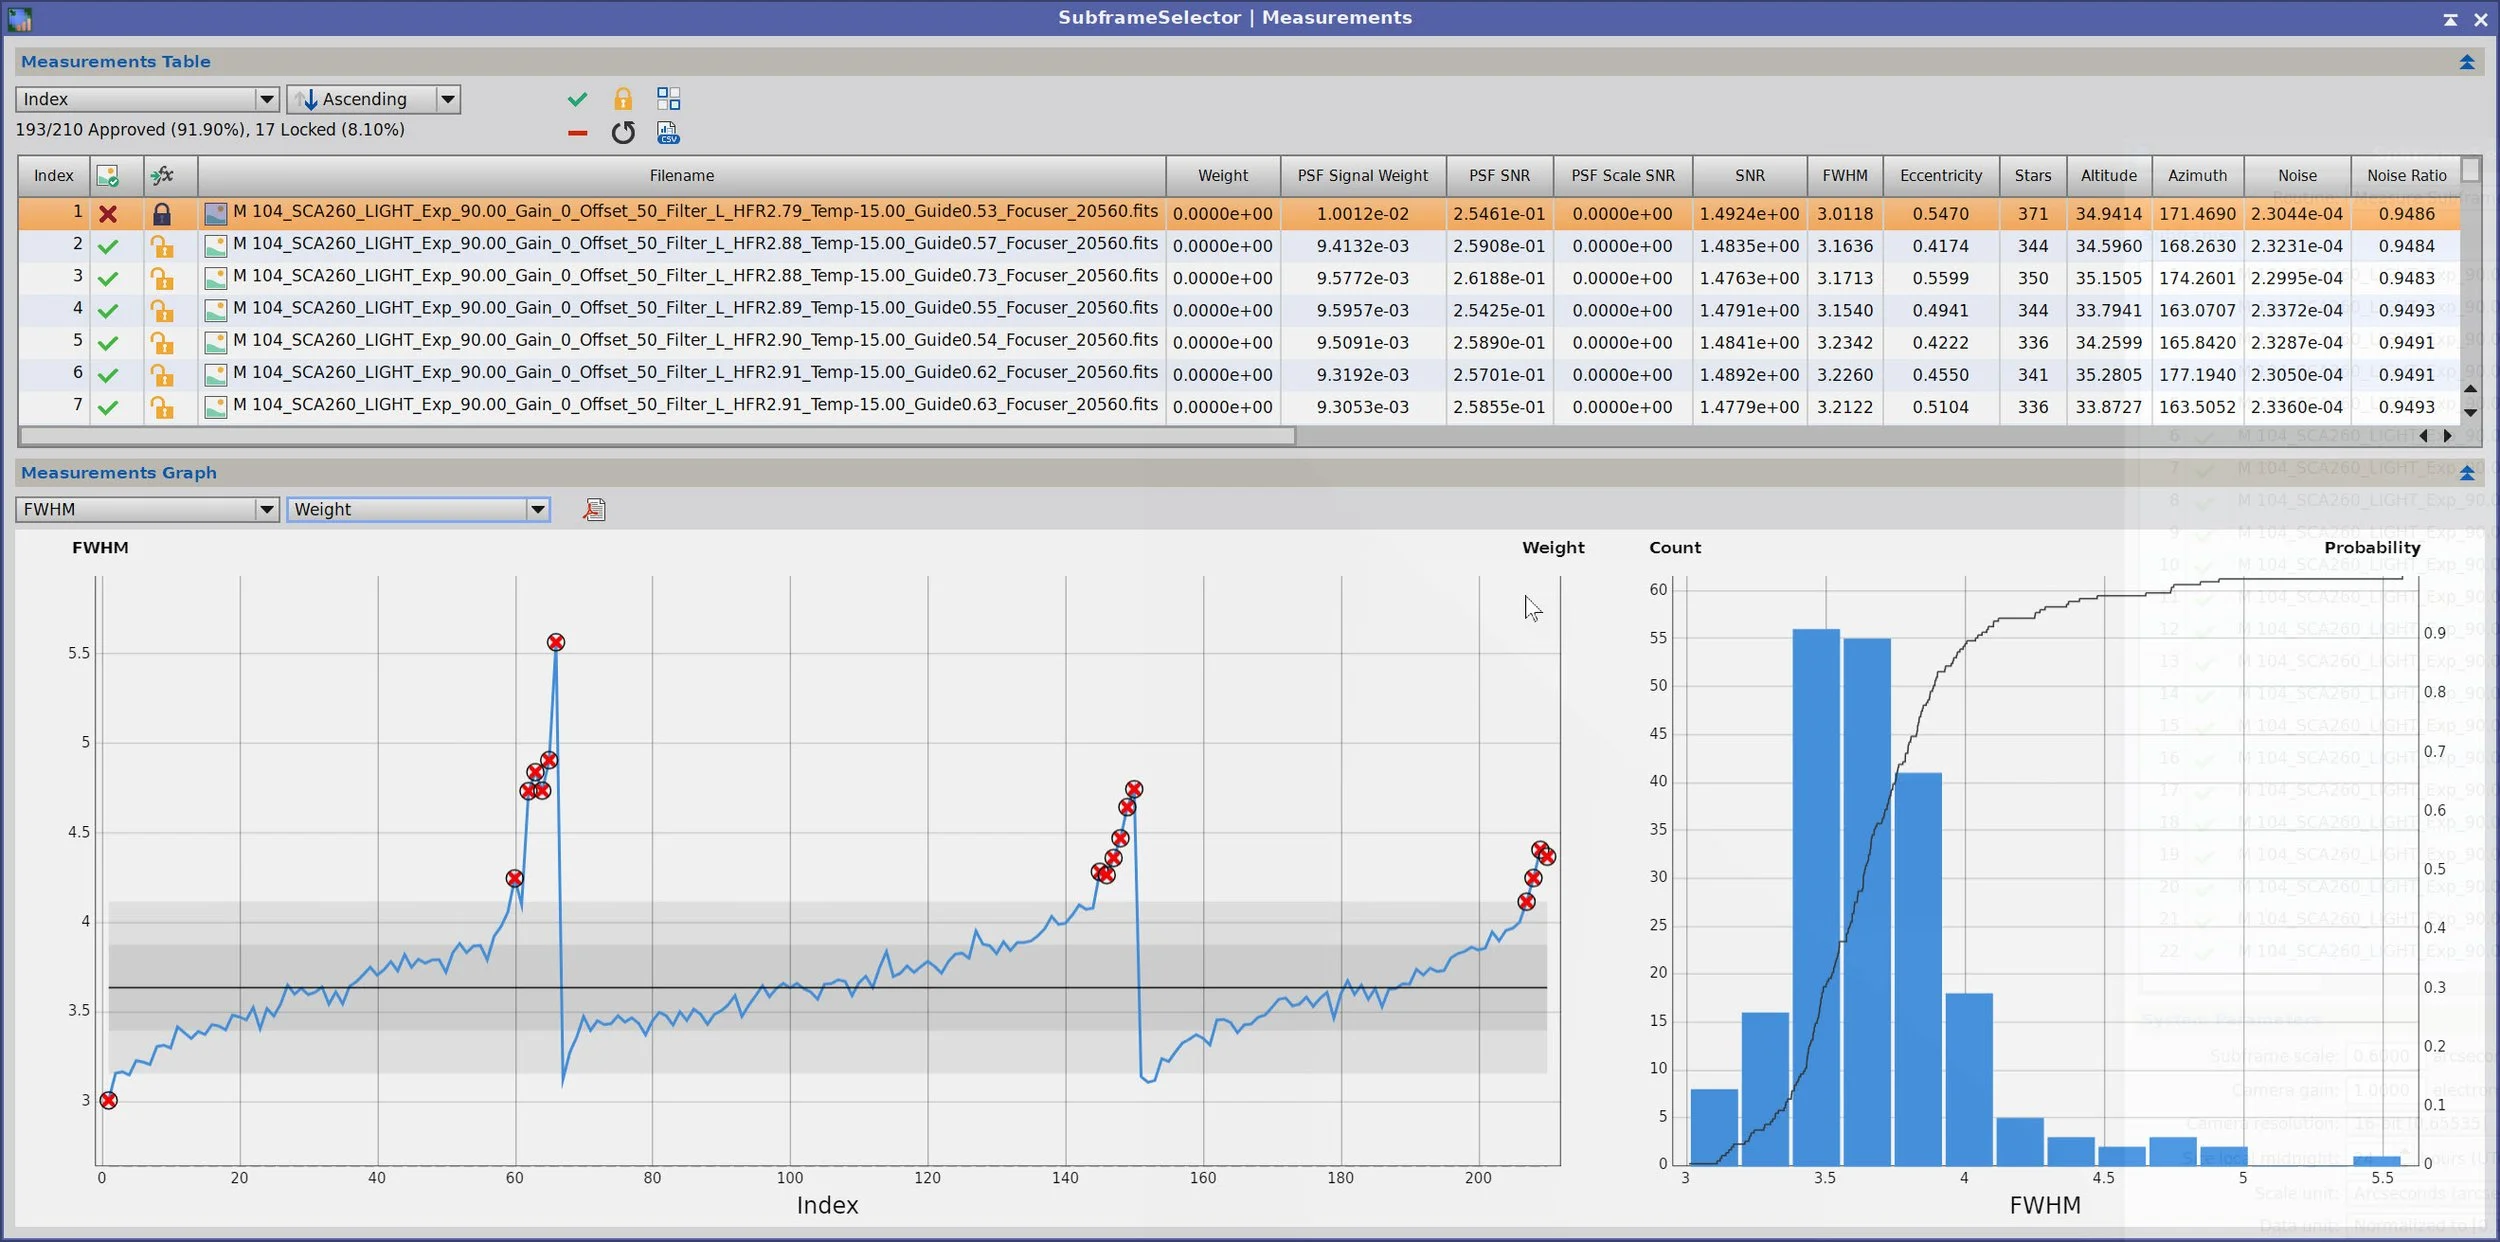
Luminance Channel: 16 frames removed,
Note the nightly pattern of star sizes increasing as the night progressed - this is almost certainly a dew effect, and it was seen in each channel.
This was the first project where I could clearly see dew buildup overnight in the SFS FWHM plots for every channel - that’s what drove the aggressive frame rejection.
Now the red channel, where 9 frames were removed. A few frames were removed because their star sizes were too small. This is almost certainly due to clouds attenuating them - ones I missed during the Blink operation.
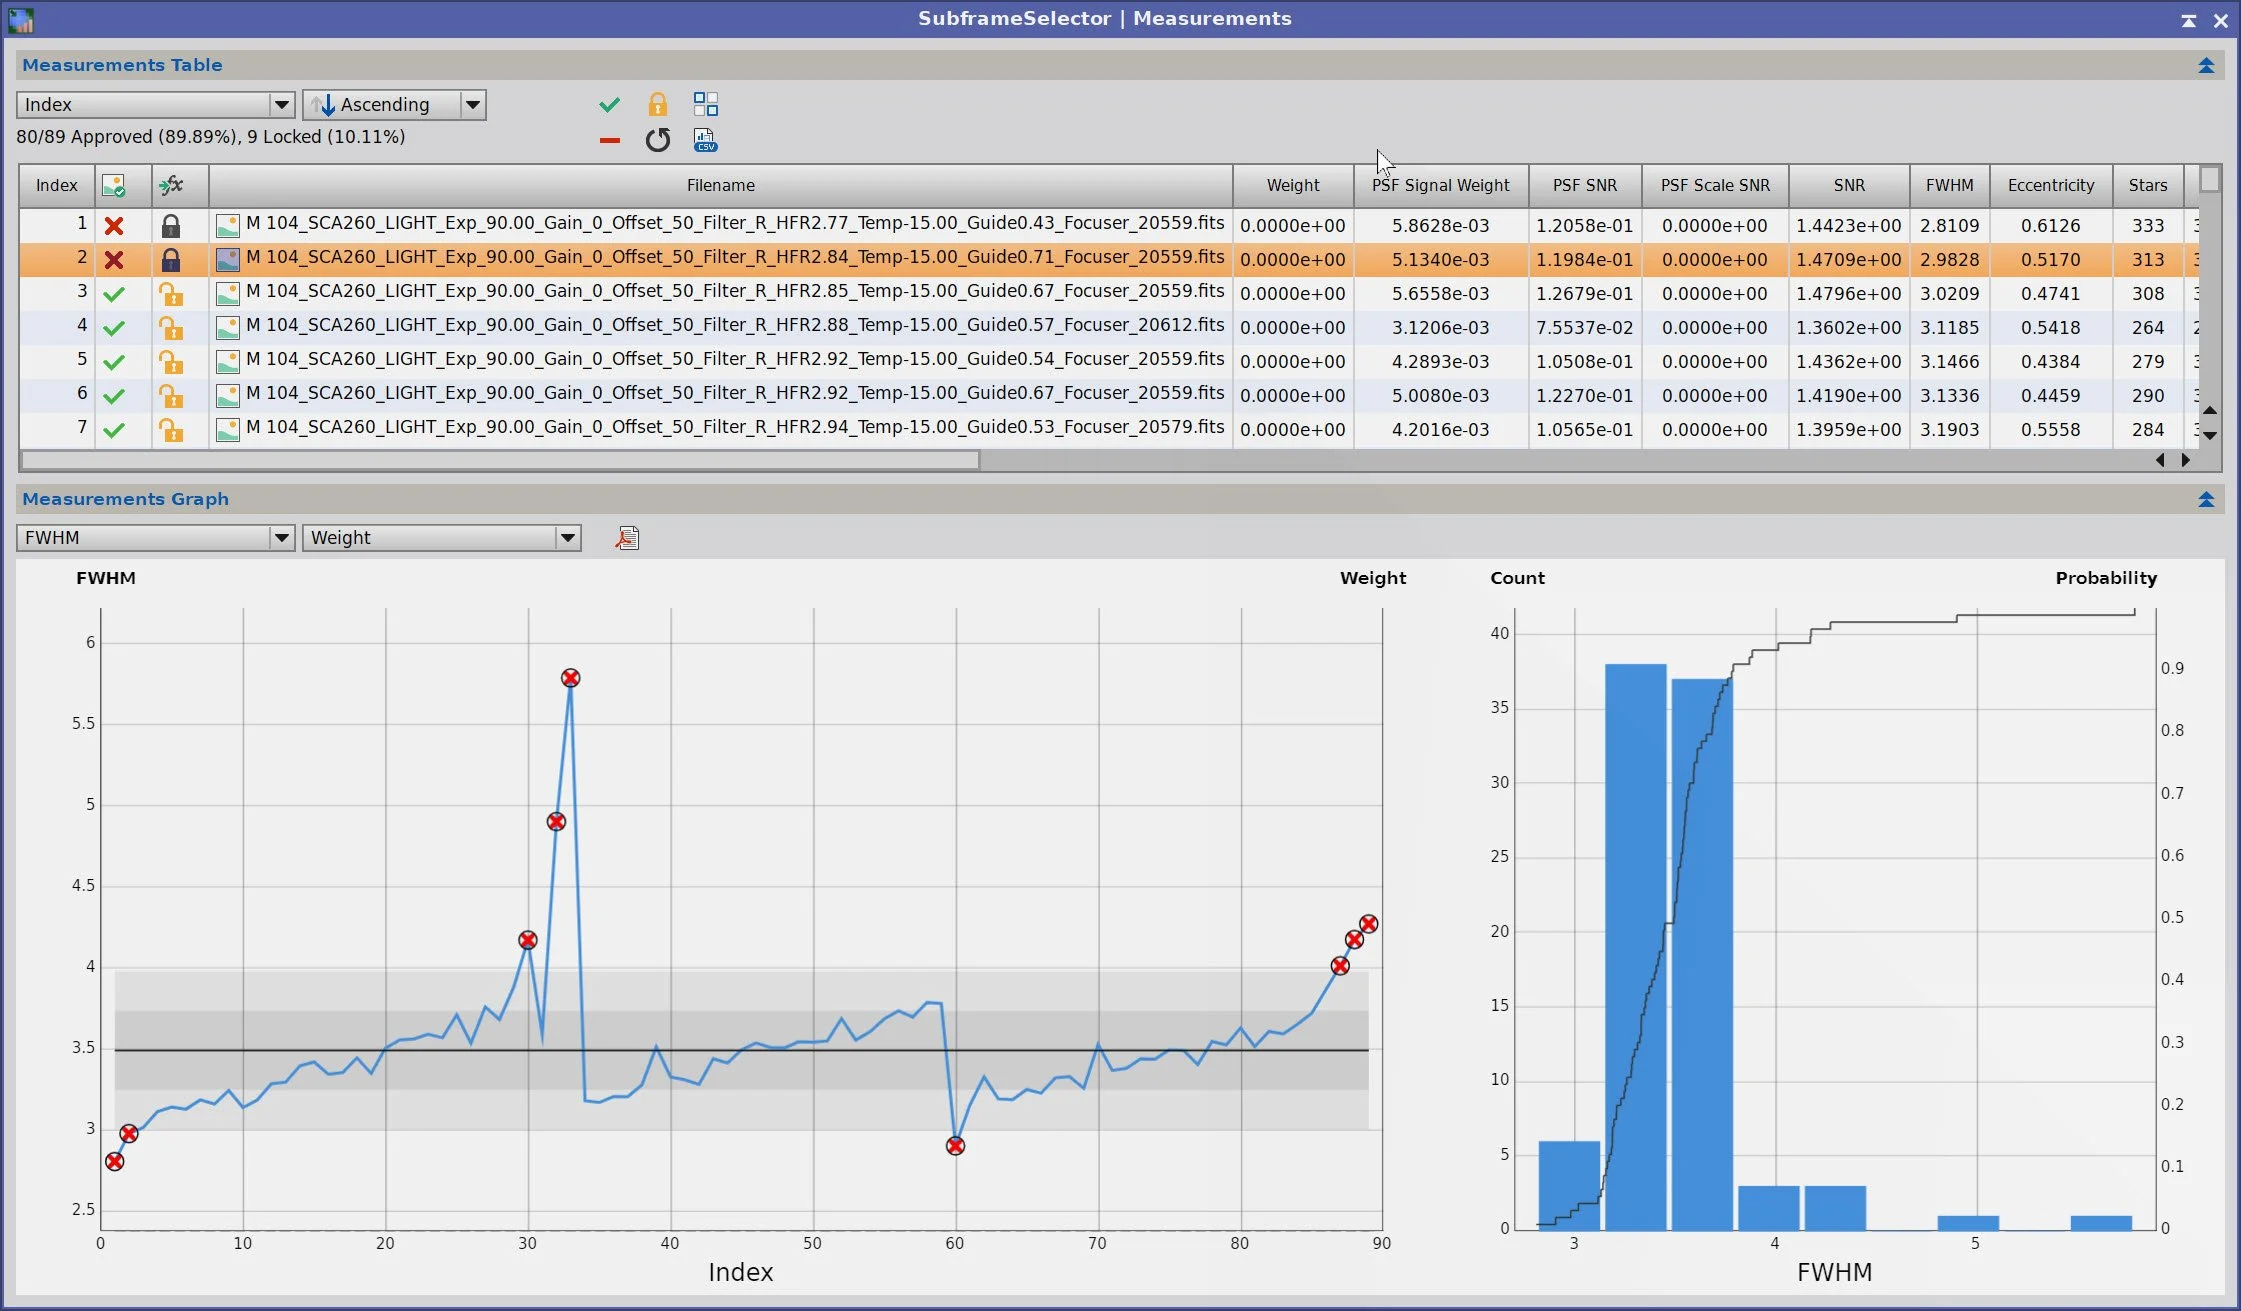
Red Channel : 9 frames removed.
Now the Green Channel, where 9 frames were removed.
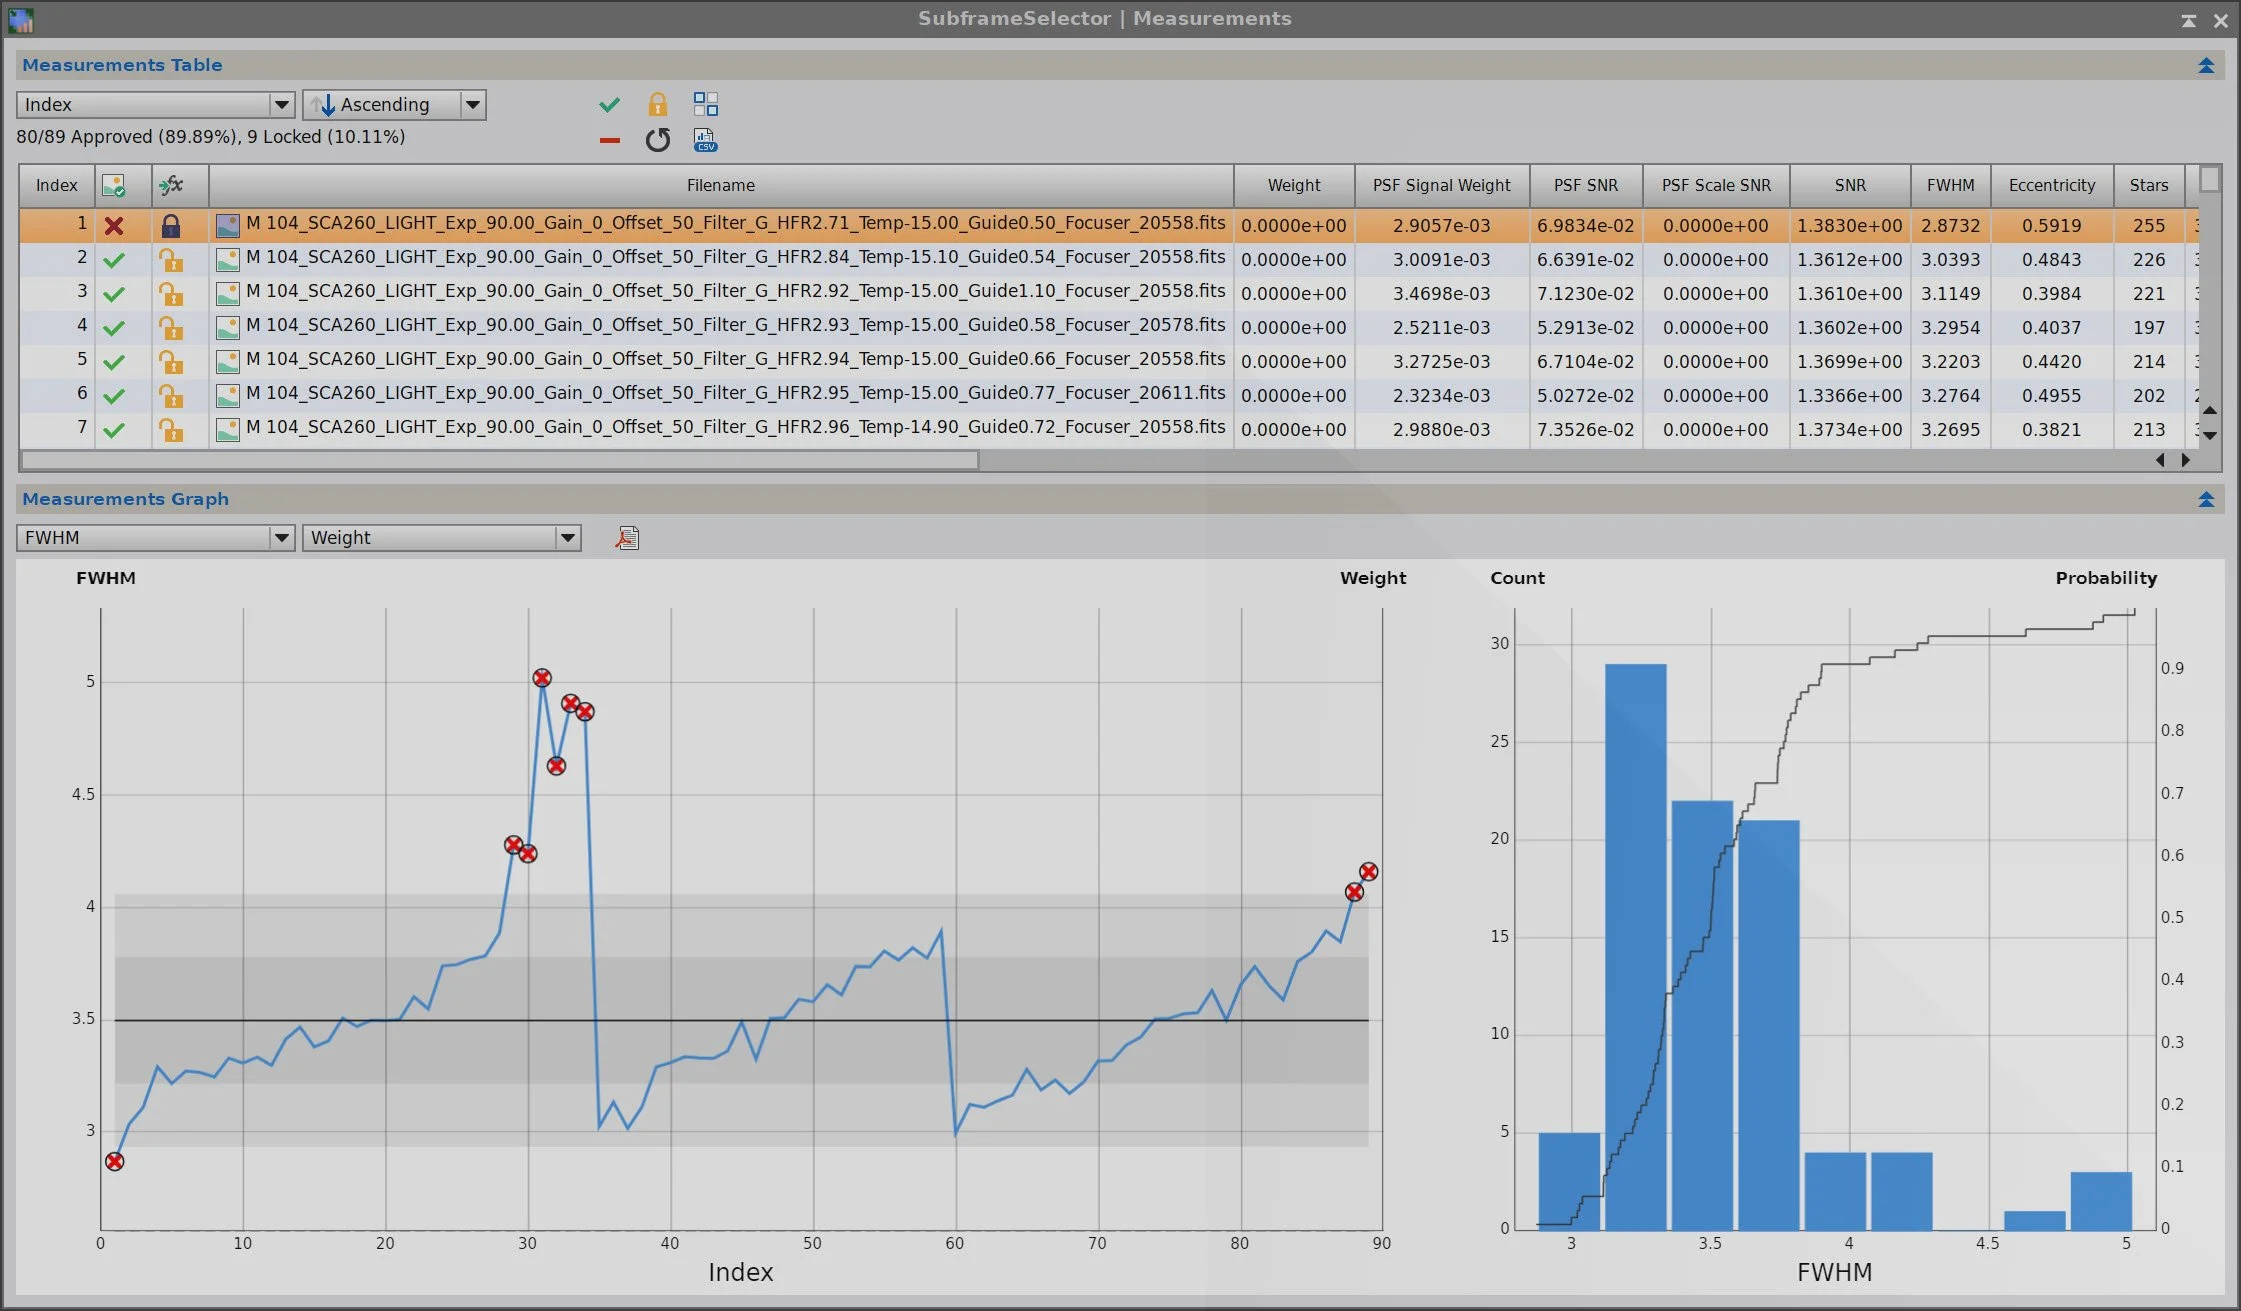
Green channel: 9 frames removed.
And finally the Blue channel, where 11 frames were removed.
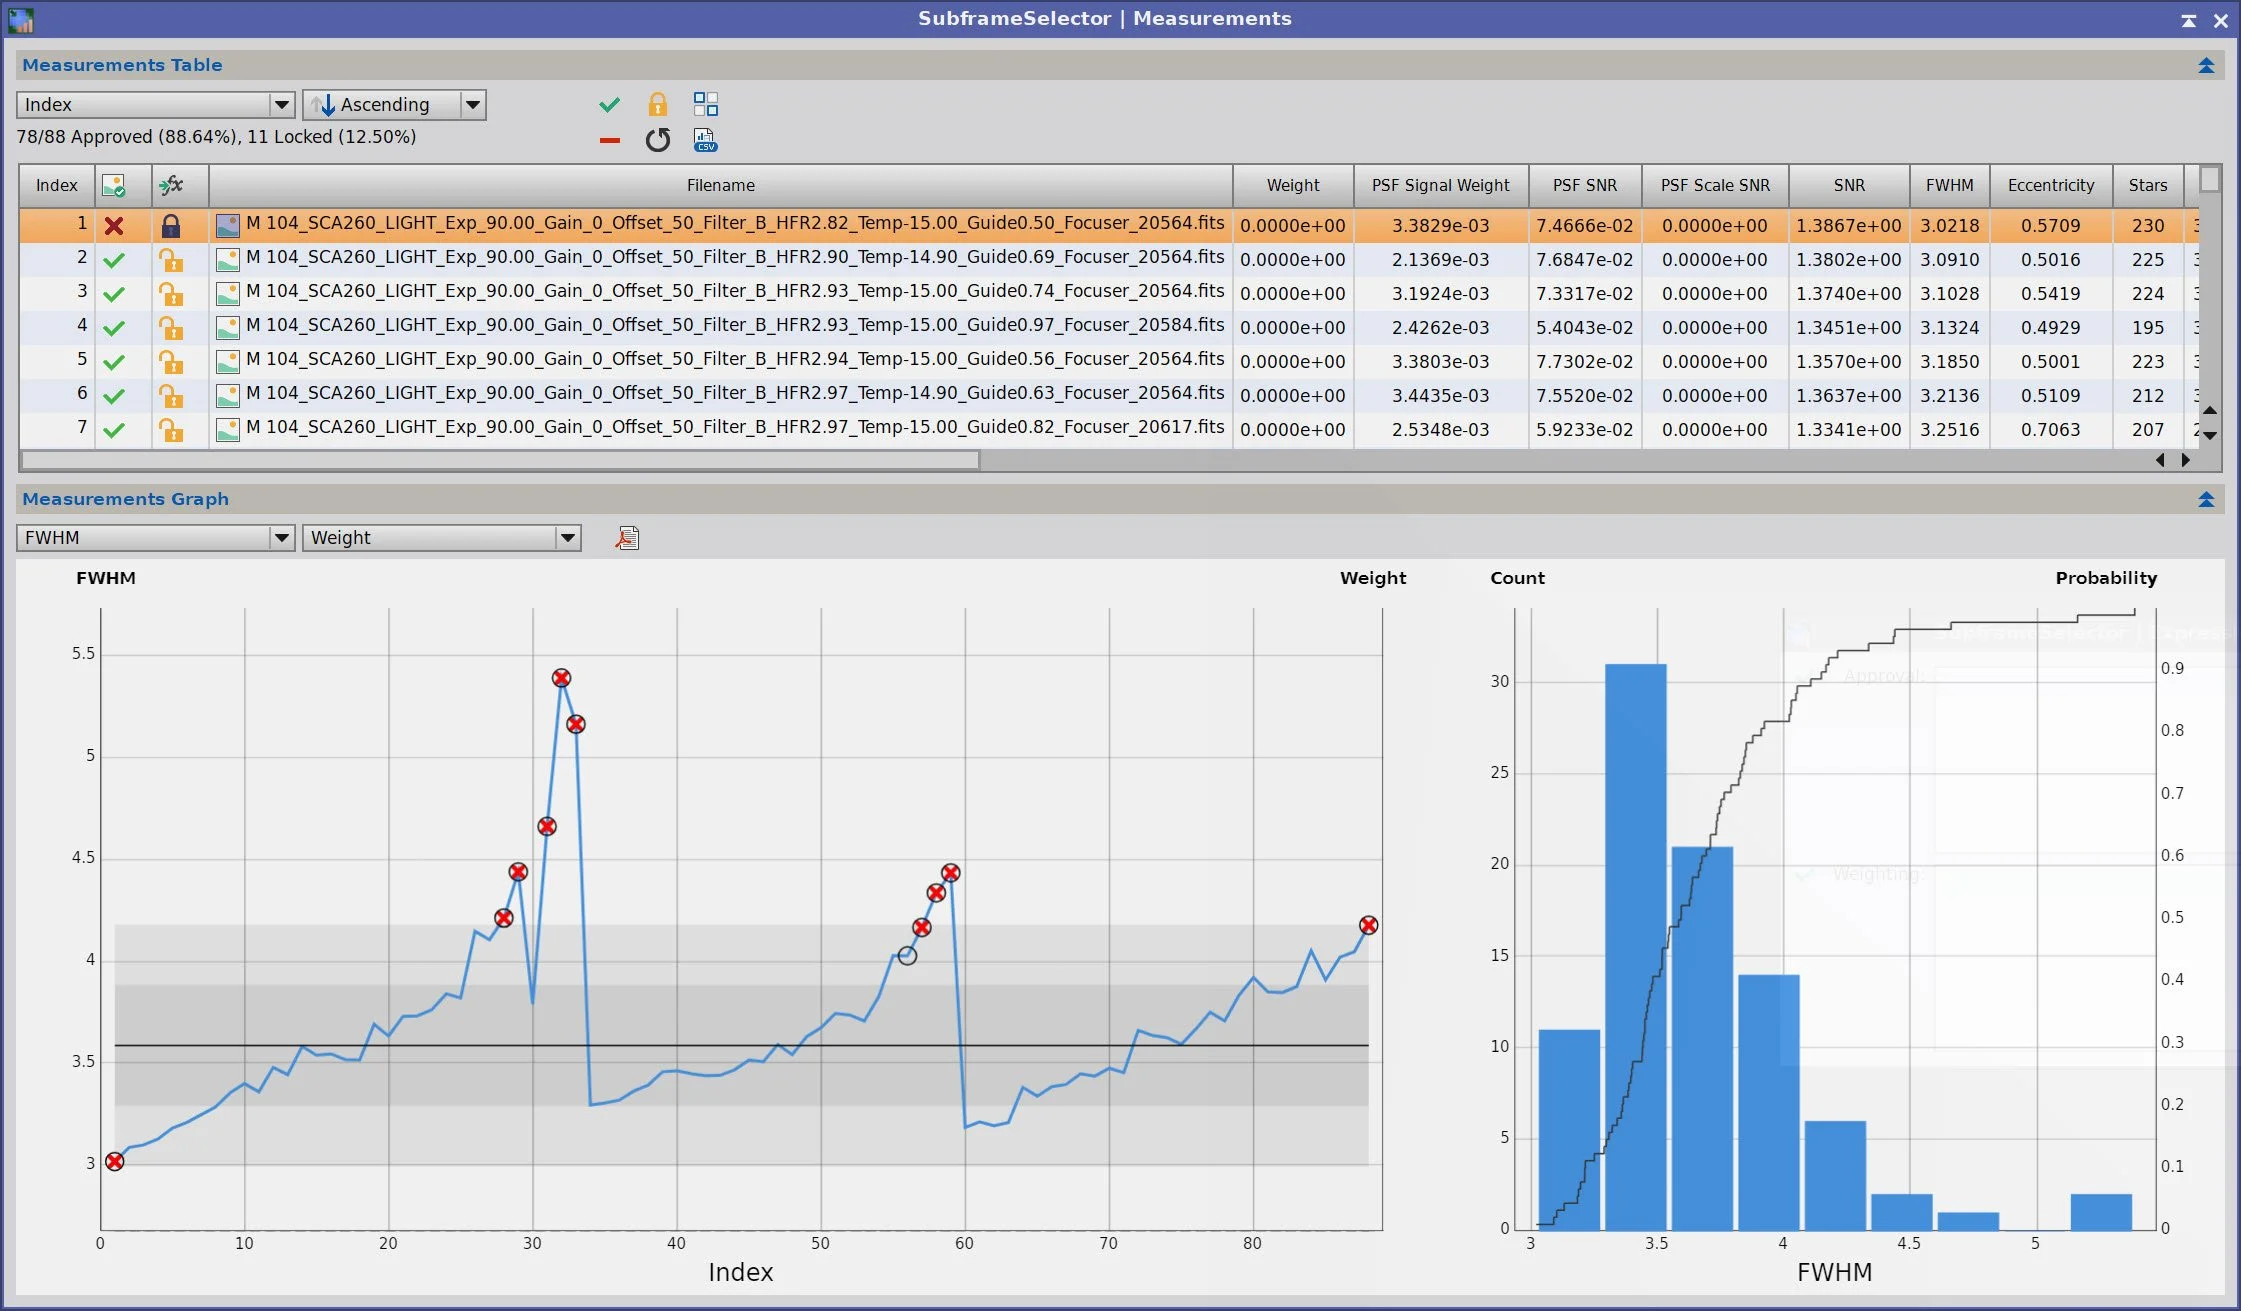
Blue Channel: 11 frames removed.
A total of 45 frames were removed during the SFS Operation.
3. WBPP 2.8.9
With the bad frames identified, I ran everything through WBPP with a quality-first configuration:
Reset everything
Load all lights
Load all flats
Load all darks
Selected maximum quality
Reference Image: auto, the default
Select the output directory for the WBPP folder
Enable CC for all light frames
Pedestal value:-auto
Darks - set exposure tolerance to 0
Lights - set exposure tolerance to 0
Lights - all option chosen except for linear defect
Enabled for Autocrop
I chose NOT to use Drizzle processing, even though I wanted the greatest possible detail. In the past, I have had problems using the RC-Astro set of tools with images from the SCA260 V2 when running Drizzle.
WBPP run in 1:44:28 - no errors
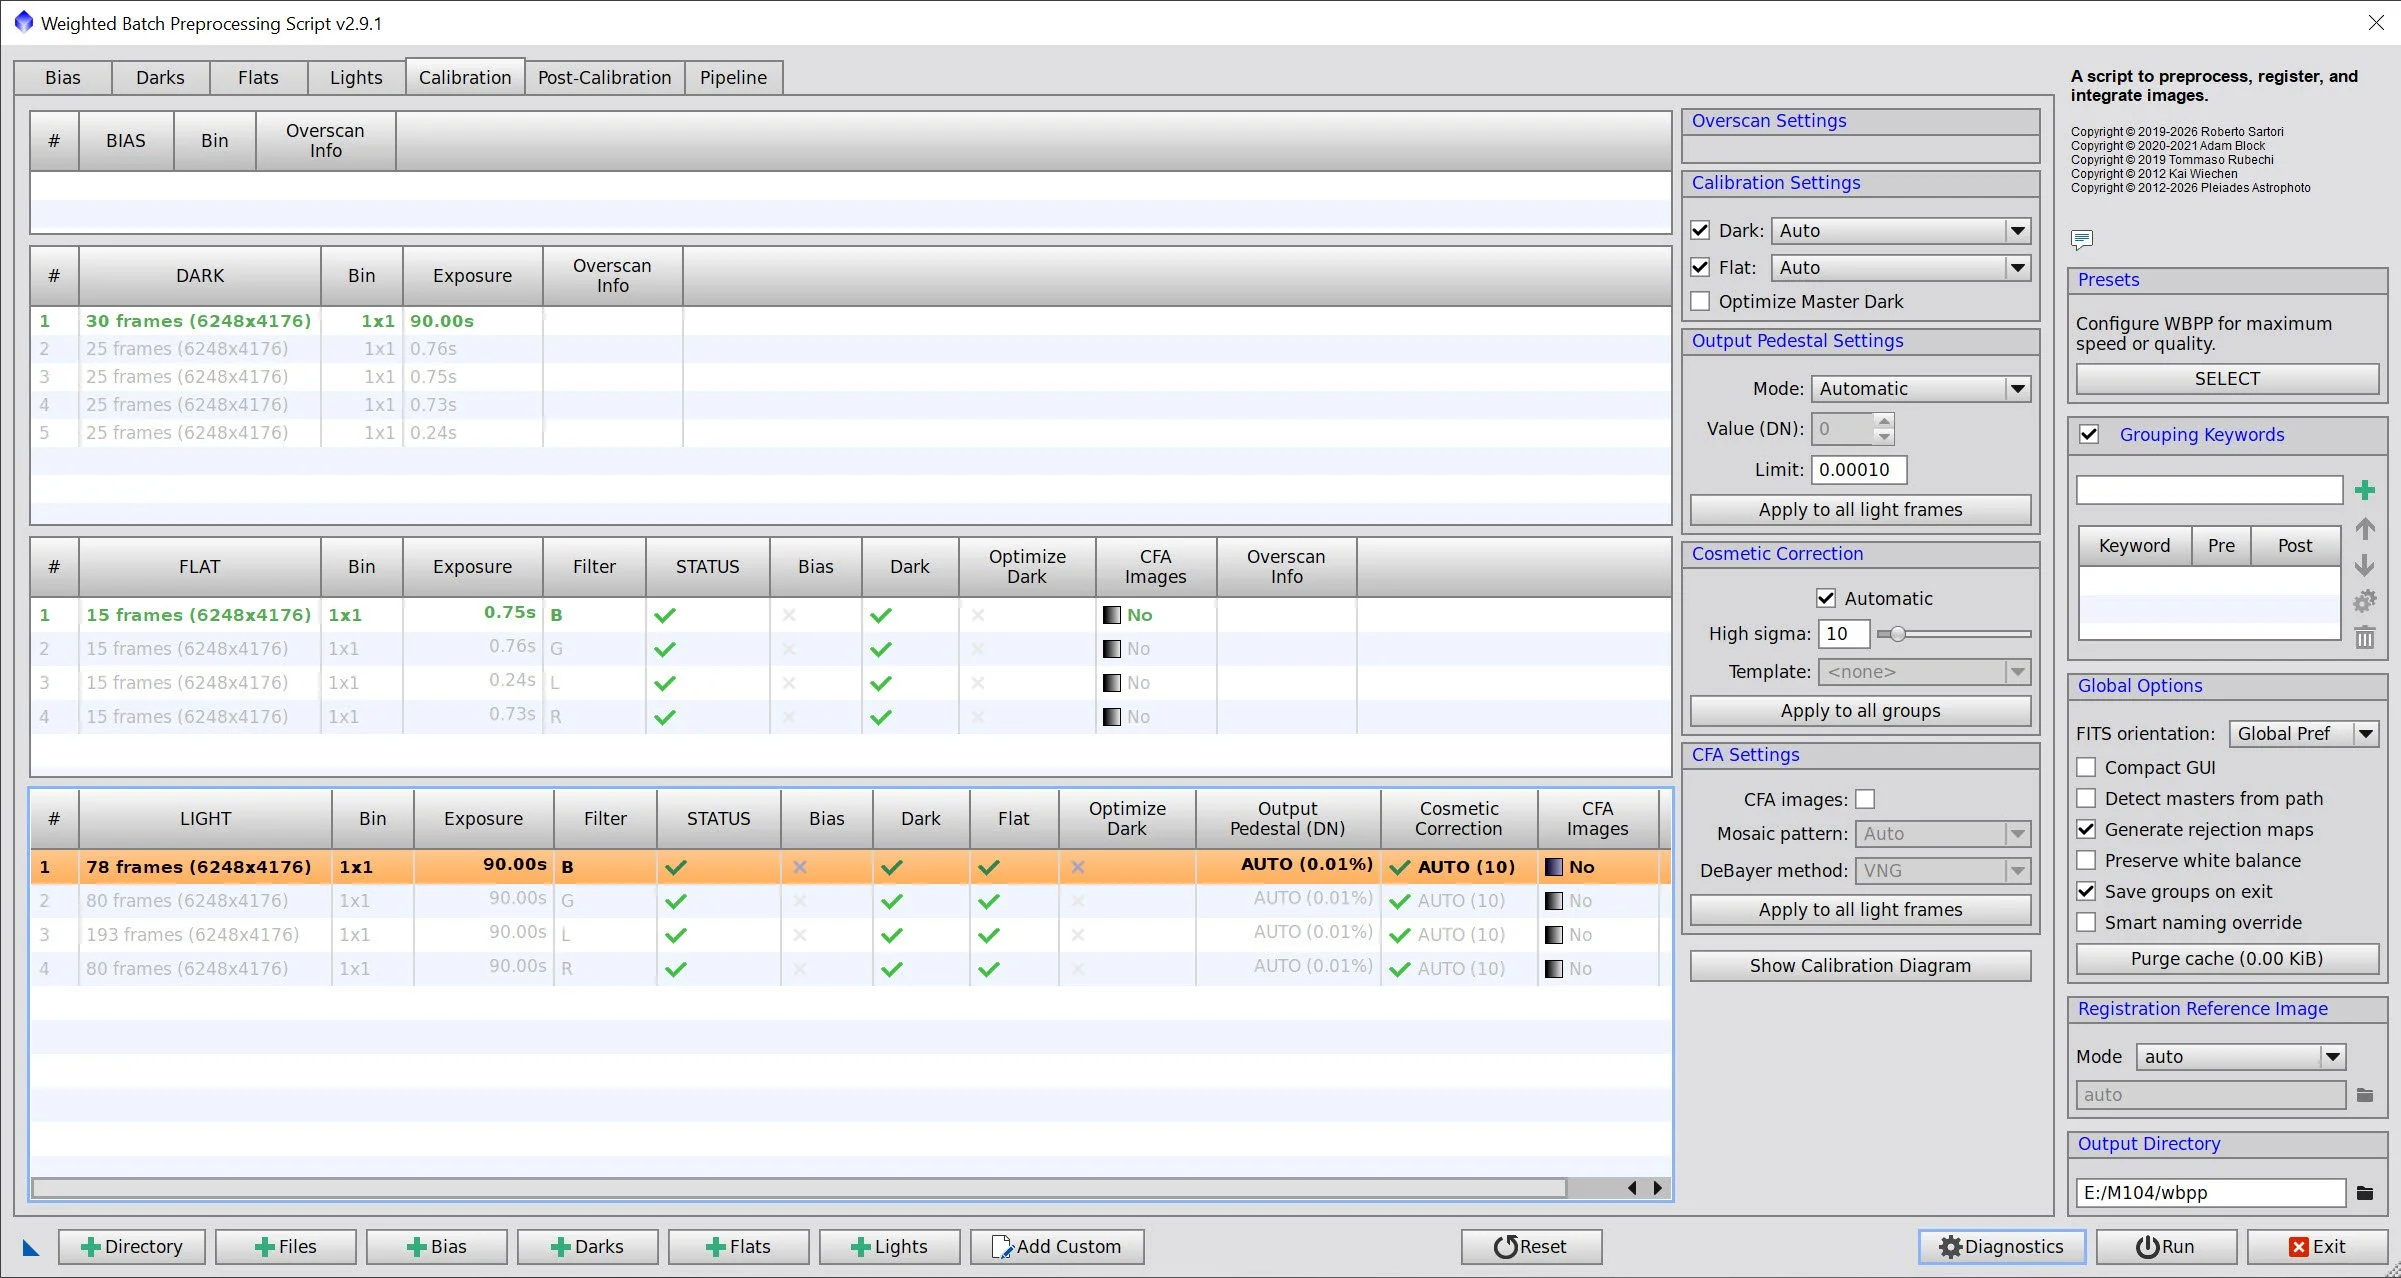
WBPP Calibration View
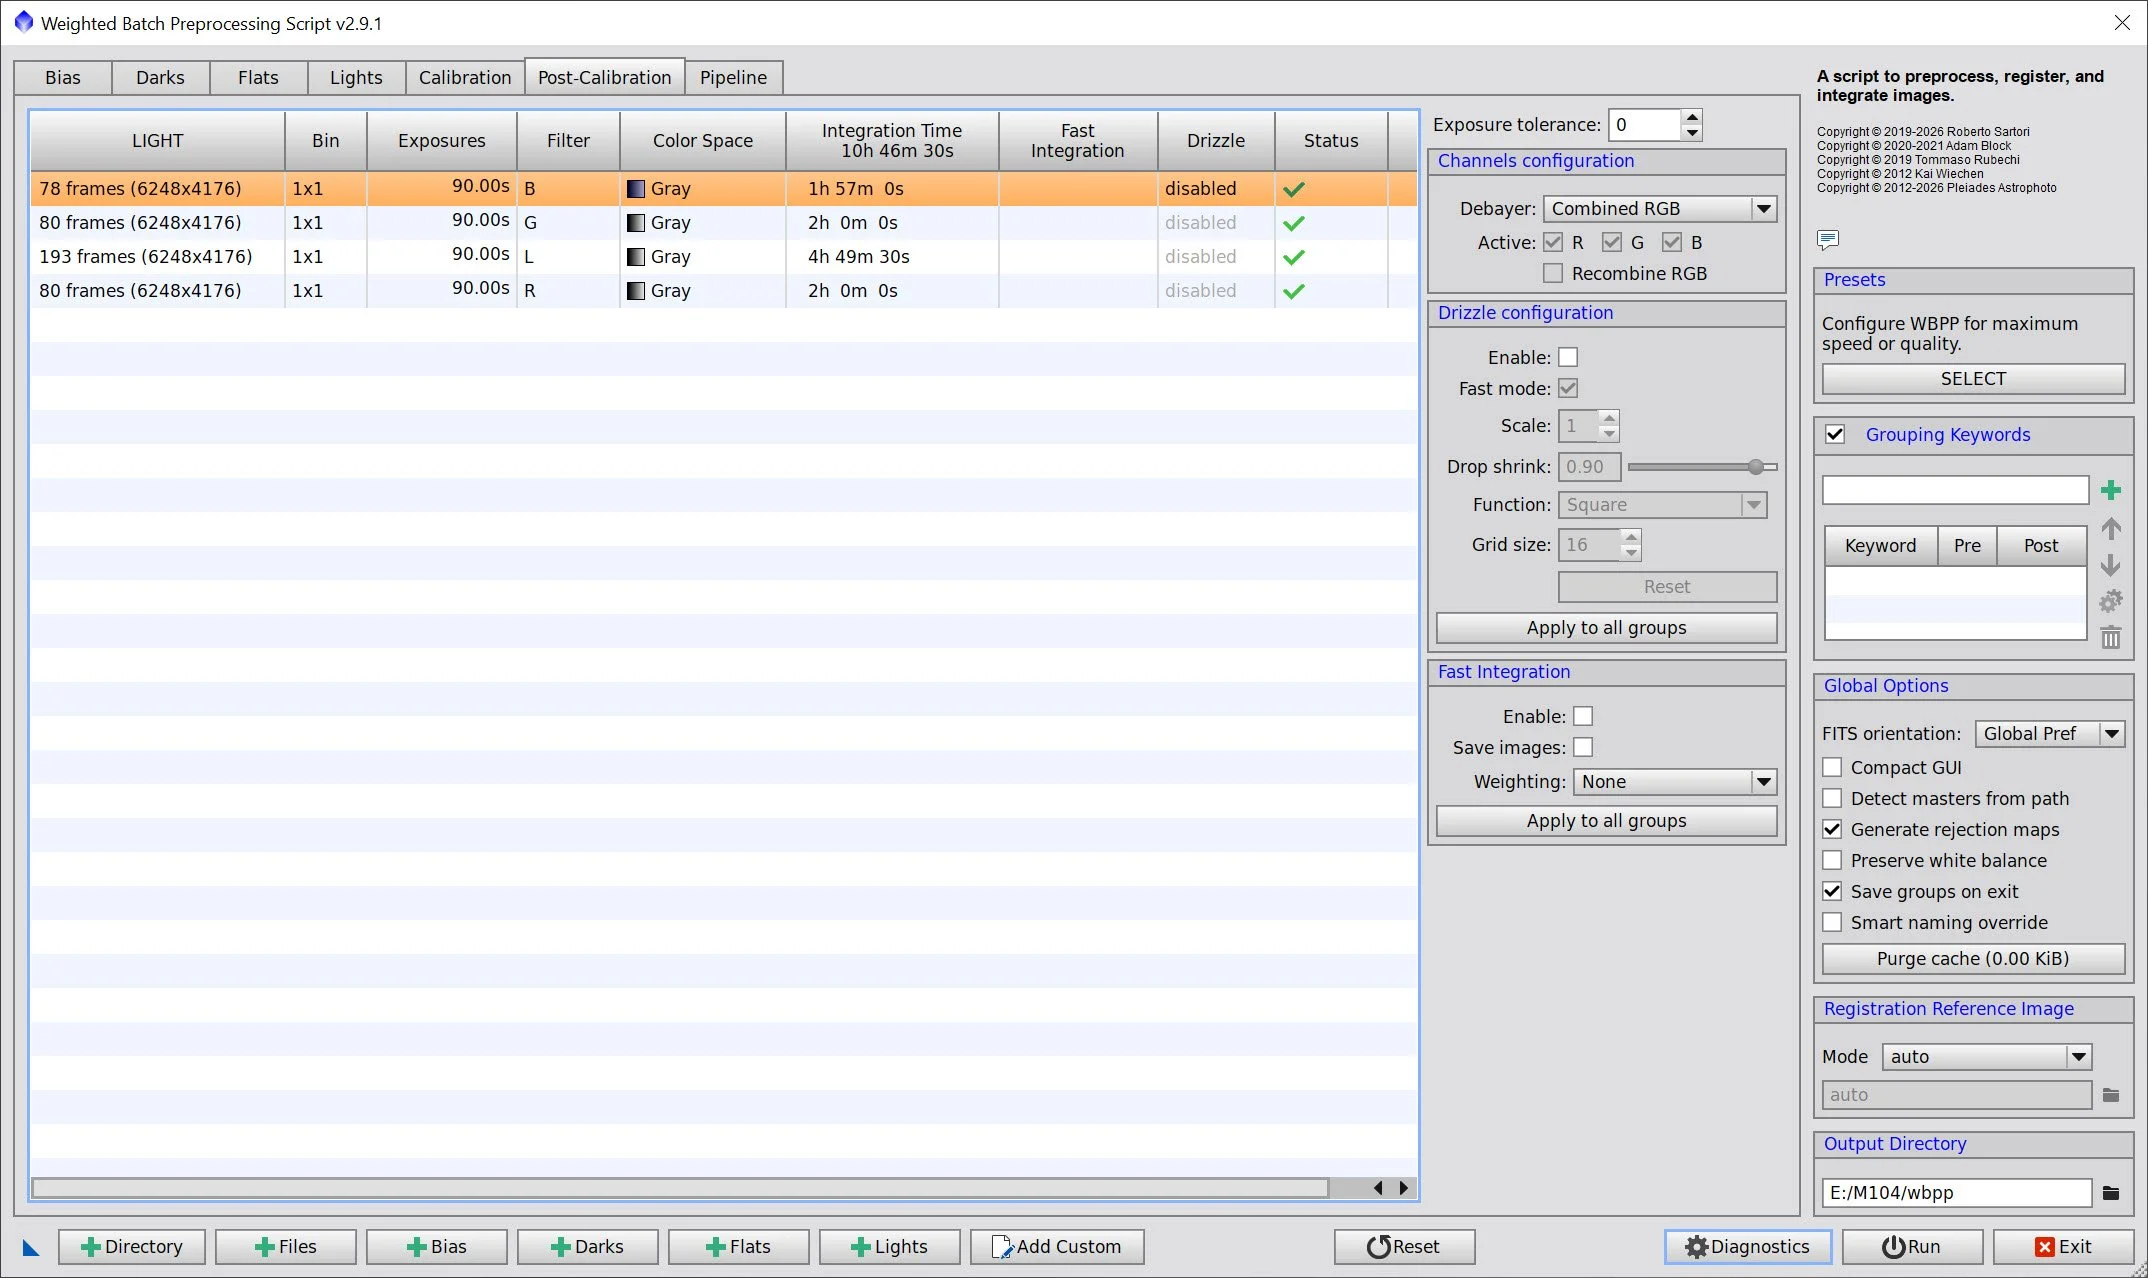
WBPP Post Calibration View
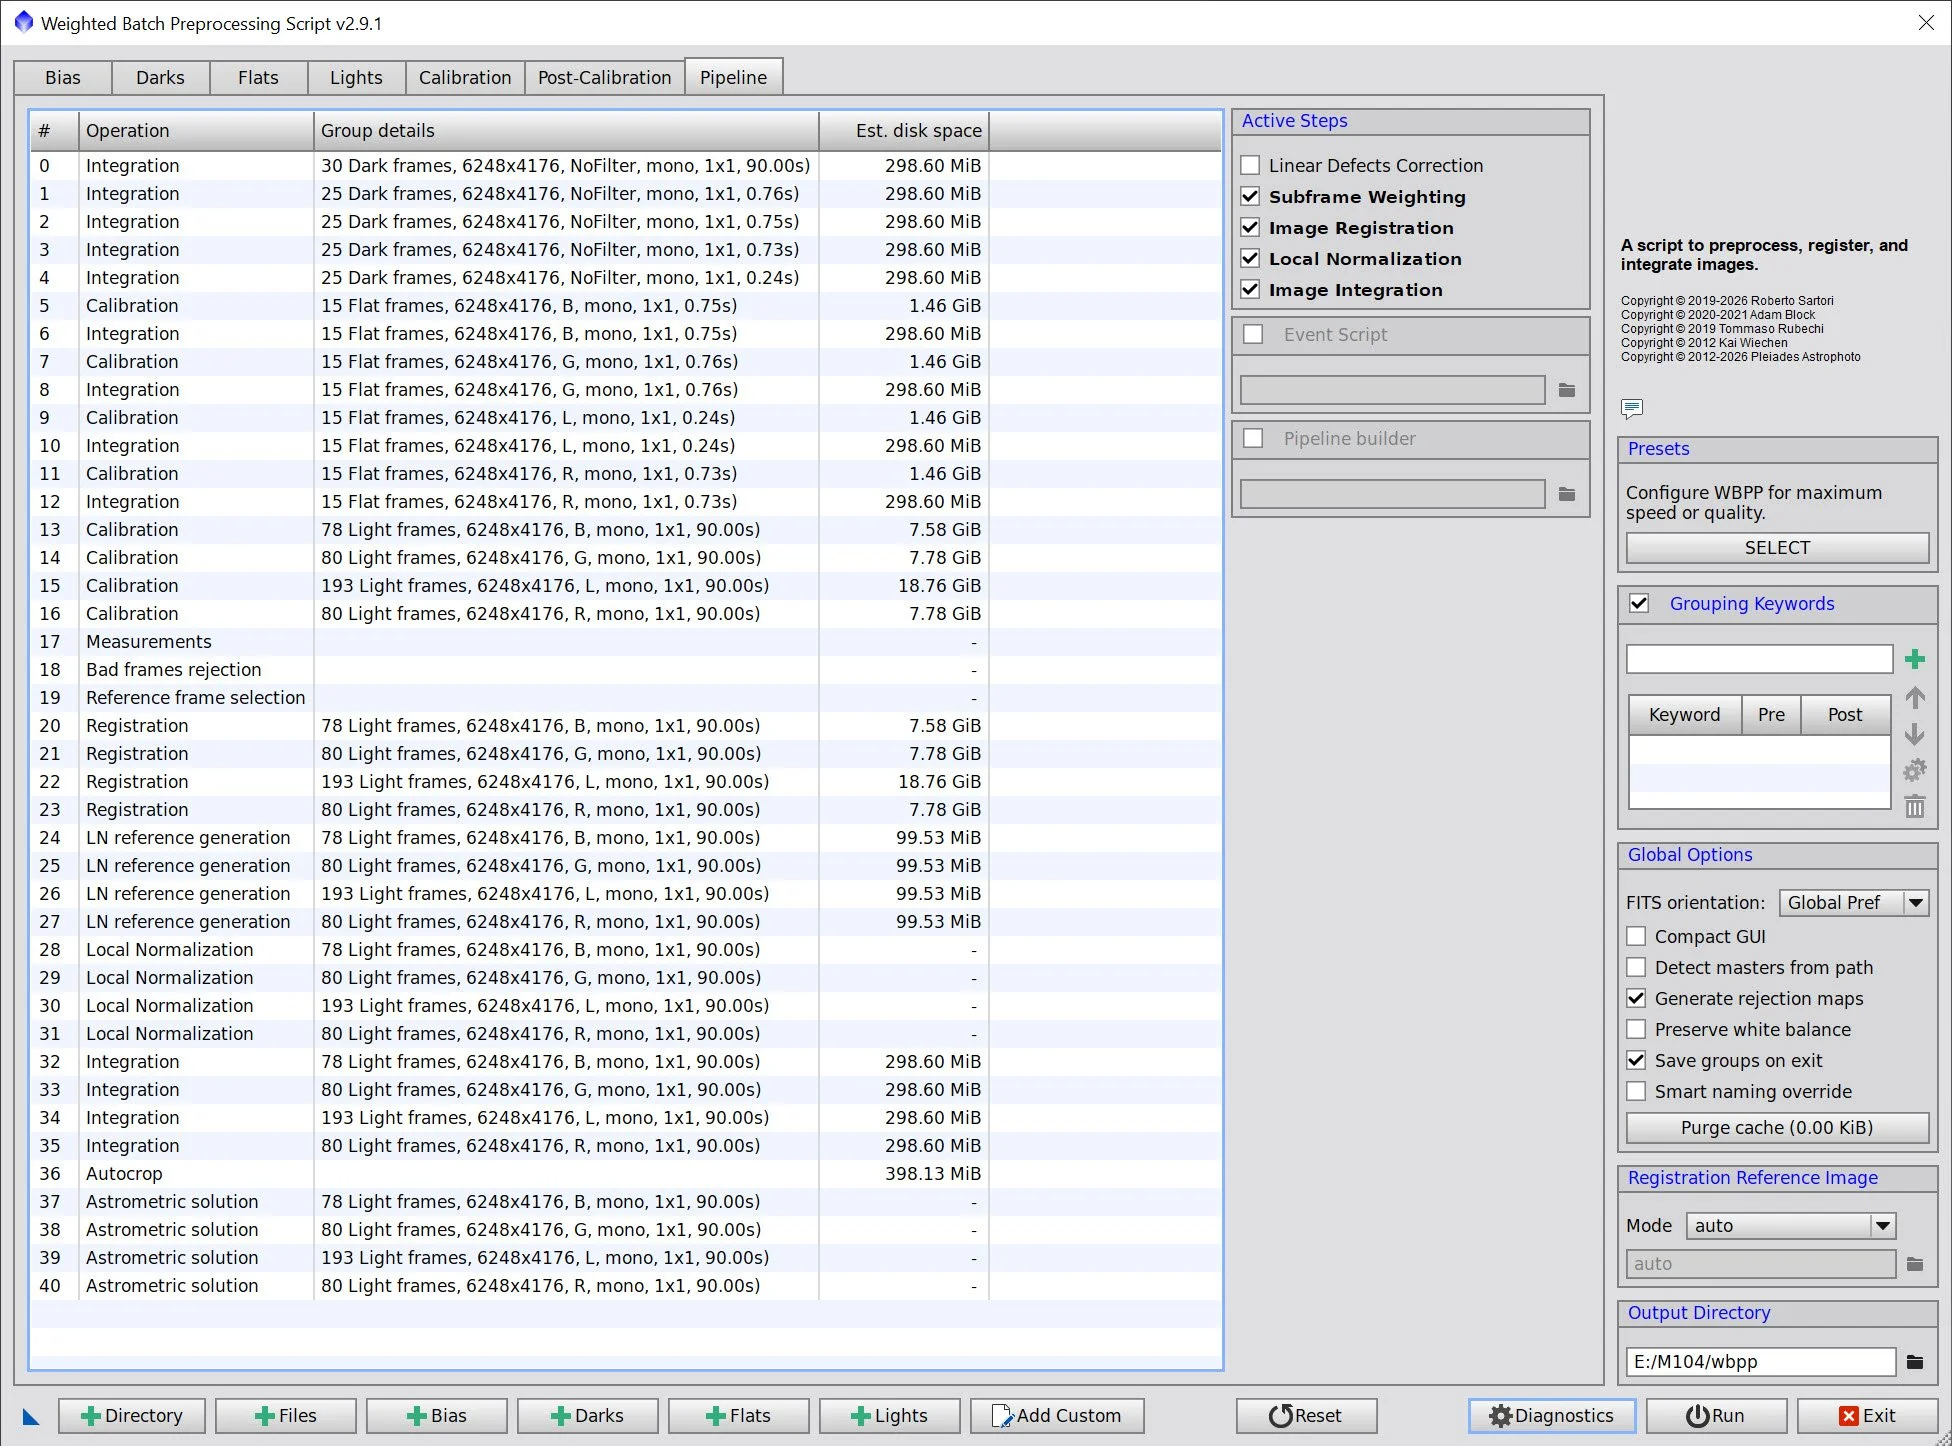
WBPP Pipeline View
4. Load Master Images and Create Color Images
Load all master images and rename them.
Using ChannelCombination, create the Master RGB color image
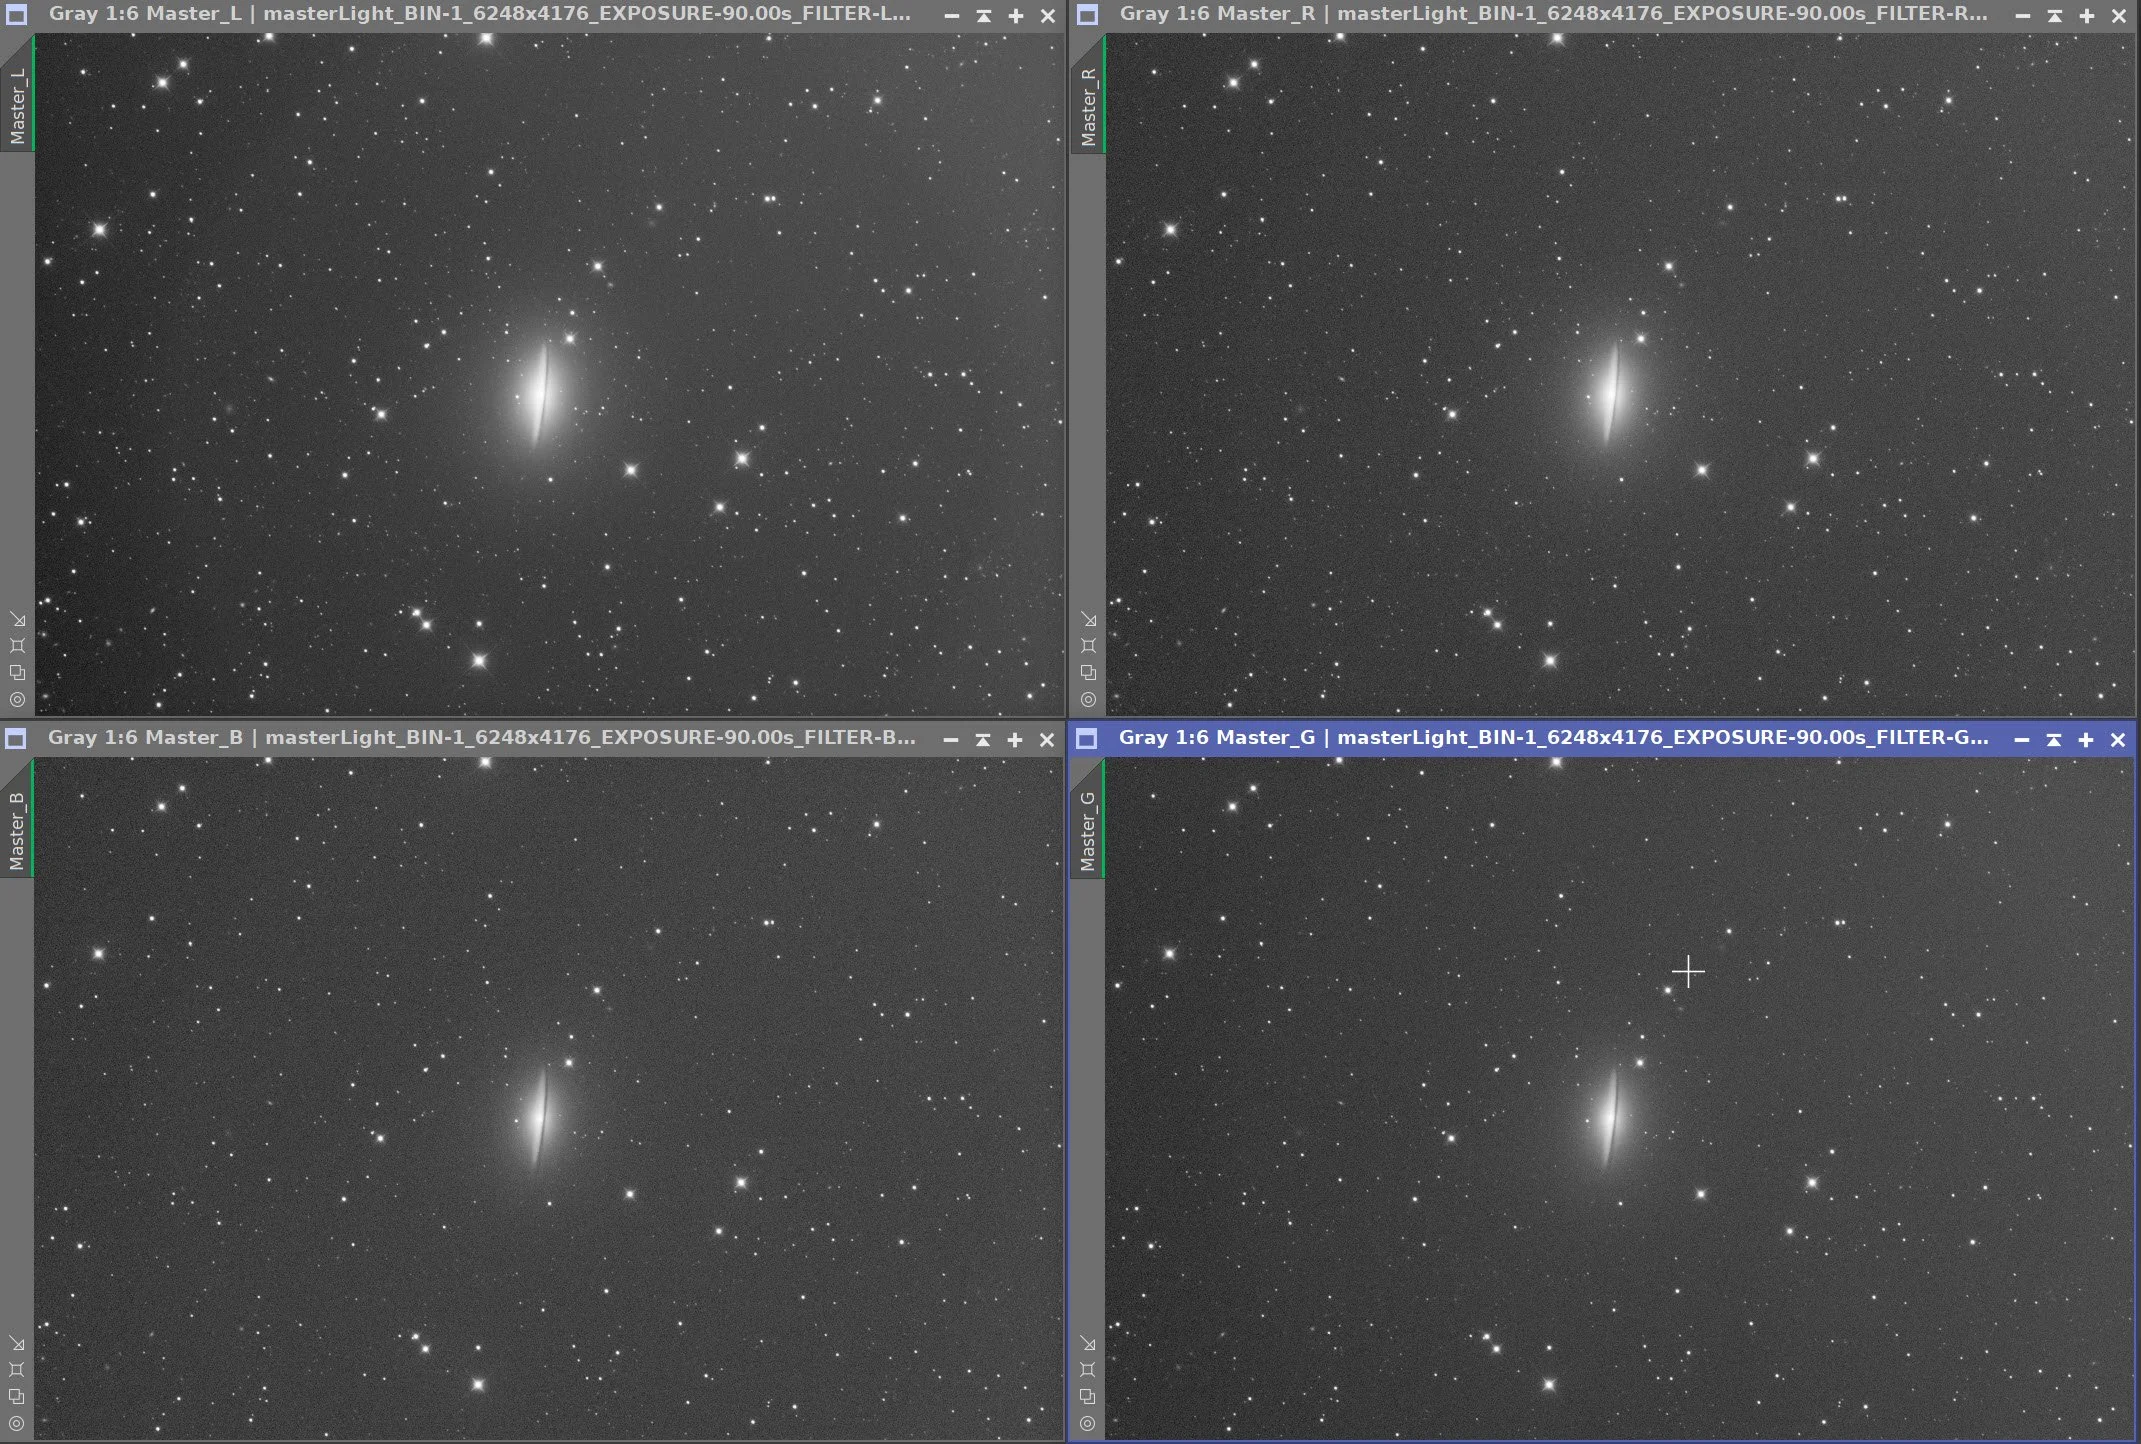
The Individual L, R, G, and B master linear images.
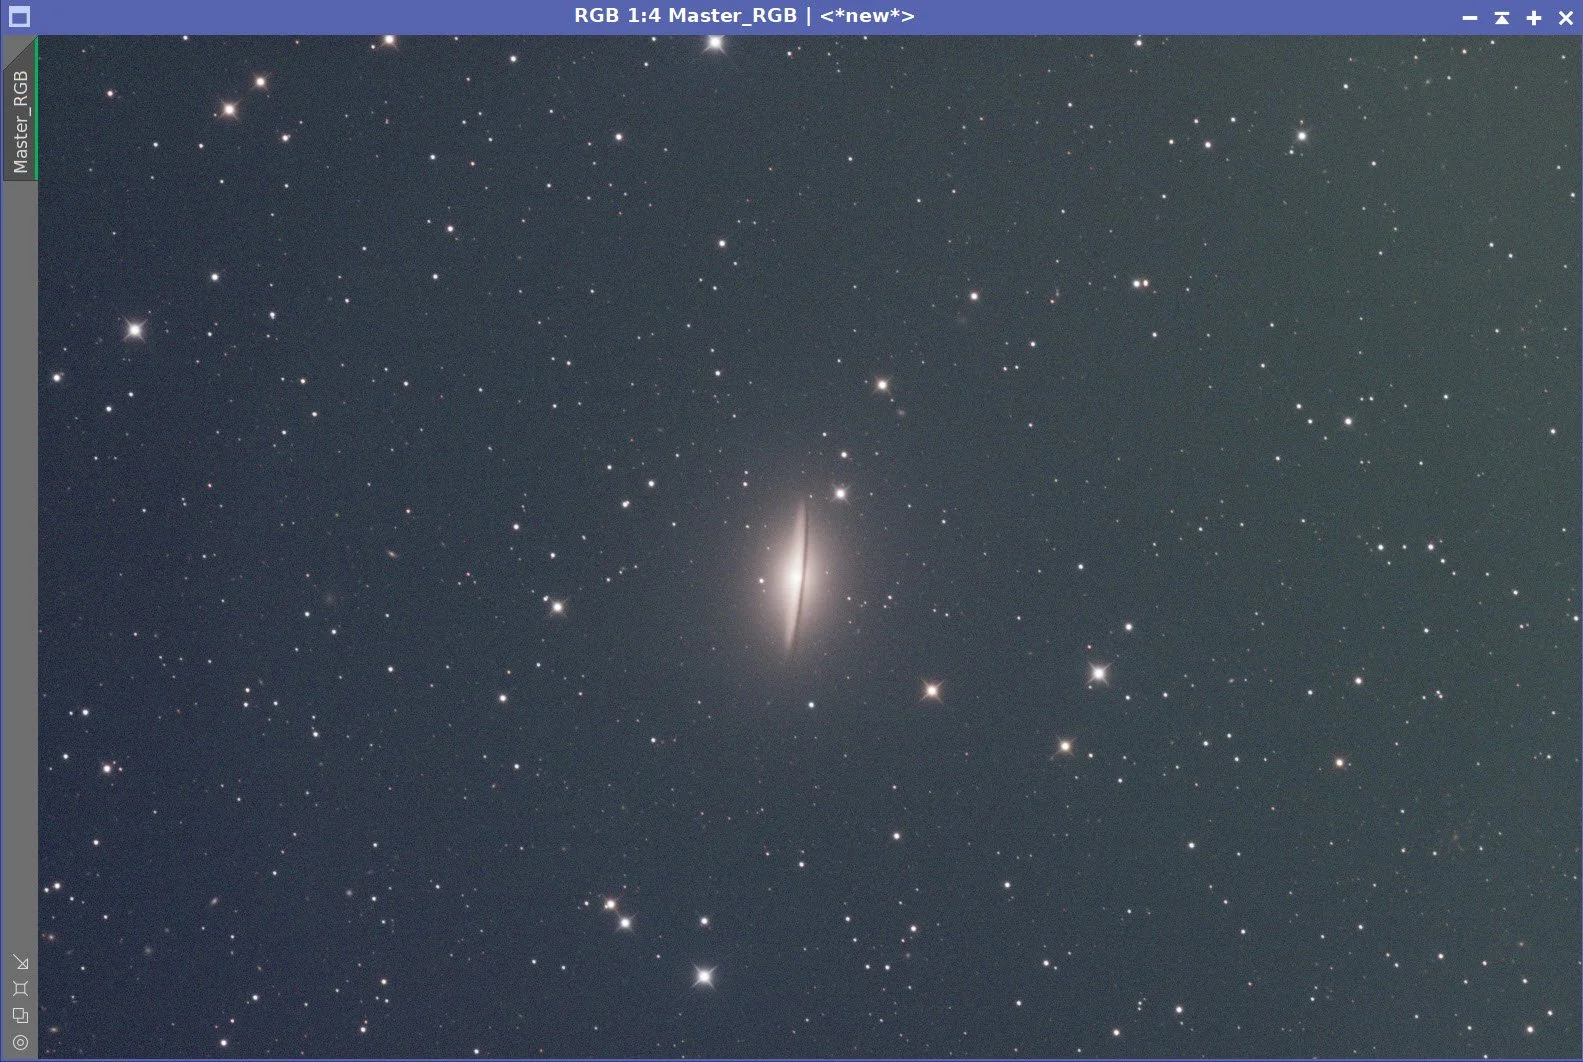
Master RGB image.
5. Initial Process of Linear Luminance data
Run DBE for the Lum linear image. Use subtraction for the correction method. Choose a sampling plan that avoids the galaxies and bright stars. (see below)
Run BXT - correct only. This cleans up the stars at the corners. Not much to do in this image as the scope is very crisp.
Run the PFSImage script to measure star sizes. X = 4.47 Y= 4.37. This will influence the values used in BXT.
Run full BXT. I used an enhanced set of values to shrink the stars more aggressively. These are about double the measured star sizes. See the BXT Panel Snapshot below.
Run NXT V3; refer to the parameters in the snapshot below.
Run SXT - no need to save the Lum stars, as we will not be using them.
Master L Image DBE Sampling Plan (click to enlarge)
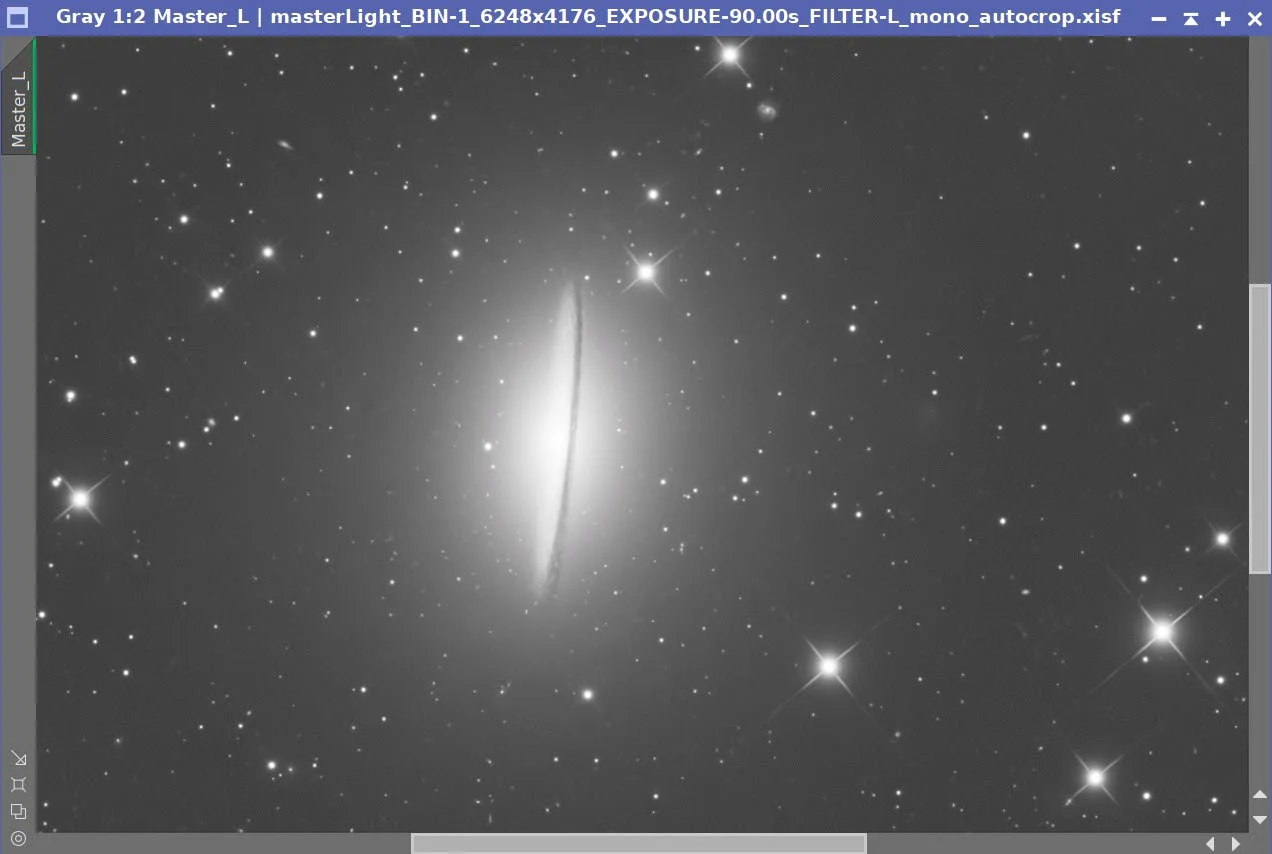
Master L- Before DBE (click to enlarge)
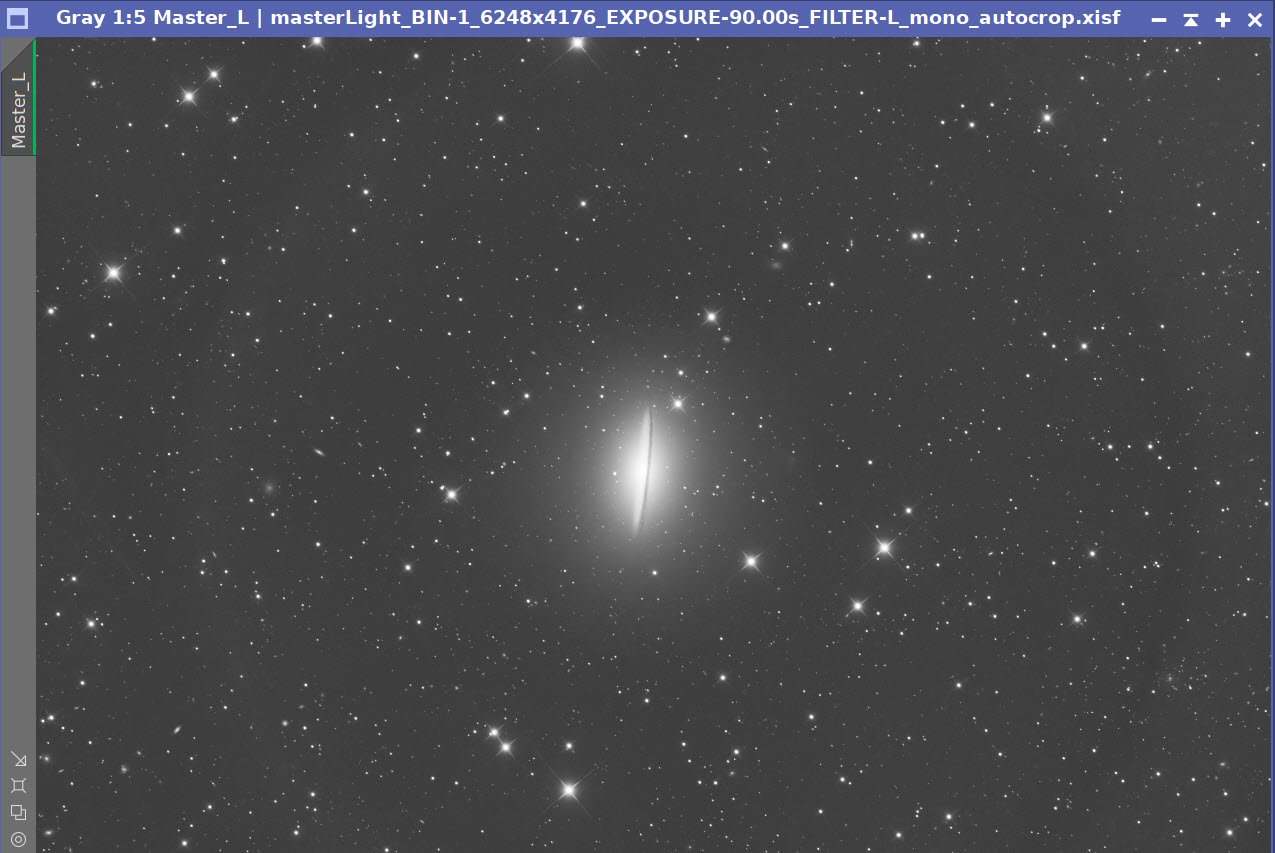
Master L after DBE (click to enlarge)
Background Subtracted by DBE (click to enlarge)
Measuring Star Sizes with PFSImage Script (click to enlarge)
BXT Settings Used. (click to enlarge)
NXT Panel used. (click to enlarge)

Master Lum Before BXT Correct Only, After BXT Correct Only, After BXT Full, After NXT
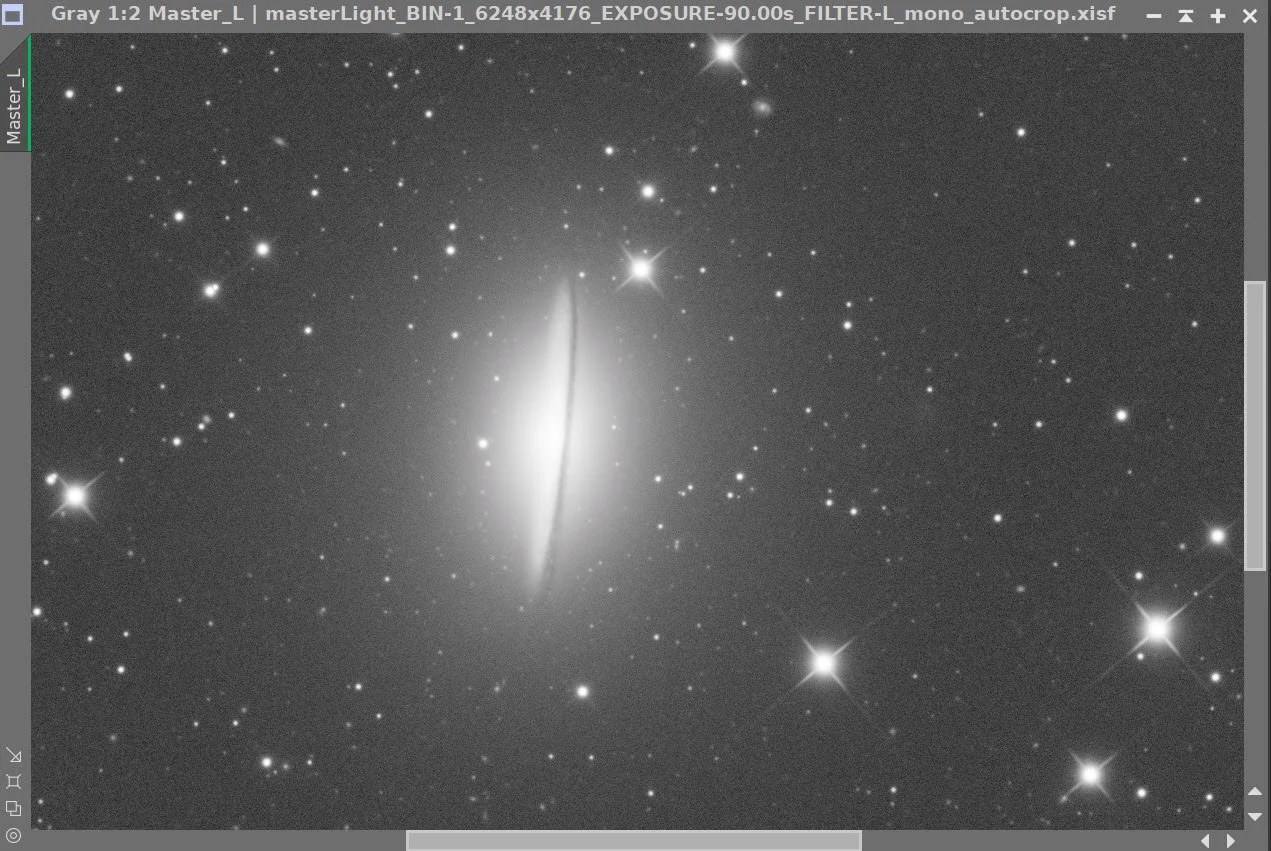
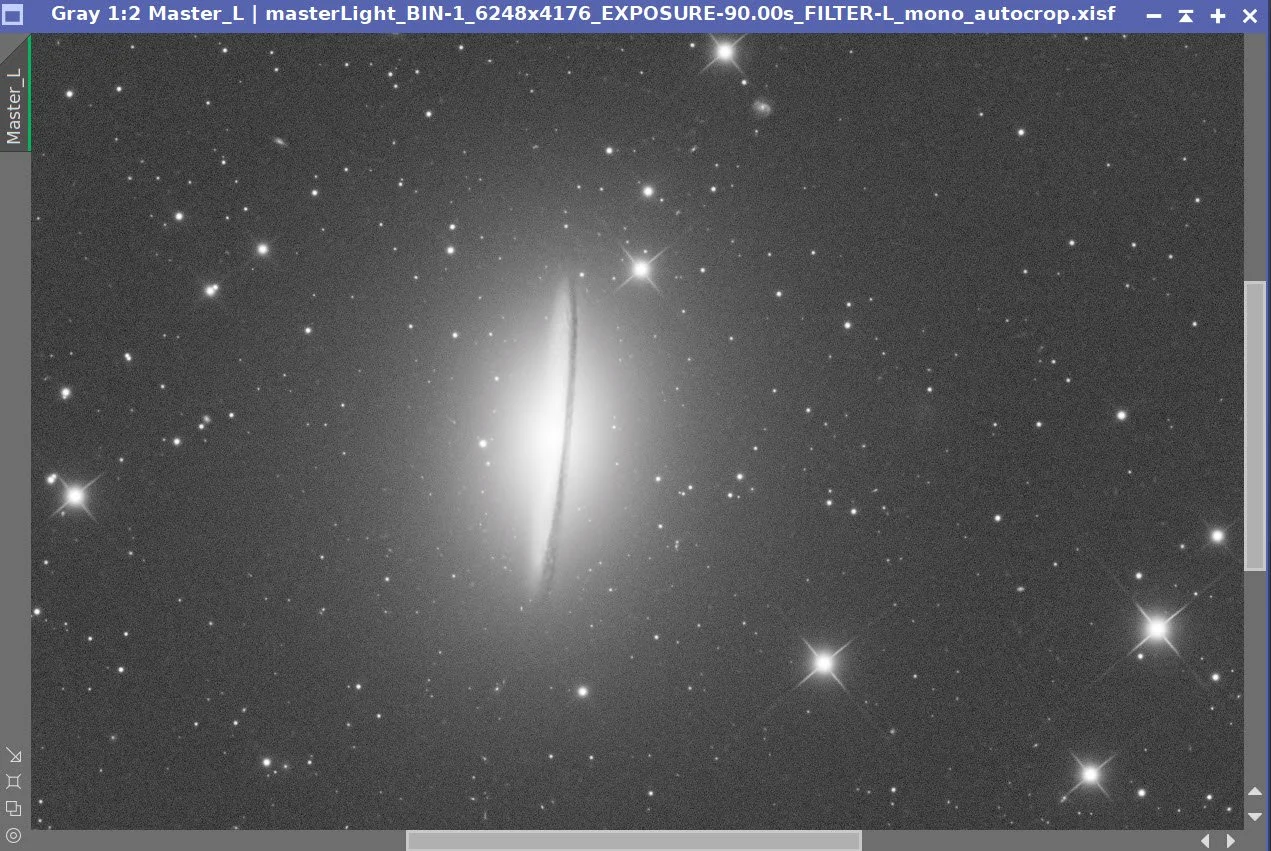
Final Master Lum Image
Master Lum Starless Image (click to enlarge)
PI’s Split Channel Menu Option
6. Initial Processing of Linear RGB data
Run DBE for the RGB linear image. Use subtraction for the correction method. Start with the same sampling plan from the Lum run. Choose a sampling plan that avoids the galaxies and bright stars. (see below)
Select a background preview, then set up and run SPCC. See the SPCC Panel shot below for the parameters used.
Run BXT - Correct only. This cleans up the stars at the corners. Not much to do in this image as the scope is very crisp.
Run the PFSImage script to measure star sizes. X=4.11 Y = 3.99. This will influence the values used in BXT.
Run Full BXT - I am using an enhanced set of values to shrink stars more. These are about double the measured star sizes. See the BXT Panel Snapshot below.
Run NXT V3; refer to the parameters in the snapshot below.
Run SXT - this time we will save the RGB stars.
Master RGB Sampling Plan (click to enlarge)
Master RGB before DBE (click to enlarge)
Master RGB after DBE (click to enlarge)
Master RGB Background removed (click to enarge)
Master RGB before SPCC (click to enlarge)
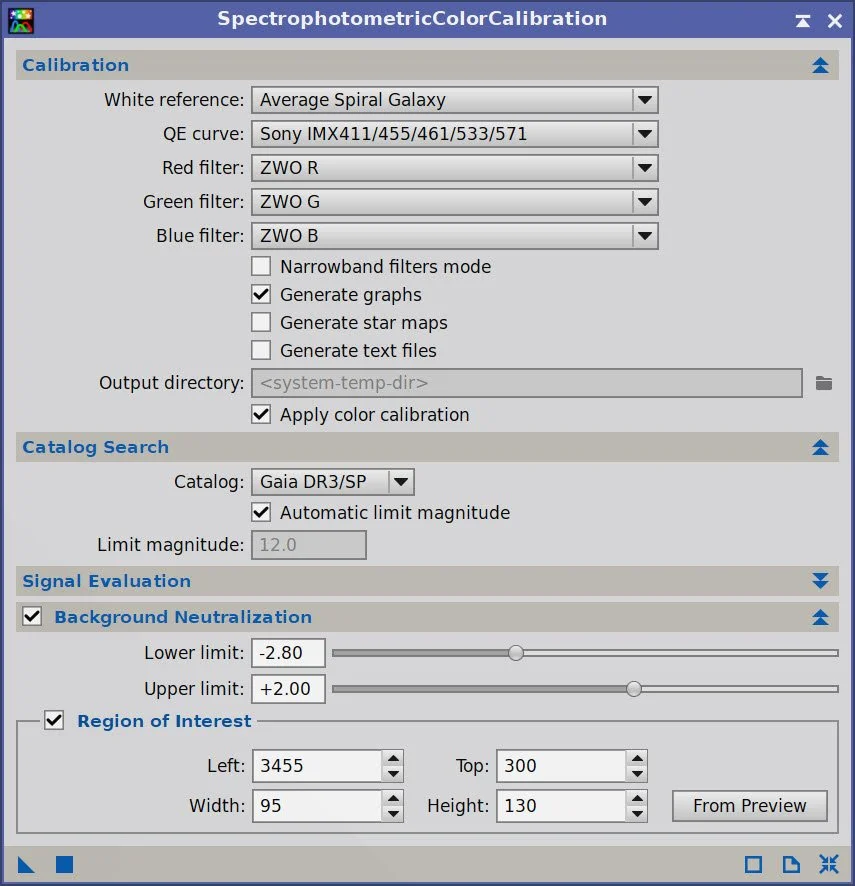
SPCC Panel showing parameters used.
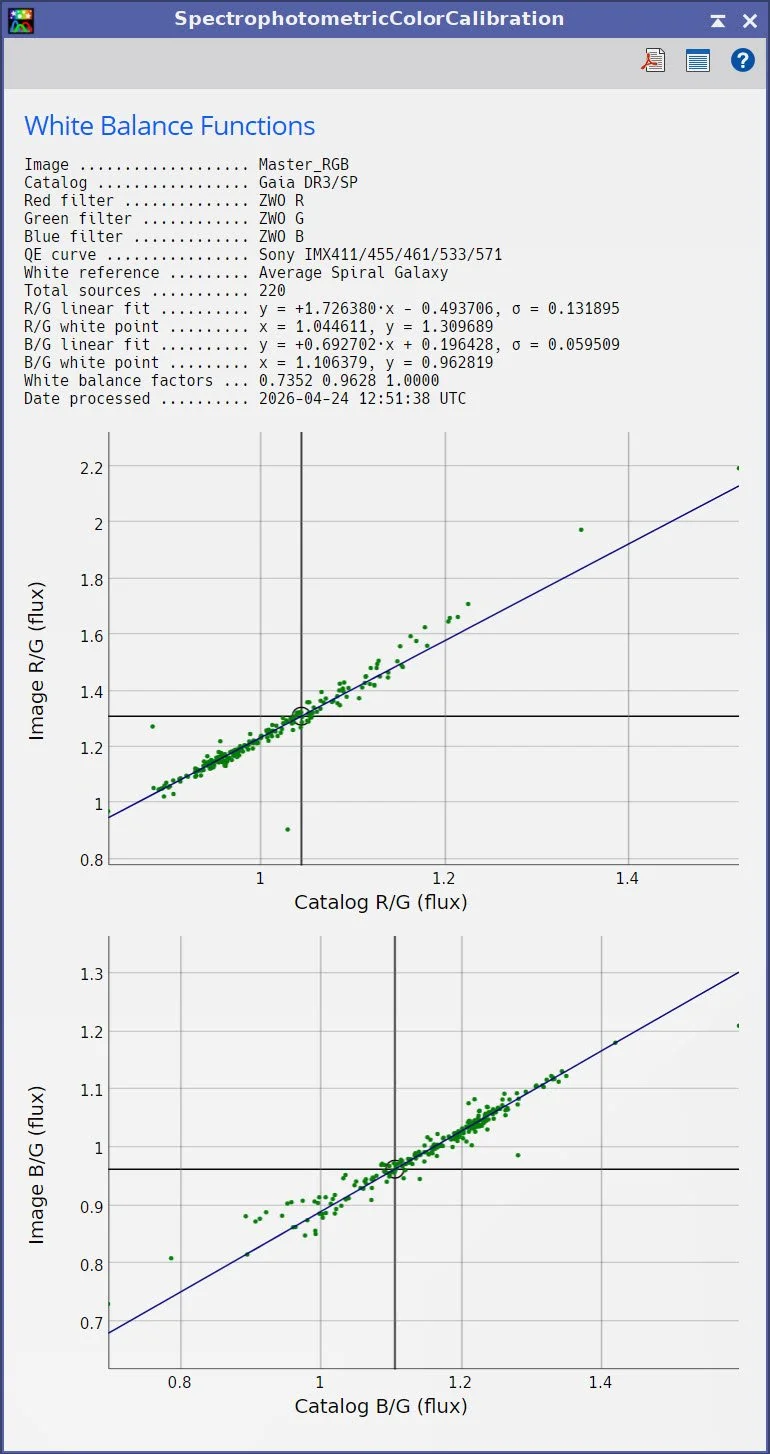
SPCC Regression results.

Master RGB after SPCC.
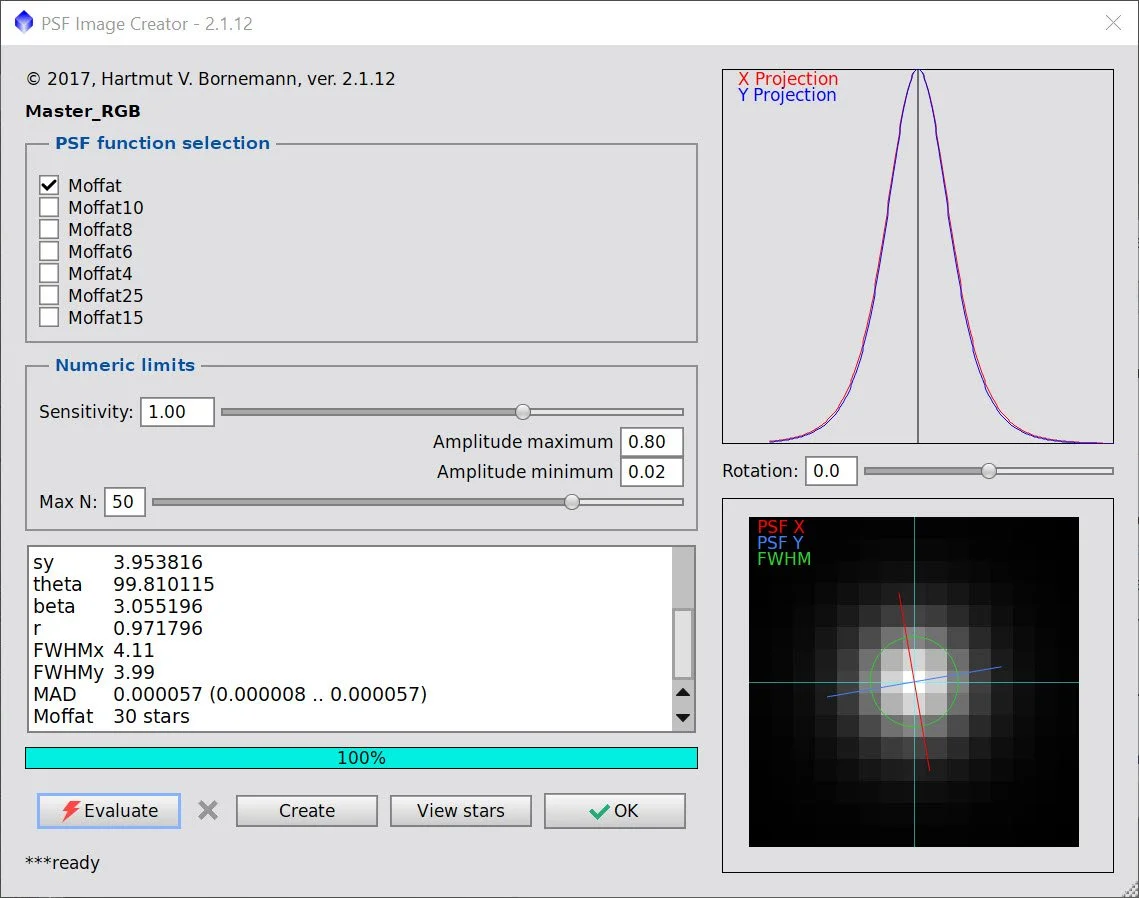
PFSImage panel showing star sizes.

BXT Panel showing paramaters used.
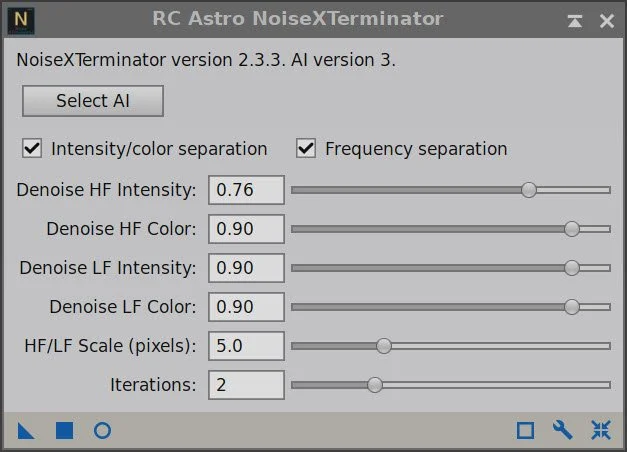
NXT Panel showing parameters used.
Master RGB Before BXT Correct Only, After BXT Correct Only, After BXT Full, After NXT
Master RGB Image before SXT.
Master RGB Starless Image. (click to enlarge)
7. Go Nonlinear
Using the STF → HT method, take the linear luminance and RGB images nonlinear.
Using Seti Astro Star Stretch, take the RGB Star image nonlinear with 3 levels of star stretch so that later, we have a choice of what size stars to use.
Nonlinear Starting Lum Image (zoomed) (click to enlarge)
Nonlinear RGB image (zoomed) (click to enlarge)
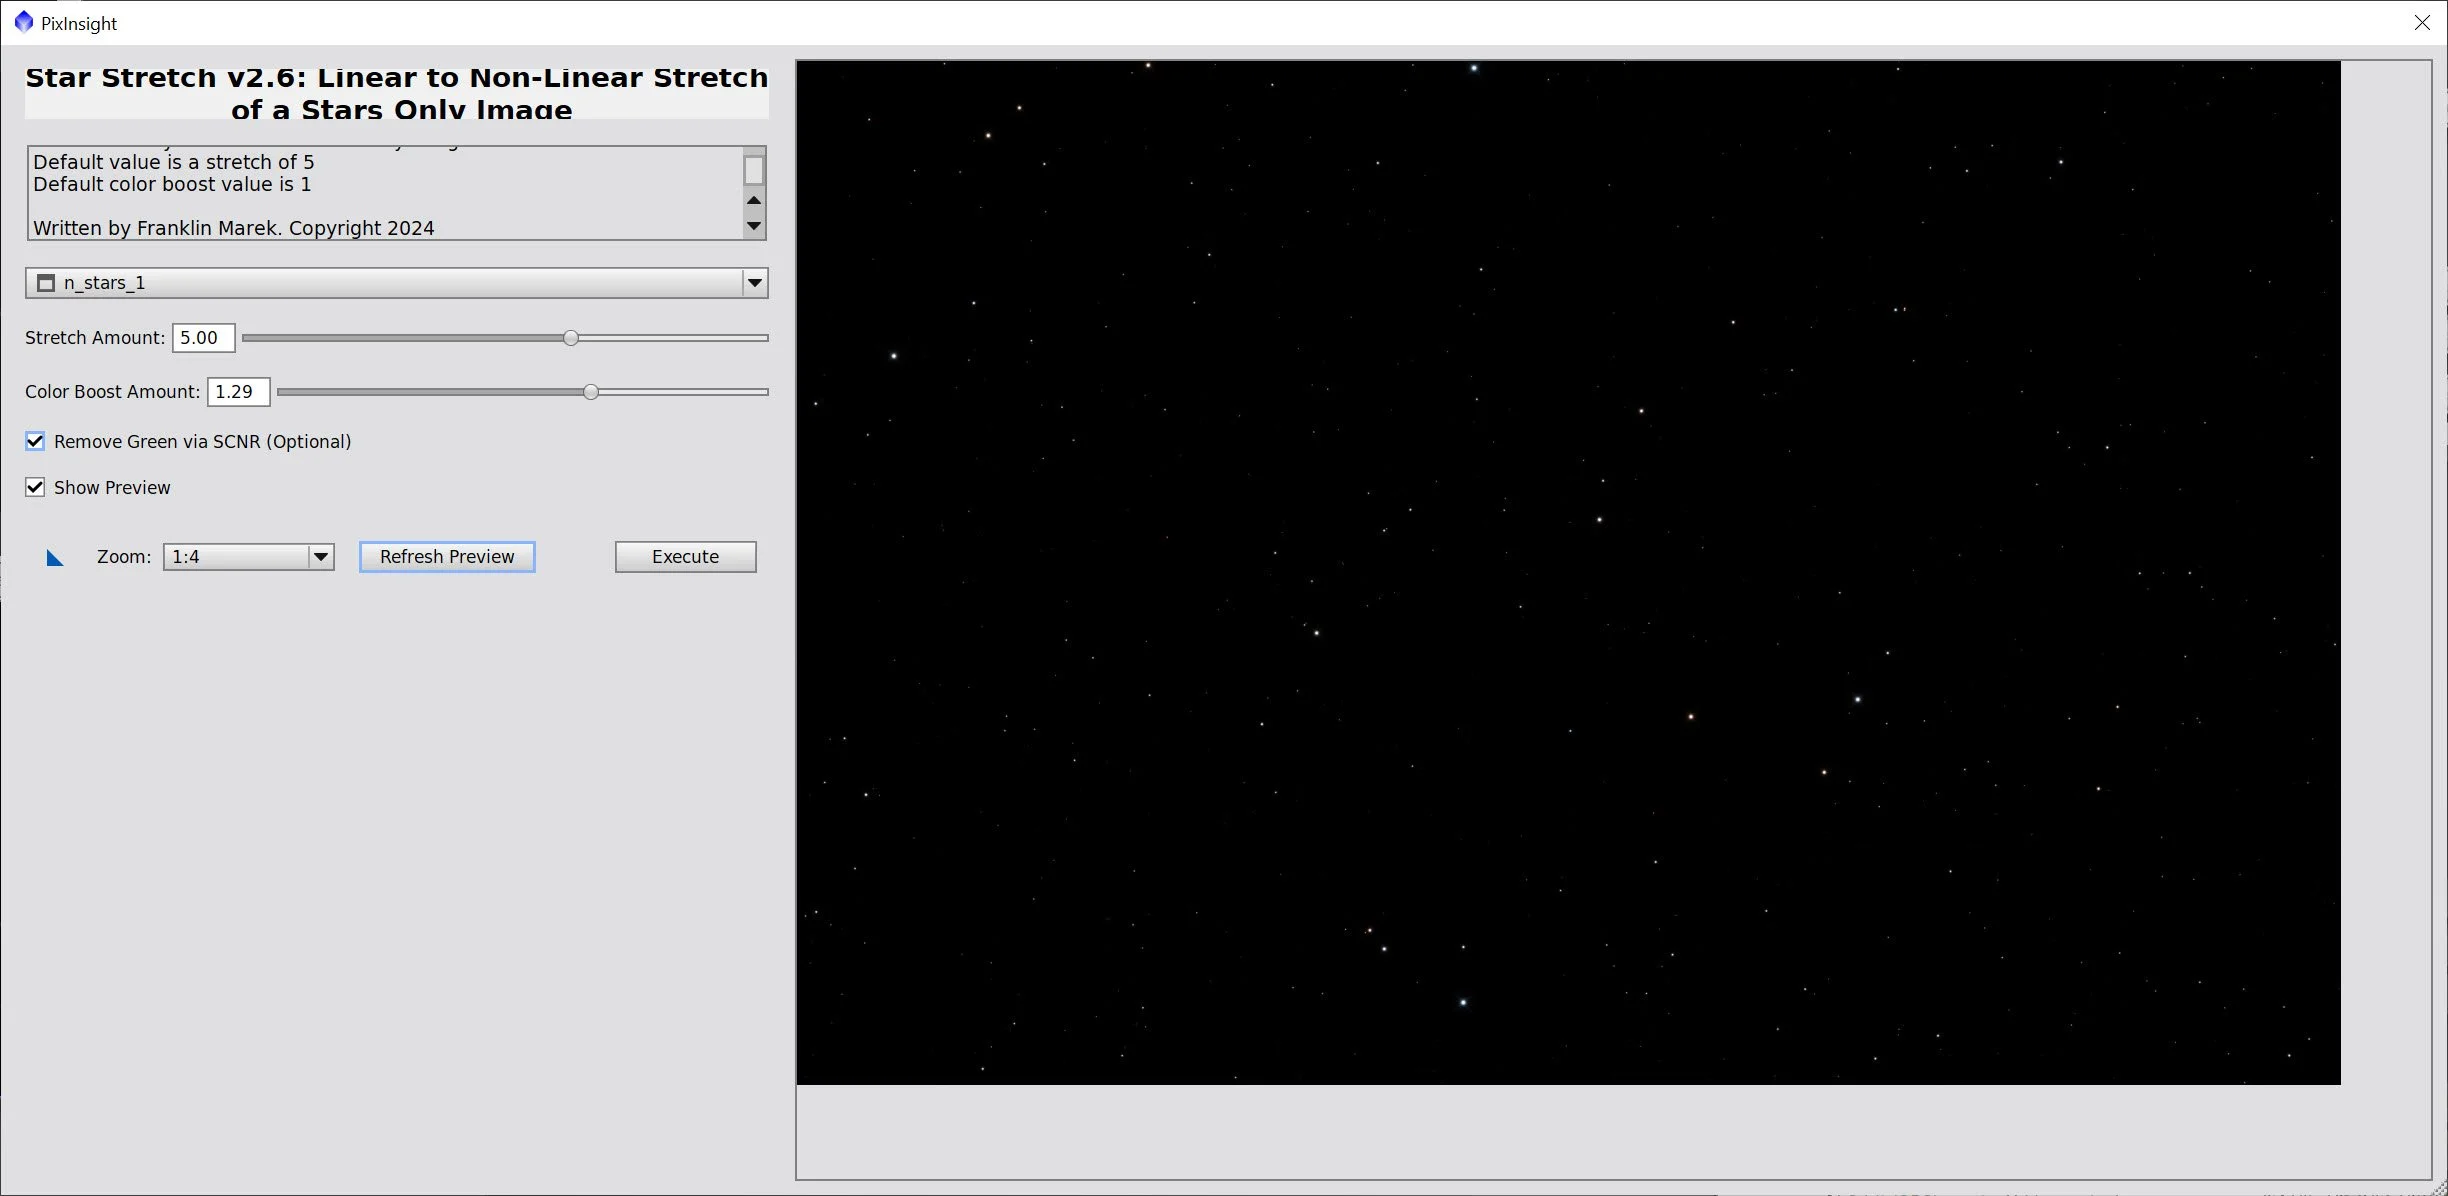
The Star Stretch Script and parameters used for Stars_1 - with the lowest stretch.
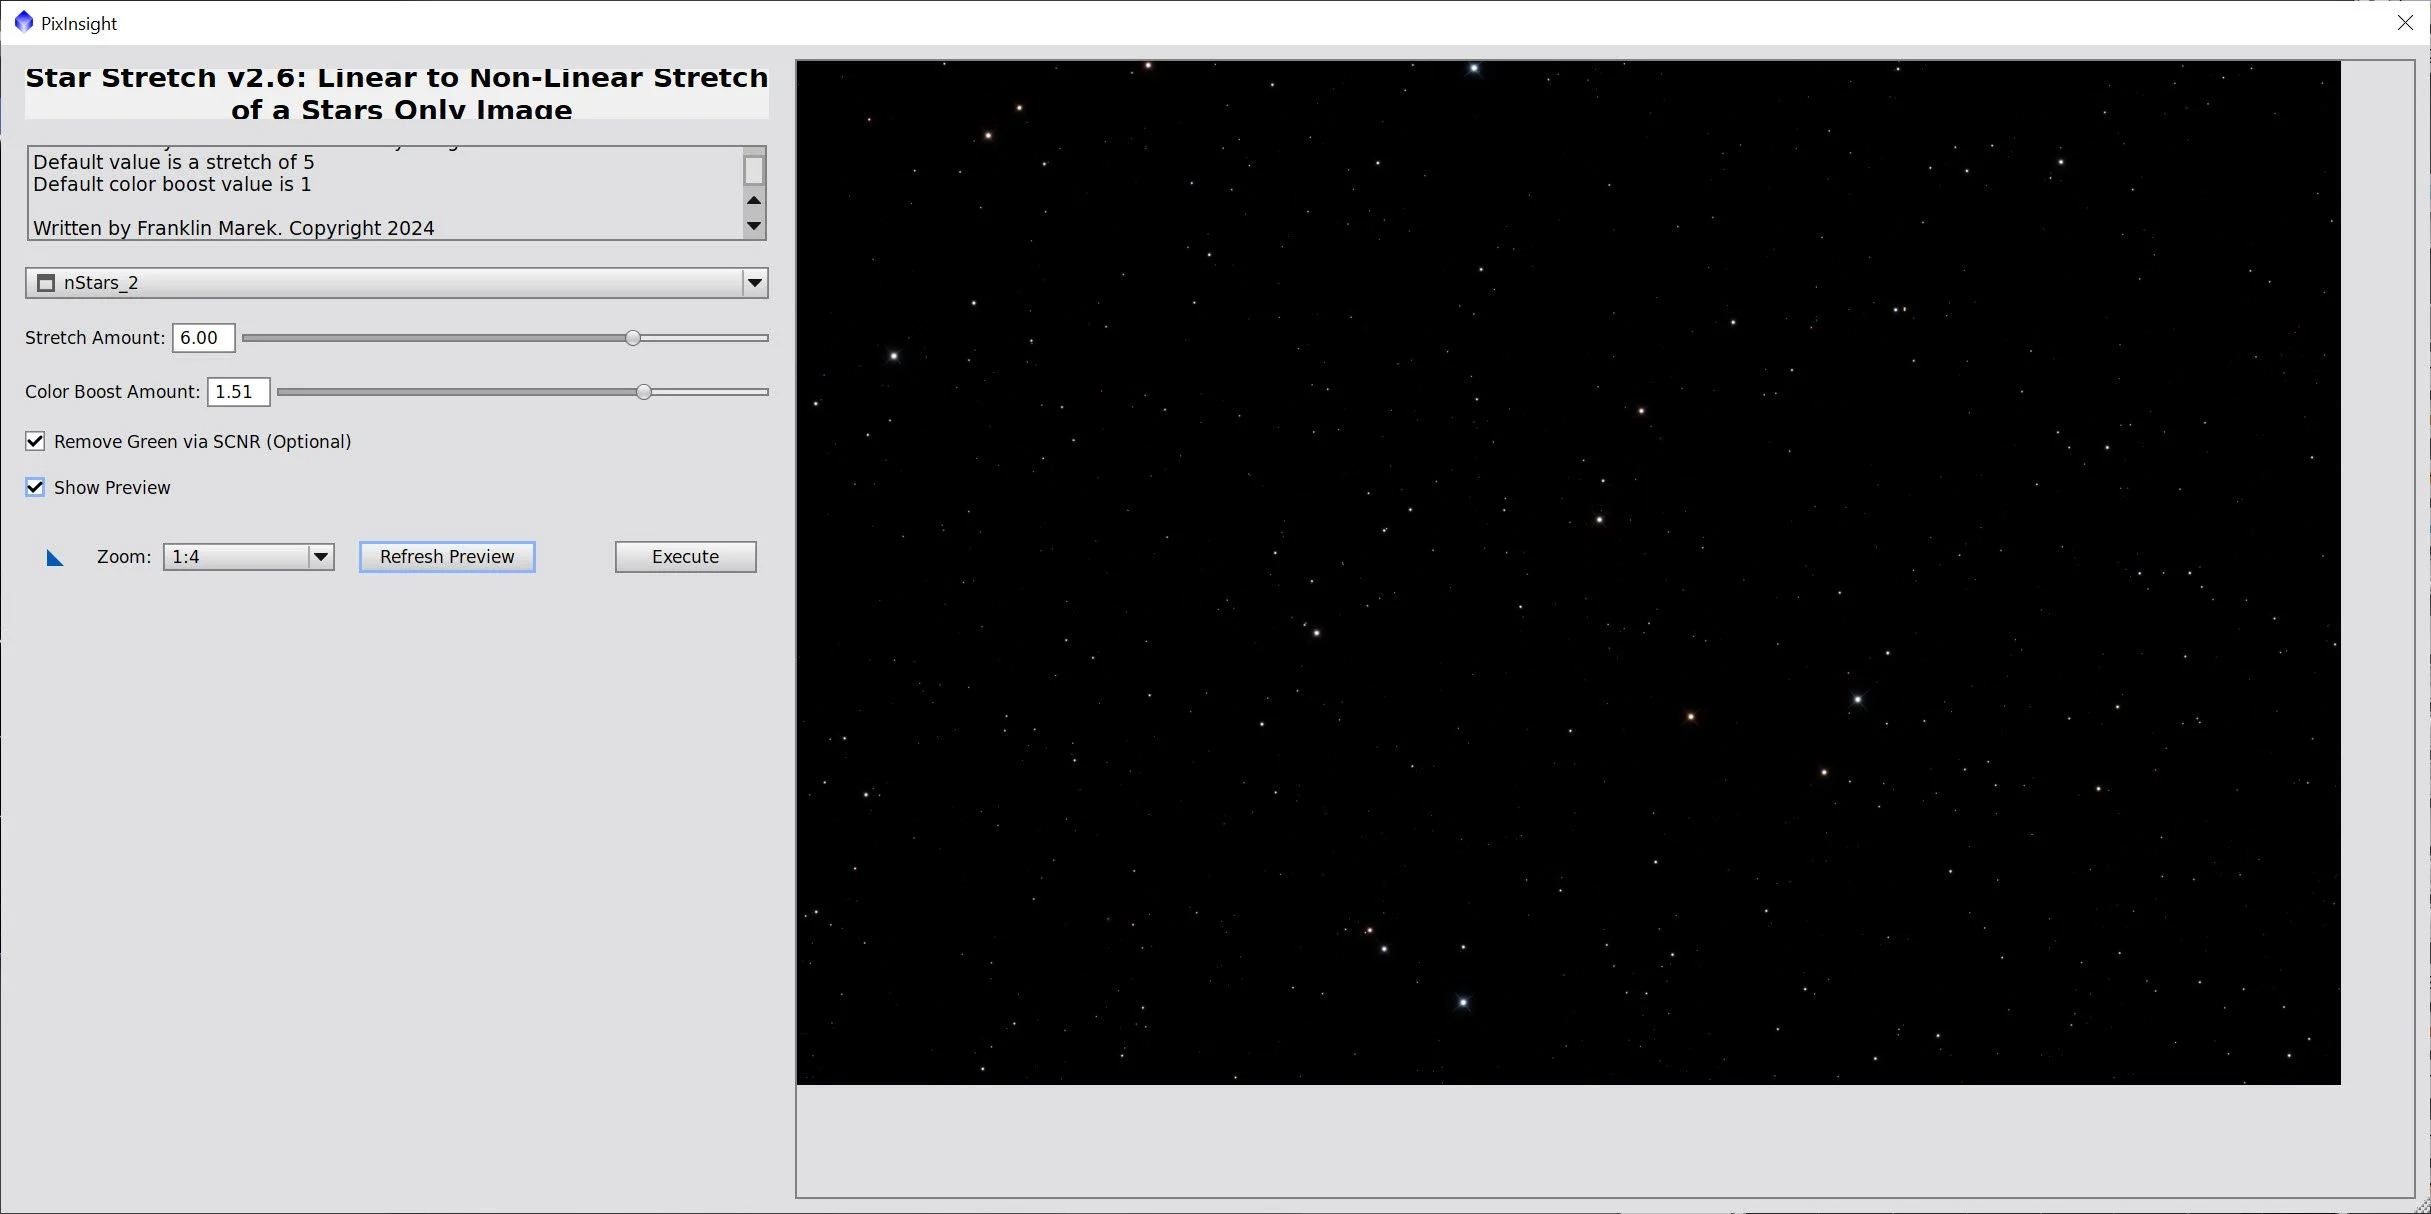
The Star Stretch Script and parameters used for Stars_2 - with the next highest stretch.
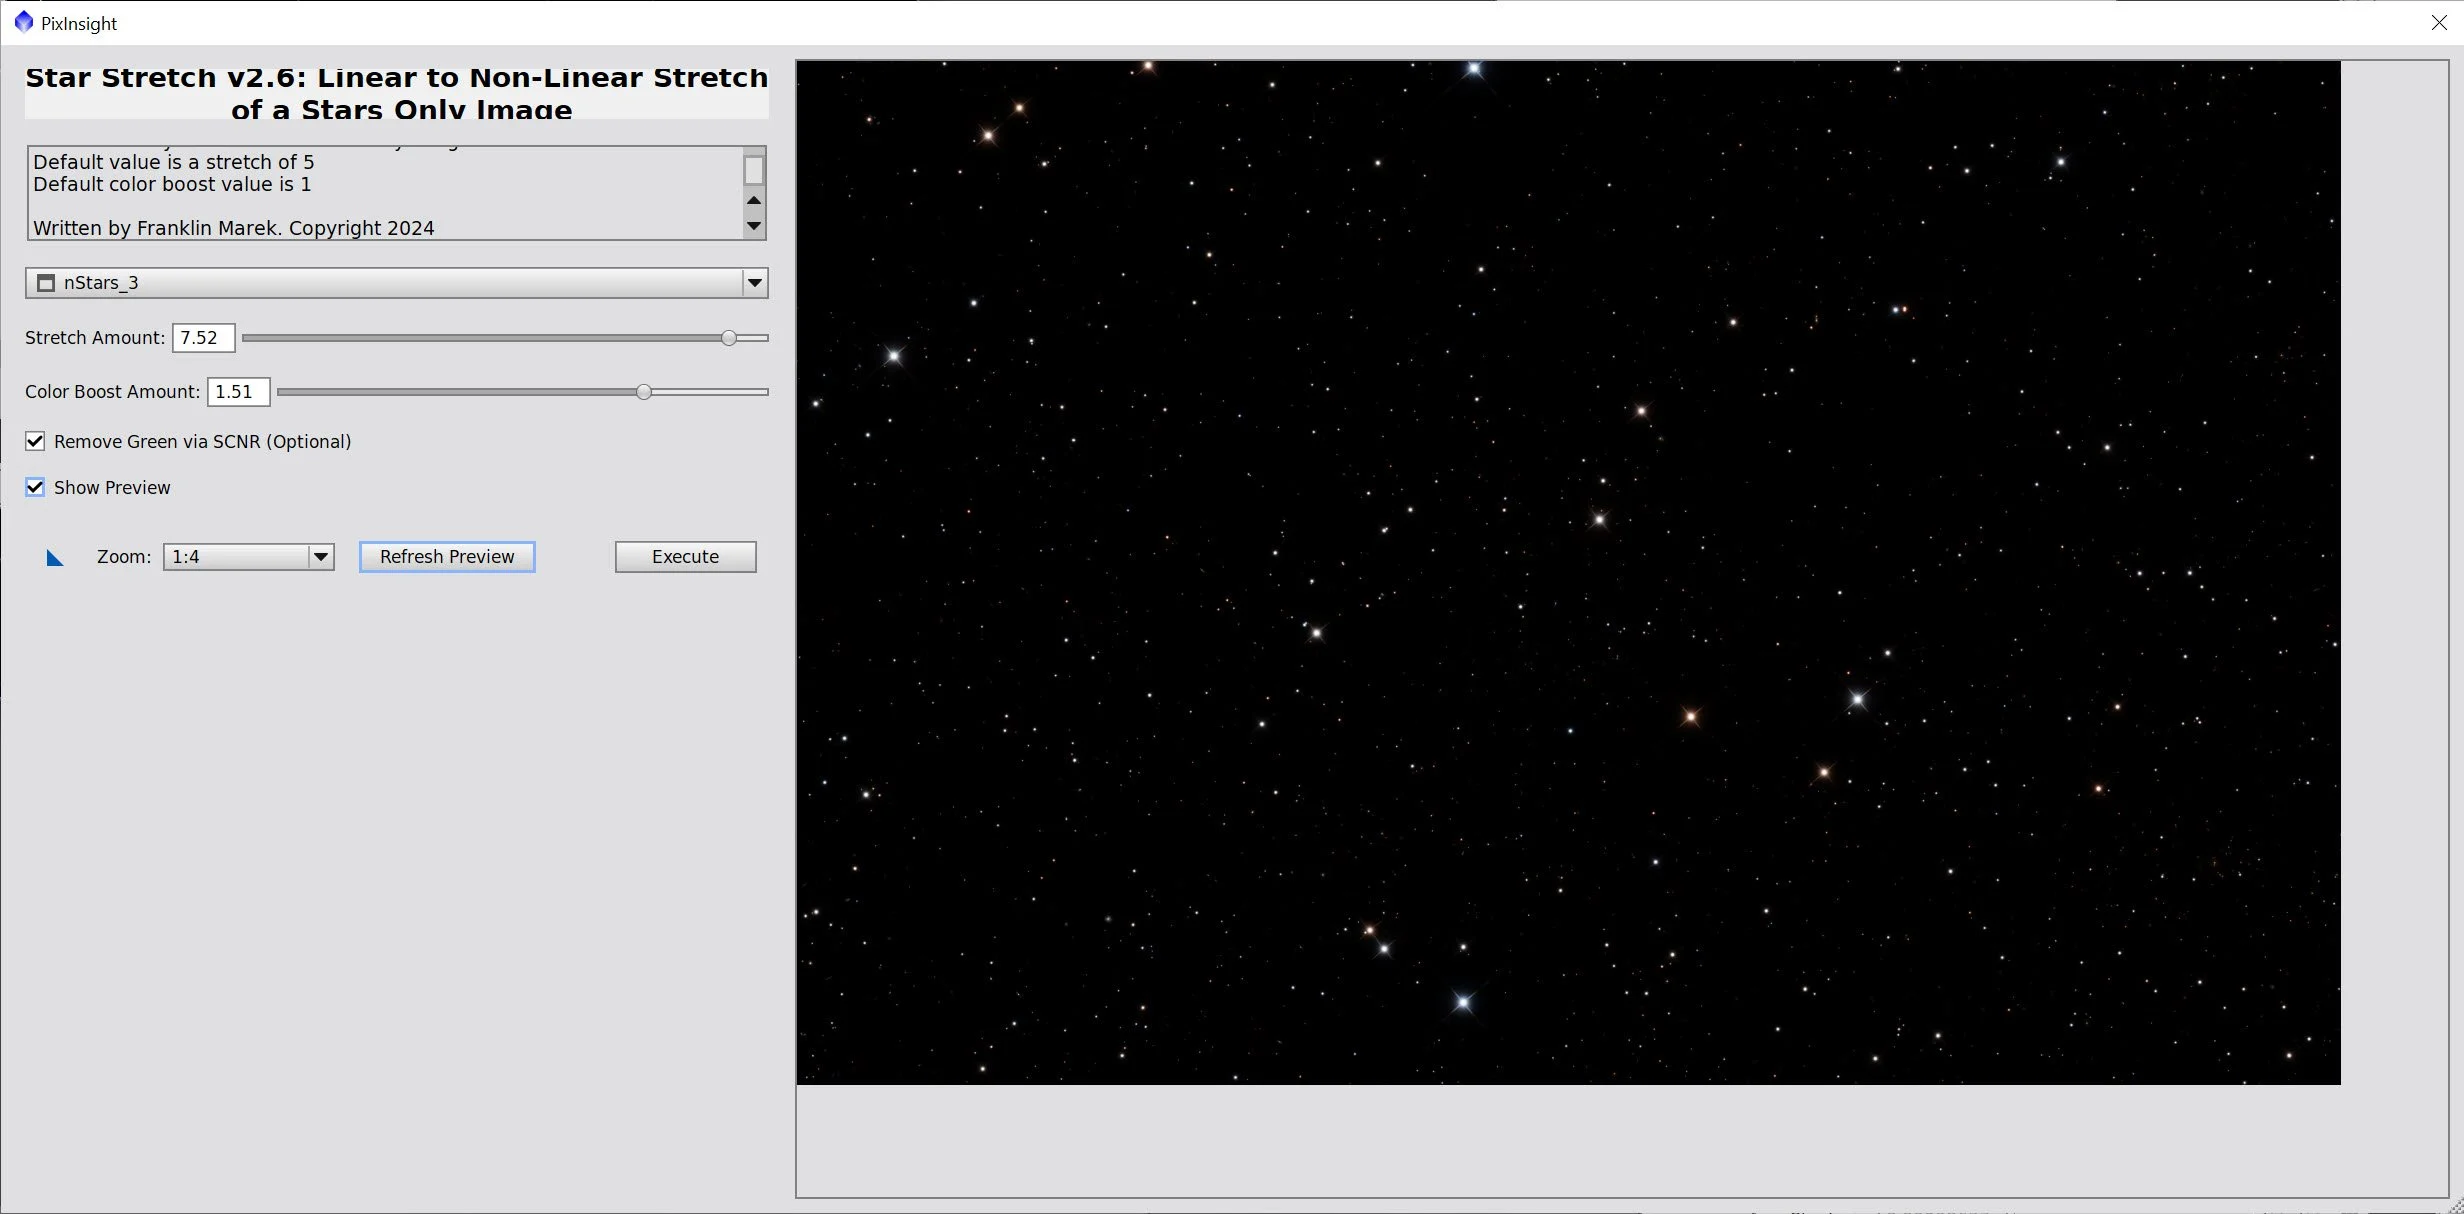
The Star Stretch Script and parameters used for Stars_3 - with the highest stretch of all

The resulting Star images.
8. Process the Nonlinear Lum Starless Image
Apply CT to darken the background sky
Open up the highlights by running HDRMT with levels=7, “To Lightness” checked, and “Lightness Mask” checked.
Apply LHE with a scale of 50, contrast limit of 2.0, amount of 0.16, and an 8-bit histogram. This helps bring out smaller details.
Apply NXT V3 now (see parameters in the screenshot below). I wanted to do this before sharpening and bringing out more detail.
Apply MLT Sharpening using the built-in linear mask (see params used in screenshot below)
The initial image (click to enlarge).
After HDRMT (click to enlarge)
NXT Parameters used next (click to enlarge)
MLT Sharpening Set up (click to enlarge)
After CT (click to enlarge)
After NXT (click to enlarge)
After CT (click to enlarge)
Apply Sharpening (click to enlarge)
9. Now Process the RGB Starless Image
Adjust tone scale with CT
Open up the highlights by running HDRMT with levels=7, “To Lightness” checked, and “Lightness Mask” checked.
Apply LHE with a scale of 36, contrast limit of 2.0, amount of 0.2, and an 8-bit histogram. This helps bring out smaller details.
Fold the L image in using LRGBCombination - see the screen snap of the LRGBCombination Panel to see the params used.
Apply CT to adjust the galaxy highlights.
The balance has gone kind of red, so I wanted to back off on that, and I used another CT application to do so.
Initial RGB nonlinear image (click to enlarge)
After CT (click to enlarge)
After HDRMT adjustment (click to enlarge)
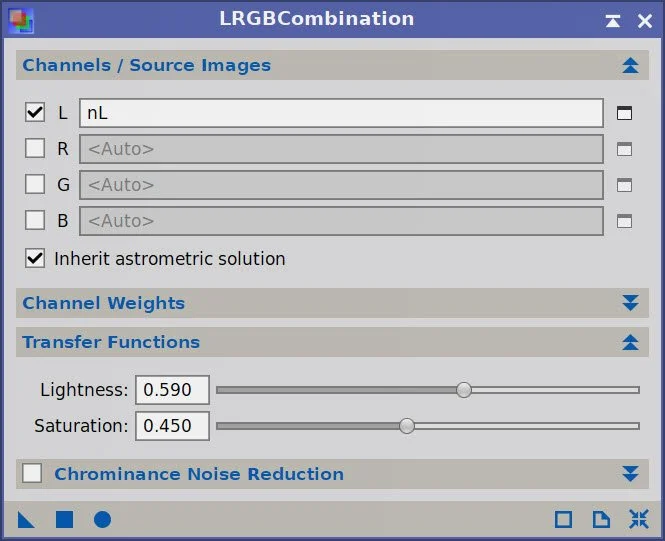
LRGBCombination Parameers used.
After NXT (click enlarge)
After LHE (click to enlarge)
After LRGBCombination (click to enlarge)
Final CT. (click to enlarge)
10. Add the Stars Back In
Using the ScreenStars Script, add stars back into our RGB starless image.
I tried using all three levels of stars, and I found I like the look of the larger stars. I assessed this in the ScreenStars script (seen below) and then went with that look.
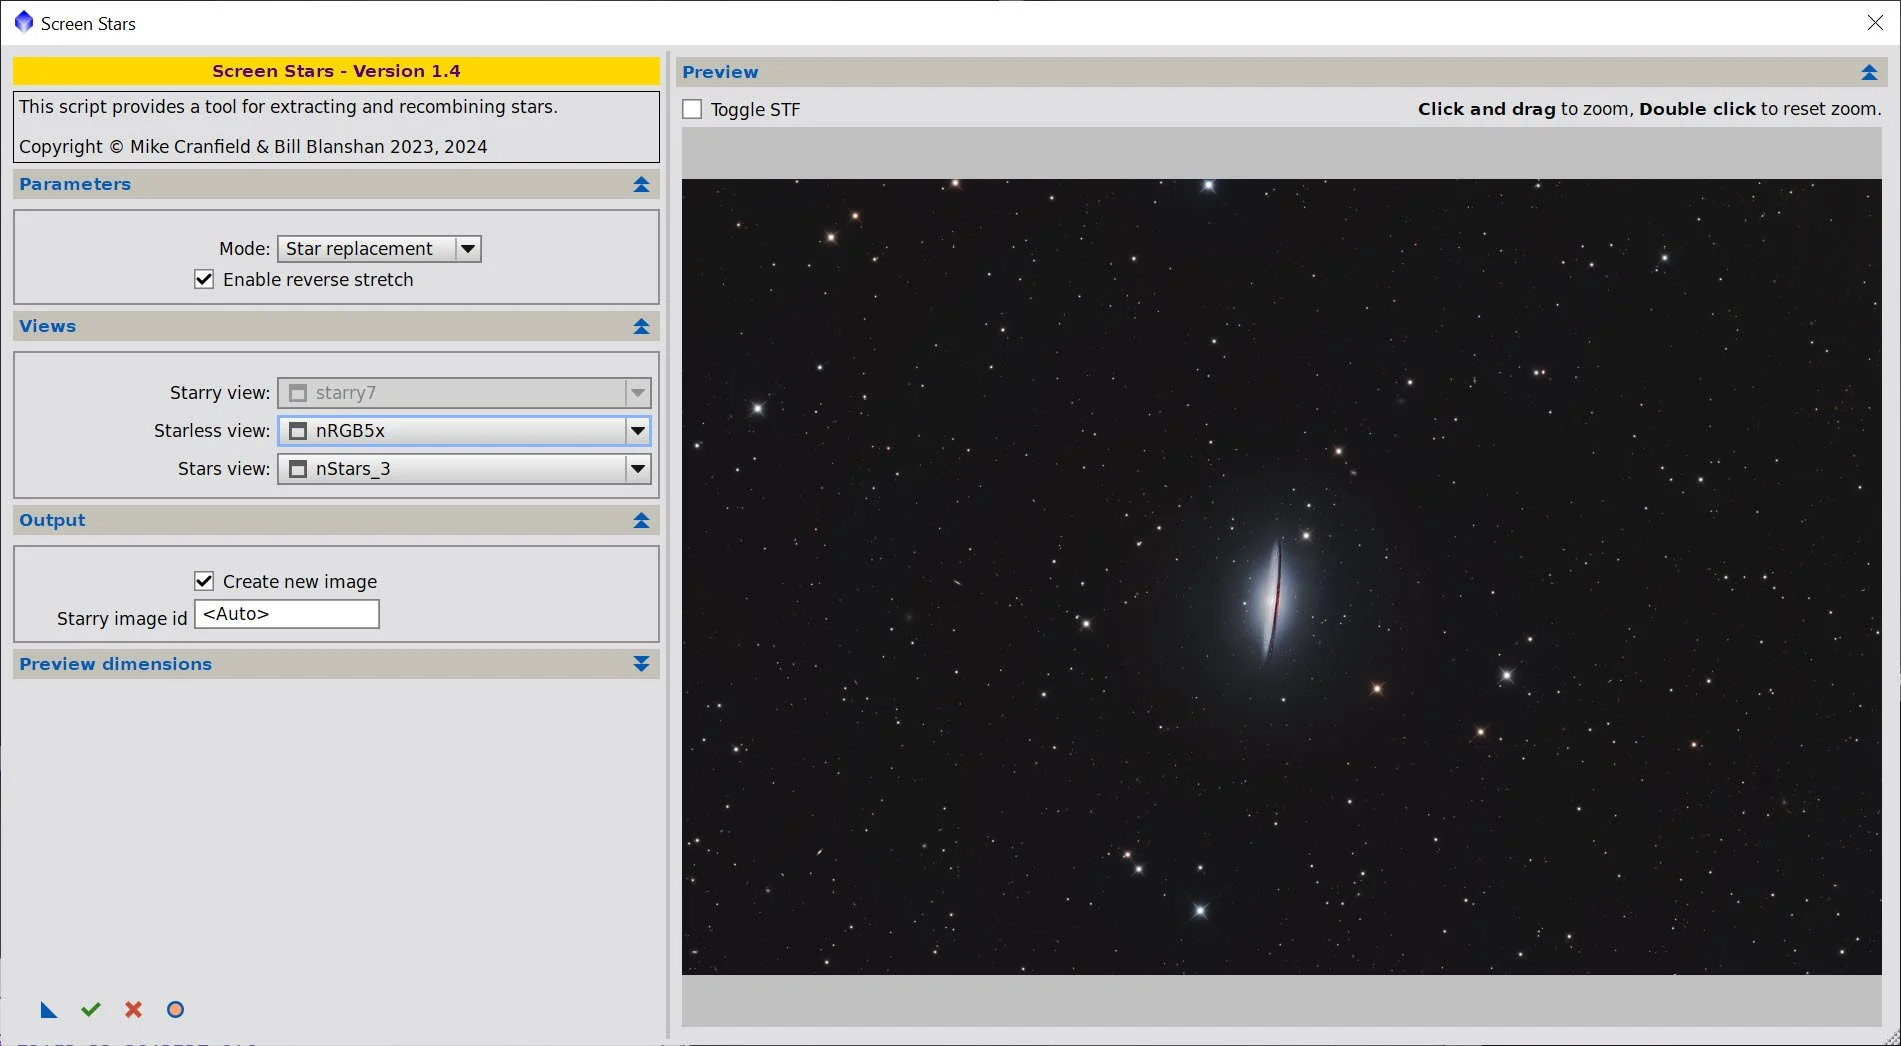
The script used to add the images back in,
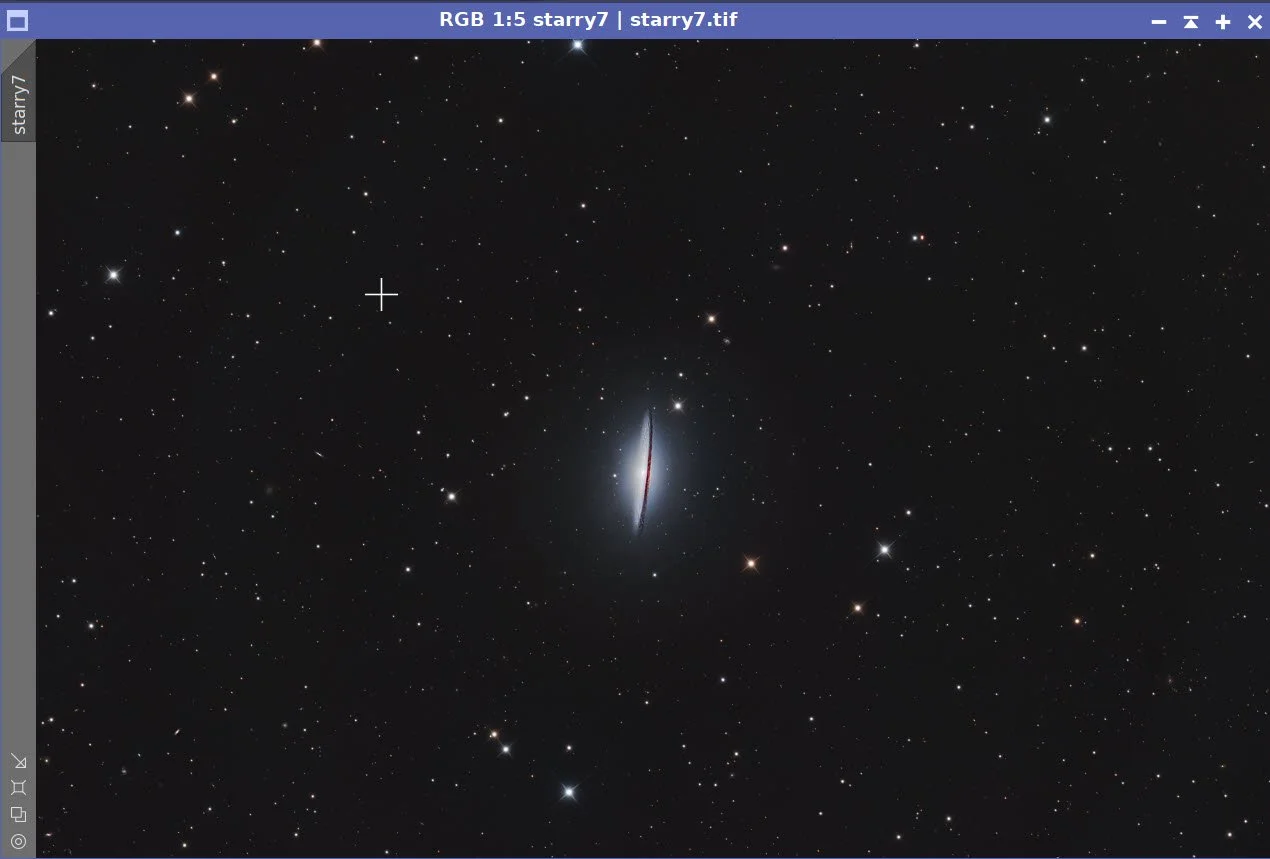
Image ready for Photoshop Polishing!
11. Export the Image to Photoshop for Polishing
Save the image as a TIFF 16-bit unsigned and move to Photoshop
The big issue here is cropping. Because I did not rotate the camera for this framing during capture, the galaxy came in sideways. I chose a rotation and a heavy crop to bring the galaxy into scale. I chose a rotation and a heavy crop to bring the galaxy into scale.
I then did a little polishing using the Camera Raw filter.
Added Watermarks
Export Clear, Watermarked, and Web-sized JPEGs.

The Final Image
Alternatively, you can use the back arrow to return to the Messier 104 page, or you can use the menu at the top of the page to continue your navigation.
Thanks,
Pat