
AP155 Version 1.0: Swapping the AP130 OTA for its Big Brother - the AP155!
Dates: March 6, 2026 - Now
Astro-Physics 155mm StarFire EDFS Platform Ver 1.0


Specs + Performance
Place holder for Future Images taken with this scope platform
Table of Contents Show (Click on lines to navigate)
From AP130 to AP155: A Major Platform Upgrade
One of the biggest changes to my telescope lineup for 2026 was the retirement of my Astro-Physics 130mm Starfire EDT and its replacement with an Astro-Physics 155mm EDFS. This was not a minor equipment swap. It was a substantial platform change that affected focal length coverage, imaging speed, mechanical layout, system weight, cable management, and the overall role this rig plays within my observatory.
The AP130 had served me well for years. It is a beautifully made telescope and has produced images that I am very proud of. But at f/8.35, it was also the slowest instrument in my observatory by a wide margin. In practical terms, that made it less versatile than my other platforms and less efficient for the kinds of targets I most often pursue and the nature of our weather here in western New York.
As I looked at the overall performance of my telescope lineup, it became increasingly clear that this platform was the one most in need of modernization.
The Video Companion to this Post:
Why I Made the Change
This was not an easy decision.
I had a long history with the AP130, and parting with it was difficult. It is an excellent telescope with real sentimental value, and there is always some reluctance in letting go of a proven instrument that has delivered good results. But sentiment alone is not a good basis for observatory design. I try to think about my platforms as a system, and from that standpoint, the AP130 was no longer the best fit.
The issue was not optical quality. The issue was strategic fit.
My observatory works best when each telescope occupies a clear role. I want each platform to cover a distinct imaging range with as little unnecessary overlap as possible. I also want every rig to be reasonably efficient, especially under the limited supply of clear, moonless nights we get in western New York. The AP130’s long focal ratio and narrower field made it the least flexible platform in the group.
At about the same time, I was seriously considering making a change, a good friend offered me the opportunity to purchase an Astro-Physics 155. That changed the equation immediately.
The AP155 can be hard to find and is sought after. This particular one had the 2.7-inch focuser rather than the four-inch, so technically it was the EDFS version.
Here is some background on the scope from Astro-Physics themselves:
History of the Astro-Physics 155mm Starfire EDFS Scope
My friend Rick has used this scope for years, but his current efforts were being done with a different scope, and this one was not in use.
The scope came at a very good price. It had seen a lot of use, and the paint on the dew shield had cracked and peeled in a few places, and there were some scratches on the scope's tube. I did not care about any of that because the AP155 optics are legendary, and that’s what I really valued. As I mentioned, these are hard to find - and this was a somewhat unique opportunity.
Why the AP155 Made Sense
The AP155 gave me several things the AP130 could not.
First, it increased the aperture from 130mm to 155mm. That is a meaningful step up in light-gathering power and image scale.
Second, it moved this platform to a much more useful native focal ratio of f/7. With the Astro-Physics 27TVPH 0.75x telecompressor, it can operate at about f/5.3, making it a much faster and more flexible imaging system than the AP130 ever was.
Third, it preserved what I value most in an Astro-Physics refractor: outstanding optical quality, mechanical precision, and long-term confidence in the instrument.
This was not simply a matter of acquiring a larger telescope. It was a chance to create a platform that would better match the way I actually image today.
A Better Fit Within My Telescope Lineup
One way I think about my observatory is as a focal-length ladder. Each telescope should occupy a useful place within that ladder, giving me a sensible spread of imaging options across a wide range of target sizes.
This graphic summarizes the change:
That change improves the utility of this platform considerably. Instead of being locked into a slower 1080mm-class instrument, this rig now occupies a more flexible 820mm position when reduced, while still retaining the option of operating at its longer native focal length when needed.
There is still some compression in the midrange, and I may continue refining how I think about target assignment across the lineup. But overall, this was a much more strategic position for the platform than the AP130 had occupied
The Real Challenge: Turning a Great Telescope into a Working Platform
Of course, buying the AP155 was only the beginning.
A telescope may be optically superb, but that does not automatically make it a practical observatory platform. In this case, moving from the AP130 to the AP155 introduced a series of mechanical and operational challenges. The new scope is larger, heavier, and longer. It changed the load distribution on the mount, affected the observatory's clearance, and forced a rethink of how accessories, guiding hardware, power distribution, and cable routing would be handled.
In other words, the real work was not deciding to buy the AP155. The real work was figuring out how to integrate it cleanly into an imaging system that would be reliable, balanced, and practical to operate.
That process is what this post is about.
Planning Things Out
Dealing with Weight
Since the new scope was heavier, I had to shed weight.
One way to do this was to move to a different, smaller guide scope.
On the AP130, I was using a Nagler TV76 as the guide. This was overkill, large, and heavier than needed. I decided to switch to a smaller guide scope that I already owned but was not currently using: an Apertura 60mm guide scope. This was an Apertuna 60mm guide scope.
The scope was smaller, lighter, and had smaller and lighter mount rings.
Hopefully, this would be enough to offset the weight.
Dealing with the Length
If the OTA is longer, I need to add some weight at the very end so that the balance would slide the scope down in its cradle.
I did not want to add just any dead weight, so I decided to go with a motorized cover.
I had to modify my flat light source anyway; this would allow me to add a remote-controlled cover, better automate the capture of my flat calibration files, and lower the scope in its cradle.
Building up the OTA
The Scope Arrives
Once the scope arrived, I unpacked it and weighed the scope and the cradle. The scope itself came in at 24 lbs 4 oz. The cradle itself was 9 lbs 7oz. Together, that was a total weight of 33 lbs and 11 oz. That left me 9 pounds to handle everything else. This was going to be tight.
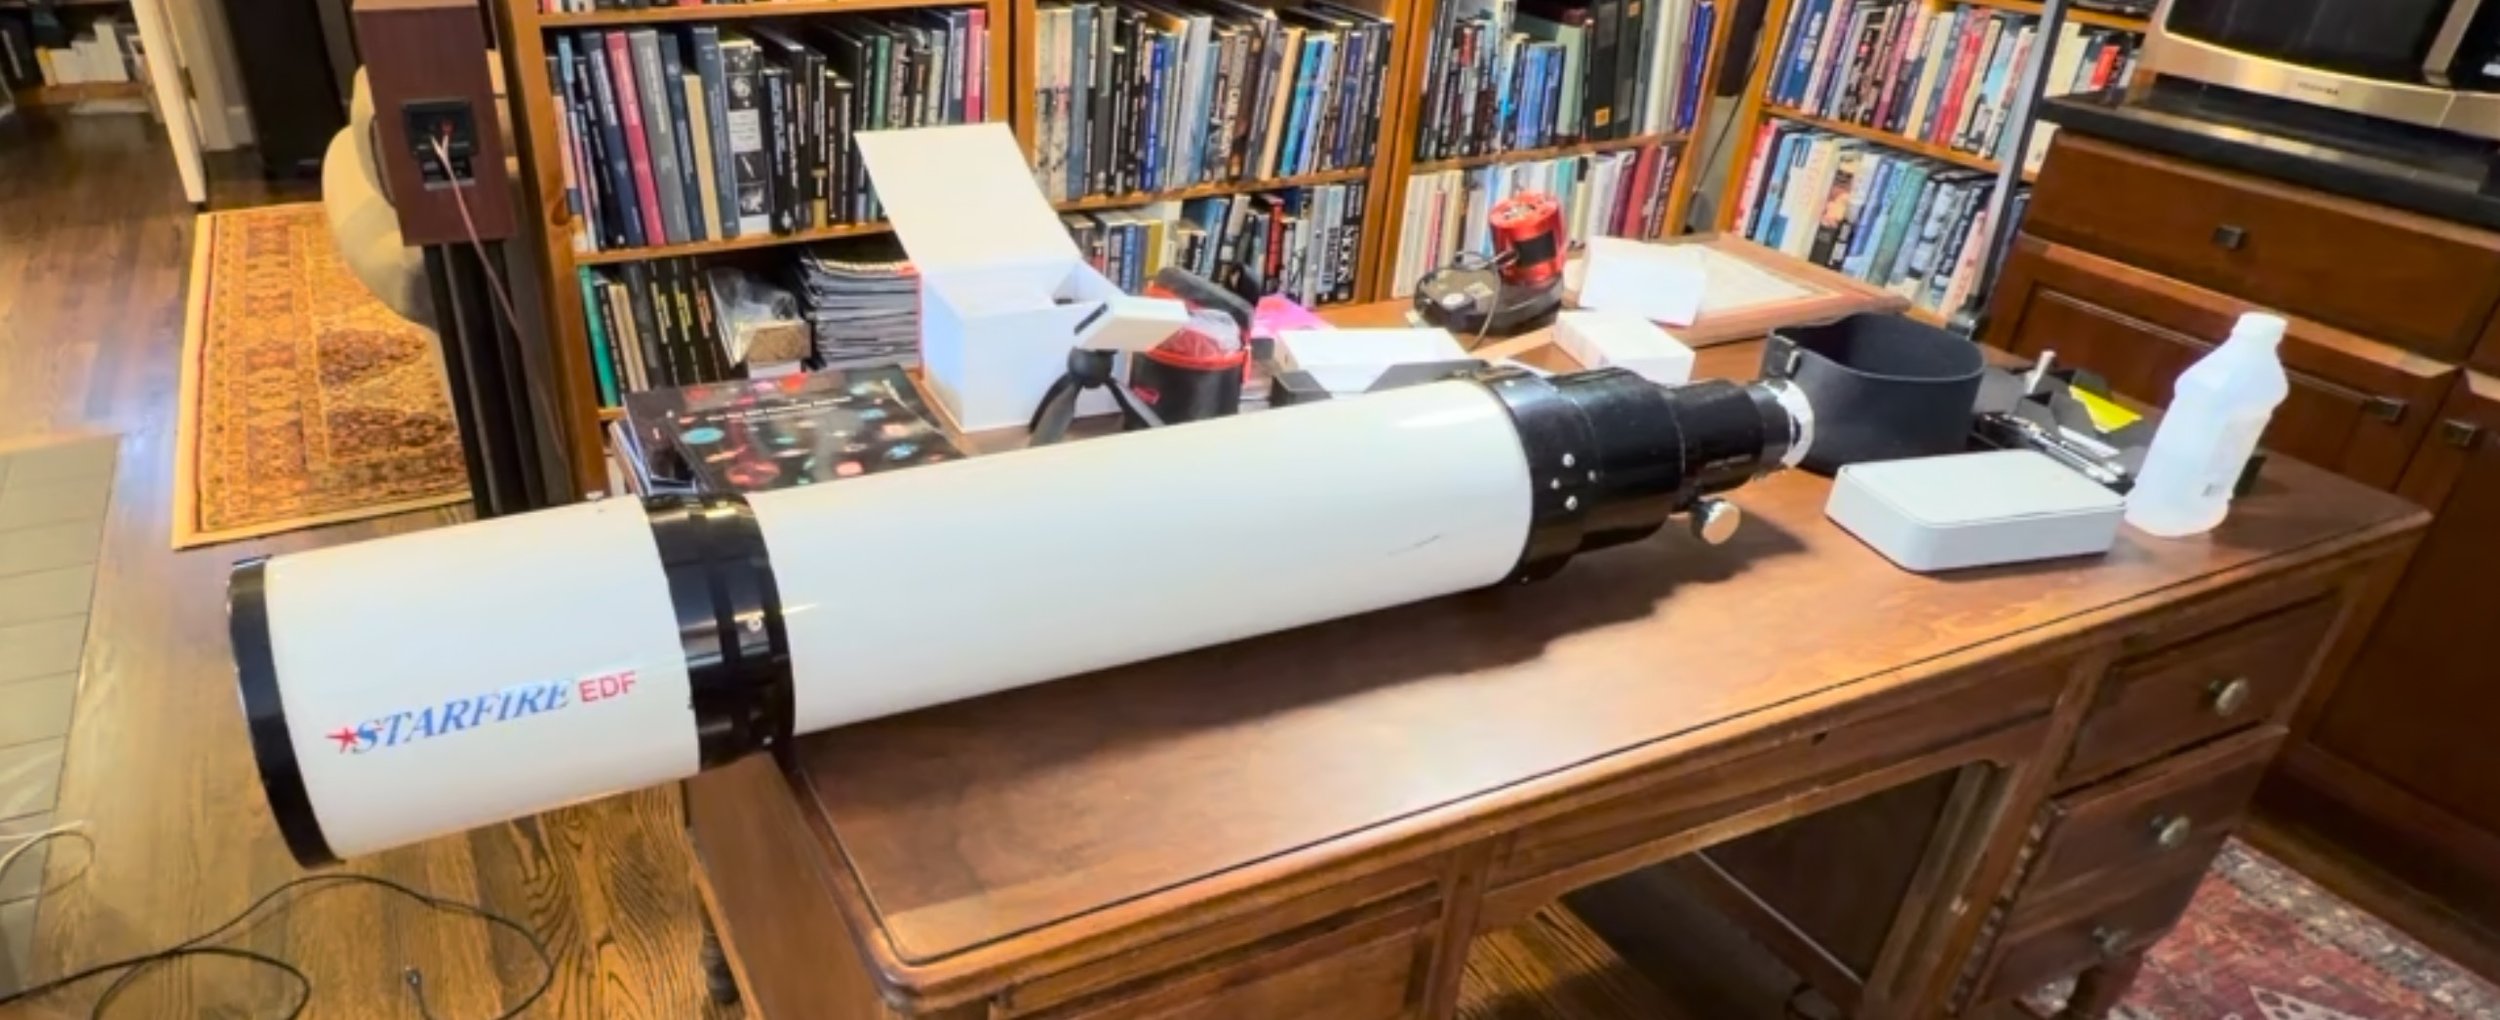
The AP155 scope, shortly after unpacking. It was larger and much heavier.
The original cradle had a Losmandy dovetail bottom plate, rings, an aluminum plate on top, and another Losmandy dovetail plate screwed onto it. The top plate was not really needed, so I removed it. This saved almost 2lbs.
I then drilled holes in the aluminum plate to mount the ring assembly for the smaller guide scope. I mounted the guide scope rings as far forward as I could so that the balance would shift the scope downward.
The original cradle. Note the additional Losmandy Dovetail plate on top of the aluminum plate. (click to enlarge) (Credit: Image by Rick Albrecht - used with permission)
Here is the cradle after the top dovetail plate was removed. (click to enlarge)
After drilling out and mounting the guide scope rings. (click to enlarge)
Now the guide scope has been mounted. (click to enlarge)
Reconfiguring the Camera
I was planning to use the camera from the AP130, but I wasn't crazy about the configuration I was using there. I did not like the distance between the rotator and the EFW. These seemed like the weakest part of the system - one that might be prone to flexure. I wanted to make something more compact and decided to use a method similar to the one I used for my WO132 platform.
The AP130 camera stack. I was not crazy about the spacers between the rotator and the EFW. (click to enlarge)
I wanted to reconfigure it to have the correct backspacing for the 0.75X Reducer.
The camera was bolted to the EFW, the way I wanted it.
Here is the setup I had on the WO132:
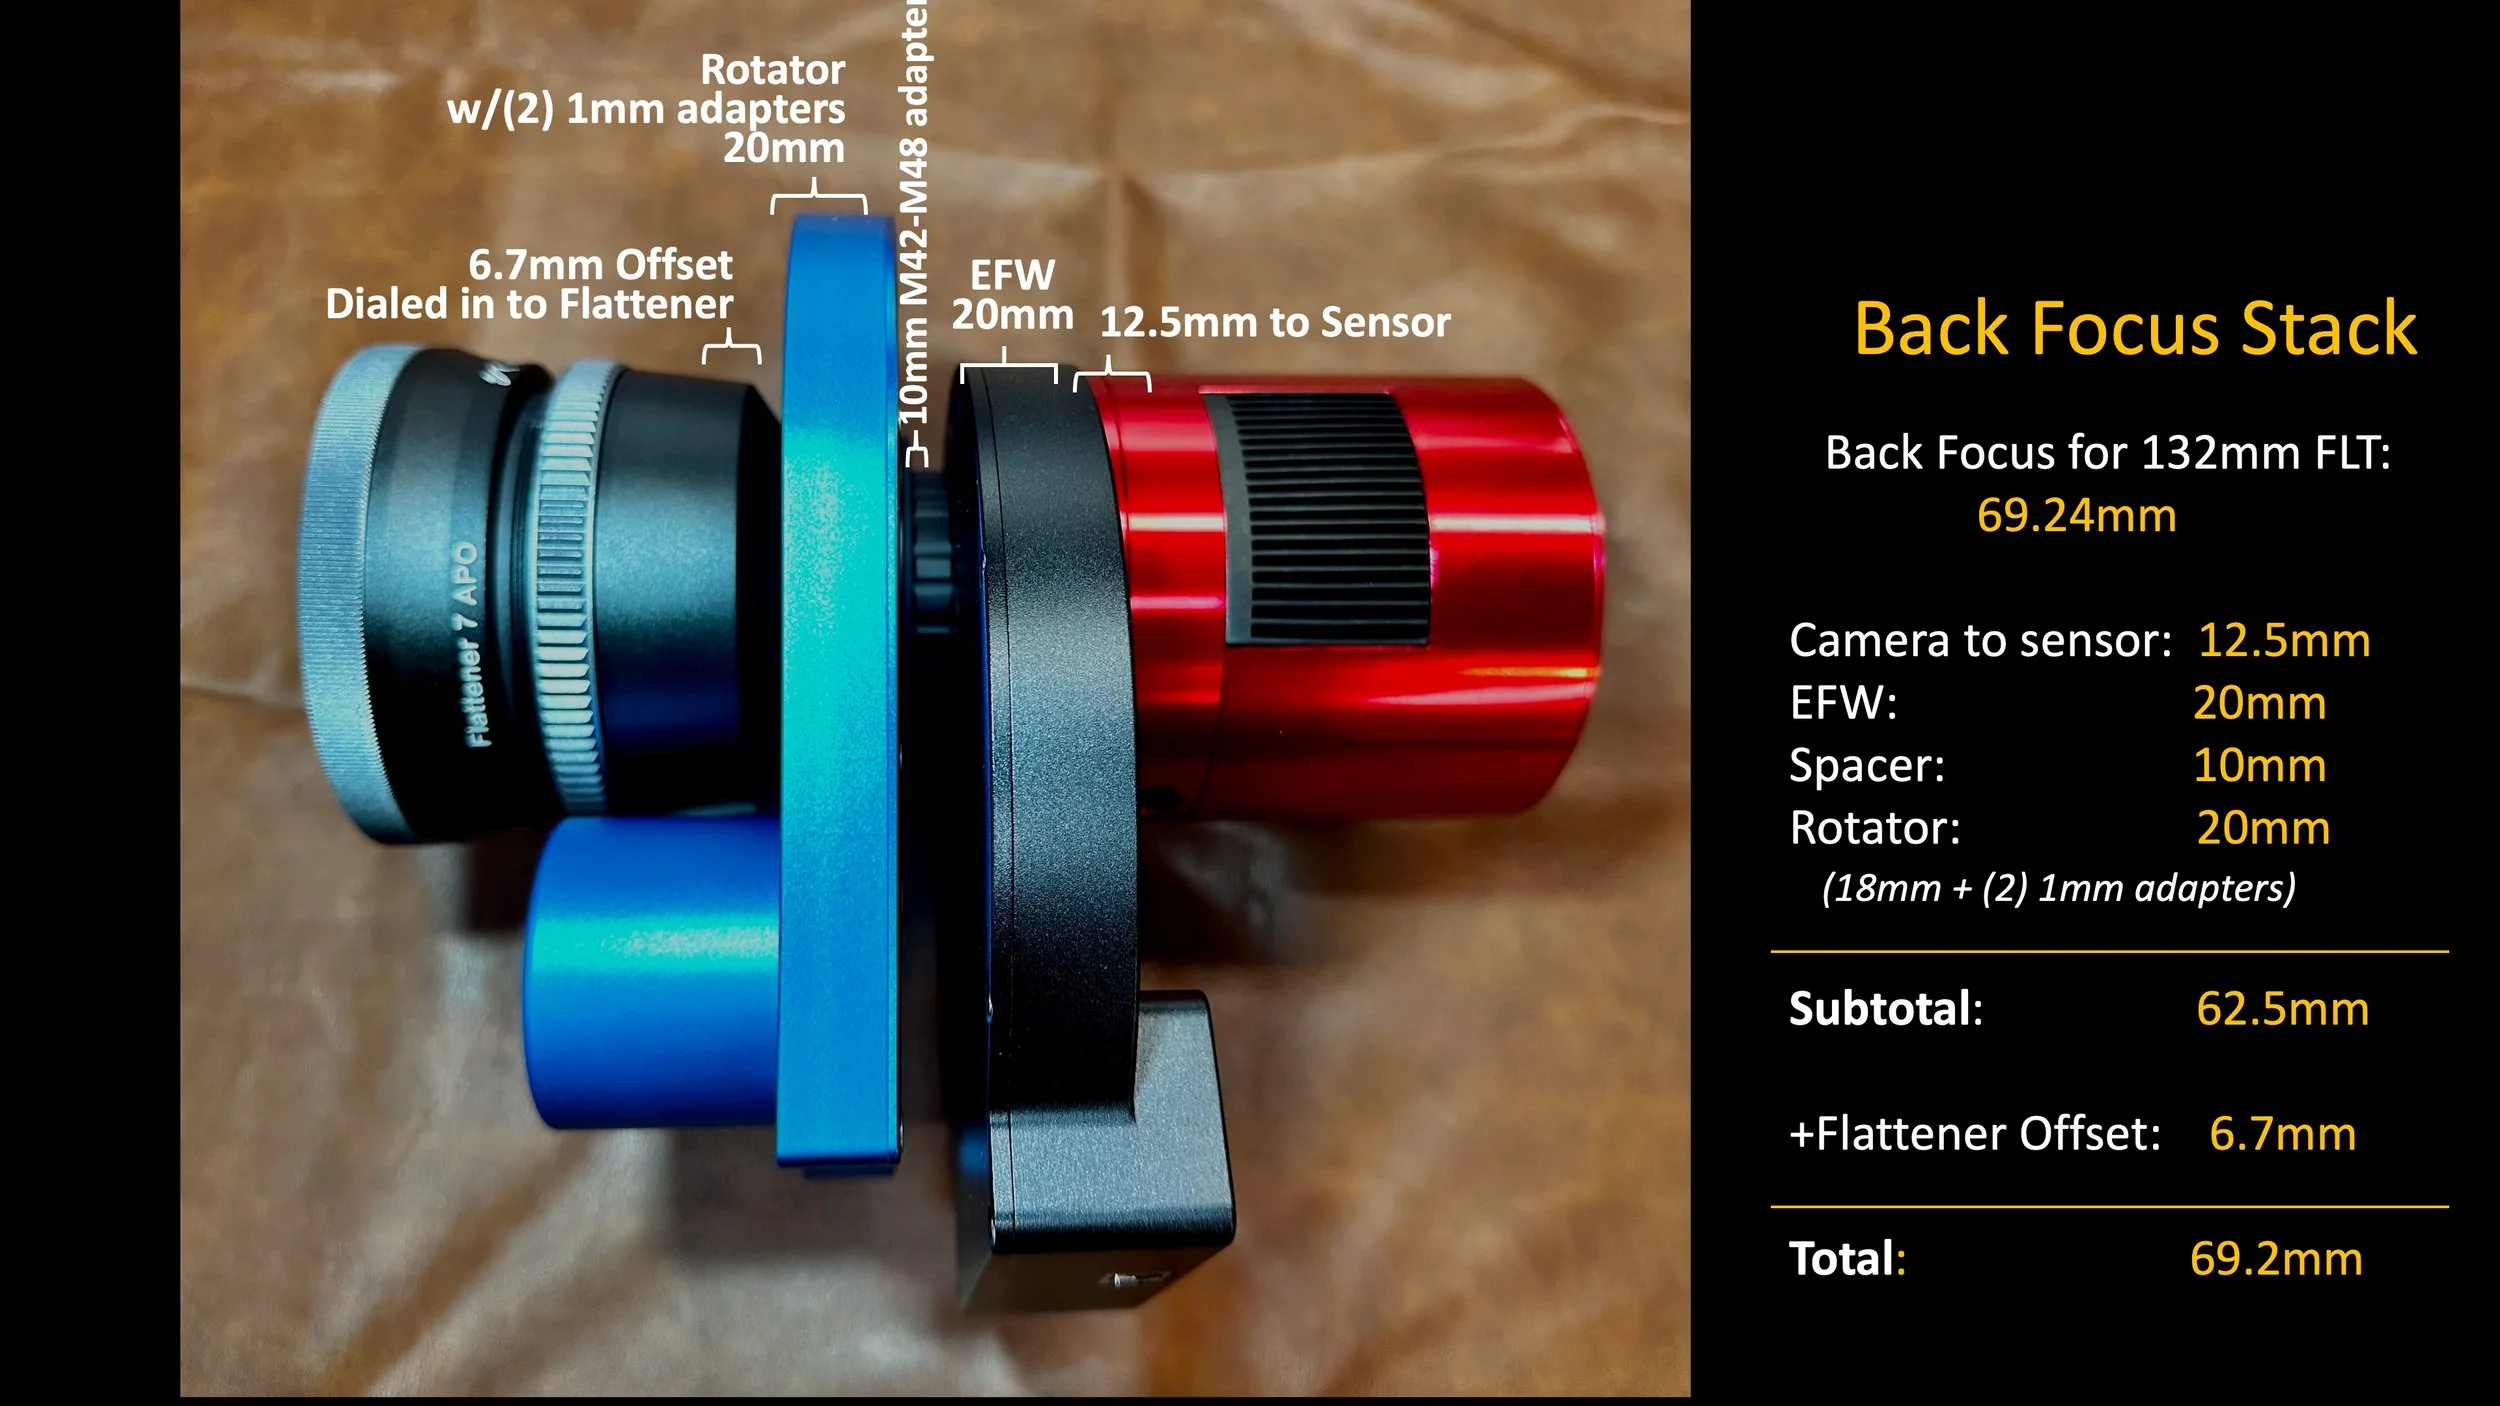
The camera stack from my WO132 is mechanically robust.
With this image stack, I can then layout the rest of the imaging chain.
On the telescope side of the rotator, there will be a 54mm-to-54mm male adpater. Then my friend rick, custom milled a spacer tube that would attach to this 54mm adapter and then to the reducer itself. This stack of elelments should give the required backfocus for the 0.75X Reducer.
The proposed imaging chain for the AP155. The leftmost component is the 0.75X Reducer. (Credit: Image by Rick Albrecht)
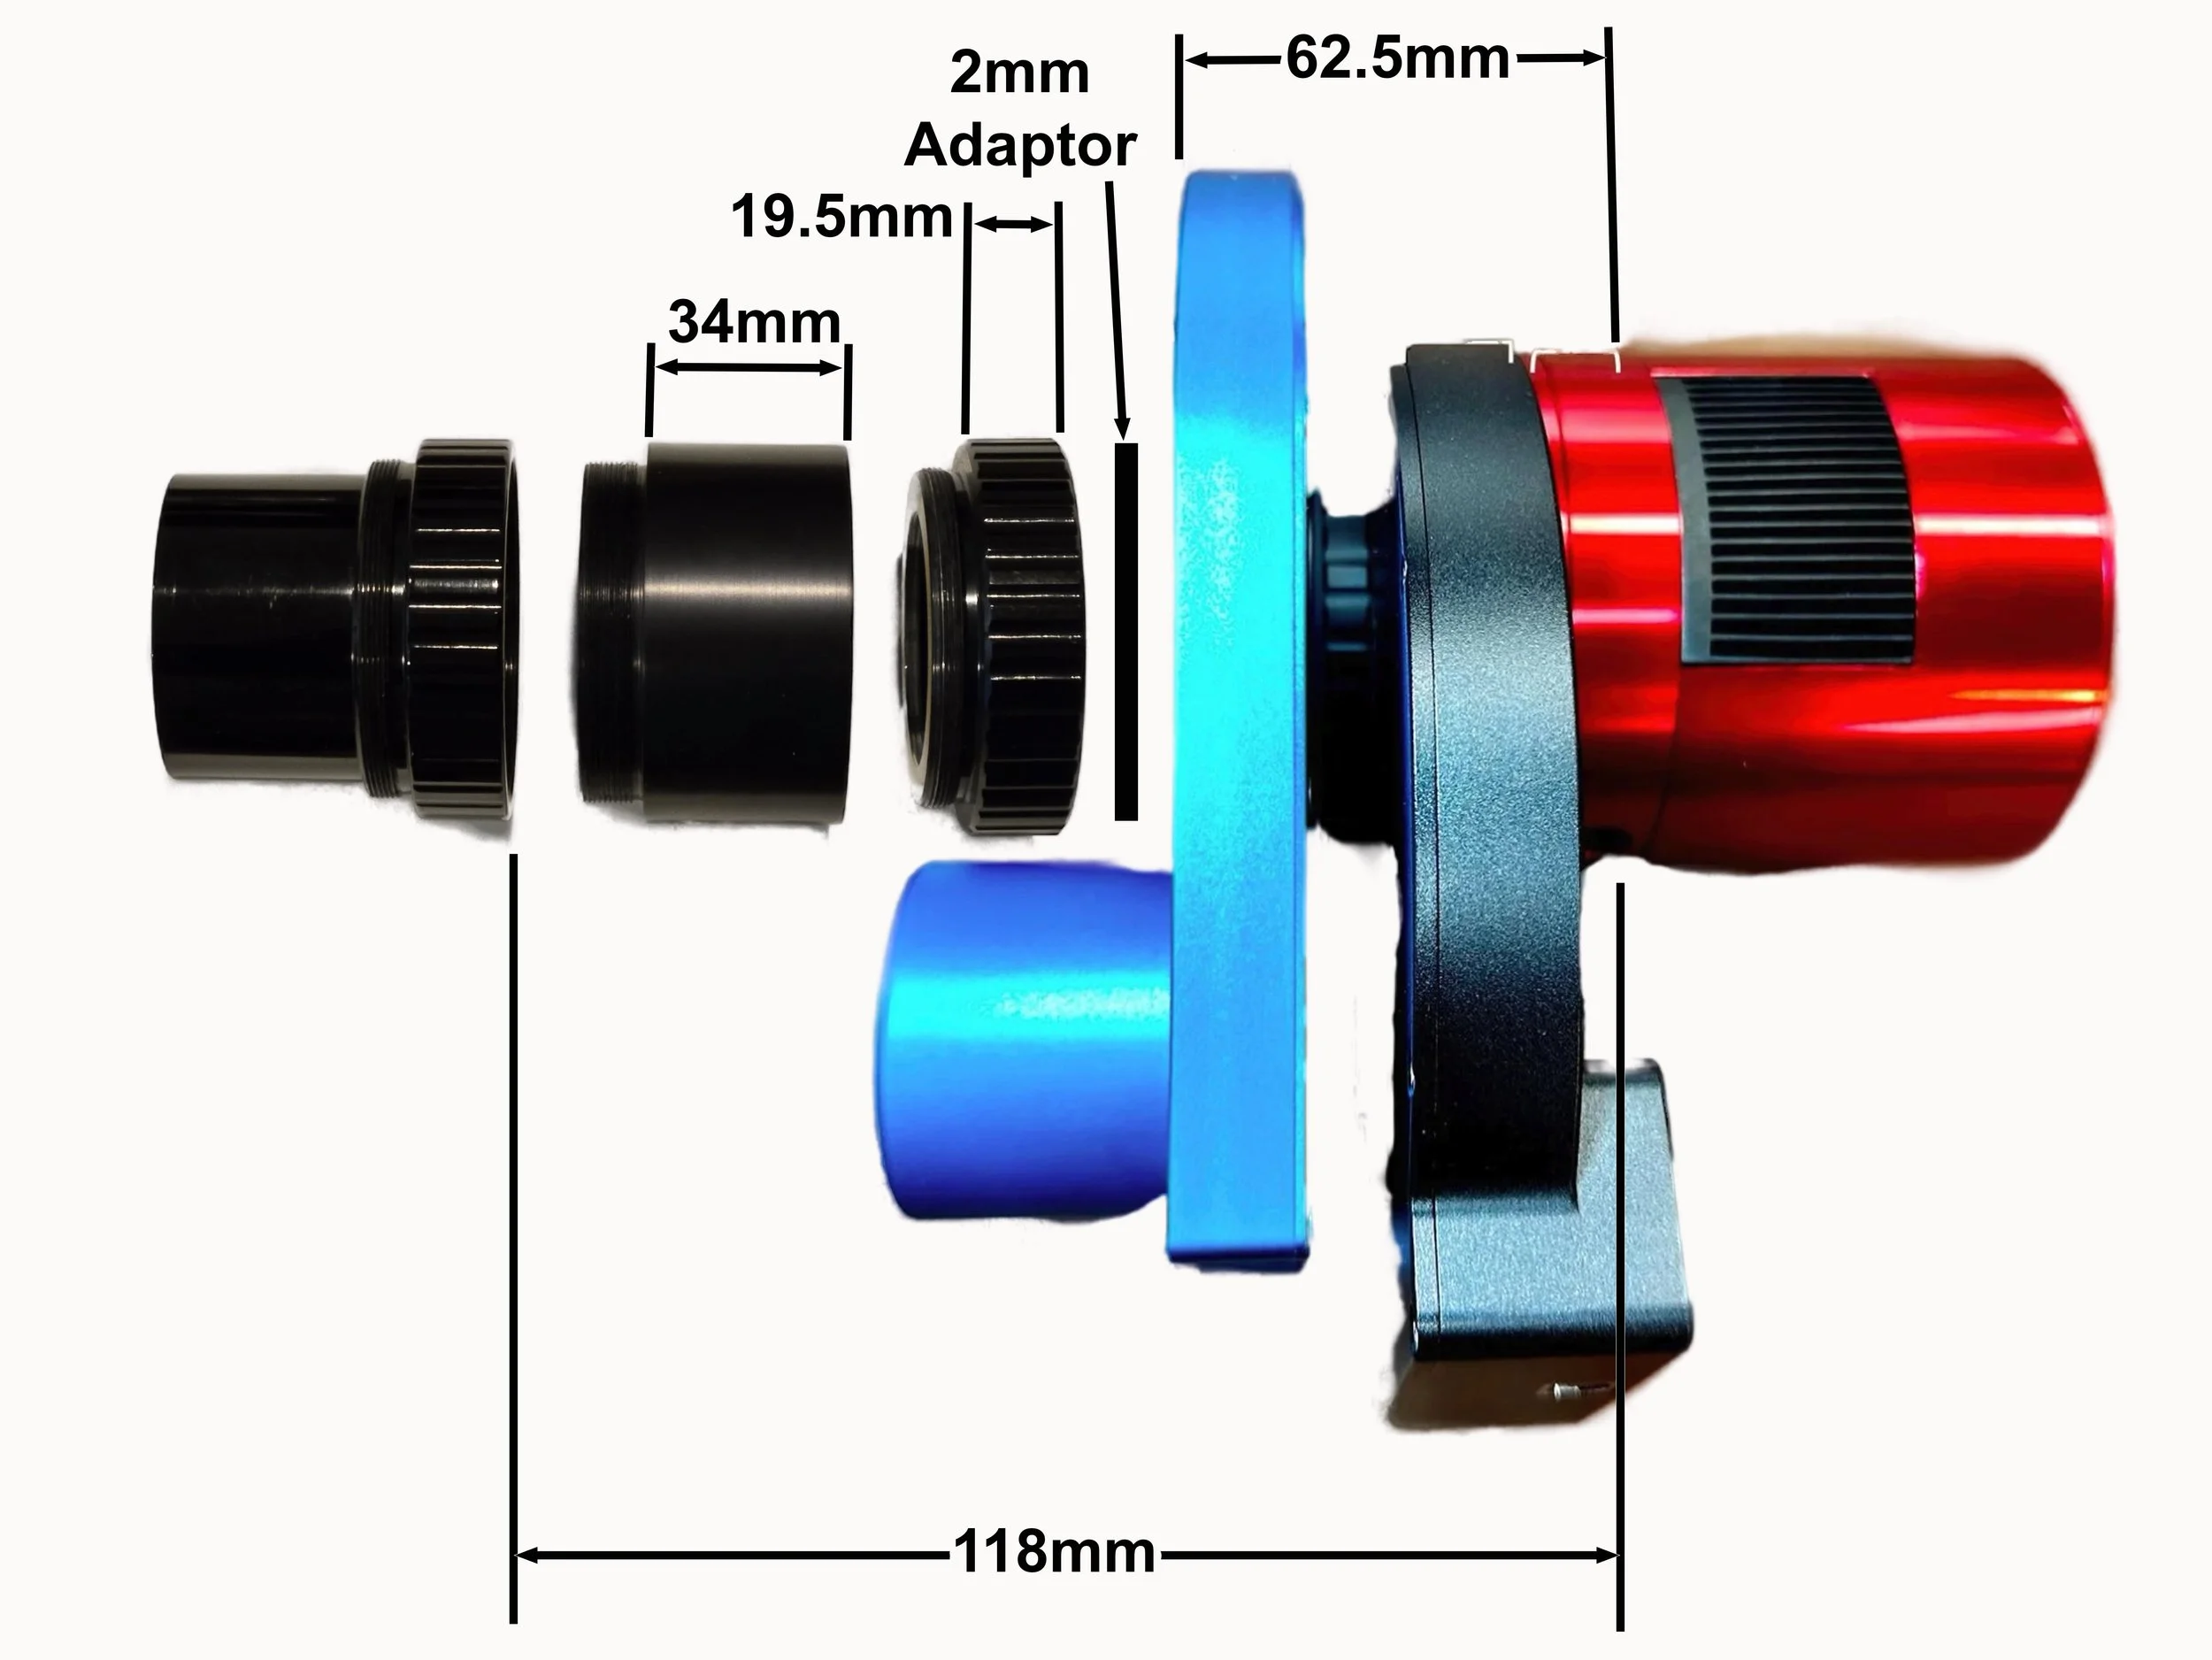
To recreate this stack, I needed to attach the EFW to the Rotator with a 10mm spacer. I was able to get a 42mm-to-48mm adapter, but this had a 7mm thickness, not 10mm. So I added three 1mm spacer rings to fill this out. Below are the parts used (while I only show two 1mm spacers here, I did use three)
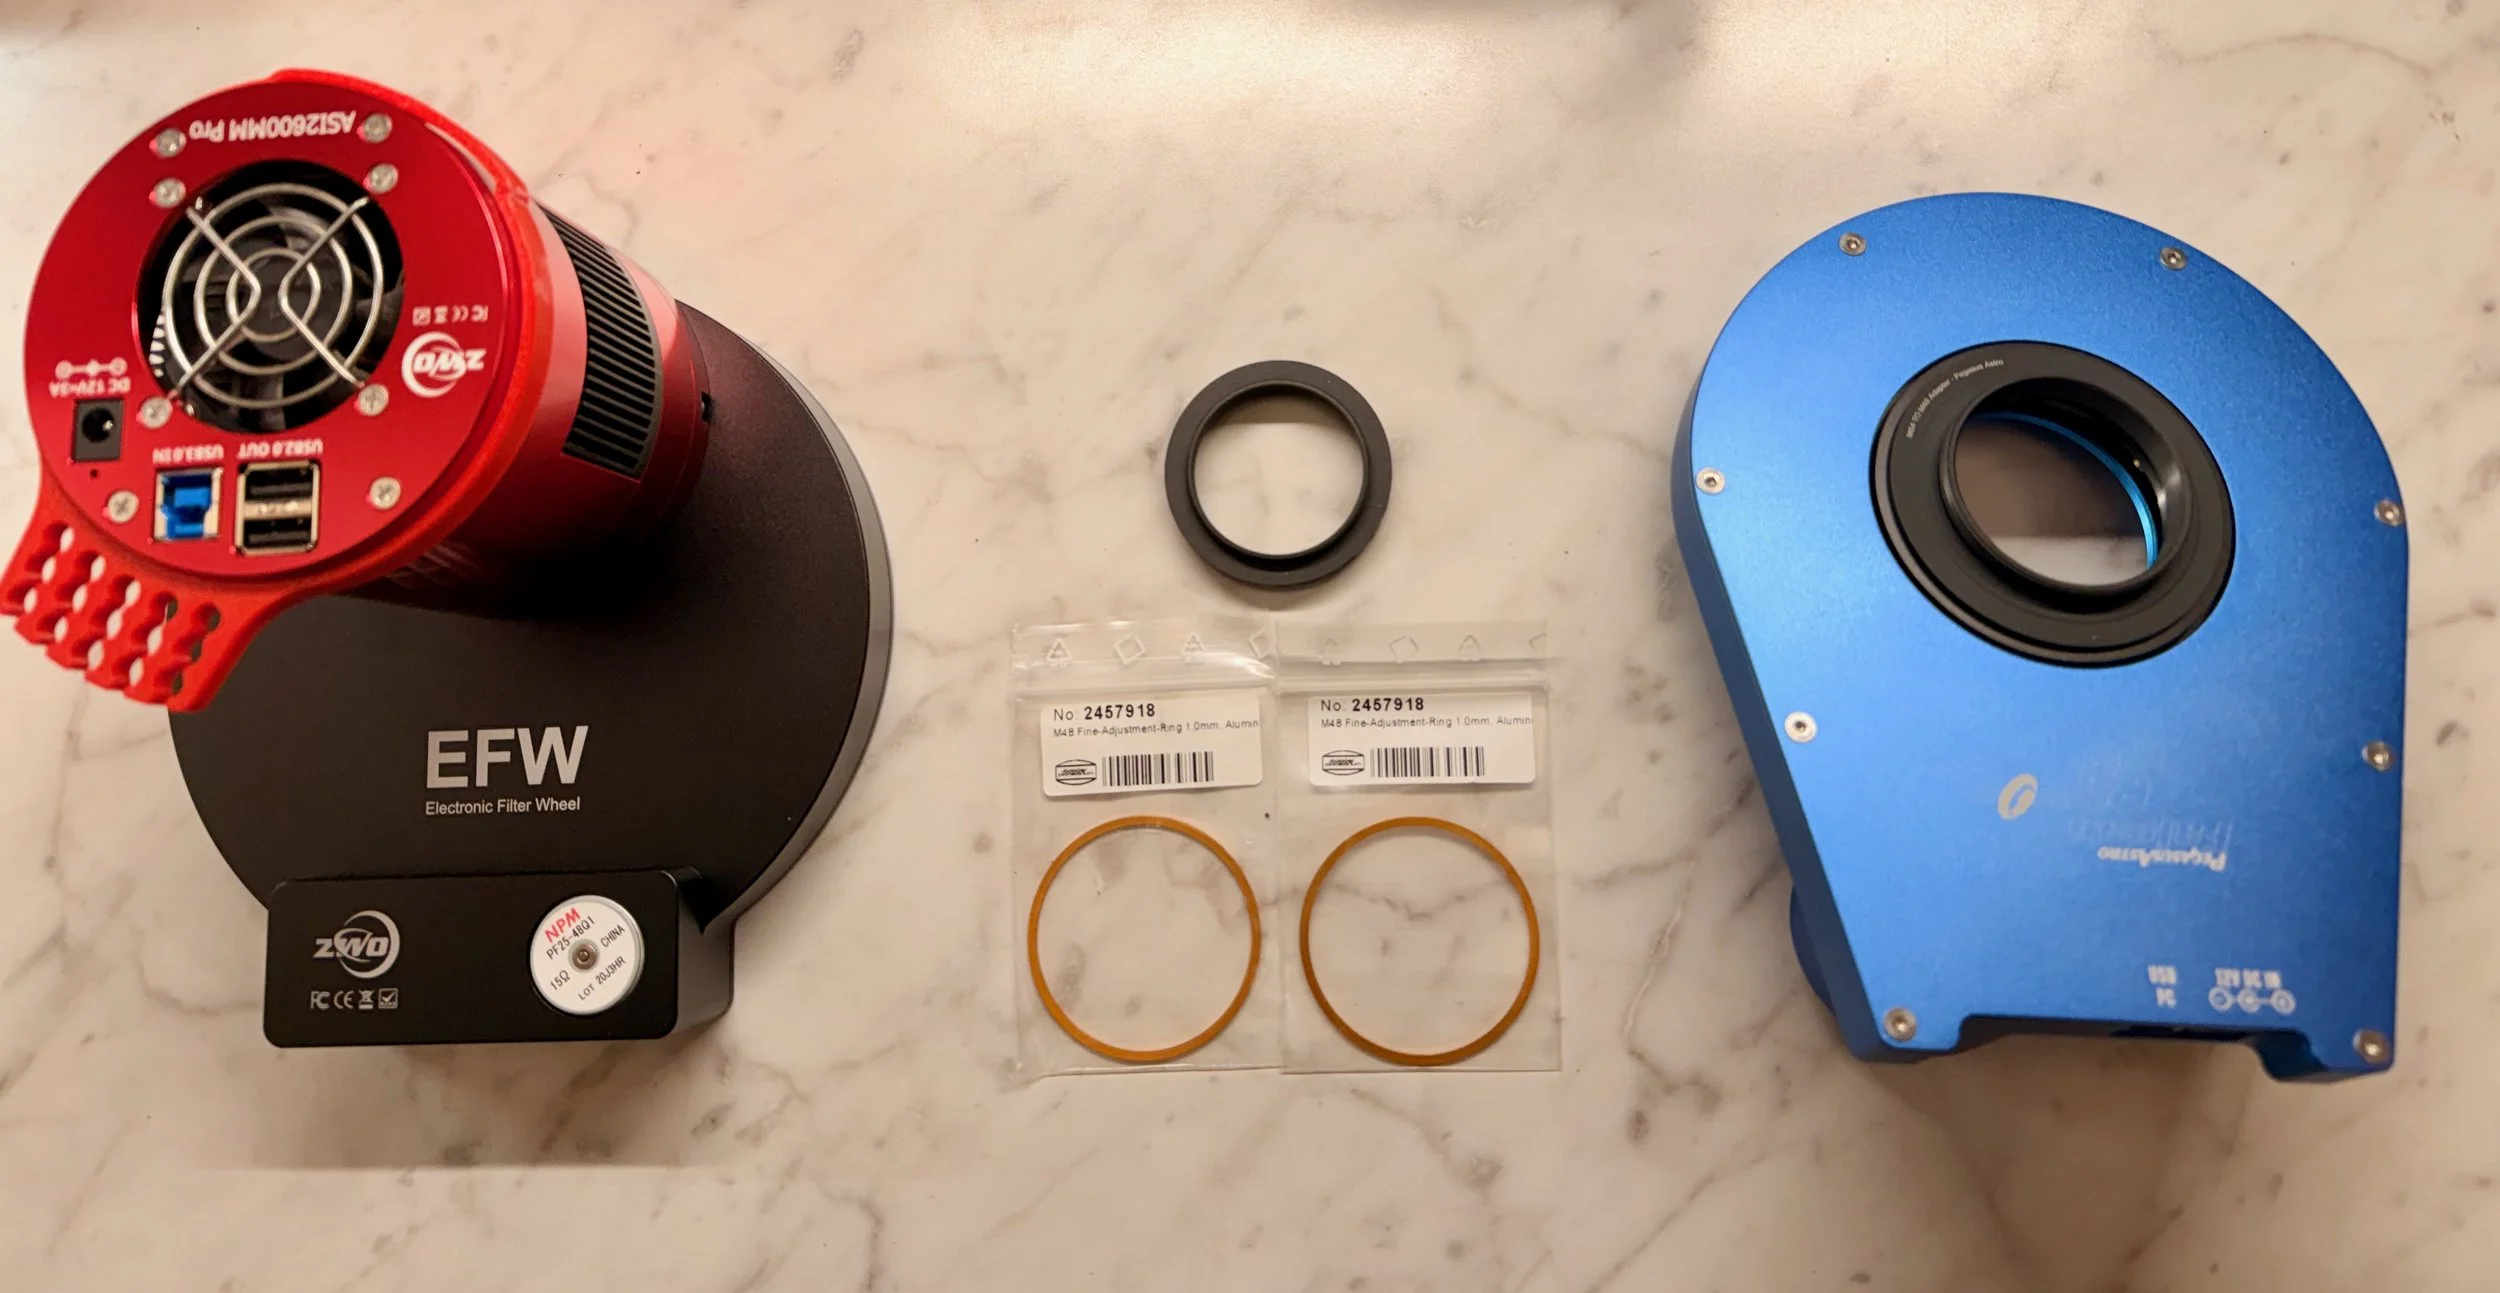
The parts needed to put the new camera stack together.
The assembled camera stack (click to emlarge)
Another view. This side of the rotator would mate with the telescope via a 54mm-male-to-54mm-male adapter. (click to enlarge)
With this together, I could mount the rotator to the end of the telescope.
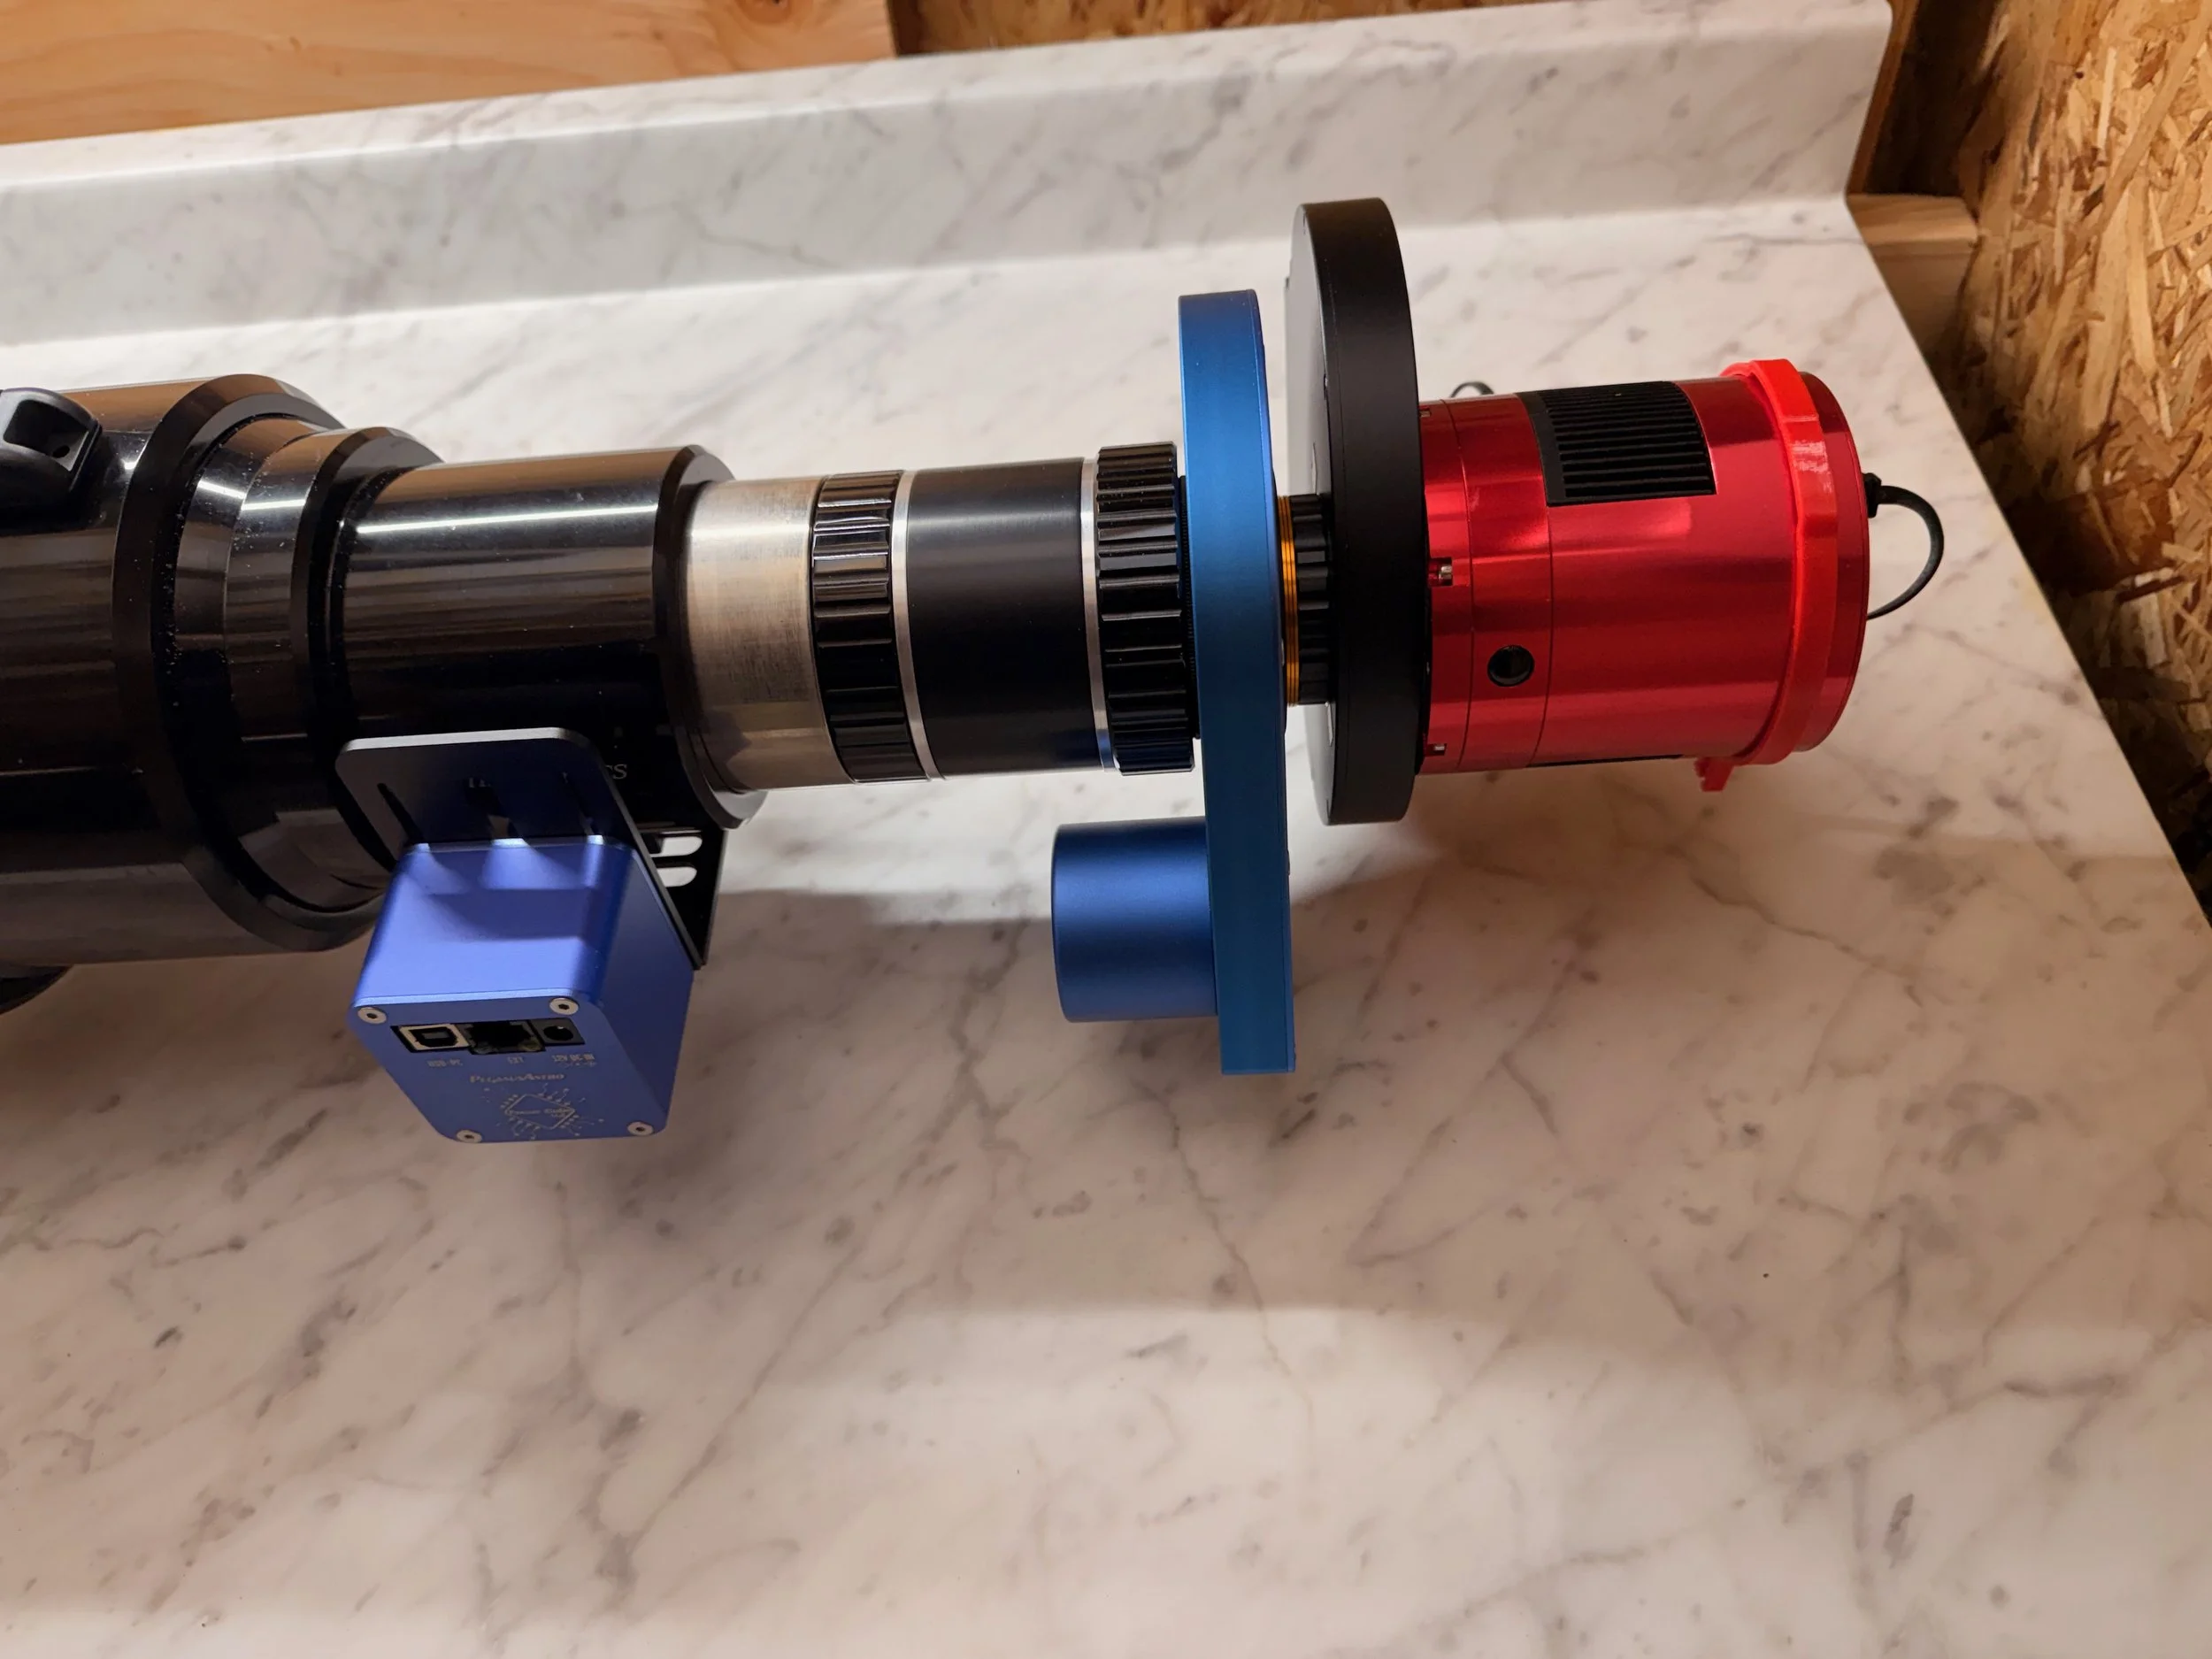
The camera stack mounted to the telescope.
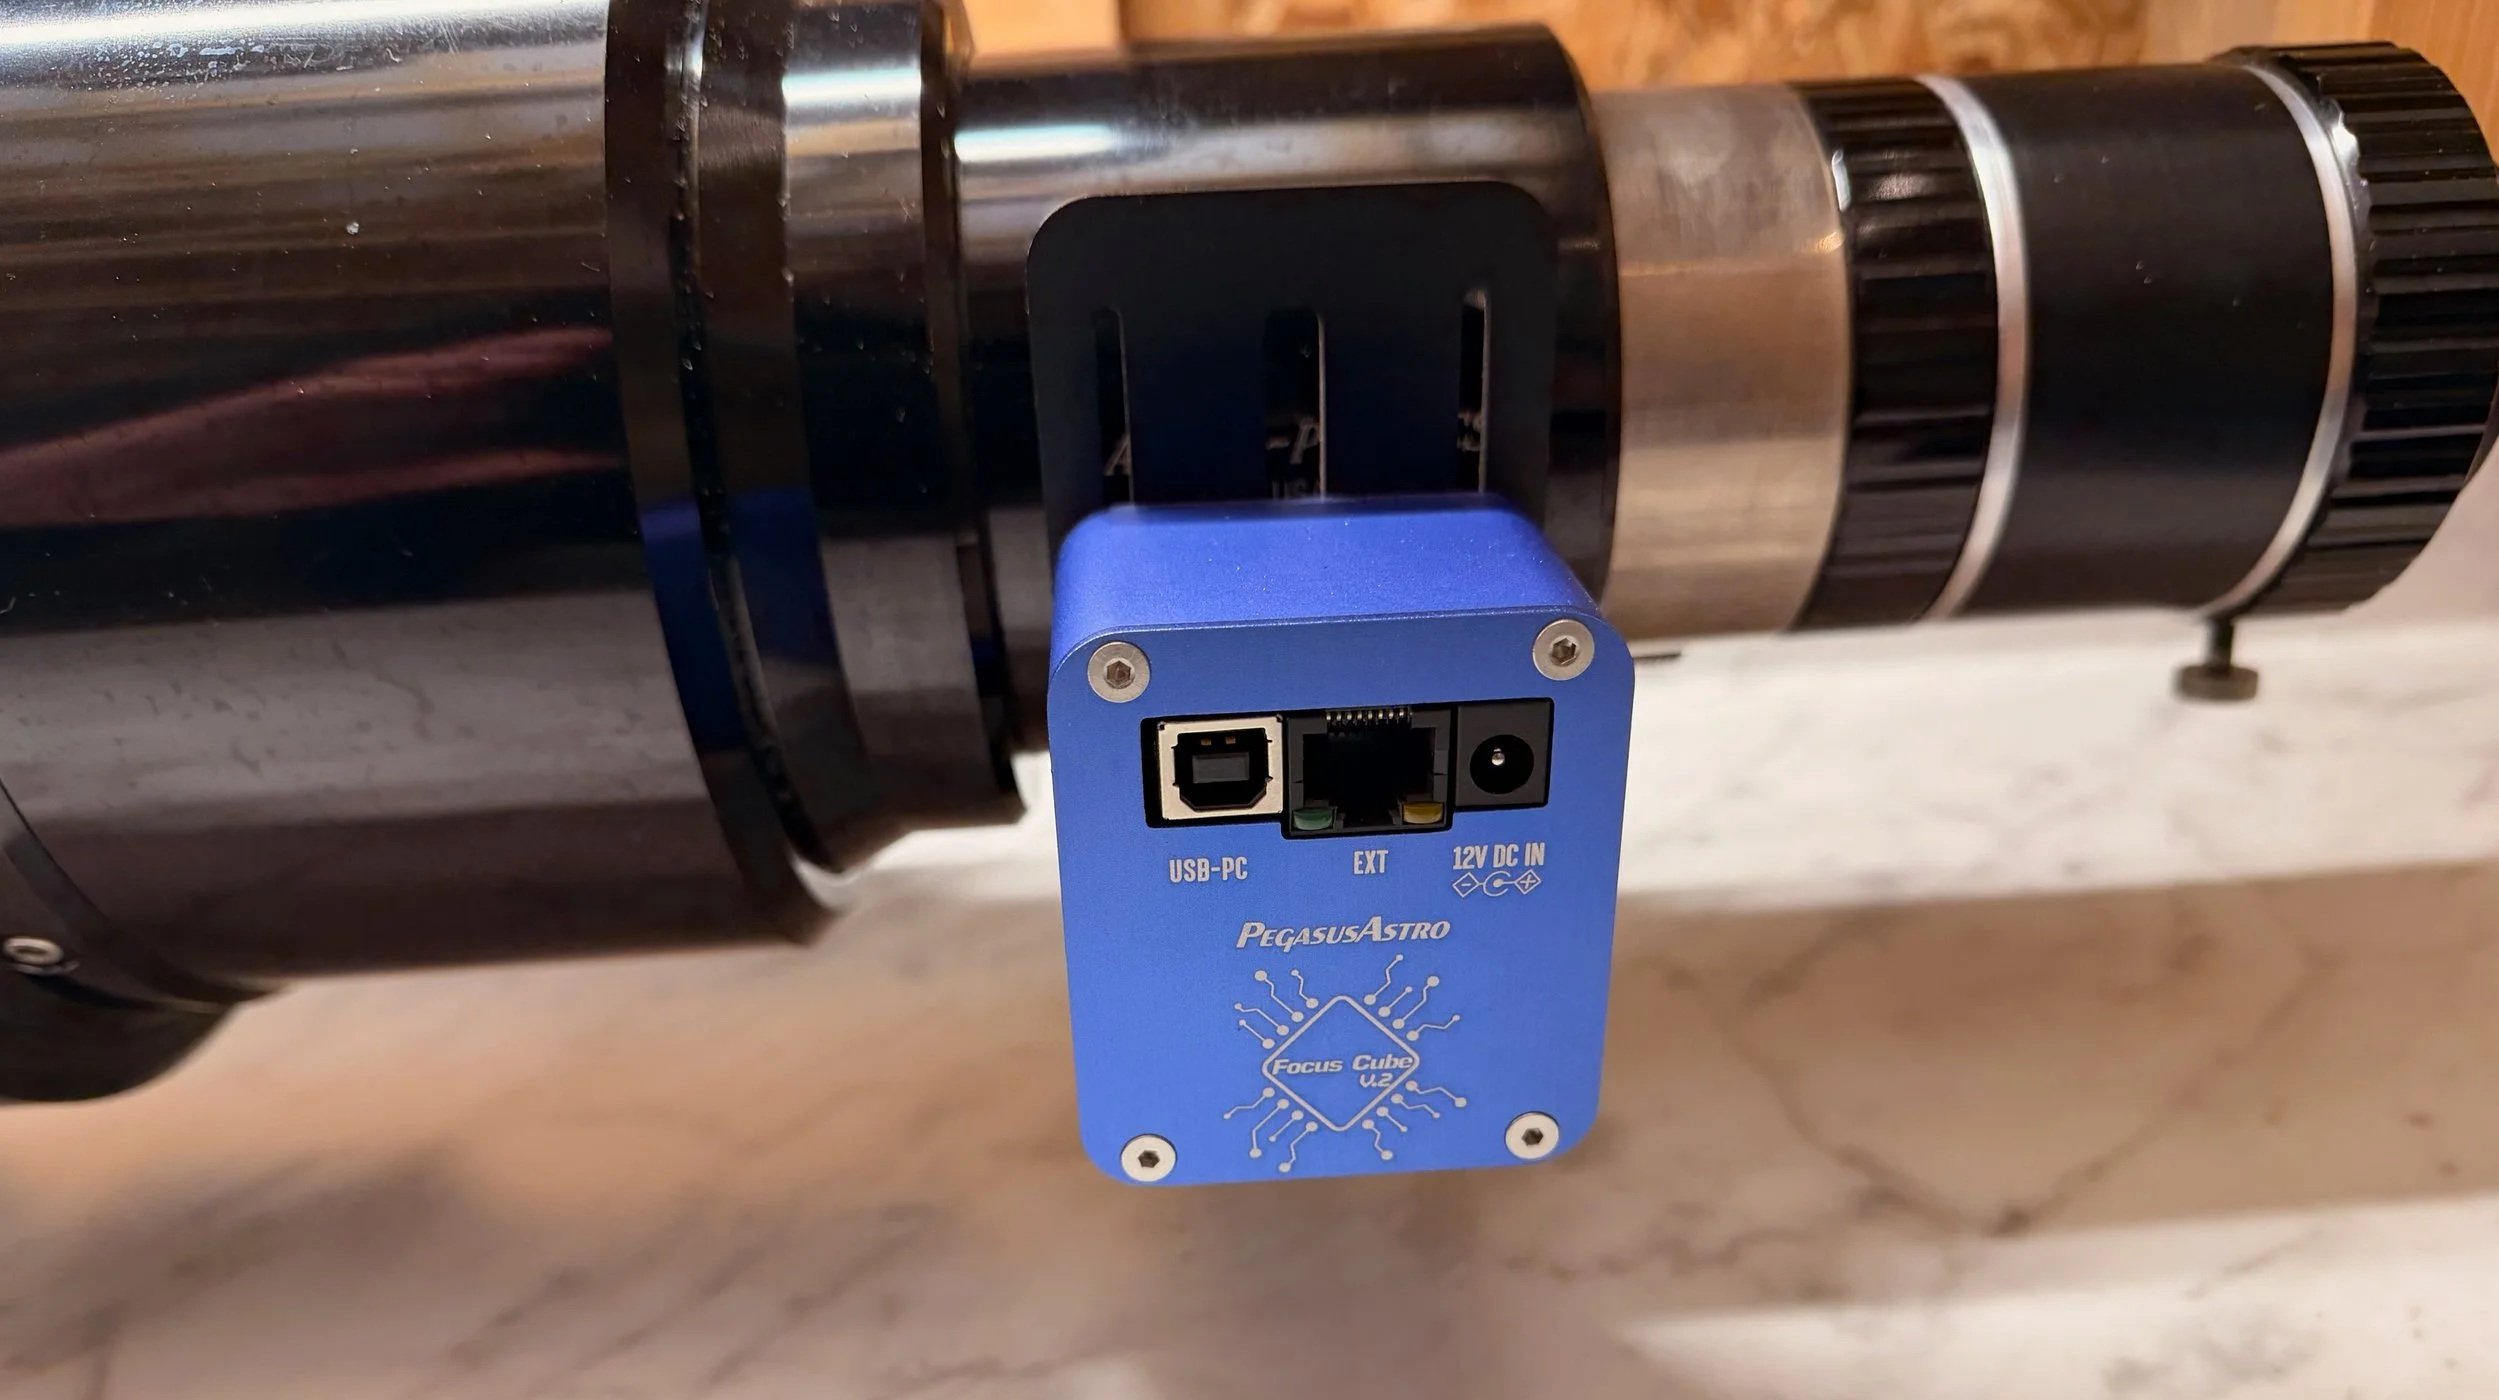
Mounting the Focus Motor
My AP130 platform used a Pegasus Astro Focus Cube 2 as the focus motor.
To mount it, I had to remove two screws from the bottom of the focuser and replace them with longer ones that gave me enough room for the bracket holding the motor to fit.
I thought I would have to use the same method on the AP155. But I soon found that the same screws on the AP155 were much smaller and unsuitable for this mounting method.
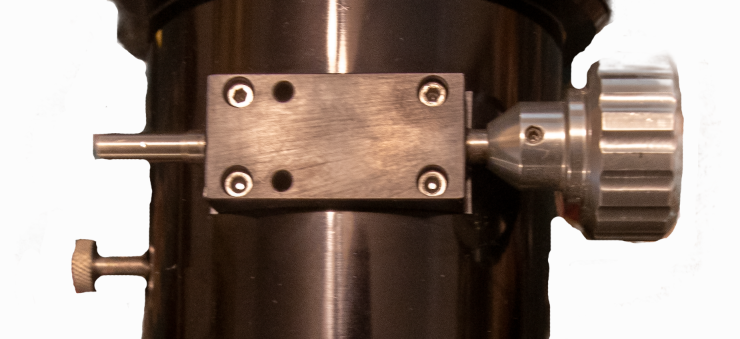
Instead, I saw two threaed holds that I could use to bolt the bracket on - so in some ways this ws even easier!

The bottom of the ap155 2.7-inch focuser. The two empty holes were used for mounting the focus motor bracket. (Credit: Image by Rick Albrecht - used with permission)
On the AP130, the motor used a coupler to attach to the focus shaft (with the knob removed). The shaft had a nice flat spot ground into it, and it made for an excellent mechanical connection with the coupler.
To my surprise, there was no flat spot on the AP155 focuser! I felt that the use of a round shaft and two set screws on the coupler woul dnot be mechanically reliable. So I decided to change that.
AP155 Focuser with the knob off - showing the smooth round shaft. (Credit: Image by Rick Albrecht, used with permission.
Using a Dremel tool with a small grindstone, I put a flat spot on the shaft.
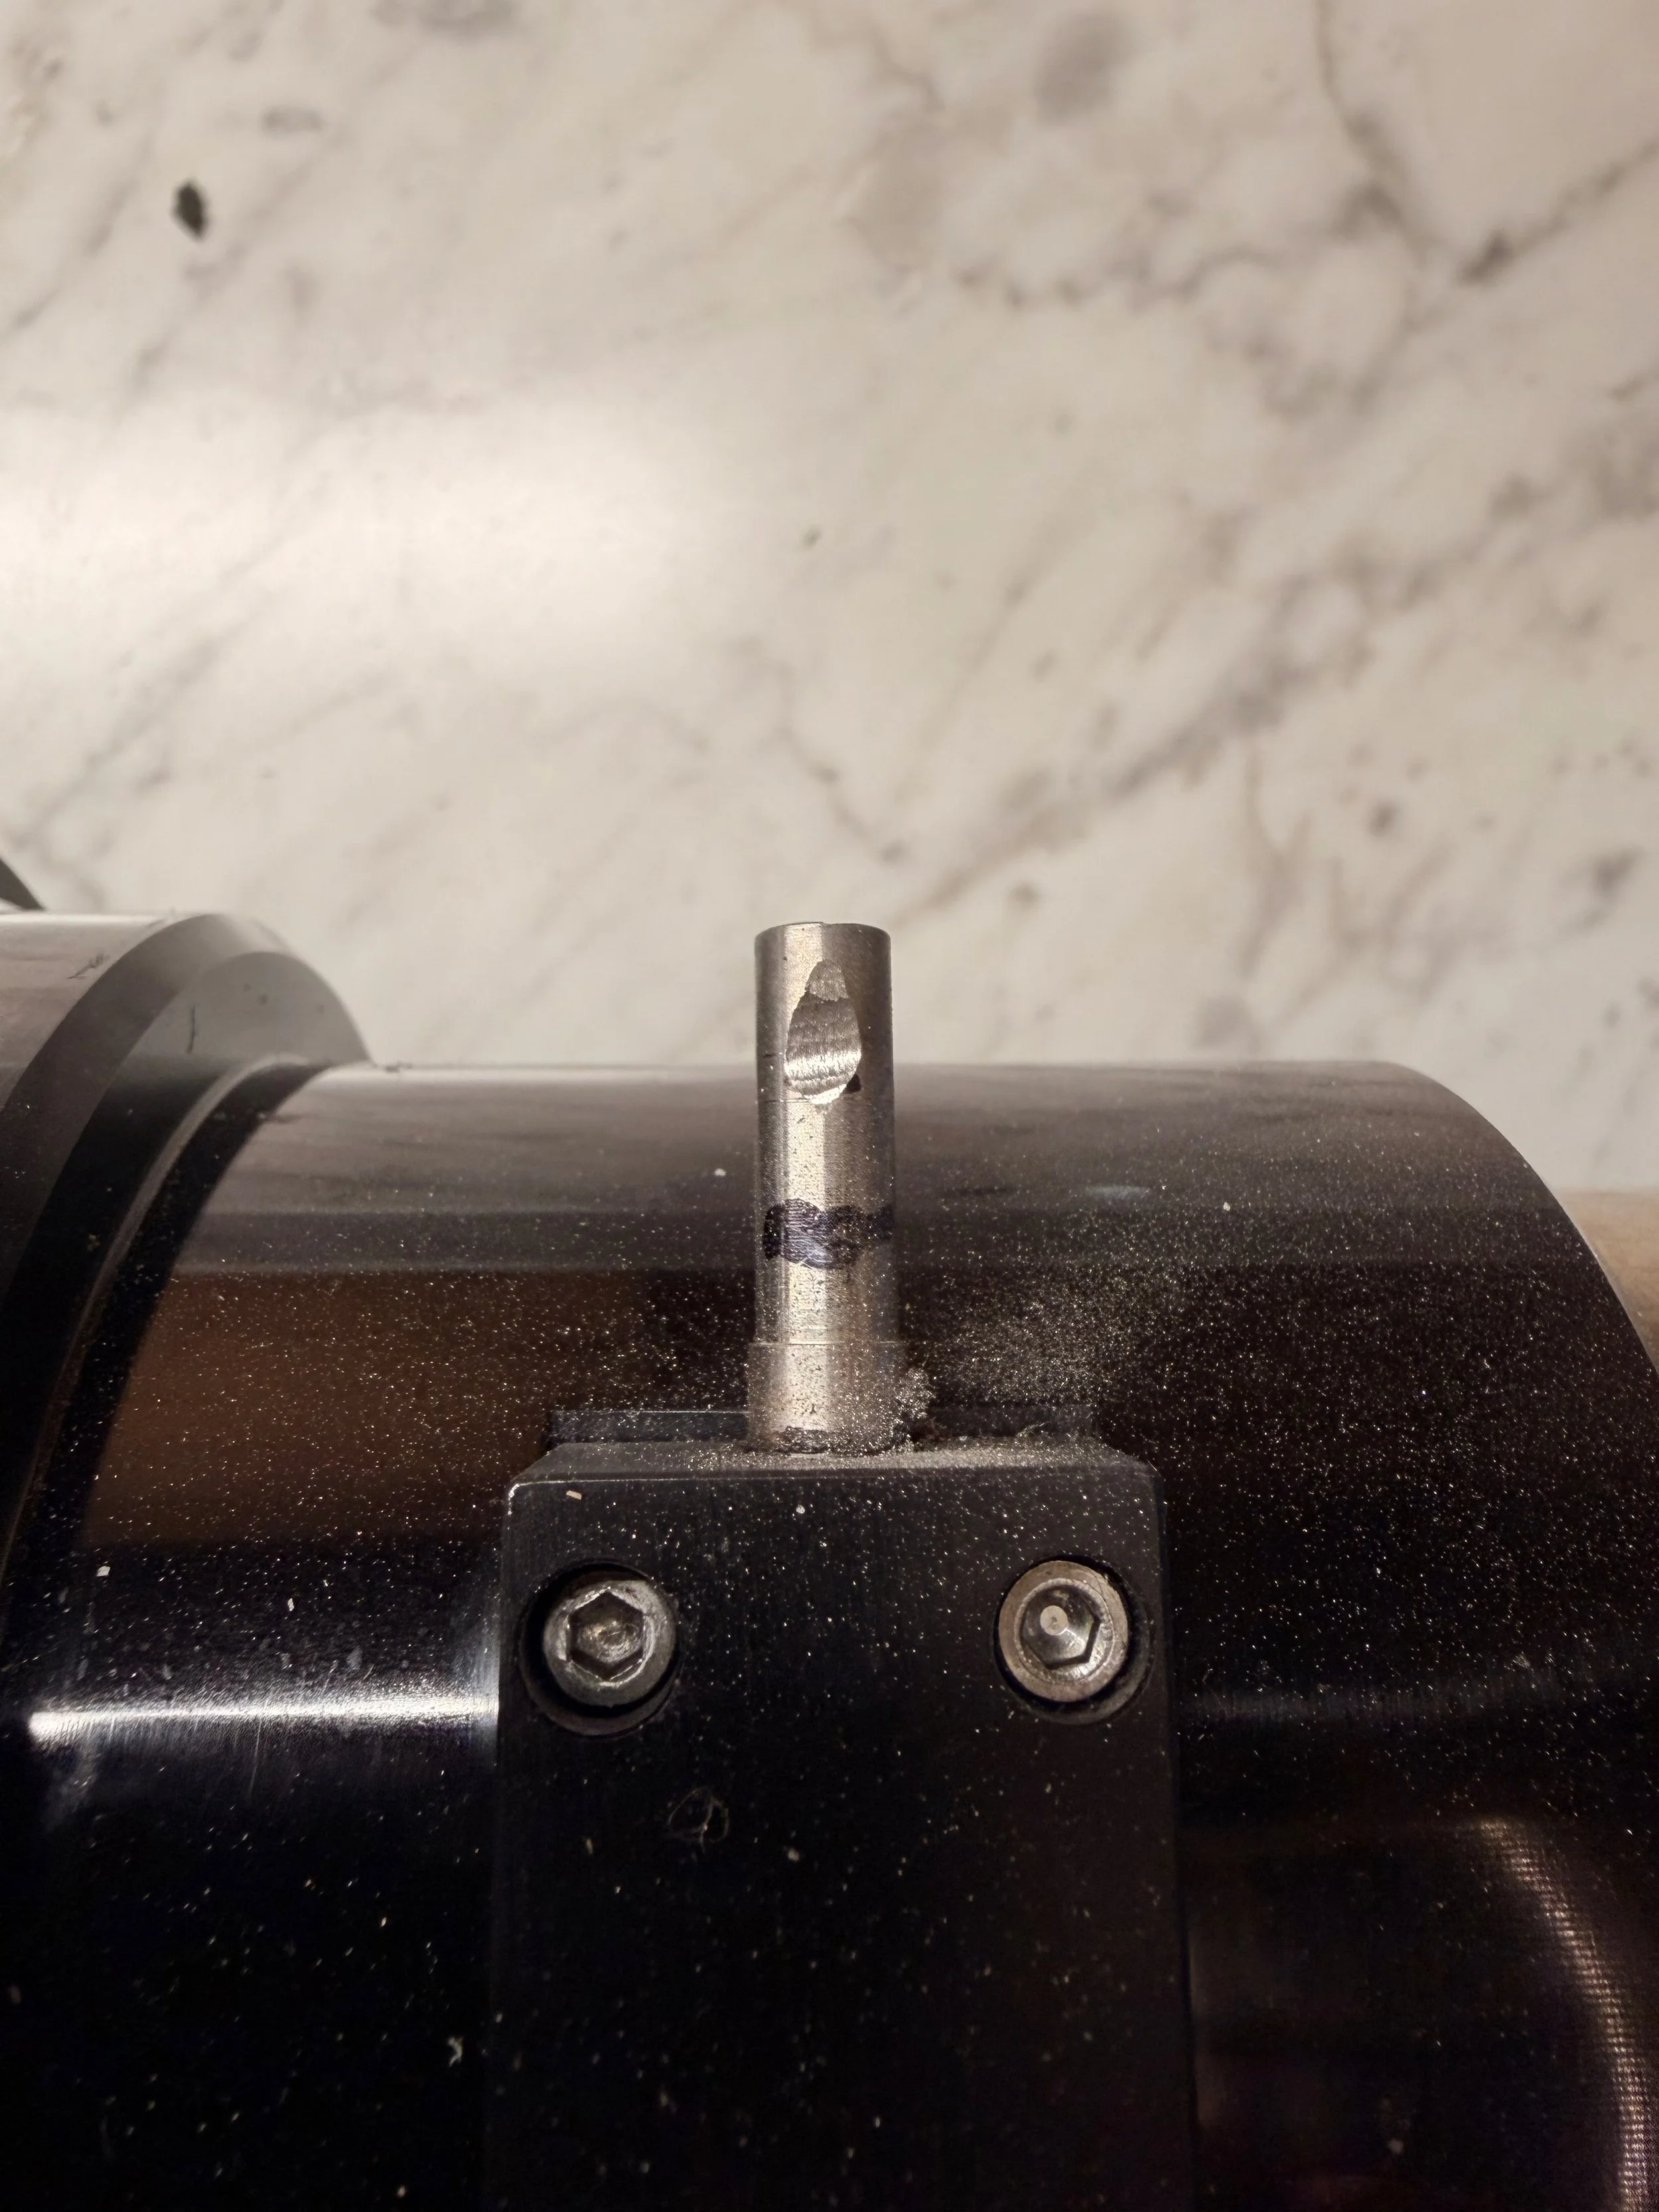
I used a Dremel tool with a small grinding stl to put a flat part onto the shaft where the coupler screws would go. I as careful to vacuum up the metal dust created.
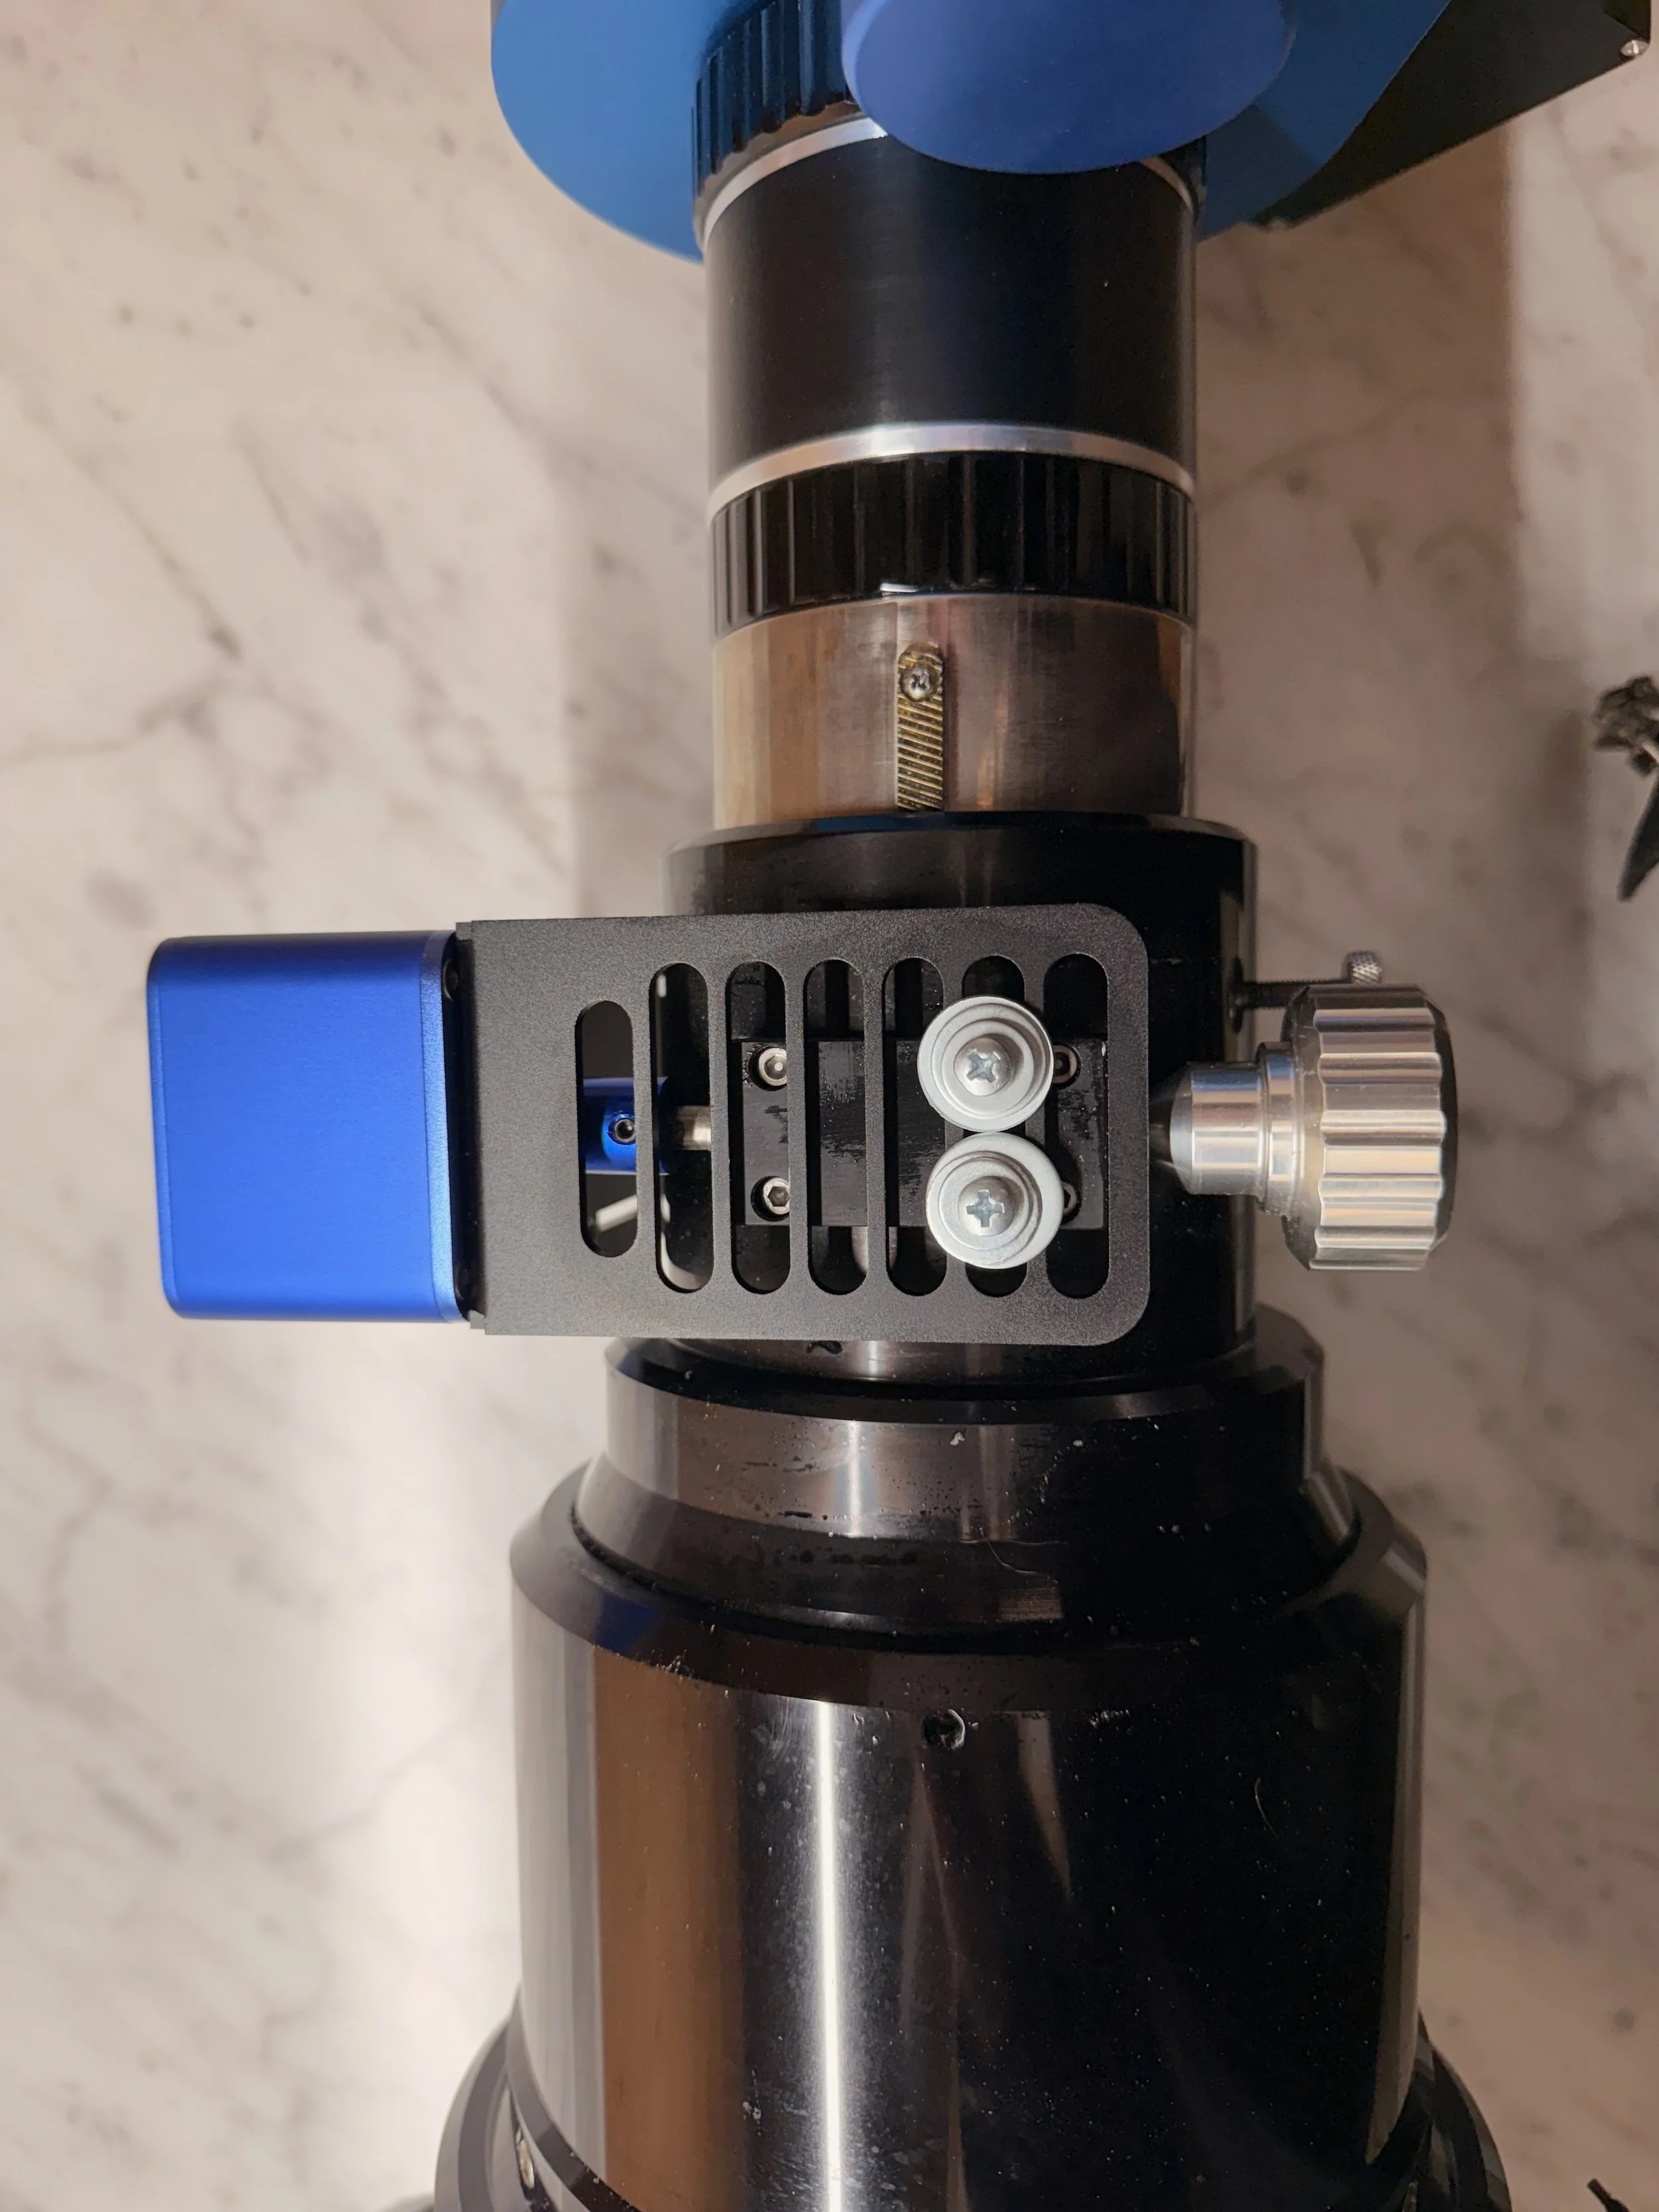
The focus motor assembly, now complete.
Another view of the mounted focus motor.
Wiring Things Up
With the focuser and camera in place, we can start to wire things up.
The most significant parts of this are the Pegasus Astro Powerbox (which distributes 12 V DC power) and the StarTech 7-port USB 3.0 Hub. These boxes were mounted to the back of the top plate with gel tape.
Then the environmental module for the Powerbox was mounted on the back of the scope's top plate.
From there, it was a gnarly task of cutting cable ties where I needed to move the cables from the old system to the new system. At first, you end up with a rat’s nest of cables, but once everything is in place, the first steps of cable management can begin.
The Powerbox and the USB Hub mounted in position. (click to enlarge)
Starting to connect and route cables. (click to enlarge)
My secret to cable management is to identify cables all going to the same place and use cable ties to bind them together. You always end up with excess cable. I coil this into bundles, cable-tie them together, and then tuck them under the top plate. I use a 1.5-inch black elastic band around the plate to hold them in place.
Sanity Check on the Weight
At this point, I have everything on the new OTA except for the motorized cover. That would take a few more days to arrive.
Now was a good time to weigh the system and see how much trouble I was in.
The old OTA weighed in at 42.8 lbs. The new OTA was coming in at 41.8 lbs. The motorized cover weighed 0.9 lbs, so that the new one would weigh almost exactly the same!
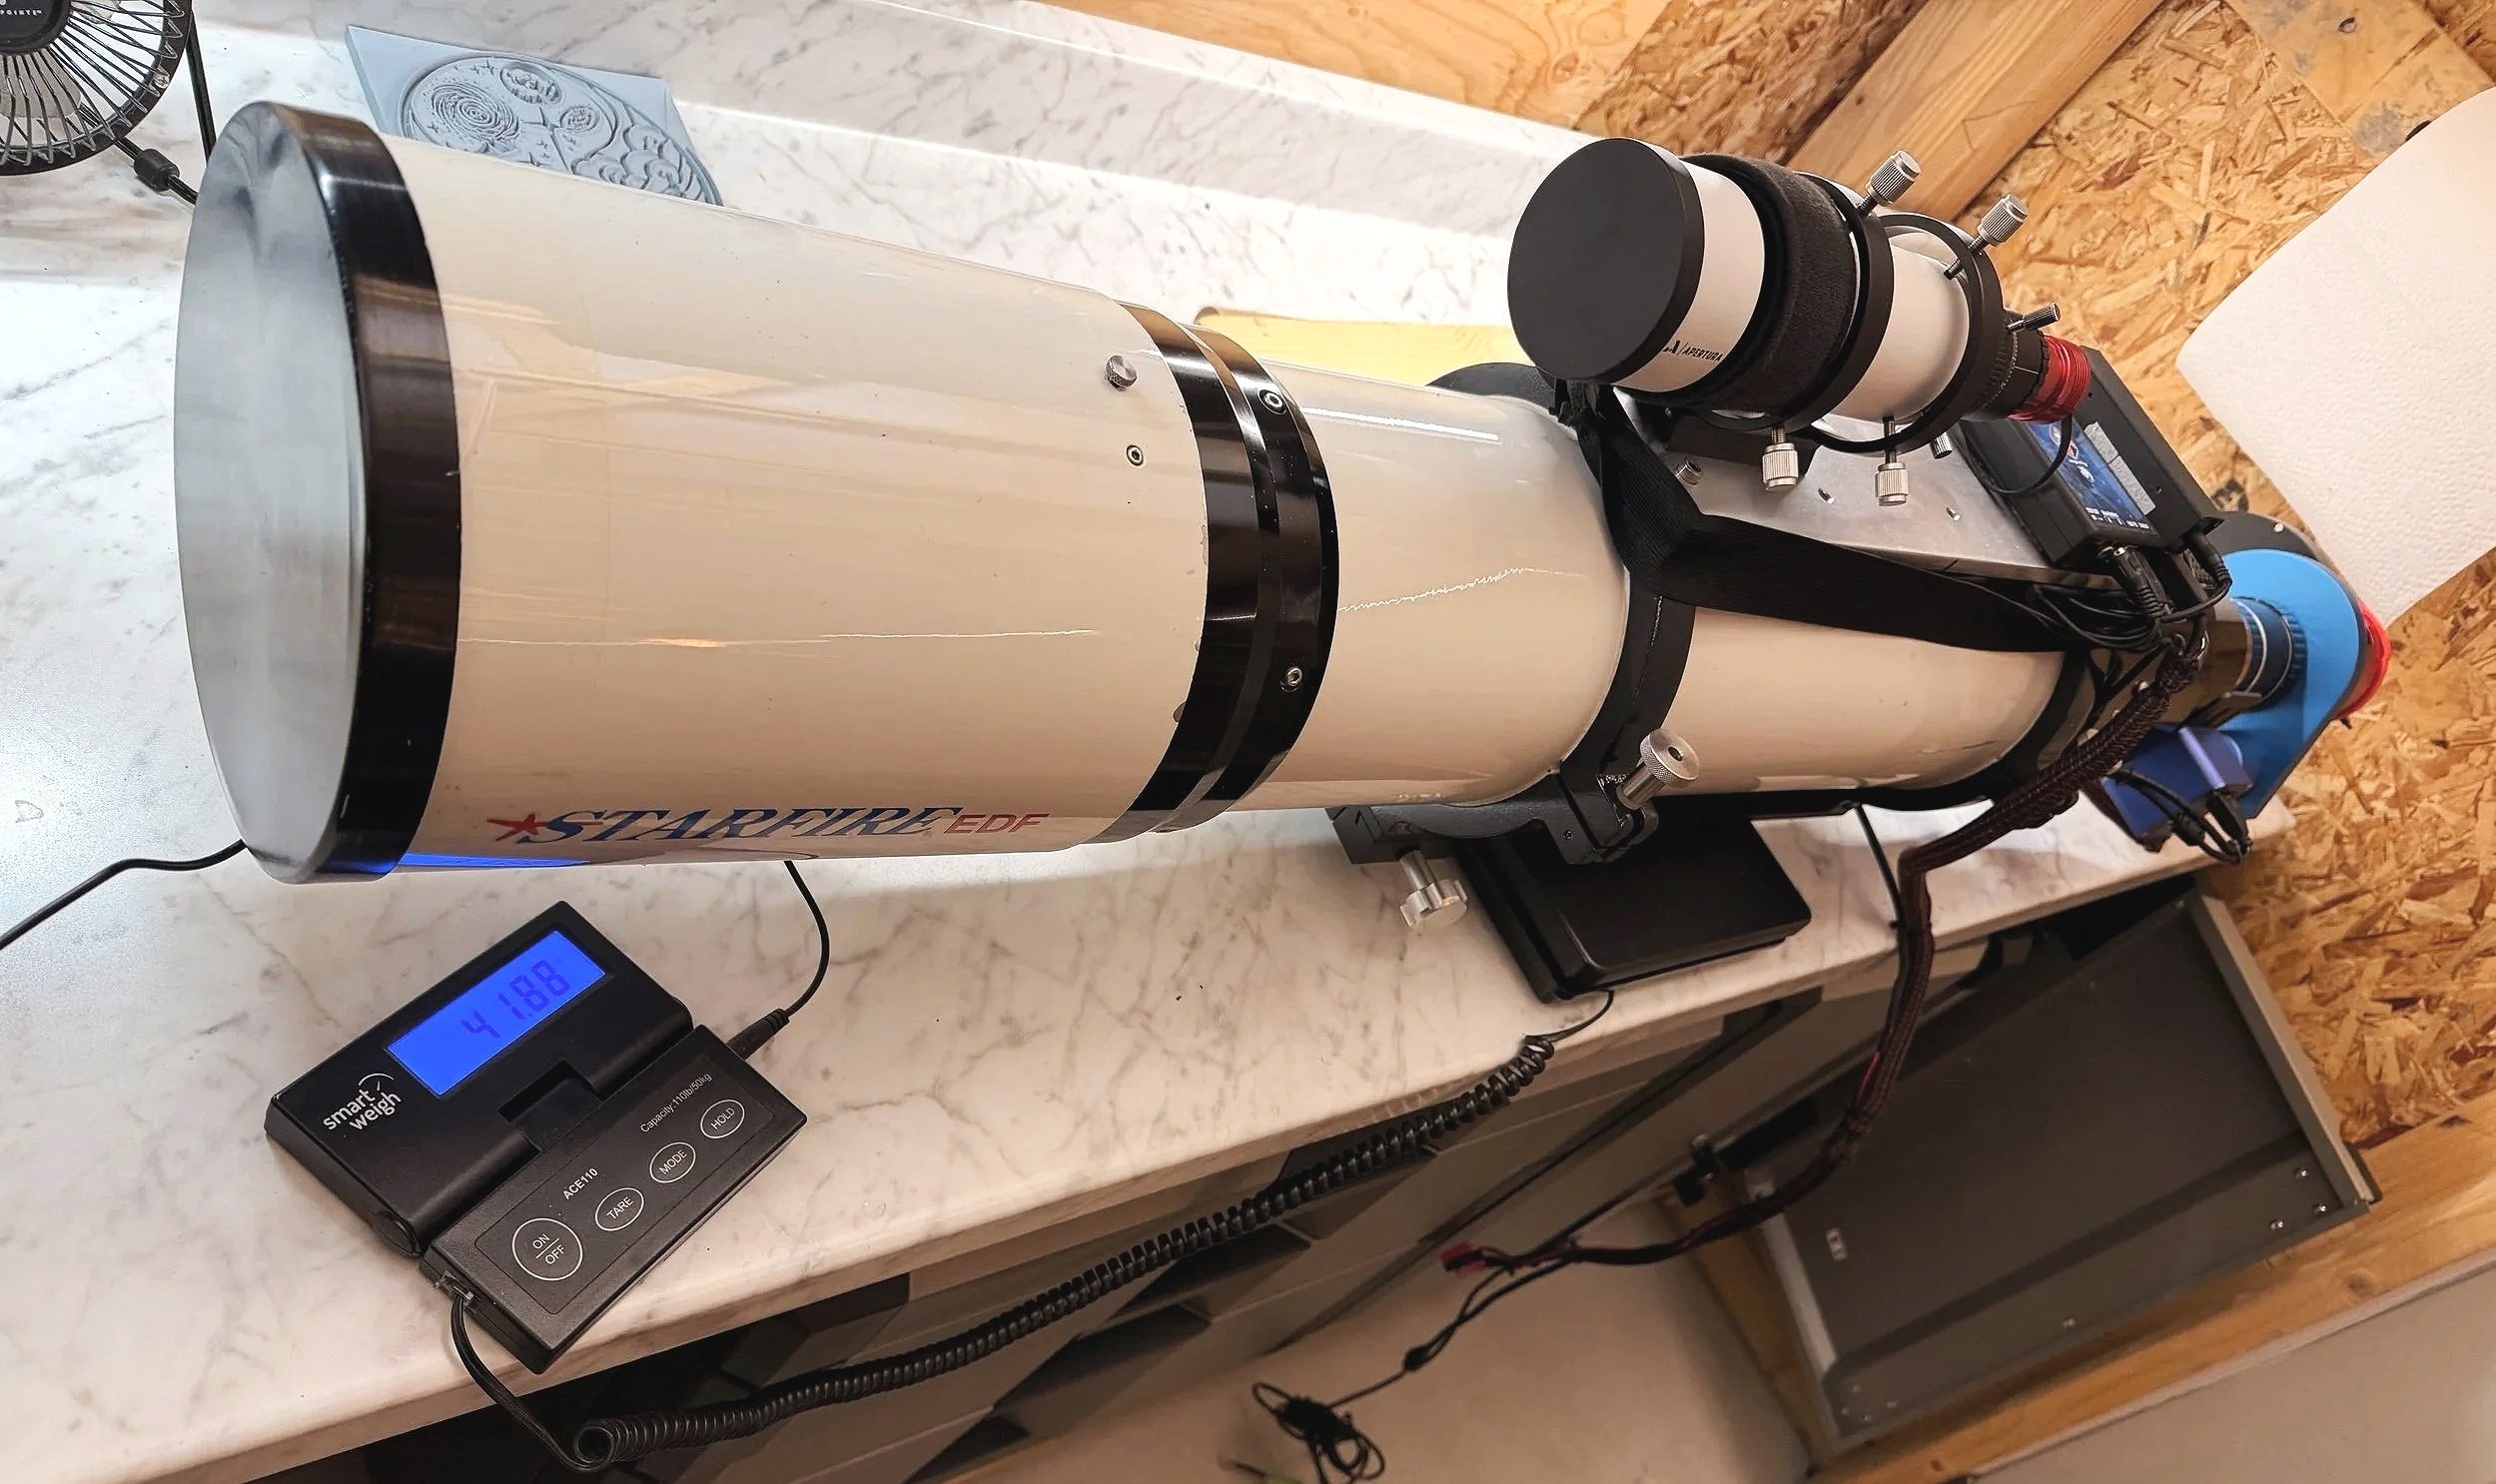
The entire OTA (just missing the motorized cover) weighs in at 41.8 lbs .
I was amazed that it worked out so well!
Mounting the Scope
At this point, I was far enough along to mount the scope.
I like to mount a dovetail clamp to the front of the dovetail before doing this. This acts as an emergency brake when sliding the scope down onto the dovetail clamp. It can also be used to mark where the OTA has to sit on the mount clamp for balancing later on.
The dovetail clamp that I add to the front to prevent the scope from slipping through the the clamps when mounting the OTA to the Drive.
With my wife providing an extra set of hands, we lifted the scope onto the mount and secured it. I then routed the cables.
The mounted scope with all of its cables in place and ready for testing. The motorized cover would come in a few days and would be the last piece added to this upgraded package.
At this point, I could power up the scope and confirm that all devices were online and available to NINA. Everything checked out fine.
I was also ready to do a rough balancing of the scope. With that done, we had one of our rare sunny winter days, and I opened the observatory roof. With this balance position, the roof cleared the scope by two inches.
With the roof open, I was able to focus the scope on some distant trees.
The Motorized Cover
I have an inexpensive LED tracing panel setup with some thick closed-cell foam so that I can easily hang the flat light source at the end of either the AP130 or the WO132 scopes. But with the AP155's larger diameter, I needed to do something different.
One of my goals for 2026 is to move to motorized covers with built-in flat light sources. I tried a Wanderer Astro Wanderer Cover on the FRA400 platform, and this worked out very well.
So I decided to go this route for the new AP155 platform.
After measuring the diameter of the dew shield, it looked like the 190mm size would work well, so I ordered one.
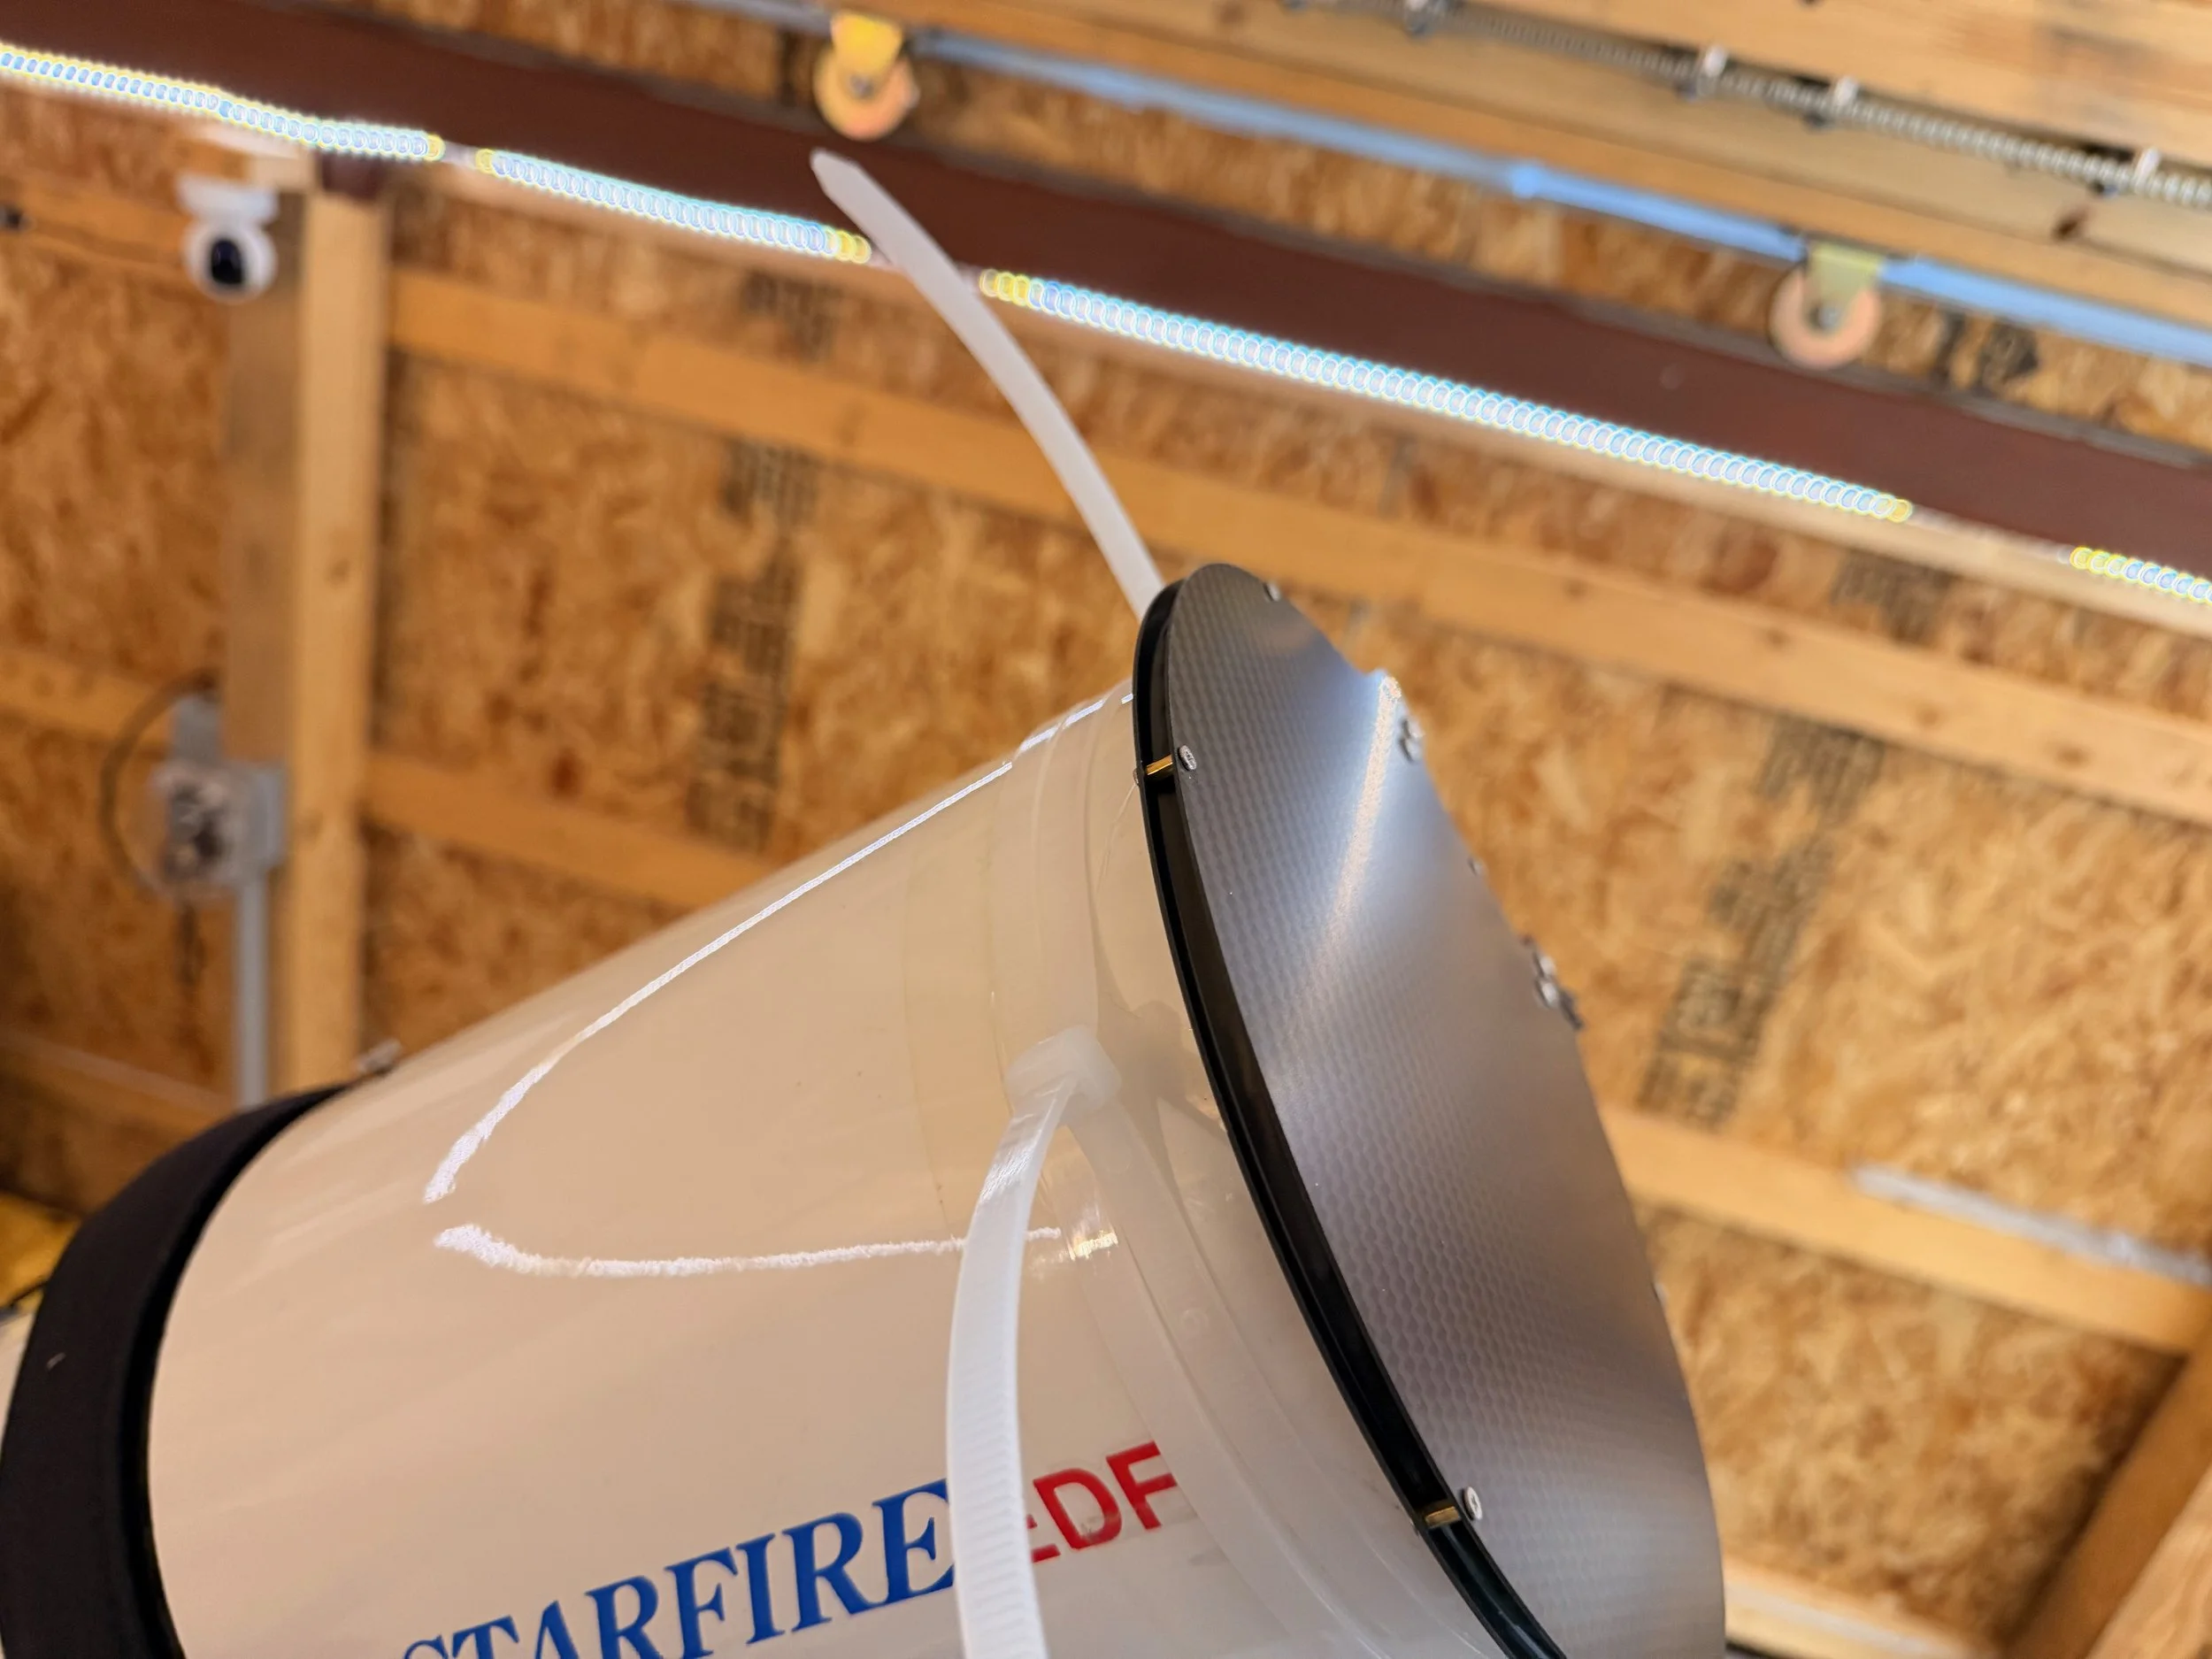
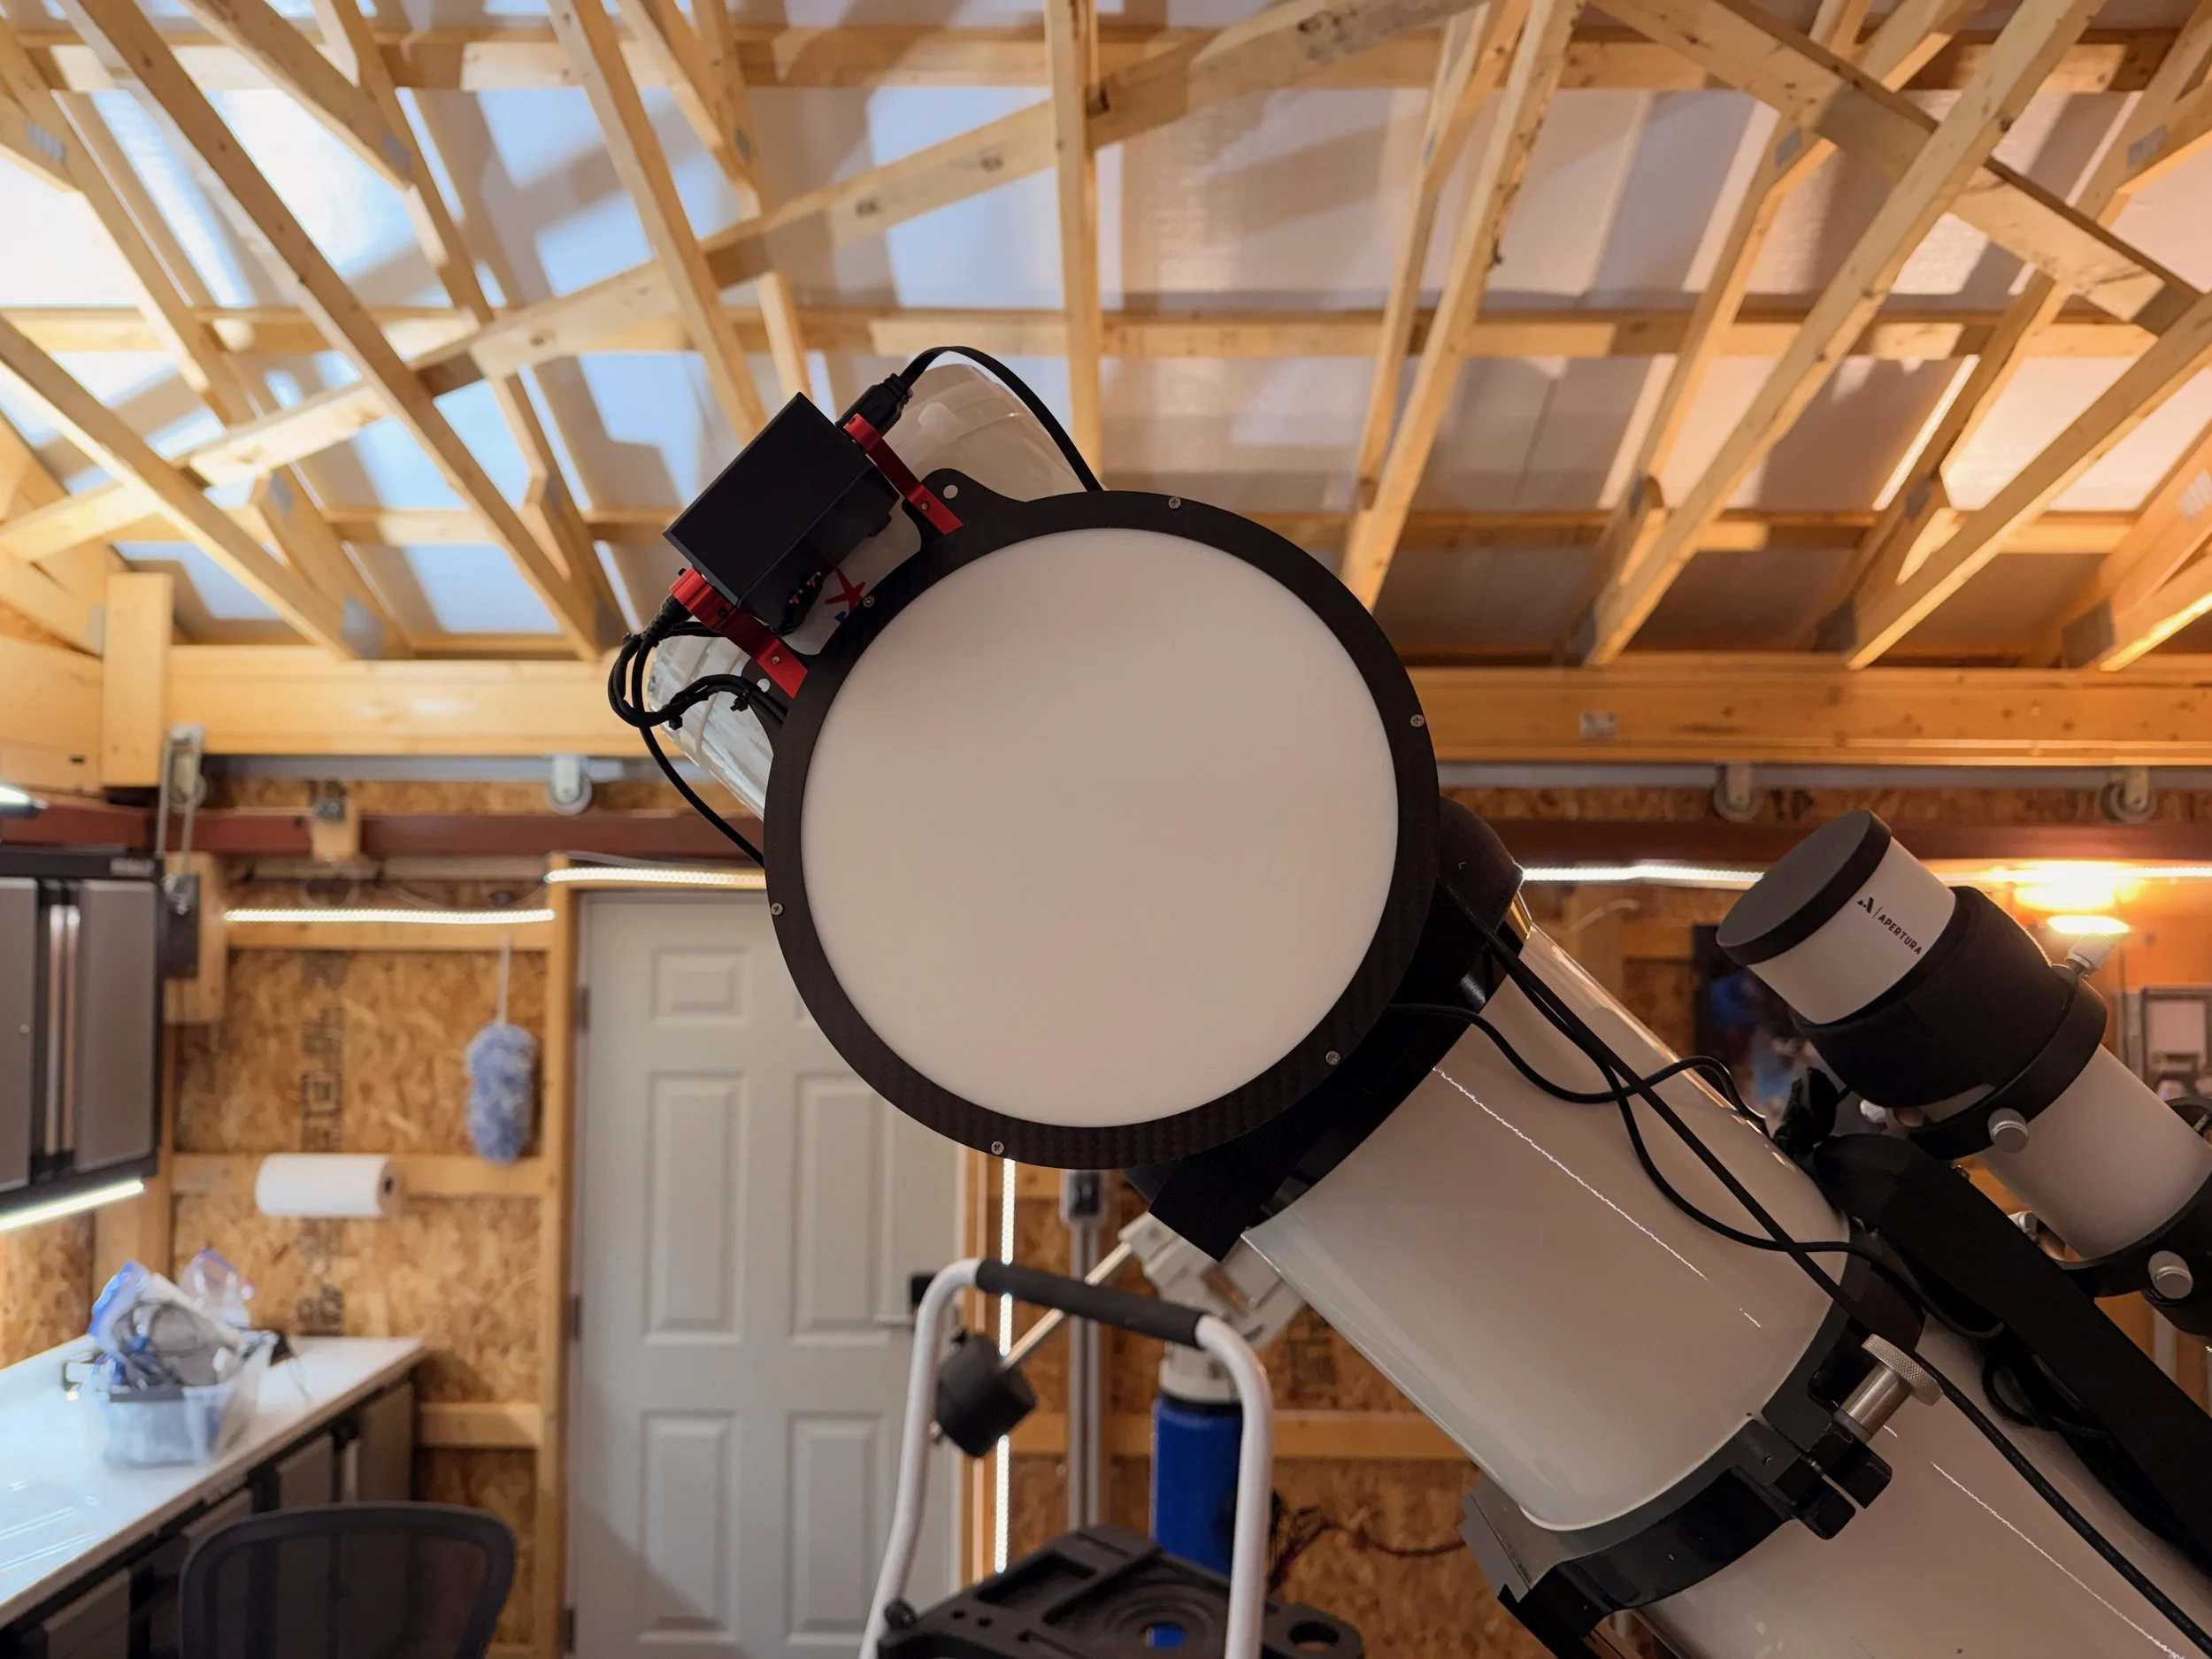
This was the second unit I’ve installed, and, as with the first, it was quite simple to do. In fact, it was even easier to mount this on the AP155 since there was no other gear in the way. to contrain it operational location. I could have positioned it anyway I wanted.
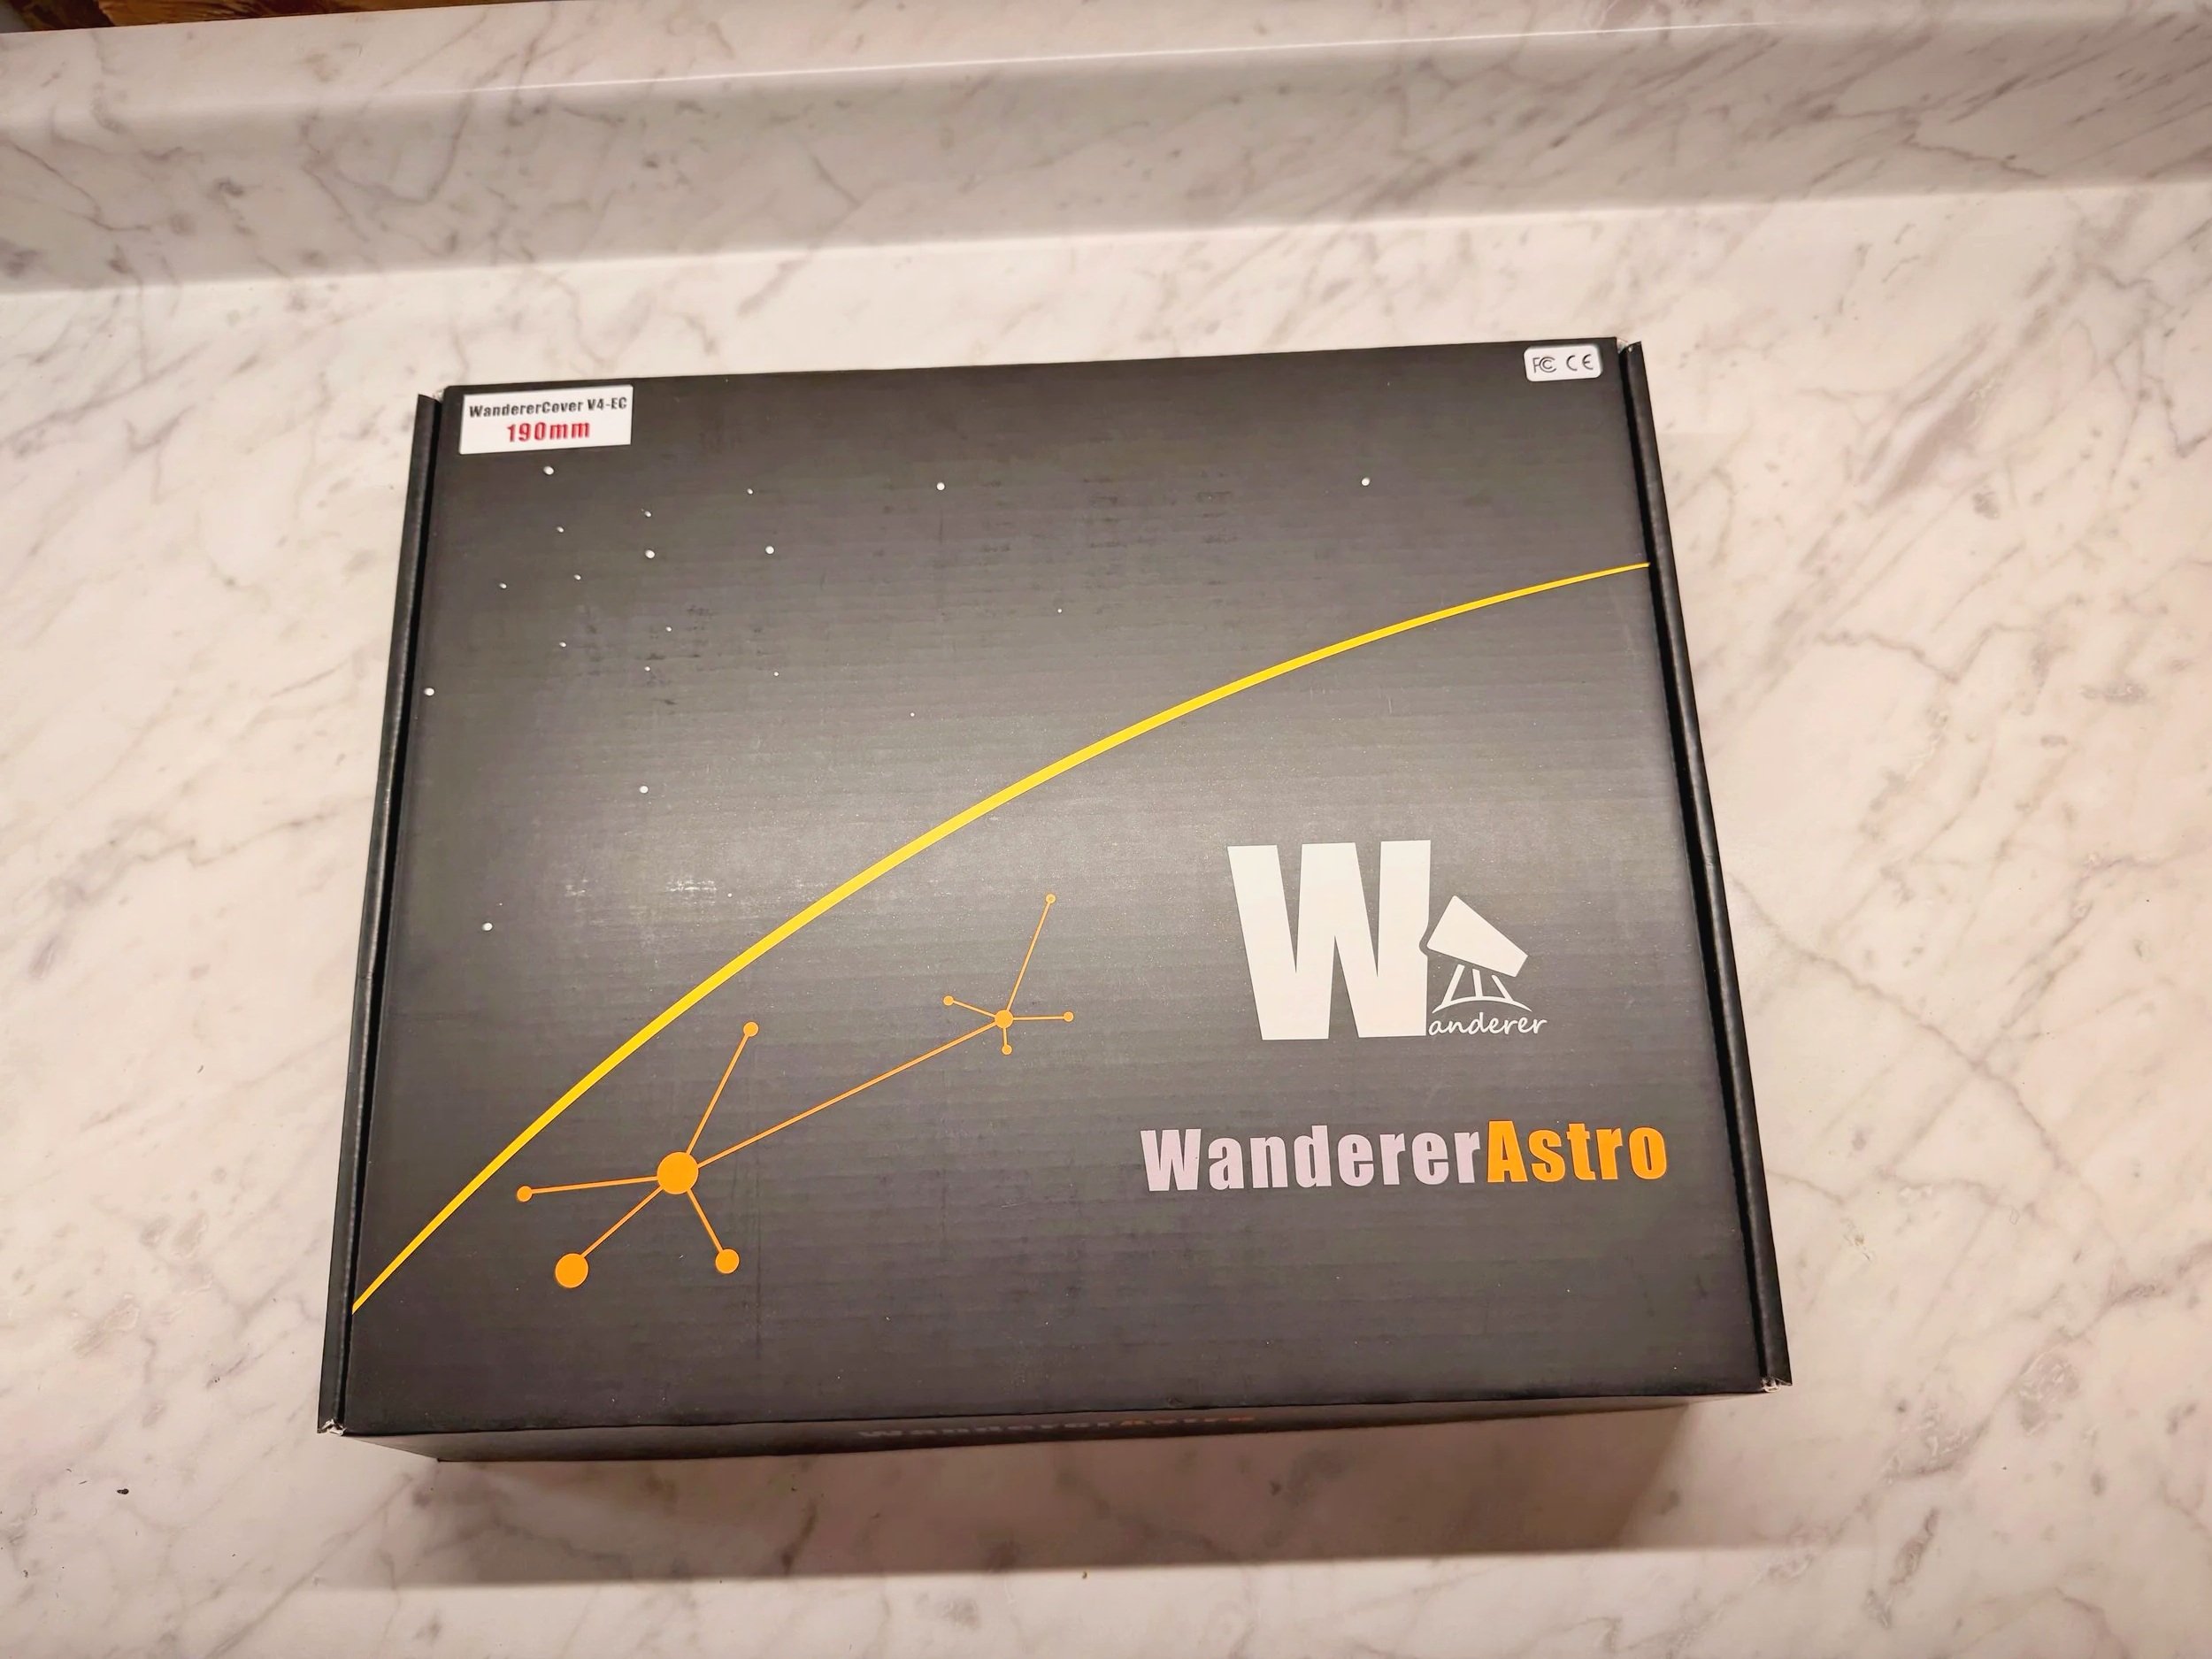
The box for the Wanderer Astro Wanderer Cover V4-EC 190mm.
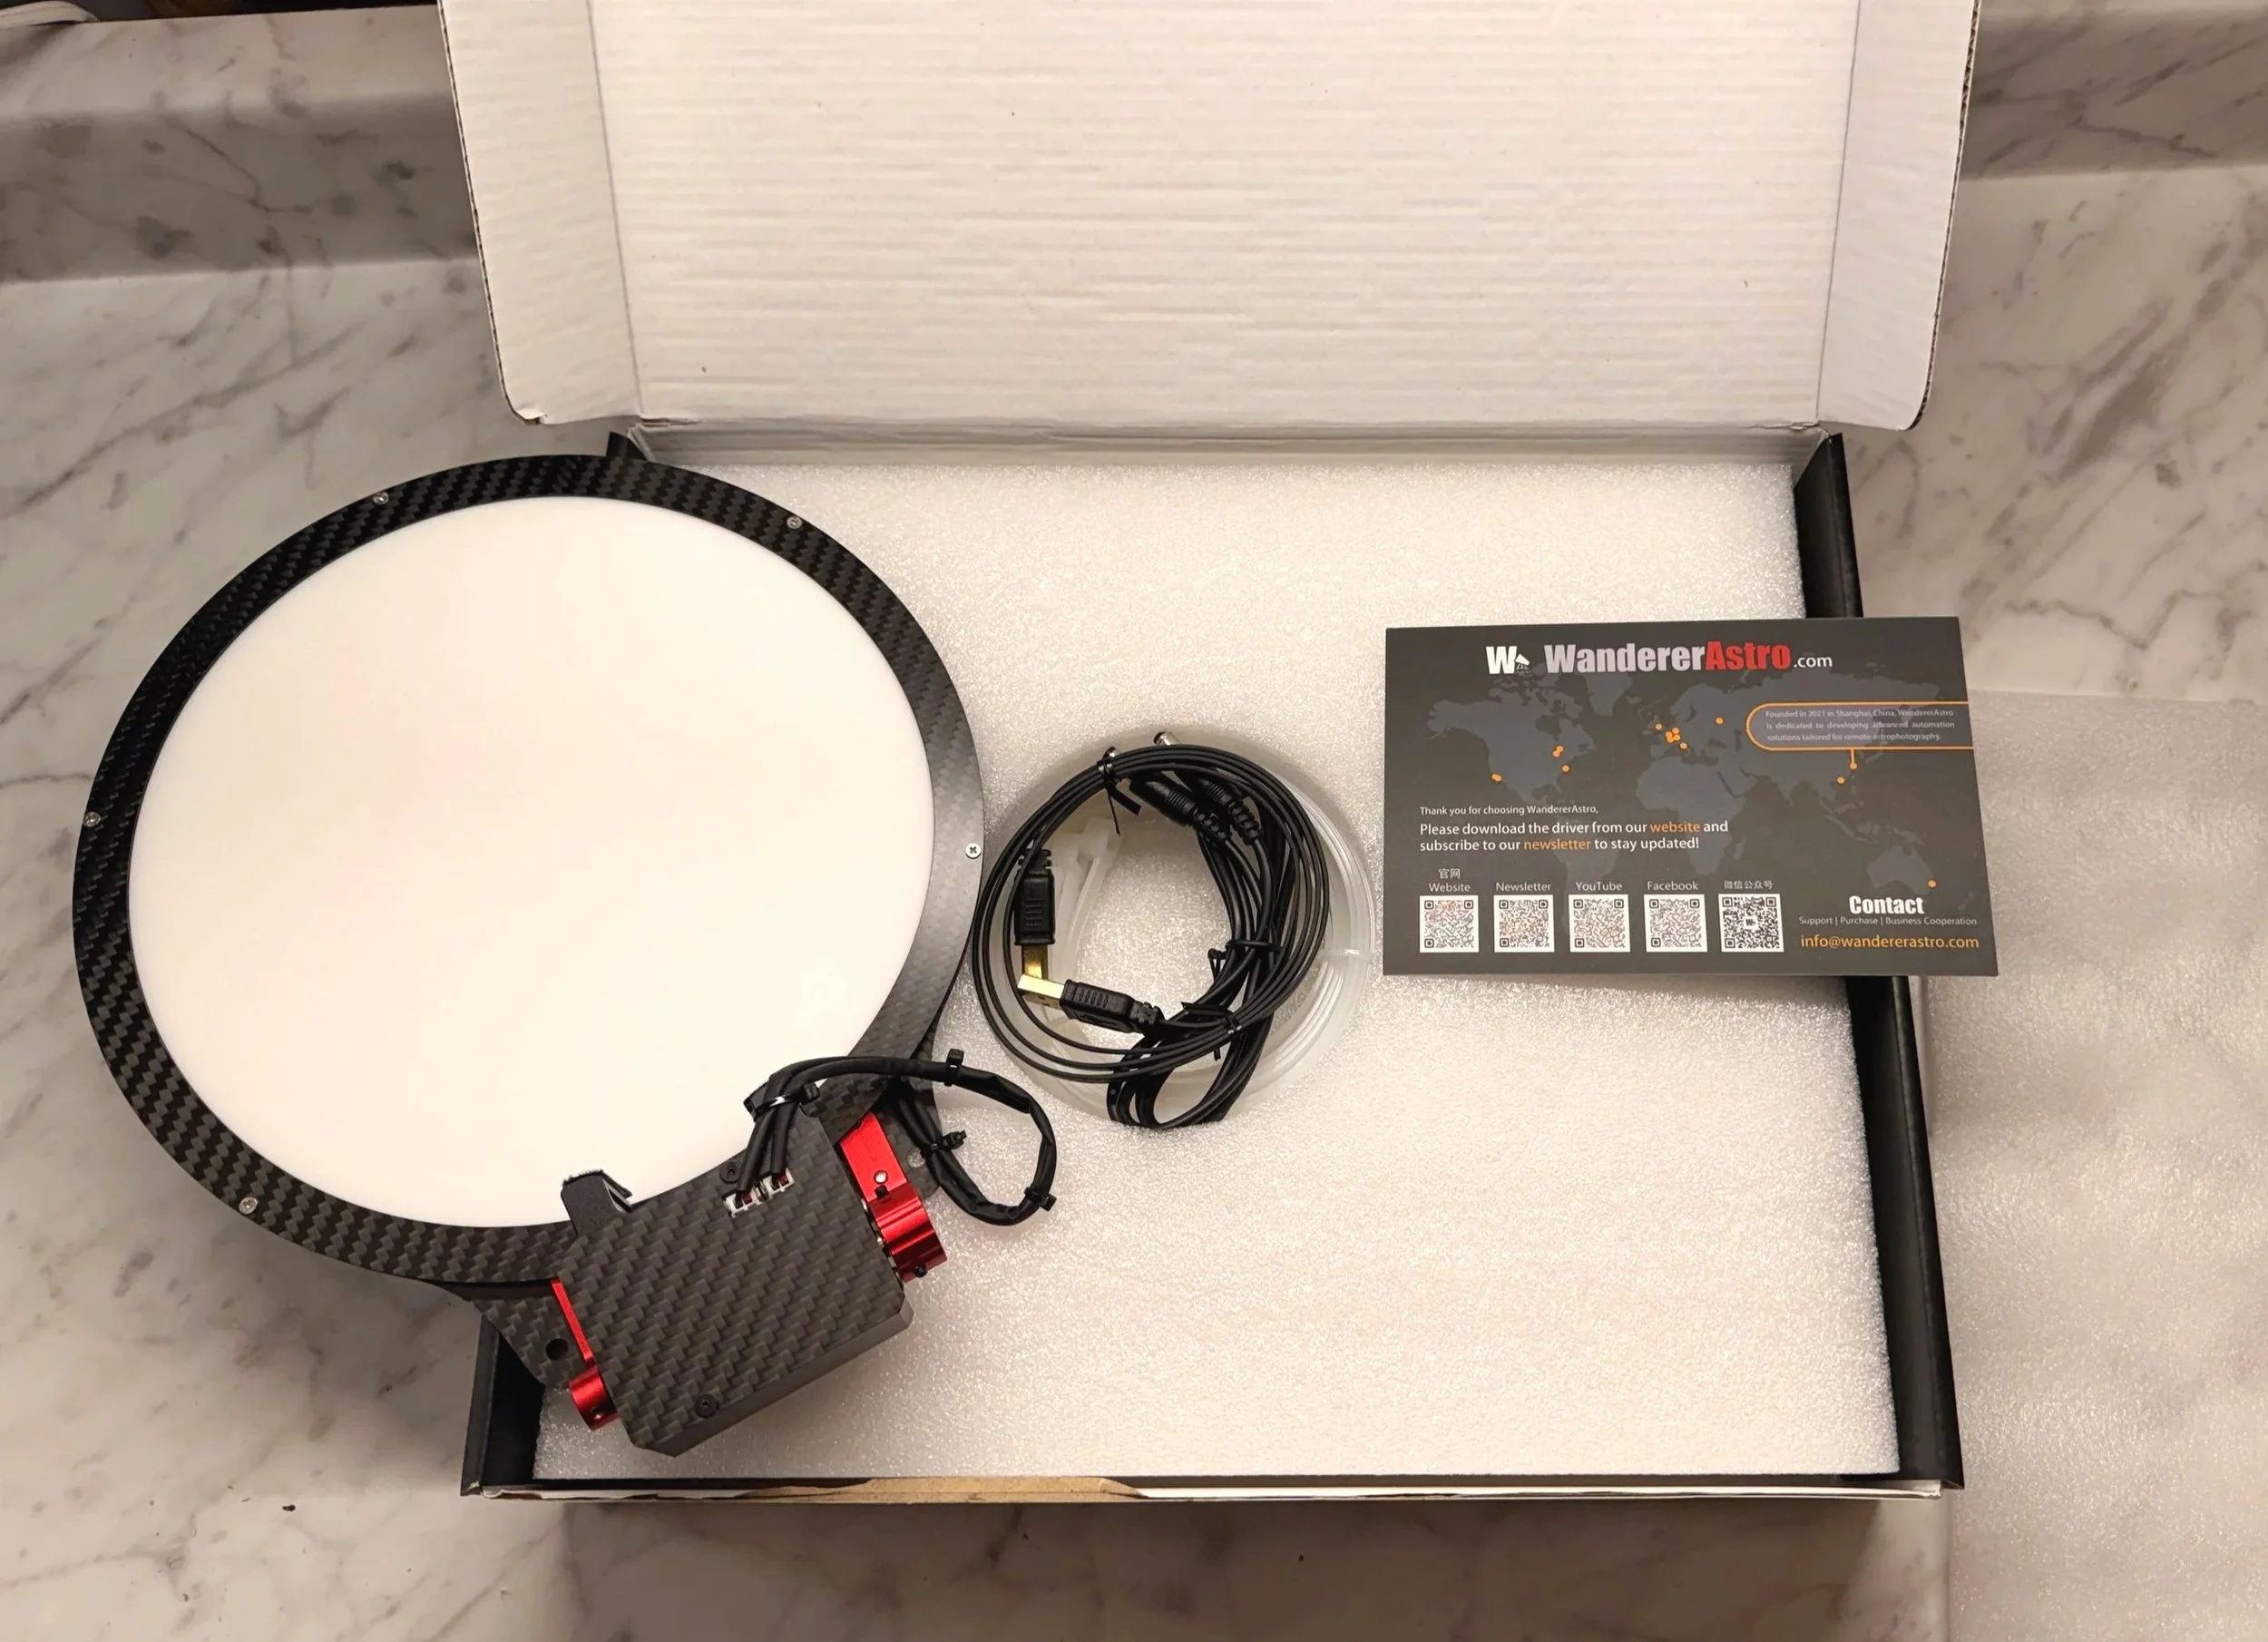
Box opening!
I chose to mount it on the side so that nothing made the scope “taller.” I use the white Cable-Wraps to mount it onto the scope, and then quickly plug in the 12v power supply wire and the USB cable. Fortunately, I had an extra USB port and an unused 12v plug on my Powerbox.
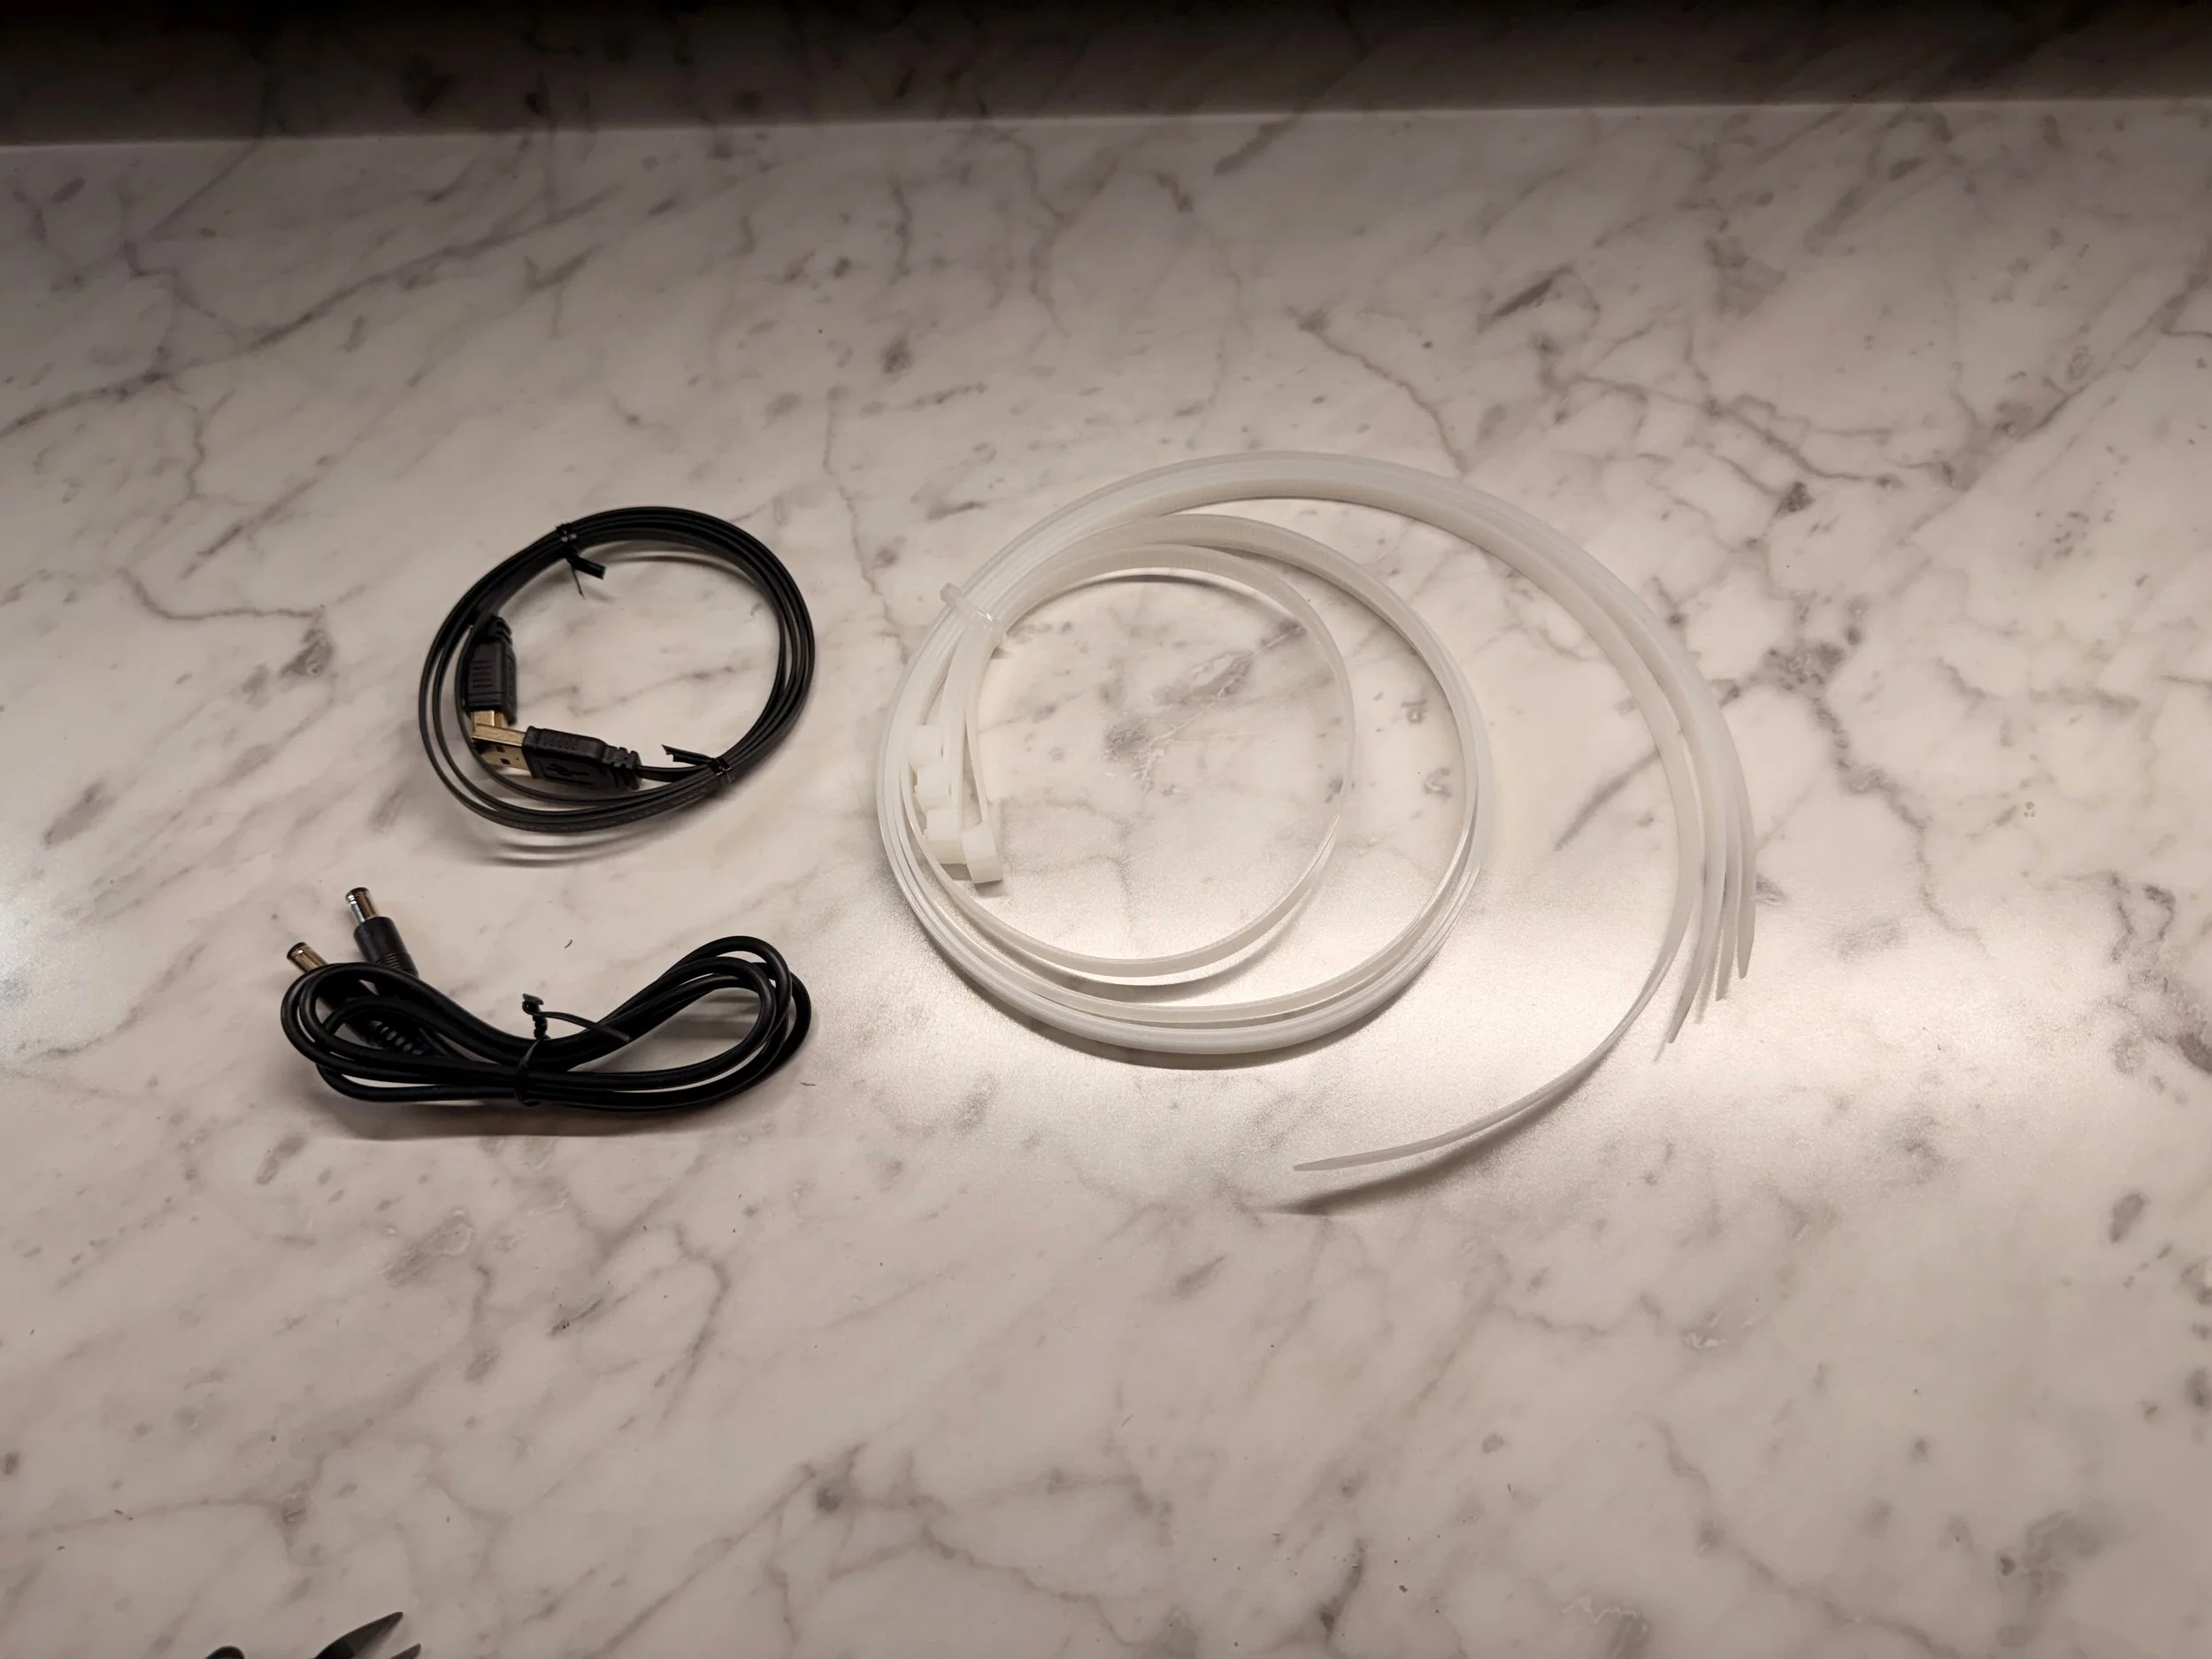
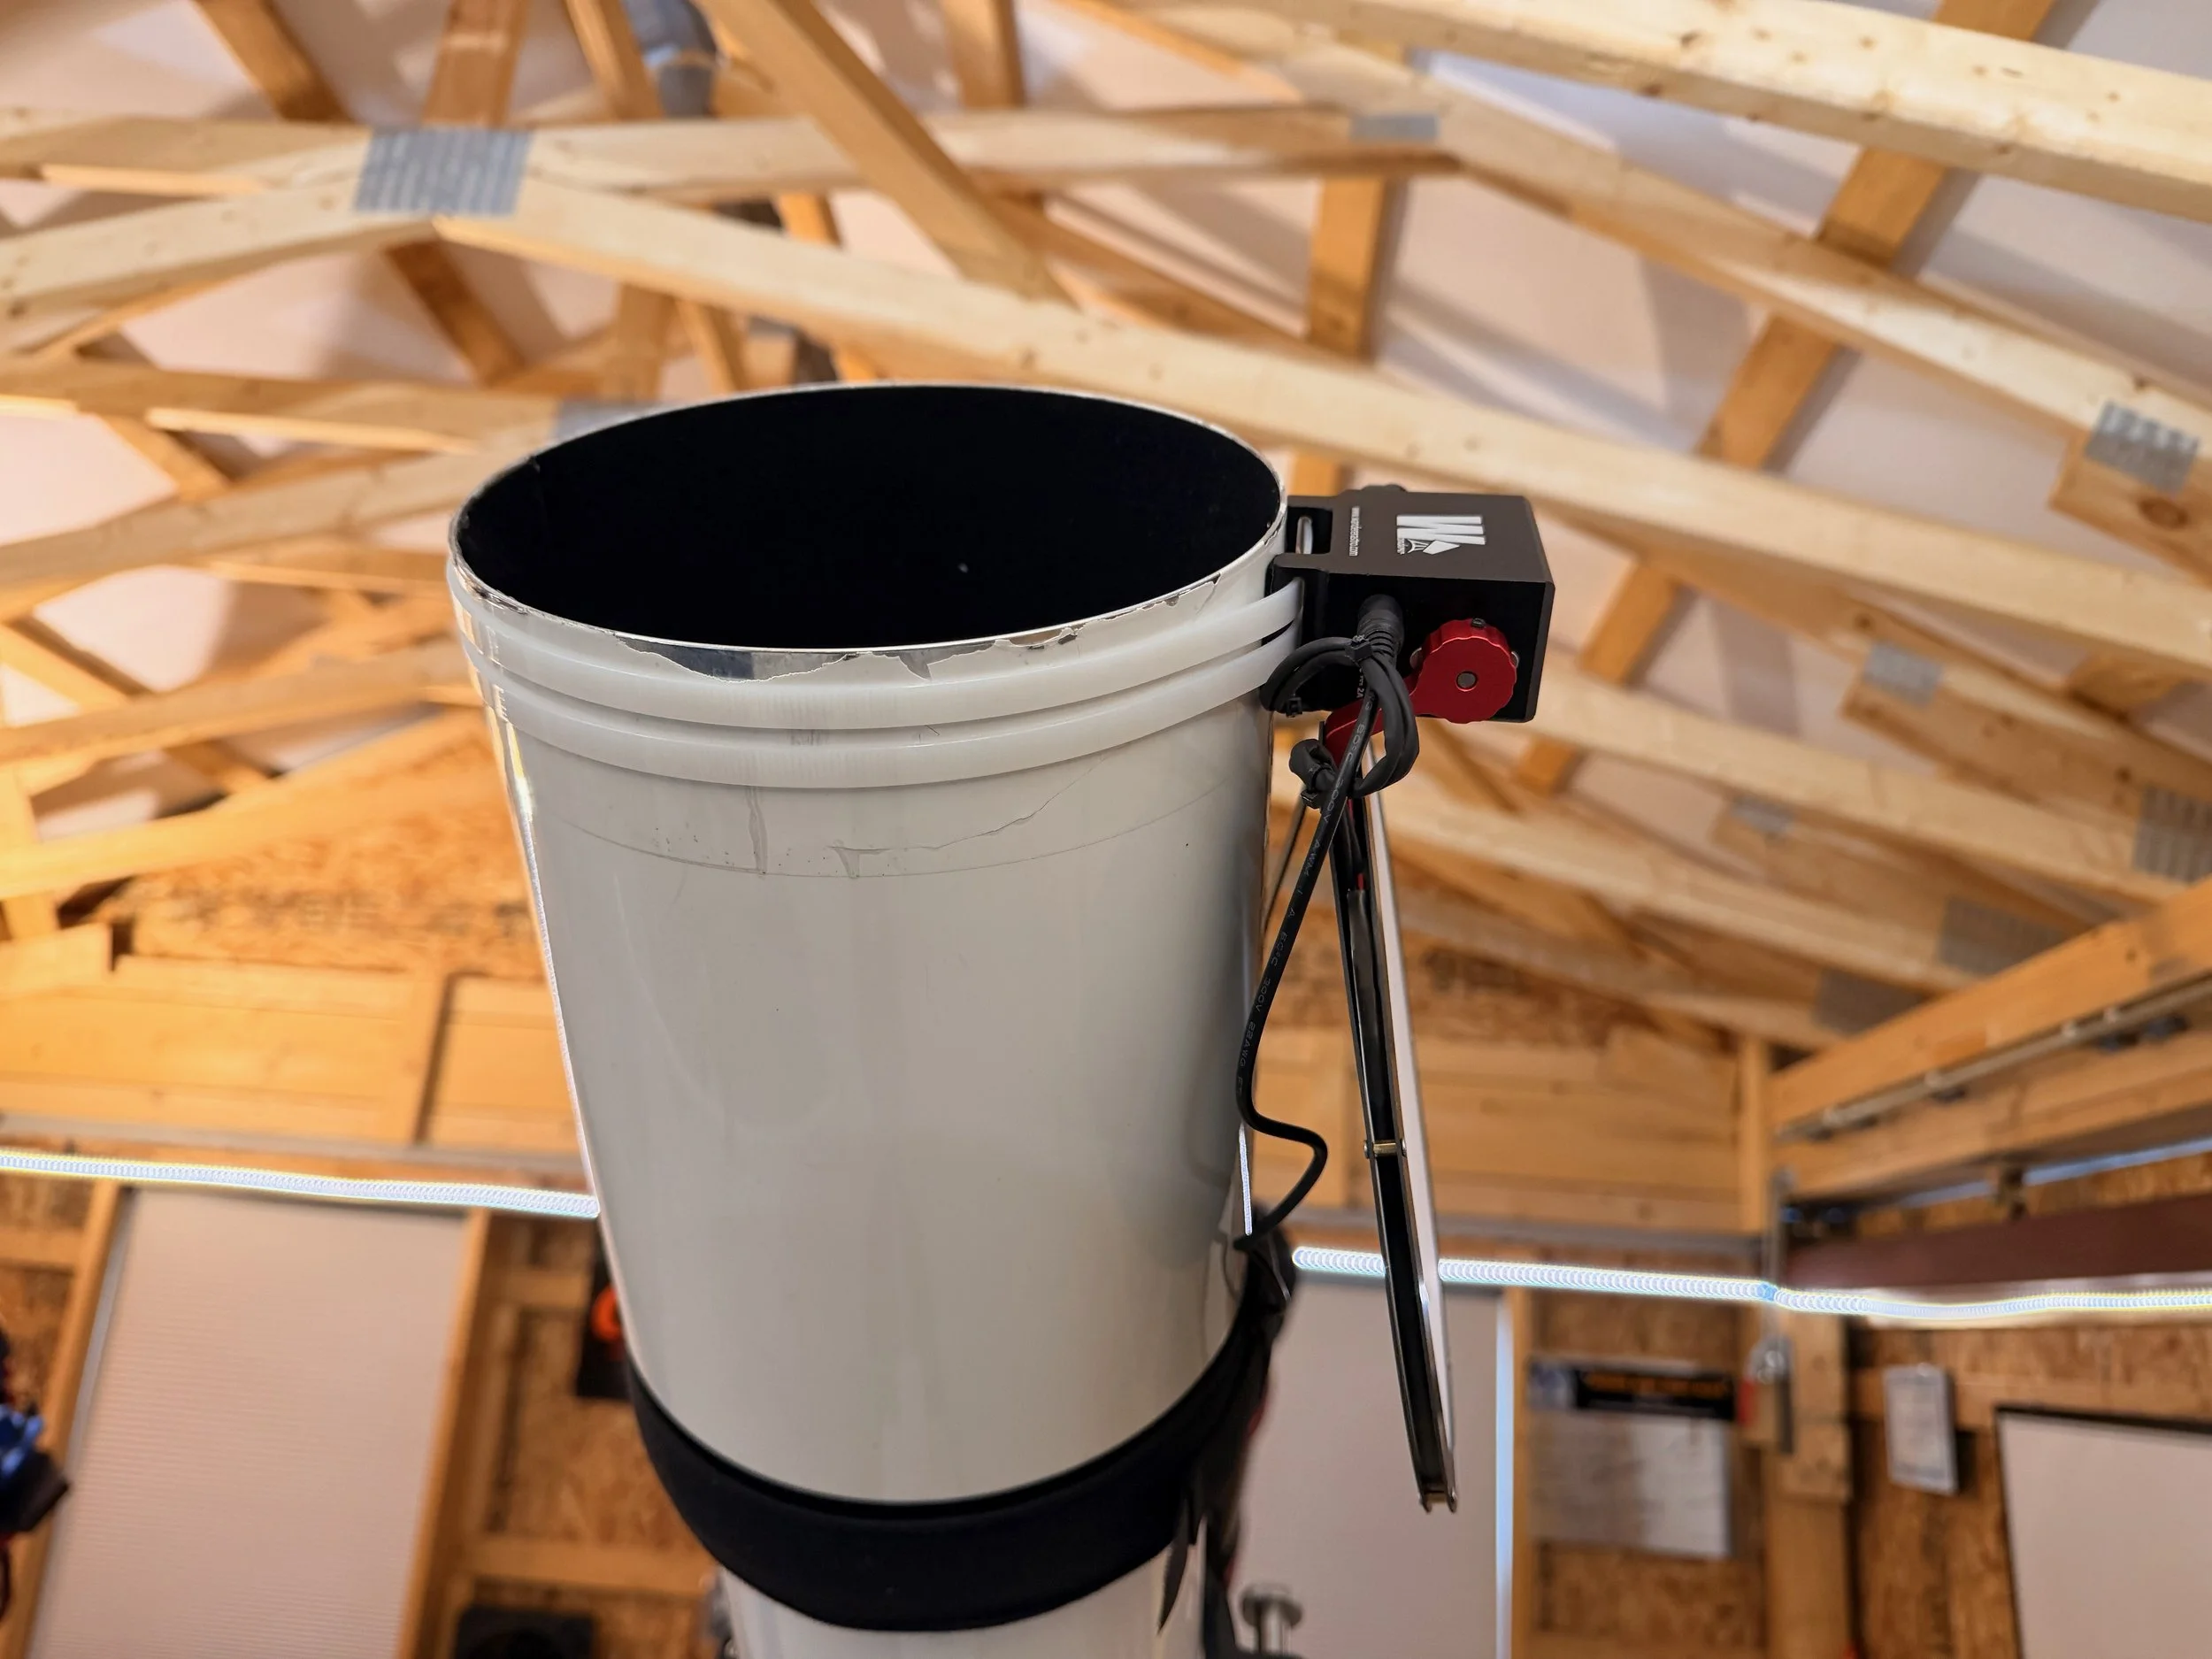
The large white cable-ties are used for mounting.. They give oyu four but you can only use two. The other cables are for 12v power and for USB.
Another view - here you can see the untrimmed cable-ties more clearly.
Mounted an in position. If you look carefully, you can see the ends of the cable-tis (one on each side) which have not yet been trimmed off. (click to enlarge)
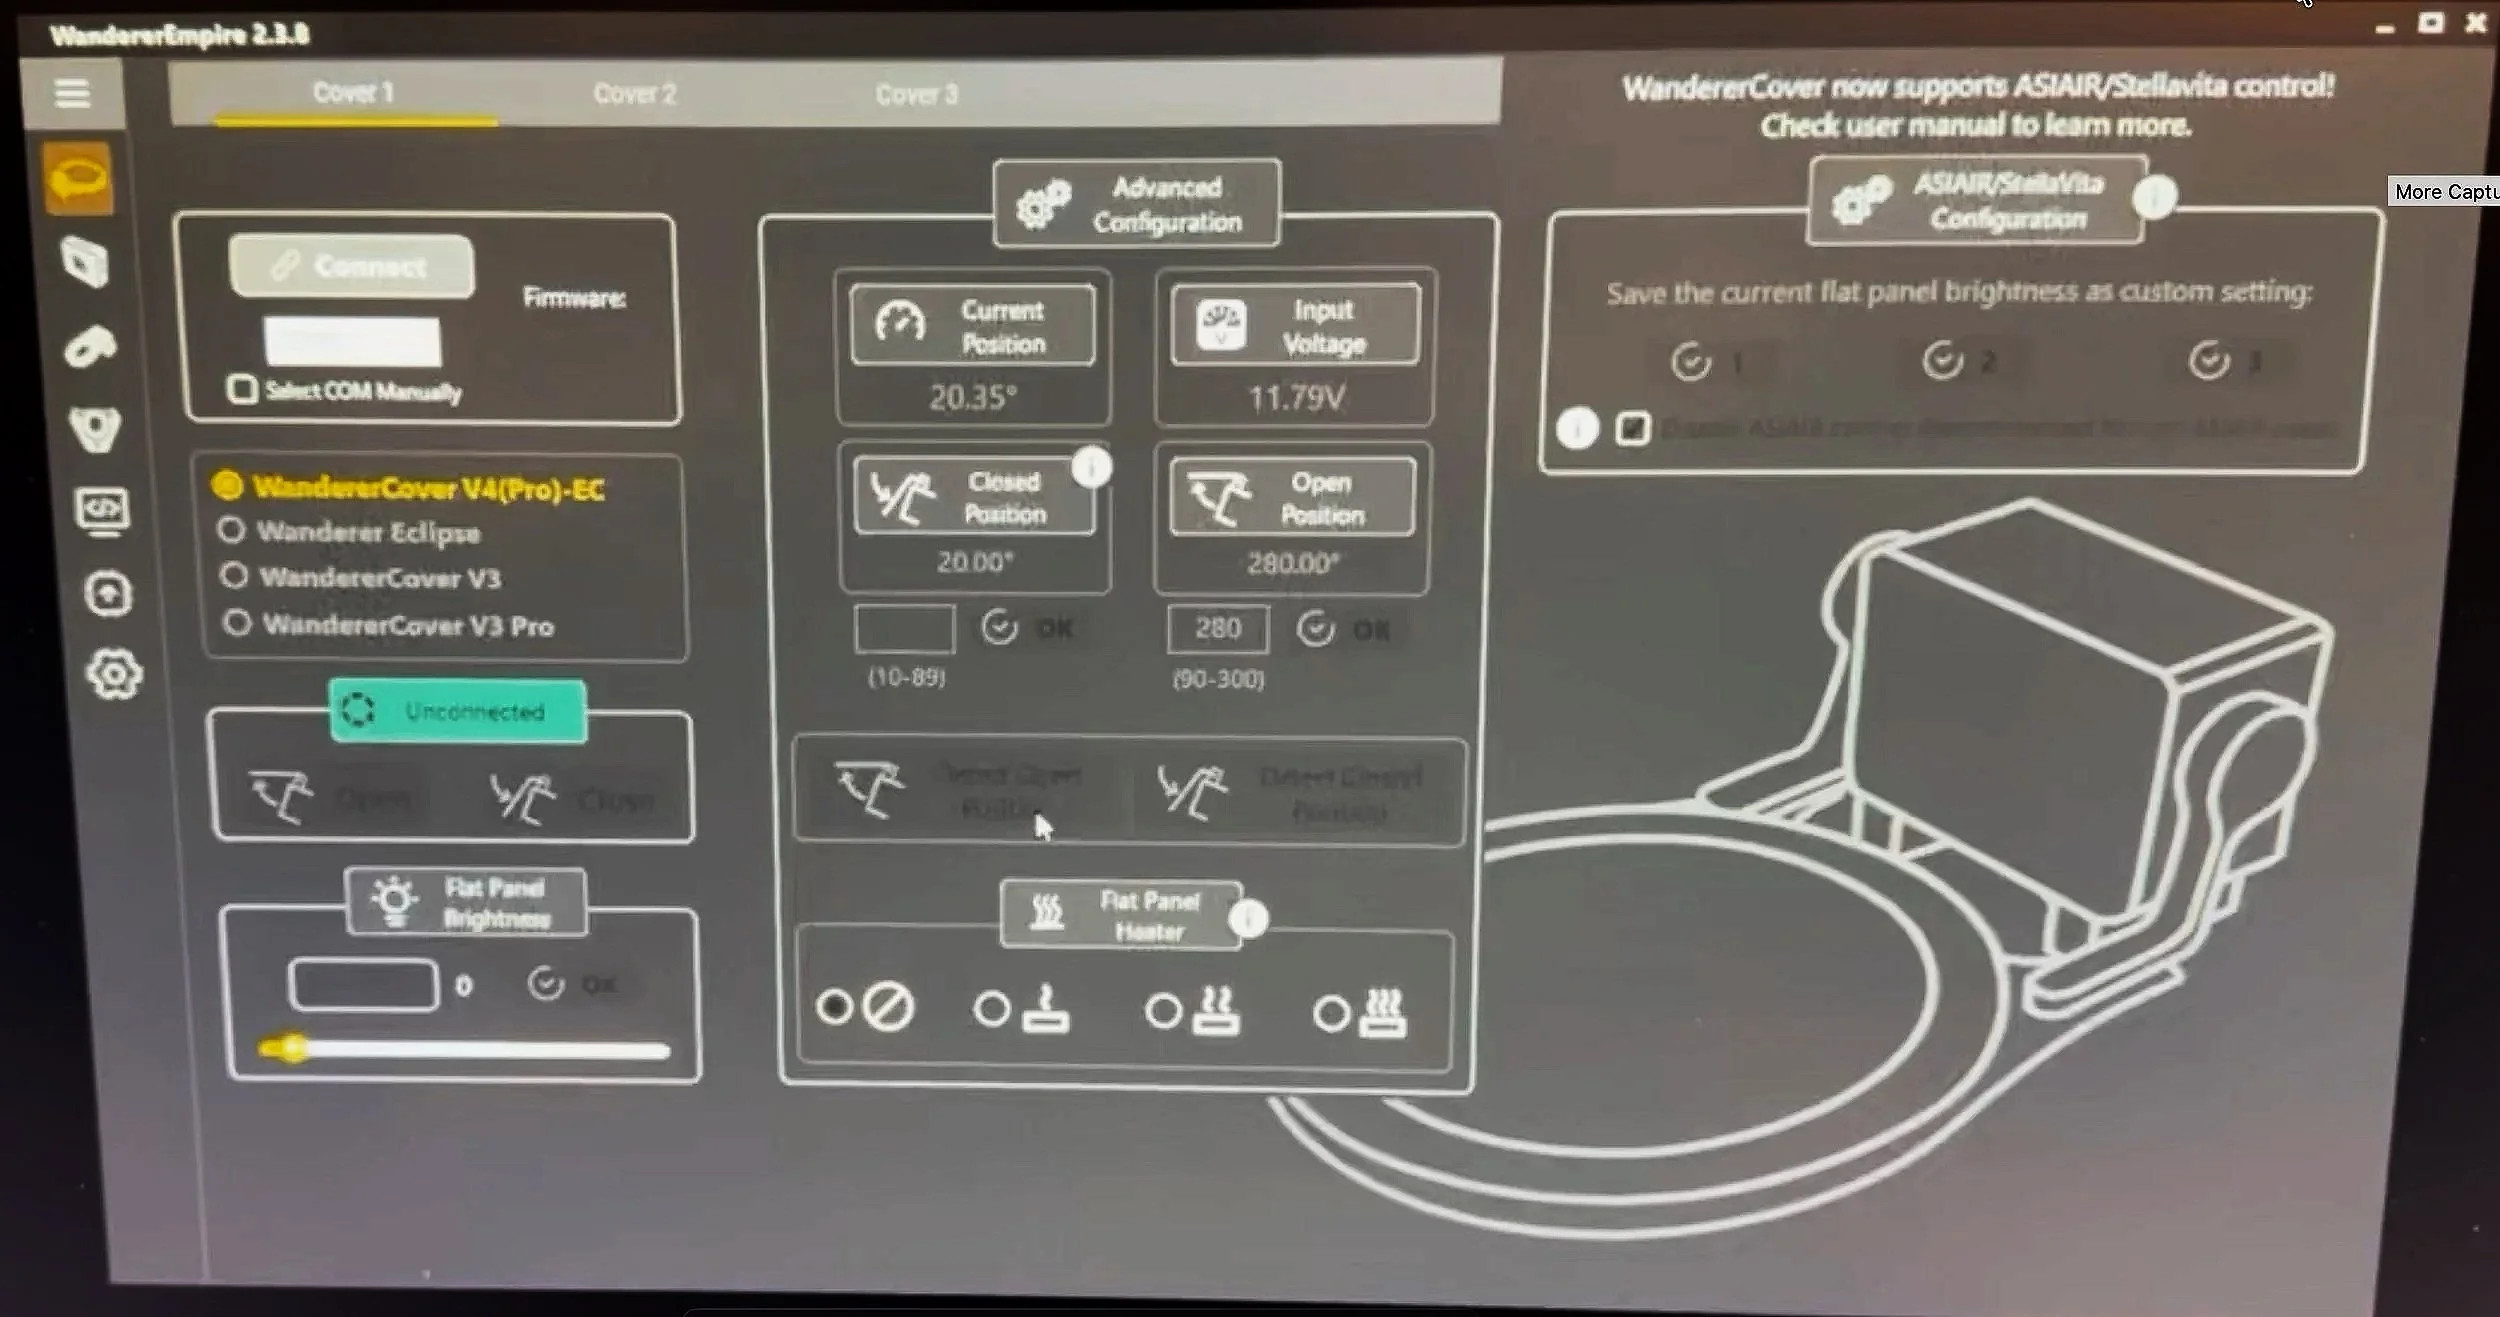
WandererEmpire Software. Nicely designed and easy to use.
This shows the fullly open position I chose.
Anotehr view of the open position.
After loading the WandererEmpire software, I connected to the cover and set the open and close angles.
After that, I did some more cable management, made sure that NINA could see the flat panel, and I was ready for business!
Early testing suggested that I did not need to add the Neutral Density Filter to the Wanderer Cover (I had bought one just in case) so that was not installed.
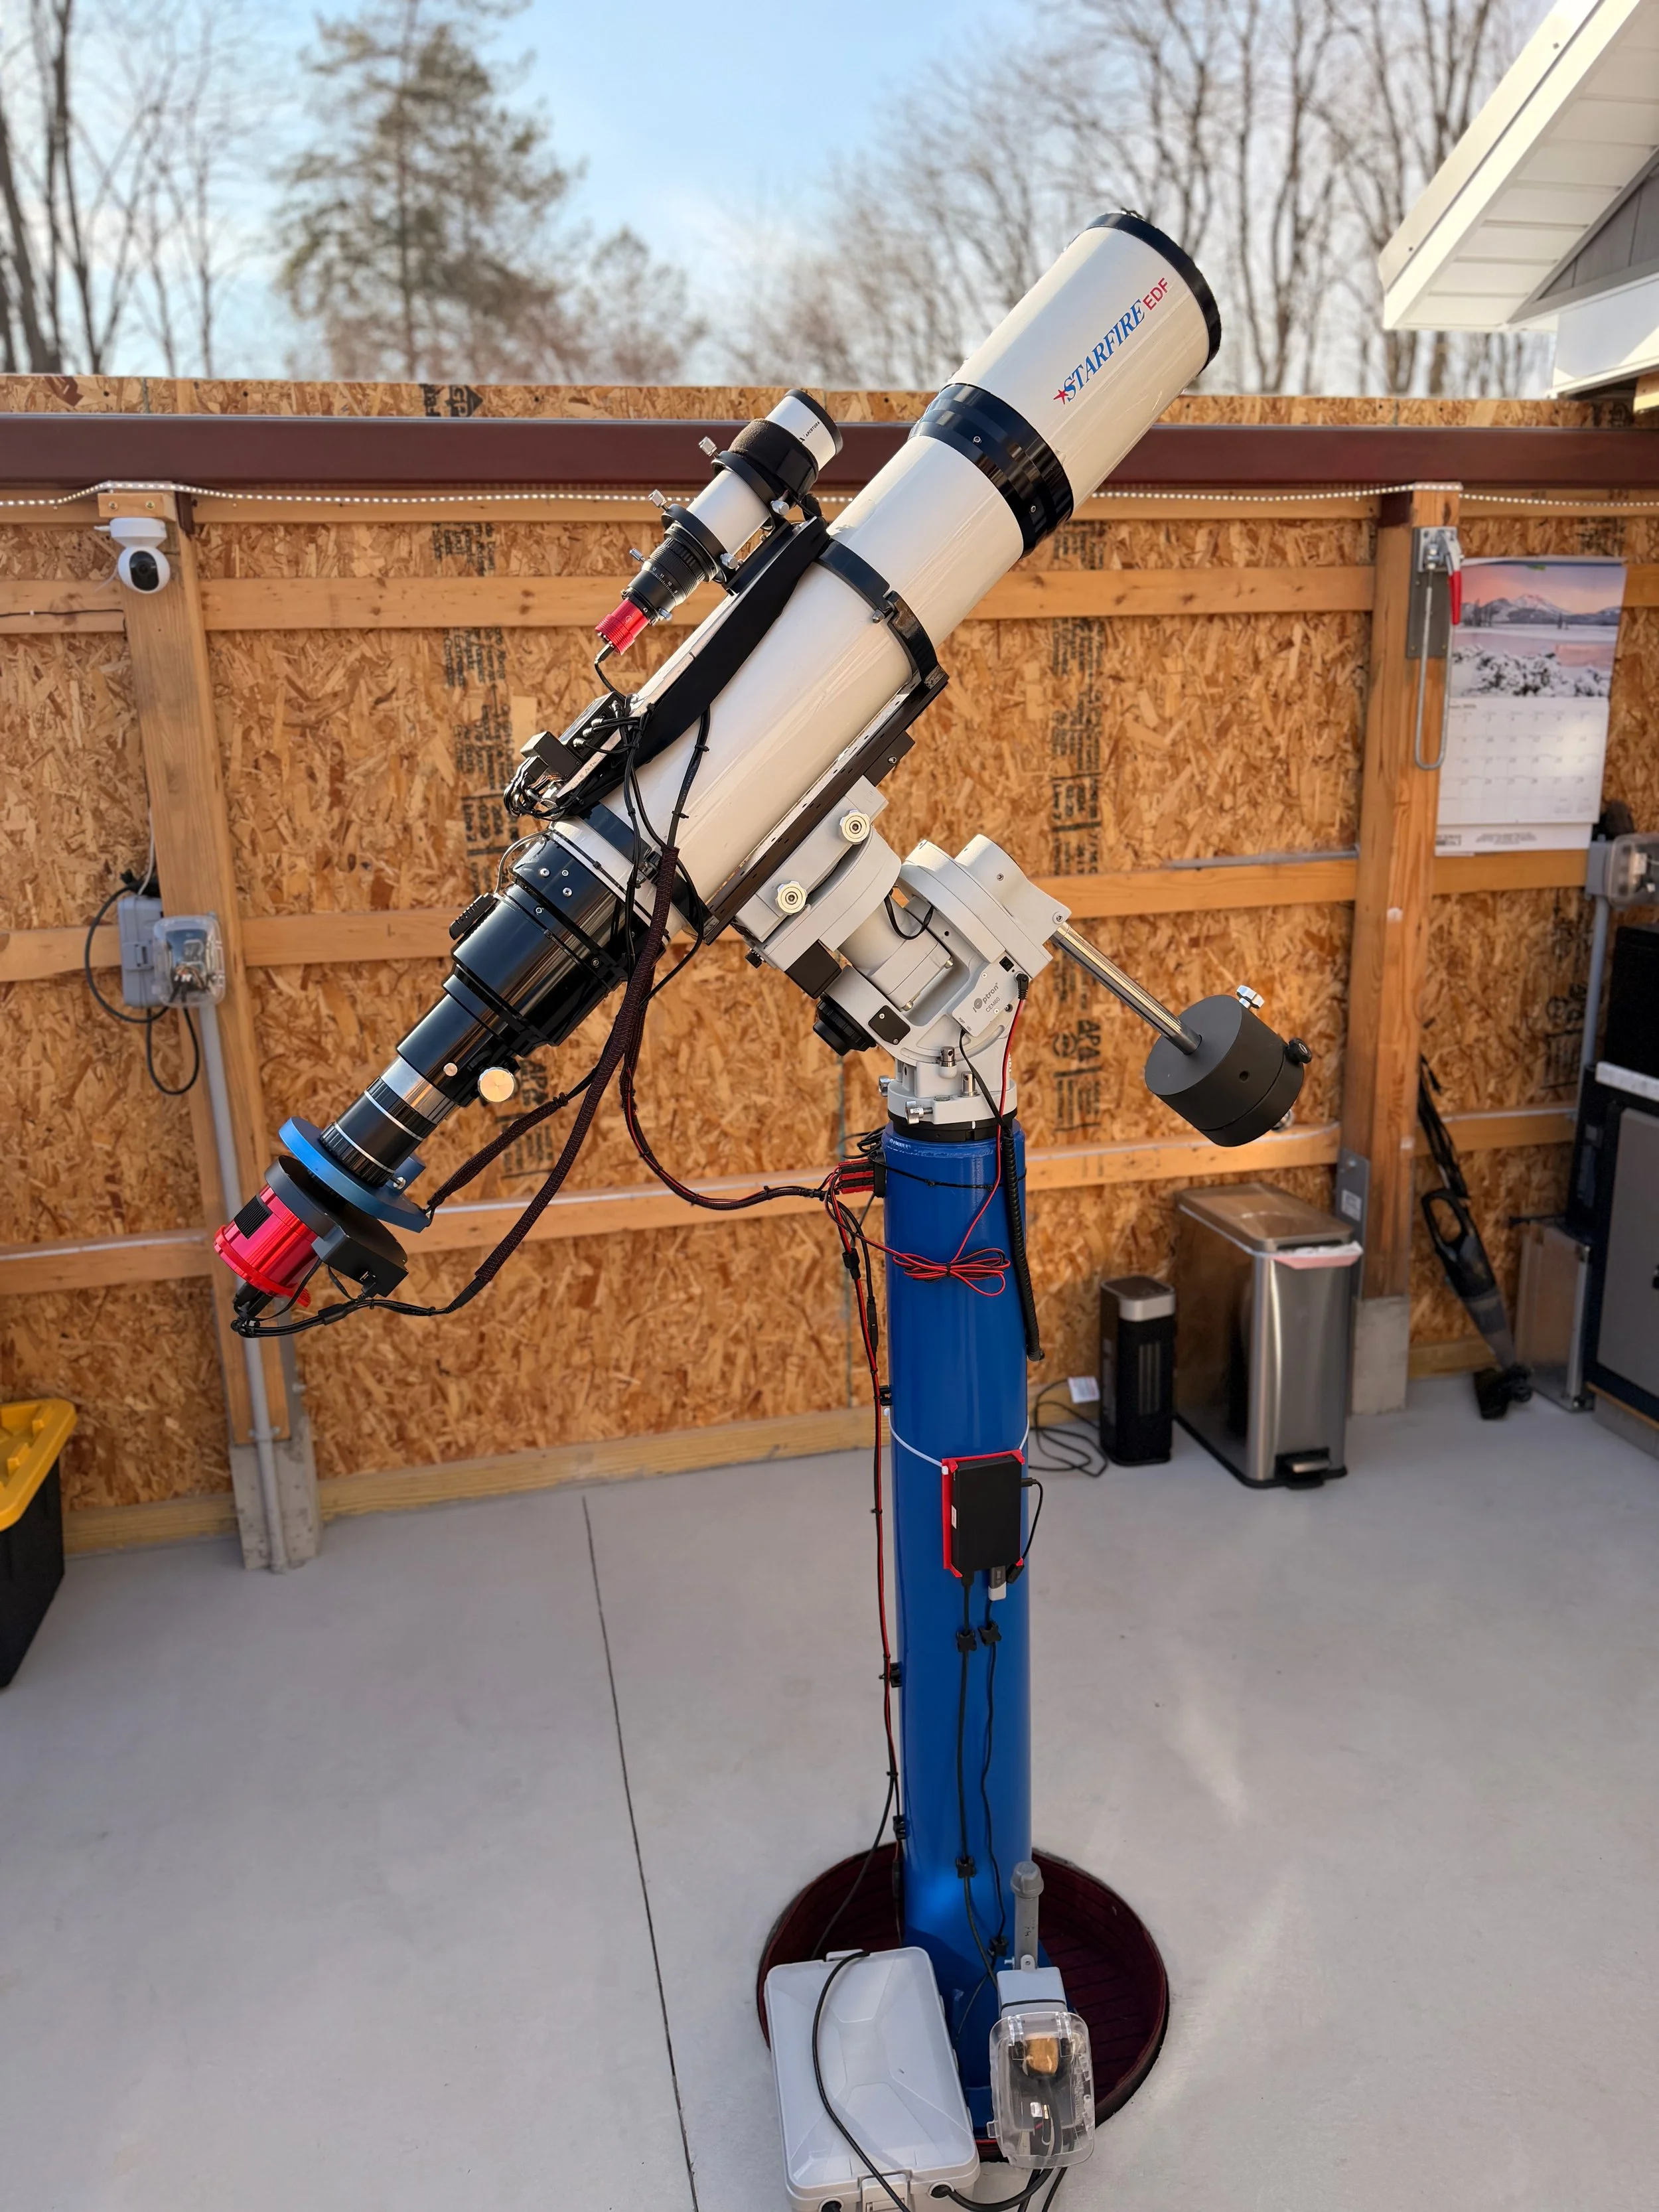
The final configuration with all updates done.
Remaining Work
While the physical configuration is complete, I still have a lot of work to do to get this ready for use. These tasks include:
Establishing the first star focus for the main scope
Making sure autofocus works correctly for all filters.
Run the filter focus series for NINA so I can tie focus position to the Lum filter.
Verifying that platesolve is working
Achieve a star focus with the guide scope
Set up PHD2 for the new guide scope - including getting dark frames
Do an initial training of PHD2
Verify my PA
Add Wanderer Cover routines to my NINA automation sequences.
Conclusion
Replacing the AP130 was not an easy decision, especially given how much history I had with that telescope. But as this project has come together, I have become more and more convinced that it was the right choice. The AP155 gives me more capability, more flexibility, and a better fit within my overall lineup. Getting to this point took more effort than I expected, but that is now mostly behind me. What remains is the part I have been working toward all along: putting the platform under the night sky and letting it do what it was built to do.
Current Configuration
So here is the AP155 platform as it currently stands:
Scope: Astro-Physics 155mm Starfire EDFS f/5.3 built in about 1995 - New
Guide Scope: Apertura 60mm GS Guide scope (f=240mm) - New
Main Focus: Pegasus Astro Focus Cube 2
Mount: Custom Steel Pier
Tripod: IOptron Tri-Pier with column extension- new
Main Camera: ZWO ASI2600MM-Pro
Filter Wheel: ZWO EFW 7x36
Filters: ZWO 36mm unmounted Gen II LRGB filters
Astronomiks 36mm unmounted 6nm Ha, OIII, & SII filters
Rotator: Pegasus Astro Falcon Camera Rotator
Cover: Wanderer Cover V4-EC 190mm by Wanderer Astro - New
Guide Camera: ZWO ASI290MM-Mini
Power Dist: Pegasus Astro Pocket Powerbox
USB Dist: Startech 7-slot USB 3.0 Hub
Computer: Mele Quieter 4C Micro computer running Win 11