
SH2-101 - The Tulip Nebula - 12.8 Hours in SHO
Date: Aug 8, 2021
Cosgrove’s Cosmos Catalog ➤#0080

SH2-101 - The Tulip Nebula (click image for full resolution via Astrobin.com)

Awarded Flickr “Explore” Status Aug 9, 2021!
Table of Contents Show (Click on lines to navigate)
Special Note:
This image data was the subject of a reprocessing project in Jul 2023, which took the original data and processed it again using advanced tools and techniques that I did not have when this image was originally done. That Project can be seen HERE.

The reprocessed and improved image. (click to go to this newer posting)
About the Target

Artist rendition of Cygnus X-1 (PBS/Nova Teaching Material Collection)
Sharpless 101 (specifically Sh2-101) is also known as the Tulip Nebula and is located approximately 6000 light-years away in the constellation of Cygnus (The Swan). Stewart Sharpless first cataloged this rich H II emission region in 1959 in his second catalog of nebulae. Early photographic images of this area resembled a flower, giving rise to its common name.
Most of the targets I have imaged so far have come from the much more familiar Messier Catalog or the NGC catalog - I believe this is the first target from the Sharpless catalog. Wikipedia provides some background on this:
"In 1953 Stewart Sharpless joined the staff of the United States Naval Observatory Flagstaff Station, where he surveyed and cataloged H II regions of the Milky Way using the images from the Palomar Sky Survey. From this work, Sharpless published his catalog of H II regions in two editions: the first in 1953, with 142 nebulae, and the second and final edition in 1959, with 312 nebulae."
Also in this region is the first black hole ever discovered, Cygnus X-1. First detected in 1964 from an x-ray instrument sent aloft on a sounding rocket, Cygnus X-1 was the brightest x-ray source seen from Earth. In 1971 radio signals were detected, which were used to locate the x-ray source from a star known as HDE 226868. This star is a supergiant but, alone, cannot produce the energetic x-rays seen. It was concluded that HDE 226868 must have a dark companion with the ability to heat gases in the system to the millions of degrees of temperature necessary to produce x-rays. Measures of doppler shift in the spectrum of HDE 226868 allowed the orbits of the star and its companion to be determined, and based on the mass required for these observed orbits - and the fact there was no light signature from its companion - it was proposed that Cygnus X-1 was indeed a back hole - potentially the first-ever detected!
In 1974, Kip Throne famously bet Stephen Hawking that Cygnus X-1 was a black hole. In 1990 Hawkings conceded that X-1 was a black hole, and Throne won the bet.
Wikipedia: Thorne-Hawkings Bet (note: the X-1 bet is described at the end of this link)
It is now believed that Cygnus X-1 is pulling gas from its companion toward its event horizon. This superheated spinning disk of gas is the engine that produces the x-rays seen from Earth.
I have marked the location of the binary pair on the annotated version of this image.
The Annotated Image

Annotated version of Sh2-101 created with Pixinsight ImageSolve and AnnotateImage scripts. Note the reference note on the right - in orange - indicating the location of Cygnus x-1.
The Location in the Sky
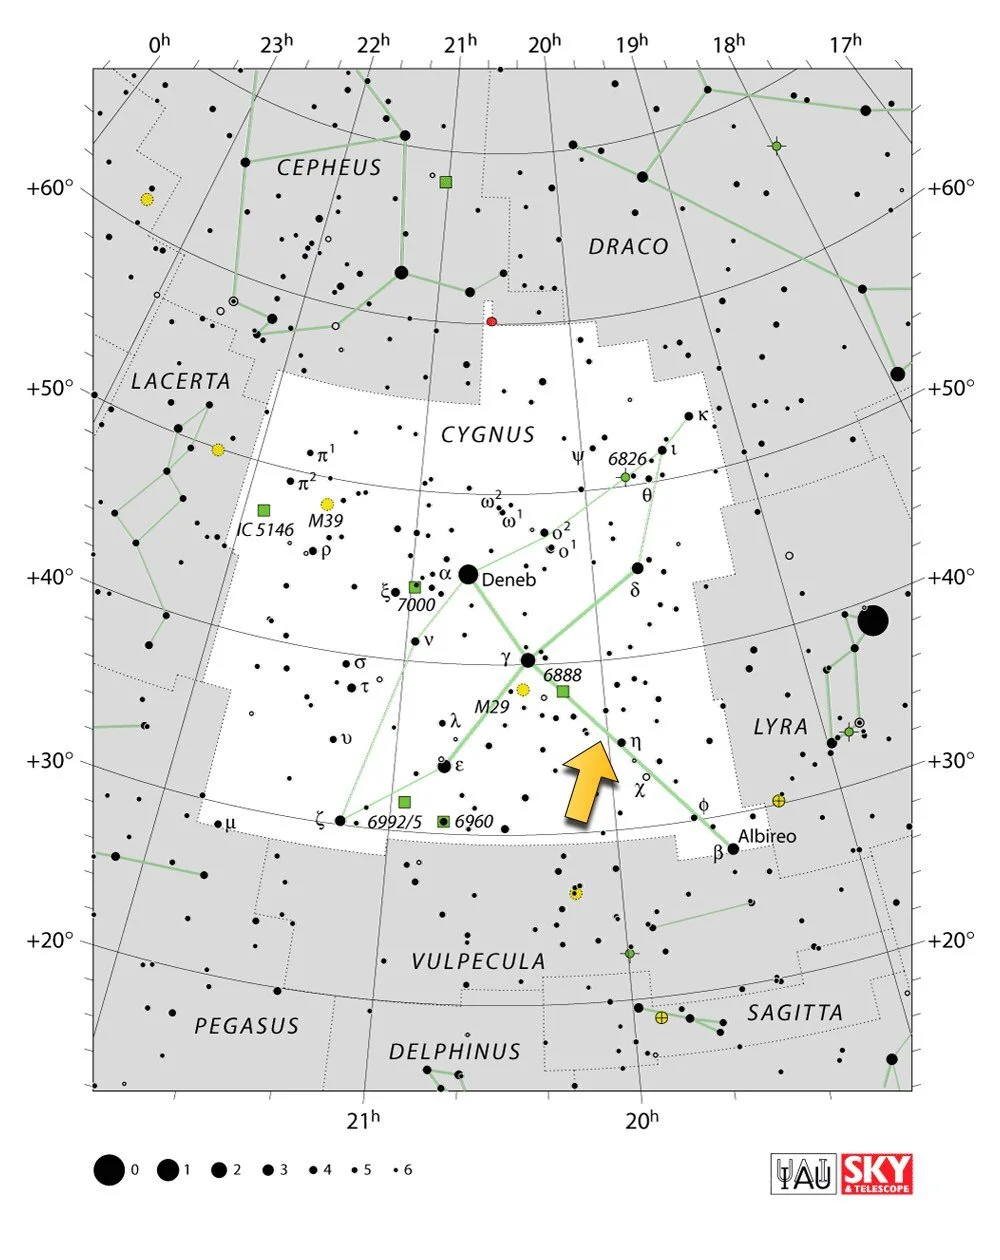
IAU/Sky & Telescope Constellation Map for Cygnus - The TUlip Nebula is indicated with the yellow arrow.
About the Project
In general, July was a miserable month for astrophotography, but as it ended and August began, we were suddenly gifted with 3-4 days of clear skies, no moon, and no smoke (or at least not much smoke!) In addition, since we are now later in the year, and the period of time each is useful, darkness has grown from 4 to 6 hours.
For three nights, I had all three telescope platforms capturing photons for three different imaging projects.
So after three nights of clear skies, I captured over 12 hours of data for my target. What a novelty! For most of this summer, you have heard whining and complaining:
The clouds ate my homework
Thin clouds kept messing up my subframes
The smoke is cutting my contrast
Well, no excuses this time!
Target Selection
To kick this all off, I needed to choose what targets I wanted to go after, and then I needed to build a framing and capture plan around these targets.
First, I decided what target I wanted to go after using my AP130 scope and the new ASI2600MM-Pro camera.
I used Stellarium with my custom horizon plot to see what constellations were past my tree lines as it got dark. I found that Cynus would be very prominent overhead. And was also high enough in the sky that I had the maximum exposure window possible between my tree lines - perhaps 4+ hours a night.
Cycnus is a very rich region of the sky and has many attractive Astro Targets - many of which I have already imaged. However, I was looking for something a bit different.
The Website Astrobin.com has a cool feature that helps with planning activities. For example, you can pick a constellation and search for all images users have taken from that part of the sky. So I scanned through those until I saw one that caught my eye - The Tulip Nebula! I always thought this was a cool target, so I pretty much immediately decided this one would be suitable for my Astro-Physics 130mm Platform.
Another aspect of the Tulip Nebula that attracted me was that the first Back Hole ever detected, Cygnus X-1, was in the same field of view.
Yes - I know - all that shows is a small white dot.
But I think it is very cool that we could theorize the existence of black holes before we ever found one. Then we’re able to collect wisps of data from sounding rockets, orbital craft, and radio telescope arrays that fundamentally prove that this unassuming white dot has a black hole companion that is sucking gases from its companion star to produce intense x-rays? That kind of thing fires my imagination, and I am happy I chose this target!
Someone pointed out that the white dot was not the only evidence of Cygnus X-1. An expanding shock or bow wave is coming out from that system, and if you look at the bottom right quadrant of the image, you will see a bright blueish star, and next to it, you can see a faint blue arc that is the bow-wave moving through space. Now that is pretty cool!
Planning
Before I start capturing photons, I spend the afternoon before a project setting up Sequence Generator Pro for the upcoming capture series.
I like to compose and frame my shots. To do this, I go into Sequence Generator Pro and call up the Framing & Mosaic Wizard. This tool lets you plan complex captures of adjacent overlapping frames that can be stitched together to make a single large image. But if you are capturing a single image - it turns into a nice planning and layout tool.

Sequence Generator Pro Framing and Mosaic Wizard
On the panel to the left, I can enter the designation for a target. Here, I have entered SH2-101. The tool then brings up a box that corresponds to the capture area of your sensor when used on a specific scope. You can now drag this box around in X & Y and rotate the capture field to achieve the framing and composition that you want.

Sequence Generator Pro Framing & Mosaic Wizard with framing box for my camera and scope shown
Once you have achieved the framing that you like, you can press the “Create Sequence” button at the bottom of the panel, and it will create an entry in your capture sequence plan that you can then flesh out further.
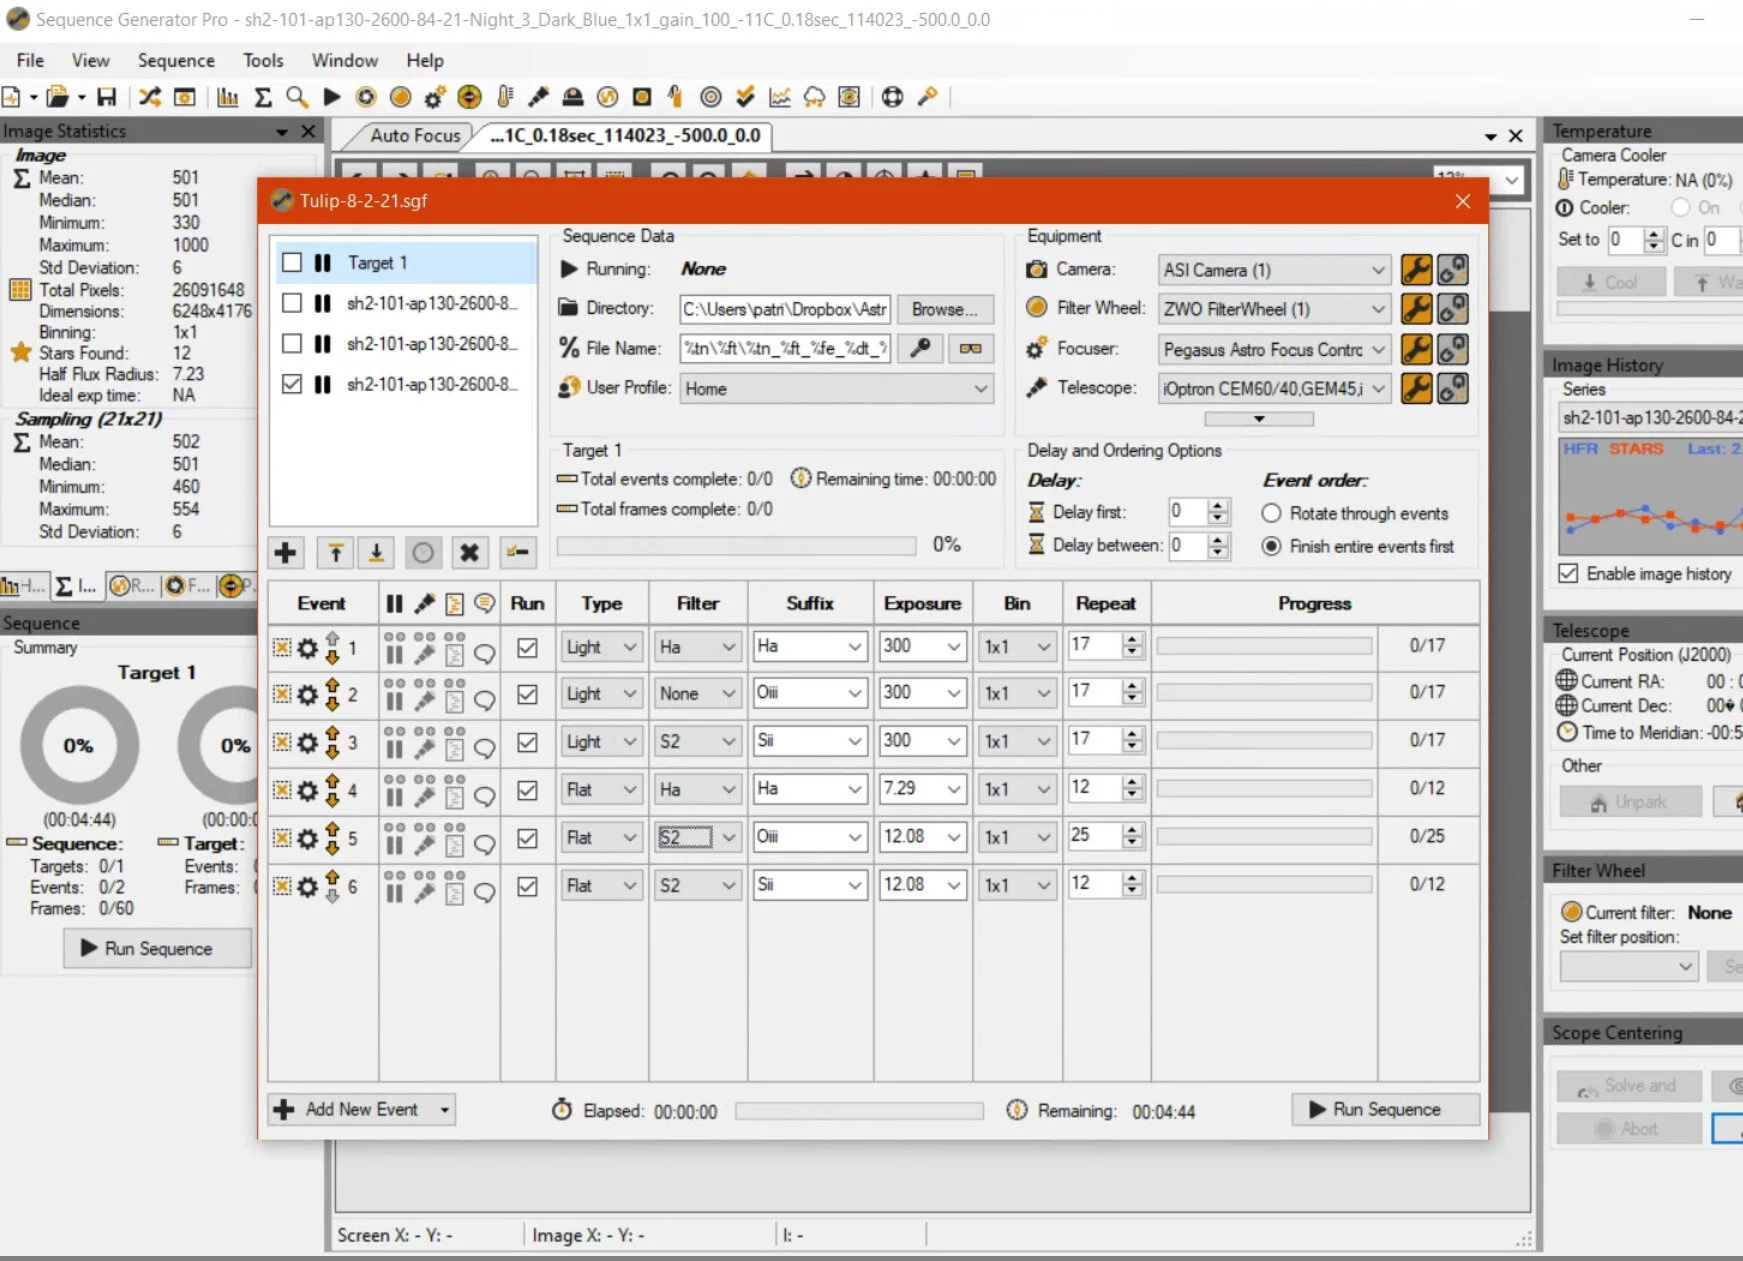
Sequence Generator Pro - Sequence panel for this target all filled out for one evening
To fill this out, I create a series of steps for my evening programs. First, note the name of the sequence. My convention is to use the designation of the target, the telescope platform used, the camera used, and finally, the date of exposure.
The first three lines define the exposures I plan to make. These are referred to as “Light” frames. Next, I define the filters to use, the exposure times for the subs, and the number of subs to take.
The last three lines are used to define Flat calibration exposures. I take these cal frames each evening - and these are used to calibrate the “light” images taken for the same evening. Flats capture the contribution of the optical path to the image data. This would include the light fall-off from the center-to-the-edge of the lens and dust that might be found on the filters or camera sensor in the optical path. These need to be done every night because as I move the telescope around, I may dislodge dust and move it to a new location. Also, I use a camera rotator that dials in the camera's rotation needed for framing. My tolerance for these moves is about 1 degree, so I want to capture the precise locations of the camera for each evening as seen by the sensor. The System will ask me to mount the flat light source when it is ready. I use a LED tracing panel for my light source, and it hangs right off the end of the telescope for this purpose.

Doing Flat exposures with my LED trace panel light source. This happens to be with the William Optics 132mm Platform.
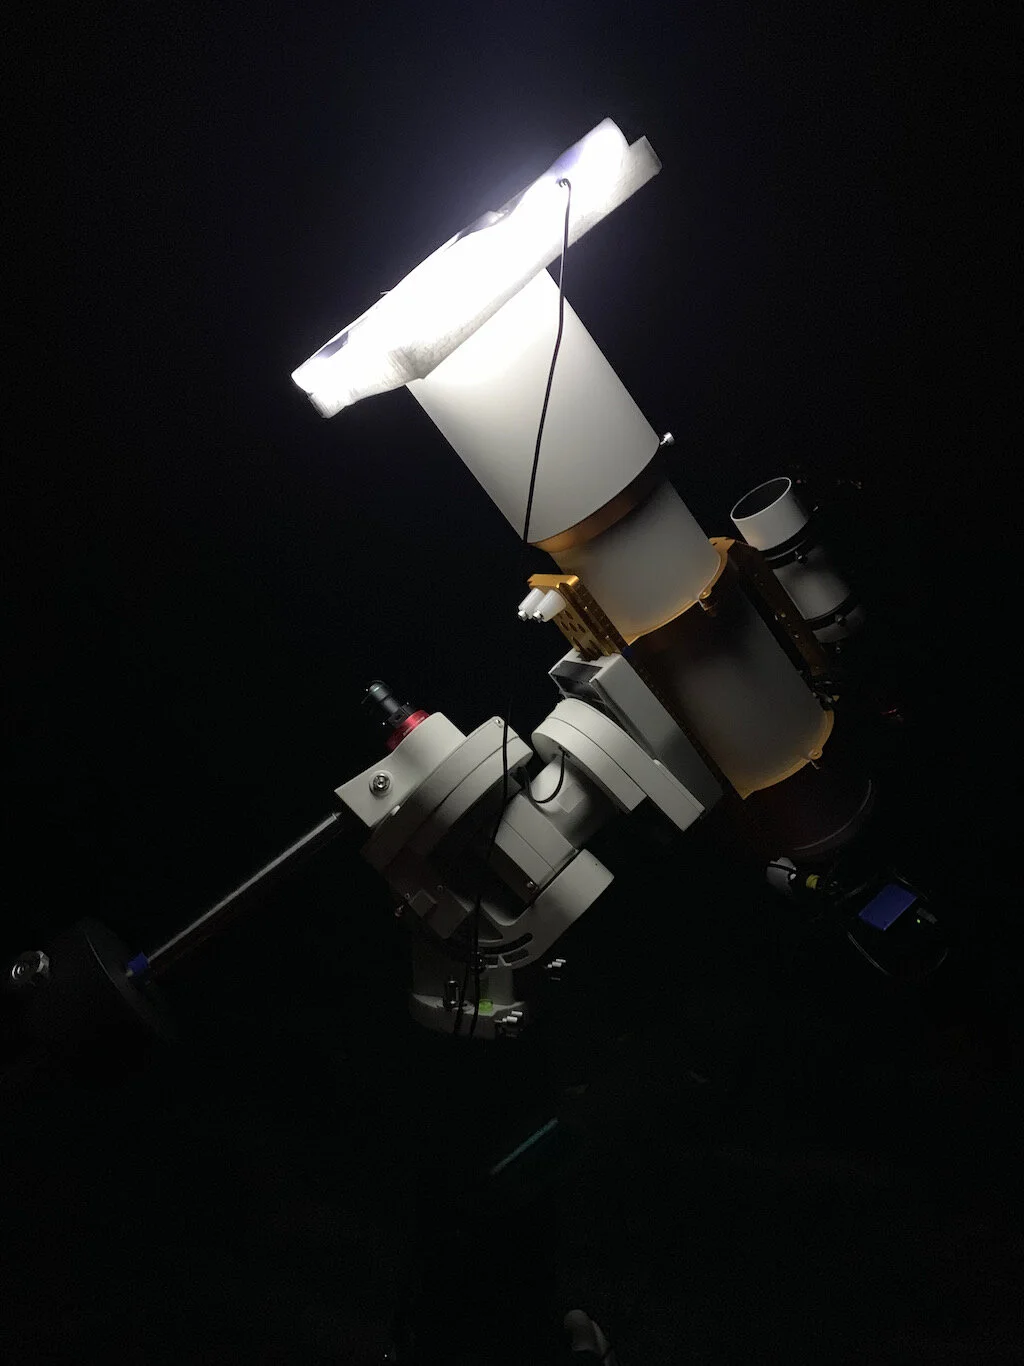
The light panel is wrapped in thick closed-cell foam with a cut-out for hanging on the scope.
After these are shot, I also shoot a series Flat Darks. Basically, these are images shot the same way the flats were shot but with a dark field. To do this, I take the 3 lines labeled “Flats” and change them to “darks”, remove the flat light source and put the lens cap back on, and shoot away.
Image Processing
I again used Pixinsight's WBPP script to handle calibration and alignment and then did the final integration by hand. Next, I used the NormalizeScaleGradient Script, which handles normalizing all subs to the gradient of a chosen reference frame - I find that I get better results and better rejection when I run it this way. When this script is done, it drops me off into the ImageIntegration process, where I finally create my master images - one by one.
It took me about two days to get the image where I wanted it. When I was almost complete, I was pretty bleary-eyed. The image looked good, but I was disappointed with the composition. There was just too much empty space on the right side of the frame. See for yourself - this is how the image looked when I was about done with it. I considered how I might crop the image and found reasons (or excuses) for why each one would not help.
Update 08-26-21
In general, I was very happy with this image - but there was one thing that I did find problematic. This is an image that is very rich in stars. Sometimes when you have an image like that - it can look great when seen on a large screen or zoomed in, but when you see it on a smaller screen, or as a scaled-down image, some of those stars seemed emphasized and dominate the image more than they should. I suspect this is a problem based on the image scaling algorithms. I recently noticed this effect on an image done by Dan Kuchta ( A master astrophotographer) and he took a pass at minimizing the small-scale stars and I thought this really helped the image he was working on. So I took my Tulip image and used Starmask in Pixinsight to create a star mask for just the smaller stars. Then I ran the convolution operator over the image with the mask to de-emphasize those many small stars. It seems to look good when viewed on a large screen and I like the image better now when looking at a scaled-down version. For now, I am keeping this as the final version.
Take a look at the side-by-side images below. Do you like the new version better? Add a comment at the bottom of the screen.
The first version of the image - I was not happy with the composition. (click to enlarge)
The Final Composition (click to enlarge)
Sometimes when you have been working on an image for a long time, you stop "seeing" it. When that happens, I usually send it to some of my fellow local photon herders to get their input. That’s just what I did here, and Gary Opitz suggested cropping the top and the right side off. As soon as I read his suggestion, I knew he was right. So that is what I did to get to the final image.
So while the Mosaic & Framing tool in SGP can really help with composition - it can't really give you the final feel of the image, and there are times where you need to make a change at the last minute in the software. The nice thing about the 2600 camera is that I have about 6Kx4K resolution to play with. I can make a significant crop and still have plenty of pixels for a good image!
Hope you enjoy the image - Thanks for looking!
This was the version I originally posted. (click to enlarge)
In this version, I have de-emphasized the small stars. I like it better and have chosen it to be the new final image. (click to enlarge)
More Information
Wikipedia: Tulip Nebula
Wikipedia: Cygnus X-1
PBS/Nova: 5-minute NOVA Program video on the discovery of Cygnus X-1
Capture Details
Lights Frames
Taken the nights of August 2nd, 3rd, and 4th
55 x 300 seconds, bin 1x1 @ -15C, Gain 100.0, Astrodon 5nm Ha Filter
44 x 300 seconds, bin 1x1 @ -15C, Gain 100.0, Astrodon 5nm OIII Filter
55 x 300 seconds, bin 1x1 @ -15C, Gain 100.0, Astronmiks 6nm SII Filter
Total of 12.8 hours
Cal Frames
30 Darks at 300 seconds, bin 1x1, -15C, gain 100
30 Dark Flats at Flat exposure times, bin 1x1, -15C, gain 100
Flats done separately for each evening to account for camera rotator variances:
12 Ha Flats
12 OIII Flats
12 SII Flats
Capture Hardware
Scope: Astrophysics 130mm Starfire F/8.35 APO refractor
Guide Scope: Televue 76mm Doublet
Camera: ZWO AS2600mm-pro with ZWO 7x36 Filter wheel with ZWO LRGB filter set, Astrodon 5nm Ha & OIII, and Astronomiks 6nm SII Narrowband filter set
Guide Camera: ZWO ASI290Mini
Focus Motor: Pegasus Astro Focus Cube 2
Camera Rotator: Pegasus Astro Falcon
Mount: Ioptron CEM60
Polar Alignment: Polemaster camera
Software
Capture Software: PHD2 Guider, Sequence Generator Pro controller
Image Processing: Pixinsight, Photoshop - assisted by Coffee, extensive processing indecision and second-guessing, editor regret and much swearing…..
Adding the next generation ZWO ASI2600MM-Pro camera and ZWO EFW 7x36 II EFW to the platform…