WO132 Version 2.0: A major upgrade to the William Optics 132mm FLT Platform
Dates: October 1 6, 2019 - July 15, 2020
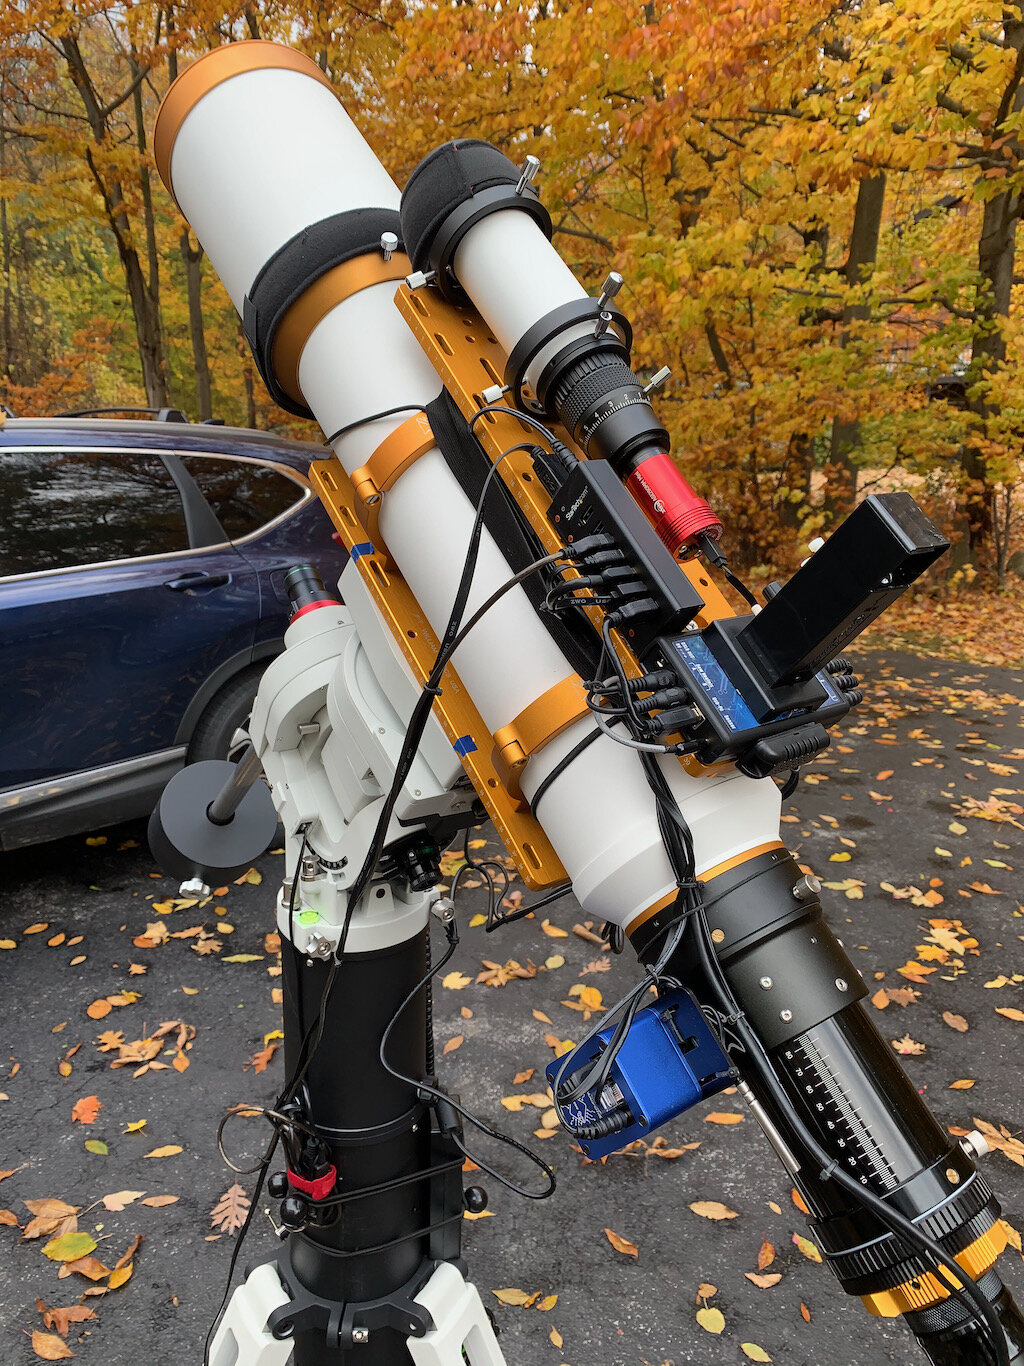
Table of Contents Show (Click on lines to navigate)
Addressing some early issues
During August and September, I was out shooting every clear night. I had learned many things, but I was also noticing several issues that were causing me problems as I did more imaging. So I decided to do something to address those issues….
Main Scope Focusing. I was focusing the camera using the Bahtinov Mask built into the Lens cap of the scope. This was a little tricky, and it took some time to ensure I had good focus. But as the night wore on, the focus would drift as the scope cooled, and I would have to interrupt things to refocus once again. I decided that auto-focus was the answer to this. To do that, I had to shift to control software that would support this. So I move from Astrophotographic Tool (APT) to Sequence Generator Pro software. I also needed a focus motor for my scope.
Guide Scope Focusing. The Williams Optics 50mm Guide scope was a little twitchy to focus (at least in my hands), and I saw a 60mm guide scope from Apterna that supported a helical focuser that would not rotate the camera. This seemed like the way to go.
Dew Problems. We were finally getting to the time of year where dew was forming on my lens, and it was beginning to wreck some shots—time to add a dew control system.
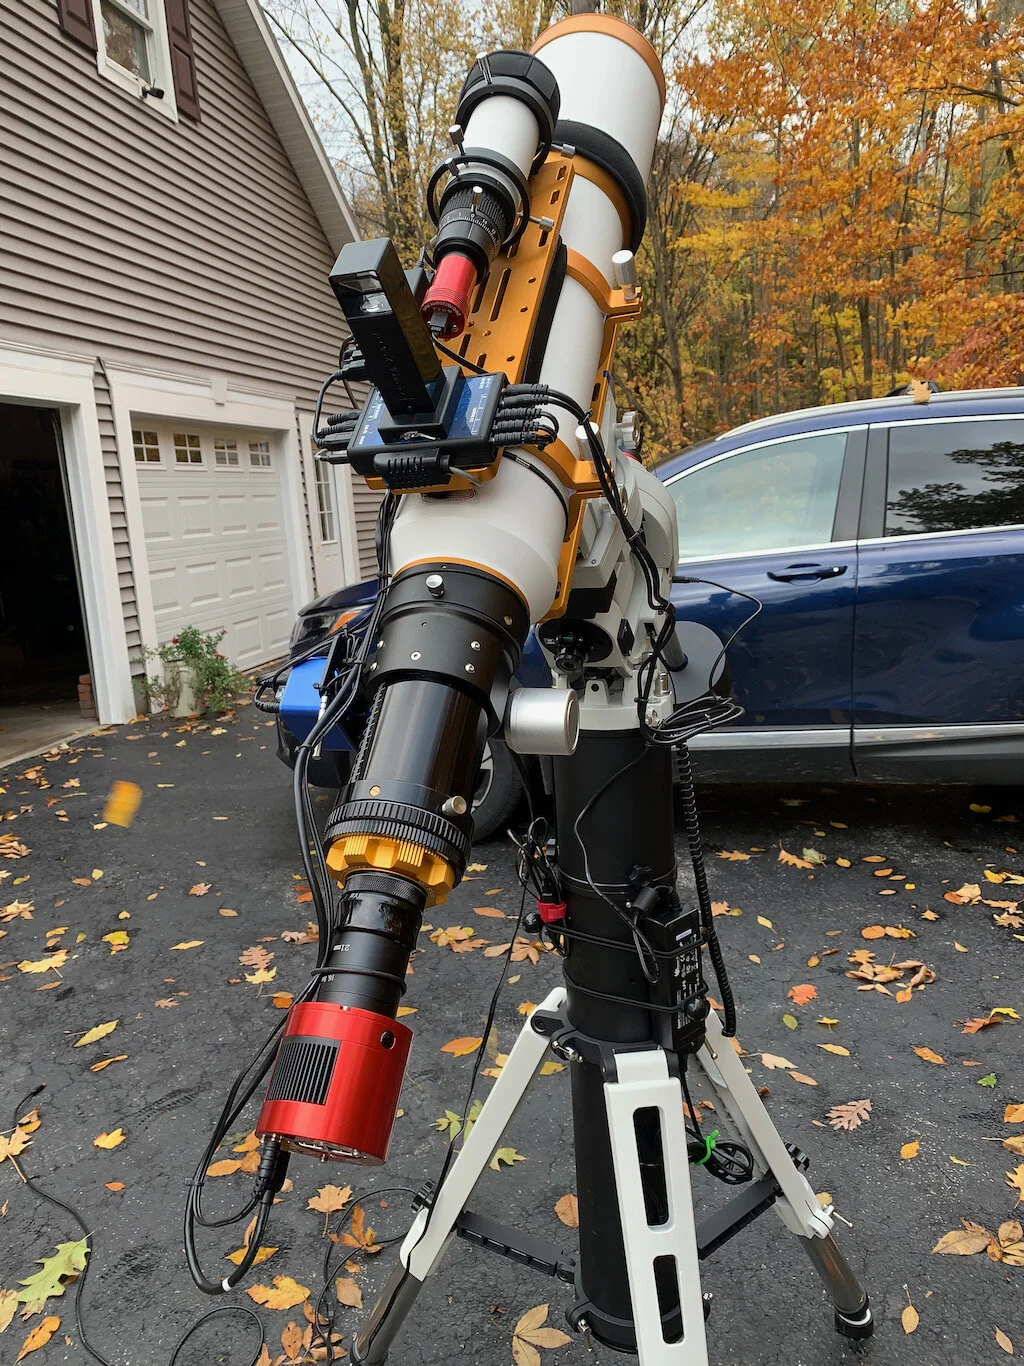
System Mounting and Cable Issues. I knew that if I added a dew control system and a focus motor, some changes would have to happen to support this. First, I needed a better place to mount things. Second, I needed a power and USB distribution system, and maybe most importantly, I needed a place to stow and organize cables.
I reconfigured the system in the following way:
New Dovetail Plate. I bought a dovetail plate to mount on top of the scope. This would allow the mounting of needed devices and offer places to hide cables. I got this from William Optics and was able to match the gold color of the FLT System,
Focus Motor. I chose the Pegasus Astro Focus Cube 2 focus motor for the system. This needed a power feed and a USB cable.
Dew Heaters. For main scope and guide scope
Power Distribution. I chose the Pegasus Astro Pocket Powerbox to distribute power, sense environmental variables, and drive the dew heaters.
USB Hub. I added a seven-slot Startech powered UBS Hub to handle USB distribution.
Rigel Finder. At this point, I was still taking the time and effort to do a 2-star calibration of the Ioptron mount as part of my setup procedure. So I mounted a Rigel Finder on the scope to help me zero things in and get stars closer to the camera field of view while doing the Then, A little while later, it dawned on me that when I did my first platesolve - it would sync with the mount, and I really did not ever need to do this step. But when I had put this together, I had not figured this out yet.
Cable Management. All these new cables needed to be managed, or you end up with a rat’s nest - or worse - you get cable drag or snags that will mess u your guiding. I put a lot of effort into using cable ties to manage things nicely. Excess cable was tucked under the top dovetail plate and held in position by a 2” band of black stretch nylon webbing.
The updated Configuration:
Scope: William Optics 132mm f/7 FLT APO Refractor
Focus Motor: Pegasus Astro Focus Cube 2 - new
Guide Scope: Apterna 60mm Guidescope - new
Mount: Ioptron CEM 60
Tripod: Ioptron Tri-Pier
Camera: ZWO ASI294MC-Pro
Guide Camera: ZWO ASI290MM-Mini
Dew Strips: Dew-Not Heater strips for Main and Guide Scopes - new
Power Dist: Pegasus Astro Pocket Powerbox - new
USB Dist: Startech 8 slot USB 3.0 Hub - new
Polar Alignment Camera: Polemaster
This configuration worked really well for me, and the William Optics Rig was pretty stable for a long while after this. Autofocus, once I got it working, dramatically improved my images. The environmental module of the Pocket Powerbox worked very well to control dew. And I found the new guide scope a little brighter and easier to focus on. Within a few weeks of this, I did pull the Rigel Finder Off of the Scope.