
Overcoming Barriers: Wiring up and Cable Managing Your Telescope Platform
Date: Feb 6, 2022
Revised Feb 7, 2022
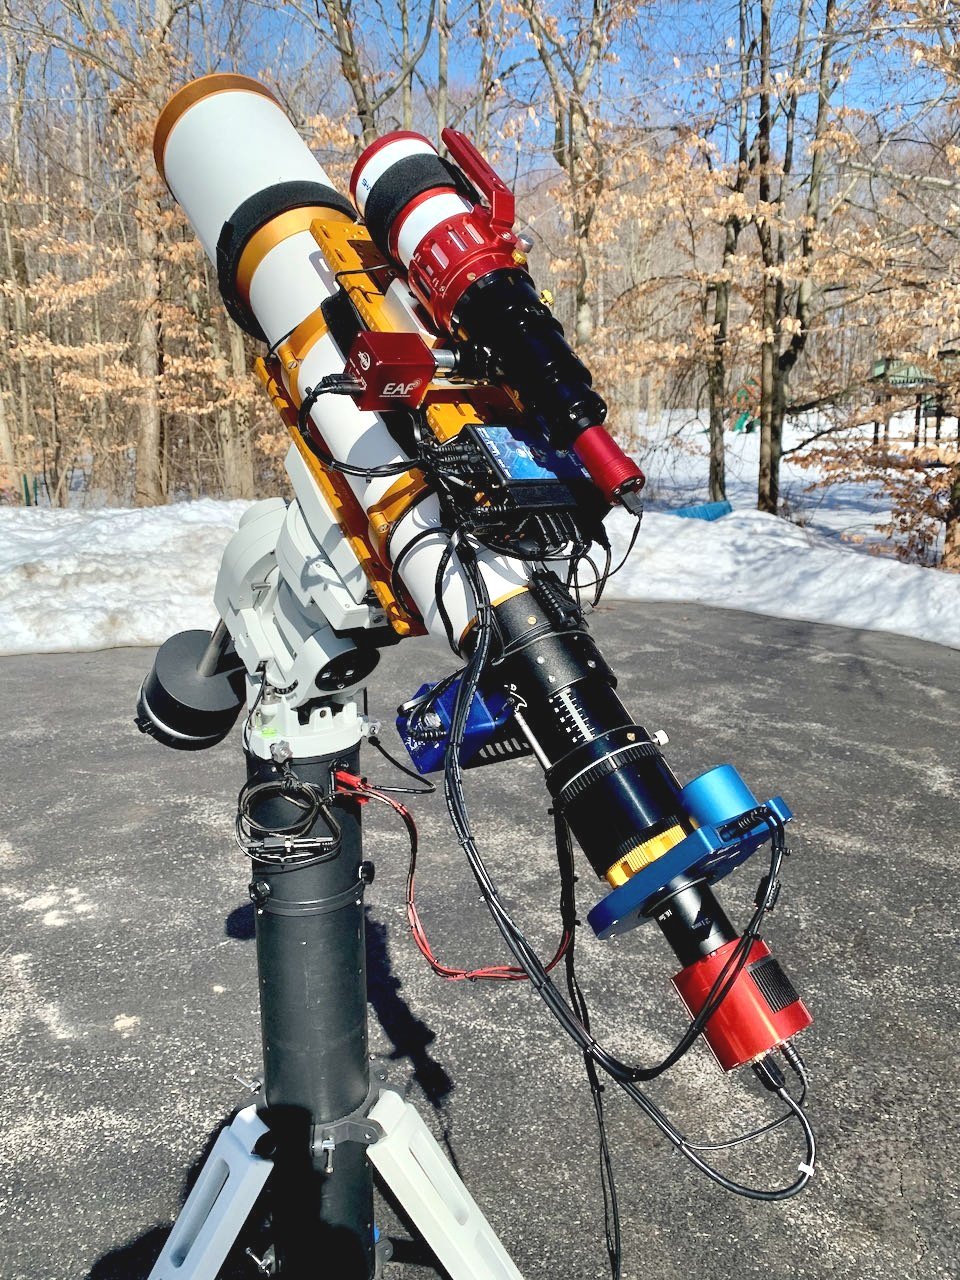
This is my William Optics 132mm FLT APO Platform. Note he cable bundles…..
Building a Telescope Platform
In the middle of 2019, I made the decision to get involved in Astrophotography. I had just retired and suddenly had the time to apply myself to such an endeavor.
Of course, to do that, I had to have some gear. I did my research and placed my first order for the components necessary to build their first telescope platform.
The foundation for this platform was the main telescope along with a suitable mount and tripod. Then of course I needed to add the main camera, a guide telescope, and a guide camera.
Once these are physically assembled, my next step is to get everything working - and importantly, working together! This involves powering up the cameras and the mount, connecting these components to your computer via USB cables, and getting the software configured.
With a simple OSC Camera - which is always a good choice for a beginner - this can be fairly simple. Power must go to the mount, and perhaps the camera if it is running a thermoelectric cooler. USB connections from your laptop must go to the mount and to both cameras. Many mounts often have a small USB hub built-in, and some even have power distribution capability.
There are not that many cables involved and if they just hang all over - it's not really such a big deal. After I had everything working, I of course was interested in neatening up the cable disarray. This was a reasonably simple task at this point.
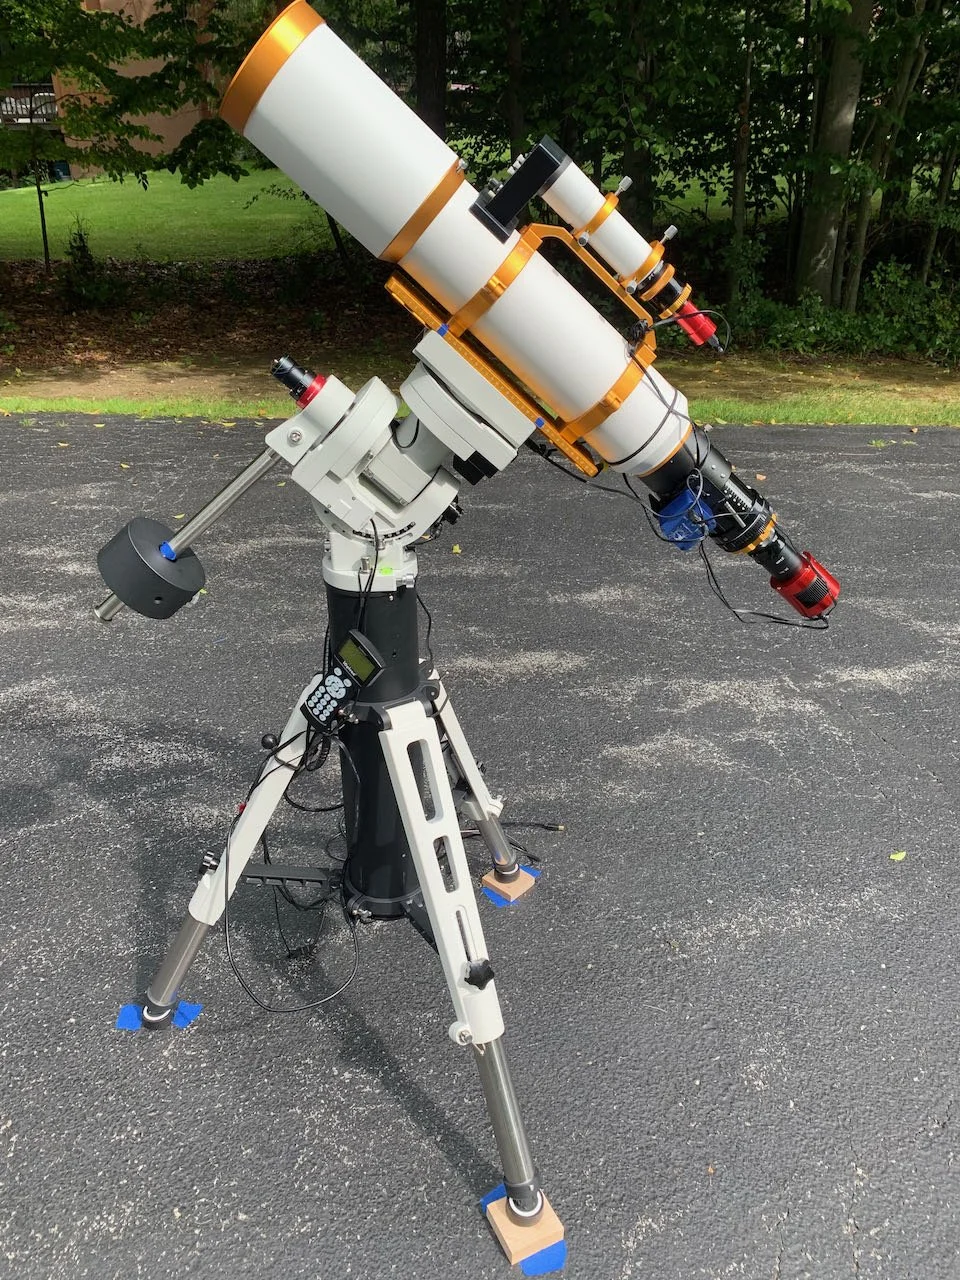
Here was my initial scope platform configuration. Not many connections. Not many cables. Calble Management? Who needs cable management?
The Platform Evolves…
As time goes on and you begin to progress with your Astrophotography, you might begin to embellish your telescope platform. I know I did. More toys! Of course, each time you add a component you may need to support additional power and USB connections.
First I added a focus motor so that I could automate focusing. This really helped the sharpness of my images. But it also added the need for a new power connection and a new USB connection.
A little later in the year, I began to run into dew problems for the first time. So I needed to add dew strips to the main scope and the guide scope. I also needed to add something to power and control the dew strips as well as sense the environmental conditions that dictate how they were driven. In my case, I bought a Pegasus Astro Pocket Power Box.

The bad news here was that by adding this, I needed to get power to it, as well as cables for the dew strips, and a USB Back to the computer. The Good news was the Pocket Power Box would handle power distribution for four devices. This worked great - until I added enough devices that four was no longer sufficient. More about this later.
Then I moved from an OSC camera to a Mono camera. Some of my Astrophotography friends refer to this as moving to the dark side of the force. This required that I add a filter wheel. The filter wheel had to be controlled, so I needed yet another USB connection.
A little while later I added a camera rotator and this required yet another USB and power connection.
Finally - I added another focus motor to my guide scope so that I could swap the main and guide camera when I wanted to do really wide fieldwork and still have the ability to do autofocus.
At this point, you could say that I had hung about as many "ornaments" that my telescope "Christmas Tree" could handle!
I now had a problem.
I had too many cables running to my laptop. I needed to get USB connections to the mount, the main camera, the guide camera, the focus motors, and the rotator.
I also needed to get 12v power to the mount, my main camera, the dew heater controller, the focus motor, and the rotator!
My power supply was struggling to power everything now hanging off my scope. The cables were all over the place. They were snagging on the mount during slews and tracking. I even found that it was even impacting my ability to balance my rig.
Something had to change.
My Approach
The Power Supply
I needed a source of power that was able to handle all of the loads. In fact - since I run multiple telescopes at the same time, I chose a 30amp power supply that was small and robust - one that I had used successfully for my ham radio pursuits.
This was the Powerwerks SS30DV:
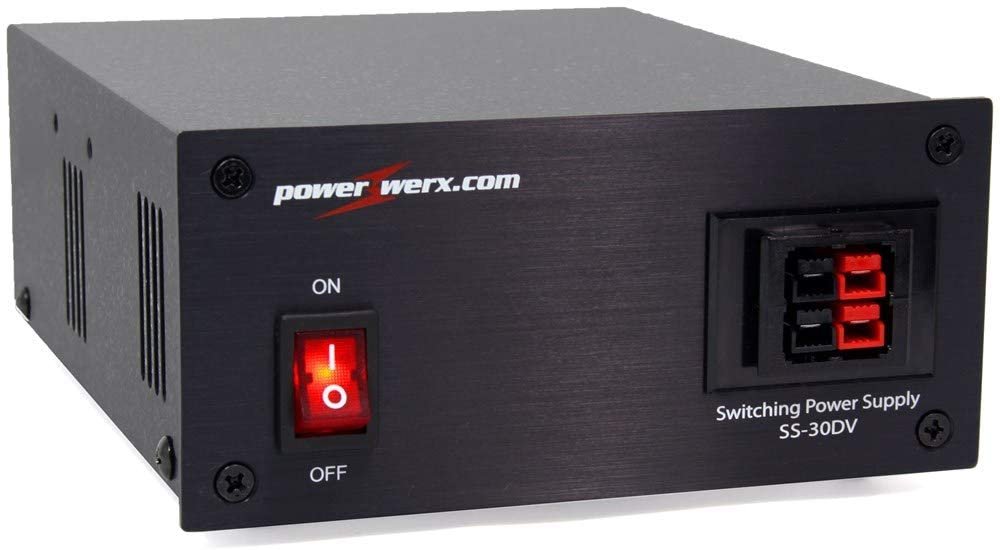
The front of the power supply is set up for twin Anderson Powerpole connectors and I used this to feed power to two different telescopes platforms.
Power Distribution
Each rig has a 4 plug power pole distribution block.

I used this to split power out thusly:
One plug brings the power in
One plug goes to the mount
One plug goes to the guide scope focus motor
One Plug goes to the Pocket Powerbox for further distribution.
Originally I had the power routed to my Pegasus Astro Pocket Powerbox and used it for distribution. But as I added more things, I needed to have additional feeds so I used the powerpole distribution block to add a few extra 12v power feed lines.
The Pegasus Astro Pocket Powerbox is mounted on the top plate of the telescope assembly and has the following connections in relation to power:
An input feed from the power supply
the Main Camera
the Main Focus Motor
the Rotator
a powered USB Hub
Two plugs for each dew controller
One input from the environmental module.
USB Distribution
My telescope platform ended up having a lot of USB connections. Some of these were USB 3.0 as used by the main camera, but most were USB 2.0. A Powered USB hub was clearly the way to go. Since it has to function both when it is very warm and when it is very cold - and must be reasonably robust in dew conditions, I went with an Industrial Strength Startech 7 slot Powered USB Hub.

This was also mounted on top of the telescope assembly and has the following connections:
One Power input line
One USB Input line - feeding back to my laptop
Main Camera
I had the filter wheel connected to an extra USB port on the Main Camera
Guide Camera
Camera Rotator
Main Scope Focus Motor
Guide Scope Focus Motor
With this arrangement, I had only two lines coming off the scope: One to the power supply, and one to the computer.
Cable Management
I still had a LOT of cables that needed to be organized. How did I do this?
Where possible, I used custom power cables cut to specific lengths
I used higher-quality cables so that they would last longer and have less noise or leakage issues.
I mounted a top plate on my scope - this gave me a place to mount the guide scope, the USB Hub and the Pocket Powerbox. It also provides a convenient place between the plate and the top of the scope to coil and tuck in some cables. I keep these cables in place and hide them from view by using 2" wide black elastic bands.
I then coil cables and route just what is needed to each feed location. Some feed locations have several cables coming to them. In these cases, I tie wrap the cables together to make a very neat bundle.
I allow enough cable slack to allow for certain movements:
Camera focuser travel
Camera rotation
Scope pointing position
I never want the weight of the cables to hang on the scope. So where possible, I anchor the cables to mount points that are relatively static and do this with thick rubber O-rings.
Once the cables are routed, coiled, and cable-wrapped, I make sure that the weight of the wire bundles is never hanging off the scope in such a way that it is causing drag - it is held supported by parts that do not move. With the cabling done, I then carefully balanced the rig. This includes Z-axis balancing as well.
This is arrangement has worked well for me. My guiding is not fighting cable drag. My balance is pretty spot on. I have never lost a sub because the cable snagged on something.

This taken a littler later, but before I had converted to the Mono Camera. Here you can see the Pocket Powerbox and the Startech USB Hub. As well as th cables reaching back for the camera, and the rotator.
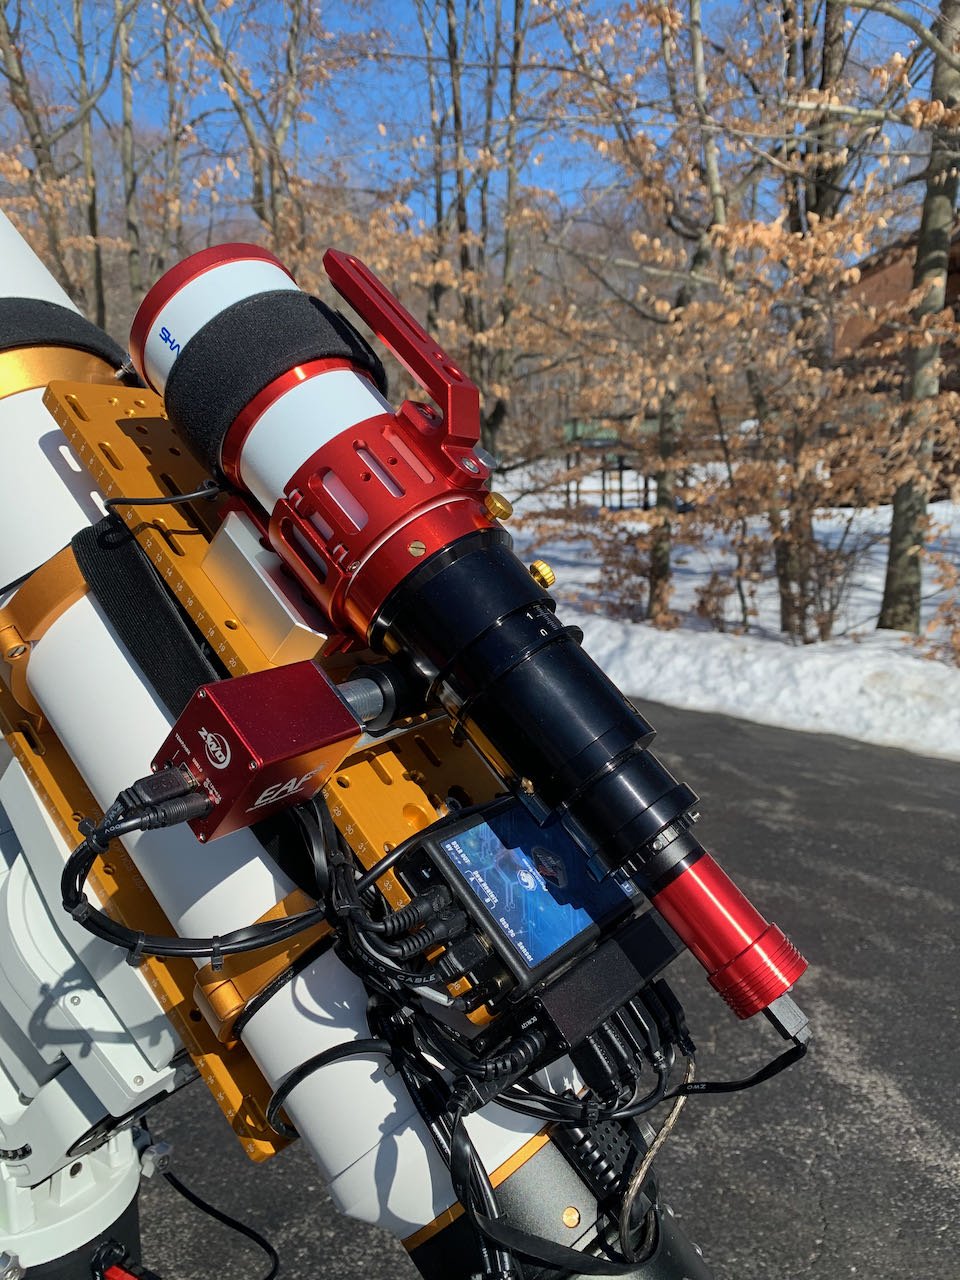
In this shot you can see the number of cables coming to the key power and USB distribution points. you can also see the 2” elastic band that surrounds the bottom portion of the top plate - this secures and hides where excess cable is coiled and tucked.

Here is the same configuration as see on the far side of the scope platform.
This shows the cables feeding to the main scope focus motor, the camera, and the rotator. It’s a bit hard to see, but the bundle of cables going back to the rotator and camera is secured to the main scope by large black o-rings. There is slack in the back end of the cables so allow the rotator to spin the camera as needed.

Another view form the top.

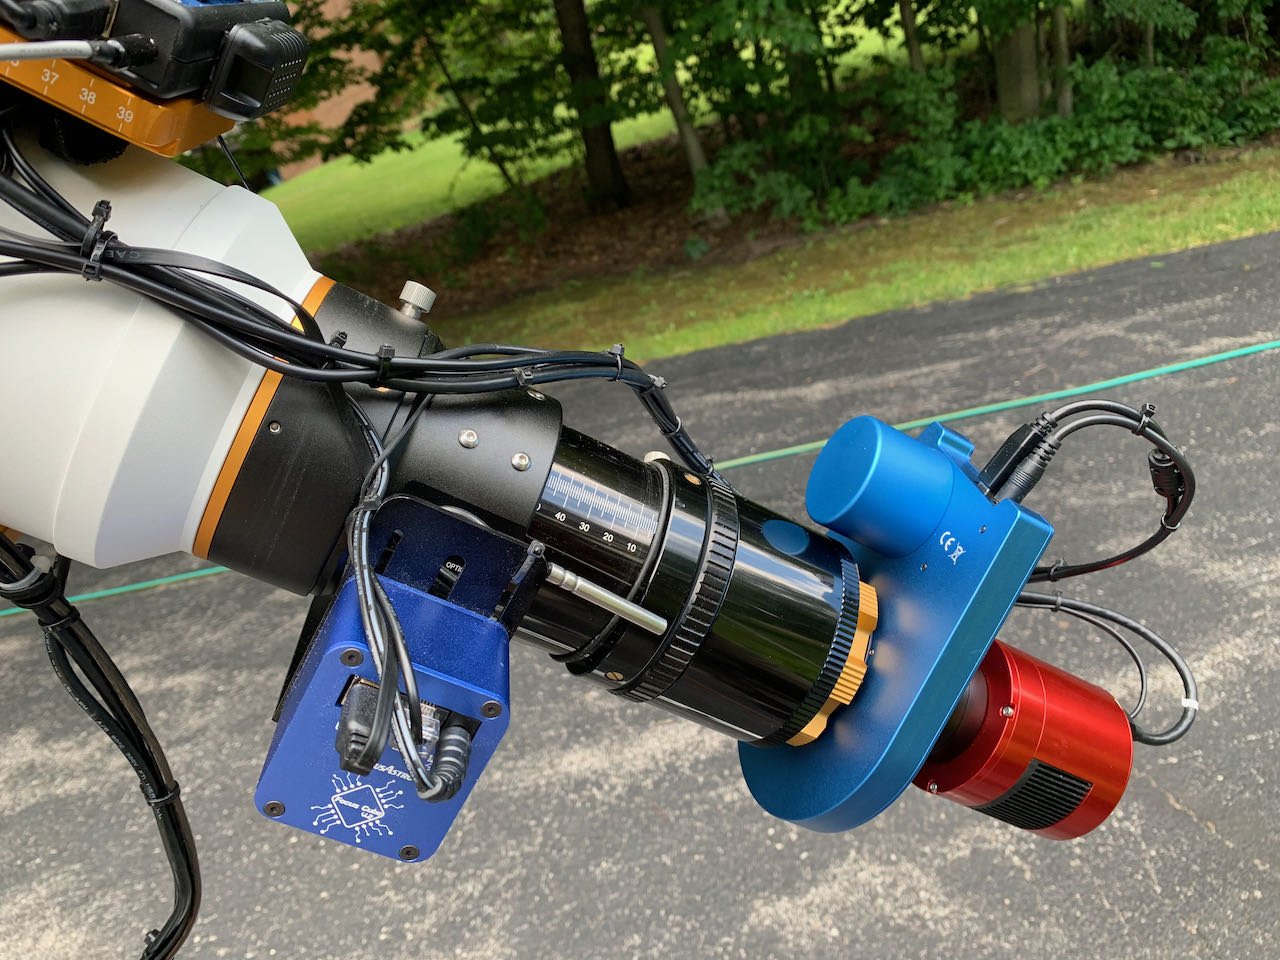
This is a later photo that shows the the mono camera added. This image was taken as I was reworking the cable management. THe lines to the back of the scope are not yet secured in their final location along the scope tube.

Another view from the very back.

The Pegasus Astro Falcon Rotator in action.

This image shows cables on the very back of my Astro-Physics 130mm Platform and how I usually set up cables for a mono camera, filter wheel and rotator.
Postscript - Some Great Additional Ideas
After completing this post and publishing it I have gotten a lot of good feedback - thank you all! I also received some additional Ideas on cable management that I wanted to share:
Cable Sleeves. One of the best suggestions is around the use of cable sleeves. These are braided sleeves of various diameters that you can use to encase a bundle of cables. This creates a smooth outer protective cover that also helps to protect against snagging. Sleeves can also be cut so that at some point one cable can exit the bundle and be fed to a component. While I have not used these, they do make good sense and I will likely be adding them to my setup.
Coiled Cables. I tend to leave some cable slack to allow for needed movements in the scope. For example, to allow for focuser movements or rotator movements. One suggestion I had was to seek our coiled cables for this application. The cooling acts to allow for mechanism movement while still holding the cable snug against the scope. Another good idea!
Colored Velcro Cable TIes and Cable Labels. The idea here is to use velcro to tie-wrap cables - as these can be easily changed over time. Color coding and labels also can be a great assistance when reworking setups.
Thanks again for these other great ideas! I will continue to update this post as I come across more interesting ideas!
Let me know if you have any questions
Pat